Cozy Leg Warmers for Ballet Enthusiasts: Knitting Pattern

Stay cozy and stylish during your ballet practice with these beautiful ballet leg warmers. Knitting your own leg warmers is not only a fun and rewarding project, but it allows you to customize them to fit your personal style and preferences. Whether you prefer classic ribbing or intricate lace patterns, there are endless possibilities to create the perfect leg warmers.
Knitting leg warmers is a great project for knitters of all levels. If you’re a beginner, this pattern will help you practice basic stitches and techniques. If you’re an experienced knitter, you can experiment with complex stitch patterns and create a unique design.
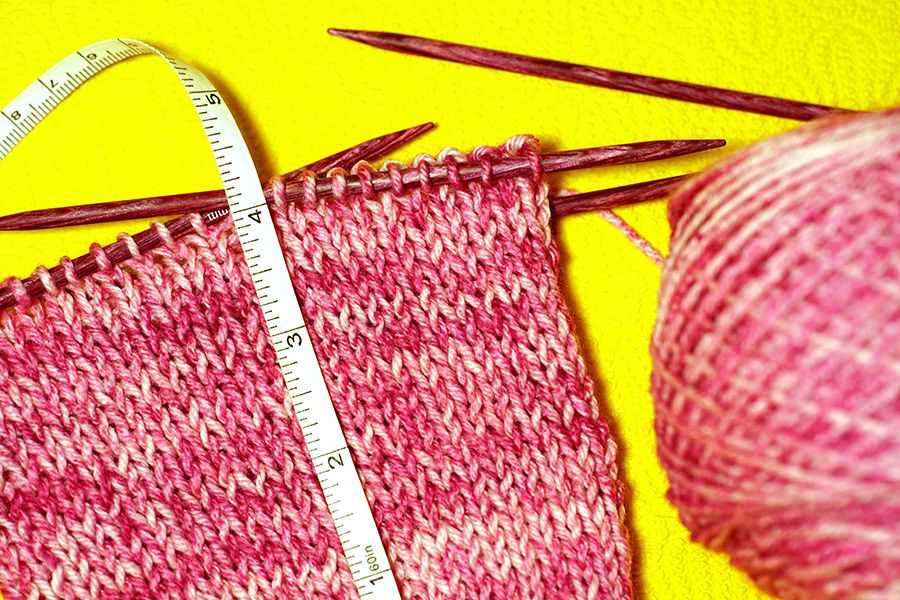
To get started, you’ll need a few supplies: yarn in your preferred color, a pair of knitting needles in the appropriate size, and a tape measure. The pattern will provide instructions for the gauge, so make sure to check if your tension matches.
Once you have your supplies ready, you can start knitting. The pattern will guide you through casting on, knitting the ribbing, and shaping the leg warmers. You can adjust the length and width to fit your legs perfectly. Finish off with a bind-off and weave in any loose ends, and voila! You’ll have a gorgeous pair of ballet leg warmers ready to keep you warm and stylish during your dance rehearsals.
So why wait? Start knitting your own ballet leg warmers and enjoy the satisfaction of creating something beautiful with your own hands. Not only will you stay warm and cozy, but you’ll also have a unique accessory that showcases your love for ballet. Get ready to dance in style!
Ballet Leg Warmers Knitting Pattern
If you’re looking for a fun and stylish knitting project, ballet leg warmers are a great choice. These leg warmers are not only practical for dancers but also a trendy accessory for everyday wear. With a simple knitting pattern, you can create a pair of leg warmers that will keep you warm and add a touch of elegance to your outfit.
Materials:
- Yarn: Choose a soft and lightweight yarn in your preferred color.
- Knitting Needles: Use needles in the appropriate size for your yarn.
- Tape Measure: This will help you measure the length of your leg warmers.
- Scissors: Essential for cutting the yarn when you finish your project.
- Darning Needle: You will need this to sew in any loose ends.
Knitting Pattern:
- Cast on the desired number of stitches. Typically, 40-50 stitches work well for adult leg warmers.
- Knit in a rib stitch pattern, such as K2, P2, for the entire length of your leg warmers.
- Continue knitting until the leg warmers reach the desired length. Measure them against your leg to ensure a perfect fit.
- When you’re satisfied with the length, bind off all stitches.
- Using a darning needle, sew in any loose ends to give your leg warmers a polished look.
Optional Customizations:
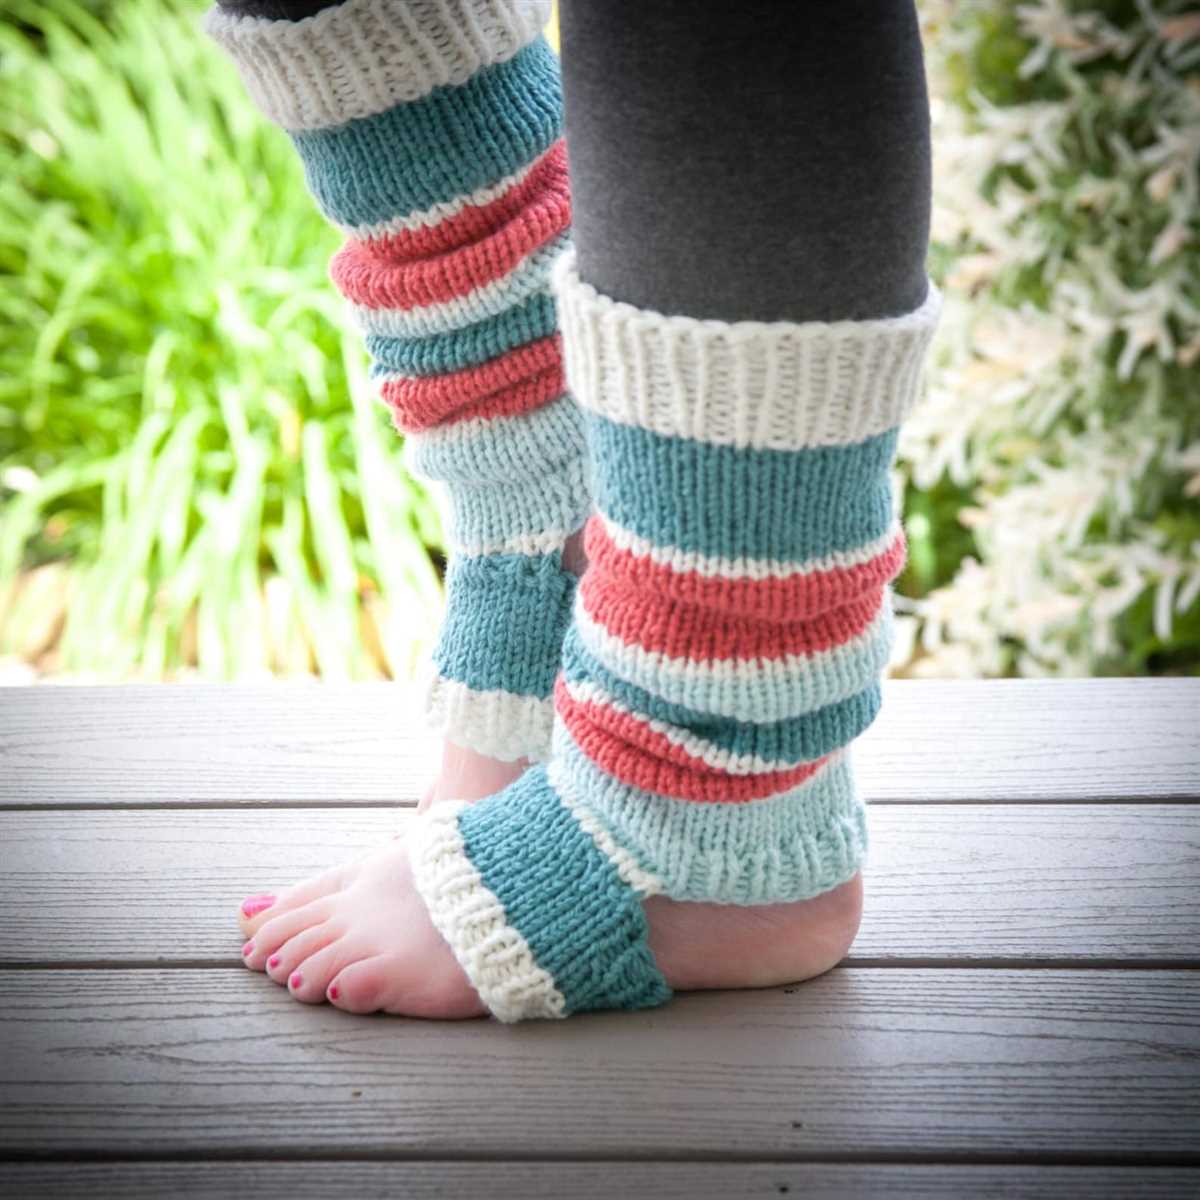
If you want to add some personal flair to your leg warmers, you can experiment with different stitch patterns, such as cables or lace. You can also incorporate color changes or add decorative elements, like beads or buttons. Let your creativity guide you as you customize your leg warmers to make them unique.
By following this ballet leg warmers knitting pattern, you’ll be able to create a stylish and functional accessory that will elevate your ballet practice or make a fashion statement in your everyday outfits. Enjoy the process of knitting and the warmth and style that your leg warmers will bring!
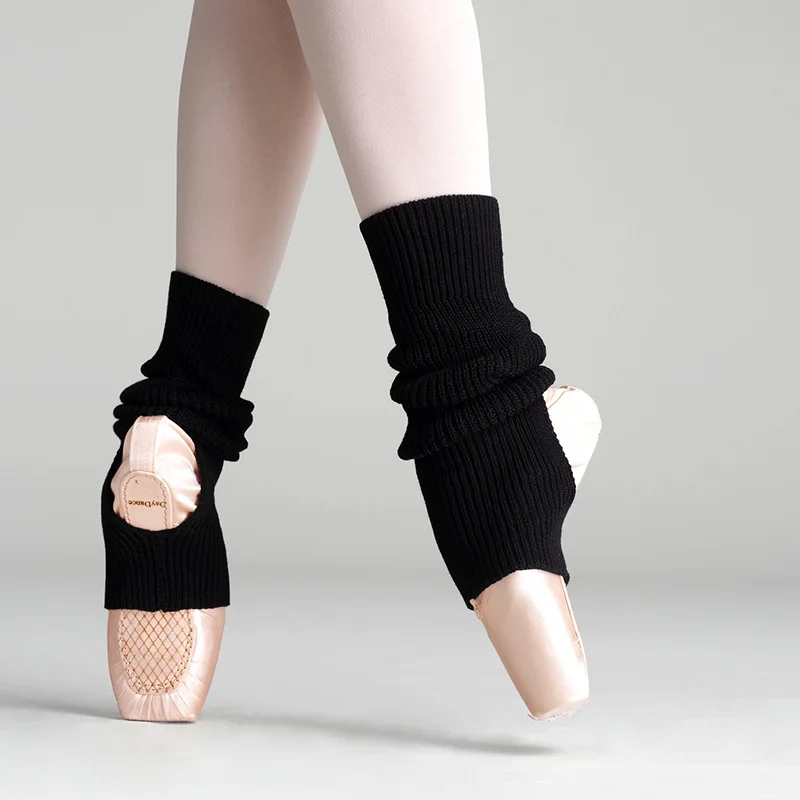
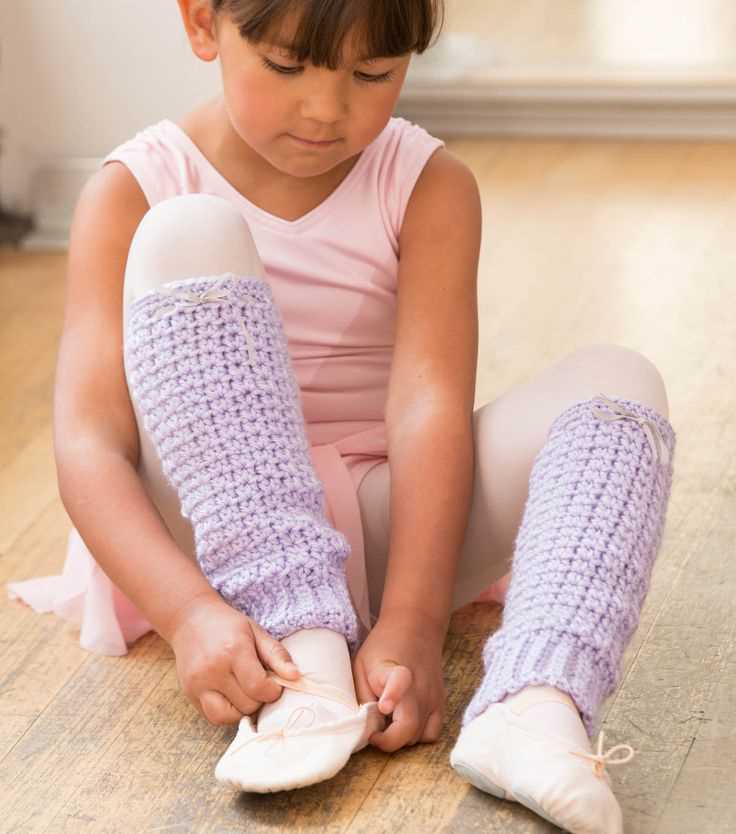
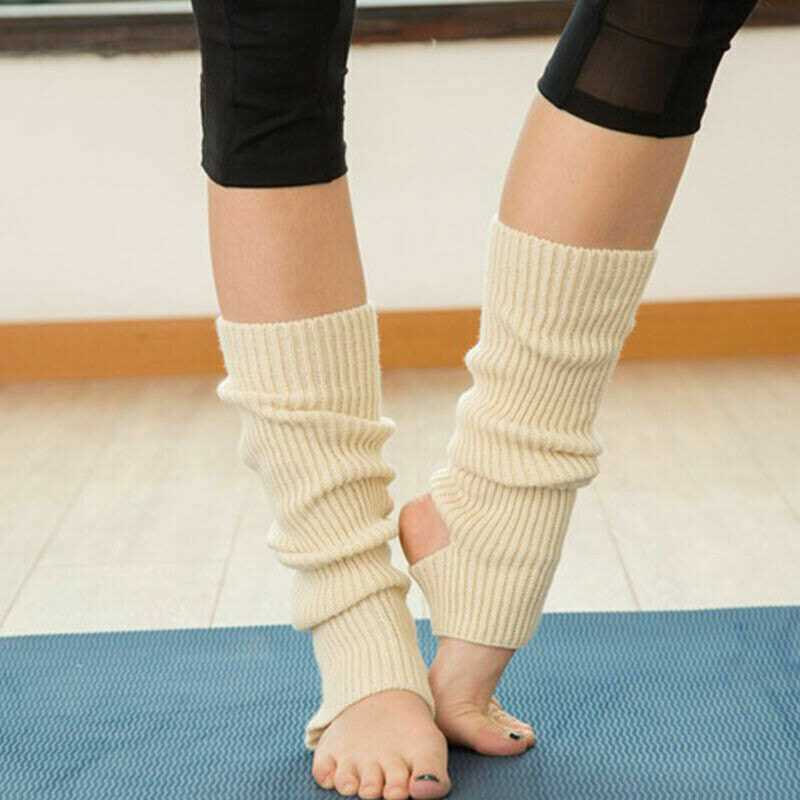
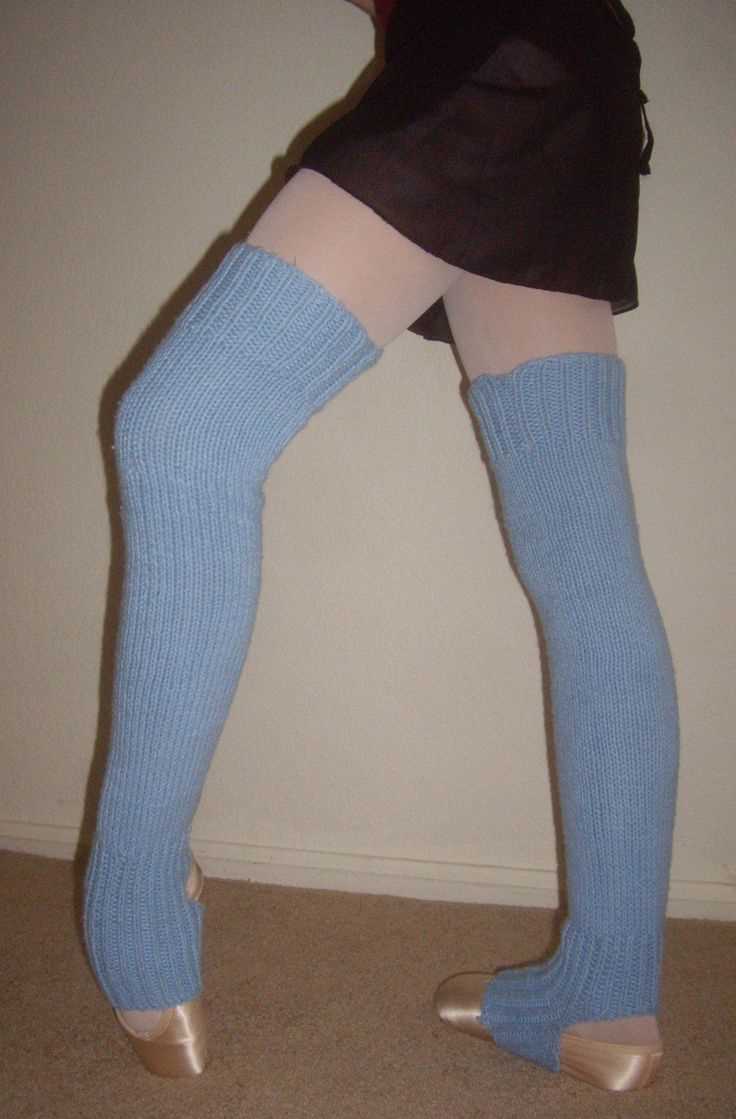
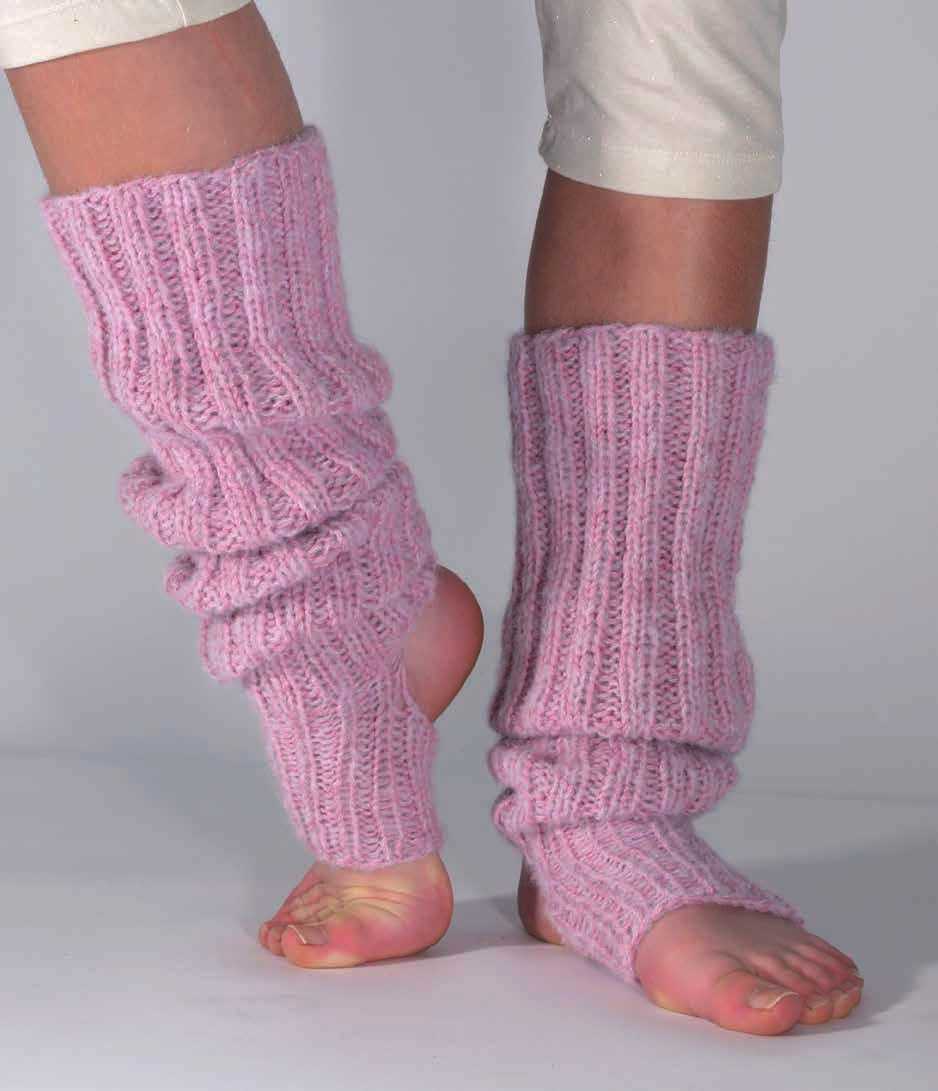
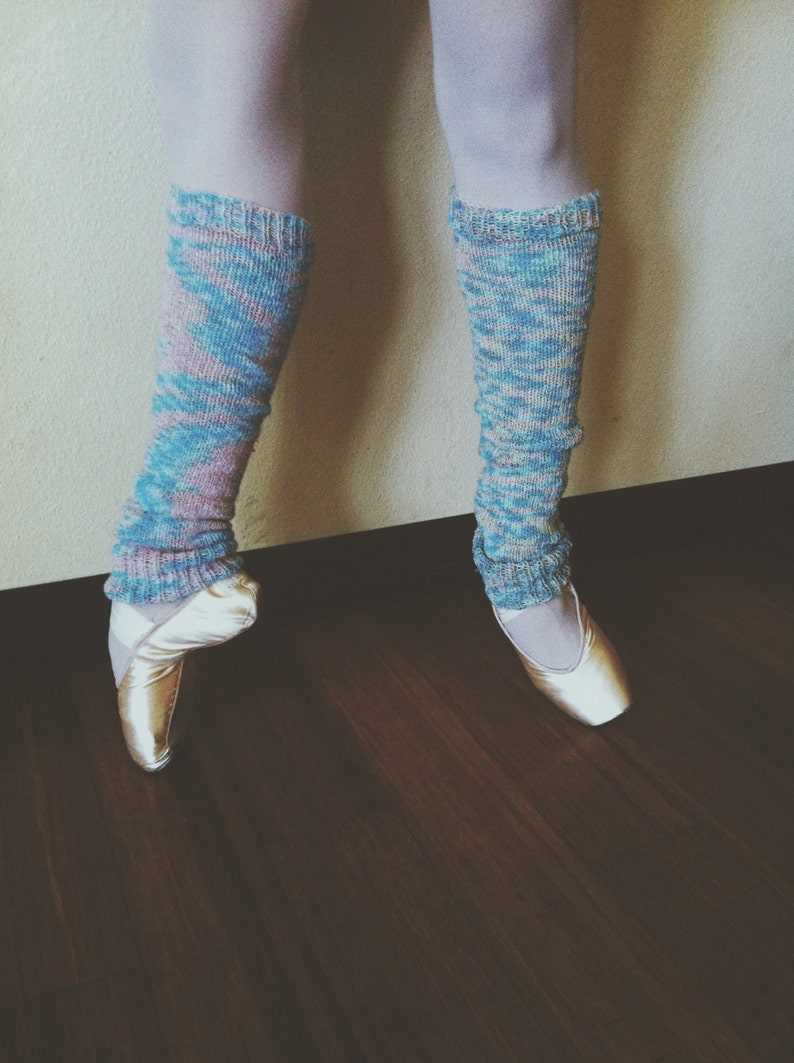
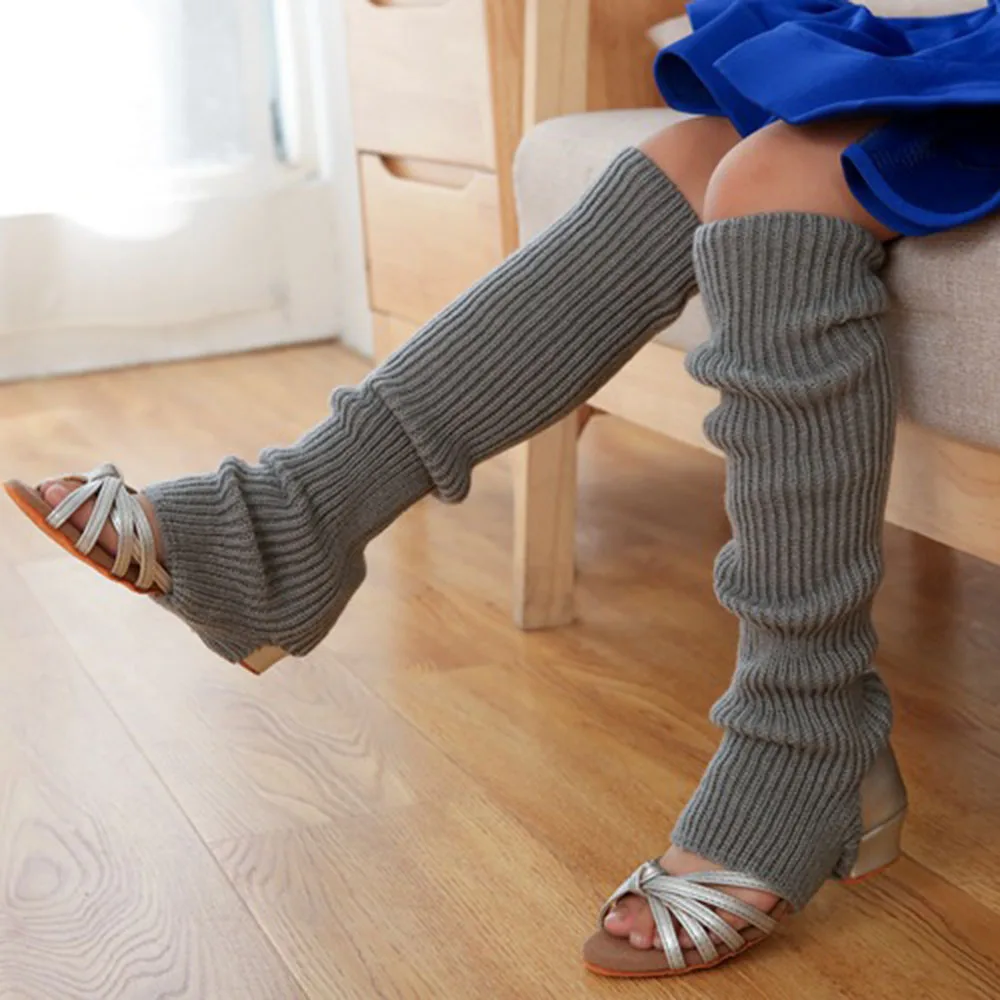
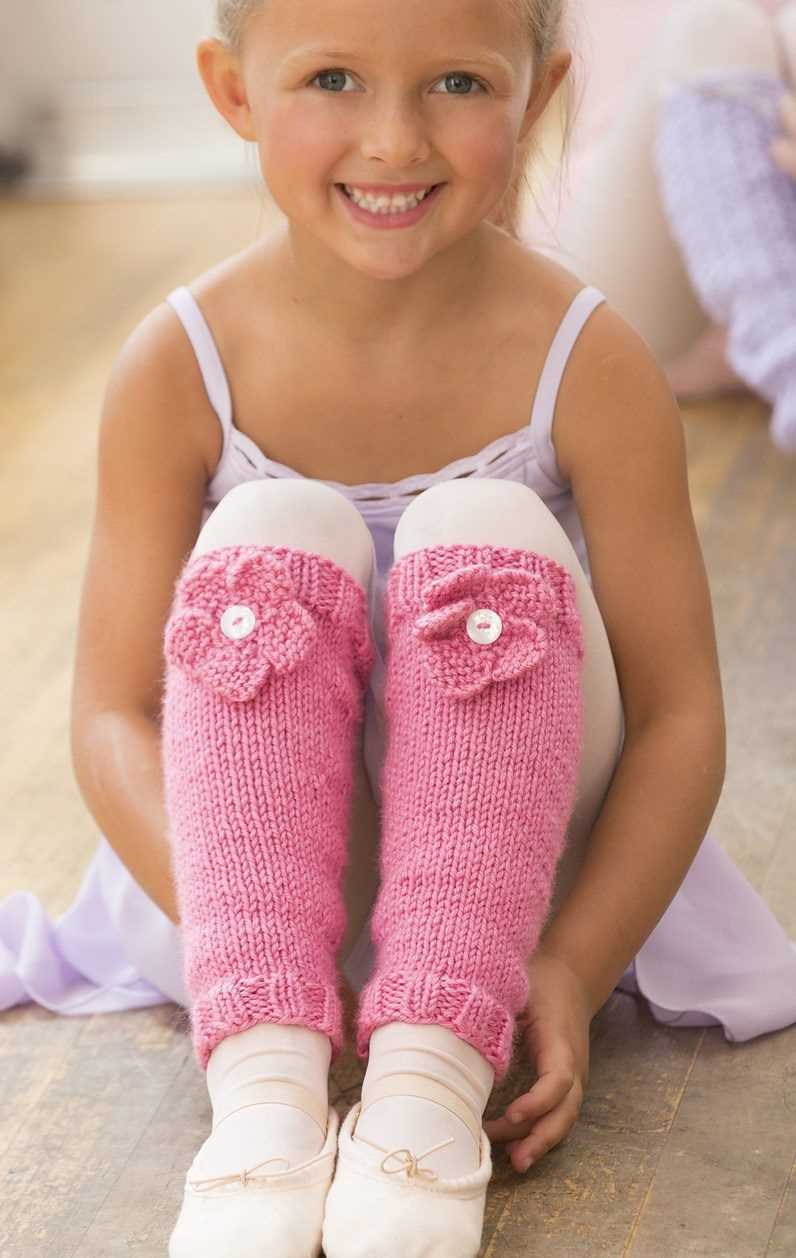
What Are Ballet Leg Warmers?

Ballet leg warmers are knitted accessories that are worn by ballet dancers to keep their legs warm during practice or performances. They are typically made from a soft and stretchy material, such as acrylic or wool, and are designed to cover the lower legs from the ankle to just below the knee. Leg warmers are often worn over ballet tights or leggings and can be pulled up or scrunched down, depending on the dancer’s preference.
Leg warmers were first popularized in the 1980s by dancers and enthusiasts of aerobic exercise. However, they have since become an essential accessory in the world of ballet. They not only provide warmth and protection to the legs but also add a stylish and fashionable touch to a dancer’s attire. Leg warmers come in various colors and designs, allowing dancers to express their individuality and personal style.
One of the main benefits of ballet leg warmers is that they help to keep the muscles warm and limber, reducing the risk of injury during intense training or performances. The snug fit of the leg warmers helps to retain body heat and promote blood circulation, which can improve flexibility and prevent muscle strain. Additionally, leg warmers provide extra support to the joints, such as the ankles and knees, helping to maintain stability and prevent injuries.
Leg warmers are also practical for dancers as they can easily be removed or added as needed. This is particularly useful during rehearsals or practice sessions when the temperature of the dance studio can fluctuate. Dancers can quickly adjust their leg warmers to stay comfortable and maintain an optimal body temperature.
In summary, ballet leg warmers are functional and stylish accessories that are essential for dancers. They provide warmth, support, and flexibility to the legs while also allowing dancers to showcase their individuality. Whether worn during practice or performances, leg warmers are a must-have item for ballet dancers of all levels.
Benefits of Ballet Leg Warmers
Ballet leg warmers offer several benefits to dancers of all levels. Whether you are a beginner or a professional, these accessories can enhance your performance and provide comfort during practice sessions and performances.
1. Warmth and Protection: One of the primary benefits of ballet leg warmers is that they keep your legs warm during rehearsals and performances. This is especially important in colder weather or in dance studios with low temperatures. Warm muscles are less prone to injuries and strains, allowing dancers to focus on their movements without worrying about discomfort or stiffness.
2. Muscle Support: Leg warmers provide compression and support to your muscles, which can enhance your performance and prevent muscle fatigue. The compression helps improve blood flow, increasing oxygen delivery to the muscles and promoting better muscle function. This can lead to improved stamina and reduced muscle soreness after rigorous ballet training sessions.
3. Style and Aesthetics: Ballet leg warmers not only serve a functional purpose but also add style and elegance to your dance attire. They come in various colors and designs, allowing you to express your personal style and stand out during performances. Additionally, leg warmers can visually elongate your legs and enhance your overall look, giving you a more graceful and professional appearance on stage.
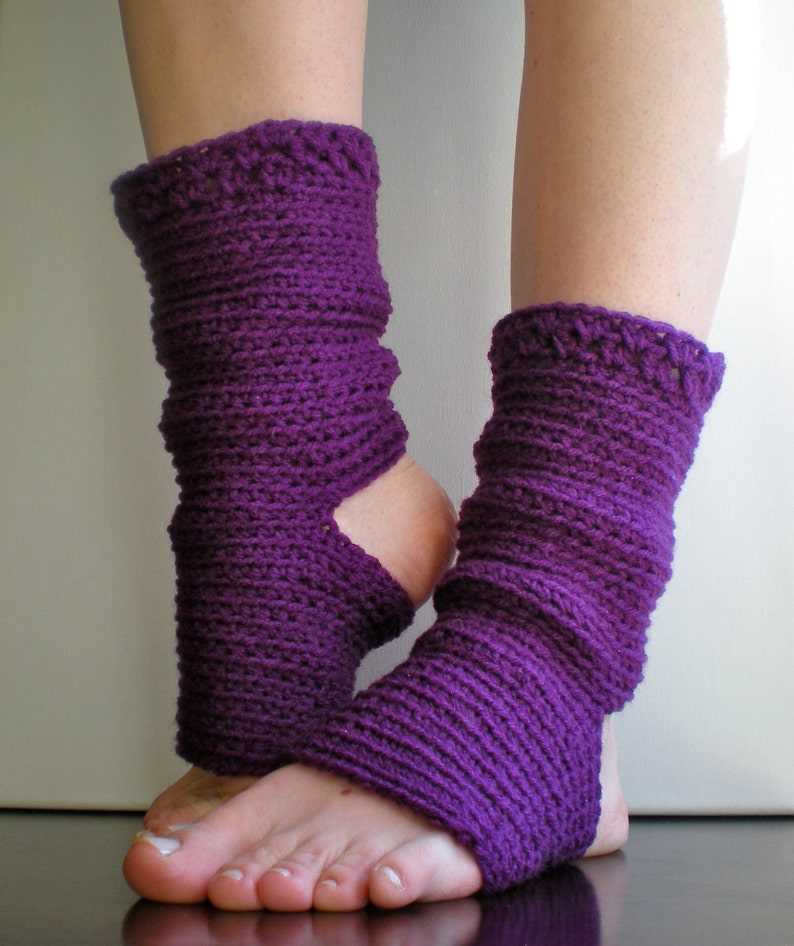
4. Versatility and Convenience: Leg warmers are versatile accessories that can be easily added or removed during dance sessions. They can be pulled up or down to adjust the warmth and coverage of your legs, depending on your needs. This convenience makes leg warmers suitable for various types of dance, including ballet, contemporary, jazz, and even yoga or fitness workouts. You can also wear them during warm-up exercises or while waiting for your turn to perform, keeping your muscles warm and ready.
Overall, ballet leg warmers are not only fashionable but also practical accessories that offer warmth, muscle support, style, and versatility to dancers. Invest in high-quality leg warmers to experience these benefits and enhance your ballet practice or performances.
Choosing the Right Yarn and Needles for Ballet Leg Warmers
When knitting ballet leg warmers, it is important to choose the right yarn and needles to ensure a comfortable and durable finished product. The choice of yarn and needles will not only affect the look and feel of the leg warmers, but also their functionality and wearability.
Yarn: When selecting the yarn for ballet leg warmers, it is recommended to choose a lightweight and soft yarn that provides warmth without adding bulk. An acrylic or wool blend yarn is a popular choice as it is machine washable and durable. Opting for a yarn with some stretch is also beneficial to ensure a snug fit around the legs.
Needles: The choice of needles will depend on the yarn and the desired tension of the finished leg warmers. For a lightweight yarn, it is advisable to use smaller needles, such as US size 6 (4.0mm) or smaller, to create a tight and even fabric. If using a thicker yarn, larger needles, such as US size 9 (5.5mm), can be used for a looser and more open texture.
It is also important to consider the length of the needles. For leg warmers, longer needles, such as 16 or 24-inch circular needles, are often preferred as they allow for easy knitting in the round. However, if you prefer using double-pointed needles or shorter circular needles, they can also be used depending on personal preference and comfort.
In conclusion, when knitting ballet leg warmers, it is essential to choose the right yarn and needles that will result in a comfortable, functional, and aesthetically pleasing finished product. By opting for a lightweight and stretchy yarn, and selecting the appropriate needle size and type, knitters can create leg warmers that not only keep dancers warm but also enhance their performance on stage.
Getting Started: Casting On
Before you can start knitting your ballet leg warmers, you will need to cast on your stitches. Casting on is the process of creating the foundation row of stitches on your knitting needles. This is the first step in any knitting project and sets the stage for the rest of your work.
To cast on your leg warmers, you will need a pair of knitting needles and the yarn of your choice. It’s important to choose a yarn that is warm and comfortable against your skin, as leg warmers are often worn directly against the legs. Additionally, consider selecting a yarn that has some stretch to it, as this will provide a better fit and help the leg warmers stay in place as you move.
There are several different methods you can use to cast on your stitches, but one of the most common and beginner-friendly methods is the long-tail cast on. To use the long-tail cast on, you will need to estimate the amount of yarn you will need for each stitch and leave a long tail. This tail will be used to create the first row of stitches.
To start, hold the needle with the tail in your right hand and the other needle in your left hand. Make a slipknot by creating a loop with the tail and pulling the working yarn through. Slip this loop onto the needle in your left hand and tighten it. This will be your first stitch. Continue casting on by bringing the working yarn over the needle in your left hand, then under and through the loop on your right-hand needle. Slide the new stitch onto the left-hand needle and repeat until you have cast on the desired number of stitches for your leg warmers.
Once you have cast on all your stitches, you are ready to start knitting your ballet leg warmers! Keep in mind that the cast on edge will become the top edge of your leg warmers, so it’s important to make sure it is neat and even. Take your time and practice if needed to ensure a professional-looking finish.
Knit Stitch: Creating the Main Body of the Leg Warmers
Once you have finished casting on the desired number of stitches for your leg warmers, you will begin working the knit stitch to create the main body of the leg warmers. The knit stitch is one of the basic stitches in knitting and is commonly used in various patterns and projects.
To create the main body of the leg warmers, you will continue working the knit stitch in each row. Start by holding the knitting needle with the cast-on stitches in your right hand and the empty needle in your left hand. Insert the empty needle into the first stitch on the right-hand needle from left to right, making sure the yarn is behind the needles.
Next, wrap the yarn around the right-hand needle counterclockwise, moving the yarn from back to front. This creates a loop around the right-hand needle.
Then, using the right-hand needle, pull the loop of yarn through the first stitch on the left-hand needle, bringing it to the right-hand needle. The first stitch has now been knitted.
Repeat this process for each stitch on the left-hand needle until you reach the end of the row. When you reach the end, the stitches will transfer from the left-hand needle to the right-hand needle, and the empty needle will become the left-hand needle for the next row.
Continue working the knit stitch in each row until the leg warmers reach the desired length. Remember to keep the tension of your stitches consistent to create an even and neat fabric.
By using the knit stitch to create the main body of the leg warmers, you will achieve a classic and textured look that is both functional and stylish. Once you have mastered the knit stitch, you can experiment with different patterns and variations to add more visual interest to your leg warmers.
Rib Stitch: Adding a Stretchy Cuff
When knitting ballet leg warmers, adding a stretchy cuff is an important element to ensure a comfortable fit and to keep the leg warmers in place. One popular stitch pattern for creating a stretchy cuff is the rib stitch. The rib stitch involves alternating knit and purl stitches to create a textured ribbing effect.
To begin knitting the rib stitch cuff, cast on the desired number of stitches using a circular needle or double-pointed needles. It is important to cast on loosely to ensure the cuff has enough stretch. A common cast on method for the rib stitch is the long-tail cast on.
In the rib stitch pattern, you will be alternating knit stitches and purl stitches across each row. For example, you may start with two knit stitches followed by two purl stitches, and repeat this pattern until the end of the row. This alternating pattern creates the ribbing effect and allows the cuff to stretch comfortably.
To create the rib stitch cuff, continue knitting in the rib stitch pattern for the desired length. It is important to measure the leg warmers against the wearer’s leg as you go to ensure a proper fit. Once the desired length is reached, you can bind off the stitches using a stretchy bind off method, such as the suspended bind off or the sewn bind off.
Shaping the Leg Warmers: Decreases and Increases
When crafting ballet leg warmers, shaping is an important step to ensure the perfect fit and style. This can be achieved through decreases and increases in the knitting pattern. Decreases are used to narrow the width of the leg warmers, while increases are used to widen it. The placement and frequency of these shaping techniques depend on the desired design and size of the leg warmers.
To decrease the width of the leg warmers, various techniques can be utilized. One common method is the knit two stitches together (k2tog) decrease. This involves knitting two stitches as if they were one, which creates a decrease in the number of stitches. Another technique is the slip, slip, knit (ssk) decrease, where two stitches are slipped onto the right needle, then knit together through the back loops. Both methods result in a decrease in stitches and a narrower leg warmer.
Decrease Example:
Row 1: K8, k2tog, k to end of row (repeat this row until desired width is achieved)
On the other hand, to increase the width of the leg warmers, increases are used. The most common increase technique is the yarn over (yo). This involves wrapping the yarn around the needle before knitting the next stitch, which creates an extra stitch and widens the leg warmer. Another technique is the make one (M1) increase, where a new stitch is created by lifting the horizontal strand between two stitches and knitting into it. These increase techniques can be strategically placed to achieve the desired shape and size of the leg warmer.
Increase Example:
Row 1: K8, yo, k to end of row (repeat this row until desired width is achieved)
By incorporating decreases and increases into the knitting pattern, the leg warmers can be shaped to fit snugly around the legs, providing both comfort and style. These shaping techniques allow for customization and can be adjusted according to personal preferences. With careful planning and execution, the leg warmers will be the perfect addition to any ballet dancer’s wardrobe.
Adding Length: Continuing the Knitting Pattern
In order to add length to your ballet leg warmers knitting pattern, you will need to continue knitting the pattern as instructed. To do this, you will need to have a basic understanding of knitting techniques such as knit and purl stitches, as well as following a pattern.
To add length to your leg warmers, you will essentially be repeating the pattern rows for a certain number of times. Start by referring to the pattern instructions to determine which section of the pattern to repeat. This could be a series of rows or a specific stitch pattern.
If the pattern instructs you to repeat a certain set of rows, continue knitting those rows until you have reached the desired length. Be sure to keep track of your row count using stitch markers or a row counter to ensure accuracy.
If the pattern specifies a stitch pattern to be repeated, continue knitting that particular stitch pattern until the desired length is achieved. This may involve repeating a set of stitches or a specific combination of knit and purl stitches. Make sure to follow the stitch pattern instructions carefully to maintain consistency and achieve the desired look.
Once you have reached the desired length, you can then proceed to the next section of the pattern or finish off the leg warmers according to the pattern instructions. Remember to always check your gauge and make any necessary adjustments to ensure the leg warmers fit properly. Enjoy the process of adding length to your leg warmers and creating a beautiful and functional accessory for ballet or other activities!
Finishing Touches: Binding Off and Weaving in Ends
Finishing a knitting project involves more than just completing the last row. It’s important to properly bind off and weave in any loose ends to ensure a polished and professional-looking finished piece.
When binding off, you’ll want to use a method that matches the stitch pattern of your project. The standard bind off method is suitable for most projects, but you can also use a stretchy bind off for projects that require more flexibility. Follow the instructions provided in your pattern or consult a knitting reference guide for specific bind off techniques.
To bind off, begin by knitting the first two stitches as usual. Then, insert the left-hand needle into the first stitch on the right-hand needle. Lift this stitch up and over the second stitch, and let it slide off the right-hand needle. Repeat this process for the remaining stitches until only one stitch remains on the right-hand needle. Cut the yarn, leaving a long tail, and pull it through the last stitch to secure.
Once you’ve bound off all your stitches, you’ll likely have a few loose ends of yarn hanging from your project. To weave in these ends, thread the tail onto a tapestry needle and insert it into the back of the nearby stitches. Weave the needle in and out of the stitches, following the direction of the yarn, for about an inch or so. Then, cut the remaining yarn close to the stitches. This will ensure that the end is securely hidden inside the fabric, preventing any unraveling.
By taking the time to bind off and weave in ends properly, you’ll give your knitting project a clean and polished look. It may seem like a small detail, but it can make a big difference in the overall appearance of your finished piece. So don’t rush through these last steps; take the time to do them right for a truly professional finish.
Blocking and Caring for Your Ballet Leg Warmers
After completing your ballet leg warmers knitting pattern, it’s important to properly block and care for them to ensure they maintain their shape and durability. Blocking refers to the process of shaping and smoothing your knitted piece to its intended dimensions. Here are some steps to follow:
Blocking
1. Prepare your leg warmers: Fill a basin or sink with cold water and add a small amount of gentle wool wash or mild detergent. Gently submerge your leg warmers in the water, making sure they are fully saturated. Let them soak for about 10 minutes.
2. Shape the leg warmers: Remove the leg warmers from the water and gently squeeze out any excess moisture. Lay them flat on a clean towel or blocking mats, stretching and shaping them to your desired length and width. Smooth out any wrinkles or folds, taking care not to pull or distort the stitches.
3. Pin the leg warmers: Use rust-proof T-pins or blocking wires to secure the leg warmers in place. Start at one end and work your way to the other, pinning along the edges and corners to ensure they stay in shape. Leave the leg warmers to dry completely, preferably in a well-ventilated area away from direct sunlight.
Caring
1. Washing: Hand wash your ballet leg warmers using lukewarm water and a gentle wool wash or mild detergent. Avoid harsh chemicals or bleach, as they can damage the fibers. Gently squeeze out excess water and lay flat to dry on a clean towel.
2. Storage: When not in use, store your leg warmers in a clean, dry place to protect them from dust, moths, and other potential damage. Avoid hanging them for long periods, as this can cause stretching or distortion. Instead, fold them neatly and place them in a drawer or an airtight bag.
3. Refreshing: If your leg warmers become slightly stretched or lose their shape over time, you can reblock them using the same blocking process mentioned earlier. This will help restore their original form and keep them looking their best.
By following these blocking and caring instructions, you can ensure that your ballet leg warmers remain in excellent condition for years to come. Enjoy the warmth and style they bring to your dance practice!
Customizing Your Design: Embellishments and Variations
Once you have mastered the basic ballet leg warmers knitting pattern, you can start exploring different ways to customize and embellish your design. Adding unique touches to your leg warmers can make them stand out and reflect your personal style. Here are some ideas to get you started:
1. Lace Inserts
For a delicate and feminine touch, consider adding lace inserts to your leg warmers. You can use a lace stitch pattern such as the feather and fan stitch or the eyelet lace stitch to create a beautiful and intricate design. The lace inserts can be placed along the sides of the leg warmers or even at the back for a dramatic effect.
2. Colorful Stripes
Experiment with different colors by adding bold and vibrant stripes to your leg warmers. You can use a contrasting color to create simple stripes or play with multiple colors for a more intricate design. Stripes can be placed horizontally, vertically, or even diagonally to create different visual effects.
3. Cable Knitting
Add texture and depth to your leg warmers by incorporating cable knitting techniques. Cable stitches can create intricate and eye-catching patterns that add a unique touch to your design. You can try simple cable patterns or challenge yourself with more complex cable designs.
4. Embroidery and Appliqué
If you enjoy embroidery or sewing, consider adding embellishments to your leg warmers. You can embroider flowers, animals, or any other design onto the leg warmers to create a personalized and unique look. Alternatively, you can sew on appliqués or patches for a quick and easy way to add some extra flair.
Remember, the sky’s the limit when it comes to customizing your leg warmers. Feel free to mix and match different techniques and ideas to create a design that reflects your own personal style and creativity. Happy knitting!