A Unique and Adorable Owl Hat Pattern for Knitting

Looking to add a touch of charm and playfulness to your winter wardrobe? Look no further than the knitted owl hat pattern. This adorable and stylish accessory is perfect for all ages, from children to adults, and adds a unique and whimsical touch to any outfit.
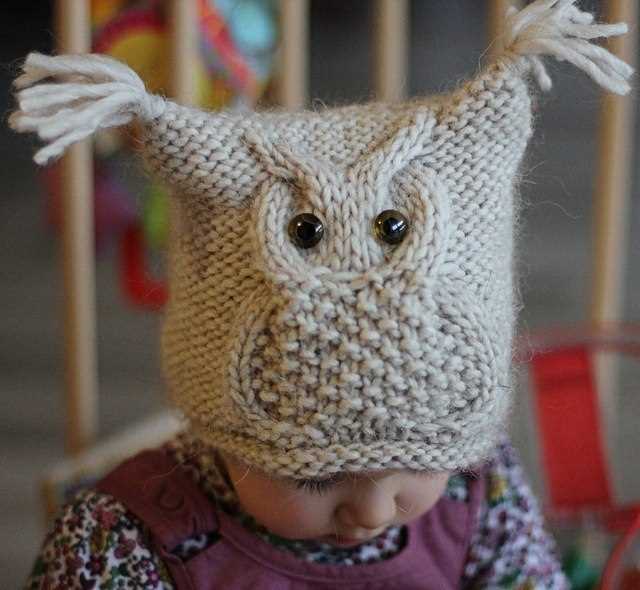
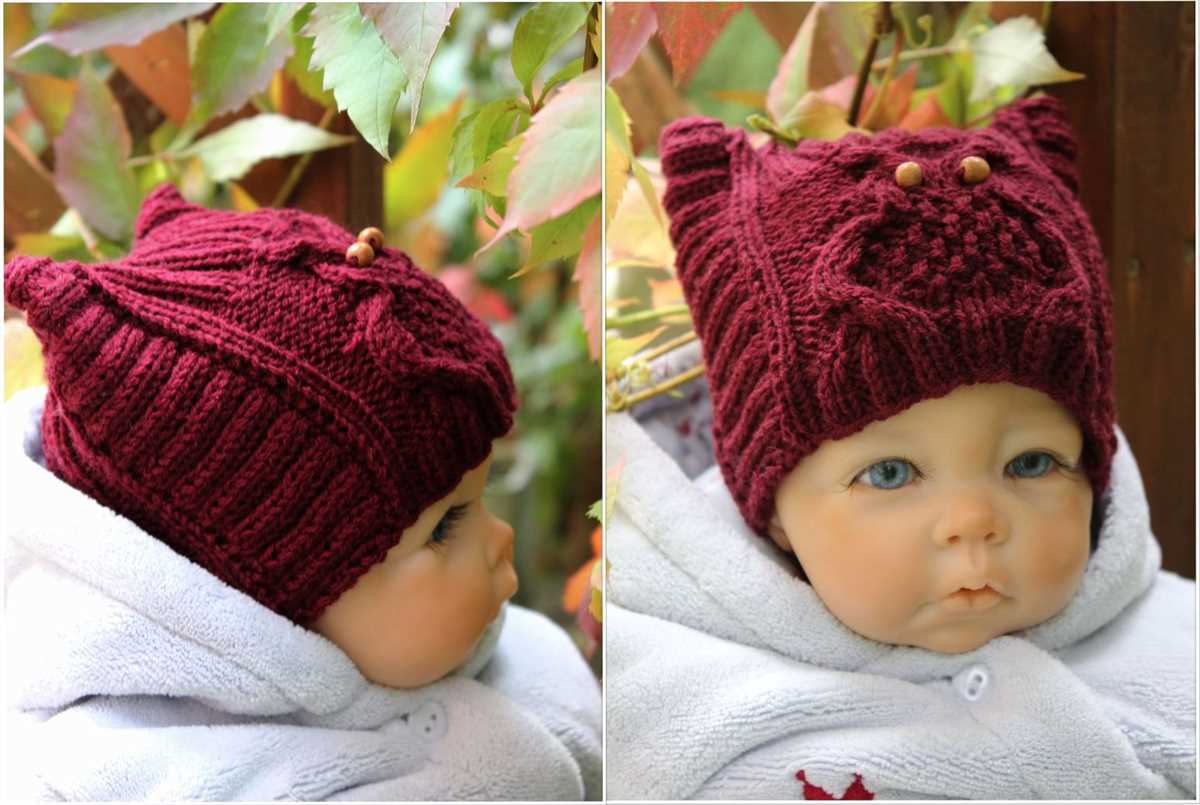
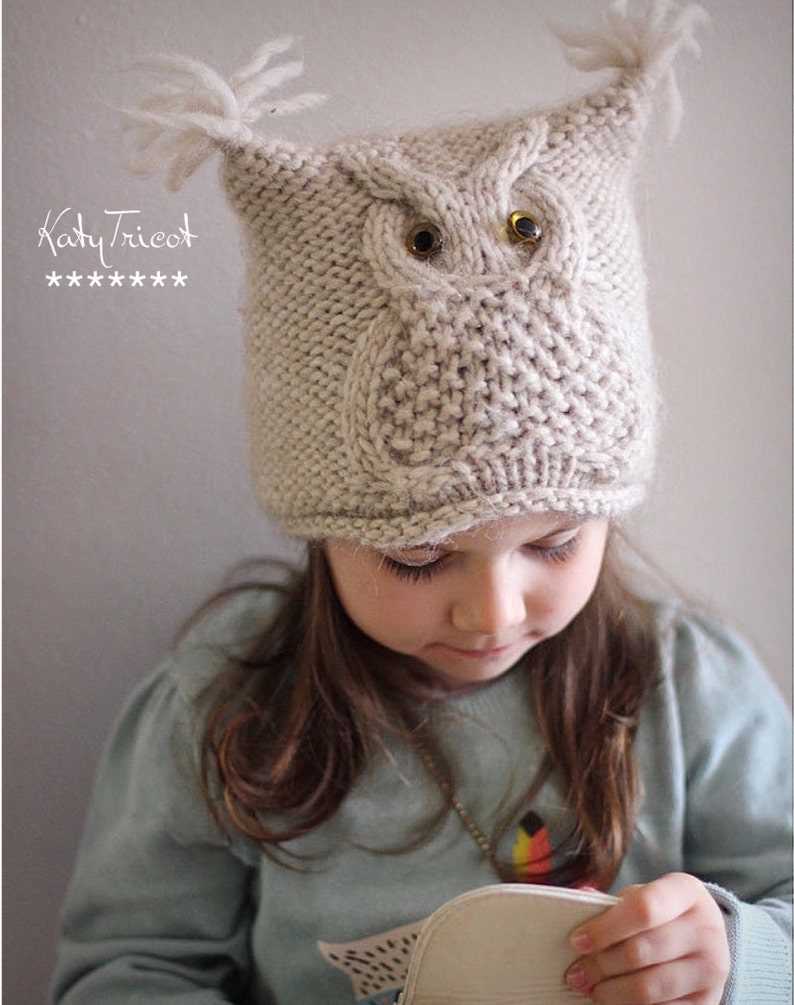
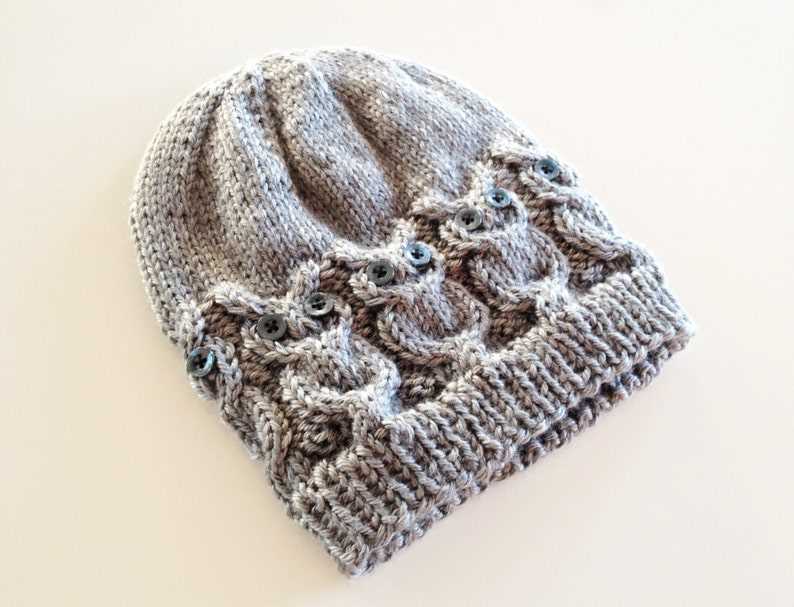
With its distinct owl-inspired design, this hat is sure to turn heads and spark conversations wherever you go. The oversized eyes, cute little ears, and intricate stitch work make it an eye-catching and fun accessory that will make you stand out from the crowd.
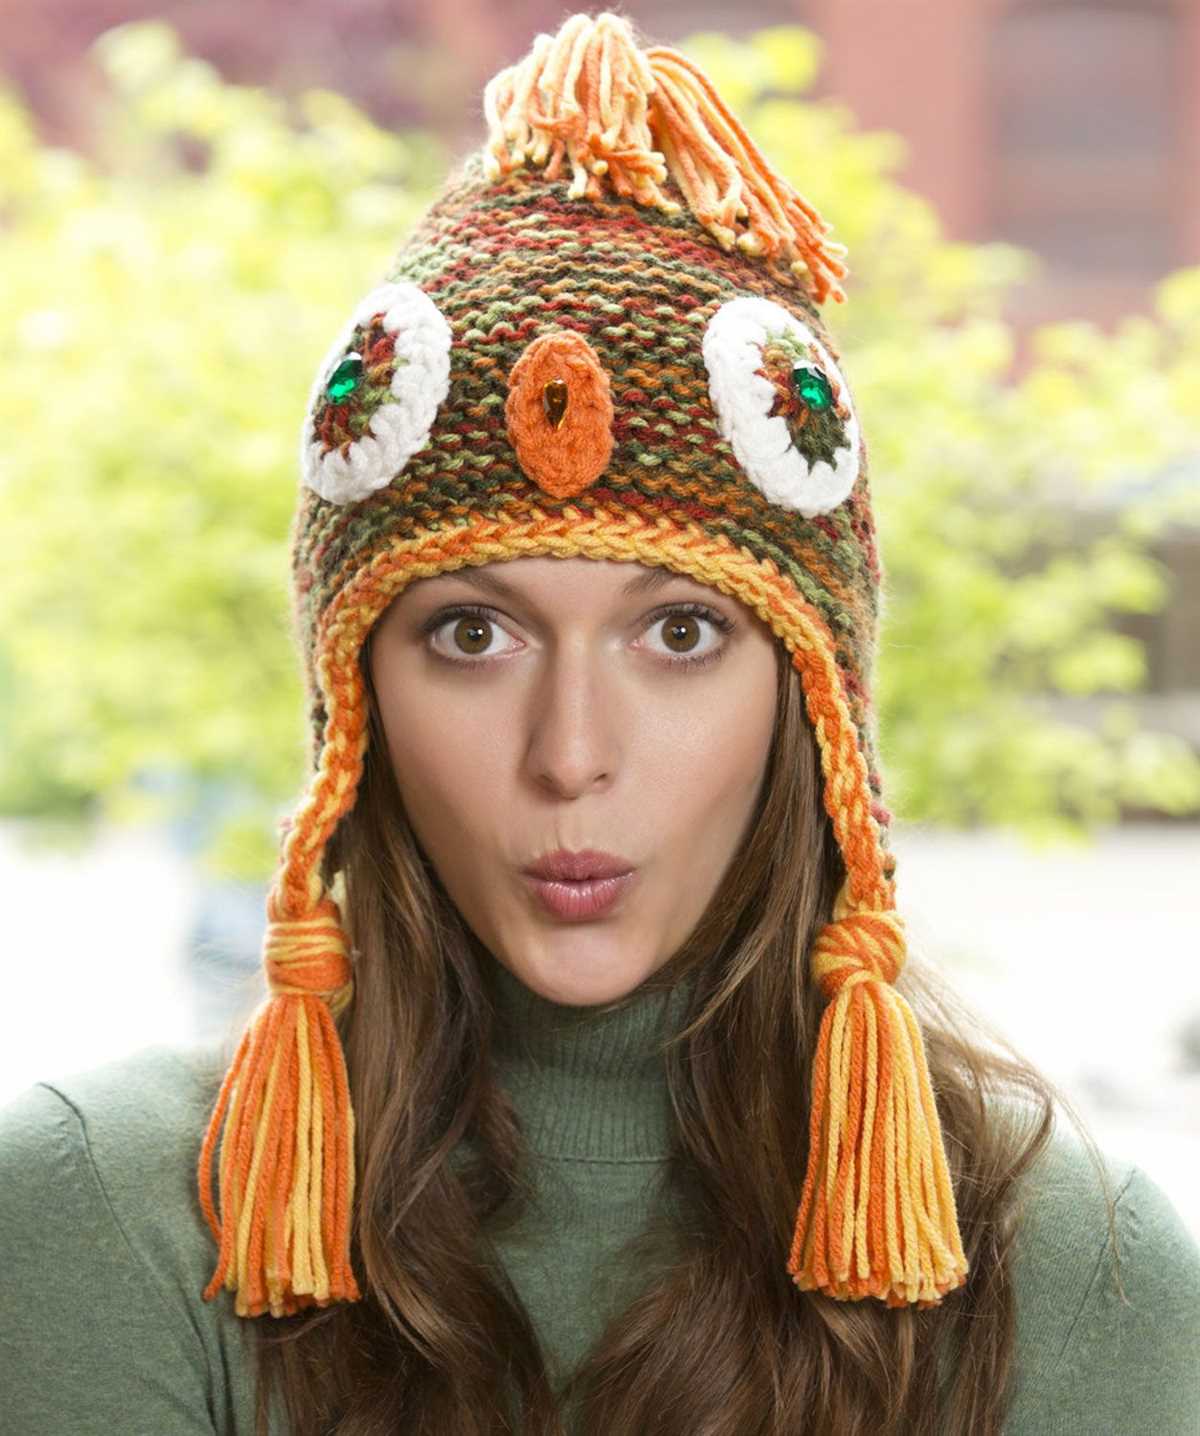
Not only is the knitted owl hat a fashion statement, but it is also a practical accessory for those chilly winter days. The thick yarn and intricate stitch pattern create a warm and cozy hat that will keep you snug and comfortable in even the coldest of temperatures. Plus, the extra-long ear flaps provide added warmth and protection for your ears and neck.
Materials needed
To make a knitted owl hat, you will need the following materials:
- Yarn: Choose a soft, medium-weight yarn in the colors of your choice. You will need one skein each for the main color (for the body of the owl), the contrasting color (for the eyes and beak), and the accent color (for the feathers).
- Knitting needles: Use a set of double-pointed needles in the appropriate size for your yarn. The recommended size is usually included on the yarn label.
- Tapestry needle: This needle will be used for weaving in ends and sewing any necessary seams.
- Stitch markers: These small plastic rings will help you keep track of your stitches and pattern repeats.
- Scissors: You will need a good pair of scissors for cutting your yarn and any necessary trimming.
- Measuring tape: This will be used to measure your gauge and ensure accurate sizing.
- Stuffing: To give your owl hat some shape, you will need a small amount of stuffing material, such as polyester fiberfill or scraps of yarn.
- Buttons or felt: Depending on your desired finishing touches, you may want to add buttons for the eyes or cut out small pieces of felt for the beak.
Once you have gathered these materials, you will be ready to start knitting your adorable owl hat.
Gauge and Sizing
When it comes to knitting a hat, getting the right gauge is crucial to ensure a proper fit. Gauge refers to the number of stitches and rows in a given measurement, and it determines how large or small the finished hat will be. To achieve the correct gauge, it’s important to use the recommended yarn and needle size specified in the pattern.
In the case of the knitted owl hat pattern, the recommended gauge is 18 stitches and 24 rows = 4 inches in stockinette stitch. This means that for every 18 stitches and 24 rows in your swatch, it should measure 4 inches. If your swatch is too big, it means you are knitting too loosely and should go down a needle size. If your swatch is too small, it means you are knitting too tightly and should go up a needle size.
It’s also important to consider sizing when knitting a hat. The knitted owl hat pattern typically includes instructions for multiple sizes, ranging from newborn to adult. Each size will have its own set of stitch counts and measurements to ensure a proper fit. When choosing a size, it’s helpful to measure the head circumference of the person the hat is intended for and compare it to the provided measurements in the pattern.
To adjust the size of the hat, you can either change the yarn weight and needle size or increase/decrease the number of stitches cast on. However, it’s important to keep in mind that altering the pattern may affect the final appearance of the owl design. It’s always a good idea to make a gauge swatch and test the fit before starting the project.
By paying attention to gauge and sizing, you can knit a hat that fits perfectly and showcases the adorable owl design. Whether you’re making it for yourself, a friend, or a little one, a well-fitting knitted owl hat is sure to be a cozy and stylish accessory. Get ready to show off your knitting skills and create a unique and charming accessory that will surely turn heads!
Cast on
When starting to knit a hat using the owl pattern, it is important to cast on the correct number of stitches to ensure the hat fits properly. The number of stitches to cast on will depend on the size of the hat and the gauge of the yarn being used. It is recommended to swatch and measure the gauge before casting on to determine the number of stitches needed.
To cast on, there are different methods that can be used. One common method is the long tail cast on, which creates a neat and stretchy edge. To do the long tail cast on, hold the needle in your right hand and make a slip knot with the yarn, leaving a long tail. Insert the needle into the slip knot, bringing the working yarn under and over the needle. Pull the working yarn through the slip knot, creating a new stitch on the needle. Repeat this process until the desired number of stitches have been cast on.
Note: It is important to cast on with a slightly larger needle size than you plan to use for the main part of the hat. This will help ensure that the cast on edge is not too tight. Once the cast on is complete, you can switch to the smaller needles to continue knitting the hat.
Main body
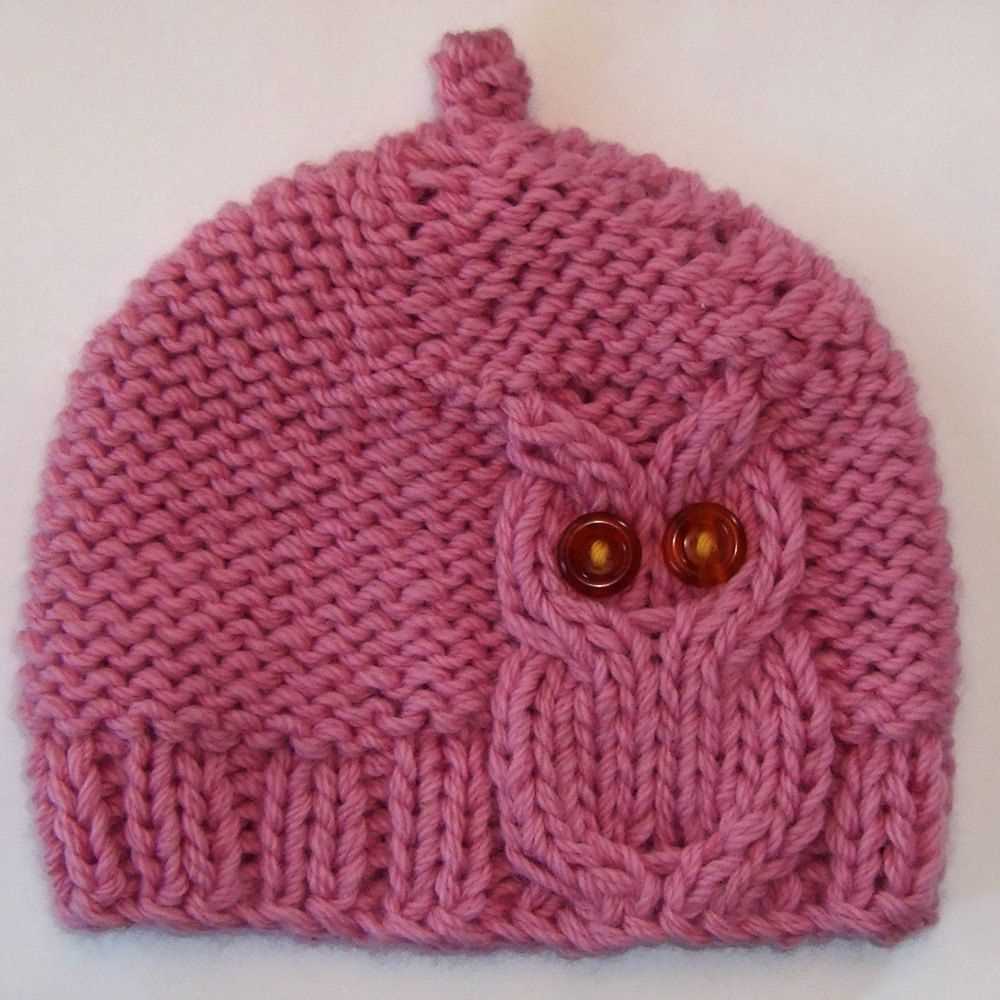
The main body of the knitted owl hat consists of two parts: the brim and the crown. The brim is worked in ribbing stitch to provide a snug fit and keep the hat in place. It is knitted in a contrasting color to add a pop of color to the hat. The crown is worked in stockinette stitch, which gives a smooth and uniform finish to the hat.
To begin knitting the main body of the hat, cast on the required number of stitches using the contrasting color yarn for the brim. The ribbing stitch is created by alternating knit and purl stitches in each row. Continue knitting in ribbing stitch for the desired length, making sure to maintain an even tension throughout.
Once the brim is complete, switch to the main color yarn and begin knitting the crown in stockinette stitch. Knit all stitches in the right side rows and purl all stitches in the wrong side rows. Repeat these rows until the crown reaches the desired length, keeping in mind any shaping instructions specified in the pattern.
When the main body is complete, you can proceed to the next steps of the pattern, such as adding the owl’s eyes and ears. The main body provides the foundation for the hat and sets the stage for the owl design to come to life. With careful attention to detail and proper knitting techniques, you can create a cozy and adorable knitted owl hat that will keep you warm and stylish.
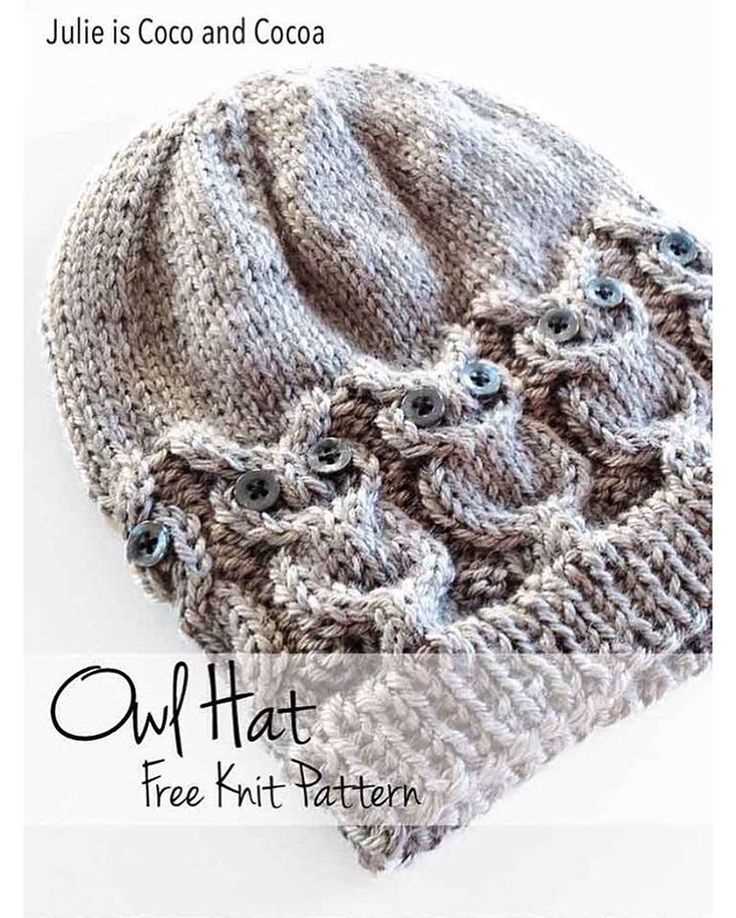
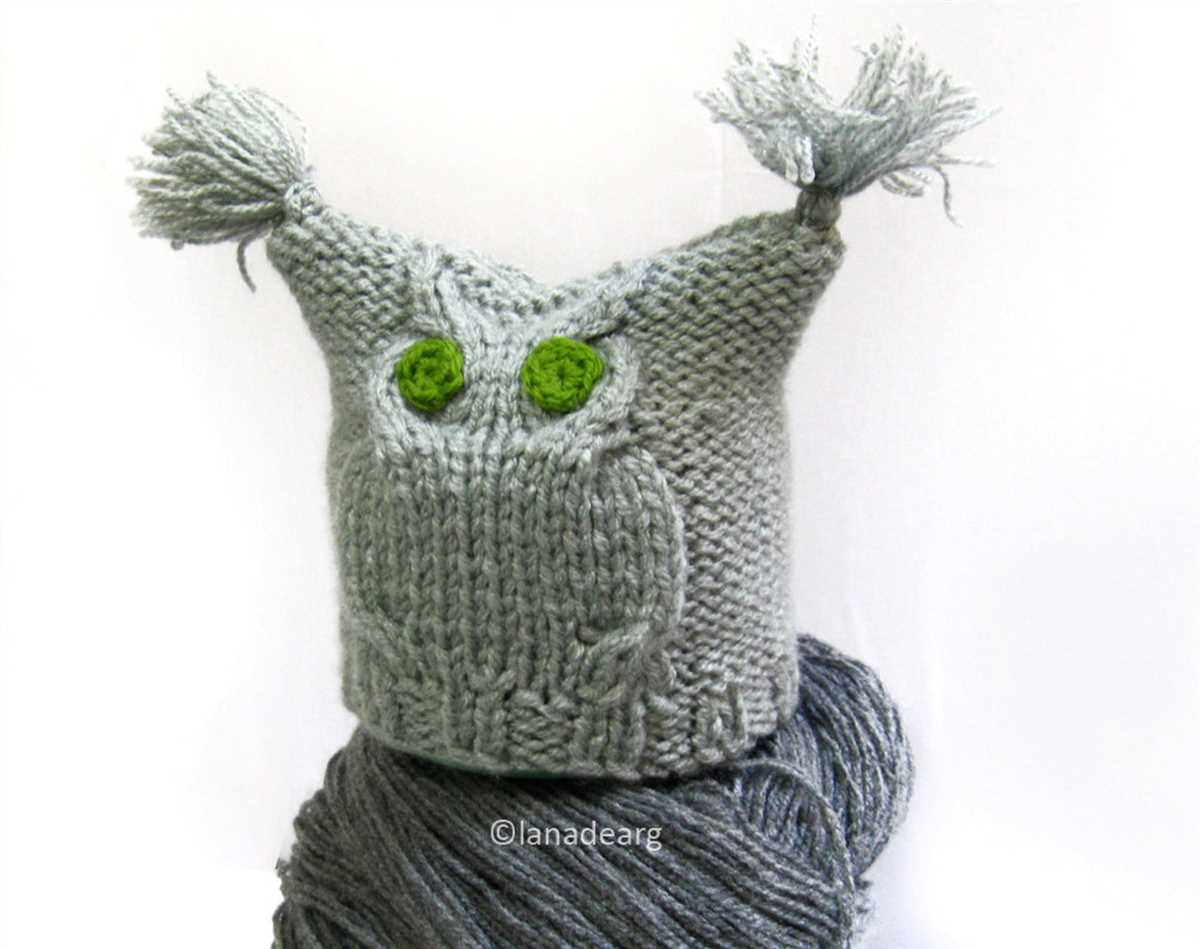
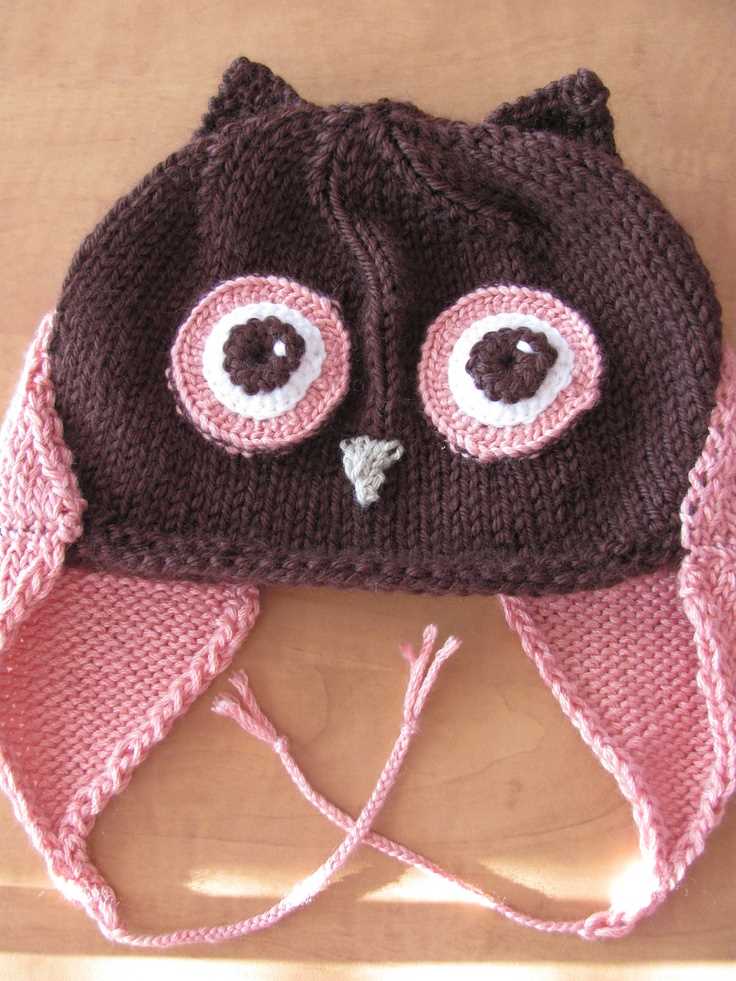
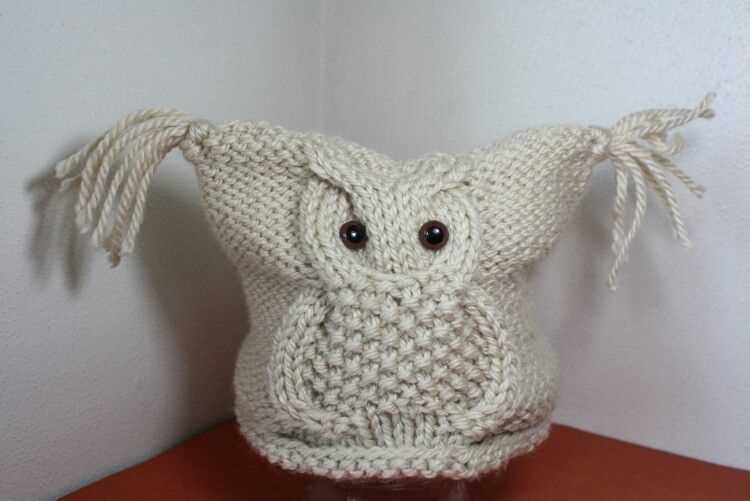
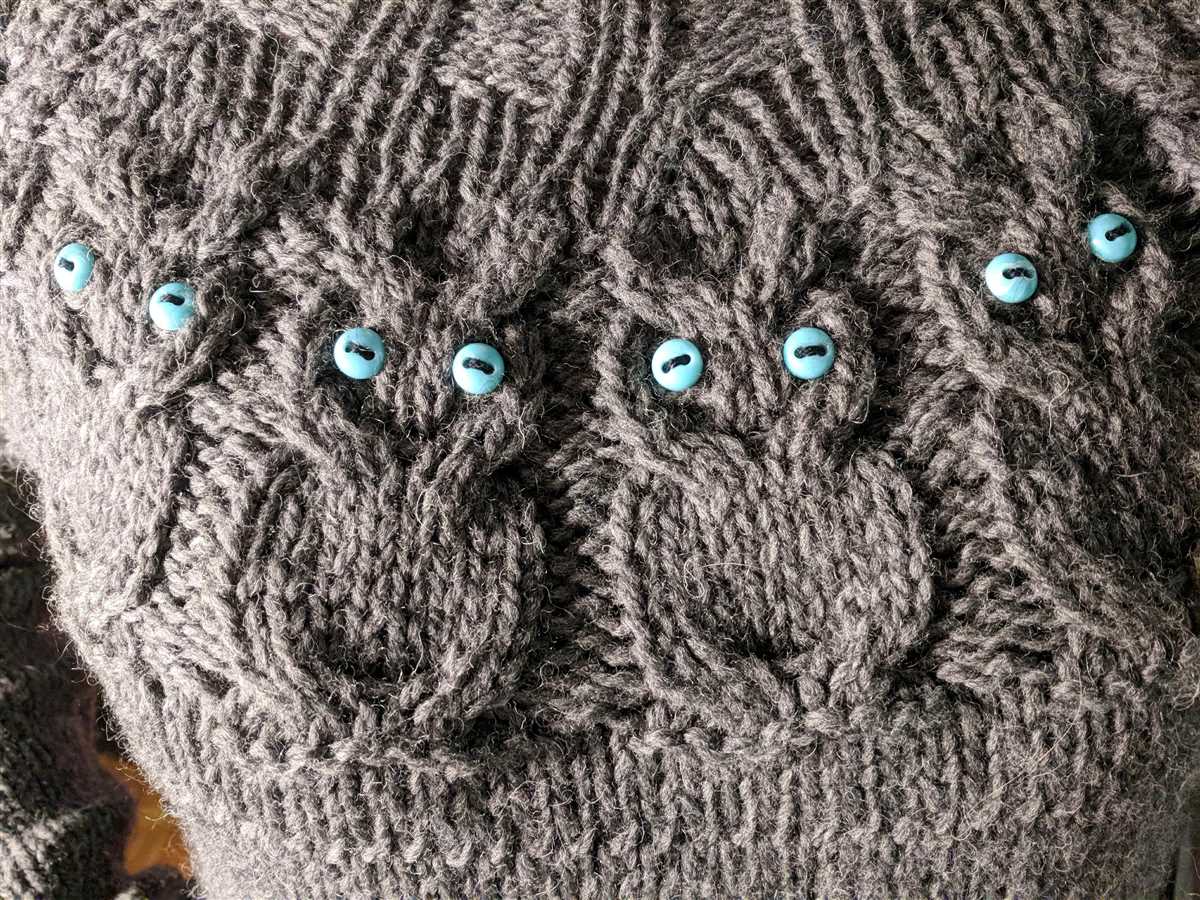
Eye Details
The eyes are an essential element in creating a knitted owl hat. They add character and charm to the finished product. Here are some eye details to consider when making a knitted owl hat.
Eye Size
Choosing the right size for the eyes is crucial. Depending on the desired look, you can opt for small, medium, or large eyes. Small eyes give the owl a cute and innocent appearance, while larger eyes can create a more realistic or exaggerated look.
Eye Shape

The shape of the eyes can vary depending on the owl hat design. Circular eyes are the most common and traditional choice. However, some designs may call for oval or even triangular-shaped eyes. The choice of eye shape can greatly influence the overall look and feel of the hat.
Eye Color
The color of the eyes is another important detail to consider. Traditional owl colors like yellow, orange, and brown are commonly used. However, you can get creative and use any color you prefer. Consider using contrasting colors to make the eyes stand out or match the colors of the rest of the hat for a cohesive look.
Eye Placement
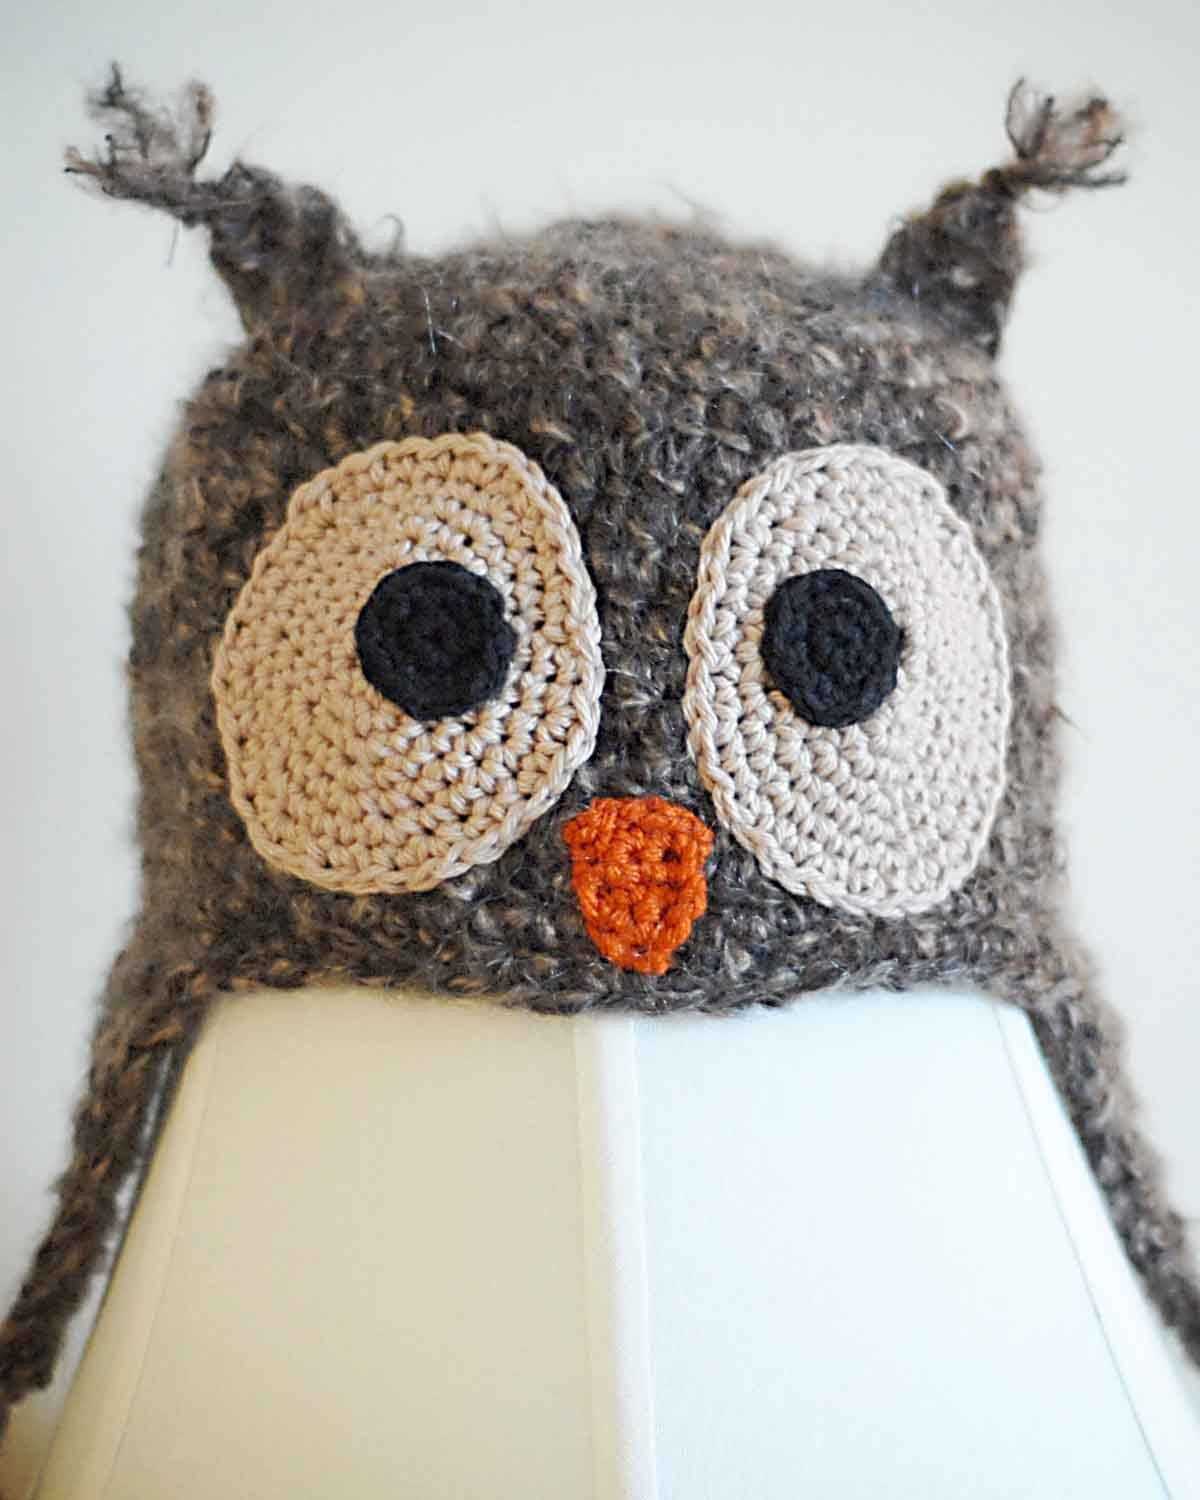
The placement of the eyes also contributes to the overall appearance of the owl hat. Placing the eyes closer together can create a cute and innocent look, while placing them farther apart can give the owl a more serious or wise expression. Experiment with different placements to achieve the desired effect.
Eye Embellishments
Adding embellishments to the eyes can make them even more eye-catching. Consider using embroidery or buttons to create pupils or add sparkles for a whimsical touch. This can give the owl hat a unique and personalized look.
When designing a knitted owl hat, paying attention to the eye details can make a significant difference in the final result. By considering factors such as size, shape, color, placement, and embellishments, you can create an adorable and charming hat that will surely turn heads.
Beak
In a knitted owl hat pattern, the beak is an important feature that adds character to the finished hat. The beak is typically knit separately and then sewn onto the hat. It can be made using a contrasting color to make it stand out or in the same color as the rest of the hat for a more subtle look.
To create the beak, you will need to follow the specific instructions provided in the pattern. Knitting the beak usually involves using basic knitting stitches such as knit and purl, and may also include increases or decreases to shape the beak. The pattern will provide the number of stitches to cast on and the specific rows or rounds to knit to create the desired shape.
Once the beak is complete, it is usually sewn onto the front of the hat using a yarn needle and the same yarn that was used to knit the beak. The exact placement of the beak will depend on the pattern instructions, but it is typically centered between the eyes of the owl. It is important to securely sew the beak in place to ensure that it stays attached to the hat.
The beak is an essential element in creating a knitted owl hat that resembles an owl’s face. It adds a playful and whimsical touch to the hat, making it a fun and unique accessory for both children and adults. With its vibrant color and distinctive shape, the beak is sure to make the hat stand out and bring a smile to anyone who wears it. Whether you are knitting the hat for yourself or as a gift, the beak is a detail that should not be overlooked.
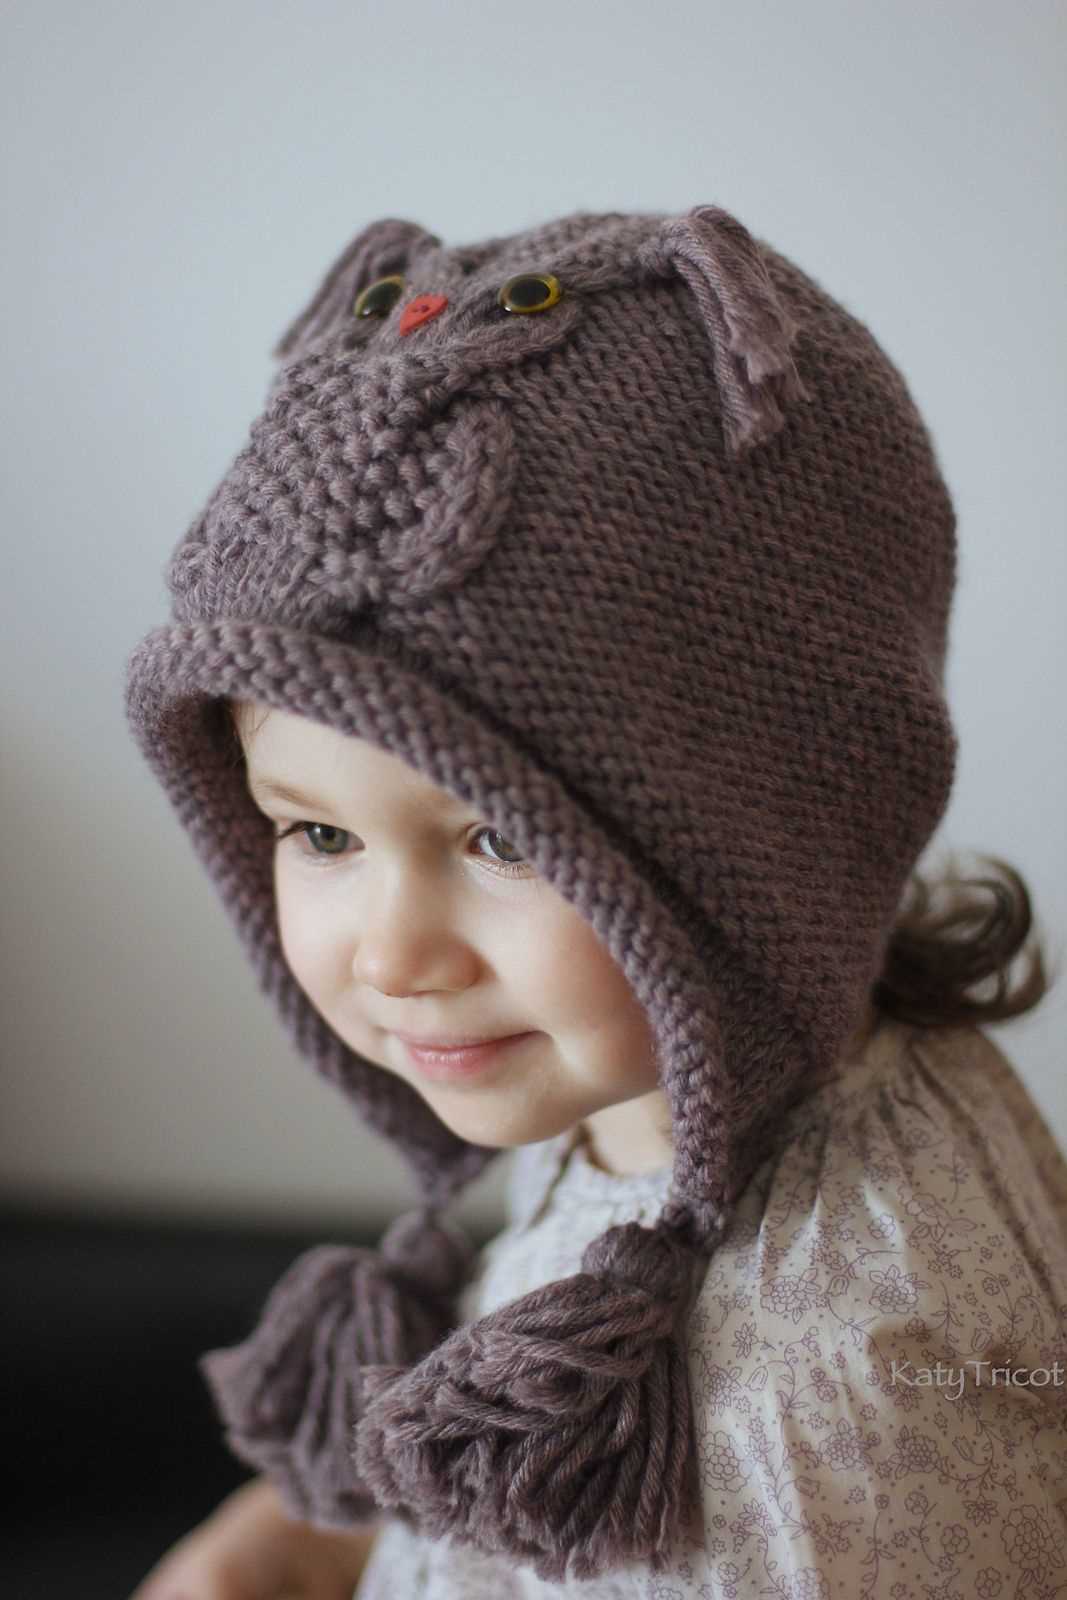
Ear Flaps
When knitting a knitted owl hat, one popular design element to consider is adding ear flaps. Ear flaps not only provide an adorable and whimsical look to the hat, but they also serve a functional purpose by keeping the ears warm and protected from the cold weather.
To create ear flaps for your knitted owl hat, you can follow a simple pattern. Start by casting on the desired number of stitches for each ear flap. This number will vary depending on the size of the hat and the desired length of the ear flaps. For example, you could cast on 10 stitches for each ear flap.
Next, you can knit the ear flaps in garter stitch, which means knitting every row. This creates a thick and cozy texture. To increase the length of the ear flaps, simply continue knitting in garter stitch until they reach the desired length, keeping in mind that you will need to fold the flaps up and sew them in place.
Once the ear flaps are complete, you can sew them to the sides of the hat. Position the flaps slightly below the top of the hat to ensure a secure fit and a cute look. To attach the ear flaps, you can use a darning needle and matching yarn to carefully sew them in place, making sure to secure them tightly.
Overall, adding ear flaps to your knitted owl hat is a fun and functional way to enhance the design and keep the wearer warm. With a simple pattern and some basic sewing skills, you can create a charming hat that is sure to be a hit.
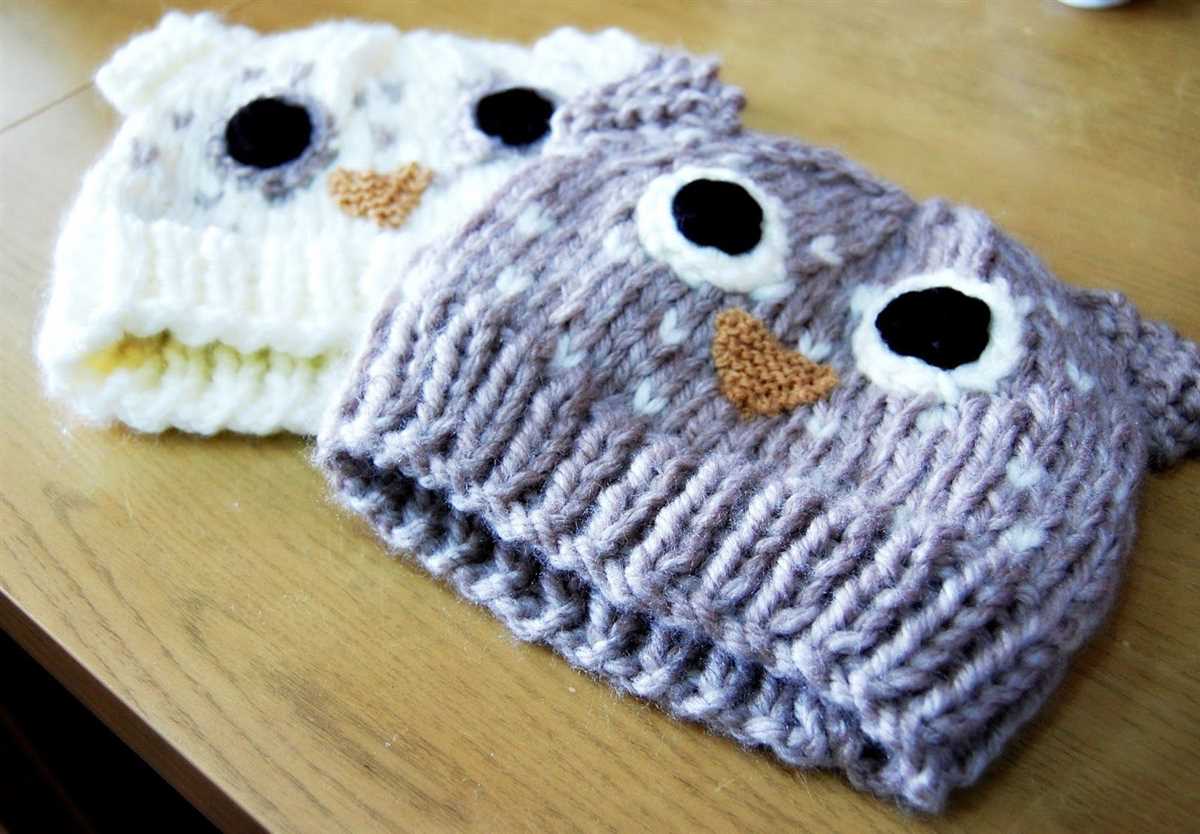
Finishing touches
Once you have completed knitting your owl hat, it’s time to add some finishing touches to make it perfect. These final details will give your hat its unique charm and personality.
First, you can add some eyes to your owl hat. Sew on two buttons or use felt to create felt eyes. You can make them round, oval, or a combination of different shapes to give your owl hat a playful look. Make sure to securely attach the eyes so they won’t come off easily.
Next, you can add a beak to your owl hat. Cut out a small triangle shape from felt or fabric and sew it onto the front of the hat, just below the eyes. You can choose a contrasting color or use the same fabric as the rest of the hat. Make sure the beak is securely attached to the hat so it won’t come off during wear.
To add more character to your owl hat, you can also attach some feathers. You can either sew on felt feathers or use real feathers, depending on your preference. Position the feathers along the sides or top of the hat to create a tufted effect. You can use feathers of different colors to add more visual interest.
Finally, don’t forget to weave in any loose ends and secure them with a knot. This will give your hat a neater and more polished look. Trim any excess yarn carefully, making sure not to accidentally cut any stitches. And voila, your owl hat is now complete and ready to be worn!
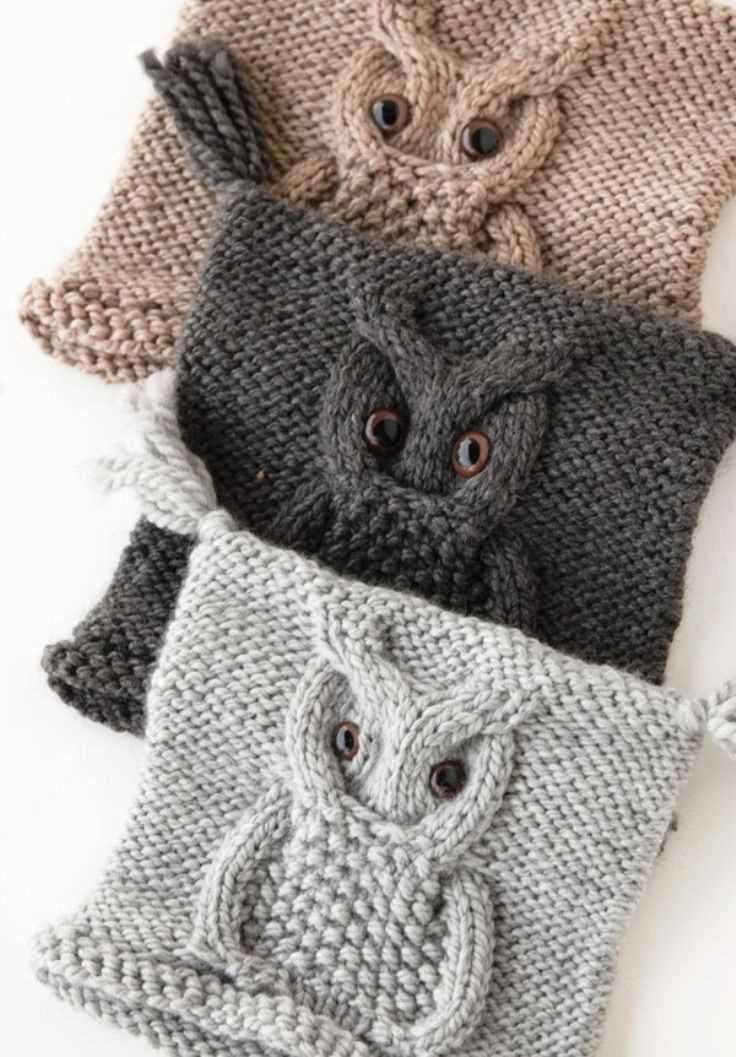
Variations and Customizations
When it comes to knitting owl hats, there are countless variations and customizations that you can make to create a unique and personalized design. Here are a few ideas to inspire your creativity:
Color combinations:
- Experiment with different color combinations to give your owl hat a different look. You can choose traditional brown and beige shades for a realistic owl appearance, or go for bright and vibrant colors to create a fun and whimsical design.
- Create patterns or stripes using contrasting colors to add visual interest to the hat.
Embroidered details:
- Add embroidered details such as eyes, beak, or feathers to bring your owl hat to life. You can use different stitches and thread colors to create different effects.
- Get creative with embroidery and add unique patterns or designs to make your owl hat stand out.
Ear flaps and tassels:
- Instead of a basic beanie shape, you can add ear flaps to your owl hat to make it extra cozy and warm.
- Add tassels or pom poms to the ends of the ear flaps for a playful touch.
Accessories:
- Consider adding accessories such as buttons, bows, or flowers to the owl hat for a cute and feminine touch.
- You can also incorporate other animal elements like wings or feathers to create a unique hybrid design.
Remember, the possibilities are endless when it comes to knitted owl hats. Use these ideas as a starting point and let your imagination run wild to create a one-of-a-kind hat that reflects your personal style.
Frequently Asked Questions
Here, we have compiled some frequently asked questions regarding the knitted owl hat pattern:
1. Can I use any type of yarn for this pattern?
Yes, you can use any type of yarn you prefer for this pattern. However, keep in mind that the weight and thickness of the yarn might affect the size of the final hat. It is recommended to use a medium-weight yarn for the best results.
2. Are there different sizes available for the hat pattern?
Yes, the knitted owl hat pattern includes instructions for multiple sizes. You can choose the size you want to make based on the age or head circumference of the recipient. The pattern usually provides sizing options for newborns, infants, toddlers, children, and adults.
3. Do I need to have advanced knitting skills to make this hat?
Not necessarily. The knitted owl hat pattern is designed to be beginner-friendly, but it does require some basic knitting skills. If you are new to knitting, it is recommended to familiarize yourself with knitting stitches such as knit, purl, and basic shaping techniques like increasing and decreasing. The pattern also includes detailed instructions and helpful tips to guide you through the process.
4. Can I sell the hats I make using this pattern?
Yes, you are allowed to sell the hats you make using this pattern. However, please note that the pattern itself is protected by copyright and should not be reproduced or distributed without permission. It is always a good idea to credit the original pattern designer when selling the finished items.
5. How long does it typically take to complete the hat?
The time it takes to complete the hat may vary depending on your knitting speed and experience. On average, it takes a few hours to a couple of days to finish the hat. Factors such as the complexity of the pattern, the size of the hat, and the time you can dedicate to knitting will also affect the completion time.
6. Can I customize the hat with different colors or additional embellishments?
Absolutely! The knitted owl hat pattern provides a basic template, but you can get creative and customize it as you wish. You can choose different colors of yarn to create your own unique design and add embellishments such as buttons, ribbons, or embroidery to give the hat a personal touch. Feel free to let your imagination run wild!
Final Thoughts
The knitted owl hat pattern is a fun and creative project that can be enjoyed by both beginner and experienced knitters. With its adorable design and cozy warmth, it is sure to be a hit with anyone who wears it.
Knitting this hat not only allows you to create a unique and personalized accessory, but it also provides an opportunity to practice and improve your knitting skills. Whether you are using this pattern as a starting point or adding your own modifications, the process of knitting the hat will help you develop your technique and broaden your understanding of different knitting stitches and techniques.
Additionally, the versatility of this pattern allows you to customize the hat to fit your own preferences and style. You can choose different colors of yarn to match your wardrobe or experiment with different combinations of stitches to create unique textures. The possibilities are endless, and the end result will be a one-of-a-kind hat that you can proudly wear or give as a gift to someone special.
So why wait? Grab your knitting needles and get started on your own knitted owl hat today!
Q&A:
What is a knitted owl hat?
A knitted owl hat is a hat designed to look like an owl’s face. It typically has owl-like ears and eyes, and sometimes even a beak.
Where can I find a knitted owl hat pattern?
You can find knitted owl hat patterns on various websites, such as knitting blogs, knitting pattern websites, or online marketplaces that sell knitting patterns. You can also find them in knitting books or magazines.
What materials do I need to make a knitted owl hat?
To make a knitted owl hat, you will need yarn in the desired colors, knitting needles of the appropriate size for the yarn weight, a tapestry needle for sewing, and any additional embellishments you want to add to your hat, such as buttons or felt.
Is a knitted owl hat suitable for beginners?
Knitted owl hat patterns can vary in difficulty, but there are many patterns available that are suitable for beginners. Look for patterns with clear instructions and basic knitting techniques, such as knit and purl stitches. It’s a great way for beginners to practice their knitting skills and create something cute and functional.
Can I customize a knitted owl hat pattern?
Yes, you can definitely customize a knitted owl hat pattern to make it your own. You can change the colors of the yarn to your liking, add or remove embellishments, or modify the size to fit different head sizes. Just make sure to adjust your gauge and follow any necessary pattern modifications to ensure the best results.