Knit Your Own Cozy Cloud Sweater

Knitting is a beloved craft that allows individuals to create beautifully designed clothing and accessories. One popular knitting project that has gained popularity in recent years is the cloud sweater. This cozy and stylish sweater is perfect for keeping warm during the colder months while also adding a fashionable touch to any outfit.
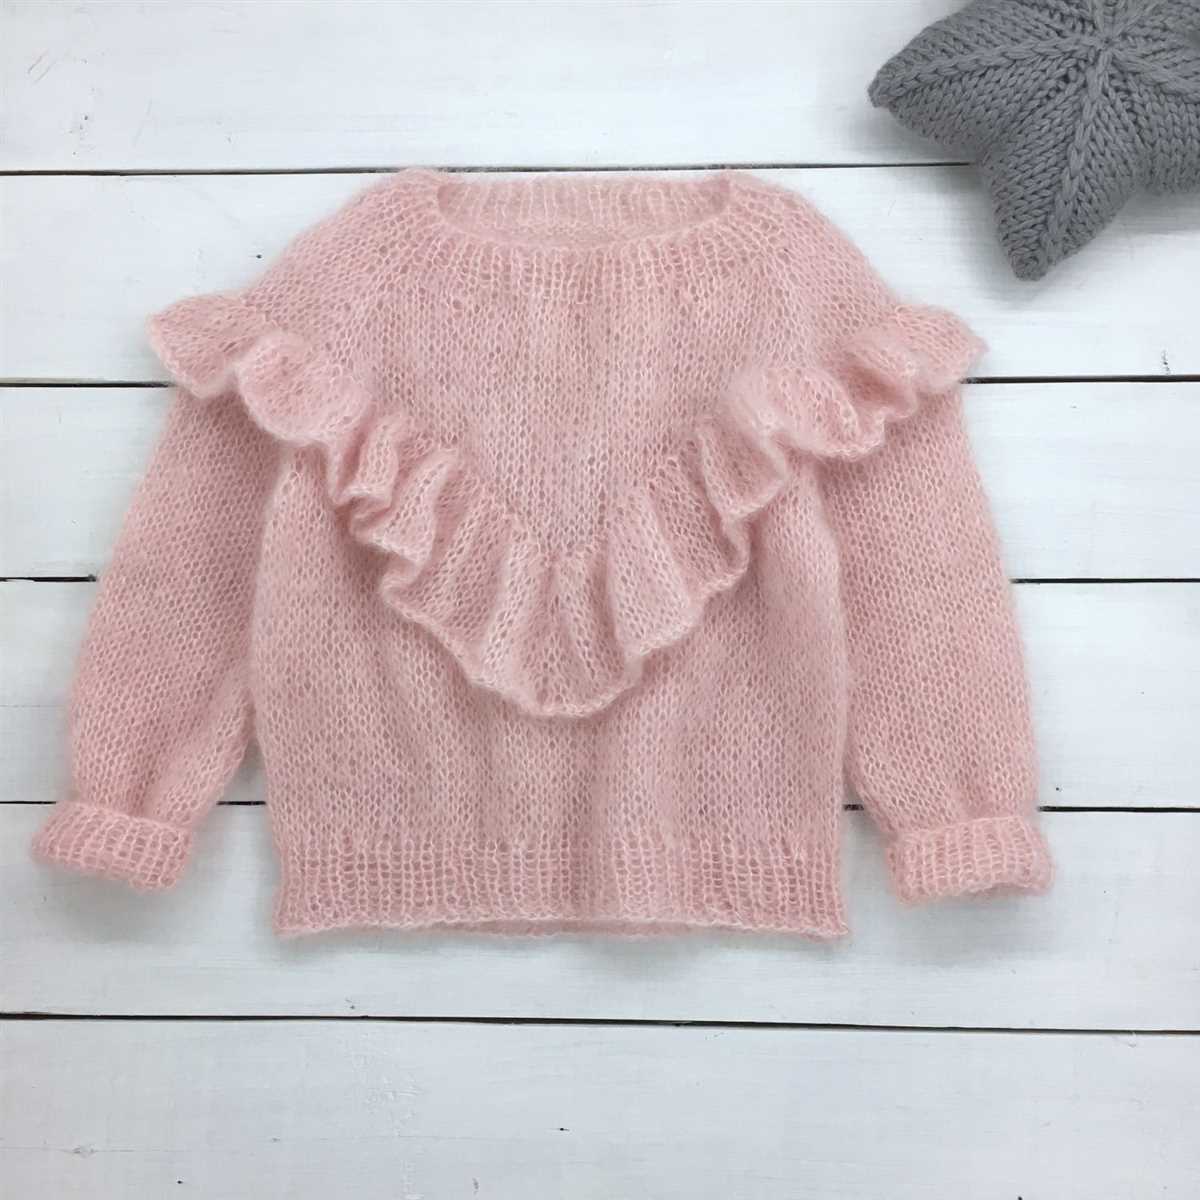
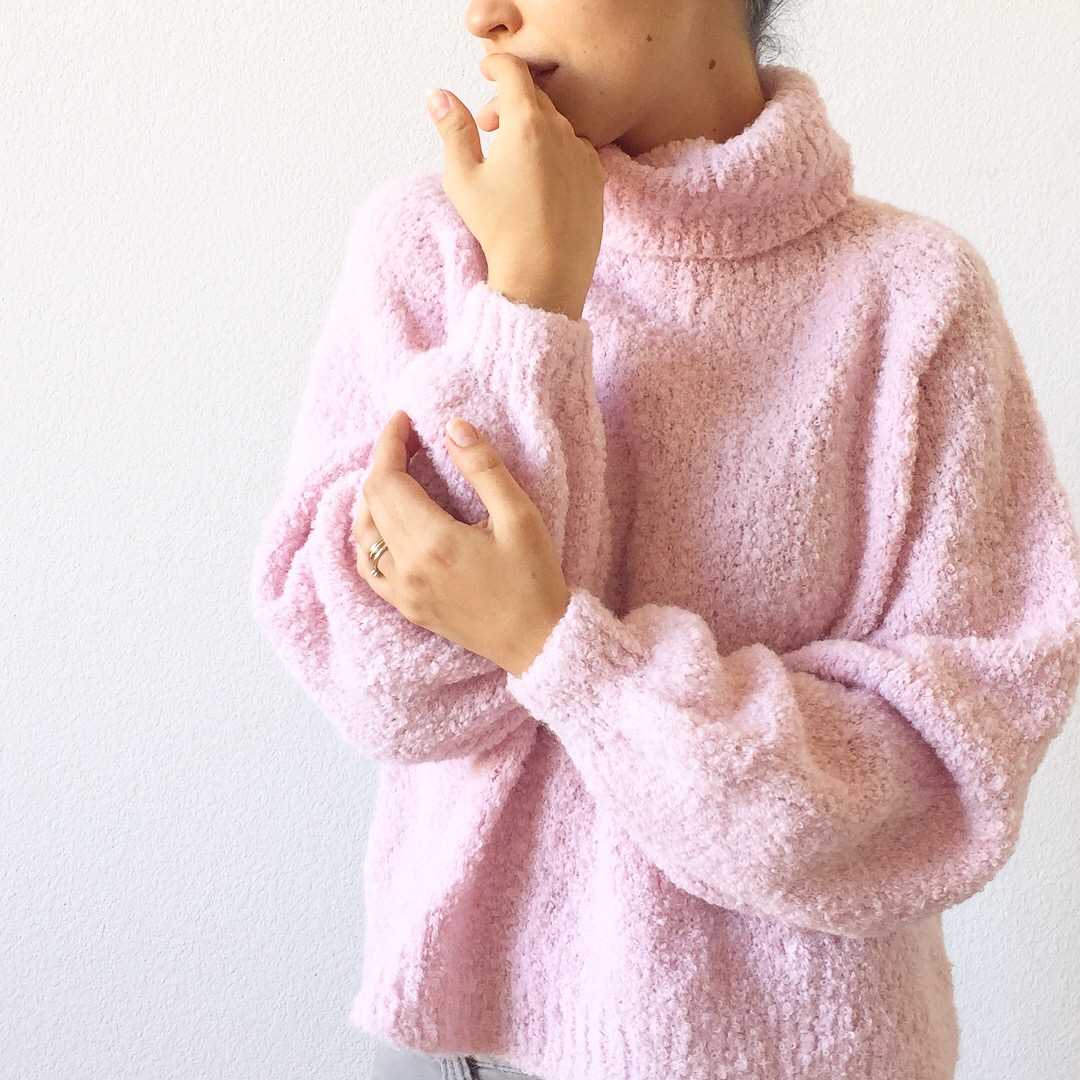
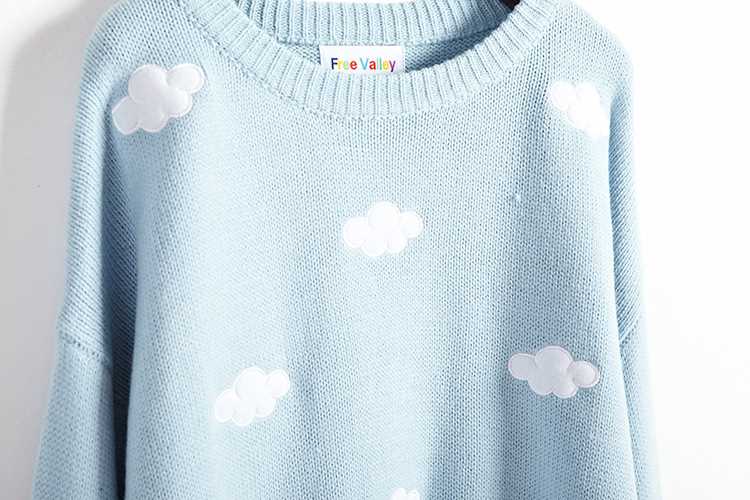
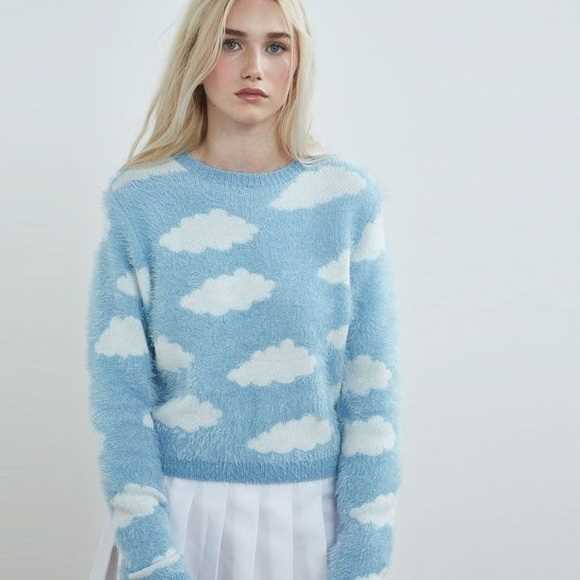
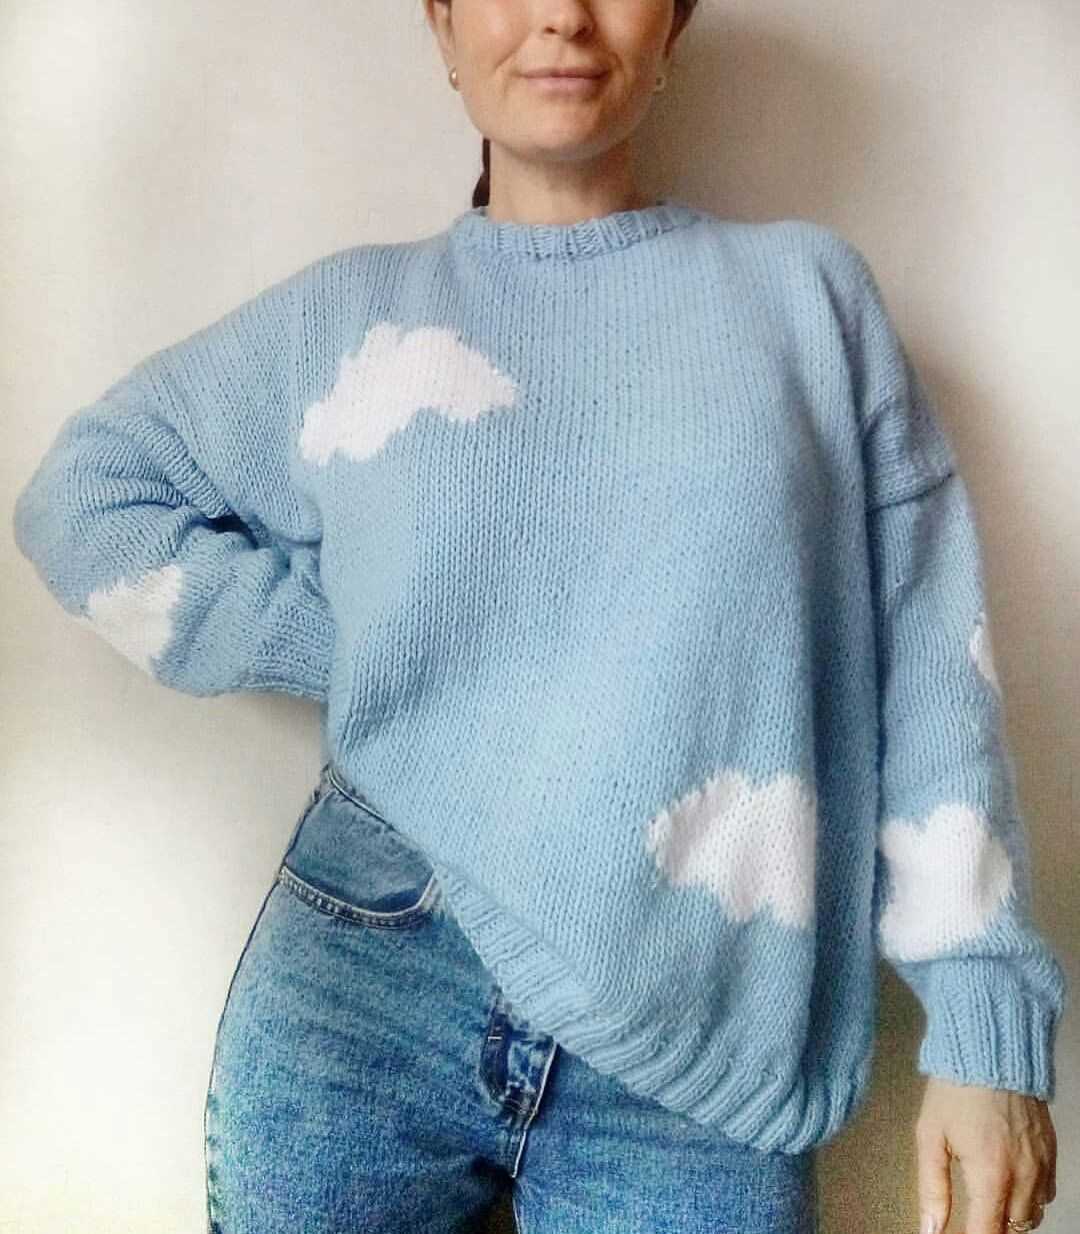
The cloud sweater gets its name from its incredibly soft and fluffy texture, resembling the appearance of a fluffy cloud. It is typically knit using a combination of different yarn weights and textures, creating a unique and eye-catching pattern. Knitters have the freedom to choose their own yarn colors and combinations, allowing for a truly personalized creation.
While the cloud sweater may appear daunting to beginners, it is actually a relatively easy pattern to follow. With the right knitting needles, yarn, and a basic knowledge of knitting techniques, anyone can create their own cloud sweater masterpiece. Whether you are a seasoned knitter or just starting out, this pattern offers a fun and rewarding challenge.
Cloud Sweater Knitting Pattern
Knitting a cloud sweater is a fun and cozy project that is perfect for chilly weather. This knitting pattern is relatively simple and suitable for both beginners and experienced knitters. The end result is a soft and fluffy sweater that feels like wearing a cloud.
To start, you will need a set of knitting needles and a fluffy, bulky yarn of your choice. It is recommended to use a circular needle to accommodate the large number of stitches.
Materials:
- Size 10 circular knitting needles
- Bulky weight yarn (approximately 900-1000 yards)
- Tape measure
- Stitch markers
- Tapestry needle
Instructions:
- Cast on the desired number of stitches, ensuring that it is a multiple of 4.
- Join in the round, placing a stitch marker to indicate the beginning of the round.
- Knit in the round for the desired length, following the stitch pattern below:
| Round 1: | *Knit 2, purl 2. Repeat from * to end. |
|---|---|
| Round 2: | *Purl 2, knit 2. Repeat from * to end. |
| Repeat Rounds 1 and 2: | Continue alternating between Rounds 1 and 2 until the sweater reaches the desired length. |
Choosing the Right Yarn for Your Cloud Sweater
When knitting a cloud sweater, selecting the right yarn is crucial for achieving the desired texture and comfort. The ideal yarn for this project should be soft, lightweight, and have a fluffy appearance that resembles a cloud. Additionally, choosing a yarn that is easy to work with and has good stitch definition will make the knitting process more enjoyable and the finished sweater more aesthetically pleasing.
Fiber Content: One of the primary considerations when selecting yarn for a cloud sweater is the fiber content. Natural fibers such as merino wool, cashmere, and alpaca are excellent choices as they offer softness, warmth, and breathability. These fibers have natural insulating properties and will keep you cozy in colder weather while still allowing your skin to breathe.
Weight: The weight of the yarn is also important to consider. For a cloud sweater, you’ll want to choose a yarn that is on the lighter side, such as a fingering or sport weight. These lighter weights will give your sweater a delicate and airy feel, perfect for mimicking the ethereal appearance of a cloud. However, if you prefer a more substantial garment, you can opt for a heavier weight yarn like a DK or worsted weight.
Texture: The texture of the yarn plays a significant role in achieving the desired cloud-like effect. Look for yarns that have a fluffy or bouclé texture, as they will give your cloud sweater a beautiful, soft appearance. Mohair or angora blends are great options for achieving a fluffy texture, while yarns with a crimped or plied construction can add depth and dimension to your sweater.
Color: Lastly, consider the color of the yarn for your cloud sweater. While you can’t go wrong with classic white or cream, don’t be afraid to explore different shades and hues that evoke the feeling of being surrounded by clouds. Pastel shades like pale blue or blush pink can create a dreamy and whimsical effect, while gray or silver yarns can give your sweater a more sophisticated and elegant look.
By carefully selecting the right yarn for your cloud sweater, you’ll be able to create a cozy and stylish garment that feels like wearing a cloud. So take your time to consider the fiber content, weight, texture, and color options available, and enjoy the process of knitting your cloud sweater from start to finish.
Selecting the Proper Needle Size
Choosing the right needle size is crucial when knitting the Cloud sweater pattern. The needle size determines the gauge, or tension, of your stitches, which in turn affects the size and drape of your finished garment.
When selecting a needle size, it’s important to consider both the suggested needle size provided in the pattern and your own personal knitting tension. The pattern will usually recommend a specific needle size to achieve the desired gauge. However, it’s worth noting that everyone knits with slightly different tension, so you may need to adjust the needle size to achieve the correct gauge for your project.
One way to determine the proper needle size is to knit a gauge swatch. A gauge swatch is a small sample of knitting worked in the pattern stitch using the recommended needle size. By measuring the number of stitches and rows per inch in your swatch, you can determine if your tension matches the pattern’s gauge. If your swatch has too many stitches per inch, your tension is too tight, and you will need to use a larger needle size. Conversely, if your swatch has too few stitches per inch, your tension is too loose, and you will need to use a smaller needle size.
It’s important to note that the needle size is not the only factor that affects gauge. The type of yarn you choose, as well as your knitting style, can also impact your tension. If you find that you consistently knit tighter or looser than the pattern’s gauge, you may need to adjust your needle size accordingly. Additionally, it’s a good idea to periodically check your gauge as you progress in your knitting to ensure that you are maintaining consistency.
If you are unsure about which needle size to use, it’s always a good idea to consult with the pattern designer or experienced knitters for guidance. They can provide valuable insight and advice based on their own experiences with the pattern and yarn. Ultimately, selecting the proper needle size is a personal decision that will depend on your individual tension and the desired outcome for your project. With some experimentation and practice, you will find the perfect needle size to create a beautiful Cloud sweater.
Getting Started with the Cloud Sweater Pattern
The Cloud Sweater is a cozy and stylish knitting project that is perfect for chilly weather. This pattern features a beautiful cloud motif that adds an element of whimsy to the design. If you’re a beginner knitter looking for a fun challenge or an experienced knitter looking for a new project, this pattern is for you.
To get started with the Cloud Sweater pattern, you’ll need a few materials. First, you’ll need a set of knitting needles in the recommended size for your chosen yarn. It’s important to check the gauge swatch before starting to ensure that you’re using the correct needle size. Additionally, you’ll need several skeins of your chosen yarn in a color of your choice.
Once you have your materials ready, it’s time to cast on and begin the Cloud Sweater pattern. The pattern is written in a clear and concise manner, making it easy to follow along. Each row is detailed with instructions for the cloud motif, as well as any shaping or stitch pattern changes. It’s a good idea to read through the entire pattern before starting to familiarize yourself with the different sections.
The Cloud Sweater pattern also includes a helpful stitch chart, which is great for visual learners. The chart provides a visual representation of the cloud motif, making it easier to understand and follow along with the pattern. Additionally, the pattern includes a glossary of any special stitches or techniques used, providing additional guidance and support.
Once you’ve completed the Cloud Sweater pattern, you’ll have a beautiful and cozy sweater to wear and show off. This pattern is sure to become a favorite in your knitting collection, and you’ll love the stylish and whimsical design. So grab your knitting needles and get started on the Cloud Sweater today!
Knitting the Ribbing for the Cuffs and Hem
The ribbing is an essential part of the Cloud sweater, as it gives the cuffs and hem a neat and stretchy finish. Knitting the ribbing requires an understanding of basic knitting stitches and techniques, but it is relatively easy to learn and execute. The ribbing adds an extra element of style and structure to the sweater, making it a versatile and cozy garment.
To knit the ribbing for the cuffs and hem, you will need to cast on a multiple of stitches that is divisible by the number of stitches required for the ribbing pattern. This will ensure that the ribbing is even and consistent throughout the cuffs and hem. You can choose from various ribbing patterns, such as 1×1 ribbing (alternating knit and purl stitches) or 2×2 ribbing (alternating two knit and two purl stitches).
Once you have cast on the appropriate number of stitches and chosen your ribbing pattern, you can begin knitting the ribbing. Work the ribbing pattern for the specified length, making sure to maintain the correct stitch pattern throughout. Pay attention to your tension and gauge to ensure that the ribbing is not too tight or too loose.
After completing the ribbing, you can continue with the rest of the Cloud sweater pattern. The ribbing will provide a professional and polished look to the cuffs and hem, adding structure and elasticity to the garment. It also creates a nice contrast to the main body of the sweater, making the ribbing visually appealing and interesting.
In summary, knitting the ribbing for the cuffs and hem is an important step in creating the Cloud sweater. It adds style and structure to the garment and requires basic knitting skills. By following the pattern and maintaining tension and gauge, you can achieve a neat and professional finish for the cuffs and hem of your sweater.
Creating the Body of the Cloud Sweater
Once you have finished knitting the collar and the sleeves of your cloud sweater, it is time to move on to creating the body. This is where the sweater really starts to take shape, and you will be able to see the cloud-like texture come to life.
To begin, you will need to join your yarn at the bottom of the sweater and start knitting in the round. This can be done using either circular or double-pointed needles, depending on your preference. Using the stockinette stitch, knit several rounds to create the base of the body. This will help to give the sweater a smooth and even finish.
Once you have established the base, you can start incorporating the cloud pattern. This can be done by alternating between knit and purl stitches to create a textured effect. The pattern may require you to knit several rows, followed by a row of purl stitches, or vice versa. Be sure to check the pattern instructions for the specific stitch pattern and repeat it until you have reached the desired length of the sweater.
To add extra depth and dimension to your cloud sweater, you can also incorporate different techniques such as cable knitting or lace knitting. These techniques can create intricate designs that mimic the look of clouds and add a unique touch to your sweater. Again, consult the pattern instructions for any additional techniques or stitches that may be required.
Throughout the process of creating the body of the cloud sweater, it is important to maintain an even tension and gauge. This will ensure that the sweater fits properly and has a professional finish. Take the time to regularly check your gauge and make any necessary adjustments to your knitting technique.
After completing the body of the sweater, you can move on to finishing touches such as adding ribbing to the bottom hem or cuffs, and weaving in any loose ends. Once all the pieces are finished, you can block the sweater to give it a polished look and ensure that the cloud-like texture is fully defined.
Materials:
- Yarn
- Knitting needles
- Tapestry needle
- Stitch markers
Instructions:
- Join yarn at the bottom of the sweater and start knitting in the round.
- Knit several rounds in stockinette stitch to create the base of the body.
- Follow the pattern instructions to incorporate the cloud stitch pattern.
- Continue knitting until you reach the desired length of the sweater.
- Add any additional techniques or stitches as required by the pattern.
- Check gauge and tension regularly to ensure an even finish.
- Complete the body of the sweater by adding ribbing and weaving in loose ends.
- Block the sweater to give it a professional finish.
Shaping the Neckline
When knitting a cloud sweater, one important step is shaping the neckline. The neckline is what frames the face and can greatly affect the overall look and fit of the sweater. There are several techniques that can be used to shape the neckline, and the method chosen will depend on the desired style and design of the sweater.
1. Short row shaping: Short rows are a commonly used technique for shaping the neckline of a sweater. This method involves knitting or purling part of the stitches on a row, then turning the work and knitting or purling back, leaving some stitches unworked. This creates a curve in the fabric, which can be used to shape the neckline in a gradual or more dramatic way.
2. Casting off: Another method for shaping the neckline is through casting off stitches. This can be done at the beginning or end of a row, or in the middle of a row if shaping is required on both sides of the neckline. Casting off stitches creates a straight or angled edge, depending on how it is done, and can be used to create a more structured or defined neckline.
3. Decreases: Decreasing stitches is another way to shape the neckline. This can be done by knitting or purling two stitches together, or by working specific decrease stitches such as the knit two together (K2tog) or slip, slip, knit (SSK). Decreases can be used to create a more subtle shaping or to create a V-neckline.
4. Knitting in pattern: Many cloud sweater patterns include specific instructions for shaping the neckline within the stitch pattern being used. This can involve working certain stitches or sections in a different way, such as knitting or purling a different number of stitches, to create the desired neckline shape.
Overall, shaping the neckline of a cloud sweater is an important step in the knitting process. By choosing the right technique and following the pattern instructions carefully, you can create a neckline that enhances the overall look and fit of the sweater. Whether you prefer a gradual curve, a sharp angle, or a more structured edge, there are many ways to shape the neckline to achieve the desired style.
Knitting the Sleeves for the Cloud Sweater
When knitting the sleeves for the Cloud Sweater, it’s important to follow the pattern instructions closely to ensure a perfect fit and beautiful finish. The sleeves of this sweater are an important part of its design, adding coziness and style to the overall look.
The pattern provides clear instructions for both the right and left sleeves, allowing knitters to create a symmetrical and professional-looking garment. It’s recommended to use the same yarn and needle size as specified in the pattern to achieve the desired gauge and drape.
Start by casting on the required number of stitches for the sleeve, as indicated in the pattern. Consider using a long-tail cast-on method to ensure an elastic edge. It’s helpful to place stitch markers at the beginning and end of each row to keep track of your progress.
Follow the pattern’s instructions for the desired stitch pattern, whether it’s a simple stockinette stitch or a more intricate cable or lace pattern. Work the specified number of rows or rounds, following any shaping instructions for the sleeve’s width and length. Remember to check your gauge as you go along to ensure your sleeve matches the desired measurements.
Once the sleeve is complete, bind off the stitches using a stretchy bind-off method, such as the sewn bind-off or the suspended bind-off. This will ensure a comfortable fit around the wearer’s arm. Weave in any loose ends and repeat the process for the second sleeve.
In conclusion, knitting the sleeves for the Cloud Sweater requires attention to detail and careful following of the pattern instructions. By taking your time and ensuring you have the right gauge, you’ll create sleeves that add beauty and warmth to your finished garment.
Adding the Finishing Touches
Once you have completed knitting your cloud sweater, it is time to add the finishing touches to make it truly special. These final steps will give your sweater a polished and professional look.
Blocking: Before adding any finishing touches, it is important to block your sweater. Blocking helps even out the stitches, relaxes the fabric, and gives the garment its final shape. Follow the instructions provided in the pattern to block your sweater properly.
Weaving in Ends
One of the first finishing touches you should complete is weaving in the loose ends. This involves using a yarn needle to thread the loose ends through the stitches on the wrong side of the fabric. Take care to weave the ends in discreetly, ensuring that they are secure and do not show through to the right side of the fabric.
Seaming
If your sweater has been knitted in separate pieces, it will require seaming to join them together. Use a yarn needle and the same yarn as your sweater to carefully sew the seams. Take your time to ensure that your seams are neat and even, as this will greatly contribute to the overall appearance and durability of your sweater.
Adding Buttons or Zippers
If your sweater has a button or zipper closure, now is the time to add these components. Measure and mark the appropriate placement for the buttons or zipper, and use a needle and thread or a sewing machine to secure them in place. Make sure they are aligned properly and securely attached.
Finishing Details
The finishing touches also include any additional details specified in the pattern, such as ribbing, edging, or decorative stitches. Follow the instructions carefully to ensure that your sweater is finished according to the designer’s vision. These details can make a significant difference in the overall look of the garment.
Once you have completed all these finishing touches, take a step back and admire your work. You have transformed a few skeins of yarn into a beautiful and cozy cloud sweater. Now it is ready to be worn with pride or gifted to someone special.
Blocking and Care Instructions for Your Cloud Sweater

After completing your beautiful Cloud Sweater, it is important to properly block it to ensure its best fit and appearance. Blocking is the process of gently stretching and shaping your knitted garment to its desired measurements.
Before blocking, gently hand wash your Cloud Sweater using a mild detergent. Make sure to lay it flat to dry to avoid any distortion or stretching. Avoid wringing or twisting your sweater to remove excess water.
Blocking Your Cloud Sweater
To block your Cloud Sweater, follow these steps:
- Fill a basin or sink with lukewarm water and add a few drops of a wool wash or gentle detergent.
- Place your sweater in the water and gently press it down to ensure it is fully submerged. Let it soak for about 15-30 minutes.
- Remove the sweater from the water and gently squeeze out the excess water. Do not twist or wring it.
- Lay a clean towel on a flat surface and place your sweater on top. Gently roll up the towel with the sweater inside to remove any additional moisture.
- Unroll the towel and carefully remove your sweater, being mindful not to stretch it.
- Lay your sweater flat on a clean, dry surface and shape it to its desired measurements. Use pins to secure the edges and ensure it stays in place while drying.
- Leave your sweater to dry completely before unpinning and wearing.
Care Instructions
To keep your Cloud Sweater looking its best, follow these care instructions:
- Hand wash your sweater using a mild detergent and lukewarm water. Avoid harsh chemicals or excessive agitation.
- Lay your sweater flat to dry to maintain its shape and prevent stretching.
- Store your sweater folded or laid flat in a clean, dry place to avoid any unwanted stretching or damage.
By following these blocking and care instructions, you can ensure that your Cloud Sweater will last for years to come, keeping you warm and stylish in the chilly seasons.
Happy knitting and wearing!