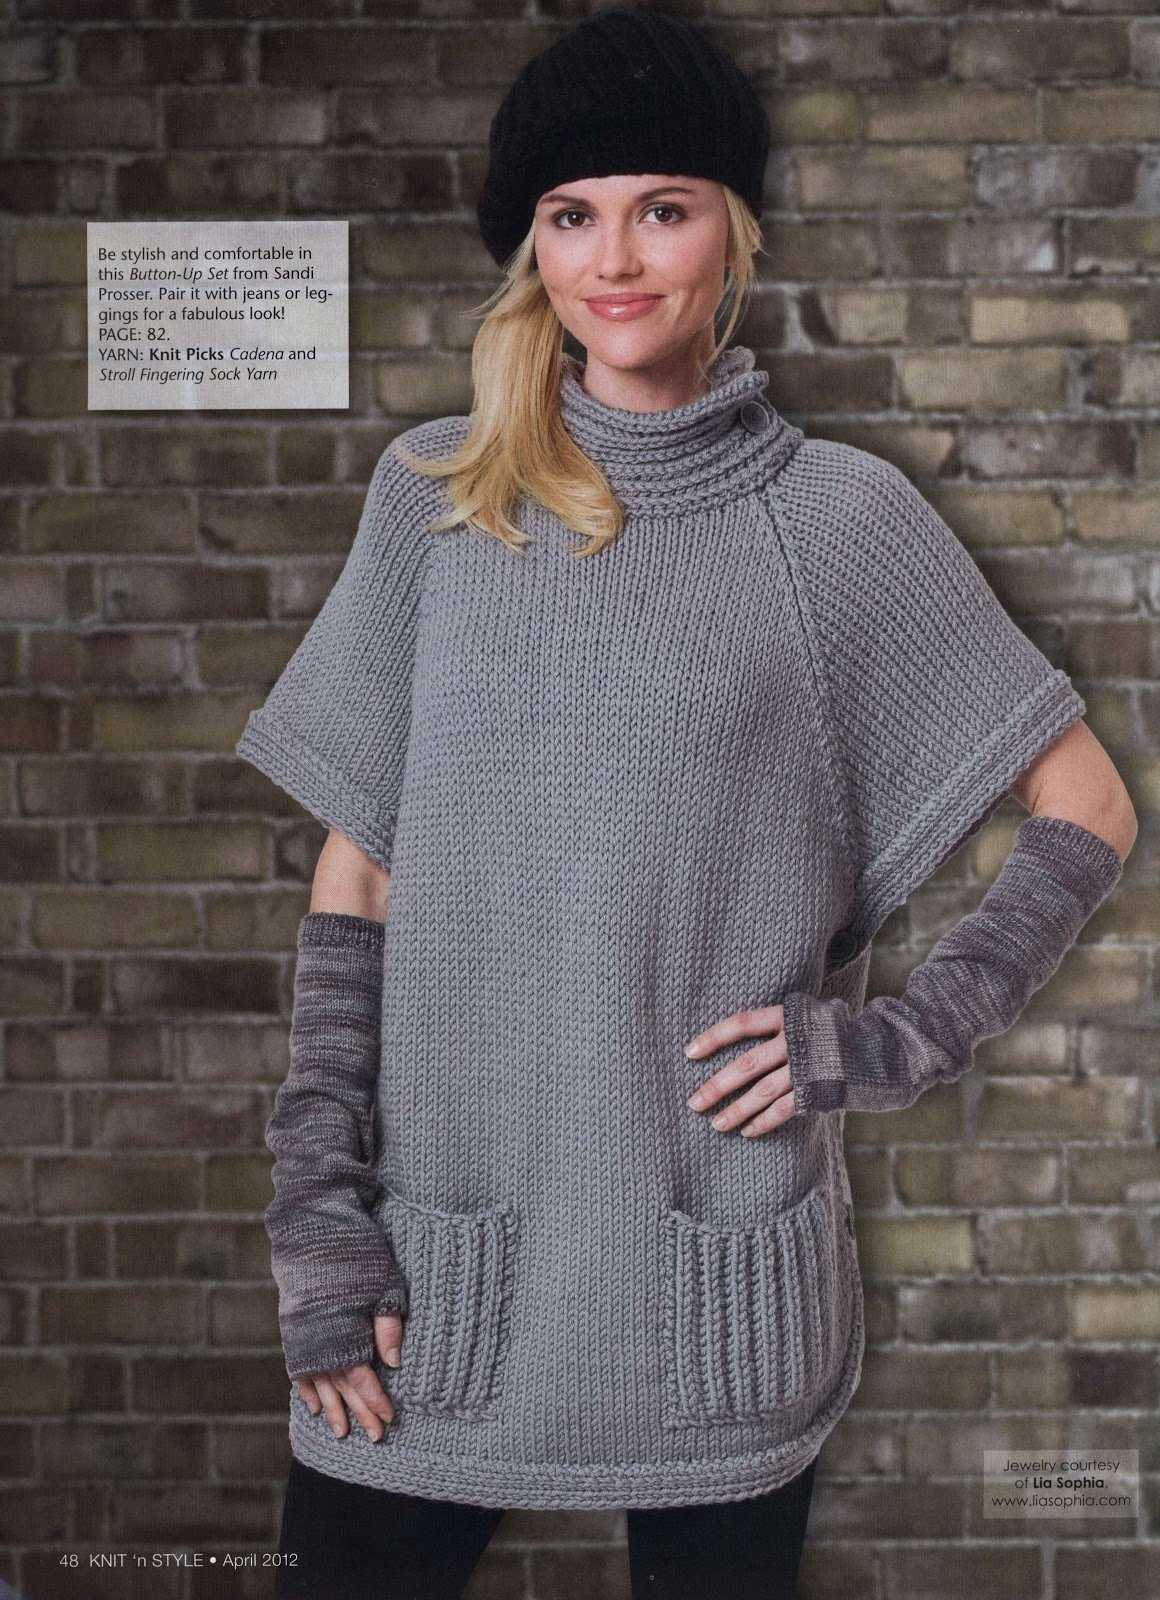
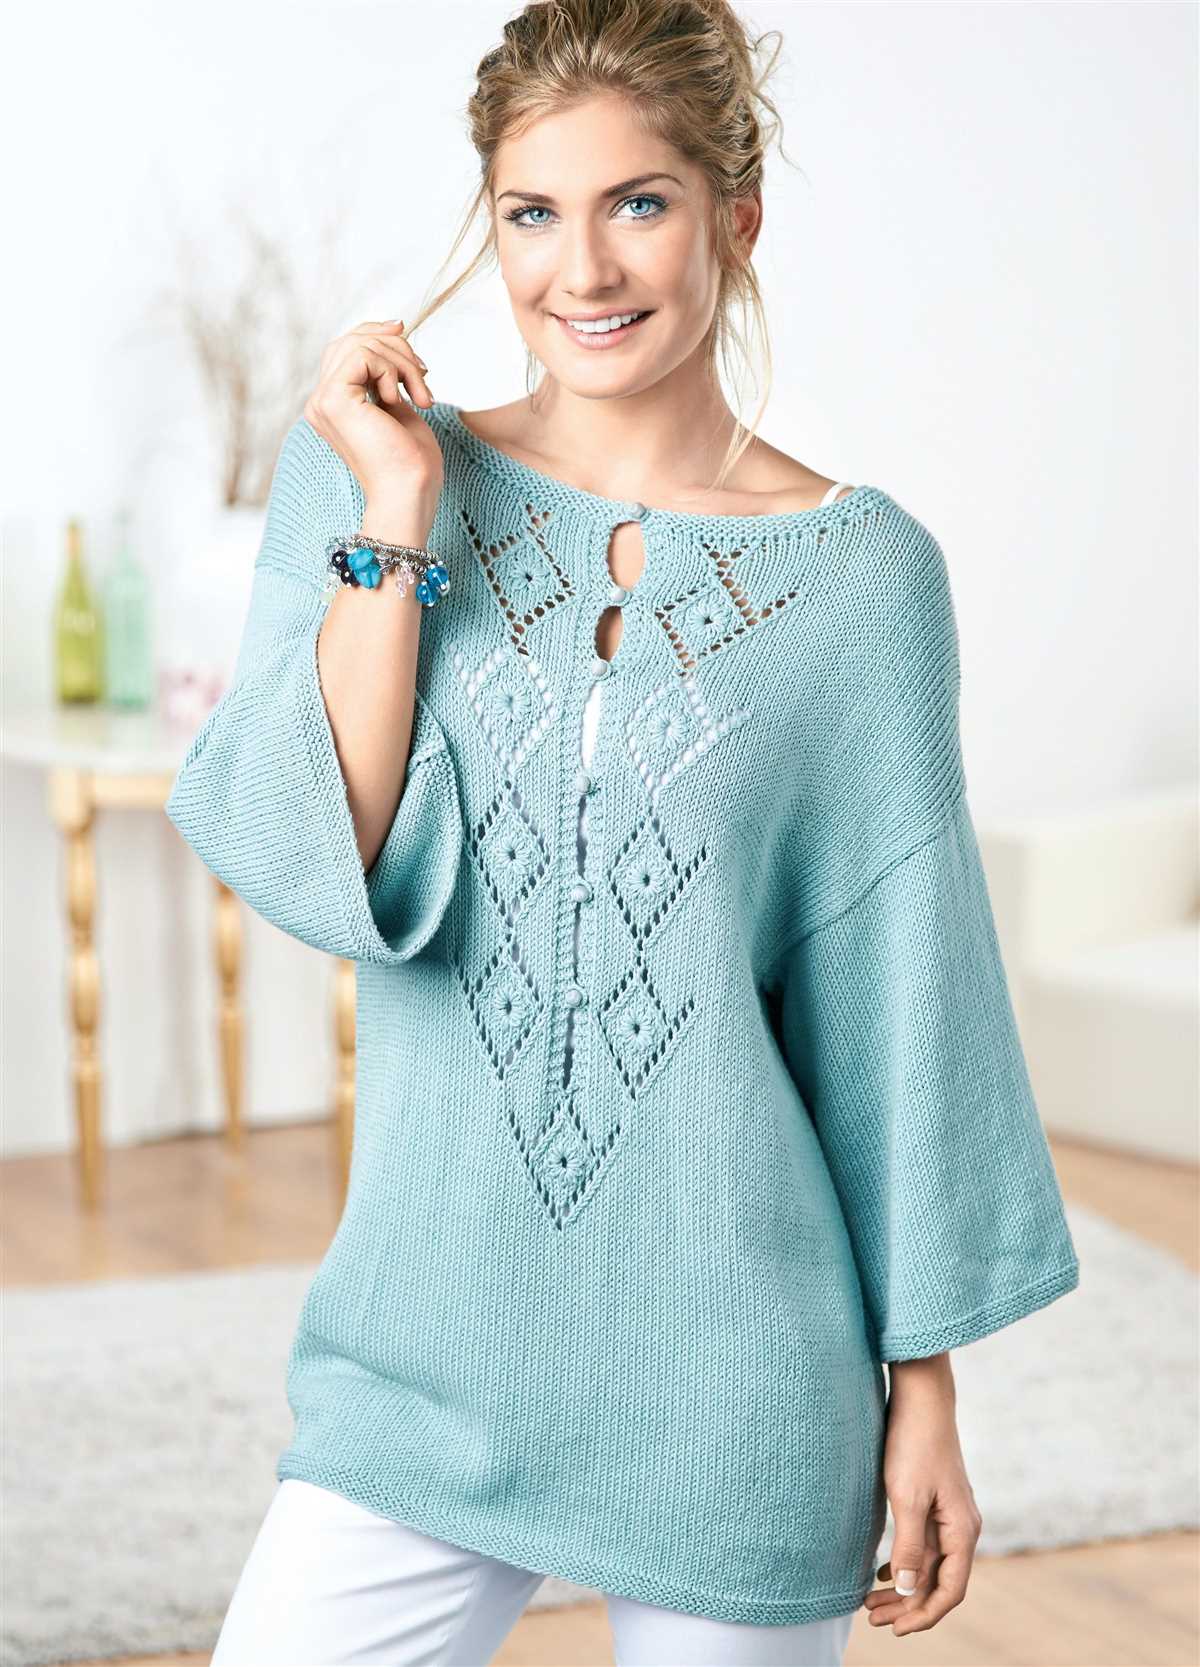
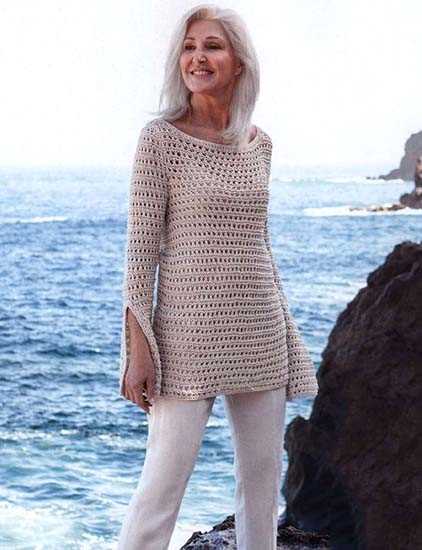
Stylish and Cozy: Knit Your Own Tunic

Knitting is a popular pastime for many people, and one of the most enjoyable aspects of this craft is being able to create beautiful garments that are stylish and comfortable. One of the most versatile and fashionable pieces you can make is a knitted tunic. A tunic is a loose-fitting top that can be worn with leggings or jeans, making it perfect for casual or dressy occasions.
There are countless patterns available for knitted tunics, but in this article, we will focus on a ladies knitted tunic pattern. This pattern is specifically designed for women and includes instructions for the sizing and shaping of the tunic. The pattern will guide you through the entire process, from selecting the right yarn to finishing touches, ensuring that you end up with a gorgeous and well-fitting tunic.
Knitting a tunic is a great project for knitters of all skill levels. If you are new to knitting, this pattern is a perfect starting point as it uses basic stitches and techniques. More experienced knitters will enjoy the challenge of creating a stylish garment with interesting details and textures. Whether you are a beginner or an expert, knitting a tunic is a rewarding and enjoyable project that will result in a beautiful addition to your wardrobe.
Ladies Knitted Tunic Pattern
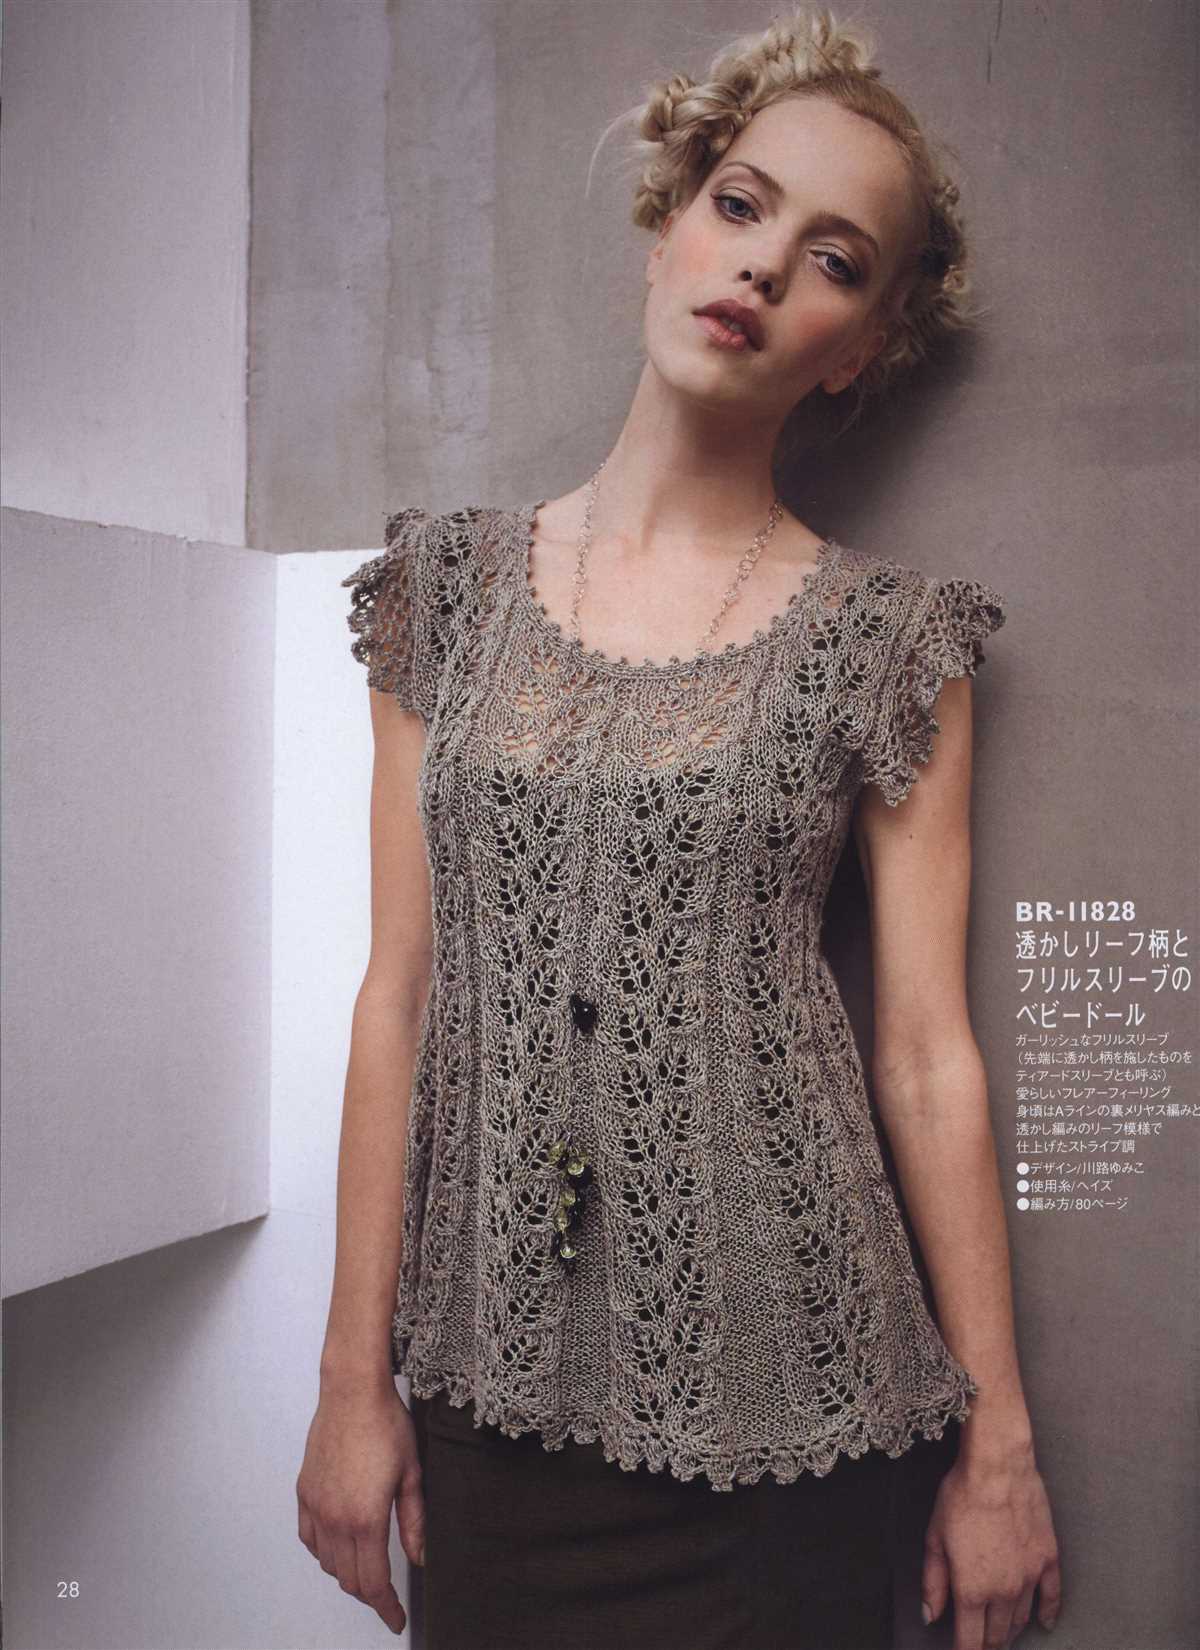
A ladies knitted tunic is a versatile and stylish garment that can be worn in various seasons and occasions. Whether you’re looking to add a cozy layer to your outfit or create a stand-out piece, a knitted tunic is the perfect choice. With the right pattern, you can create a unique and tailored look that reflects your personal style.
When choosing a ladies knitted tunic pattern, consider the difficulty level that suits your knitting skills and the desired style. There are patterns available for beginners, intermediate, and advanced knitters, allowing you to challenge yourself or keep it simple. Look for patterns that provide clear instructions and diagrams to guide you through the knitting process.
Materials: Before starting your project, gather the necessary materials. This typically includes knitting needles, yarn in the desired color and weight, stitch markers, and a tapestry needle. The pattern will specify the recommended needle size and yarn weight, so be sure to have these on hand.
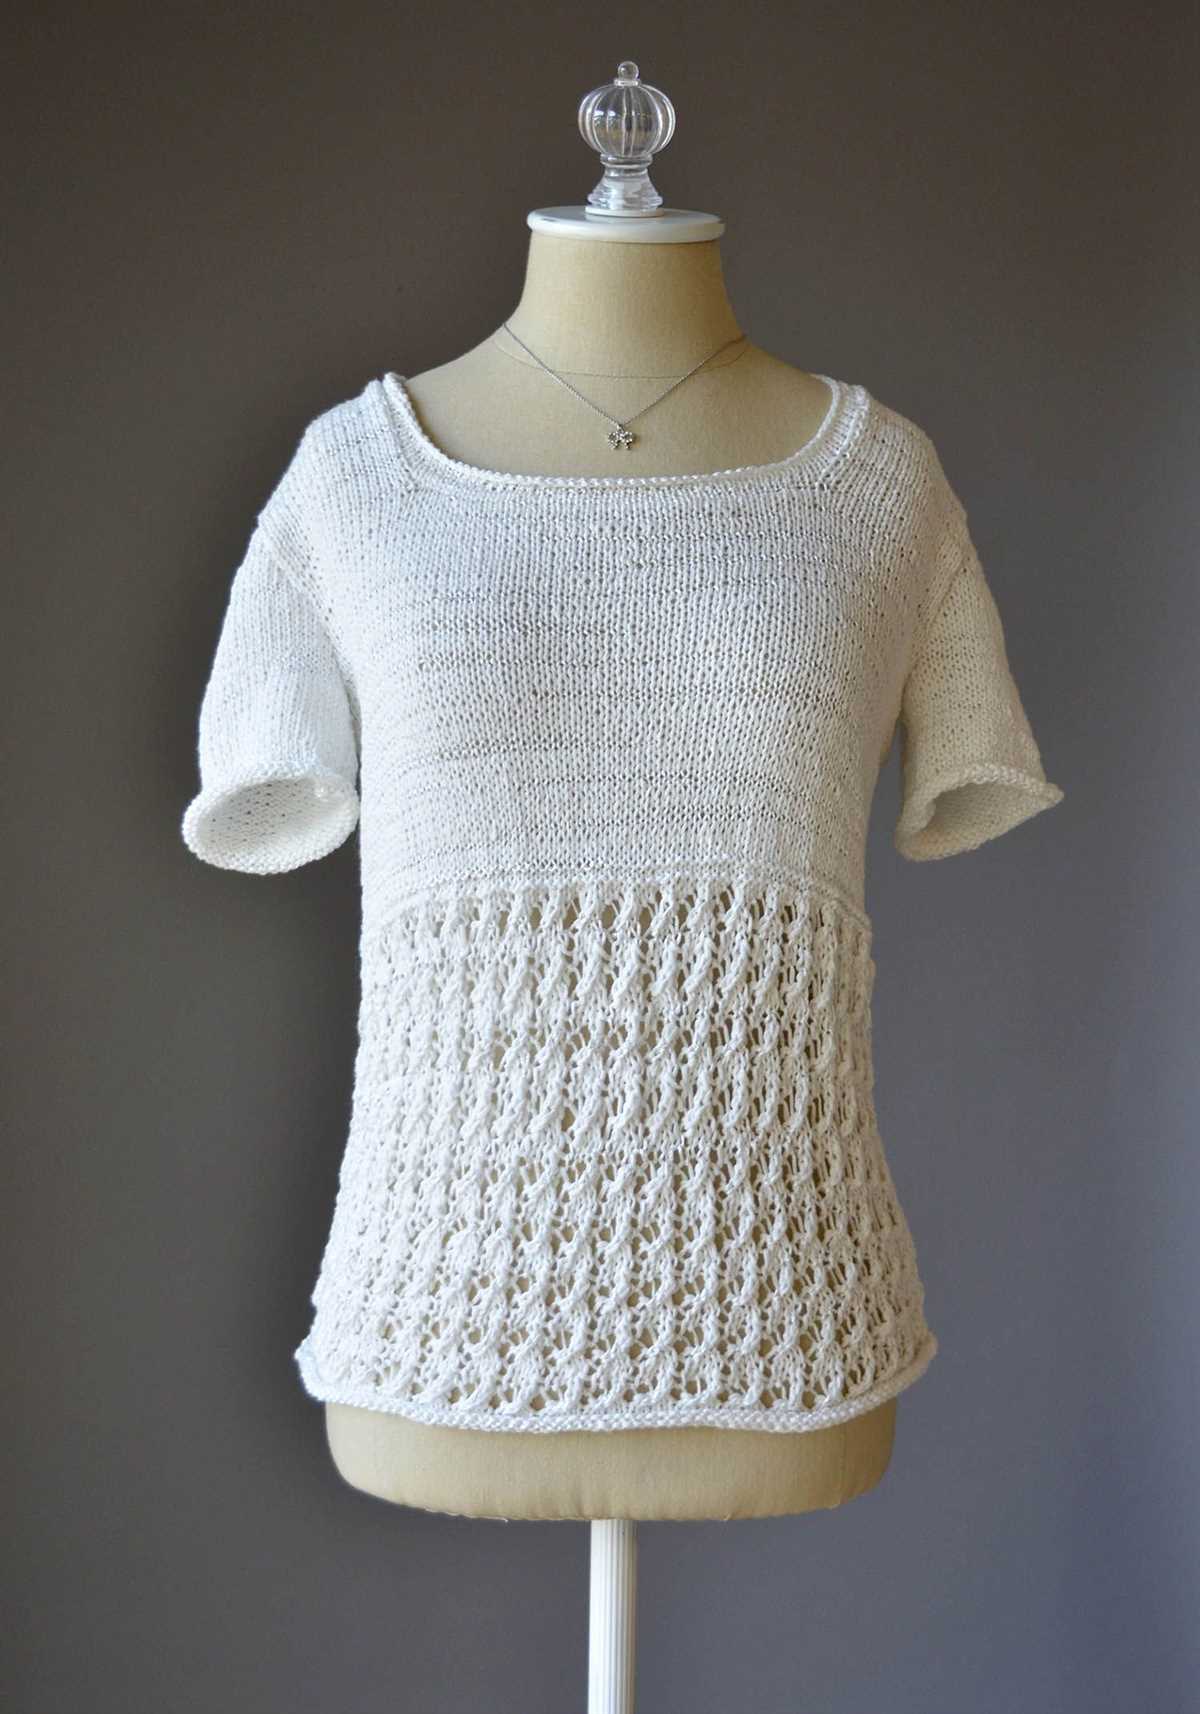
Pattern design: A ladies knitted tunic pattern typically includes instructions for various sizes, so you can create a garment that fits you perfectly. The pattern will provide step-by-step instructions for casting on, knitting the body and sleeves, and shaping the neckline and hemline. Some patterns may also include special stitch patterns or embellishments to add extra detail to the tunic.
Customization: One of the benefits of knitting your own tunic is the ability to customize it to your liking. You can choose different yarn colors and textures to create a unique look or modify the pattern to suit your preferences. Experiment with different stitch patterns and techniques to make your tunic truly one-of-a-kind.
Finishing touches: Once you have completed knitting your tunic, it’s time to add the finishing touches. This may include seaming any pieces together, weaving in loose ends, and blocking the garment to ensure it maintains its shape. The pattern will provide guidance on these final steps to give your tunic a polished and professional look.
- With a ladies knitted tunic pattern, you can create a fashionable and comfortable garment.
- Choose a pattern that matches your skill level and desired style.
- Gather the necessary materials before starting your project.
- Follow the pattern’s instructions for casting on, knitting, shaping, and finishing the tunic.
- Customize your tunic by choosing different yarn colors and modifying the pattern.
- Finish your tunic by seaming, weaving in ends, and blocking the garment.
Why choose a knitted tunic?
A knitted tunic is a versatile and stylish addition to any wardrobe. Made from soft and cozy yarn, it provides warmth and comfort while still being lightweight and breathable. Whether you’re lounging at home or out for a casual outing, a knitted tunic is the perfect choice for staying comfortable and looking fashionable.
One of the key reasons to choose a knitted tunic is the endless design possibilities. Knitting allows for intricate patterns and textures, creating unique and eye-catching garments. With a knitted tunic, you can showcase your personal style and make a fashion statement. Plus, the versatility of a tunic means it can be dressed up or down, depending on the occasion.
Another advantage of a knitted tunic is its practicality. The loose fit and relaxed silhouette make it flattering for all body types, providing comfort without sacrificing style. The longer length of a tunic also makes it great for layering over leggings or jeans, adding an extra layer of warmth in colder weather.
Furthermore, a knitted tunic is a sustainable choice. By opting for a handmade garment, you’re supporting the slow fashion movement and reducing your environmental footprint. Knitting allows for the use of natural and organic fibers, minimizing the use of synthetic materials that are harmful to the environment. Additionally, a knitted tunic is a timeless piece that can be worn for years to come, avoiding the need for frequent replacements.
In conclusion, a knitted tunic is a versatile, stylish, and sustainable choice. Whether you’re looking for comfort, fashion, or both, a knitted tunic is the perfect addition to your wardrobe.
Getting started with the pattern
Before you begin working on the ladies knitted tunic pattern, it’s important to gather all the necessary materials. You will need a set of knitting needles in the recommended size, as well as the specified yarn in the indicated amount. Additionally, make sure you have a tape measure, scissors, and yarn needles on hand.
Once you have all your materials ready, it’s time to familiarize yourself with the pattern. Read through the instructions carefully, paying attention to any specific stitch abbreviations or techniques mentioned. Take note of the recommended gauge, as this will ensure that your finished tunic comes out to the correct size.
Key steps to follow:
- Start by casting on the required number of stitches, as stated in the pattern. Make sure your cast-on edge is not too tight or too loose, as this can affect the overall fit of the tunic.
- Work through the pattern in rows or rounds, following the instructions for each section. Pay close attention to any shaping details, such as increases or decreases, to create the desired fit and silhouette.
- If the pattern includes any stitch patterns or textures, make sure to execute them correctly. This may involve using different stitches or repeating certain stitch combinations.
- Keep track of your progress by marking off completed rows or rounds. This will help you stay organized and ensure that you don’t accidentally skip or repeat any sections of the pattern.
- Finally, once you have completed all the necessary sections, follow the finishing instructions to assemble and embellish your tunic as desired. This may involve seaming, adding buttonholes, or attaching any additional details, such as pockets or trims.
Remember, knitting a tunic is a labor of love and requires patience and attention to detail. Take your time, enjoy the process, and before you know it, you’ll have a beautiful ladies knitted tunic to add to your wardrobe.
Materials needed for the project
Before starting the project, make sure you have all the necessary materials at hand. Here is a list of items you will need:
- Yarn: Choose a suitable yarn for your project. The pattern may specify a certain weight or type of yarn, so make sure to check before purchasing. You will need enough yarn to complete the tunic.
- Knitting needles: Select the appropriate size of knitting needles, typically indicated in the pattern. Make sure you have a pair of straight or circular needles, depending on your knitting preference.
- Tape measure: A tape measure will be essential for taking measurements and ensuring the tunic fits properly. It will also come in handy for checking your gauge.
- Stitch markers: Use stitch markers to mark specific stitches or sections of your knitting. This will help you keep track of pattern repeats or shaping details.
- Scissors: Keep a pair of sharp scissors nearby for cutting yarn and finishing off your project.
- Tapestry needle: A tapestry needle, also known as a yarn needle, is necessary for weaving in ends and seaming any separate pieces together.
- Buttons or closures: If the tunic pattern includes a button placket or closures, make sure to have the appropriate buttons or closures ready. Check the pattern for any specific requirements.
- Stitch holder or waste yarn: You may need a stitch holder or waste yarn to hold stitches temporarily while you work on other sections of the tunic.
Make sure to gather all these materials before you start knitting your tunic. Having everything prepared will make the process smoother and more enjoyable.
Choosing the right yarn
When it comes to knitting a ladies knitted tunic, choosing the right yarn is crucial. The yarn you choose will determine the final look and feel of the tunic, as well as its durability and comfort. Here are some factors to consider when selecting the yarn for your project.
Weight
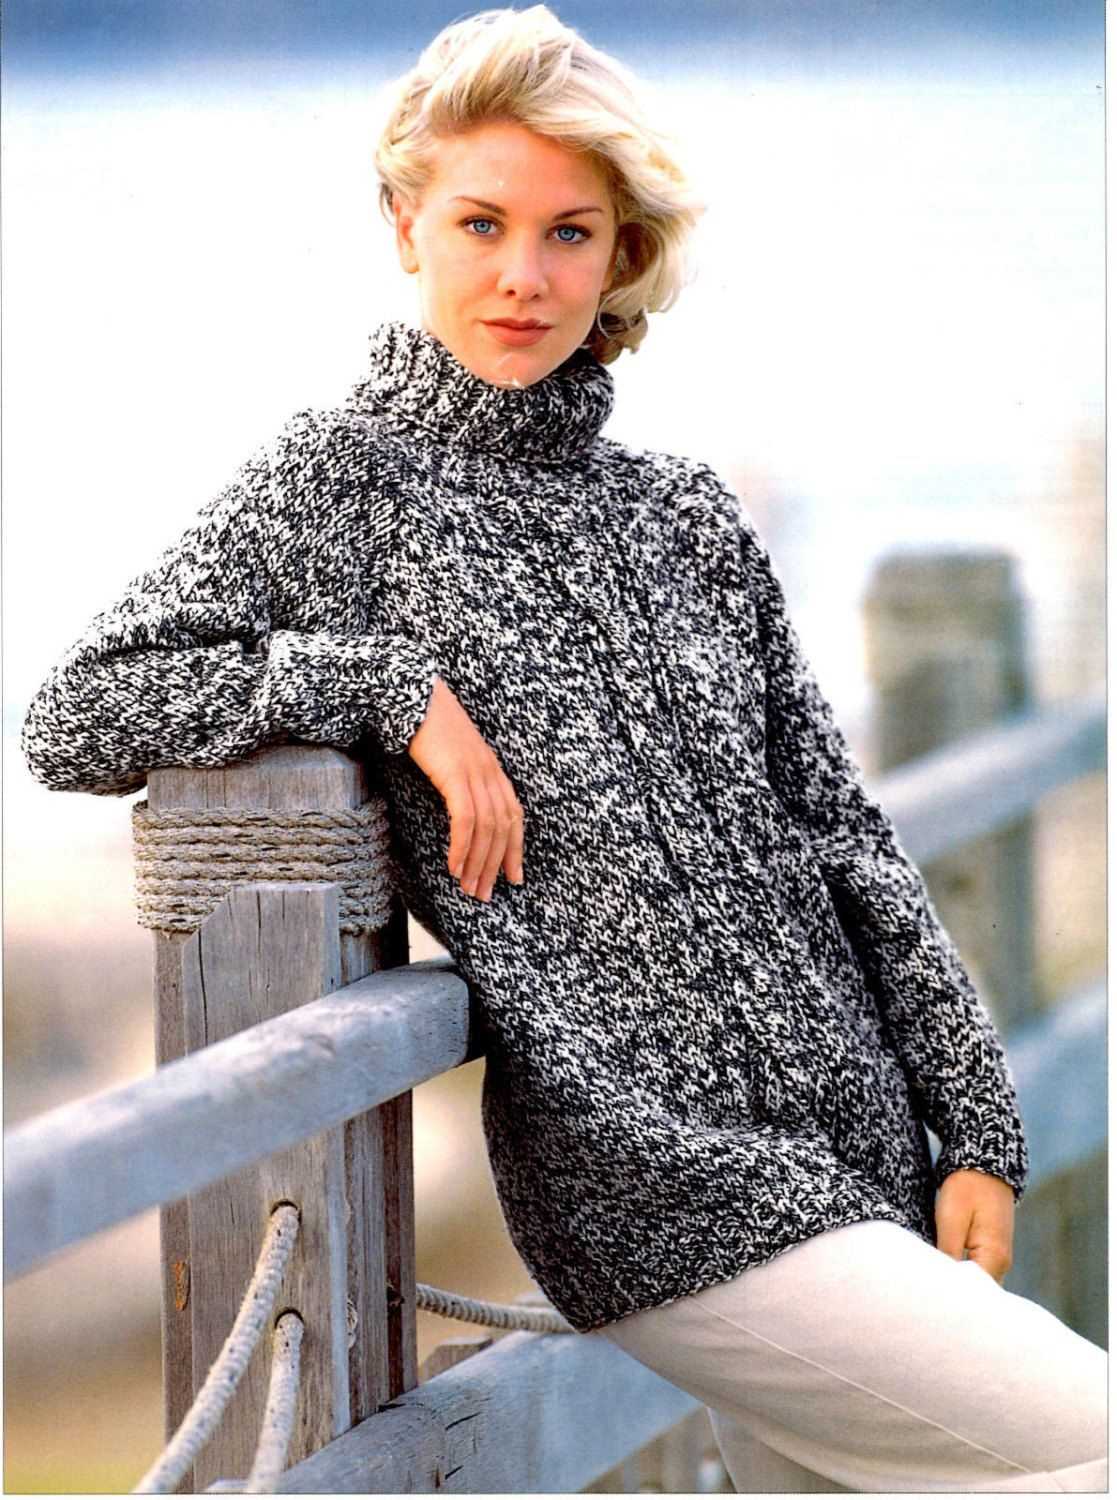
The weight of the yarn refers to its thickness. For a ladies knitted tunic, you’ll want to choose a yarn that is lightweight and breathable, so it can be worn comfortably in different seasons. Worsted weight or DK weight yarns are commonly used for tunics, as they provide a good balance between warmth and drape.
Fiber
Consider the fiber content of the yarn when choosing your tunic pattern. Natural fibers like cotton, linen, and silk are great options for warmer weather, as they are lightweight and breathable. Wool or wool blends are popular choices for cooler climates, as they provide warmth and insulating properties. Acrylic yarns can also be used, as they are often cheaper and easier to care for.
Color
The color of the yarn will also influence the overall look of your tunic. Neutral shades like white, gray, or beige can create a classic and versatile garment that can be paired with different outfits. On the other hand, bold and vibrant colors can make a statement and add a pop of color to your wardrobe. Consider your personal style and the occasion you’ll be wearing the tunic for when choosing the color of your yarn.
- Consider the weight of the yarn to ensure comfort and versatility.
- Choose natural fibers for breathability or wool blends for warmth.
- Color selection can influence the overall look and style of the tunic.
By considering these factors when choosing the yarn for your ladies knitted tunic, you can ensure that your finished project meets your expectations in terms of comfort, style, and durability.
Understanding the knitting instructions
When starting a new knitting project, it is important to carefully read and understand the knitting instructions before beginning. The instructions will provide you with the necessary information to complete the project correctly. Here are some key points to consider when reading knitting instructions:
1. Gauge:
The gauge is an important measurement that determines the size and fit of the finished project. It tells you how many stitches and rows should be in a specific measurement, typically given as a 4-inch square. Before starting your project, make sure to check your gauge using the recommended yarn and needle size. Adjusting the needle size can help you achieve the correct gauge.
2. Abbreviations:
Knitting instructions often use abbreviations to save space and make the instructions easier to read. It is important to familiarize yourself with common knitting abbreviations, such as K for knit, P for purl, and YO for yarn over. The pattern should include a key or a list of abbreviations used within the instructions.
3. Stitch pattern:
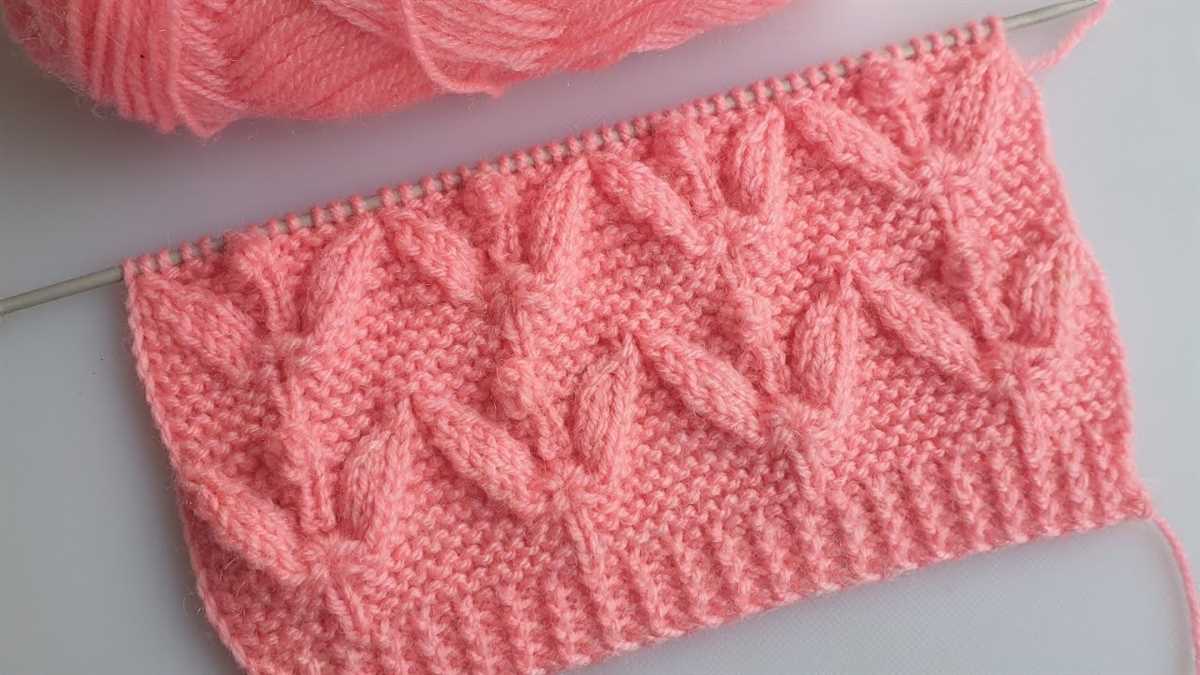
The instructions will specify the stitch pattern to be used in the project. This can include simple stitches like knit and purl, or more complex stitch patterns such as cables or lace. It is important to understand the stitch pattern and any special techniques required before starting the project. Practice the stitch pattern on a swatch to ensure you are comfortable with it.
4. Shaping and sizing:
The instructions will detail any shaping techniques, such as decreases or increases, that need to be performed to achieve the desired size and fit. Pay attention to the specific instructions for your size and follow them carefully. It may be helpful to highlight or circle the instructions relevant to your size to avoid confusion.
5. Finishing instructions:
Lastly, the pattern will include finishing instructions, such as seaming, blocking, or edging techniques. These instructions are important for giving the project its final touches and ensuring a polished finished look. Take the time to thoroughly read and understand these instructions before completing your project.
By understanding and carefully following the knitting instructions, you can confidently create a knitted tunic that is both beautiful and correctly sized. Remember to take your time, practice the stitch pattern if needed, and enjoy the process of bringing the pattern to life with your knitting skills!
Knitting the body of the tunic
Once you have finished knitting the neckline and shoulder seams, it’s time to move on to the body of the tunic. The body is worked in the round from the bottom up, using circular knitting needles.
To start, cast on the required number of stitches for the bottom hem of the tunic. You can use any cast-on method you prefer, but a stretchy cast-on, like the long-tail cast-on, is recommended for the hem. Make sure the number of stitches is divisible by the pattern repeat so that the lace or cable motifs align correctly.
Next, join the round and place a stitch marker to mark the beginning of the round. This will help you keep track of your progress as you knit in the round. Work the specified stitch pattern for the body of the tunic, following the instructions provided in the pattern. Remember to check your gauge to ensure the tunic will fit correctly.
Continue knitting in the round until the body of the tunic reaches the desired length. If the pattern includes shaping, such as waist shaping or A-line shaping, make sure to follow the instructions carefully. Add or subtract stitches as needed to achieve the desired shape and fit.
Once the body is complete, you can bind off the stitches. Make sure to use a stretchy bind-off method, like the suspended bind-off or the sewn bind-off, to ensure the hem of the tunic has some stretch. Weave in any loose ends and block the tunic according to the instructions provided in the pattern to give it a polished and finished look.
Creating the neckline
The neckline is an important detail of any knitted tunic. It not only determines the overall style and look of the garment, but also affects its comfort and fit. In this section, we will discuss different methods for creating the neckline of your knitted tunic.
1. Shaping the neckline: One common method for shaping the neckline is to work decreases at specific points to create a curved or V-shaped neckline. This can be achieved by evenly distributing the decreases along the edges of the neckline or by working them at regular intervals within the stitches. The number of decreases and their placement will depend on your desired neckline shape and the stitch pattern used.
2. Adding a ribbed or rolled collar: Another option is to add a ribbed or rolled collar to the neckline. This can be done by picking up stitches along the neckline edge and working them in a rib stitch or by knitting a separate strip and attaching it to the neckline. A ribbed collar provides a neat and structured look, while a rolled collar creates a more relaxed and casual vibe.
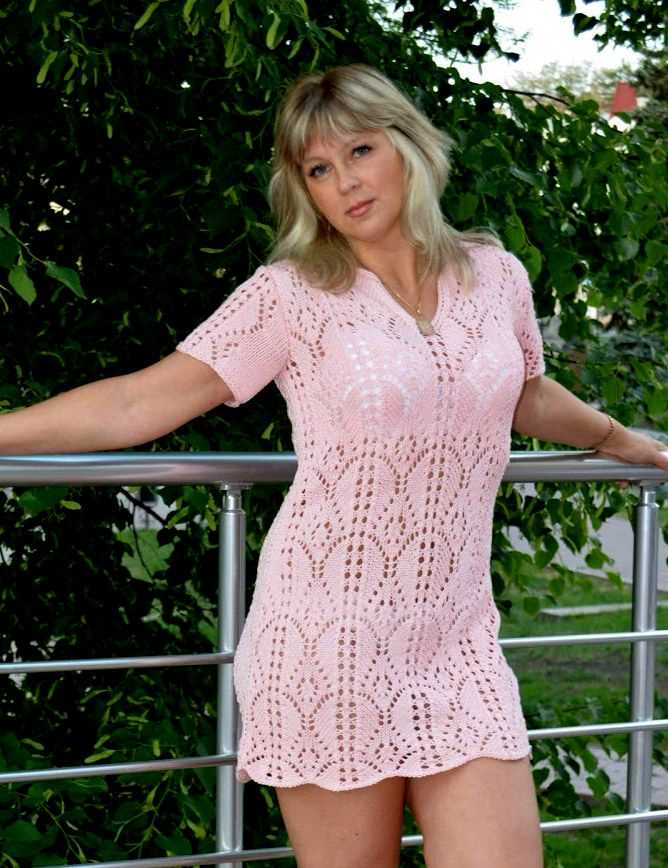
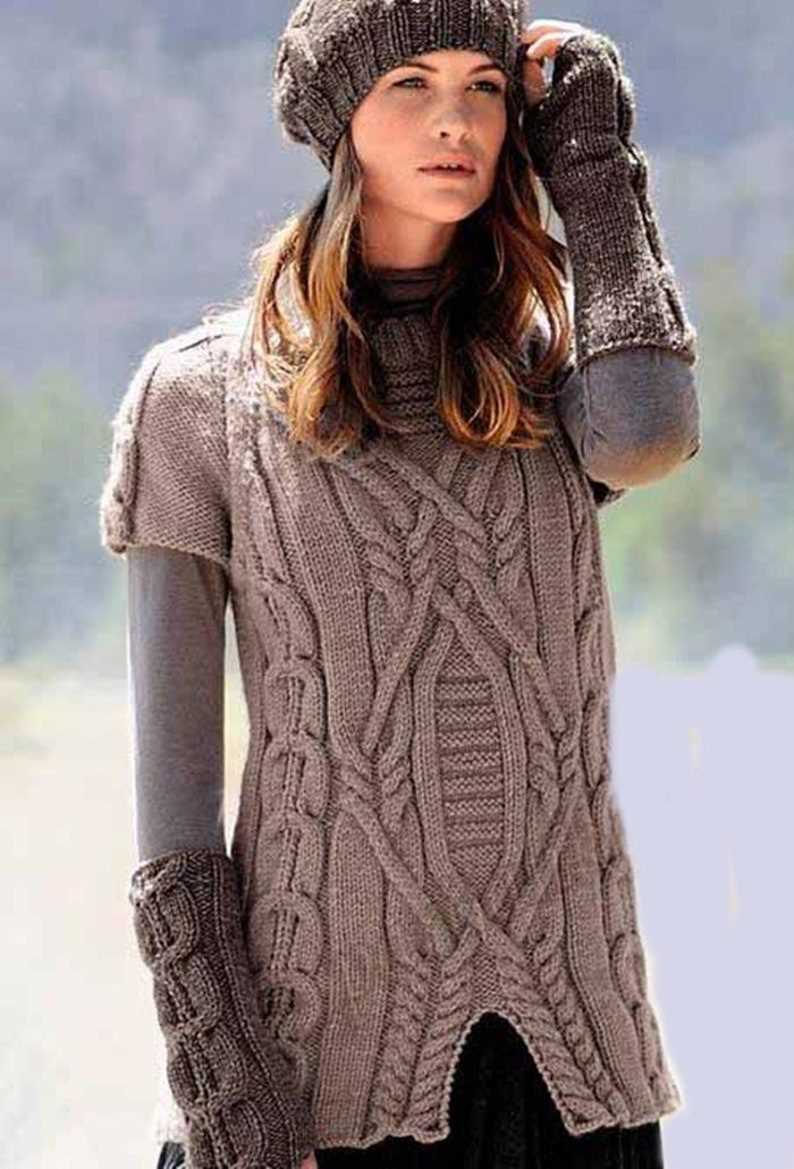
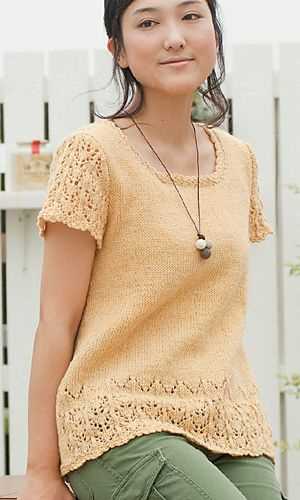
3. Incorporating a lace or cable motif: For a more elaborate and decorative neckline, you can incorporate a lace or cable motif. This can be done by working the lace or cable pattern within the stitches at the neckline. Lace patterns can create a delicate and feminine look, while cable motifs add texture and interest to the neckline.
4. Using a contrasting color: Lastly, you can create a visually striking neckline by using a contrasting color yarn for the neckline section. This can be achieved by joining a new yarn color or by working stripes along the neckline edge. A contrasting color can enhance the neckline and make it a focal point of the tunic.
Overall, the neckline of your knitted tunic plays a crucial role in its overall design. By experimenting with different shaping techniques, collar styles, lace or cable motifs, and color choices, you can create a neckline that complements your personal style and adds a unique touch to your knitted tunic.
Adding sleeves to the tunic
When it comes to customizing your knitted tunic pattern, one option you may consider is adding sleeves. While the original pattern may be sleeveless, adding sleeves can provide added warmth and versatility to your tunic. There are a few different sleeve options you can choose from, depending on your personal preference and the overall look you want to achieve.
One option is to add short sleeves to your tunic. This can be done by picking up stitches around the armhole and knitting in the round. You can choose to knit the sleeves to a desired length, whether it’s just covering the shoulders or extending further down the arm. Short sleeves can be a great option for warmer weather or if you prefer a more casual look.
If you’re looking for more coverage or a dressier look, you may consider adding long sleeves to your tunic. This can be done by either knitting the sleeves separately and sewing them onto the tunic, or by picking up stitches around the armhole and knitting the sleeves from the top down. Long sleeves can provide added warmth and make your tunic suitable for cooler temperatures.
If you want to get creative with your sleeve design, you can also experiment with different textures or patterns. For example, you could add lace or cable details to your sleeves, or you could use a contrasting color yarn for a color-blocked effect. Adding sleeves allows you to customize your tunic to your own style and preferences, making it a unique and personalized garment.
Finishing touches: hemming and blocking
Once you have finished knitting your tunic, the next step is to give it a professional finish by hemming and blocking. Hemming refers to the process of folding and sewing down the raw edges of the fabric to create a neat and polished look. Blocking, on the other hand, involves reshaping the knitted fabric by wetting it and then carefully stretching it to the desired dimensions.
When hemming your tunic, it is important to choose a suitable method based on the type of fabric you have used. For a knitted tunic, a simple folded hem or a rolled hem can be perfect options. A folded hem involves folding the raw edge of the fabric to the wrong side and then stitching it down using a sewing machine or hand sewing. A rolled hem, on the other hand, involves rolling the raw edge and stitching it down in a rolled position, creating a clean and finished look.
After hemming, the next step is blocking. Blocking is a crucial process that ensures that your tunic not only fits correctly but also looks its best. To block your tunic, start by soaking it in lukewarm water with a gentle detergent. Gently squeeze out the excess water, making sure not to wring or twist the fabric. Lay the tunic flat on a clean towel and carefully stretch it to the desired measurements, pinning it in place if necessary. Allow the tunic to dry completely before removing the pins.
By taking the time to hem and block your knitted tunic, you can achieve a professional and polished finish that will make your garment look handmade with care. These finishing touches not only add to the overall aesthetic appeal but also ensure that your tunic fits well and drapes beautifully. So don’t skip the hemming and blocking step, as it can make a world of difference in the final result of your project.
Styling and wearing your knitted tunic
Once you have finished knitting your tunic, it’s time to start styling and wearing it. The knitted tunic is a versatile and comfortable garment that can be paired with various outfits for different occasions. Here are some tips on how to style and wear your knitted tunic:
1. Casual Everyday Look
For a casual everyday look, pair your knitted tunic with a pair of jeans or leggings. Add some ankle boots or sneakers for a laid-back vibe. You can also layer it with a denim jacket or a cozy cardigan for extra warmth during the colder months.
2. Dress it up for an Evening Out
If you want to dress up your knitted tunic for an evening out, opt for a more fitted silhouette. Pair it with a leather skirt or tailored trousers and accessorize with statement jewelry and heels. You can also add a belt to cinch in the waist and create a more defined shape.
3. Layer it for Fall and Winter
During the fall and winter seasons, layering is key. You can wear your knitted tunic over a turtleneck or long-sleeve top for added warmth. Pair it with leggings or tights and knee-high boots. Don’t forget to accessorize with a cozy scarf and beanie to complete the outfit.
4. Beach Cover-Up
If you’re heading to the beach or pool, your knitted tunic can double as a stylish cover-up. Simply throw it over your swimwear and you’re ready to go. The loose and airy design of the tunic makes it perfect for keeping cool and comfortable in the sun.
Tips and Tricks for Knitting Success
Knitting can be a relaxing and rewarding hobby, but it can also be frustrating if you’re encountering difficulties or making mistakes. Here are some helpful tips and tricks to ensure knitting success:
1. Choose the Right Yarn and Needles
Before starting your project, make sure you’re using the correct yarn and needle size recommended in the pattern. Using the wrong materials can result in a finished product that doesn’t fit correctly or have the desired effect.
2. Gauge Matters
Always check your gauge before starting a pattern. This step is often overlooked, but it’s crucial for achieving the proper size and fit of your finished garment. Use the recommended needle size and yarn to knit a gauge swatch and adjust your needle size if necessary.
3. Take Breaks
Knitting can be addictive, but it’s essential to take regular breaks to prevent strain on your hands and wrists. Stretching and resting your hands and fingers will help avoid discomfort or injury.
4. Use Lifelines
Lifelines are a valuable tool when working on complicated or intricate patterns. To insert a lifeline, thread a contrasting piece of yarn through the stitches on your needle. If you make a mistake, you can easily rip back to the lifeline without losing any progress.
5. Count your Stitches
Counting your stitches regularly will help you identify and fix mistakes early on. It’s easy to lose or gain stitches accidentally, especially when knitting in intricate patterns or multiple stitch types. Keeping track of your stitch count will save you from having to unravel or redo large sections.
6. Join a Knitting Community
Joining a knitting community or taking part in knitting workshops or classes can expand your knowledge and skills. You can learn from experienced knitters, exchange tips and ideas, and get inspiration for your next project.
7. Practice, Practice, Practice
Like any skill, knitting takes practice to improve and master. Don’t be discouraged by mistakes or challenges along the way. The more you practice, the better you’ll become at reading patterns, perfecting your tension, and executing different stitches.
8. Enjoy the Process
Knitting is meant to be an enjoyable and relaxing activity. Don’t put too much pressure on yourself to finish projects quickly or strive for perfection. Take your time, savor the process, and celebrate your achievements, no matter how small they may be.
Conclusion
With the right materials, careful attention to gauge, and a few helpful tricks, you can achieve knitting success. Remember to take breaks, count your stitches, and seek support from the knitting community. With practice and a positive mindset, you’ll soon be creating beautiful garments that you can be proud of.