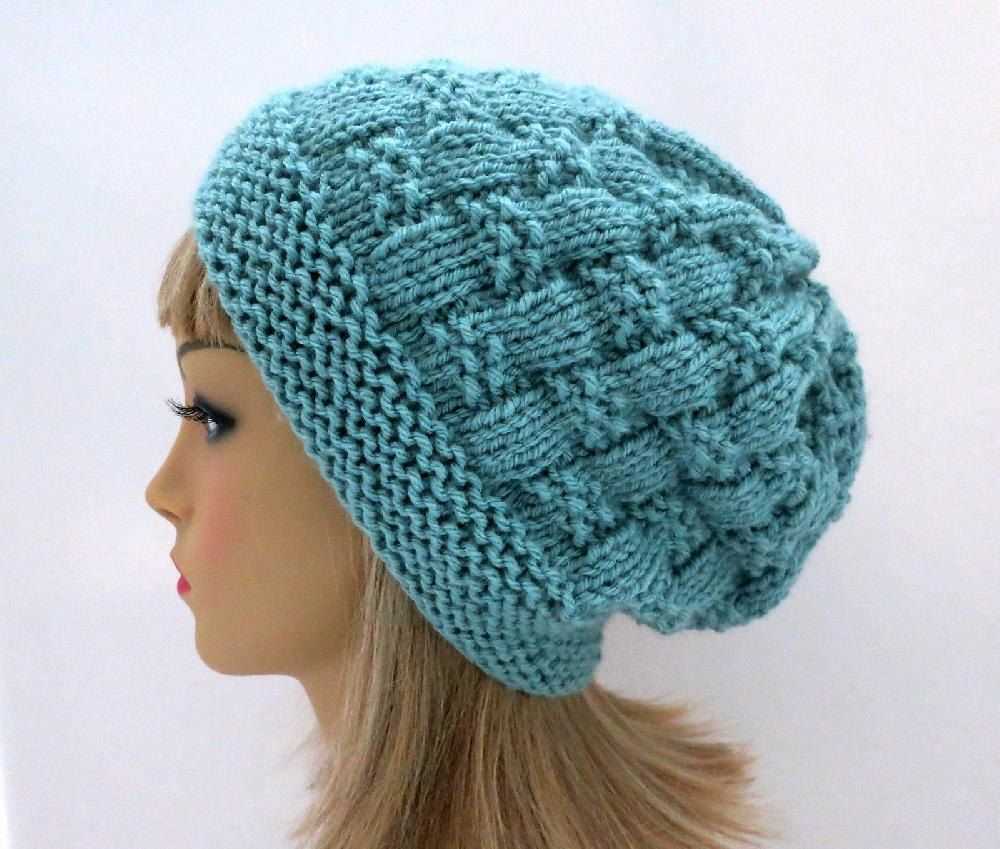
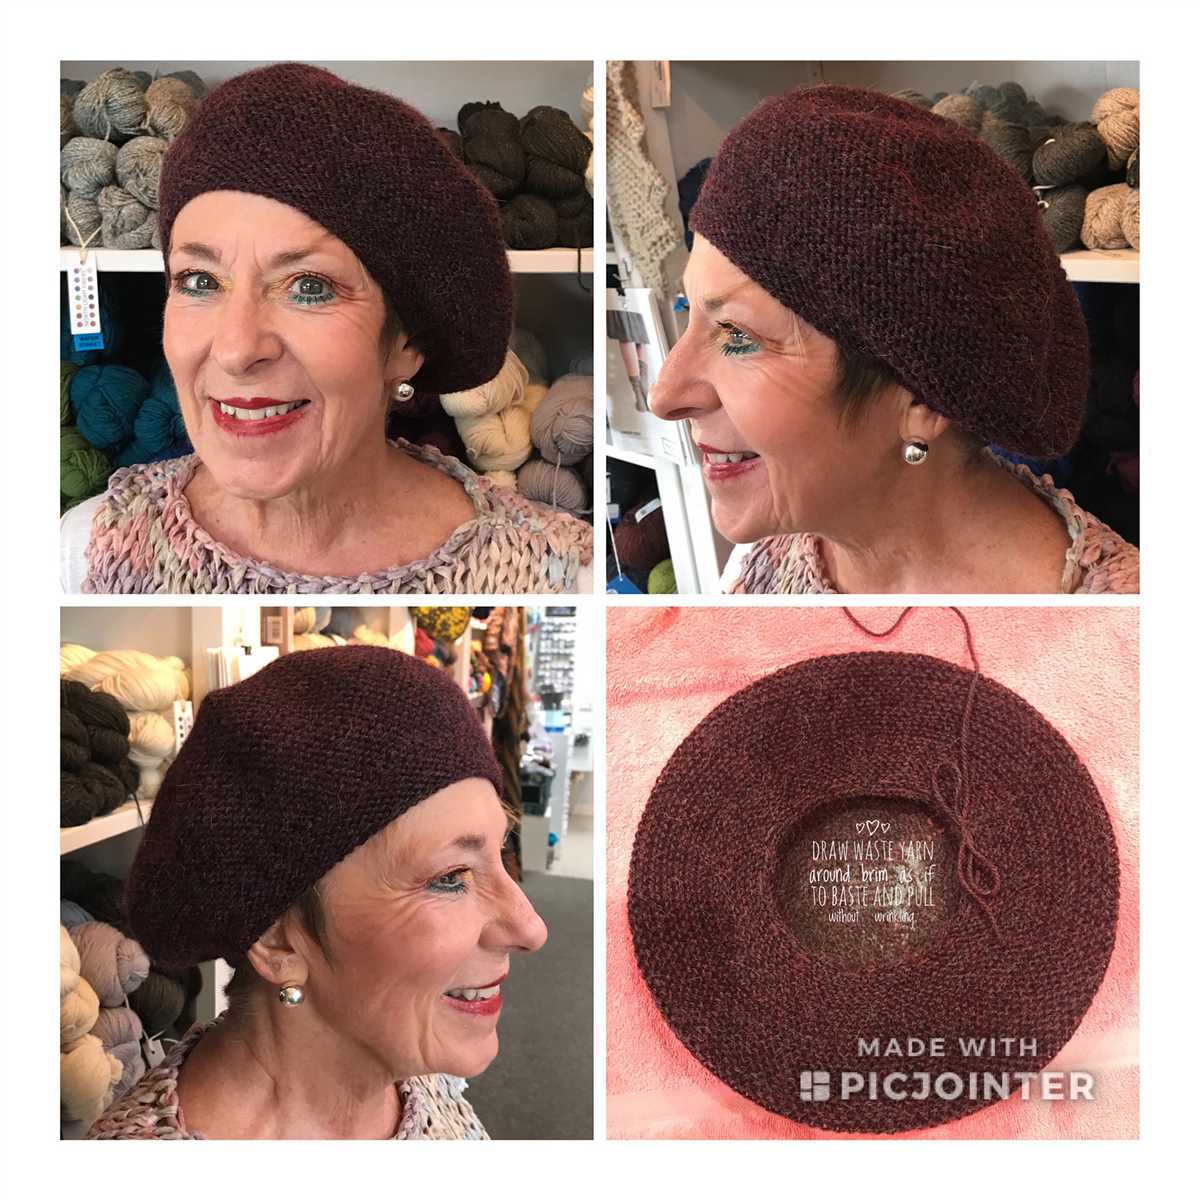
Cozy and Complimentary: Knit Your Own Tam Hat with This Free Pattern

If you’re a fan of stylish and cozy accessories, then you’re in the right place! In this article, we’re sharing a free knitted tam hat pattern that you can easily make at home. Tam hats, also known as berets, are timeless and versatile accessories that can add a touch of elegance to any outfit. Whether you’re a beginner or an experienced knitter, this pattern is suitable for all skill levels.
This pattern uses a simple yet beautiful stitch pattern that creates a textured and warm fabric. You’ll need a few basic knitting skills, such as knit and purl stitches, to complete this project. The pattern provides detailed instructions and a list of materials, including the type and amount of yarn needed. You can choose your favorite color to make a tam hat that perfectly matches your wardrobe.
Once you’ve finished knitting the tam hat, you can customize it with embellishments such as pom-poms, buttons, or embroidery. The possibilities are endless, and you can let your creativity shine through. This pattern is not only a great way to create a unique accessory for yourself but also makes a thoughtful and personalized gift for your loved ones. So grab your knitting needles and get ready to make yourself a fabulous tam hat!
Free Knitted Tam Hat Pattern
Looking for a stylish and cozy hat to knit? Look no further! This free knitted tam hat pattern is perfect for keeping your head warm and adding a touch of elegance to your winter wardrobe. Whether you’re a beginner or an experienced knitter, this pattern is easy to follow and yields beautiful results.
Materials:
- Size 8 circular knitting needles
- Set of size 8 double-pointed knitting needles
- Worsted weight yarn
- Tapestry needle
- Stitch marker
Instructions:
- Cast on 96 stitches using the circular needles.
- Join the round, being careful not to twist the stitches, and place a stitch marker to mark the beginning of the round.
- Work in a K2, P2 rib pattern for 2 inches.
- Continue knitting in stockinette stitch until the hat measures 8 inches from the cast on edge.
- Begin decreasing: *K2, K2tog* – repeat until the end of the round.
- Switch to the double-pointed needles when there are too few stitches to comfortably fit on the circular needles.
- Continue decreasing in this manner until there are 8 stitches remaining.
- Cut the yarn, leaving a long tail. Thread the tail through the remaining stitches and pull tight to close the top of the hat.
- Weave in any loose ends and block the hat if desired.
And that’s it! You now have a beautiful knitted tam hat to wear or give as a gift. Experiment with different yarn colors and patterns to make each hat unique. Happy knitting!
Materials needed for the project

In order to complete this free knitted tam hat pattern, you will need a few specific materials. These materials include:
- Yarn: You will need approximately 200-250 grams of worsted weight yarn. Choose a yarn that is soft and cozy for a comfortable hat.
- Knitting needles: You will need a set of 4 or 5 double-pointed knitting needles in the appropriate size for your chosen yarn. Size 7 or 8 needles are commonly used for worsted weight yarn.
- Circular knitting needle: You will also need a 16-inch circular knitting needle in the same size as your double-pointed needles. This will be used for the brim of the hat.
- Tape measure or ruler: A measuring tool will be helpful for ensuring proper gauge and measuring the length of the hat as you work.
- Stitch markers: These are small rings or clips that can be placed on the needles to mark specific stitches or sections of the pattern.
- Tapestry needle: This is a large-eyed needle used for weaving in ends and sewing the top of the hat closed.
Having these materials on hand will ensure that you have everything you need to successfully complete the knitted tam hat pattern. Once you gather these materials, you will be ready to begin the project and create your own cozy and stylish hat.
Step-by-Step Instructions for Knitting the Tam Hat
If you’re looking for a new knitting project, why not try making a tam hat? Tams are a stylish and versatile accessory that can be worn in various ways. This step-by-step guide will walk you through the process of knitting your own tam hat.
Materials:
- Yarn: Choose a soft and chunky yarn in your preferred color.
- Knitting Needles: Use circular or double-pointed needles in size appropriate for your yarn.
- Stitch Markers
- Tapestry Needle
Instructions:
- Cast On: Start by casting on the desired number of stitches. This will depend on the size of your head and the gauge of your yarn. A common number to start with is 80 stitches.
- Ribbing: Knit the first few rows in a rib stitch pattern (knit 1, purl 1) to create a stretchy brim for the hat. Continue in rib stitch for about 1-2 inches.
- Transition: Switch to a stockinette stitch, knitting every row, to create the body of the hat. Continue in stockinette stitch for about 4-5 inches, or until the hat reaches your desired length.
- Decrease: Begin the decrease rounds by knitting two stitches together at regular intervals. This will help shape the crown of the hat. Continue decreasing until you have around 10-15 stitches left on your needles.
- Finishing: Cut the yarn, leaving a long tail. Thread the tail through a tapestry needle and slip the needle through the remaining stitches, pulling tight to close the top of the hat. Secure the yarn and weave in any loose ends.
Optional Embellishments:
If you want to add some personality to your tam hat, consider adding a pom-pom, a decorative rib, or a colorful band around the brim. Get creative and have fun with your design!
Tips for choosing the right yarn for the tam hat
When knitting a tam hat, choosing the right yarn is essential to ensure the hat turns out the way you want it to. Here are some tips to help you select the perfect yarn for your project:
Consider the fiber content
The fiber content of the yarn will greatly affect the final look and feel of the tam hat. Natural fibers like wool, alpaca, and cashmere are great options as they offer warmth, softness, and durability. Acrylic yarns can be a more affordable alternative and are often available in a wide range of colors. Consider what qualities you value most in a yarn and choose the fiber content accordingly.
Think about the weight of the yarn

The weight of the yarn determines the thickness and drape of the tam hat. A bulky weight yarn will create a thicker, warmer hat, while a fingering weight yarn will result in a lighter, more delicate hat. Consider the desired look and feel of the tam hat and choose a yarn weight that aligns with your vision.
Pay attention to the recommended gauge
When selecting a yarn for a tam hat pattern, it’s important to pay attention to the recommended gauge provided by the pattern. The gauge indicates how many stitches and rows should be knit in a certain measurement. Using a different yarn weight or fiber content can affect the gauge and ultimately the size and fit of the hat. Make sure to choose a yarn that matches the gauge specified in the pattern to achieve the desired results.
Consider the color and texture
The color and texture of the yarn can greatly impact the overall look of the tam hat. Consider the style and purpose of the hat. If you want a classic and versatile hat, neutral and solid colors are a safe choice. For a more vibrant and unique look, opt for variegated or self-striping yarns. Additionally, the texture of the yarn can add visual interest to the hat, so consider options like smooth, fuzzy, or textured yarns.
By considering the fiber content, weight, recommended gauge, color, and texture of the yarn, you can choose the perfect yarn for your tam hat project. Experiment with different options to create a hat that is not only comfortable and warm but also reflects your personal style and creativity.
How to Measure Your Head for a Perfect Fit
When knitting a tam hat, one of the most important things to consider is achieving a perfect fit. This can be easily done by measuring your head before starting the project. Here’s a step-by-step guide on how to measure your head for a perfect fit.
1. Use a Measuring Tape: To accurately measure your head, you will need a flexible measuring tape. If you don’t have one, you can use a string or a ribbon and then measure it with a ruler.
2. Measure the Circumference: Start by placing the measuring tape or string around your head, just above your eyebrows and ears. Make sure the tape is level and snug, but not too tight. This measurement will give you the circumference of your head.
3. Record the Measurement: Once you have the circumference measurement, write it down. It’s important to remember this measurement as it will be used to determine the size of the tam hat.
4. Determine the Size: Use the following guide to determine the size of the tam hat based on your head circumference:
- Small: 18-20 inches
- Medium: 20-22 inches
- Large: 22-24 inches
5. Adjust as Needed: If your head measurement falls between two sizes, it’s recommended to choose the larger size for a comfortable fit. Additionally, if you prefer a slouchier hat, you can add a few extra inches to the measurement.
6. Start Knitting: Now that you have your head measurement and the corresponding size, you can start knitting your tam hat with the confidence that it will fit perfectly.
Understanding the basic knitting stitches used in the pattern
When knitting the free tam hat pattern, it is important to understand the basic stitches that are used throughout the pattern. By familiarizing yourself with these stitches, you will be able to successfully complete the tam hat and achieve the desired look.
Garter Stitch
The garter stitch is one of the most basic knitting stitches and is often used in beginner projects. It is achieved by knitting every row, creating a bumpy texture on both sides of the fabric. In the tam hat pattern, the garter stitch may be used for the brim or other sections of the hat.
Stockinette Stitch

The stockinette stitch is another fundamental knitting stitch that creates a smooth and even fabric. It is achieved by knitting one row and purling the next, alternating between knit and purl rows. In the tam hat pattern, the stockinette stitch may be used for the main body of the hat to create a sleek and polished look.
- Knit Stitch: The knit stitch is the most basic stitch in knitting. It involves inserting the right needle into the front loop of the stitch on the left needle, wrapping the yarn around the right needle, and pulling the new loop through.
- Purl Stitch: The purl stitch is the reverse of the knit stitch. Instead of inserting the needle from the front, it is inserted from the back. The yarn is wrapped around the right needle, and the loop is pulled through.
- Increasing: Increasing in knitting involves adding extra stitches to the fabric. This can be done by knitting into the front and back of a stitch or by using other increase methods, such as yarn overs.
- Decreasing: Decreasing in knitting involves removing stitches from the fabric. This can be done by knitting two stitches together, slipping a stitch, or using other decrease methods to create shaping in the fabric.
By understanding and practicing these basic knitting stitches, you will have the necessary skills to tackle the free tam hat pattern and create a unique and stylish accessory.
Adding decorative elements to your tam hat
Once you have completed the basic pattern for your tam hat, you may want to add some decorative elements to give it a unique and personalized touch. There are many options to choose from, depending on your skill level and personal preference.
One option to consider is adding a pompom to the top of the hat. Pompoms can be made from the same yarn as the hat or from a contrasting color for added visual interest. You can make pompoms using a pompom maker or simply by wrapping yarn around your fingers and tying it off in the middle. Adding a pompom can instantly elevate the look of your tam hat and make it more fun and playful.
If you are looking for a more intricate and detailed design, you can consider adding some cable stitches to your tam hat. Cable stitches create a beautiful texture and can be used to create various patterns, such as braids or twists. There are many cable stitch patterns available online, and you can easily incorporate them into your tam hat design by following the instructions and charts provided.
An alternative option to embellish your tam hat is to add some decorative buttons. Buttons come in a variety of shapes, sizes, and colors, allowing you to choose ones that match your personal style and the overall look of your hat. You can sew the buttons onto the brim of the hat or along the sides to create a visually appealing design.
- Pompoms: Consider adding a pompom to the top of your hat for a fun and playful touch.
- Cable stitches: Add intricate cable stitches to your tam hat for a textured and detailed design.
- Decorative buttons: Sew decorative buttons onto your hat to create a visually appealing design.
With these decorative elements, you can turn a basic tam hat into a unique and personalized accessory. Don’t be afraid to experiment with different techniques and designs to make your hat truly one-of-a-kind!
Common mistakes to avoid during the knitting process
Knitting can be a relaxing and enjoyable activity, but it’s easy to make mistakes along the way. Here are some common mistakes to avoid during the knitting process:
1. Not checking gauge
One of the most common mistakes knitters make is not checking their gauge before starting a project. Gauge refers to the number of stitches and rows in a given measurement, and it’s important because it determines the size and fit of the finished item. Failing to check gauge can result in a project that is too big or too small. Take the time to knit a gauge swatch and measure it accurately before starting your project.
2. Skipping or misreading the pattern instructions
Another common mistake is skipping or misreading the pattern instructions. Knitting patterns can be complex, with multiple sections and different stitch patterns. It’s important to take the time to read and understand the instructions before starting each section. Skipping or misreading instructions can lead to mistakes in the finished project and frustration along the way. Take your time and double-check the instructions as you go.
3. Not using the correct knitting technique
Using the correct knitting technique is essential for achieving the desired result. For example, using the wrong type of stitch or knitting too loosely or tightly can result in an uneven or misshapen project. It’s important to practice and develop the correct knitting technique for each project, and to maintain consistent tension throughout.
4. Not counting stitches
Counting stitches is a crucial step in knitting, especially when working on complex patterns or shaping. Failing to count stitches accurately can result in the wrong number of stitches and throw off the entire project. Take the time to count your stitches regularly and make sure you’re on track with the pattern instructions.
5. Not weaving in ends properly
When completing a knitting project, it’s important to weave in the loose ends of yarn to secure them and prevent unraveling. Not weaving in ends properly can result in the yarn coming loose over time and the project falling apart. Take the time to weave in ends securely using a tapestry needle, and trim any excess yarn for a neat and finished look.
Avoiding these common mistakes can help you create beautiful and well-finished knitting projects. Remember to take your time, read and understand the instructions, and pay attention to detail throughout the process.
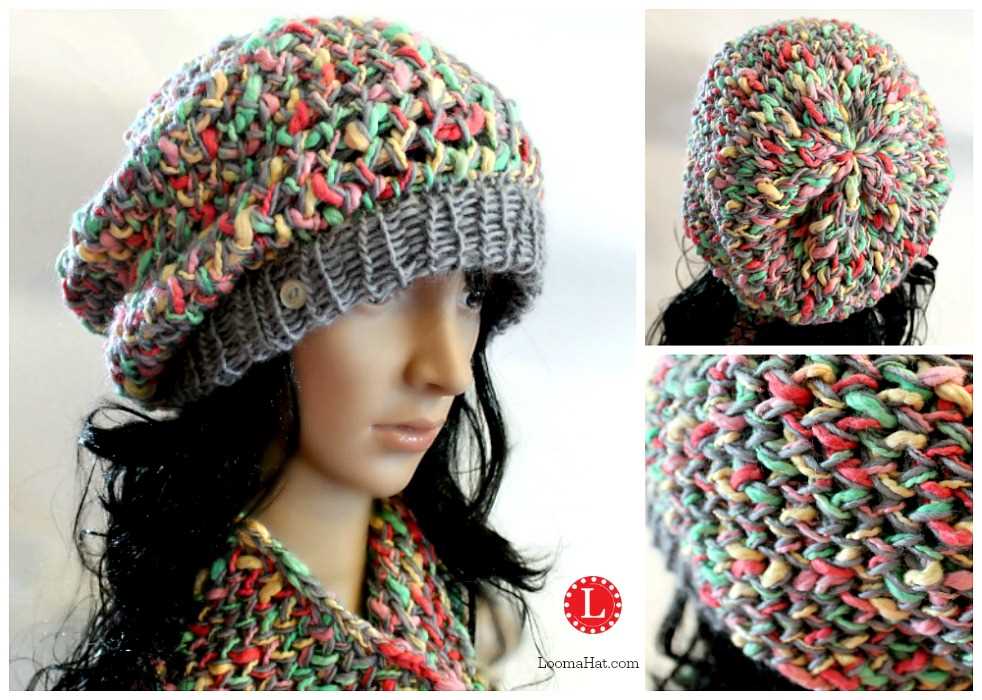
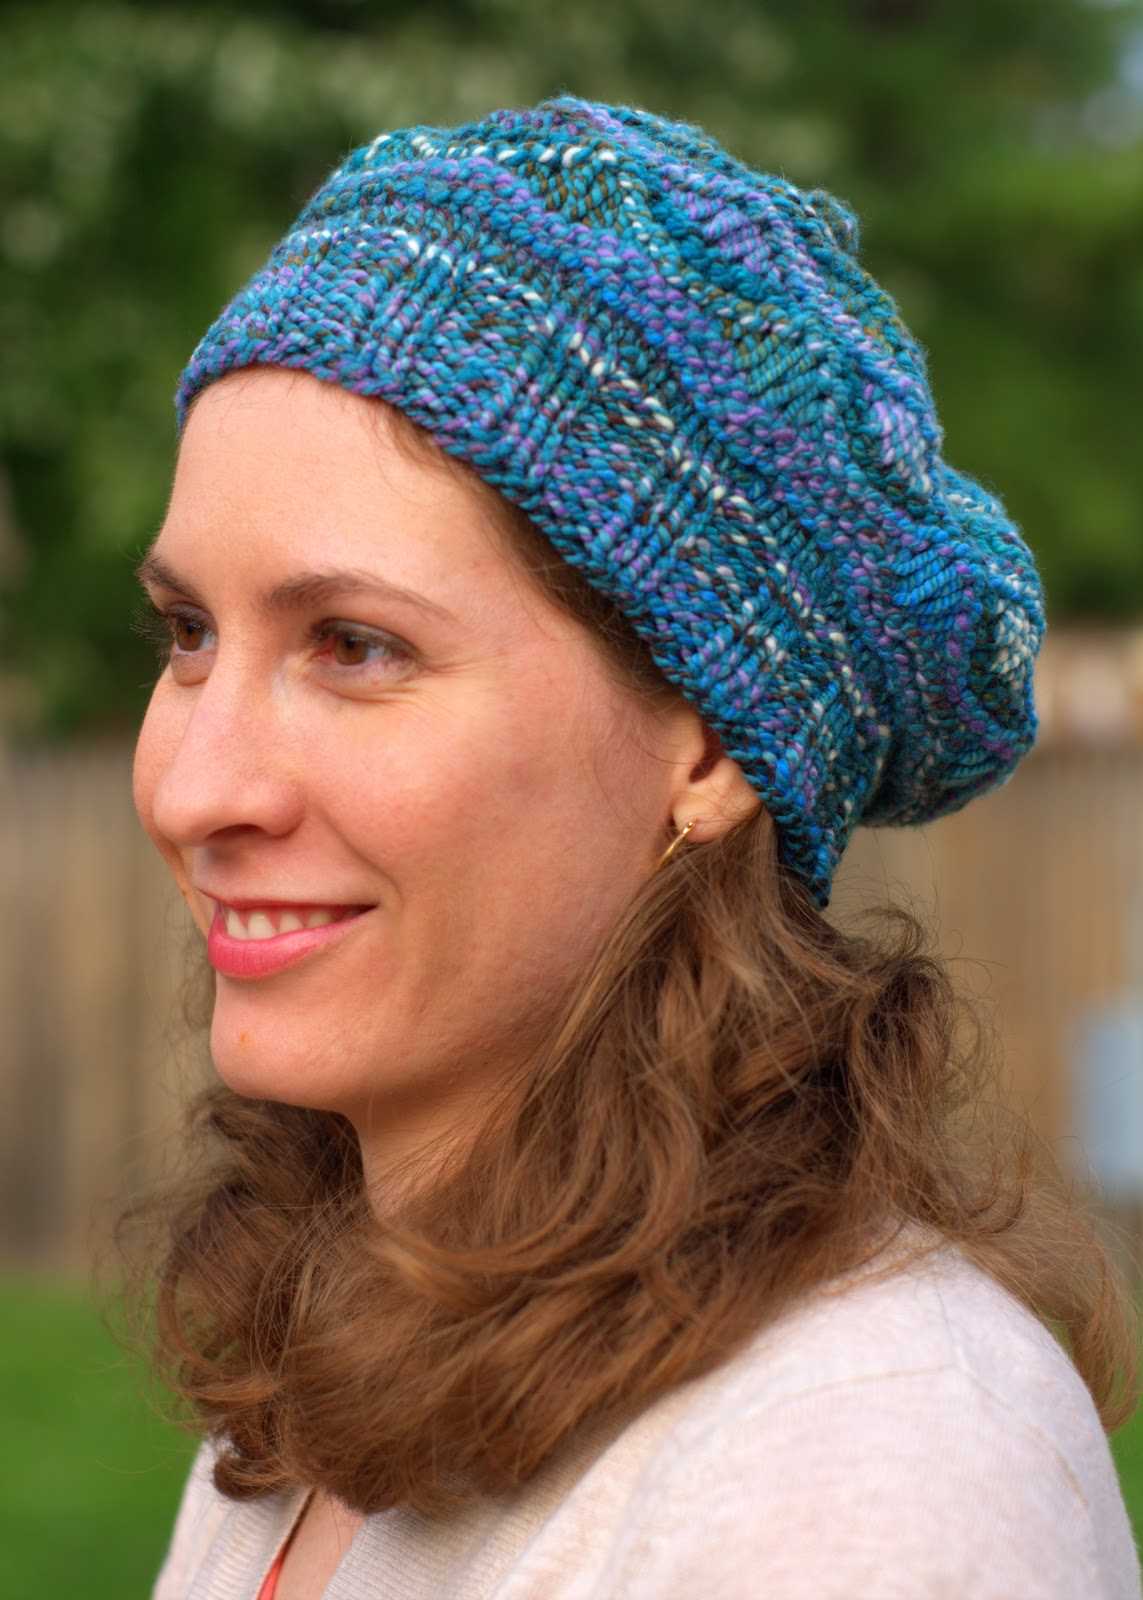
Variations of the tam hat pattern for different styles
Whether you’re looking for a classic or a trendy look, the tam hat pattern can be easily modified to suit your style. Here are a few variations of the pattern that you can try:
1. Colorful stripes
Add a pop of color to your tam hat by incorporating colorful stripes. You can use different shades of the same color for a subtle effect, or opt for contrasting colors for a bolder look. Experiment with different color combinations to create a unique and eye-catching design.
2. Lace detail
To add a touch of femininity to your tam hat, consider adding a lace detail. You can knit a small section of lace using a lace stitch pattern and sew it onto the hat. This delicate feature will elevate the overall look of the hat and make it perfect for special occasions or as an accessory to dress up an outfit.
3. Embellishments
If you want to personalize your tam hat, try adding some embellishments. You can sew on buttons, beads, or even small fabric flowers to give your hat a unique and stylish look. Be creative and experiment with different types of embellishments to create a hat that reflects your personal taste and style.
4. Pom pom or tassel
Add a playful element to your tam hat by attaching a pom pom or a tassel. You can make your own pom pom or tassel using yarn in a matching or contrasting color. Simply attach it to the top of the hat using a yarn needle and secure it with a knot. This simple addition can make your hat look fun and whimsical.
5. Textured stitches
If you want to add some visual interest to your tam hat, try using textured stitches. You can experiment with different stitch patterns, such as cables, bobbles, or seed stitch, to create an interesting texture on the surface of the hat. These textured stitches can give your hat a more intricate and unique look.
By trying out these variations, you can create a tam hat that perfectly suits your style and adds a personal touch to your accessories collection. Whether you prefer a classic or a more contemporary look, the tam hat pattern offers endless possibilities for customization.
Inspiration and ideas for customizing your tam hat
The tam hat is a classic head covering that can be customized to reflect your personal style and creativity. Whether you’re a beginner knitter or an experienced crafter, there are endless possibilities for making your tam hat truly unique. Here are some inspiration and ideas to help you create a one-of-a-kind tam hat:
1. Color blocking
Experiment with different colors to create a bold and vibrant tam hat. Choose contrasting or complementary colors to make a statement. You can also try gradient or ombre effects by using different shades of the same color. Play around with color combinations and see what works best for you.
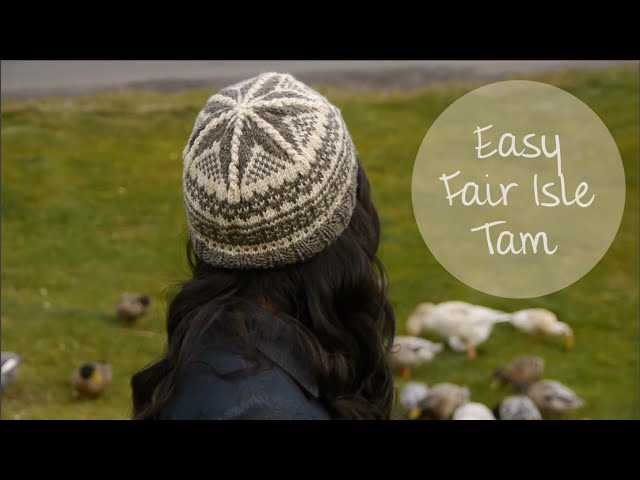
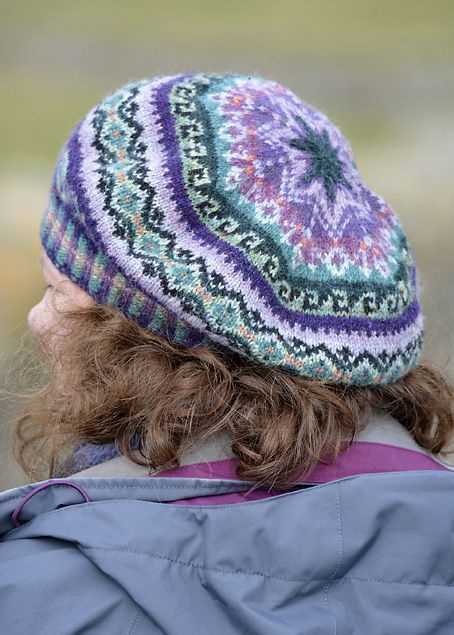
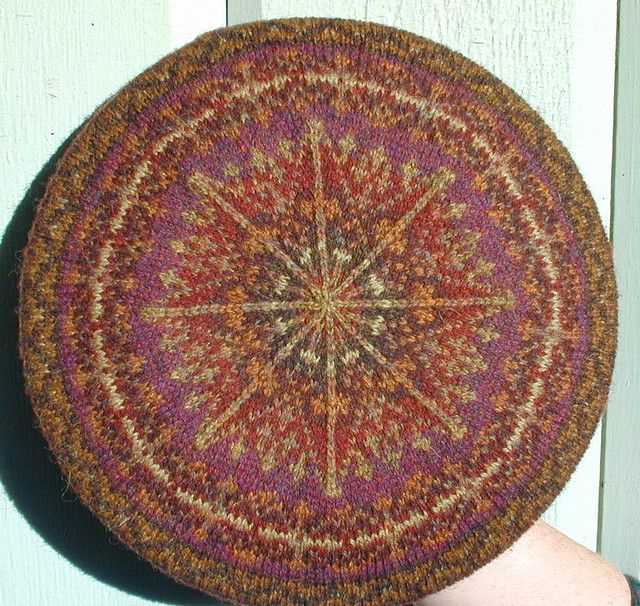
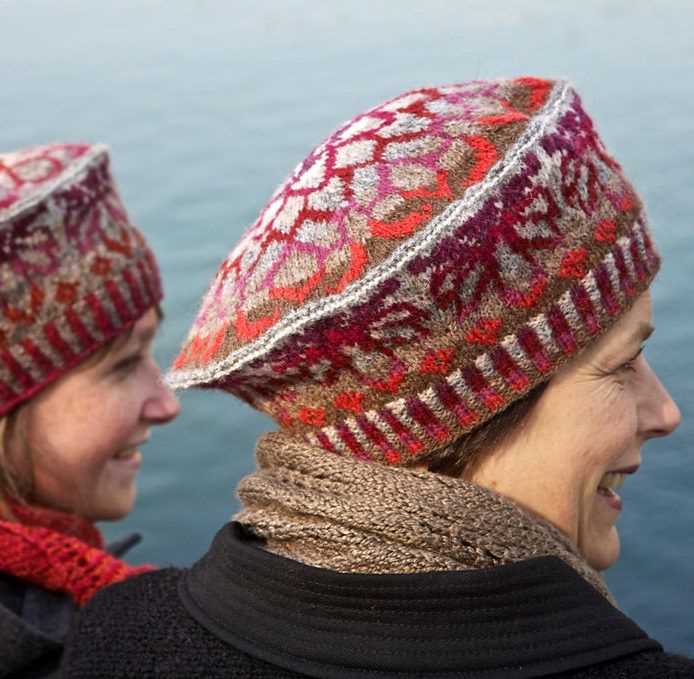
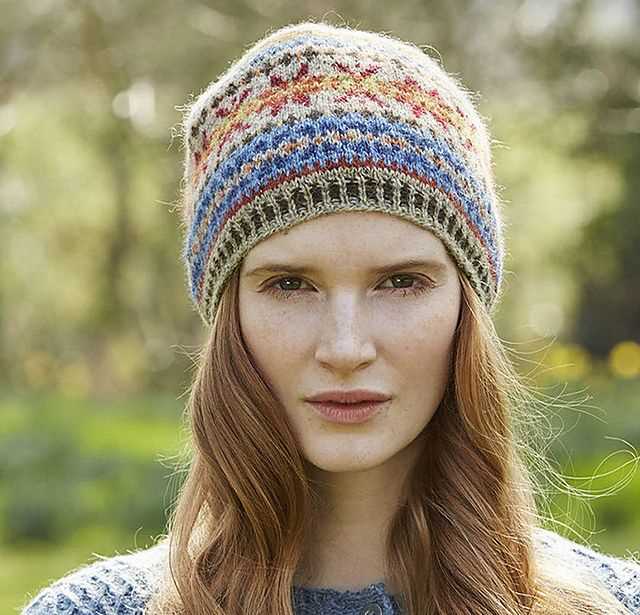
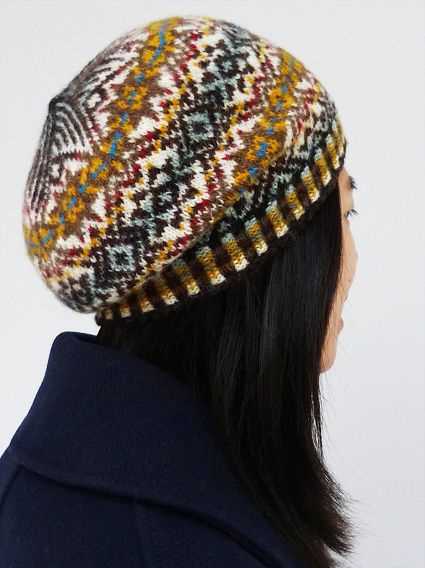
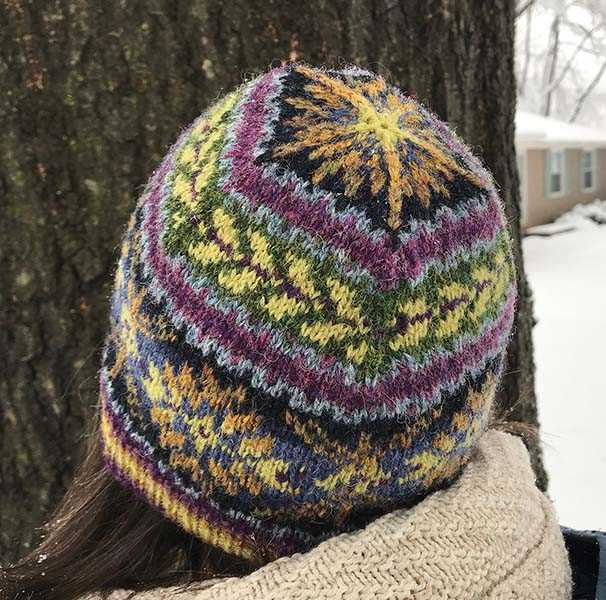
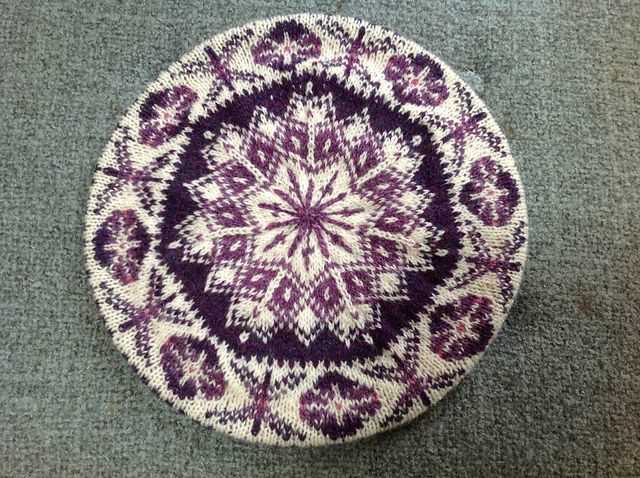
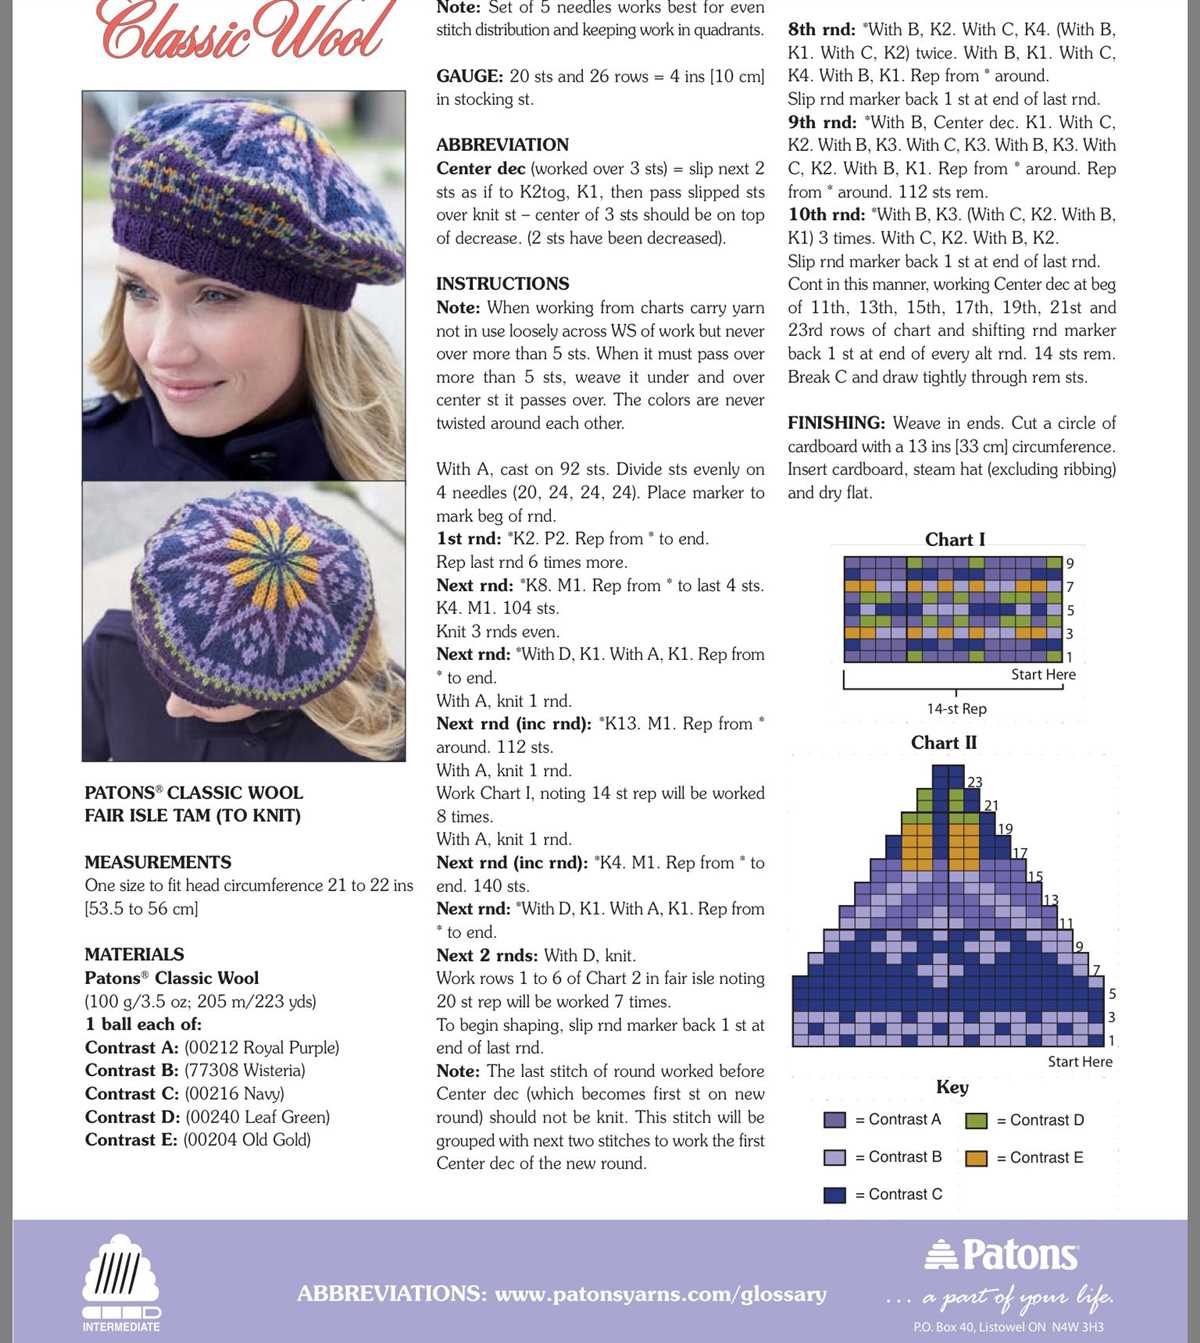
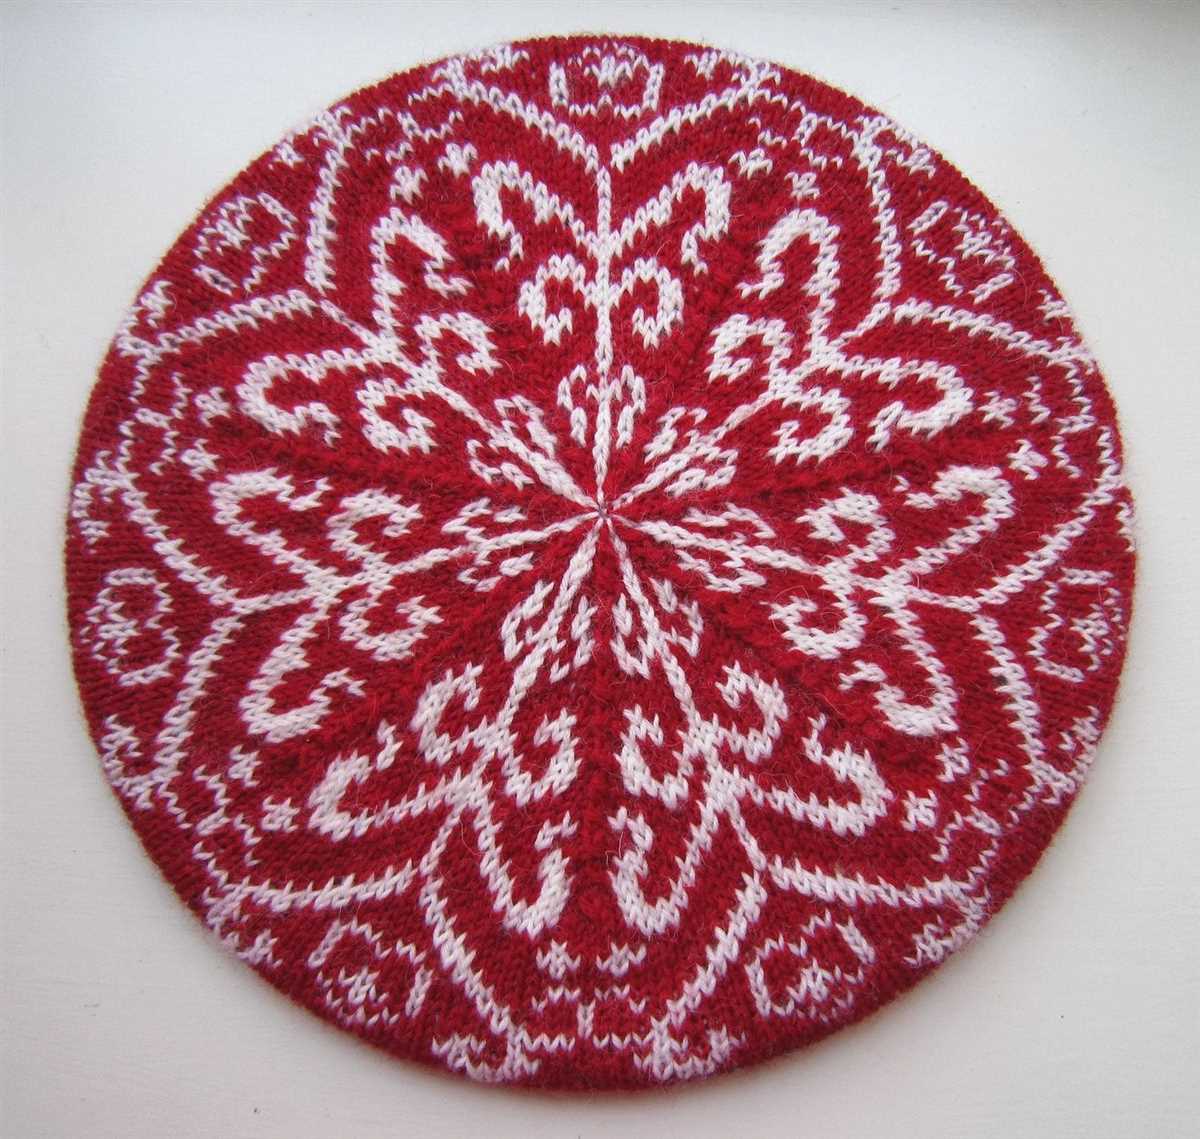
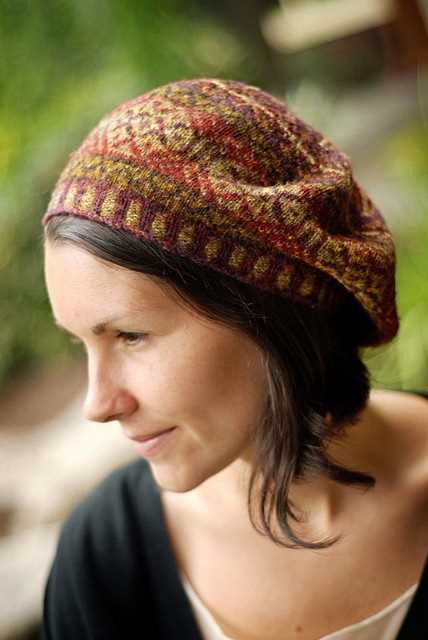
2. Fair Isle or intarsia patterns
Add intricate details to your tam hat with Fair Isle or intarsia knitting techniques. These techniques involve creating patterns or motifs using multiple yarn colors. You can incorporate traditional motifs or create your own design. The possibilities are endless, so let your creativity run wild!
3. Embellishments
Take your tam hat to the next level by adding embellishments. Consider adding buttons, beads, ribbons, or even crocheted flowers to give your hat a unique and personalized touch. These embellishments can be easily added after you’ve finished knitting the hat.
4. Textured stitches
Experiment with different textured stitches to add depth and interest to your tam hat. Try cables, bobbles, lace patterns, or any other stitch pattern you like. Not only will these stitches add visual appeal, but they can also provide extra warmth and insulation.
5. Customized pattern sizing
While there are many free tam hat patterns available, you can also customize the sizing to fit your head perfectly. Measure your head circumference and adjust the pattern accordingly. This way, you can ensure a snug and comfortable fit.
With these inspiration and ideas, you can create a tam hat that truly reflects your personal style and showcases your knitting skills. Get creative and have fun experimenting with different techniques and designs!
Frequently asked questions about knitting tam hats
Knitting tam hats can be a fun and rewarding project for all skill levels. Whether you’re a beginner or an experienced knitter, you may have some questions about the process. Here are some frequently asked questions about knitting tam hats, along with their answers.
1. What is a tam hat?
A tam hat, also known as a tam o’shanter, is a type of hat that originated in Scotland. It typically has a beret-like shape with a flat crown and a brim that can be folded up or down. Tam hats are often knitted and can be customized with different colors and patterns.
2. What are the materials needed to knit a tam hat?
To knit a tam hat, you will need a set of double-pointed or circular knitting needles, yarn in your desired color(s), a tapestry needle for weaving in ends, and a stitch marker. The specific materials and sizes may vary depending on the pattern you choose, so be sure to check the instructions before starting your project.
3. How long does it take to knit a tam hat?
The time it takes to knit a tam hat can vary depending on your knitting speed, the complexity of the pattern, and the size of the hat. On average, it may take a few days to a couple of weeks to complete a tam hat project. If you’re a beginner, it may take longer as you become familiar with the knitting techniques.
4. Can I resize a tam hat pattern?
Yes, tam hat patterns can be resized to fit different head sizes. If you want to make a larger or smaller hat, you can adjust the number of stitches or use a different needle size. Keep in mind that altering the pattern may also affect the overall appearance and fit of the hat, so it’s important to make gauge swatches and test the fit as you go.
5. Are there different knitting techniques used in knitting tam hats?
Yes, knitting tam hats typically involve a variety of techniques, such as knitting in the round, increasing and decreasing stitches, and creating colorwork or texture patterns. Some patterns may also include special stitches or lacework. If you’re new to these techniques, it can be helpful to practice them on a smaller project before attempting a tam hat.
- In summary, knitting tam hats can be a rewarding and enjoyable project. With the right materials and a bit of practice, you can create a hat that is both stylish and cozy. If you have any other questions, consulting a knitting pattern or reaching out to experienced knitters can also provide valuable guidance.
Sharing your finished tam hat with the knitting community
Once you have completed knitting your tam hat using the free pattern, it’s time to share your creation with the knitting community. By sharing your finished tam hat, you not only showcase your skills and creativity but also inspire and motivate other knitters. There are several ways to share your finished tam hat with the knitting community and connect with fellow knitting enthusiasts.
1. Online platforms: Share a photo of your finished tam hat on social media platforms like Instagram, Facebook, or Pinterest. Use relevant hashtags like #knittingcommunity, #knitstagram, and #handknitted to reach a wider audience. You can also join knitting groups or forums to share your hat and receive feedback and appreciation from fellow knitters.
2. Craft websites and blogs: Submit your tam hat project to craft websites and blogs that feature user-submitted knitting projects. This will provide you with an opportunity to showcase your work to a larger audience, gain exposure, and even get featured on popular knitting websites.
- Keep in mind the submission guidelines for each website or blog, including image specifications and any specific information they may require about your hat.
- Provide a brief description of your inspiration, yarn used, and any modifications you made to the original pattern.
- Include high-quality photos of your tam hat from different angles to highlight its design and details.
3. Local knitting groups and classes: If you have a local knitting group or attend knitting classes, bring your finished tam hat along to share with the group. This will not only allow you to receive feedback and suggestions but also create a sense of community and camaraderie among fellow knitters.
4. Personal blog or website: If you have a personal blog or website, create a dedicated post to showcase your tam hat project. Share your knitting experience, the challenges you faced, and the satisfaction of completing the project. Include step-by-step pictures or a video tutorial, if possible, to inspire and guide others who may want to knit a tam hat.
In summary, sharing your finished tam hat with the knitting community is a great way to engage with fellow knitters, gain inspiration, and showcase your knitting skills. Embrace the knitting community and be proud of your creation by sharing it on online platforms, craft websites, local knitting groups, or your own blog. The support and feedback you receive will not only encourage you to take up new knitting projects but also create a sense of belonging in the knitting community. Happy knitting!