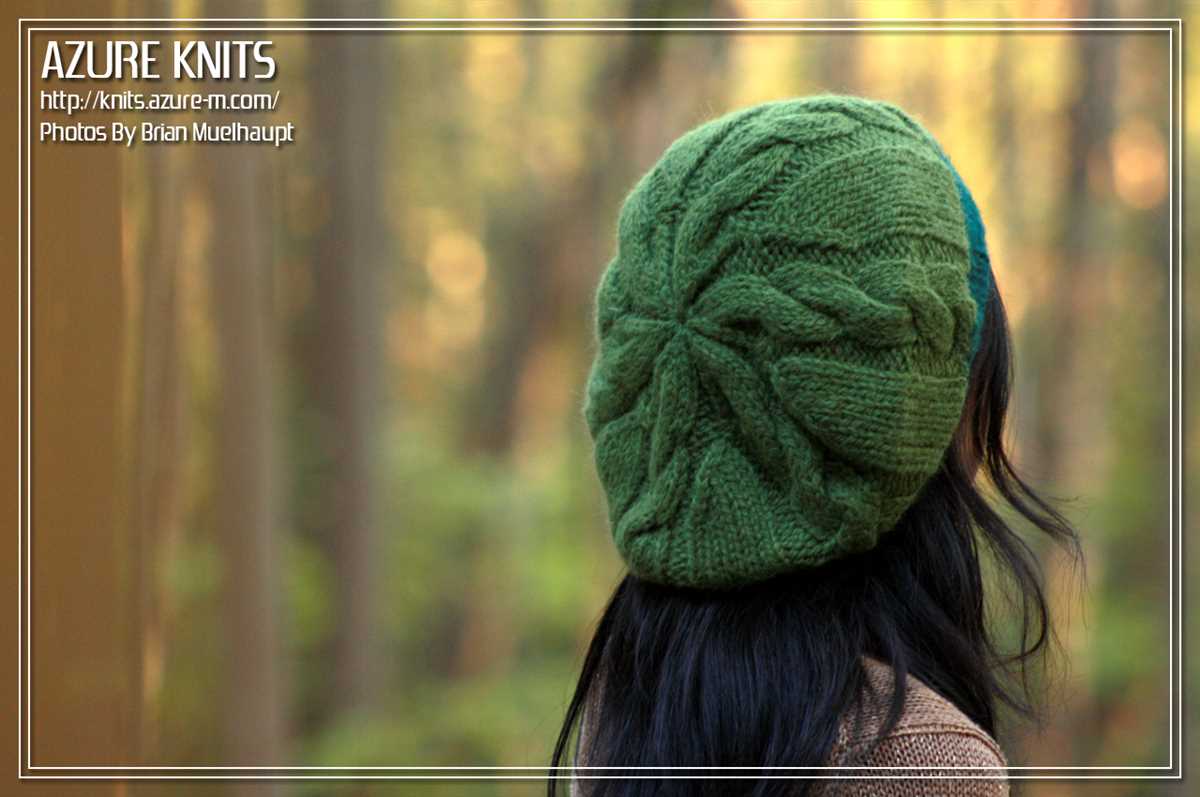
Stay Warm and Stylish with this Knit Cable Hat Pattern

If you’re looking for a cozy and stylish accessory to keep you warm during the cold winter months, look no further than a knit cable hat. These hats are not only practical, but also fashionable, making them the perfect addition to any winter wardrobe. Whether you’re an experienced knitter or just starting out, this knit cable hat pattern is easy to follow and yields beautiful results.
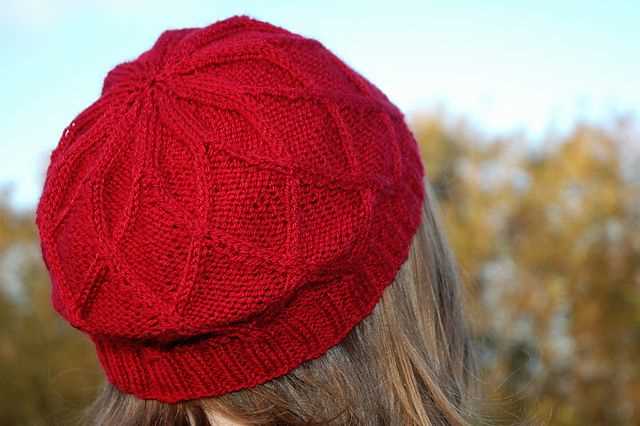
One of the best things about knitting your own hat is that you can customize it to fit your personal style. With a variety of cable patterns to choose from, you can create a hat that is uniquely yours. From simple twists to intricate braids, the possibilities are endless. You can also experiment with different yarn colors and textures to add even more personality to your hat.
Not only will knitting your own cable hat give you a sense of accomplishment, but it will also allow you to make a one-of-a-kind item that you can’t find in stores. Whether you’re making it for yourself or as a gift for a loved one, a hand-knit cable hat is sure to be treasured for years to come. So grab your knitting needles and dive into this knit cable hat pattern – you’ll be stylishly warm in no time!
Knit Cable Hat Pattern: How to Create a Cozy and Stylish Accessory
If you love knitting and want to add a cozy and stylish accessory to your wardrobe, a knit cable hat is the perfect project for you. Knit cable patterns are timeless and add a touch of elegance to any outfit. With a few basic knitting skills, you can create a beautiful hat that will keep you warm during the colder months.
Before you begin, gather the necessary materials: a set of knitting needles, cable needle, stitch markers, and a soft and warm yarn of your choice. Once you have everything ready, you can start casting on stitches. The number of stitches will depend on the size of the hat you want to make, so make sure to measure your head circumference and choose a suitable pattern.
Creating the Cable Pattern
Once you have cast on the required number of stitches, it’s time to start working on the cable pattern. Cable knitting may seem intimidating at first, but it’s actually quite straightforward. The pattern typically involves crossing stitches over each other to create the cable effect.
Start by knitting a few rows in a basic stitch pattern, such as garter stitch or rib stitch, to create a foundation for the cable pattern. Then, follow the instructions provided in your chosen cable pattern to create the twists and turns of the cables. Remember to use the cable needle to hold some stitches in front or in the back while you work on the others.
Once you have completed the cable pattern, continue knitting in your chosen stitch pattern until the hat reaches your desired length. Finally, bind off the stitches and sew the ends together to form the hat. You can also add a pom-pom or a decorative button for some extra flair.
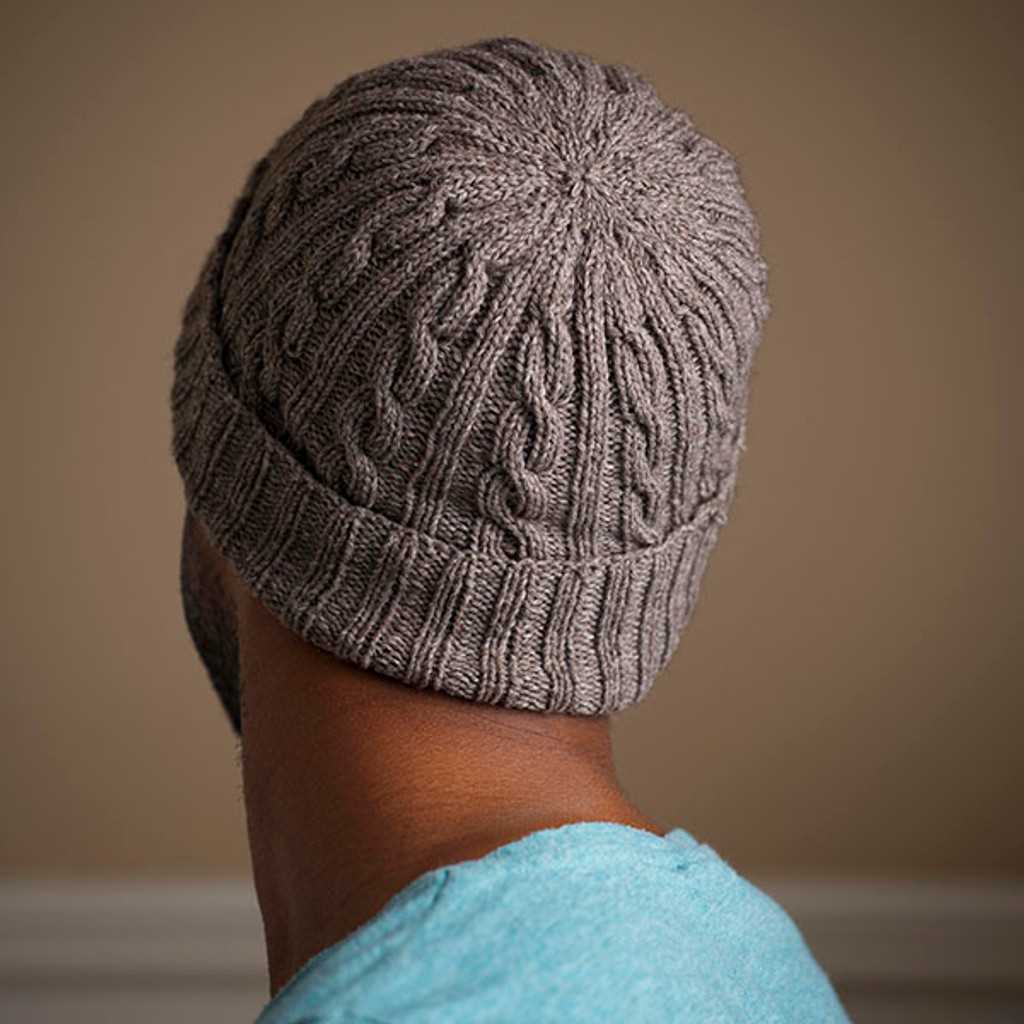
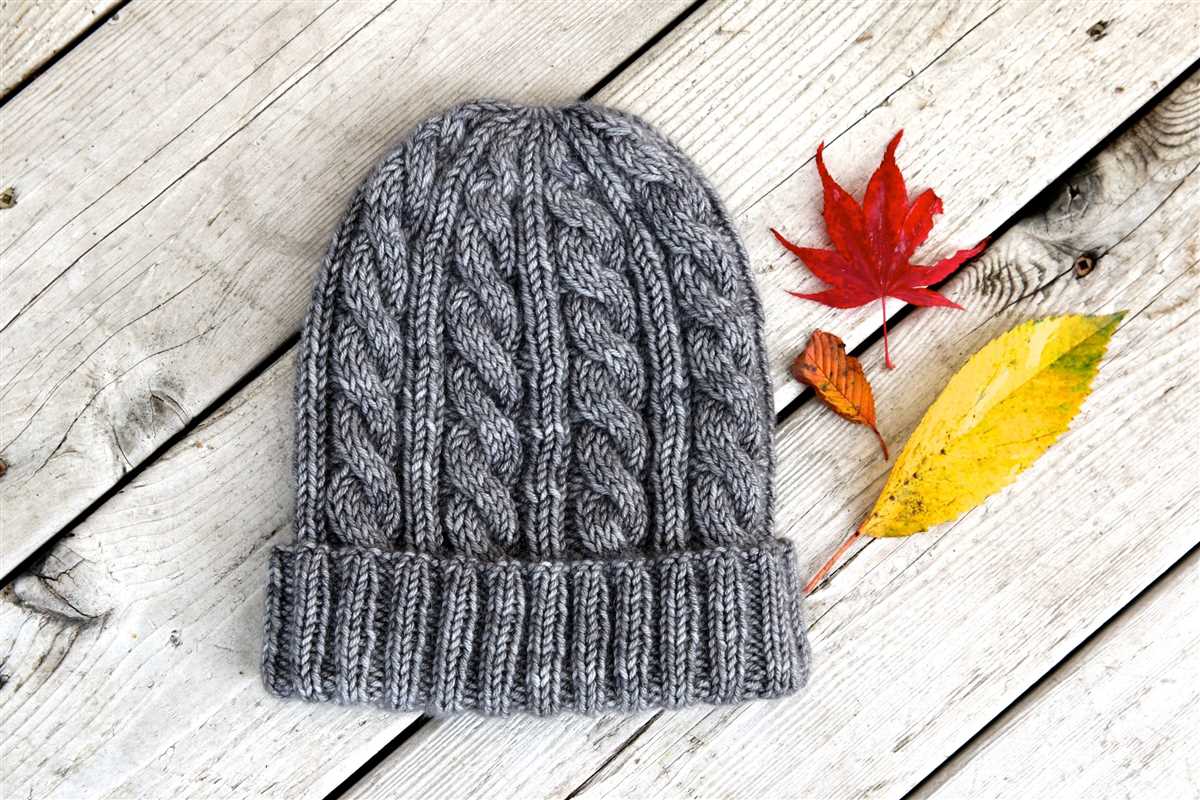
A knit cable hat is not only a functional accessory for the colder months but also a stylish addition to any outfit. The intricate cable pattern adds texture and depth to the hat, making it a statement piece. Whether you’re a beginner knitter or an experienced one, challenge yourself with a cable hat pattern and enjoy the process of creating a cozy and stylish accessory.
Why Knitting a Cable Hat is a Great DIY Project

Knitting can be a relaxing and rewarding hobby, and one project that is great for beginners and experienced knitters alike is a cable hat. Knitting a cable hat allows you to practice your basic knitting skills while also learning a new technique. Plus, at the end of the project, you’ll have a stylish and cozy hat to wear or gift to a loved one.
One of the reasons knitting a cable hat is a great DIY project is that it allows you to be creative and customize your hat to your own personal style. You can choose from a variety of yarn colors and textures to create a hat that is unique to you. Additionally, you can experiment with different cable patterns to add even more interest and depth to your hat.
When knitting a cable hat, you’ll also have the opportunity to learn and practice new knitting techniques. Cable knitting involves crossing stitches over each other to create intricate patterns. This technique may seem intimidating at first, but with practice, you’ll quickly get the hang of it. Knitting a cable hat is a great way to challenge yourself and expand your knitting skills.
Not only is knitting a cable hat a fun and creative project, but it also has practical benefits. Cable knitting creates a thick and cozy fabric, making the hat perfect for keeping warm during the colder months. The cables also add extra insulation, making the hat even more comfortable and cozy. You’ll be able to showcase your knitting skills while staying toasty and stylish.
In conclusion, knitting a cable hat is a great DIY project for anyone interested in knitting. It allows you to practice your skills, be creative, and create a functional and fashionable accessory. So why not pick up your knitting needles and start knitting your own cable hat today?
Understanding the Basics: Materials and Tools Needed
Materials

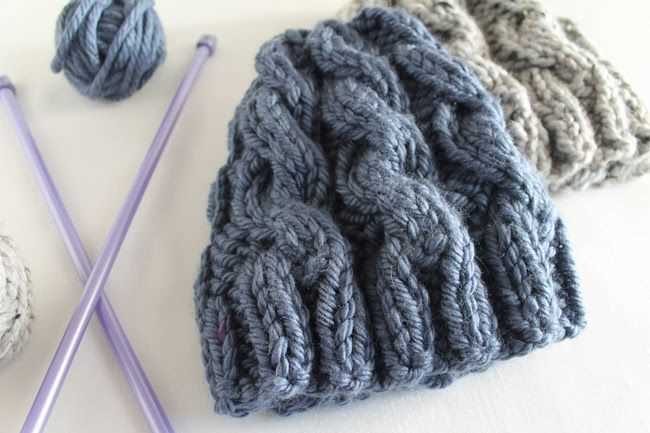
To knit a cable hat, you will need a few essential materials. First and foremost, you will need yarn. It is recommended to use a medium-weight yarn, such as a worsted weight, for this project. Worsted weight yarn is versatile and provides a good balance between warmth and thickness. Choose a yarn that is soft and comfortable to wear.
In addition to yarn, you will need a set of knitting needles. For this pattern, it is recommended to use circular knitting needles with a cable length of at least 16 inches. Circular needles allow you to easily work in the round and accommodate the number of stitches required for the hat. Make sure to choose knitting needles that correspond to the gauge suggested by the yarn label or the ones that give you the desired tension.
Tools
Aside from the essential materials, there are a few tools that will make your knitting experience easier and more enjoyable. First, you will need a cable needle. This small, double-pointed needle is used to hold stitches temporarily while you work the cable pattern. Make sure to choose a cable needle that is compatible with your yarn and needle size.
Additionally, you will need a pair of scissors to cut the yarn when needed. It is also helpful to have a tapestry needle for weaving in loose ends and a stitch marker to keep track of your rounds. These tools will simplify the knitting process and ensure that your cable hat turns out beautifully.
To summarize, for knitting a cable hat, you will need yarn, circular knitting needles, a cable needle, scissors, a tapestry needle, and a stitch marker. Gathering these materials and tools before you start the project will set you up for success and make the knitting process more enjoyable.
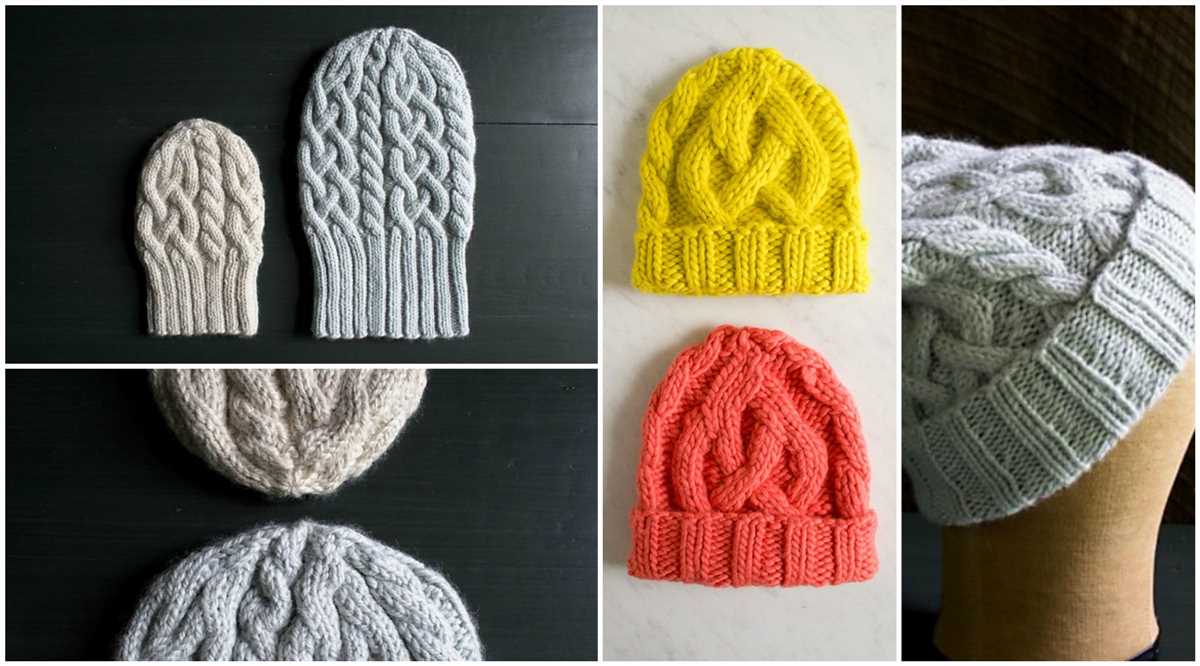
Choosing the Right Cable Pattern for Your Hat

When it comes to knitting a cable hat, choosing the right cable pattern is essential to achieve the desired look and style. Cable patterns can add texture and visual interest to your hat, making it a unique and fashionable accessory.
Consider the Complexity: Cable patterns can range from simple twists to intricate braids, and it’s important to choose a pattern that matches your skill level. If you’re a beginner, opt for a simpler cable pattern with fewer crosses and twists. As you gain more experience, you can take on more complex patterns with multiple cables and intricate designs.
Think about the Yarn: The type and weight of yarn you use for your cable hat can also influence the choice of cable pattern. Thicker yarns with more structure, such as worsted weight or bulky yarns, are great for showcasing more intricate cable patterns with bold twists and turns. On the other hand, finer yarns like fingering or sport weight can work well with simpler cable patterns, as they allow the cables to stand out more.
Consider the Hat Style: The style of hat you want to knit can also guide your choice of cable pattern. If you’re going for a cozy, slouchy hat, opt for a cable pattern with larger, more open cables. For a more fitted beanie style, choose a pattern with smaller, tighter cables. The cable pattern should complement the overall shape and structure of the hat, enhancing its style and fit.
Take Inspiration from Others: There are countless cable hat patterns available online and in knitting books, and looking at other knitters’ projects can give you inspiration for your own hat. Browse through knitting communities and pattern websites to see how different cable patterns look when knit into hats. You can also experiment with combining different cable patterns or adapting existing patterns to create a unique design that matches your personal style.
In conclusion, choosing the right cable pattern for your hat involves considering the complexity of the pattern, the type of yarn you’re using, the style of the hat, and taking inspiration from other knitters. By taking these factors into account, you can create a cable hat that is not only warm and functional but also stylish and visually appealing.
Casting On: Getting Started with the Ribbing
When starting a knitting project, one of the first steps is casting on, which creates the foundation row of stitches. For a ribbed hat pattern, the ribbing is typically worked at the brim to create stretchiness and a snug fit. The ribbing is created by alternating knitted and purled stitches, resulting in a textured pattern that is both functional and visually appealing.
To cast on for the ribbing, you will need your knitting needles and the yarn of your choice. It’s important to choose a yarn that is suitable for the project, such as a medium weight yarn that is soft and durable. You may also need stitch markers to help keep track of your stitches as you work.
The ribbing for the hat can be created using a variety of techniques, including:
- Long-Tail Cast On: This is a commonly used method that creates a neat and elastic edge. It involves using both the working yarn and a “tail” of yarn to cast on the stitches.
- Cable Cast On: This method creates a sturdy and decorative edge that is similar to a cable stitch. It involves creating a twisted loop for each stitch.
- Knitted Cast On: This is a simple method that creates a neat and even edge. It involves knitting each stitch onto the needle as you cast on.
Once you have cast on the required number of stitches for the ribbing, you can begin working the pattern. For a basic ribbing, you will alternate between knitting and purling stitches for each row. The specific pattern and stitch count may vary depending on the hat design, so be sure to refer to the instructions provided.
By mastering the art of casting on and working the ribbing, you will be on your way to creating a cozy and stylish knit cable hat. Whether you’re a beginner or an experienced knitter, the ribbing is an essential part of the process and sets the foundation for the rest of the project.
Mastering Cable Stitch Techniques: Crossing and Twisting

The cable stitch is a classic knitting technique that creates a beautiful and intricate pattern. It involves crossing stitches over each other, creating a cable-like effect. To master this technique, it’s important to understand the two main cable stitch techniques: crossing and twisting.
1. Crossing:
In the crossing technique, stitches are crossed over each other to create a cable pattern. To cross stitches, you will need a cable needle, a small double-pointed needle or a stitch holder. Start by slipping a designated number of stitches onto the cable needle and hold it in front or behind the work, depending on the pattern instructions. Then, knit the next set of stitches from the left-hand needle, and finally, knit the stitches from the cable needle. This will create the desired crossing effect.
2. Twisting:
The twisting technique involves twisting stitches without using a cable needle. This technique is often faster and more efficient than crossing, making it a popular choice for experienced knitters. To twist stitches, you will need to follow the pattern instructions carefully. For example, a right twist is created by knitting the second stitch from the left needle without dropping it, then knitting the first stitch and dropping both stitches off the left needle. Similarly, a left twist is created by knitting the second stitch from the left needle through the back loop, then knitting the first stitch and dropping both stitches off the left needle. By mastering these twisting techniques, you can create intricate cable patterns with ease.
By understanding and practicing these cable stitch techniques, you can create stunning cable patterns in your knitting projects. Whether you choose to use the crossing or twisting technique, the cable stitch adds a touch of elegance and complexity to any design.
Creating the Body of the Hat: Increasing Stitch Count
Once you have completed the brim of your cable hat, it is time to start working on the body of the hat. To create a warm and snug fit, you will need to increase the stitch count gradually.
Begin by knitting the first few rounds in the established cable pattern, making sure to follow the specific stitch sequence and cable chart. After a few rounds, you can start increasing the stitch count to give the hat more room. To do this, work a series of increase rounds where you add extra stitches evenly across the row.
One common way to increase stitches is by knitting into the front and back of a stitch (kfb). This technique creates a new stitch and increases the stitch count by one. Another method is using yarn overs (yo) to create new stitches. However, keep in mind that the chosen method of increasing should be in line with the cable pattern stitches, to maintain the integrity of the design.
Continue increasing the stitch count every few rounds until you reach the desired size for the body of your hat. Be sure to check your gauge regularly to ensure the hat will fit properly. Once you have reached the desired stitch count, you can begin working the body of the hat without any further increases.
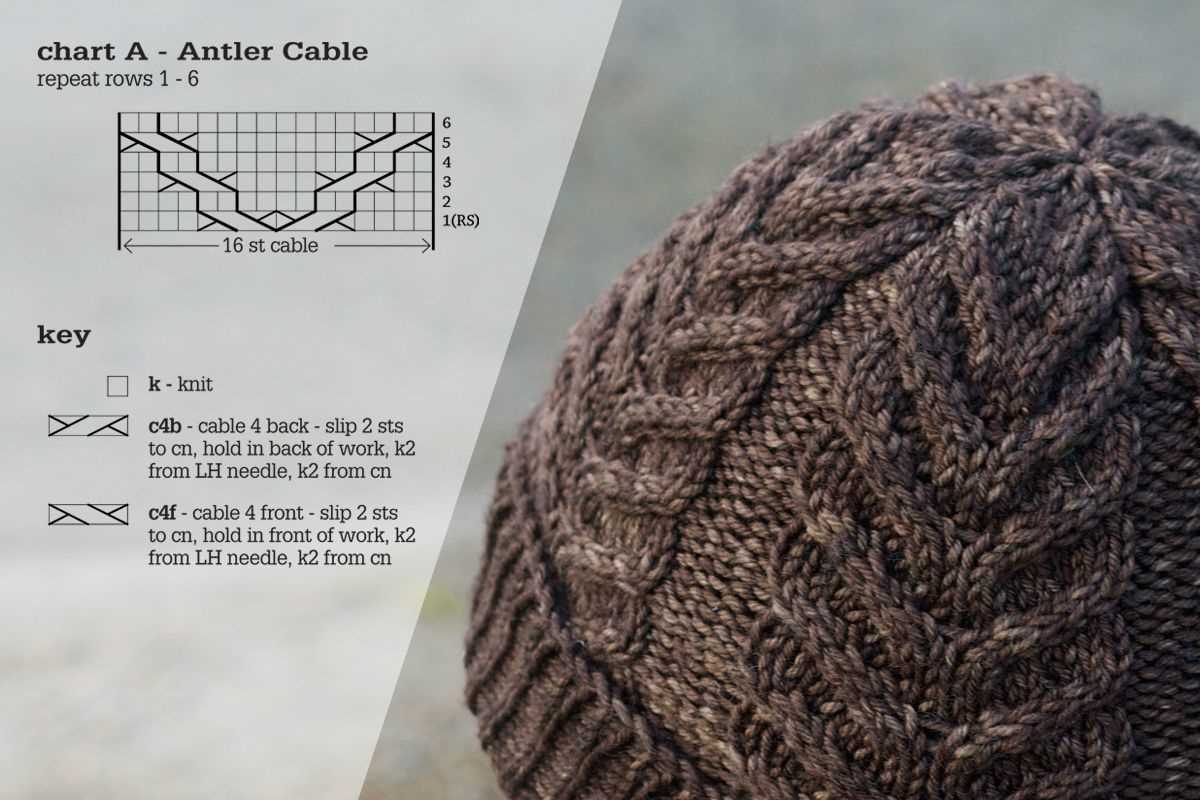
Adding the Cable Design: Chart or Written Instructions?
When it comes to adding a cable design to a knit hat pattern, you have two main options: using a chart or following written instructions. Both methods have their advantages and it ultimately comes down to personal preference and experience.
A cable chart is a visual representation of the cable design, usually with symbols or colors representing different stitches. It provides a clear and concise overview of the pattern, making it easier to follow along and keep track of where you are. This can be especially helpful for more complex cable designs with multiple crossings. Some knitters find charts to be more intuitive and prefer the visual aspect of working with them.
On the other hand, written instructions provide step-by-step guidance on how to create the cable design. They often include specific stitch counts, abbreviations, and row-by-row directions. This can be beneficial for knitters who prefer a more detailed and written approach. Written instructions can also be easier to modify or adapt, allowing for more flexibility in designing your own cable patterns.
Ultimately, the choice between using a cable chart or written instructions comes down to personal preference and comfort level. Some knitters may find charts more visually appealing and easier to follow, while others may prefer the explicitness of written instructions. It’s important to try both methods and see which one works best for you. Remember, practice makes perfect, so don’t be discouraged if it takes a few tries to get the hang of working with cables!
Shaping the Crown: Decreasing Stitch Count
The crown of a knitted hat is the topmost part that covers the head. To achieve a well-fitting and aesthetically pleasing crown, it’s important to decrease the stitch count gradually. This creates a tapered effect, allowing the hat to snugly fit the head while maintaining its shape.
Decreasing the stitch count can be done in various ways, depending on the desired outcome and the chosen pattern. One common method is to work a series of decrease rounds, where specific stitches are worked together or skipped to eliminate stitches. This can be achieved through techniques such as knit two together (k2tog), slip slip knit (ssk), or simply knitting or purling stitches together.
Knit two together (k2tog) is a simple decrease technique where two stitches are knit together as one. To work k2tog, insert the right-hand needle into the next two stitches as if to knit, then knit them together as if they were one stitch. This decreases the stitch count by one.
Slip slip knit (ssk) is another popular decrease technique. To work ssk, slip the next two stitches knitwise onto the right-hand needle, then insert the left-hand needle into the front loops of these two stitches and knit them together through the back loop. This also decreases the stitch count by one.
It’s important to follow the pattern instructions for the specific hat you’re working on to ensure the correct decrease method is used. The rate at which the stitch count is decreased will depend on the desired shape of the crown and the overall size of the hat.
By decreasing the stitch count gradually and evenly, you can create a beautifully shaped crown for your knitted cable hat. The shaping creates a more tailored fit and adds visual interest to the finished hat. Whether you’re a beginner or an experienced knitter, experimenting with different decrease techniques can result in unique and personal creations.
Finishing Touches: Binding Off and Weaving in Ends
Once you have completed knitting your cable hat, it’s time to finish off your work with binding off and weaving in the loose ends. These final steps will give your hat a polished look and ensure that your stitches are secure.
Binding Off
To bind off your hat, knit the first two stitches as usual. Then, using your left-hand needle, lift the first stitch over the second stitch and off the right-hand needle. Knit the next stitch and continue this process until you have one stitch left. Cut the yarn, leaving a long tail, and pull it through the remaining stitch to secure it. This will create a clean edge and prevent your stitches from unraveling.
Weaving in Ends
To weave in the loose ends, thread your yarn needle with the tail left from binding off. Starting from the inside of the hat, insert the needle through several stitches, following the path of the yarn. Make sure to weave in the end in different directions to secure it. Repeat this process with any other loose ends, such as those from joining a new ball of yarn or changing colors.
After weaving in the ends, trim the excess yarn close to the fabric, being careful not to cut any stitches. This will give your hat a neater appearance and prevent any yarn from coming undone. Once all ends are woven in and trimmed, your cable hat is ready to be worn or given as a gift!
Customizing Your Cable Hat: Adding Pom-Poms, Ribbons, or Buttons

Once you have completed knitting your cable hat, you may want to add some additional embellishments to make it unique and personalized. There are several ways you can customize your cable hat, such as adding pom-poms, ribbons, or buttons.
Pom-Poms: Adding a pom-pom to the top of your cable hat can give it a playful and fun look. You can make pom-poms using yarn in a contrasting color to your hat or choose a pom-pom made from faux fur for a cozy and luxurious feel. Simply attach the pom-pom securely to the top of your hat using a needle and thread.
Ribbons: Adding a ribbon to your cable hat can add a touch of elegance. You can choose a ribbon in a color that complements your hat and tie it around the base of the hat, just above the brim. You can leave the ends of the ribbon long and flowing for a more feminine look or tie them into a neat bow for a more polished appearance.
Buttons: Adding buttons to your cable hat can give it a stylish and functional touch. You can choose buttons in a coordinating color or opt for buttons with unique designs or textures. Sew the buttons securely onto the brim of your hat or along the sides for added visual interest.
By customizing your cable hat with pom-poms, ribbons, or buttons, you can add your own personal touch and make your hat truly one-of-a-kind. Don’t be afraid to get creative and experiment with different combinations to find the perfect embellishments for your cable hat.
Tips and Tricks for a Professional-looking Finish

When knitting a cable hat, achieving a professional-looking finish can make a big difference in the overall appearance of your project. Here are some tips and tricks to help you achieve that polished, high-quality look:
1. Blocking your hat
Blocking is a crucial step in achieving a professional finish for your knitted hat. It helps to even out stitches, open up cables, and give your hat its final shape. To block your hat, wet it thoroughly, gently squeeze out excess water, and then shape it using blocking mats or towels. Pin the edges to hold the shape and let it dry completely before removing the pins.
2. Seaming and finishing
When seaming your hat, use a method that creates an invisible join, such as the mattress stitch. This will give your hat a clean and seamless appearance. Additionally, be sure to weave in any loose ends neatly to prevent them from showing through the finished hat. This attention to detail will contribute to the overall professional look of your project.
3. Paying attention to tension
Consistent tension throughout your knitting is essential for a professional finish. Uneven tension can result in lumpy or distorted stitches, making your hat look less polished. Take your time and try to maintain consistent tension as you work each stitch. If you find that your tension is inconsistent, consider using a different needle size to achieve the desired gauge.
4. Choosing quality yarn
The quality of the yarn you use can greatly impact the finished look of your hat. Opt for high-quality yarn that has good stitch definition and durability. Look for yarn that is specifically designed for cables to ensure that the cables stand out and retain their shape. Investing in good yarn will contribute to the overall professional appearance of your finished hat.
5. Blocking your cables
To make your cables really pop and look neat, consider blocking them separately before attaching them to the hat. This will help ensure that the cables lie flat and show off their intricate details. To block cables, wet them, pin them into shape, and let them dry completely before attaching them to the hat.
6. Paying attention to finishing details
Lastly, pay attention to the finishing details that can elevate the overall look of your hat. Adding a decorative edge, such as a picot or ribbed cuff, can give your hat a polished and professional finish. Additionally, consider adding a pom-pom or a tasteful embellishment to complete the look. These small details can make a big difference in the overall appearance of your cable hat.
Staying Inspired: Exploring Variations and Advanced Cable Patterns
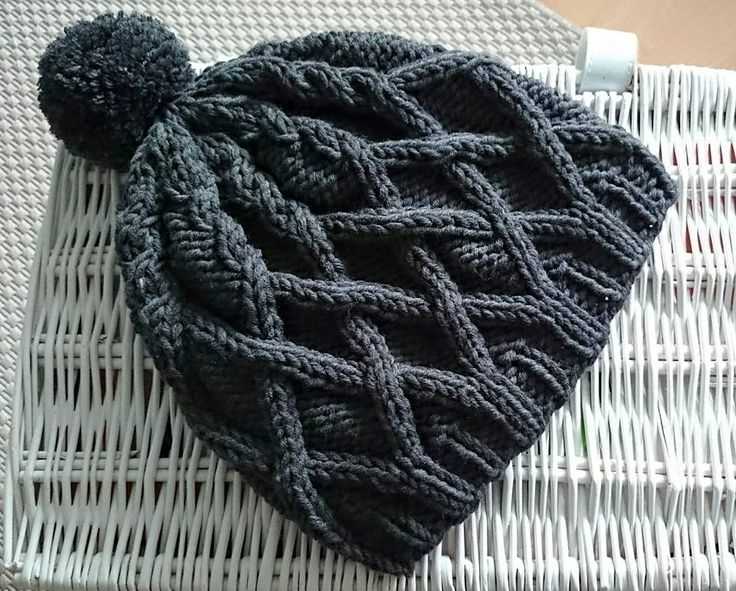
The world of cable knitting is endlessly fascinating, with countless possibilities for exploring different variations and advanced techniques. Once you have mastered the basic cable hat pattern, you can start to experiment with different stitch patterns, cable sizes, and even incorporate other knitting techniques to create unique and personalized designs.
One way to explore variations is by changing the cable pattern itself. You can try different combinations of twists and turns, or experiment with more complex cable stitches such as traveling or stacked cables. These advanced cable patterns can add dimension and intricacy to your hats, making them stand out even more.
Traveling cables are cable stitches that move across the fabric, creating a sense of movement. They can be used to create dynamic patterns that flow seamlessly from one section of the hat to another. By incorporating traveling cables into your designs, you can add an extra level of visual interest and challenge yourself with more intricate knitting techniques.
Stacked cables are another advanced cable pattern that can take your hat knitting to the next level. Instead of having cables separated by columns of knit stitches, stacked cables create a continuous column of cables. This creates a more dense and complex cable pattern that can be visually stunning.
If you’re feeling adventurous, you can also combine cable knitting with other techniques such as lace knitting or colorwork. By incorporating lace stitches into your cable patterns, you can create a delicate and airy effect. Alternatively, you can experiment with different colors of yarn to create bold and eye-catching designs.
In conclusion, learning how to knit cable hats opens up a world of possibilities for exploring variations and advanced cable patterns. Whether you choose to experiment with different cable stitches, incorporate traveling or stacked cables, or combine cable knitting with other techniques, the key is to stay inspired and keep pushing your knitting skills to the next level. So grab your needles, choose your favorite cable pattern, and let your creativity soar!