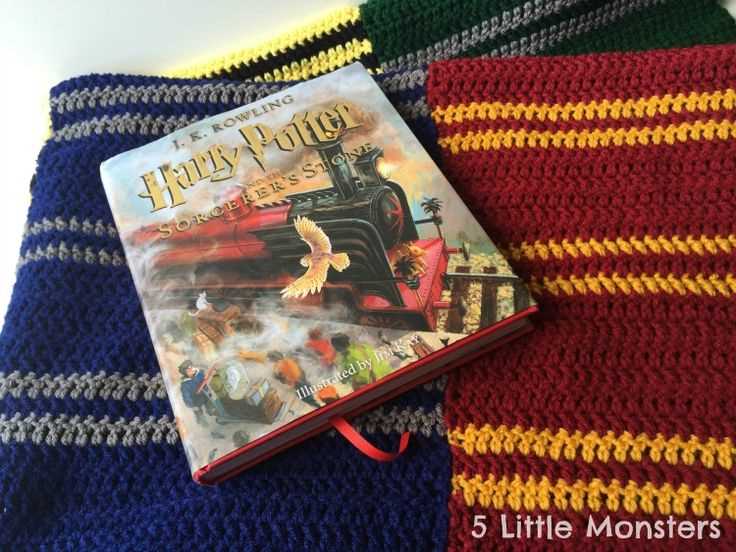
Knit your own Hogwarts house scarf with this pattern

If you’ve ever dreamt of attending Hogwarts School of Witchcraft and Wizardry, then knitting your very own Hogwarts house scarf is a must. These iconic scarves represent the four houses of Hogwarts – Gryffindor, Hufflepuff, Ravenclaw, and Slytherin – and are instantly recognizable to any Harry Potter fan. Whether you’re a seasoned knitter or a beginner looking for a fun and challenging project, this knitting pattern will guide you through the process of creating your very own house scarf.
Knitting your own Hogwarts house scarf is not only a fun and creative way to show off your love for Harry Potter, but it also allows you to customize your scarf to fit your style. The pattern provides instructions for the classic striped design, but you can easily modify the colors or even add your own unique embellishments to make it truly one-of-a-kind. Plus, knitting your own scarf gives you the satisfaction of wearing something you made with your own two hands.
Whether you’re a Gryffindor lion-hearted and brave, a Hufflepuff loyal and hardworking, a Ravenclaw wise and intelligent, or a Slytherin ambitious and cunning, knitting your own Hogwarts house scarf is a way to proudly show off your house pride. Wear it to Harry Potter-themed events, cosplay conventions, or simply as a cozy accessory on chilly days. Knitting your own scarf allows you to embrace your love for the Harry Potter universe and display your house affiliation with pride.
Hogwarts House Scarf Knitting Pattern
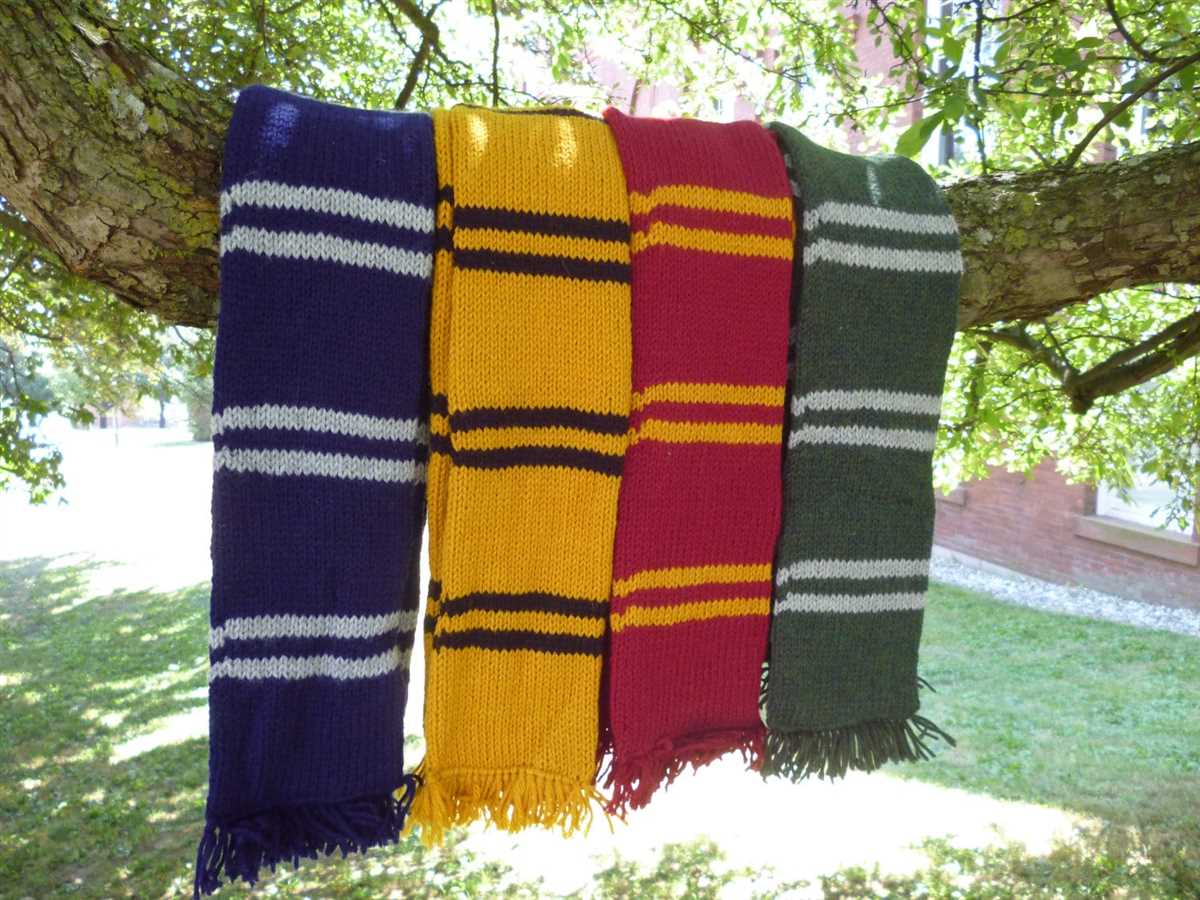
If you’re a fan of the Harry Potter books and films, you’re probably familiar with the iconic scarves worn by the students of Hogwarts. Each house has its own distinctive colors, making it easy to show off your house pride. Whether you belong to Gryffindor, Hufflepuff, Ravenclaw, or Slytherin, you can create your own Hogwarts house scarf with this knitting pattern.
Materials Needed:
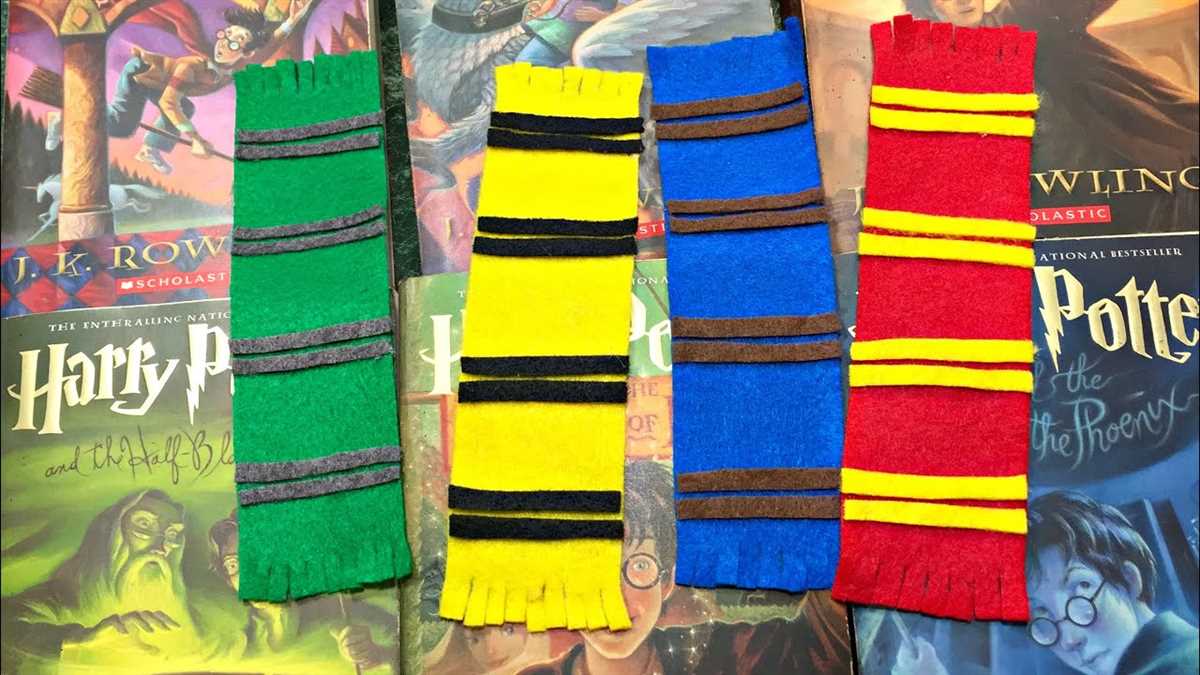
- Worsted weight yarn in your house colors: red and gold for Gryffindor, yellow and black for Hufflepuff, blue and silver for Ravenclaw, and green and silver for Slytherin
- Size 7 knitting needles
- Tapestry needle
Instructions:
- Cast on 60 stitches in your main house color.
- Row 1-4: Knit all stitches.
- Row 5: Knit 4 stitches in your main house color, switch to your accent house color and knit 4 stitches, repeat until the end of the row.
- Row 6: Purl all stitches in your main house color.
- Repeat rows 5 and 6 until your scarf reaches your desired length.
- Knit 4 rows in your main house color.
- Bind off all stitches.
Finishing:
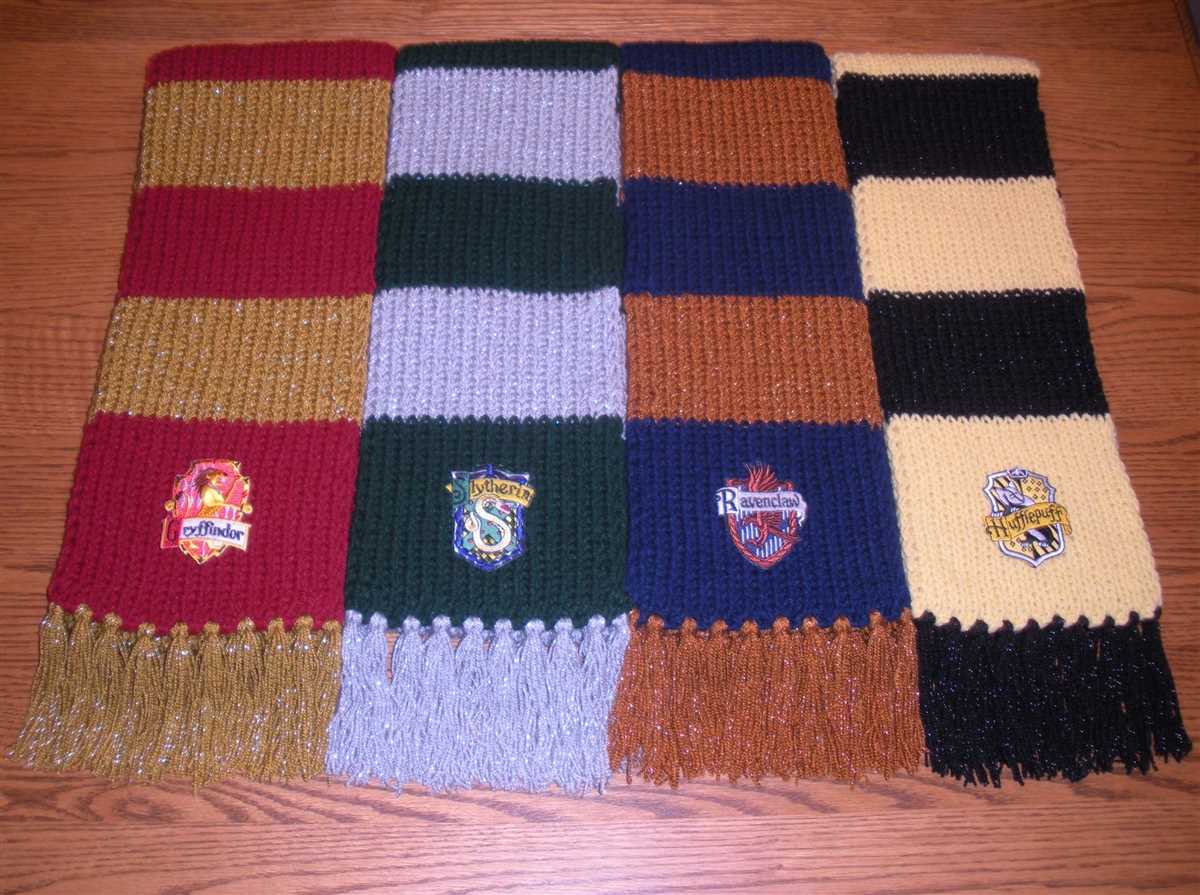
Weave in any loose ends with a tapestry needle. To add extra flair, you can also embroider your house crest onto one end of the scarf. Wear your Hogwarts house scarf with pride and show off your love for the wizarding world!
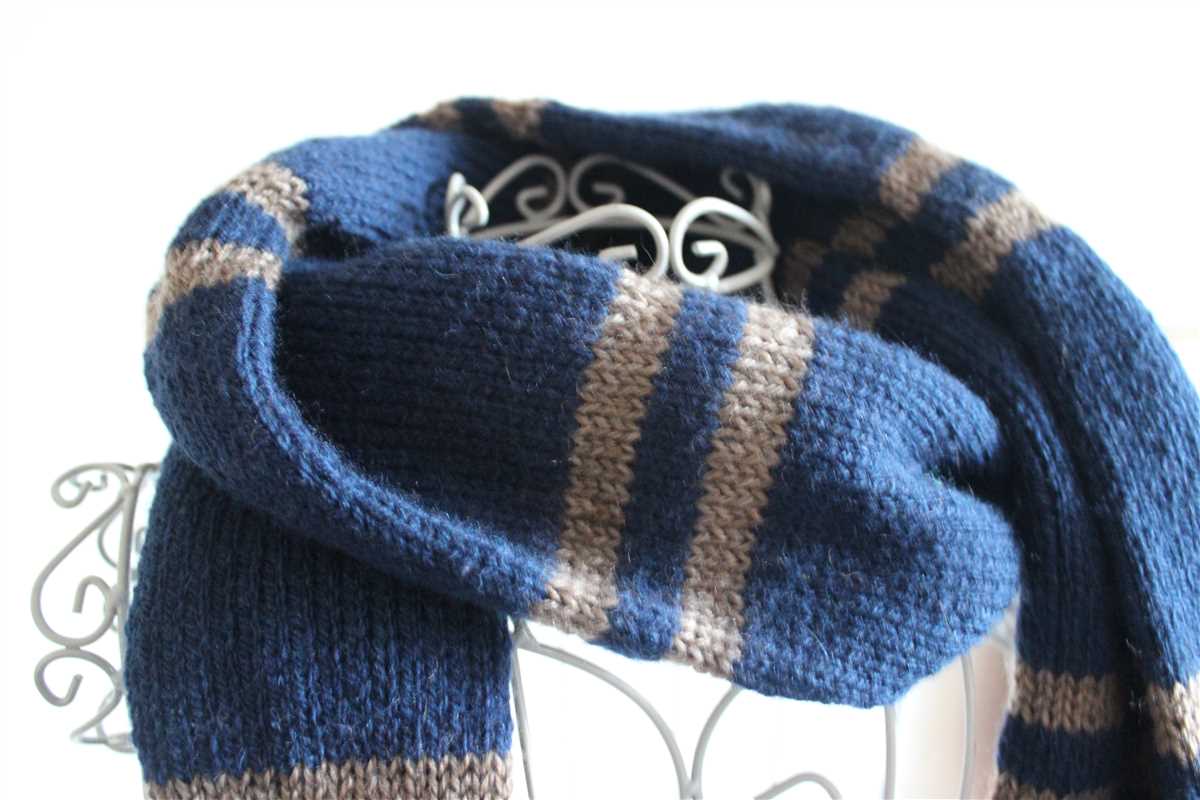
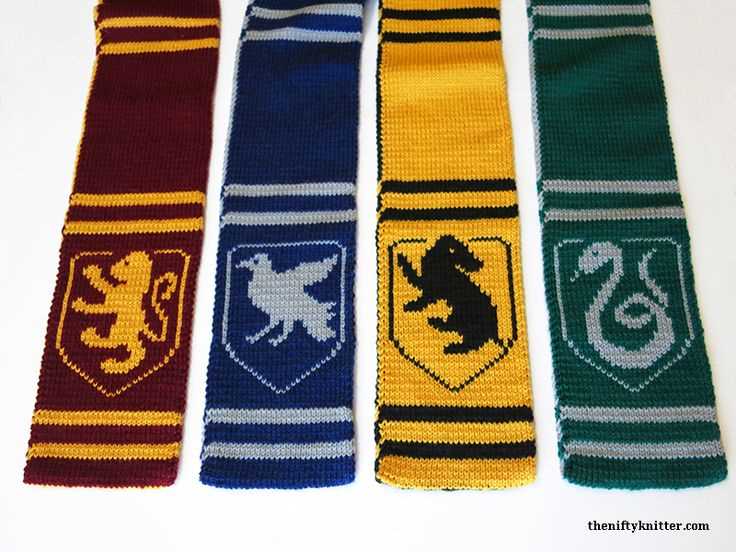
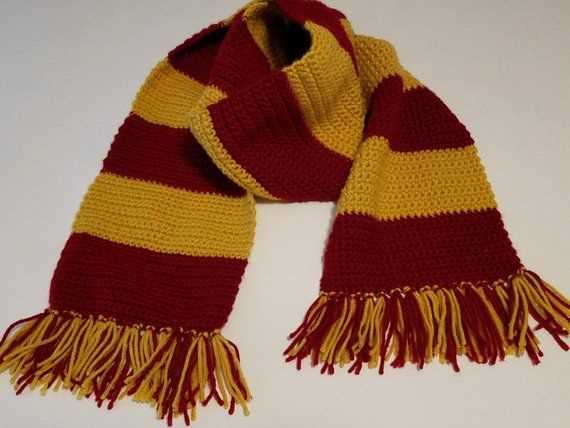
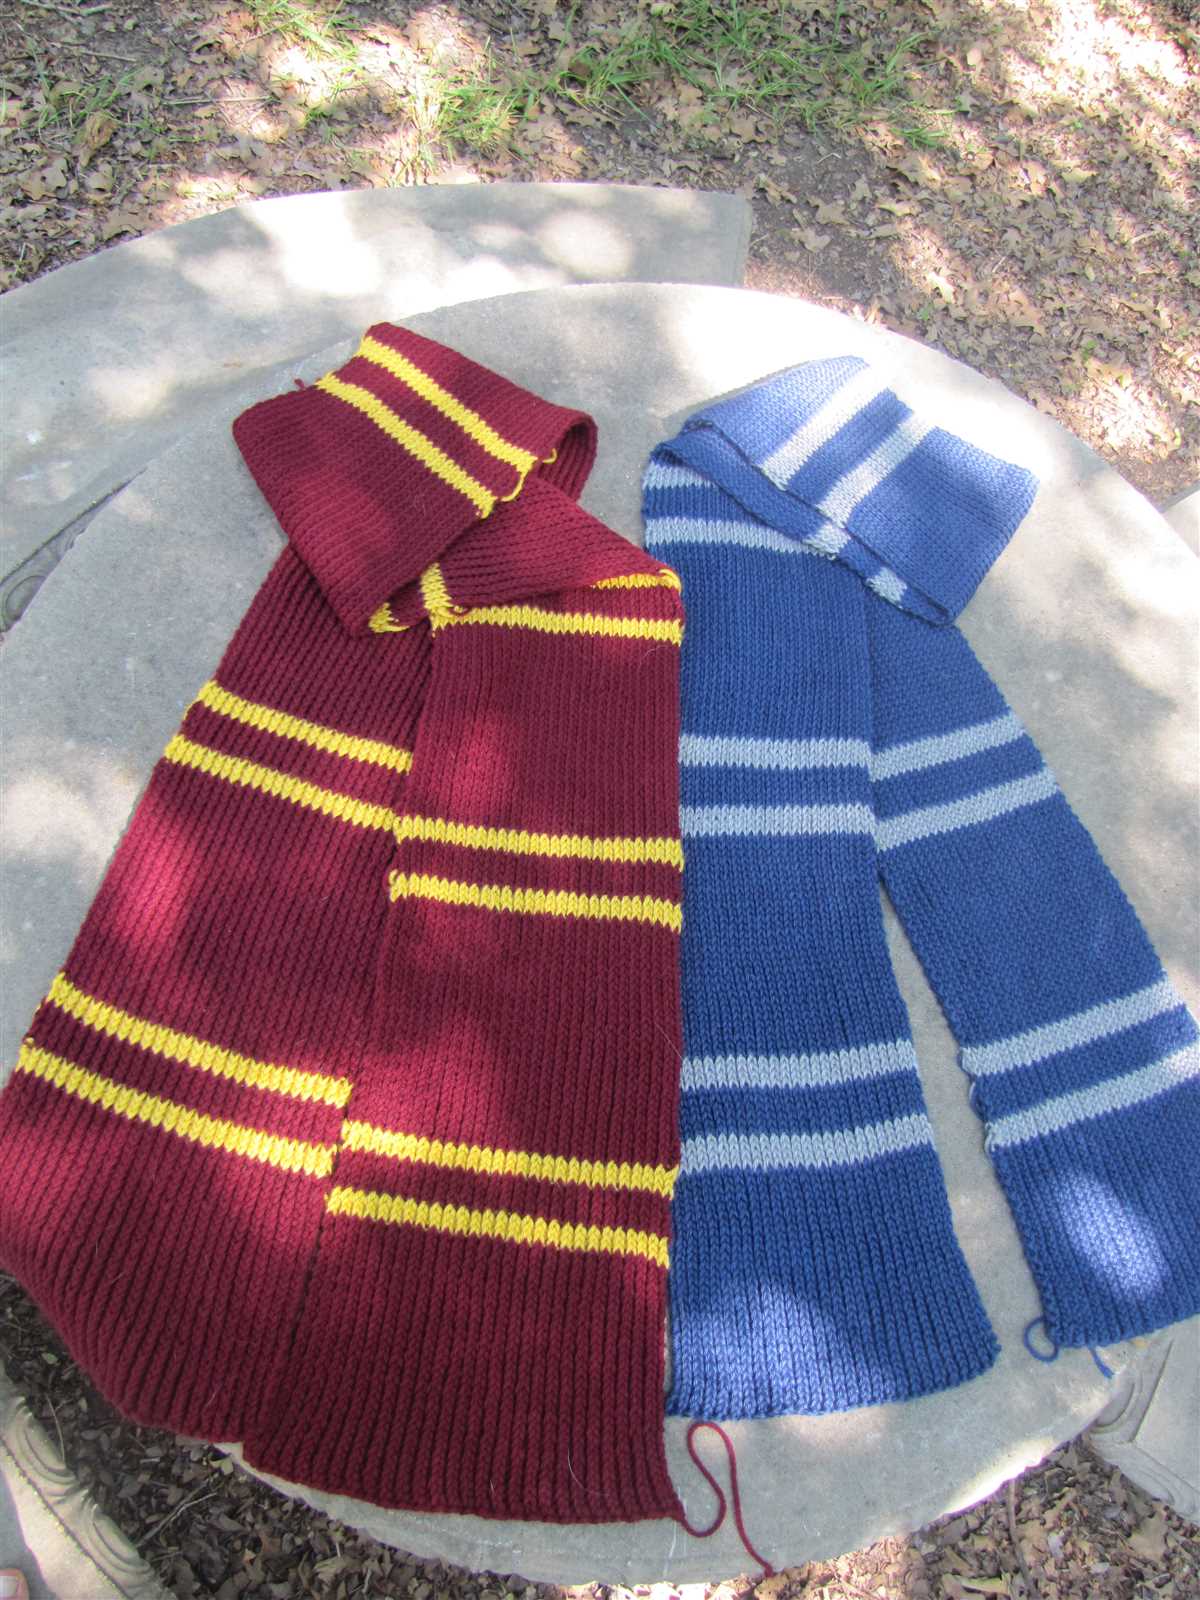
Gryffindor Scarf
The Gryffindor scarf is a symbol of bravery, courage, and determination. This iconic accessory is worn by the students of Gryffindor House at Hogwarts School of Witchcraft and Wizardry. Knitted with the colors of scarlet and gold, the Gryffindor scarf is a must-have for any aspiring Gryffindor.
Design

The Gryffindor scarf features alternating stripes of scarlet and gold, representing the house colors. The scarf is typically long and wide, allowing for multiple wraps around the neck, providing warmth and style. The scarf also includes the Gryffindor House crest at one end, showcasing the lion, the symbol of Gryffindor, along with the house name.
Known for their bravery and courage, Gryffindor students proudly wear their scarves as a symbol of their house allegiance. The scarf is not only a fashion accessory but also a way to identify Gryffindor students and show their pride. It is often worn during Quidditch matches and other house-related events.
Knitting Pattern
To create your own Gryffindor scarf, you can use a specific knitting pattern that captures the essence of the original design. The pattern typically involves using two colors of yarn, scarlet and gold, and knitting in a simple garter or stockinette stitch to create the alternating stripes.
There are many variations of the Gryffindor scarf knitting pattern available, allowing you to choose the one that best suits your knitting skills and preferences. Whether you prefer a shorter or longer scarf, a thicker or thinner design, there is a pattern out there for you to create your very own Gryffindor scarf.
- Materials needed:
- Red and gold yarn
- Knitting needles
- Tapestry needle
- Scissors
Once you have gathered all the necessary materials, follow the instructions in the chosen knitting pattern to knit your Gryffindor scarf. Take your time, enjoy the process, and soon you will have a scarf that represents the bravery and spirit of Gryffindor.
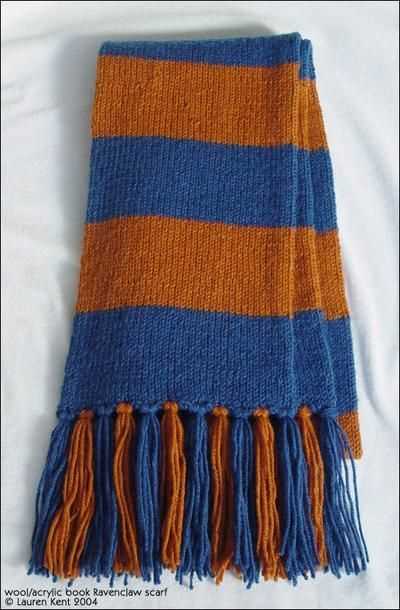
Ravenclaw Scarf
The Ravenclaw house scarf is a must-have accessory for any Harry Potter fan who identifies with the traits of this house: intelligence, creativity, and wit. Knitting your own Ravenclaw scarf allows you to show off your love for the magical world while staying warm and stylish.
This knitting pattern follows the traditional colors of Ravenclaw: blue and silver. The scarf is knit in a simple rib stitch, making it a beginner-friendly project for those who are new to knitting. The end result is a beautiful, cozy scarf that you can proudly wear to showcase your Ravenclaw pride.
Materials:
- Size 8 US (5mm) knitting needles
- Worsted weight yarn in two colors: blue and silver
- Tapestry needle for weaving in ends
Instructions:
- Using the blue yarn, cast on 60 stitches.
- Row 1: *K2, P2, repeat from * to end of row.
- Row 2: Repeat Row 1.
- Continue repeating Row 1 and Row 2 until the scarf measures your desired length.
- Switch to the silver yarn.
- Repeat Row 1 and Row 2 in the silver yarn for the same length as the blue section.
- Bind off all stitches.
- Weave in any loose ends.
Once your Ravenclaw scarf is complete, you can proudly wear it to Hogwarts-themed parties, movie marathons, or simply as a cozy accessory during the colder months. The blue and silver colors are a subtle nod to Ravenclaw, allowing you to show off your house pride while maintaining a fashionable look.
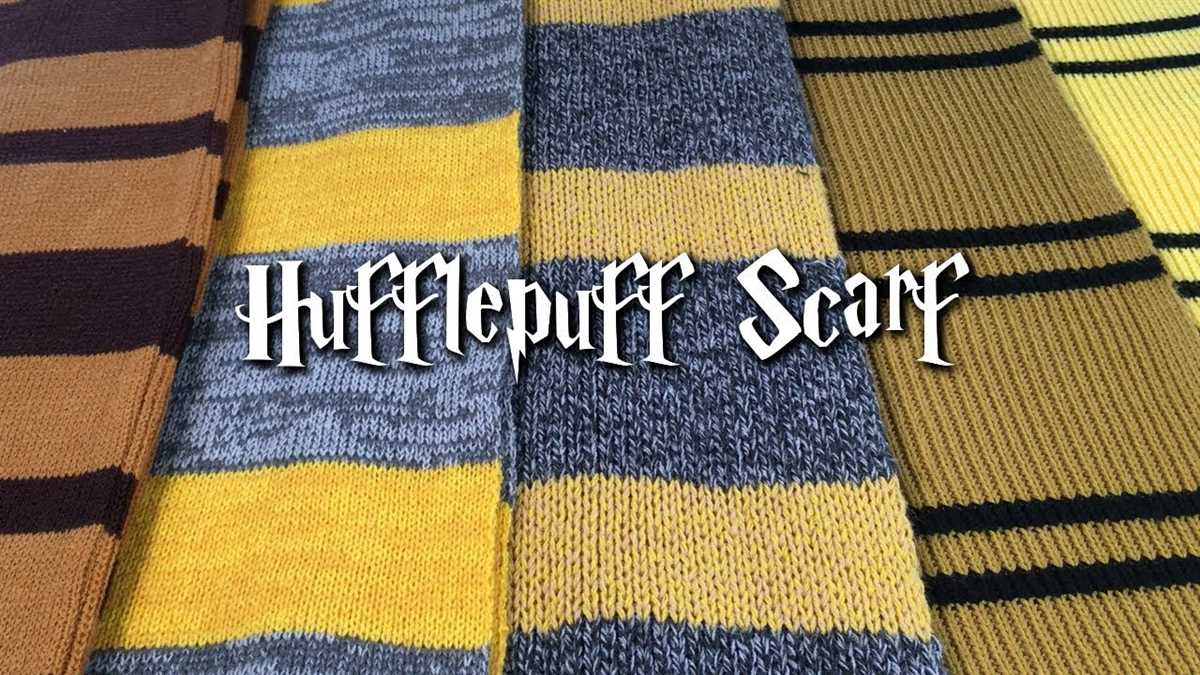
Hufflepuff Scarf
Hufflepuff is one of the four Houses at Hogwarts School of Witchcraft and Wizardry, and their house colors are yellow and black. The Hufflepuff Scarf is a classic striped scarf that represents the pride and loyalty of the Hufflepuff House.
The Hufflepuff Scarf is made using the traditional knitting technique. It features alternating stripes of yellow and black, with the Hufflepuff House crest embroidered at one end. The scarf is long enough to be wrapped around the neck multiple times, keeping the wearer warm and cozy during the chilly winter months.
To create your own Hufflepuff Scarf, you will need yellow and black yarn in the appropriate colors. The scarf can be knitted using any type of stitch pattern, such as garter stitch or ribbing, as long as the alternating stripes of yellow and black are maintained. You can also add fringes or tassels at the ends of the scarf for an extra touch of style.
The Hufflepuff Scarf is not only a fashionable accessory for fans of the Hufflepuff House, but also a symbol of their values. Hufflepuffs are known for their dedication, hard work, and loyalty, and the scarf represents these qualities. Wearing the Hufflepuff Scarf is a way to show your pride in being part of this house and to connect with fellow Hufflepuffs.
Slytherin Scarf
The Slytherin scarf is an essential accessory for any aspiring member of the cunning Hogwarts house. Made with the signature colors of green and silver, this scarf is not only stylish but also represents the ambitious and resourceful qualities of Slytherin students.
Crafted using a knitting pattern, the Slytherin scarf is a fun and rewarding project for Harry Potter fans. The pattern typically includes instructions for creating the iconic striping pattern, as well as the house crest. Knitters can choose from different techniques, such as intarsia or fair isle, to create the desired design.
To start knitting the Slytherin scarf, first gather the necessary materials, including green and silver yarn, knitting needles, and a Slytherin house crest patch. Then, follow the pattern instructions to cast on the desired number of stitches and begin knitting the scarf in the specified color sequence. Don’t forget to incorporate the house crest patch into the design, adding an extra touch of Slytherin pride.
Whether you’re knitting the Slytherin scarf as a fan of the Harry Potter series or as a gift for a fellow Slytherin, this accessory is sure to be a hit. Wear it with pride as you embrace the cunning and ambitious spirit of the Slytherin house.
Choosing the Right Yarn
When it comes to knitting a Hogwarts house scarf, choosing the right yarn is crucial. The scarf should not only be warm and comfortable to wear but also reflect the colors and qualities of the respective Hogwarts house. Here are some considerations to keep in mind when selecting your yarn.
Color
The most important aspect of the yarn selection is getting the right colors for the house scarf. Each Hogwarts house has a distinct color combination that represents its identity. For example, Gryffindor is known for its red and gold colors, while Slytherin is associated with green and silver. Make sure to choose yarn colors that closely match the house you are knitting for. This will ensure that the scarf looks authentic and represents the house accurately.
Fiber
The fiber content of the yarn will determine the softness, warmth, and durability of the finished scarf. Some common fiber options for scarves include wool, acrylic, and blends. Wool is a popular choice as it is warm and has natural insulating properties. Acrylic, on the other hand, is often chosen for its affordability and ease of care. Blends of different fibers can provide a combination of qualities from each type. Consider the climate and the preferences of the recipient when selecting the fiber for the scarf.
Weight
The weight of the yarn will determine the thickness and drape of the scarf. Bulky or chunky yarn will create a thicker and warmer scarf, while fingering or lace-weight yarn will result in a lighter and more delicate scarf. Consider the desired look and functionality of the scarf when choosing the weight of the yarn. You may also need to adjust your knitting needles’ size to accommodate the chosen yarn weight.
Yardage
Make sure to estimate the required yardage of the yarn before making a purchase. The length of the scarf will depend on personal preference, but it is generally recommended to have at least 400-500 yards to ensure it is long enough. If you are using multiple colors for stripes, make sure to calculate the total yardage needed for each color. This will help avoid running out of yarn in the middle of the project and ensure consistency in color throughout the scarf.
Selecting the Appropriate Needles
When it comes to knitting a Hogwarts house scarf, choosing the right needles is crucial for achieving the desired result. The right needle size will determine the gauge and the overall appearance of the scarf.
Needle Size: The recommended needle size for knitting a Hogwarts house scarf is usually a US size 8 (5mm) needle. This size is often preferred because it allows for a medium tension, resulting in a scarf that is not too loose or too tight. However, if you prefer a denser or looser fabric, you can experiment with smaller or larger needle sizes respectively.
Circular Needles:

Using circular needles for knitting a Hogwarts house scarf is a popular choice among knitters, as it allows for easier handling and prevents the weight of the scarf from straining the wrists. A 24-inch circular needle is typically recommended for this project, as it provides enough length to accommodate a large number of stitches without crowding the needle.
Note: If you choose to use circular needles, you will need to knit the scarf in a flat panel, working back and forth rather than in the round. This involves knitting one row and purling the next, alternating between knit and purl stitches to create the desired pattern.
Straight Needles:
Straight needles can also be used for knitting a Hogwarts house scarf, especially if you are more comfortable using them or if you prefer the traditional knitting method. When using straight needles, it is recommended to use a pair of 10-inch needles to accommodate the width of the scarf.
Note: If you choose to use straight needles, keep in mind that you will need to bind off the stitches once the knitting is complete and seam the two ends of the scarf together to create a loop.
Ultimately, the choice of needle size and type will depend on your personal preference and knitting style. Experimenting with different needle sizes and types can help you achieve the perfect gauge and create a Hogwarts house scarf that is both visually appealing and comfortable to wear.
Casting On
Before you can start knitting your Hogwarts house scarf, you need to cast on. Casting on is the process of creating the first row of stitches on your knitting needle. There are different methods of casting on, but for this pattern, we will be using the long tail cast on method.
Long Tail Cast On
To begin the long tail cast on, you will first need to estimate the length of yarn you will need. Generally, you will need about three times the width of your finished scarf. Make a slipknot at the end of your yarn, leaving a long tail.
Hold the slipknot in your left hand and the needle in your right hand. Insert the needle into the slipknot from left to right, with the tail end of the yarn hanging down behind the needle. Spread your thumb and index finger to create a “V” shape with the yarn.
With your right hand, bring the needle under the yarn and then over the top, catching the yarn with the needle. Bring the needle back under the yarn and pull it through the slipknot, creating a new stitch on the needle. Repeat this process until you have cast on the desired number of stitches for your scarf.
Once you have completed the long tail cast on, you are ready to start knitting the first row of your Hogwarts house scarf. Remember to keep the tension of your stitches even and to follow the knitting pattern carefully to create the iconic stripes of your chosen house.
Knitting the Main Body
In order to knit the main body of the Hogwarts house scarf, you will need to follow a specific pattern based on the colors and design of the desired house. The main body of the scarf is typically knit using a combination of two colors, alternating between them to create the characteristic stripe pattern.
Begin by casting on the desired number of stitches onto your knitting needles. The exact number will depend on your gauge and the desired width of the finished scarf. Typically, a Hogwarts house scarf is around 6-8 inches wide. Once you have casted on the stitches, you can start knitting.
Row 1: Using the main color yarn, knit across all stitches.
Row 2: Switch to the contrasting color yarn and purl across all stitches.
Rows 3-4: Repeat rows 1-2, alternating between the main color and contrasting color yarn.
Continue to repeat these rows, alternating between the main color and contrasting color yarn, until the main body of the scarf reaches the desired length. This can vary depending on personal preference, but a typical length for a Hogwarts house scarf is around 60-70 inches.
Once you have reached the desired length, you can then move on to knitting the ribbed edge and adding any additional details, such as fringe or patches, to complete your Hogwarts house scarf.
Adding Stripes and Fringes
Once you have completed knitting the base color of your Hogwarts house scarf, you can add stripes to represent the secondary house colors. To do this, simply choose a different color yarn and knit a few rows in that color. You can repeat this process as many times as desired, alternating between the base color and the secondary color to create the striped pattern.
Adding fringes to your Hogwarts house scarf can give it a fun and finishing touch. To do this, you will need to cut strands of yarn that are approximately twice the desired length of the fringes. Fold each strand in half and use a crochet hook or your knitting needles to pull the looped end through the edge of the scarf. Then, pull the loose ends of the yarn through the loop and tighten to secure the fringe. Repeat this process along the edge of the scarf, spacing the fringes evenly apart.
Tips for Adding Stripes and Fringes:
- Make sure to leave a long enough tail of yarn when changing colors, so you can weave in the loose ends later.
- When knitting the striped pattern, carry the unused yarn up the side of the scarf to avoid having to weave in multiple loose ends.
- For the fringes, you can vary the length and thickness of the strands to create different looks.
- If you prefer a cleaner edge, you can also add a border of single crochet or slip stitch around the scarf before adding the fringes.
Finishing and Blocking
Once you have finished knitting your Hogwarts house scarf, it’s important to give it a finishing touch and block it to ensure that it maintains its shape and looks even more polished. Follow these steps to complete your scarf:
1. Weaving in ends
Start by weaving in all the loose ends of yarn that are hanging from your scarf. Use a tapestry needle to thread the yarn through the stitches on the back of your work, making sure to secure the ends tightly. Trim any excess yarn once they are secured.
2. Blocking the scarf
Blocking is a process that helps even out the stitches, relax the fibers, and shape the scarf. To block your Hogwarts house scarf, follow these steps:
- Fill a basin or sink with lukewarm water.
- Submerge your scarf in the water and let it soak for about 5-10 minutes.
- Gently squeeze out the excess water from the scarf. Do not wring or twist it.
- Place a clean towel on a flat surface and lay the scarf on top of it.
- Gently roll up the towel with the scarf inside to remove additional moisture.
- Unroll the towel and lay the scarf flat on a dry surface, shaping it into the desired dimensions.
- Use rust-proof T-pins to secure the edges of the scarf in place.
- Leave the scarf to air dry completely, preferably in a well-ventilated area.
3. Final touch-ups
Once the scarf is completely dry, remove the T-pins and give it a final inspection. Check for any loose stitches or areas that might need minor repairs. Use a crochet hook or a tapestry needle to fix any imperfections.
After completing these steps, your Hogwarts house scarf will be ready to wear or gift to a fellow Harry Potter fan. Enjoy showing off your house pride with this cozy and beautifully finished accessory!