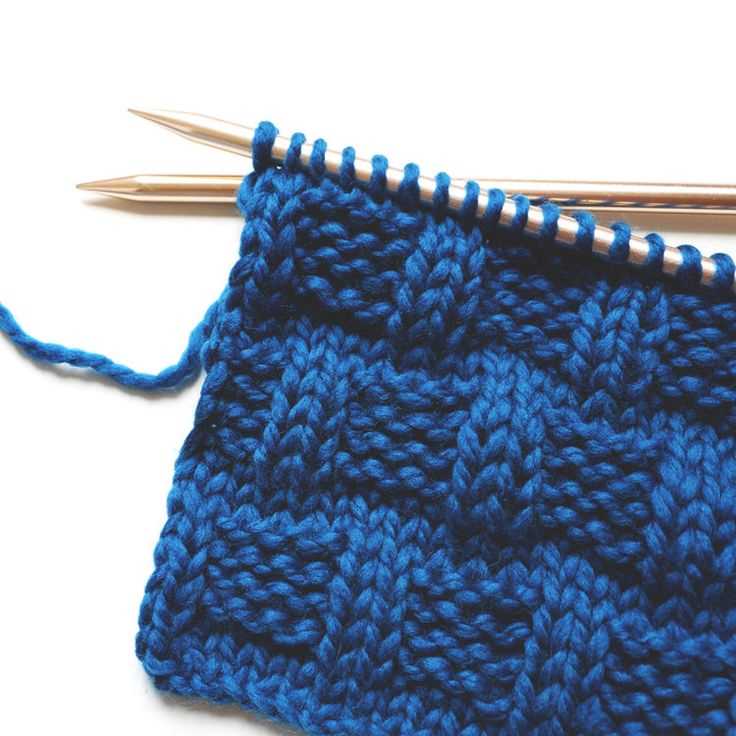
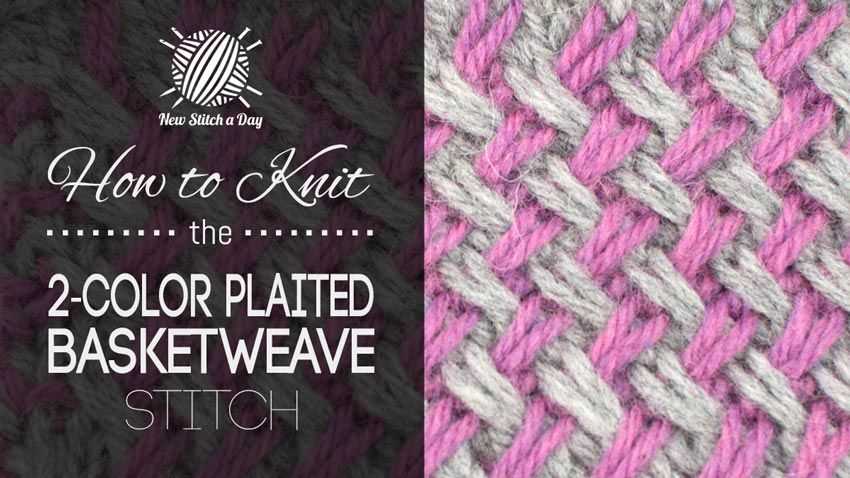
An Intricate and Unique Stitch: The Basketweave Knitting Pattern

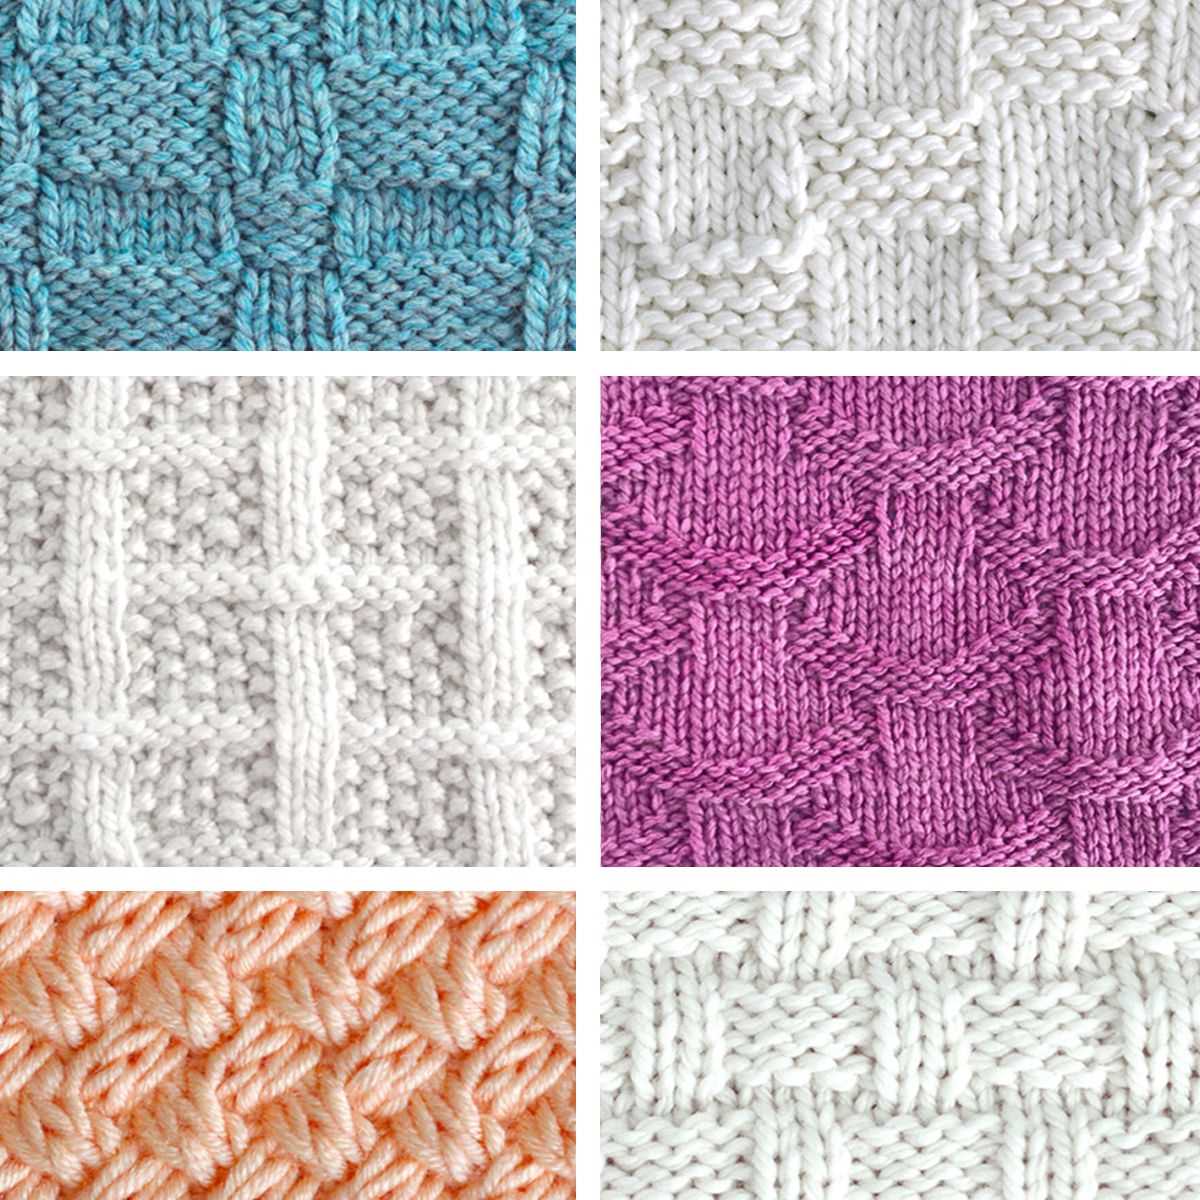
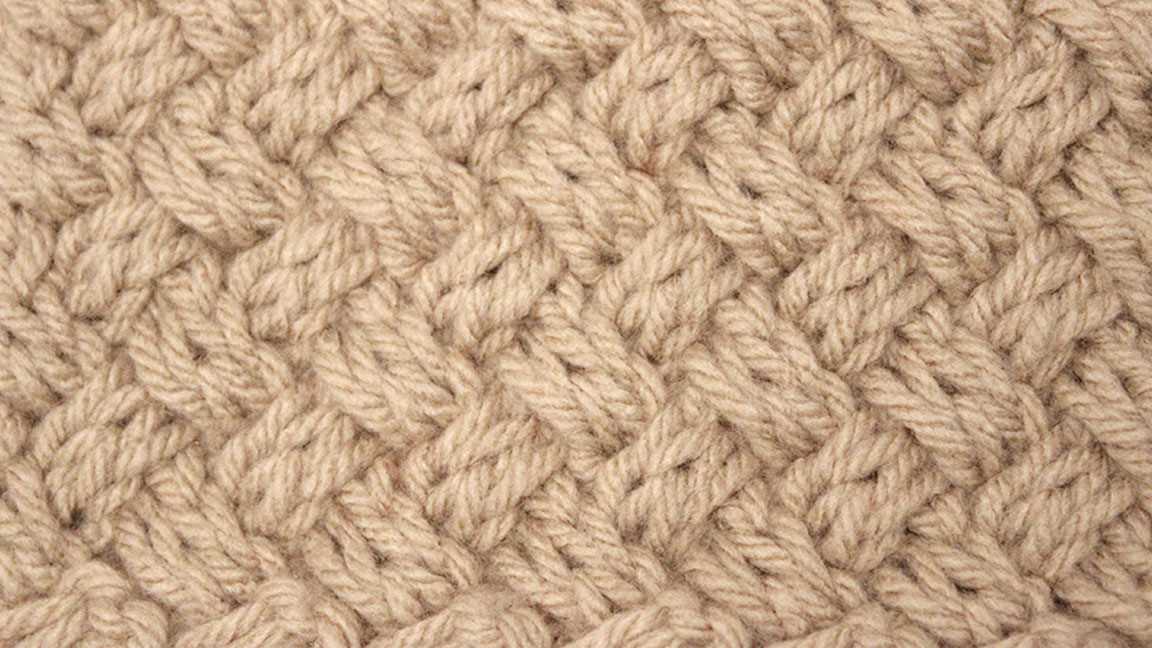
The basketweave stitch is a popular knitting pattern that creates a textured, woven appearance. It gets its name from the resemblance to a woven basket. This stitch pattern is versatile and can be used to create a variety of beautiful and intricate designs.
The basketweave stitch is created by alternating blocks of knits and purls to form a pattern that resembles a woven basket. The blocks can be arranged in different sizes and configurations to create different effects. This stitch pattern is great for adding visual interest and texture to your knitting projects.
Not only does the basketweave stitch look stunning, but it is also a relatively simple pattern to knit. If you are a beginner knitter looking to expand your skills, this stitch pattern is a great place to start. With just a few basic knitting techniques, you can create a beautiful basketweave design.
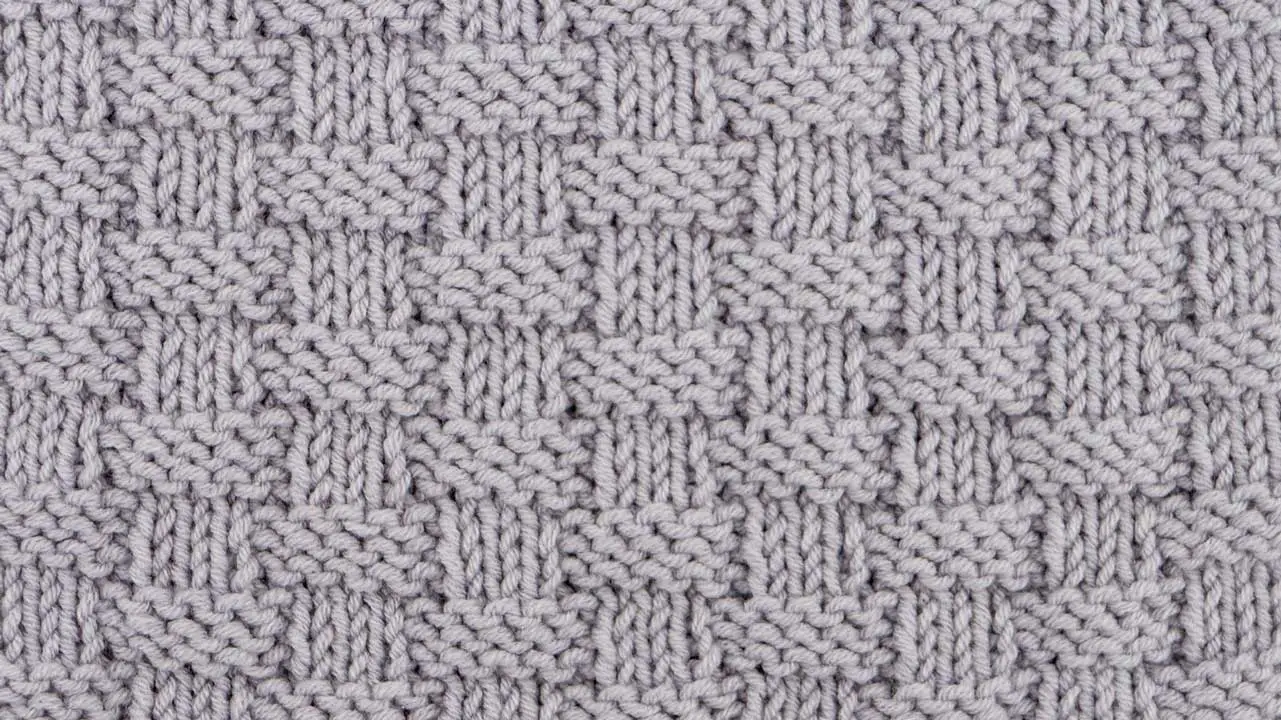
Basketweave Stitch Knitting Pattern

The basketweave stitch knitting pattern is a popular and versatile stitch that can be used to create a variety of textured patterns. It gets its name from the woven appearance it creates, which resembles a basketweave. This stitch pattern is perfect for adding depth and interest to any knitting project.
To create the basketweave stitch, you will need to alternate between knitting and purling certain sections of stitches. This creates a checkerboard effect that gives the stitch pattern its unique look. The pattern is typically worked over a multiple of four stitches and four rows, making it easy to customize to fit any project size.
How to knit the basketweave stitch:
- Row 1: Knit all stitches.
- Row 2: Knit the first two stitches, then purl the next two stitches. Repeat this pattern across the entire row.
- Row 3: Knit all stitches.
- Row 4: Purl the first two stitches, then knit the next two stitches. Repeat this pattern across the entire row.
- Repeat these four rows until you have reached the desired length of your project.
You can experiment with different variations of the basketweave stitch by changing the number of stitches and rows in each section. For example, you can create a larger checkerboard effect by working over a multiple of eight stitches and eight rows. You can also add additional rows of knitting or purling between the woven sections to create a more intricate design.
The basketweave stitch is commonly used for knitting blankets, scarves, and pillows, but it can be adapted to a wide range of projects. It works well with both solid and variegated yarns, allowing you to showcase different color combinations and textures. Whether you’re a beginner knitter or an experienced crafter, the basketweave stitch is a versatile and fun pattern to incorporate into your projects.
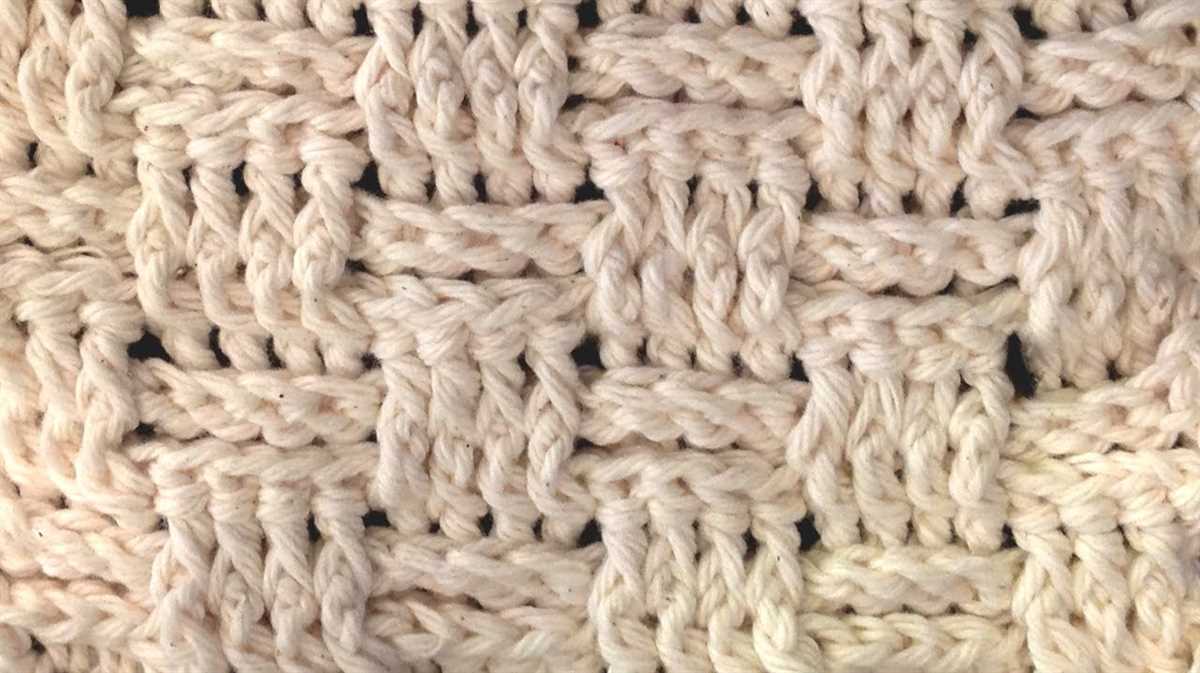
What is the Basketweave Stitch?
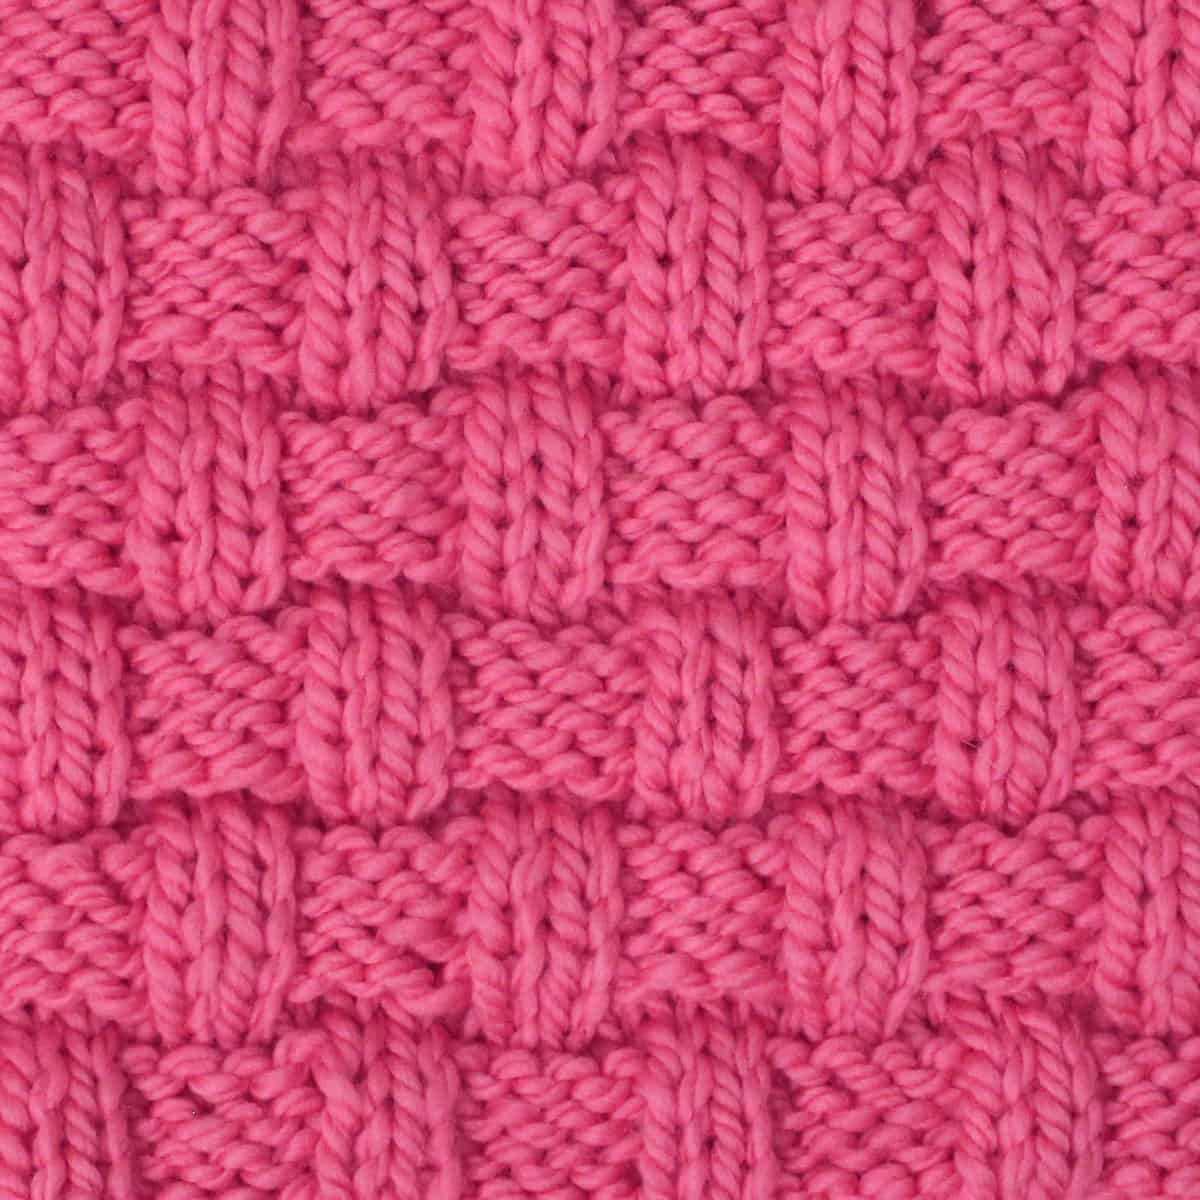
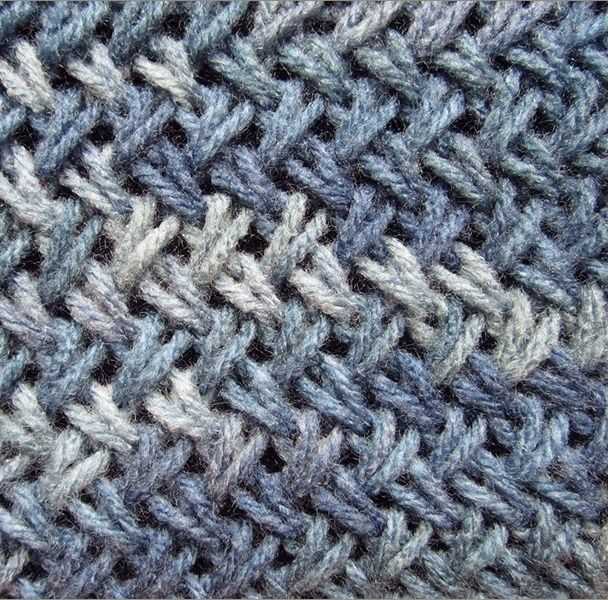
The basketweave stitch is a knitting pattern that creates a textured fabric reminiscent of a woven basket. It is a popular stitch pattern used in various knitting projects, such as blankets, scarves, and sweaters, to add visual interest and dimension to the knitted fabric. The basketweave stitch consists of a combination of knit and purl stitches that form a pattern resembling a basketweave design.
To create the basketweave stitch, the knitter typically works in multiples of a certain number of stitches, usually four or six. The stitch pattern alternates between blocks of knit stitches and blocks of purl stitches, creating the distinctive appearance of woven squares or rectangles. The pattern can be worked over any number of rows, depending on the desired length and width of the finished piece.
How to Knit the Basketweave Stitch:
- Cast on the desired number of stitches, in multiples of four or six.
- Row 1: Knit across all stitches.
- Row 2: Purl across all stitches.
- Row 3: Knit the first four stitches, then purl the next four stitches. Repeat this pattern until the end of the row.
- Row 4: Purl the first four stitches, then knit the next four stitches. Repeat this pattern until the end of the row.
- Repeat rows 1-4 to continue the basketweave pattern.
- Bind off when the desired length is reached.
By varying the number of stitches in each block and the number of rows in the pattern, knitters can create different variations of the basketweave stitch. Additionally, combining different colors or yarn textures can further enhance the woven basket effect.
The basketweave stitch is a great option for knitters who want to add texture and depth to their projects. Whether used as the main stitch pattern or as an accent, the basketweave stitch can elevate any knitted item and create a visually appealing finished product.
Materials Needed
To create the basketweave stitch knitting pattern, you will need the following materials:
- Yarn: Choose a yarn that is suitable for your project. This could be a thick yarn for a cozy blanket or a fine yarn for a delicate scarf.
- Knitting Needles: Select the appropriate knitting needles for your chosen yarn. The size of the needles will depend on the yarn weight and the desired tension.
- Tapestry Needle: A tapestry needle is essential for weaving in the loose ends and finishing off your project.
- Scissors: You will need a pair of scissors to cut the yarn at the end of each row and to trim any excess yarn.
Optional materials that may be useful for this project include:
- Stitch Marker: A stitch marker can be helpful for marking the beginning and end of each pattern repeat.
- Row Counter: A row counter can help you keep track of the number of rows completed, especially if the pattern has a specific repeat.
- Blocking Materials: If you want to block your finished project to give it a more polished look, you may need blocking mats, pins, and a spray bottle.
Gauge and Sizing
When knitting the basketweave stitch pattern, it is important to achieve the correct gauge in order for the finished project to have the desired size and fit. Gauge refers to the number of stitches and rows per inch that are achieved with a particular yarn and needle size. To determine the gauge for the basketweave stitch pattern, it is recommended to knit a swatch using the chosen yarn and needle size.
The basketweave stitch pattern typically requires a gauge of around 20 stitches and 28 rows per 4 inches in stockinette stitch. However, it is important to note that gauge may vary depending on the individual knitter’s tension and the specific yarn and needles used. Therefore, it is recommended to knit a larger swatch, measuring at least 6 inches, and then block it to ensure accurate measurements.
The sizing for projects using the basketweave stitch pattern will depend on the specific project being knitted, such as a scarf, blanket, or garment. It is advisable to follow a pattern or create a personal gauge swatch to determine the sizing and adjust the number of stitches and rows accordingly.
In some cases, it may be necessary to adjust the needle size to achieve the desired gauge and sizing. If the swatch is too small, try using larger needles, and if it is too large, use smaller needles. Additionally, it may also be necessary to adjust the number of stitches and rows in each repeat of the basketweave stitch pattern to achieve the desired width and length for the project.
How to Cast On
Casting on is the first step in starting any knitting project. It is the process of creating the initial stitches on the knitting needle. There are several different methods of casting on, but one of the most common and easy methods is the long tail cast on.
To start the long tail cast on, you will first need to measure a length of yarn that is about three times the width of the finished project. Then, make a slipknot near the end of the yarn, leaving a long tail.
Once you have your slipknot, hold the slipknot in your right hand and the long tail in your left hand. Insert the right needle through the slipknot from front to back, and then wrap the yarn around the right needle counterclockwise.
Next, use the right needle to pull the yarn through the slipknot, creating a new loop on the right needle. This new loop will be the first stitch of your project.
Continue this process of inserting the right needle through the loop on the left needle, wrapping the yarn counterclockwise around the right needle, and pulling the yarn through to create a new loop on the right needle. Repeat this until you have cast on the desired number of stitches.
The long tail cast on is a versatile method that creates a neat and stretchy edge, making it suitable for a variety of knitting projects. With a little practice, you will be able to cast on stitches confidently and begin your knitting projects with ease.
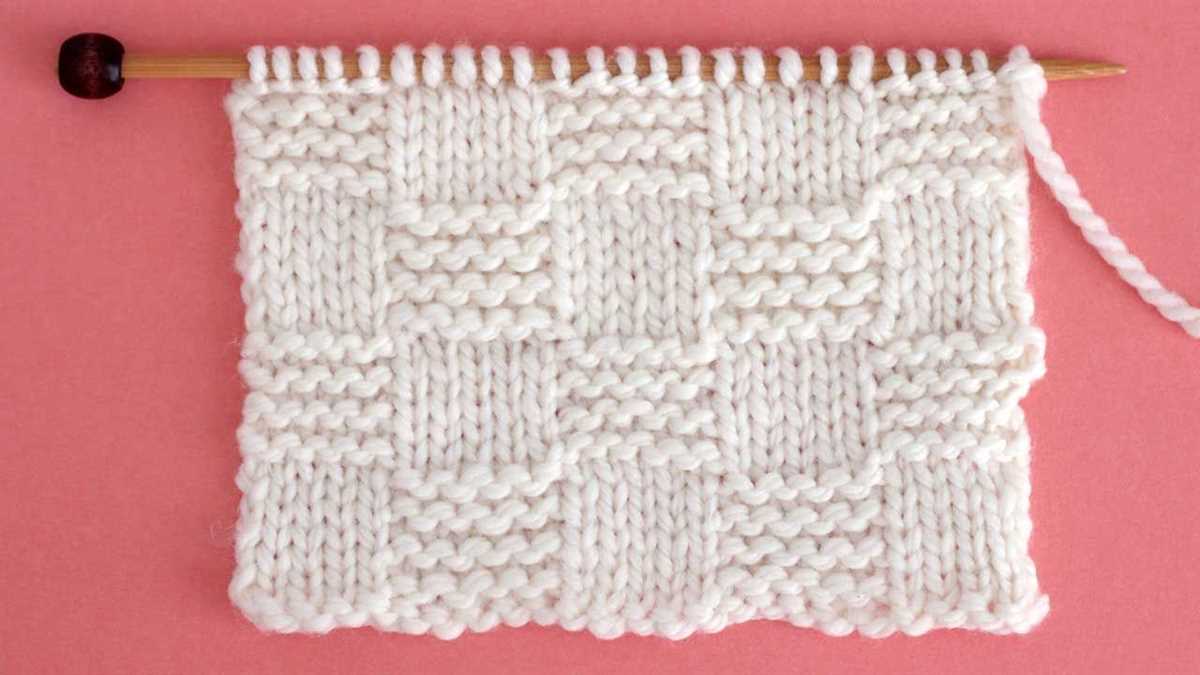
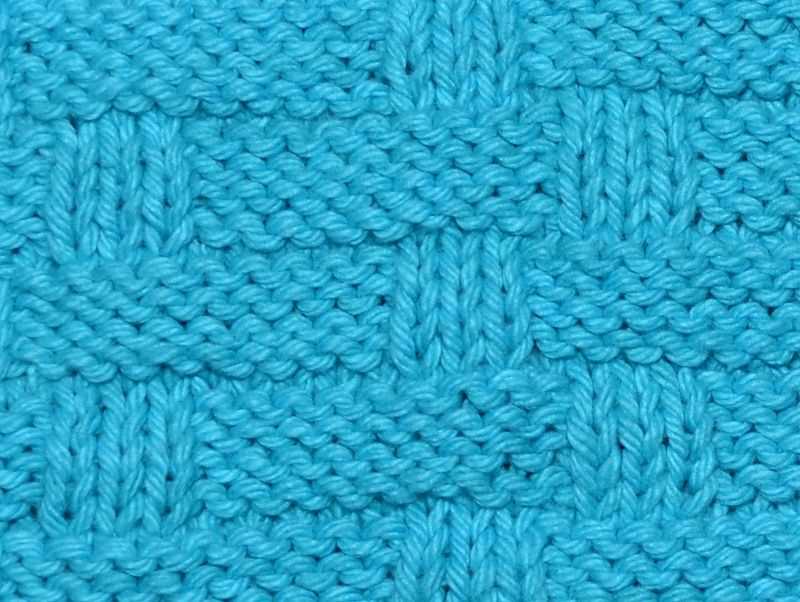
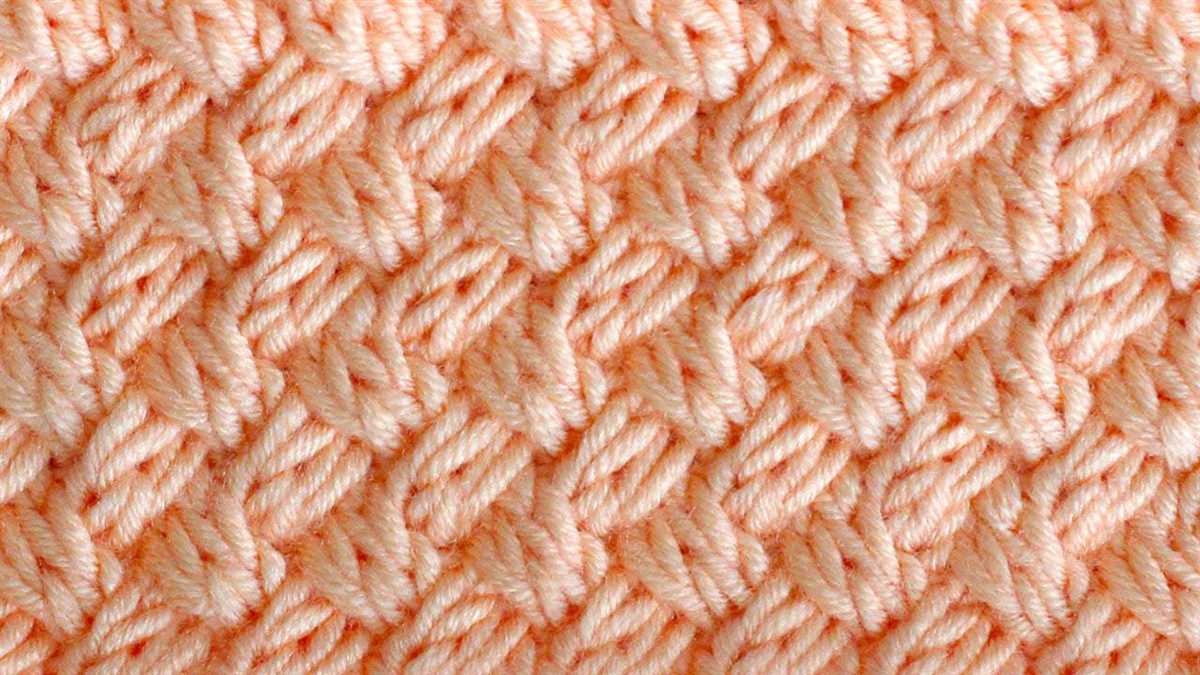
In the world of knitting, the basketweave stitch is a classic pattern that adds texture and visual interest to any project. Whether you’re knitting a cozy scarf or a beautiful blanket, the basketweave stitch creates a woven look that is both elegant and timeless.
Step-by-Step Instructions for the Basketweave Stitch

1. Start by casting on an even number of stitches. This will vary depending on the size of your desired project. For beginners, it’s recommended to start with around 20 stitches.
2. Row 1: Knit 2 stitches, then purl 2 stitches. Repeat this pattern across the entire row.
3. Row 2: Purl 2 stitches, then knit 2 stitches. Repeat this pattern across the entire row.
4. Repeat Rows 1 and 2 until you have reached your desired length. The basketweave stitch can be as short or as long as you like, depending on your project.
5. To bind off, simply knit each stitch across the row, then cut the yarn and thread it through the remaining stitch.
By following these simple steps, you’ll be able to create a beautiful basketweave stitch pattern for your next knitting project. Experiment with different yarn colors and textures to make your project truly unique.
How to Add Texture Variations
One way to add texture variations to your basketweave stitch knitting pattern is by using different types of yarn. Experiment with different weights and textures of yarn to create different effects. For example, using a chunky yarn will result in a thicker, more prominent texture, while using a finer yarn will create a more subtle texture. You can also try using yarns with different fiber contents, such as wool or cotton, to achieve different textures.
Another way to add texture variations is by incorporating different stitch patterns within the basketweave stitch. For example, you can alternate rows of the traditional basketweave stitch with rows of a different stitch, such as ribbing or lace. This will create a contrasting texture and add visual interest to your knitting project.
Using different stitch variations
You can also experiment with variations of the basketweave stitch itself to create different textures. For example, you can try changing the number of knit and purl stitches within each block of the basketweave pattern. You can also try using different combinations of knit and purl stitches, such as knitting several stitches together or doing yarn overs, to create different textures within each block.
Adding embellishments
Another way to add texture to your basketweave stitch knitting pattern is by adding embellishments such as cables, bobbles, or eyelets. These can be inserted within the blocks of the basketweave pattern or along the edges to create additional texture and visual interest. You can also experiment with using different types of needles, such as circular or double-pointed needles, to create unique textures and patterns.
Conclusion
Adding texture variations to your basketweave stitch knitting pattern is a fun way to enhance the visual appeal of your project. By using different types of yarn, incorporating different stitch patterns, and adding embellishments, you can create unique and beautiful textures that will make your knitting project stand out.
Knitting Tips

Knitting is a popular craft that allows you to create warm and cozy items such as sweaters, scarves, and hats. Whether you’re a beginner or an experienced knitter, here are some tips to help you improve your knitting skills and create beautiful projects:
1. Choose the Right Yarn
When starting a new knitting project, it’s important to choose the right yarn for the pattern. Consider the fiber content, weight, and color of the yarn to ensure that it matches your project. Different yarns have different properties, so be sure to read the label for recommended needle size and care instructions.
2. Practice Tension Control
One of the key skills in knitting is controlling your tension – the tightness of your stitches. If your stitches are too loose, your project may look sloppy, while stitches that are too tight can be difficult to work with. Practice knitting with different tensions until you find the perfect balance that creates even and consistent stitches.
3. Use Stitch Markers
Stitch markers are small rings that can be placed on your knitting needles to mark specific stitches or sections of your project. They can be particularly helpful when working on complex patterns or when shaping your knitting. By using stitch markers, you can easily keep track of your progress and prevent mistakes.
4. Don’t Be Afraid to Rip Out and Start Over
Knitting is a forgiving craft, and it’s okay to make mistakes. If you notice a mistake in your knitting, don’t be afraid to rip out the stitches and start over. It’s better to fix the mistake early on rather than continue with a project that doesn’t meet your standards. Remember, practice makes perfect, and learning from mistakes is an important part of the knitting process.
5. Take Breaks and Relax
Knitting can be a relaxing and therapeutic activity, but it’s important to take breaks and give your hands and wrists some rest. Stretching your fingers and wrists regularly can help prevent stiffness and soreness. Additionally, taking breaks can give you a fresh perspective and help you avoid making mistakes due to tiredness or frustration.
By following these knitting tips, you can enhance your skills and create beautiful, handmade items that you can cherish or give as heartfelt gifts. Happy knitting!
Finishing Off
Once you have completed the basketweave stitch knitting pattern, it’s time to finish off your project. This involves securing the ends of your yarn and making sure everything is neat and tidy.
1. Weaving in the ends: Start by threading a tapestry needle with the end of your yarn. Carefully weave the needle through the stitches on the wrong side of your knitting, making sure to go in different directions to secure the yarn. Cut off any excess yarn.
2. Blocking: Blocking is an important step in finishing off your knitting. It helps to even out the stitches and gives your project a more professional look. To block your basketweave stitch pattern, wet the knitting and gently squeeze out the excess water. Lay it flat on a clean towel and shape it to the desired dimensions. Allow it to dry completely before removing the pins.
Examples of Uses for the Basketweave Stitch

The basketweave stitch is a versatile knitting pattern that can be used in a variety of projects. Its textured and woven appearance adds visual interest and depth to any knitted item. Here are some examples of how the basketweave stitch can be used:
1. Scarves and Shawls
The basketweave stitch is perfect for knitting scarves and shawls. The woven texture creates a cozy and warm fabric that is perfect for wrapping around your neck or shoulders. You can use a chunky yarn and larger needles to create a thick and chunky scarf, or use a lighter yarn and smaller needles for a more delicate shawl.
2. Blankets and Throws
The basketweave stitch is also great for knitting blankets and throws. The pattern creates a thick and squishy fabric that is perfect for snuggling up under on a cold winter night. You can experiment with different yarn weights and colors to create a unique and personalized blanket that will add a touch of elegance to any room.
3. Sweaters and Cardigans
The basketweave stitch can also be used for knitting sweaters and cardigans. The textured pattern adds interest to any garment and can be used as an all-over pattern or as a panel on the front or back. You can mix and match the basketweave stitch with other stitch patterns to create a truly unique and eye-catching design.
4. Home Decor
In addition to clothing items, the basketweave stitch can be used to create various home decor items. You can knit cushion covers, placemats, or even table runners using the basketweave stitch. The textured pattern will add a touch of elegance and sophistication to any room, making it a great choice for both modern and traditional decor styles.
5. Accessories
Lastly, the basketweave stitch can be used to knit various accessories such as hats, headbands, and fingerless gloves. The textured pattern adds a unique and stylish touch to these items, making them stand out from the crowd. You can experiment with different colors and yarns to create accessories that match your personal style.
Overall, the basketweave stitch is a versatile knitting pattern that can be used in a wide range of projects. Whether you’re knitting for yourself or for others, the basketweave stitch is sure to add a touch of elegance and sophistication to any knitted item.
Common Mistakes to Avoid

When working on the basketweave stitch knitting pattern, it’s important to be aware of some common mistakes that beginners often make. By knowing what to look out for, you can ensure that your project turns out beautifully.
Here are some common mistakes to avoid:
- Tension inconsistencies: One of the most common mistakes is having inconsistent tension throughout your work. This can result in uneven rows or stitches that are too tight or too loose. Pay attention to your tension and make sure to maintain a consistent gauge.
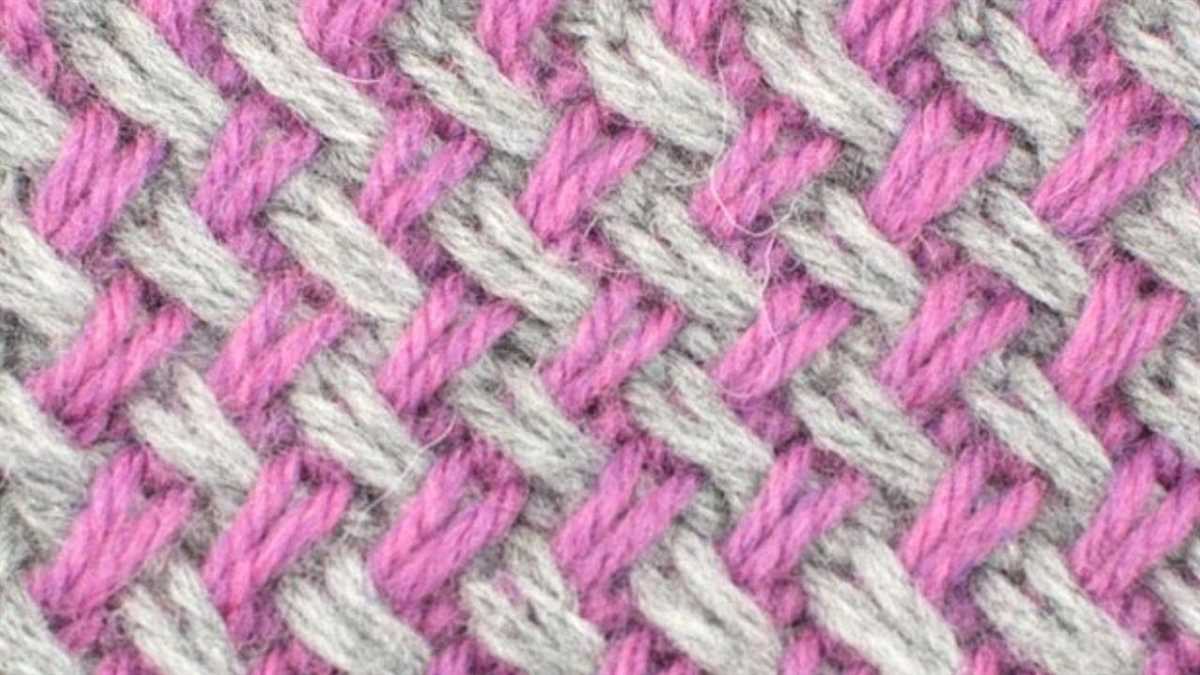
- Forgetting to switch yarn colors: In the basketweave pattern, you need to alternate between two different yarn colors to create the basketweave effect. It’s easy to forget to switch colors, especially if you’re new to colorwork knitting. Make sure to pay attention to the pattern instructions and switch yarn colors at the appropriate times.
- Missing stitch or adding extra stitches: Accidentally skipping a stitch or adding extra stitches can throw off the entire pattern. Count your stitches regularly and double-check that you haven’t made any mistakes. Fixing mistakes later on can be time-consuming and may result in an uneven finished project.
- Not blocking your work: Blocking is an important step in knitting that helps to even out your stitches and improve the overall appearance of your project. Even if it’s not explicitly mentioned in the pattern instructions, it’s recommended to block your work to achieve the best results.
- Not reading the pattern carefully: Misinterpreting or misunderstanding the pattern instructions can lead to errors in your knitting. To avoid this, take the time to read through the instructions carefully before starting your project. If something is unclear, don’t hesitate to ask for clarification.
By avoiding these common mistakes and taking the time to practice and improve your knitting skills, you’ll be able to successfully create beautiful basketweave stitch patterns. Remember to have patience and enjoy the process!