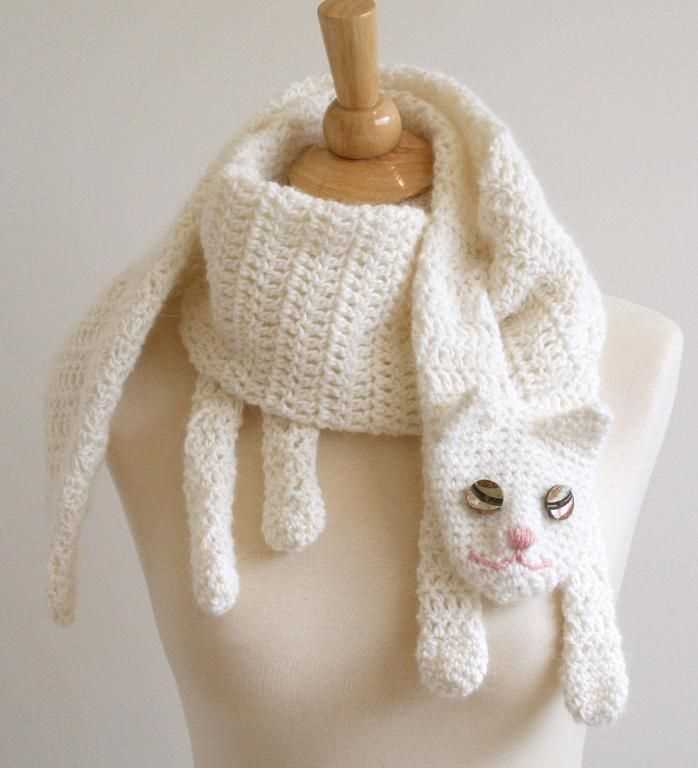
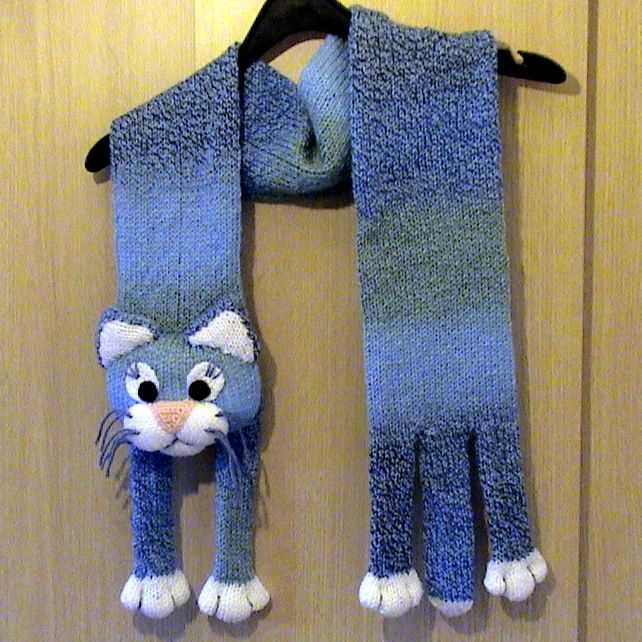
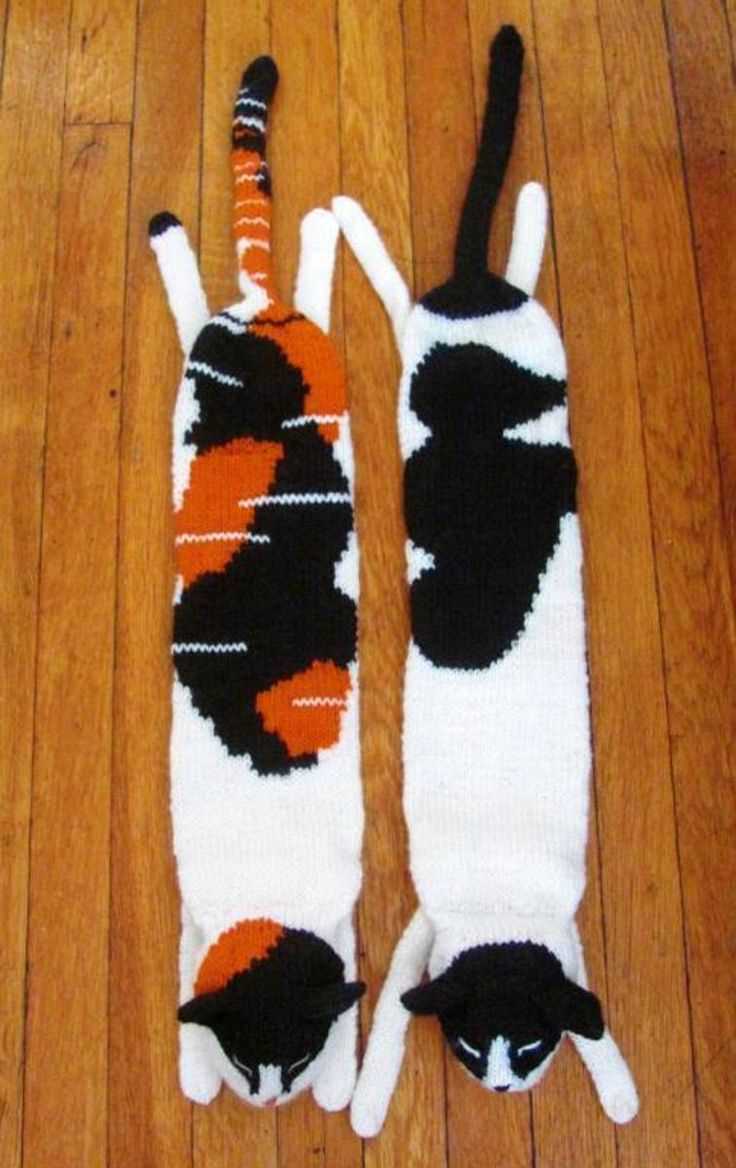
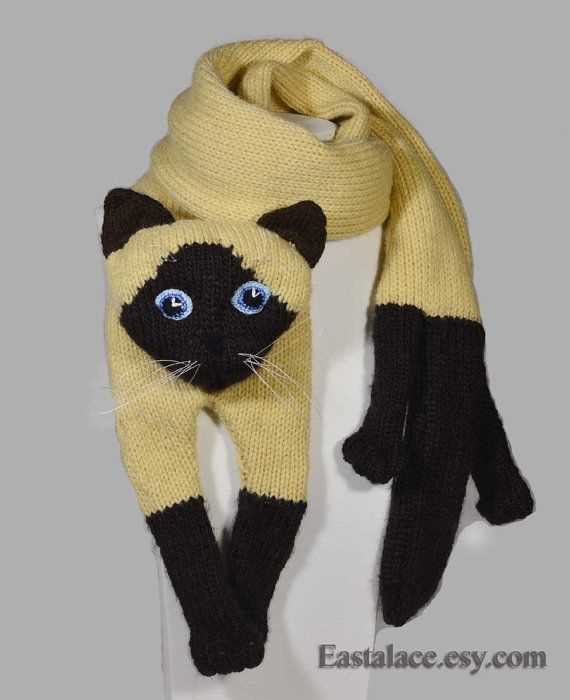
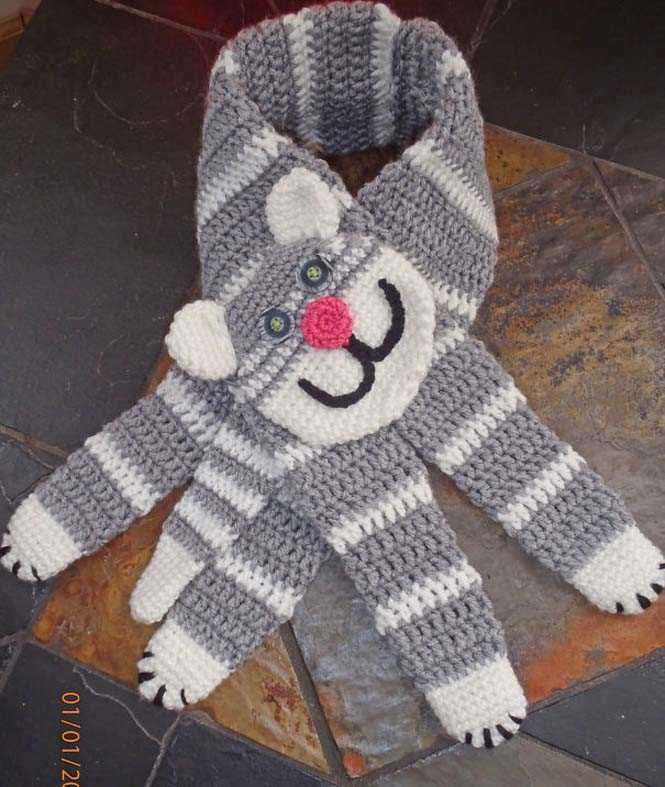
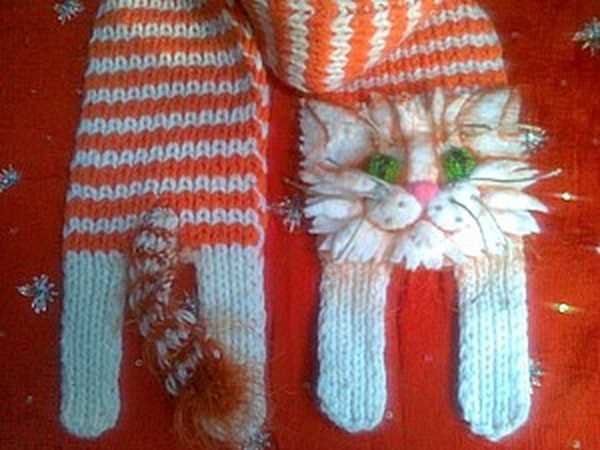
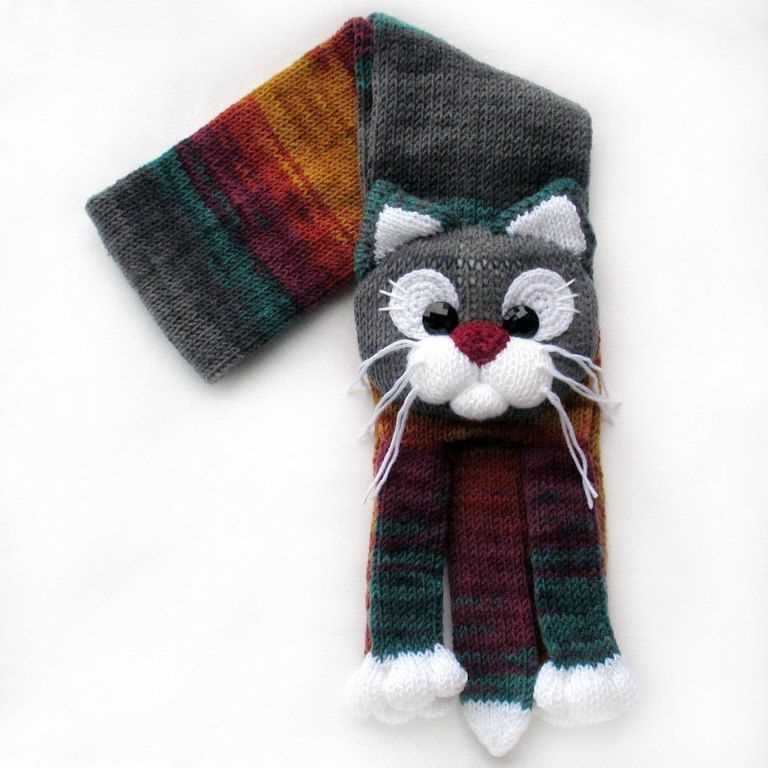
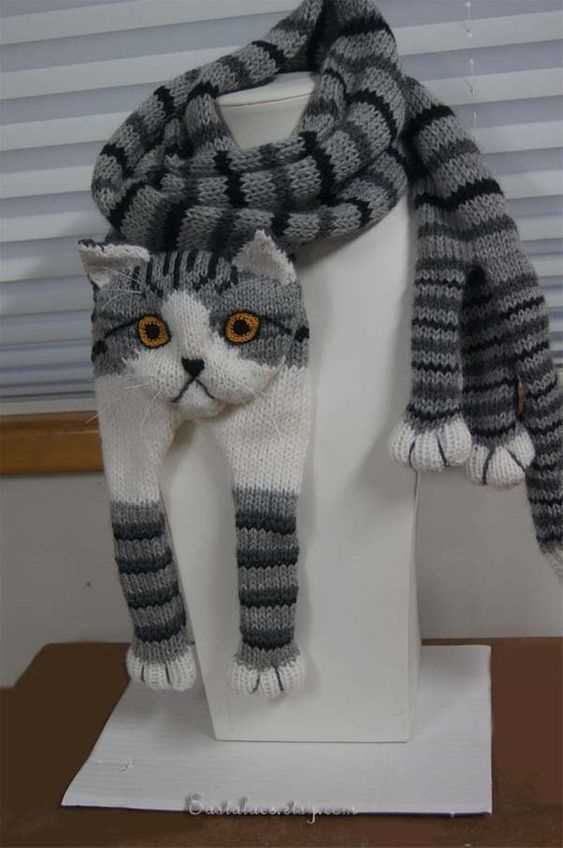
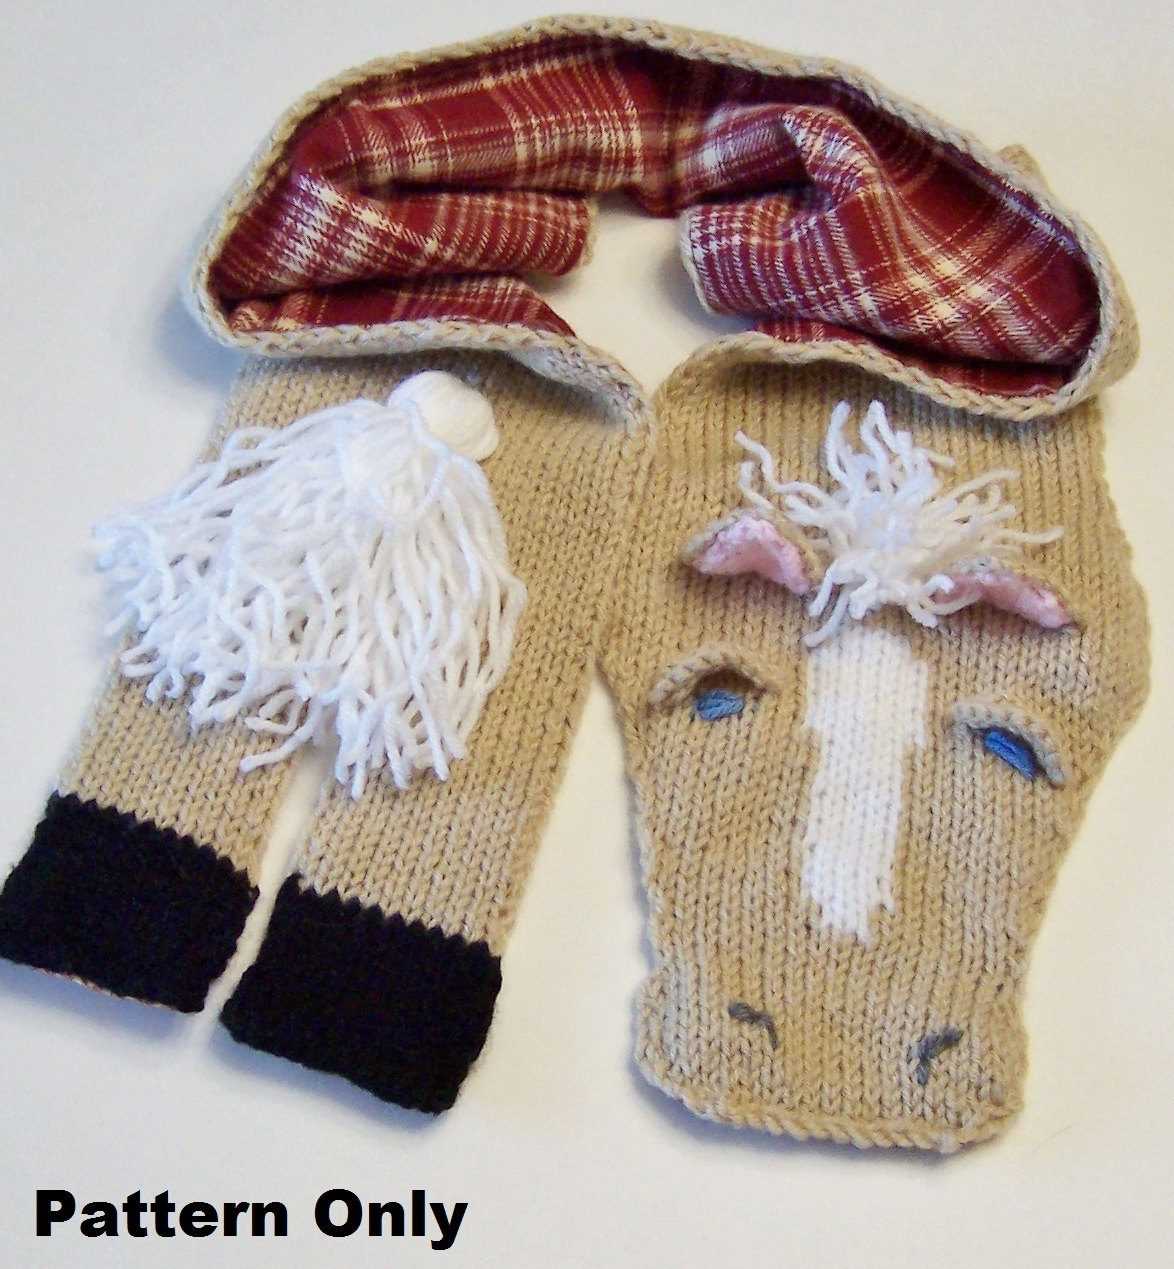
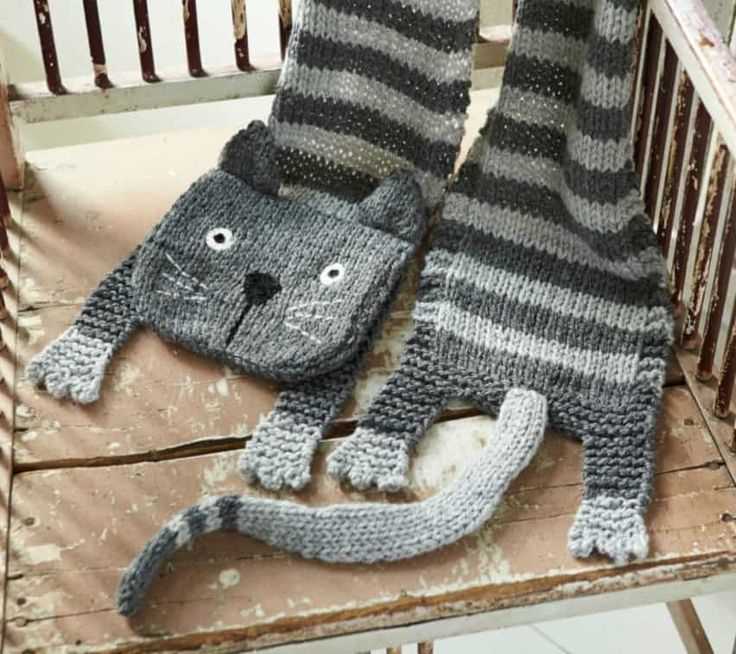
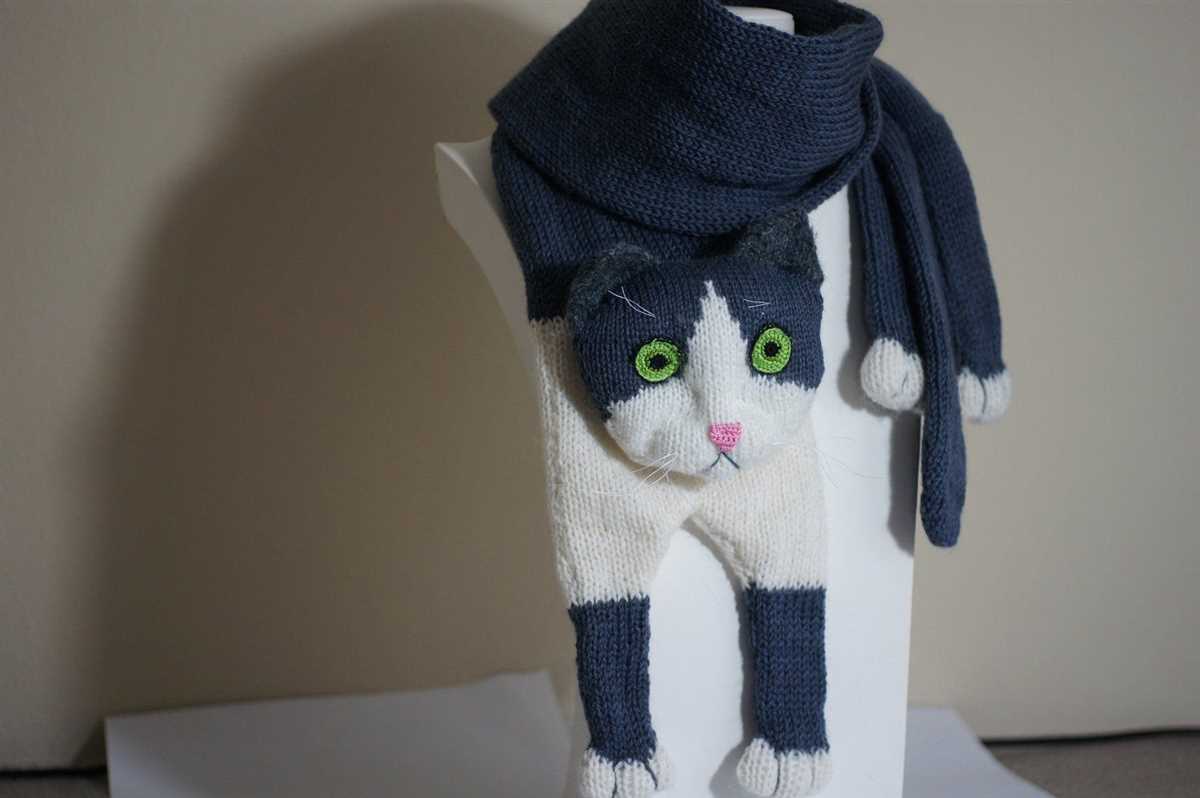
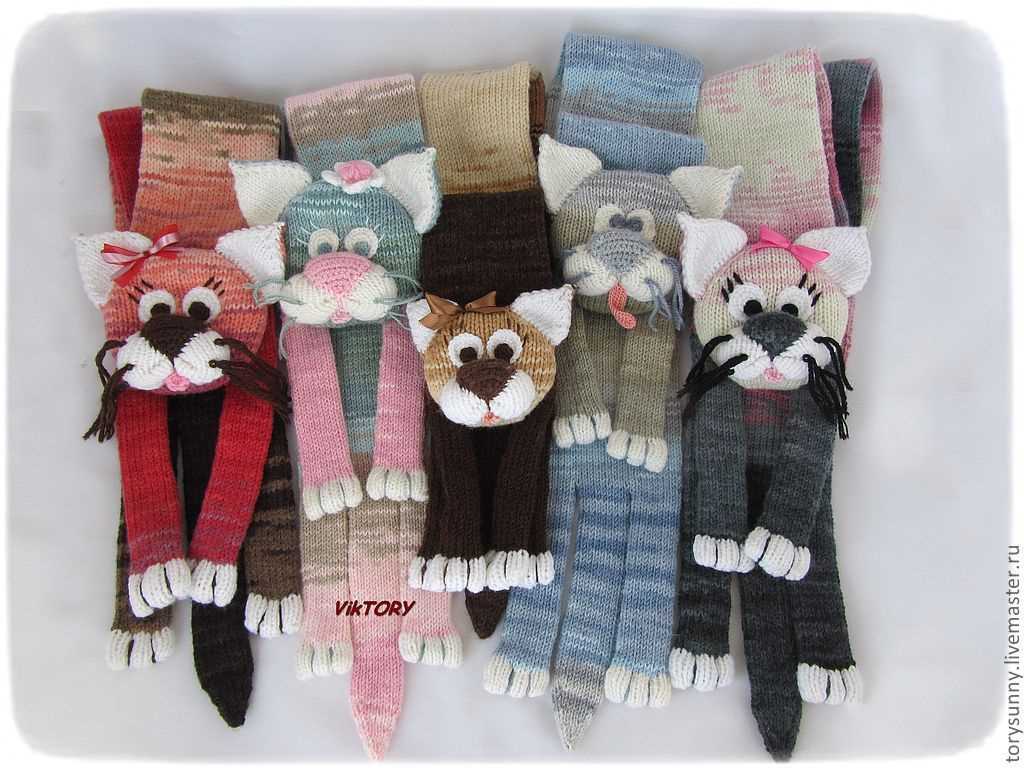
Knit a Cozy Cat Scarf with this Free Pattern!

Looking for a fun knitting project that will keep you cozy and stylish? Look no further than this adorable cat scarf knitting pattern! Whether you’re a cat lover or just looking to add a bit of whimsy to your winter accessories, this pattern is perfect for beginners and experienced knitters alike.
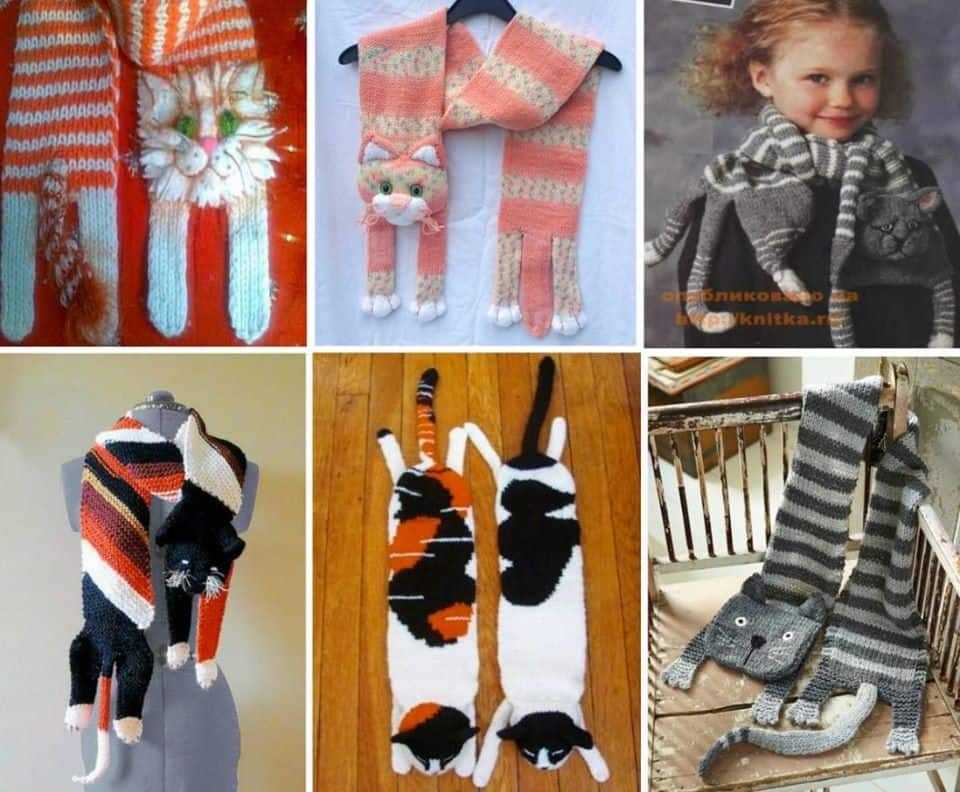
With its cute cat face and long, fluffy tail, this scarf is sure to draw attention and make people smile. Plus, it’s a great opportunity to practice your knitting skills and try out new techniques. The best part? This pattern is completely free, so you can start knitting your own cat scarf right away without breaking the bank.
Designed with comfort and warmth in mind, this scarf is made using bulky yarn and large needles, making it a quick and satisfying project to complete. The pattern includes step-by-step instructions and clear diagrams to help you along the way.
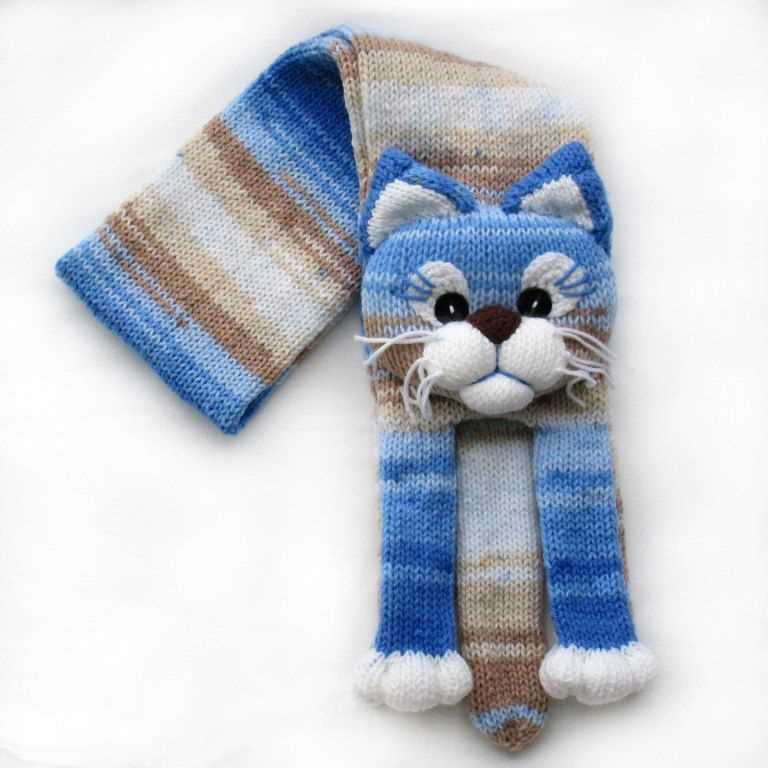
Looking for a fun and creative knitting project? Why not try your hand at making a free cat scarf? This adorable accessory is perfect for cat lovers and will add a playful touch to any outfit. Plus, it’s a great way to practice your knitting skills and experiment with different patterns and techniques.
Materials:
- Worsted weight yarn in your desired colors
- Size 8 knitting needles
- Tapestry needle
- Scissors
Instructions:
1. Start by casting on 40 stitches using your main color yarn. This will be the base of the scarf.
2. Knit the first row, working in garter stitch (knitting every stitch) for the entire row.
3. Begin the cat pattern by knitting the next row with your contrast color yarn. Follow the chart below:
| Row 1 | Row 2 | Row 3 | Row 4 | |
|---|---|---|---|---|
| Stitches | Knit | Purl | Knit | Purl |
| Chart | C | A | T | S |
4. Continue working the cat pattern for the desired length of your scarf. You can repeat the chart as many times as you like to create a longer scarf. Make sure to knit the first and last stitches of each row with your main color yarn to create a clean edge.
5. Once you’ve reached your desired length, knit one final row in garter stitch with your main color yarn.
6. Bind off all stitches and weave in any loose ends using a tapestry needle.
You now have a cute and cozy cat scarf to wear or give as a gift! Feel free to get creative and customize the colors and patterns to make it truly unique. Happy knitting!
Materials needed for the cat scarf
To make the cat scarf, you will need the following materials:
- Yarn: Choose a soft and cozy yarn in colors of your choice. Acrylic or wool yarn would work well for this project.
- Knitting needles: Use knitting needles in a size that is suitable for your chosen yarn. A set of size 8 (5mm) needles should work for most medium-weight yarns.
- Tapestry needle: A tapestry needle with a large eye will come in handy for weaving in ends and sewing the scarf pieces together.
- Scissors: Keep a pair of scissors handy for cutting yarn and trimming any loose ends.
- Stitch markers: Stitch markers are useful for marking specific points in your knitting, such as the beginning of a row or the placement of certain stitches.
- Measuring tape: A measuring tape or ruler will help you keep track of your scarf’s length and ensure consistent sizing.
Once you have gathered all of these materials, you will be ready to start knitting your cat scarf. Remember to choose yarn colors that complement each other and suit your personal style. Have fun and enjoy creating your cozy and adorable cat scarf!
How to Choose the Right Yarn
Choosing the right yarn for your knitting project is essential to ensure that your finished product looks and feels the way you want it to. Here are some factors to consider when selecting your yarn:
Fiber Type
The first thing to consider is the type of fiber you want to use. Different fibers have different properties and will result in different textures and qualities in your finished project. Common fiber types include wool, cotton, acrylic, alpaca, and silk. Wool is known for its warmth and elasticity, while cotton is breathable and lightweight. Acrylic is a synthetic fiber that is often used for its affordability and durability. Alpaca and silk offer luxurious softness and drape, but can be more expensive.
Weight
The weight of the yarn, also known as its thickness, will determine the size of the stitches and the overall look of your project. Yarns are typically classified into categories such as lace, fingering, sport, worsted, and bulky. Lace weight yarn is very thin and delicate, while bulky weight yarn is thick and chunky. Consider the desired drape and texture of your project when choosing the weight of your yarn.
Color and Texture
The color and texture of the yarn can greatly impact the overall appearance of your finished project. Choose colors that complement your personal style or the intended recipient’s preferences. Consider the texture of the yarn as well, as some yarns may be smooth and sleek, while others have a fuzzy or textured surface. These factors can add depth and visual interest to your knitted item.
Budget
Consider your budget when selecting yarn for your knitting project. Yarns can vary greatly in price, depending on the fiber content, brand, and quality. Determine how much you are willing to spend and choose a yarn that fits within your budget. Keep in mind that higher quality yarns may result in a more luxurious finished product, but there are also affordable options available.
By considering the fiber type, weight, color, texture, and budget, you can choose the right yarn for your knitting project and create a beautiful and satisfying finished product.
Understanding the knitting abbreviations
When you start knitting, it can be overwhelming to see all the knitting abbreviations used in patterns. However, understanding these abbreviations is crucial for following knitting instructions correctly. Here are some common knitting abbreviations and what they mean:
K: Knit – This abbreviation is used to indicate that you should knit a stitch. It means inserting the right-hand needle into the front of a stitch from left to right, wrapping the yarn around the right-hand needle, and pulling the new loop through the old loop.
P: Purl – Purling is the opposite of knitting. It creates a reverse stockinette stitch, with the “bumpy” side facing out. To purl, you insert the right-hand needle into the front of a stitch from right to left, wrap the yarn around the right-hand needle, and pull the new loop through the old loop.
More knitting abbreviations:
- YO: Yarn Over – This abbreviation indicates that you should make an extra stitch by bringing the yarn over the right-hand needle from back to front, creating a new loop.
- K2tog: Knit Two Together – This abbreviation instructs you to knit the next two stitches together as one stitch. You do this by inserting the right-hand needle through both stitches and knitting them together.
- P2tog: Purl Two Together – Similar to K2tog, P2tog instructs you to purl the next two stitches together as one stitch. Insert the right-hand needle through both stitches from right to left, and purl them together.
- SSK: Slip, Slip, Knit – This abbreviation is used to create a left-leaning decrease. Slip the next two stitches onto the right-hand needle one at a time as if to knit, insert the left-hand needle into the front of both stitches, and knit them together.
These are just a few examples of knitting abbreviations you may come across. As you gain experience and practice, you will become more familiar with these terms and be able to follow knitting patterns with ease.
Step-by-step instructions for knitting the cat’s head
Knitting the cat’s head is an essential part of creating a cat scarf. With these step-by-step instructions, you’ll be able to create a cute and cozy feline-inspired accessory.
To start, gather your materials, including yarn in the desired cat color, knitting needles, scissors, and a yarn needle. Choose a soft and bulky yarn to add extra warmth and texture to the scarf.
Step 1: Begin by casting on the number of stitches required to create the cat’s head. The number of stitches will depend on the pattern and the desired size of your scarf.
Step 2: Once you’ve cast on, knit the first row using the knitting stitch of your choice, such as the garter stitch or stockinette stitch. This will create the base of the cat’s head.
Step 3: Continue knitting the subsequent rows following the pattern instructions. Pay attention to any shaping or color changes that may be required to create the cat’s face. Use a stitch marker to mark the beginning of each row if necessary.
Step 4: When you reach the desired length for the cat’s head, it’s time to shape the top. Follow the pattern instructions to decrease the number of stitches gradually, creating a rounded shape for the head.
Step 5: Once you’ve shaped the top, bind off the remaining stitches. Cut the yarn, leaving a long tail for weaving in later.
Step 6: Using a yarn needle, weave in any loose ends to ensure a clean and finished look. Take extra care to secure the ends securely, especially if the scarf will be worn by children or pets.
Step 7: Finally, give the cat’s head a quick steam or block it lightly to help the stitches relax and settle into shape.
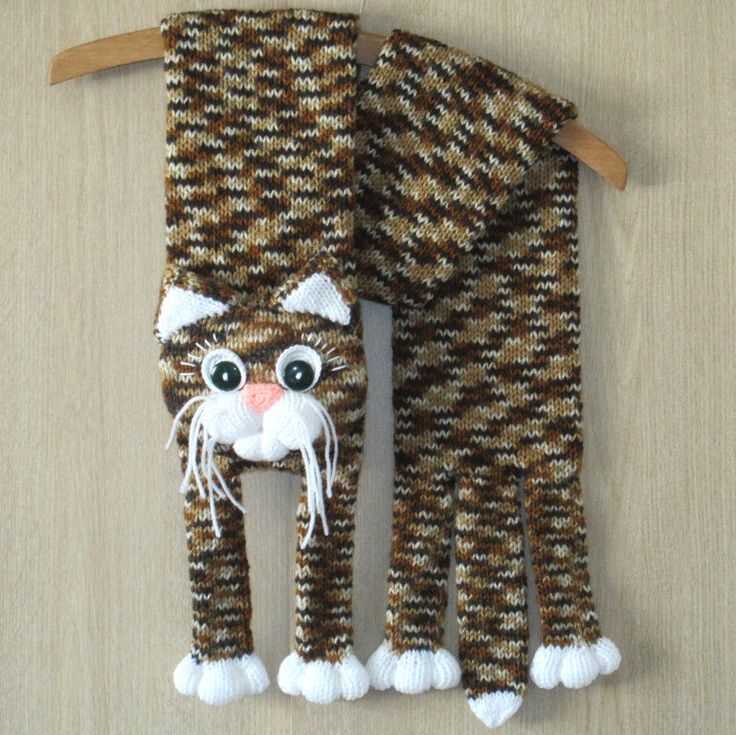
With these step-by-step instructions, you’ll be able to create a charming cat’s head for your scarf. Once completed, you can continue knitting the rest of the scarf, adding the body and tail to complete the feline look.
Creating the cat’s body and tail
Once you have gathered all the necessary materials, it’s time to start knitting the cat’s body and tail. To begin, cast on the required number of stitches using the main color of yarn. This will form the base of the cat’s body. Make sure to use a knitting needle size that will give you the desired gauge.
Next, you’ll start knitting the body in stockinette stitch. Knit the first row, then purl the second row. Repeat these two rows until the body reaches the desired length. Keep in mind that you can adjust the length to fit your preferences or the size of the cat you’re making the scarf for.
For the tail, you’ll switch to the contrasting color of yarn. Cast on a smaller number of stitches to create a narrow and tapered shape. Knit the first row, then purl the second row, and continue in stockinette stitch until the tail is the desired length. You can make the tail as long or as short as you like, depending on how you want it to look.
To add some extra texture and detail to the cat’s body, you can incorporate different stitch patterns or techniques. For example, you could knit the body in ribbing or add a few rows of seed stitch to create a textured effect. This is where you can get creative and personalize your cat scarf.
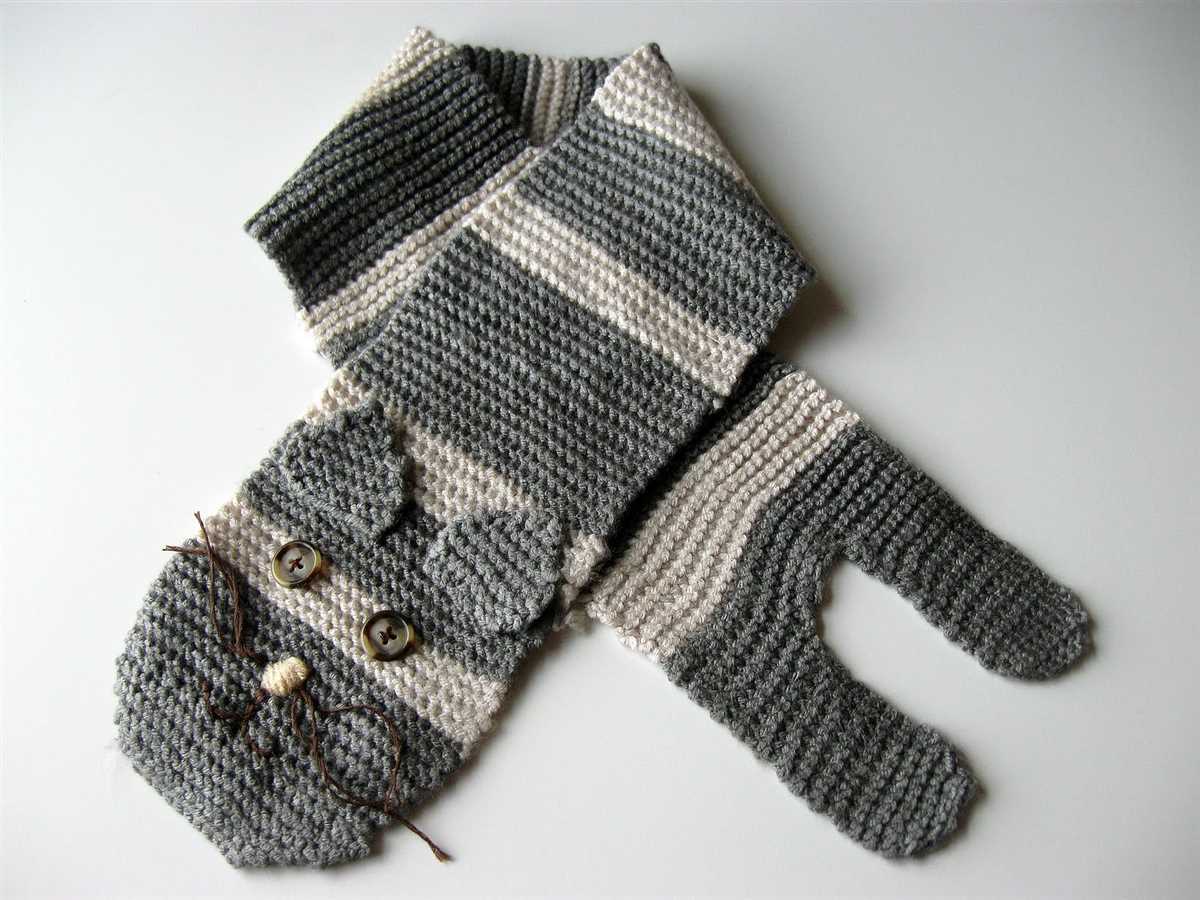
Adding details to the cat scarf
When it comes to adding details to your cat scarf, there are several options to consider. These details can help bring your scarf to life and make it even more adorable. Whether you want to add a simple touch or go for something more intricate, the choice is yours.
One option is to include whiskers to your cat scarf. You can use black yarn or embroidery thread to stitch them onto the scarf. This simple addition can give your scarf a cute and playful look. You can make the whiskers as long or as short as you like, depending on your preference.
The eyes are another important detail that can make a big difference in the overall appearance of the cat scarf. You can use safety eyes, buttons, or even embroider them on. By choosing different colors or sizes, you can give your cat scarf a personalized touch.
If you want to take things a step further, you can add a nose to your cat scarf. You can use a small piece of felt or fabric in a contrasting color and sew it onto the scarf. This little detail can add depth and character to your creation.
- Don’t forget about the ears! You can knit small triangles separately and sew them onto the top corners of the scarf to create adorable cat ears.
- Another option is to add a tail to your scarf. You can knit a long tube and attach it to the back of the scarf. You can even stuff it lightly to make it more fluffy and realistic.
- If you want to create a more detailed cat face, you can embroider a mouth or even a tongue onto the scarf. This can give your cat scarf a unique and expressive look.
Remember, these details are optional, and you can customize your cat scarf to your liking. Have fun experimenting and making your scarf truly one-of-a-kind!
Finishing touches: making the cat’s ears and eyes
In order to complete your cat scarf, you will need to add the finishing touches of making the cat’s ears and eyes. These details will truly bring your scarf to life and give it that adorable feline look.
To make the cat’s ears, you will need a small amount of yarn in a contrasting color. Start by knitting two small triangles using the same stitch pattern as the rest of the scarf. Once you have finished knitting the triangles, sew them securely onto the top corners of the scarf. Make sure to position them evenly and at an angle that gives the impression of cat ears.
Next, it’s time to add the eyes. You can use either buttons or embroidery to create the eyes. If you choose to use buttons, select two buttons that are the desired size for your cat’s eyes. Sew them on securely in the desired position, making sure they are evenly spaced and aligned. If you prefer embroidery, use a contrasting color yarn and stitch small circles or ovals to represent the eyes. This can be done either on the surface of the scarf or by adding a separate piece of fabric as a base for the eyes.
By adding these final details, you will transform your cat scarf into a delightful accessory that is sure to catch everyone’s attention. The ears will give it an unmistakable feline touch, while the eyes will bring a sense of personality and charm. Whether you choose buttons or embroidery, the end result will be a unique and adorable cat scarf that you can proudly wear or gift to a fellow cat lover.
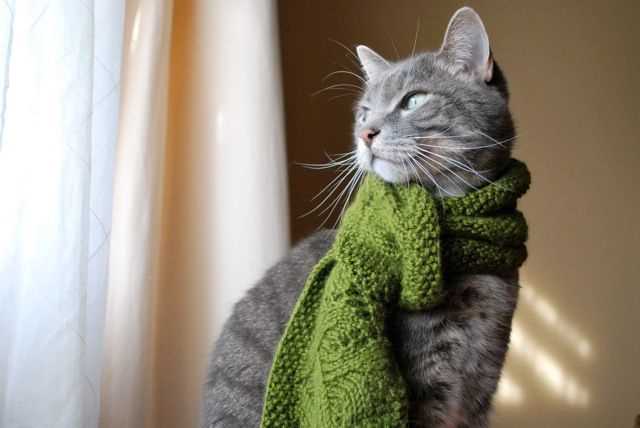
Tips for washing and caring for the cat scarf
After spending time and effort knitting a beautiful cat scarf, it’s important to take proper care of it to ensure its longevity and keep it looking its best. Here are some helpful tips for washing and caring for your cat scarf:
1. Handwashing is recommended
To preserve the integrity of the yarn and prevent any damage, it’s best to wash your cat scarf by hand. Fill a basin or sink with lukewarm water and add a mild, gentle detergent. Gently agitate the scarf in the soapy water, being careful not to rub or twist it too much. Rinse thoroughly with cool water to remove any soap residue.
2. Dry flat
After washing, avoid wringing or twisting the scarf. Instead, lay it flat on a clean towel and roll it up to gently squeeze out any excess water. Then, reshape the scarf to its original dimensions and lay it flat to dry on a clean, dry towel or a drying rack. Avoid hanging the scarf, as this can cause it to stretch out of shape.
3. Store properly
When the scarf is completely dry, store it in a cool, dry place to prevent moisture and potential damage. You can fold it neatly and place it in a drawer or hang it on a hanger. To avoid snagging, it’s best to keep the cat scarf away from any sharp objects or jewelry that could catch on the delicate yarn.
4. Avoid direct heat
When caring for your cat scarf, it’s important to keep it away from direct heat sources, such as radiators, heaters, or direct sunlight. Excessive heat can cause the yarn to become brittle or fade in color over time. Opt for air-drying whenever possible.
5. Handle with care
To avoid snags or pulls in the yarn, handle your cat scarf with care. Be mindful of any sharp edges or rough surfaces that could potentially damage the delicate fibers. When wearing the scarf, try to avoid activities or situations that could lead to excessive stretching or snagging.
By following these tips, you can ensure that your cat scarf remains in excellent condition for years to come. Remember to always check the yarn label for any specific care instructions and adjust your washing and caring routine accordingly.