Knit Your Own Minecraft Creeper with This Easy Pattern

If you’re a fan of the popular game Minecraft, you’ve most likely come face to face with the iconic enemy known as the Creeper. With its green pixelated body and signature exploding ability, the Creeper has become a staple in the Minecraft universe. And now, you can bring this iconic character to life in a whole new way: through knitting!
Knitting is a wonderful pastime that allows you to create beautiful, handmade items. And what better way to show your love for Minecraft than by knitting your very own Creeper? With our Minecraft Creeper knitting pattern, you can create a soft and cuddly version of this iconic enemy. Whether you’re a seasoned knitter or just starting out, this pattern is perfect for all skill levels.
Our knitting pattern includes step-by-step instructions and a detailed list of materials needed to create your Creeper. From its square body to its pixelated face, you’ll have all the tools you need to bring this character to life. Knitting your own Creeper can also be a fun project to do with friends or family members who are also fans of Minecraft. Imagine the joy of knitting together and then displaying your finished creations side by side!
So, if you’re looking to combine your love for Minecraft with your love for knitting, look no further. Our Minecraft Creeper knitting pattern is the perfect way to create a unique and personalized piece that showcases your fandom. Get your knitting needles ready and start crafting your very own Creeper today!
Minecraft Creeper Knitting Pattern
If you’re a Minecraft enthusiast and love knitting, then you’ll definitely want to try your hand at creating a Minecraft Creeper using this knitting pattern. The Creeper is one of the most iconic mobs in the game, known for its green pixelated body and ability to explode. With this pattern, you can bring your favorite video game character to life in a unique and creative way.
Materials Needed:
- Green yarn
- Black yarn
- Knitting needles
- Tapestry needle
- Scissors
Instructions:
- Begin by casting on 50 stitches using the green yarn.
- Knit the first row in the green yarn.
- Switch to the black yarn and knit the second row.
- Repeat steps 2 and 3 for a total of 10 rows, alternating between green and black yarn.
- Next, switch to the green yarn and knit 10 rows.
- Continue alternating between the green and black yarn, knitting 10 rows of each color, until you reach the desired height of the Creeper.
- Once the desired height is reached, finish off the knitting by binding off all stitches.
- Using the tapestry needle, sew the sides of the knitting together to create a tube shape, leaving an opening at the top for stuffing.
- Stuff the Creeper with polyester fiberfill or your preferred stuffing material.
- Sew up the remaining opening at the top of the Creeper to complete the knitting.
You now have your very own Minecraft Creeper made from knitting! This pattern allows you to create a unique and personalized Creeper that can be used as a decorative item, a toy, or a gift for a fellow Minecraft fan. Show off your creativity and love for the game by proudly displaying your knitted Creeper for all to see.
What is Minecraft Creeper?
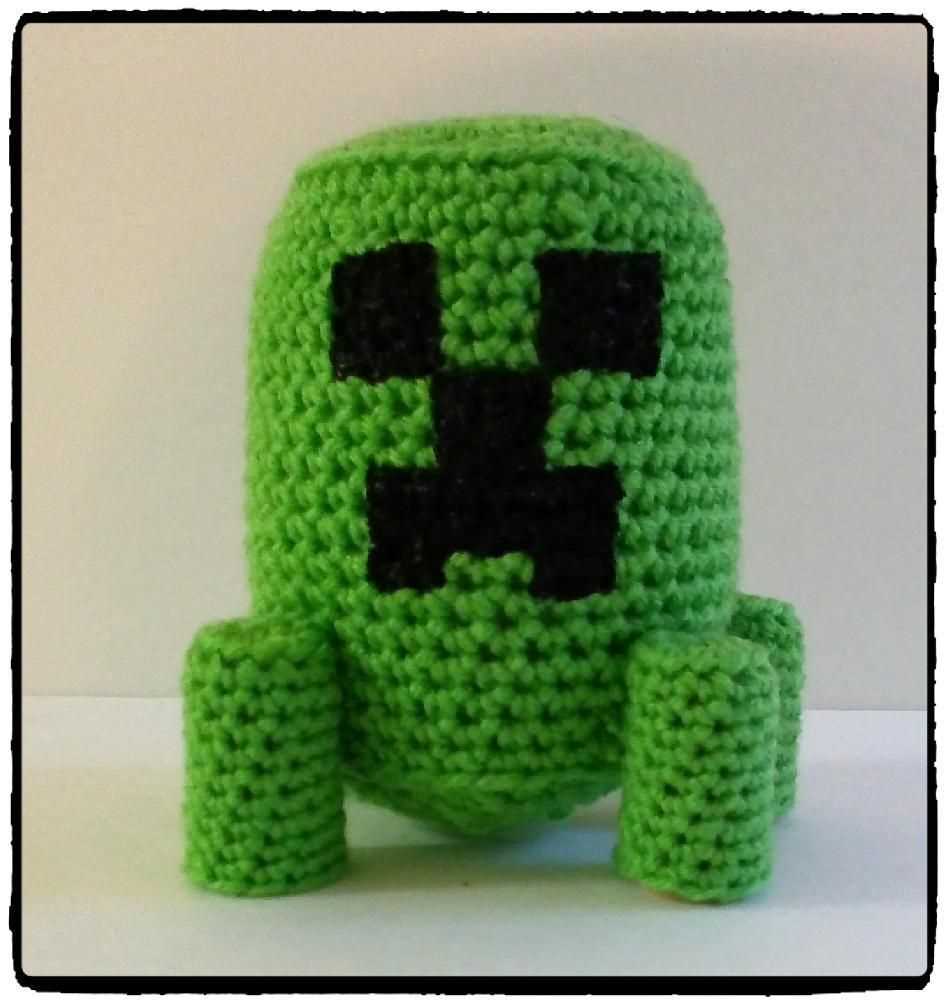
The Minecraft Creeper is one of the most iconic and recognizable characters from the popular sandbox video game, Minecraft. It is a hostile mob that spawns in the game and is known for its distinct green color and pixelated appearance.
The Creeper is easily distinguishable by its square-shaped body, four legs, and slightly curved posture. It has a pixelated face with yellow eyes and a wide, toothy grin. This character is infamous for its ability to explode when near players or certain blocks, making it a formidable enemy in the game.
Players often encounter Creepers while exploring the game’s vast and blocky world, with their appearance signaling imminent danger. Their explosive nature makes them a constant threat, as they can cause significant damage to players and structures if they get too close.
Despite being hostile, Creeper merchandise, including plush toys, t-shirts, and various other items, are highly sought after by Minecraft fans. The Creeper’s unique design and memorable presence have made it an integral part of Minecraft’s identity and a beloved character among gamers worldwide.
Why knit a Minecraft Creeper?

Minecraft Creeper is one of the most recognizable and iconic characters in the Minecraft world. With its distinctive green color and pixelated design, it has become a beloved figure among gamers and fans of the game. Knitting a Minecraft Creeper can be a fun and creative way to bring this character to life and show off your love for the game.
Knitting a Minecraft Creeper allows you to create a unique and personalized piece of Minecraft merchandise. You can choose your own colors and yarn types to customize the Creeper to match your preferences. Whether you want a traditional green Creeper or a more colorful one, the choice is yours. It’s a great way to express your creativity and showcase your knitting skills.
Knitting a Minecraft Creeper can also be a rewarding and relaxing project. The repetitive nature of knitting can be quite meditative and soothing, providing a sense of calm and satisfaction as you see your creation come to life. It’s a great way to unwind and destress, allowing you to focus on the task at hand and forget about the worries of the day.
Furthermore, knitting a Minecraft Creeper can be a great gift idea for fellow Minecraft fans. Whether it’s for a birthday, holiday, or just because, a hand-knit Creeper can make a thoughtful and unique present. It shows that you’ve put time and effort into creating something special for them, and it’s sure to be appreciated by any Minecraft enthusiast.
Overall, knitting a Minecraft Creeper is a fun and rewarding activity that allows you to showcase your love for the game and your creativity. Whether you’re a beginner knitter or an experienced one, this project is sure to bring joy and satisfaction. So grab your knitting needles and get ready to create your very own Minecraft Creeper!
Choosing the right yarn and needle size
When it comes to knitting the perfect Minecraft creeper, choosing the right yarn and needle size is essential. The right combination will ensure that your finished project turns out just the way you want it to.
Yarn choice: The first thing to consider is the type of yarn you want to use. For a Minecraft creeper, it’s best to use a yarn that is medium weight (also known as worsted weight or aran weight). This will give your creeper a good structure and make it easier to knit. Acrylic yarn is a popular choice for beginners, as it is affordable, versatile, and easy to care for. However, if you prefer a more natural fiber, you can also use wool or cotton yarn.
Needle size: The needle size you choose will depend on the yarn you are using and your desired gauge. The pattern you are following may also provide a recommended needle size. Generally, for medium weight yarn, a US size 7 (4.5 mm) needle works well. However, it’s always a good idea to make a gauge swatch before starting your project to ensure that you are getting the correct gauge. If your stitches are too loose, try using a smaller needle size, and if they are too tight, go up a size.
By carefully selecting the right yarn and needle size for your Minecraft creeper project, you’ll be on your way to creating a fun and cute knitted character that you’ll be proud to show off to other Minecraft fans!
Understanding the knitting pattern
The Minecraft creeper knitting pattern is a detailed guide to creating a knitted toy replica of the popular creeper character from the Minecraft game. This pattern is designed for intermediate knitters who are comfortable working with double-pointed needles and reading complex knitting instructions.
Materials:
- Medium weight yarn in green, black, and white
- Double-pointed knitting needles
- Tapestry needle
- Stuffing
- Black embroidery thread
Instructions:
- Using the green yarn, cast on the required number of stitches and join in the round. Begin knitting the body of the creeper following the specified stitch pattern. Make sure to mark the beginning of the round.
- As you continue knitting, carefully follow the pattern instructions for shaping the creeper’s head, body, legs, and tail. Pay close attention to any increases or decreases that are indicated.
- Once the main body of the creeper is complete, stuff it firmly with stuffing, making sure to evenly distribute it throughout.
- Using the black yarn, embroider the creeper’s face onto the front of its head. Use the tapestry needle to create the desired facial features, such as the eyes, mouth, and frown lines.
- Finally, use the white yarn to create the creeper’s iconic pixelated pattern. Follow the chart provided in the pattern, knitting or purling the specified stitches in the white yarn to depict the distinct pixelated design.
- Once all the knitting and embroidery is complete, carefully weave in any loose ends of yarn and secure them to prevent unraveling.
This knitting pattern provides a step-by-step guide to creating your own Minecraft creeper toy using knitting techniques. By following the instructions and paying close attention to the detailed stitch patterns, you’ll be able to knit a charming and accurate replica of the creeper character from Minecraft.
The Minecraft creeper knitting pattern is a fun and creative project that allows you to bring your favorite video game character to life. In this tutorial, we will provide step-by-step instructions on how to knit the body of the creeper.
Materials:
- Green yarn
- Knitting needles (size 8)
- Tapestry needle
- Fiberfill stuffing
Instructions:
- Cast on 20 stitches using the green yarn.
- Knit every row until the piece measures approximately 10 inches.
- Bind off all stitches.
- Using the tapestry needle, weave in any loose ends of yarn.
- Fold the knitted piece in half lengthwise, with the right sides facing each other.
- Using the tapestry needle and green yarn, sew the side seams together, leaving an opening at the bottom.
- Turn the piece right side out.
- Stuff the body with fiberfill stuffing, making sure to evenly distribute it.
- Use the tapestry needle and green yarn to sew up the opening at the bottom.
The body of the creeper is now complete! You can continue with the next steps to knit the head, arms, and legs, or add any additional details to personalize your creeper. Happy knitting!
Adding the face details

Once you have finished knitting the main body of the creeper, it’s time to add the face details to bring your creeper to life. The face details are what make the creeper instantly recognizable, so it’s important to get them right.
Start by embroidering the eyes onto the face of the creeper. Use black yarn or embroidery thread to create two small, oval-shaped eyes. Place the eyes about two rows down from the top of the head, and make sure they are evenly spaced apart. You can use small stitches to secure the eyes in place, making sure they are firmly attached.
Next, it’s time to add the mouth. The creeper’s mouth is made up of a distinct pattern of squares. Using black yarn, create the mouth by embroidering a row of small, square shapes just below the eyes. Each square should be about the size of a stitch in width, and you can use a backstitch or running stitch to create the pattern. Make sure the squares are evenly spaced and aligned to create a neat and tidy mouth.
To complete the face details, you can also add small square shapes as teeth inside the mouth. Use white yarn to create these teeth, and place them evenly spaced along the bottom row of the mouth. Secure them in place with small stitches, making sure they are straight and aligned with the squares of the mouth.
Knitting the arms and legs

When knitting a Minecraft Creeper, it is important to pay attention to the details, including the arms and legs. These are crucial elements that give the Creeper its iconic look.
To begin knitting the arms and legs, you will need to gather the necessary materials, including green yarn and knitting needles. It is best to use a slightly smaller needle size than you used for the body to ensure that the limbs have a tighter knit and hold their shape better.
Arms: Start by casting on a certain number of stitches, depending on how long you want the arms to be. Knit in the round or in rows, depending on your preference, until the arm reaches the desired length. Make sure to leave a long tail of yarn before cutting it to sew the arm onto the body later.
Legs: Similar to the arms, cast on the desired number of stitches for the length of the leg. Knit in the round or in rows, working until the leg reaches the desired length. As with the arms, remember to leave a long tail for sewing onto the body later.
Once you have completed knitting the arms and legs, you can stuff them lightly with fiberfill or stuffing material to give them a more three-dimensional look. Then, carefully sew the arms and legs onto the body using the long tails of yarn you left. You can refer to a reference image of a Creeper to ensure proper placement.
Knitting the arms and legs of a Minecraft Creeper requires attention to detail and precision. By following these steps, you can create the perfect limbs to complete your Creeper toy or decoration.
Assembling the Creeper

After you have finished knitting all the necessary pieces for your Minecraft creeper, it’s time to assemble them together. Follow these steps to bring your creeper to life:
1. Sew the Head

Start by sewing together the front and back pieces of the creeper’s head. Use a yarn needle and matching yarn to carefully stitch along the edges, leaving the bottom open for stuffing. Make sure to align the rows and stitches as accurately as possible to maintain the creeper’s pixelated look.
2. Stuff the Head
Once you’ve sewn the head, it’s time to stuff it. Use polyester fiberfill or any other suitable stuffing material to fill the head. Be generous with the stuffing to give your creeper a nice round shape, but be careful not to overstuff it, as it may distort the pattern. Gently push the stuffing into all corners and spaces to ensure an even distribution.
3. Sew the Body

Next, sew the front and back pieces of the creeper’s body together, following the same sewing technique as you did for the head. Leave an opening for stuffing at the bottom, just like with the head. Make sure to align the rows and stitch count to maintain the creeper’s pixelated design.
4. Stuff the Body
Once the body is sewn, stuff it using the same technique as with the head. Fill it generously, but avoid overstuffing. Ensure that the stuffing is evenly distributed throughout the body for a consistent shape.
5. Attach the Head to the Body

To attach the head to the body, align the opening of the head with the opening of the body. Use the yarn needle and matching yarn to stitch them together, ensuring that the seams are secure. Be mindful of the alignment and tension to maintain the creeper’s symmetry.
6. Stitch the Legs and Arms
Lastly, stitch the legs and arms to the body.Use the yarn needle and matching yarn to sew the limbs securely in place. Position them according to the pattern, and make sure they are evenly spaced and aligned.
Once you’ve completed these steps, your Minecraft creeper will be fully assembled and ready for display or play. Enjoy the process and take pride in your handcrafted creeper!
Personalizing your Creeper
When it comes to Minecraft, the creeper is one of the most recognizable and iconic mobs in the game. So why not personalize your creeper and make it even more unique? There are many ways you can add your personal touch to this pixelated creature.
1. Color choices: One of the simplest ways to personalize your creeper is by choosing your own color palette. While the traditional creeper is green, you can experiment with different shades and even mix in other colors to create a one-of-a-kind design. Consider using yarn in various shades of green, or incorporate different colors for the creeper’s face and body.
2. Embroidery and embellishments: Another way to personalize your creeper is by adding embroidery and embellishments. You can use a contrasting color of yarn to stitch on additional details, such as a smiley face or patterned designs. Additionally, you can sew on buttons, beads, or even small felt shapes to give your creeper some extra flair.
3. Texture and yarn choices: Experimenting with different yarn textures and types can also add a personal touch to your creeper. Play with different weights of yarn to create a fuzzy or chunky creeper, or use variegated yarn to give it a multi-colored effect. You can also incorporate different stitch patterns, such as ribbing or cables, to add texture to your creeper’s body.
4. Custom features: If you’re feeling adventurous, you can even add custom features to your creeper. Consider knitting or crocheting accessories like hats, scarves, or even tiny weapons for your creeper to hold. This will not only make your creeper unique but also show off your crafting skills.
5. Display options: Once you’ve personalized your creeper, you’ll want to find the perfect way to display it. Consider creating a small display stand or attaching a loop of yarn to hang it up. You can also place your personalized creeper on a shelf or use it as a decorative element in your gaming setup.
Remember, the possibilities are endless when it comes to personalizing your creeper. Let your creativity run wild and have fun making your very own unique Minecraft creeper!
Tips and tricks for knitting success
Knitting can be a relaxing and rewarding hobby, but it can also be a bit challenging, especially for beginners. However, with some tips and tricks, you can improve your knitting skills and achieve great results. Here are some helpful suggestions to enhance your knitting experience:
- Choose the right yarn: The type of yarn you use can greatly affect the outcome of your knitting project. Make sure to choose a yarn that matches the pattern requirements and consider the texture and weight of the yarn.
- Start with simple projects: If you’re new to knitting, it’s best to start with simple projects, such as scarves or dishcloths. These projects allow you to practice basic knitting techniques and build your skills before moving on to more complex patterns.
- Practice proper tension: Maintaining consistent tension is crucial for achieving even stitches and a professional-looking finished project. Practice finding the right balance between a tight and loose tension, and try to keep your stitches uniform in size.
- Use stitch markers: Stitch markers can be a helpful tool for keeping track of your progress and preventing mistakes. Place them at specific points in your pattern to mark increases, decreases, or stitch pattern changes.
- Take breaks and stretch: Knitting for extended periods of time can lead to muscle fatigue and tension. Remember to take regular breaks, stretch your hands and arms, and relax your posture to avoid discomfort or injury.
- Read and understand the pattern: Before starting a knitting project, carefully read through the pattern instructions to ensure you understand the techniques and stitches required. It’s also helpful to familiarize yourself with any knitting abbreviations or symbols used in the pattern.
- Don’t be afraid to make mistakes: Making mistakes is a natural part of learning and improving in knitting. If you make a mistake, don’t be afraid to unravel your work and start again. Embrace the process of learning from your mistakes and enjoy the journey of knitting.
By following these tips and tricks, you can enhance your knitting skills and create beautiful and intricate projects. Remember that knitting takes time and practice, so be patient and enjoy the process of creating something unique with your own hands.
Displaying and using your knitted Creeper

Once you have finished knitting your Creeper, it’s time to proudly display and use your creation. Whether you’re a Minecraft fan or looking for a unique decoration or gift, the knitted Creeper is sure to impress. Here are some ideas for how you can showcase and enjoy your knitted Creeper:
1. Display it as room decor
The knitted Creeper can add a touch of Minecraft charm to any room. Place it on a shelf, bookcase, or desk to show off your knitting skills and love for the game. Its vibrant green color and distinctive pixelated design will instantly catch the eye of anyone who enters the room.
2. Use it as a pillow or cushion

The knitted Creeper can also serve a practical purpose as a comfy pillow or cushion. Its square shape and soft texture make it great for lounging or adding extra support to your back while sitting. You can even use it as a pillow for a Minecraft-themed party or sleepover.
3. Incorporate it into a Minecraft-themed display

If you’re hosting a Minecraft-themed event or want to create a dedicated Minecraft display, the knitted Creeper can be a fantastic addition. Combine it with other Minecraft-themed items such as block-shaped props, character figurines, and pixelated artwork for a visually stunning and immersive experience.
4. Gift it to a fellow Minecraft fan
If you know someone who is a fan of Minecraft, the knitted Creeper can make a thoughtful and personalized gift. Wrap it up nicely and give it as a surprise for a birthday, holiday, or special occasion. It’s a unique and handmade item that will surely be appreciated by any Minecraft enthusiast.
However you choose to display or use your knitted Creeper, it’s a testament to your creativity and passion for both knitting and gaming. Enjoy showing off your creation and let it bring a touch of Minecraft whimsy to your life!
Share your Minecraft Creeper creations
After learning how to knit your very own Minecraft Creeper using the provided pattern, it’s time to show off your creations! Whether you made a cuddly toy for yourself or a gift for a Minecraft enthusiast, we want to see what you’ve created.
Share pictures of your Minecraft Creeper knits on social media using the hashtag #MCCreeperKnit. This will allow other Minecraft fans to admire and get inspired by your work. You might even discover new knitting techniques or ideas by browsing through the creations shared by others.
How to share your Minecraft Creeper knit:
- Take a clear photo of your knitted Creeper from different angles.
- Post the photo on your preferred social media platform.
- In the caption, include the hashtag #MCCreeperKnit to join the community.
- Feel free to add a description or share any interesting details about your knit.
Additionally, you can also share your Minecraft Creeper creation in knitting forums, knitting groups, or any other online communities that focus on crafts or Minecraft. Don’t forget to mention the pattern you used and any modifications you made to personalize your knit.
We can’t wait to see your Minecraft Creeper knits! Get creative, show off your skills, and inspire others to give it a try. Happy knitting!