Stylish Ribber Patterns for Your Knitting Machine

The knitting machine ribber is a valuable accessory for machine knitters that allows for the creation of intricate patterns and designs. Whether you’re a beginner or an experienced knitter, using a ribber can add a whole new level of creativity to your projects.
The ribber works in conjunction with a knitting machine to produce alternating rows of knit and purl stitches, creating ribbing or textured patterns. It is an essential tool for creating a wide range of designs, including cables, ribs, laces, and more.
One of the main advantages of using a ribber is the ability to easily produce professional-looking patterns and textures with minimal effort. With the ribber, you can create intricate designs that would be difficult or time-consuming to achieve by hand. The machine takes care of the repetitive work, allowing you to focus on the design and creativity of your project.
Knitting Machine Ribber Patterns

The knitting machine ribber is a tool that works in conjunction with a knitting machine to create a variety of patterns and textures in a knitted fabric. Ribber patterns can add depth and interest to your projects, whether you are knitting garments, accessories, or home decor items.
1. Ribbing Patterns: One of the most popular uses of the ribber attachment is to create ribbing patterns. Ribbing is commonly used for cuffs, waistbands, and collars in garments, as well as edges of blankets and scarves. With the ribber, you can easily create ribbing patterns such as 1×1, 2×2, or 3×1 ribbing. These patterns add stretch and elasticity to your knitted fabric.
2. Tuck Stitch Patterns: The ribber attachment also allows you to create tuck stitch patterns. Tuck stitches are created by selecting needles on the ribber bed and holding them in a tuck position while knitting. This creates a textured fabric with raised stitches. Tuck stitch patterns can be used to create interesting and unique designs in your knitted fabric, such as honeycomb, basketweave, or cable-like patterns.
3. Double Bed Jacquard: Another technique that can be achieved with the ribber attachment is double bed jacquard. Jacquard patterns are intricate designs that are created by using two colors of yarn and selectively knitting with each color. The ribber attachment allows you to easily create these complex patterns by automatically knitting one color on the ribber bed and the other color on the main bed. Double bed jacquard can be used to create beautiful colorwork designs, such as Fair Isle or intarsia.
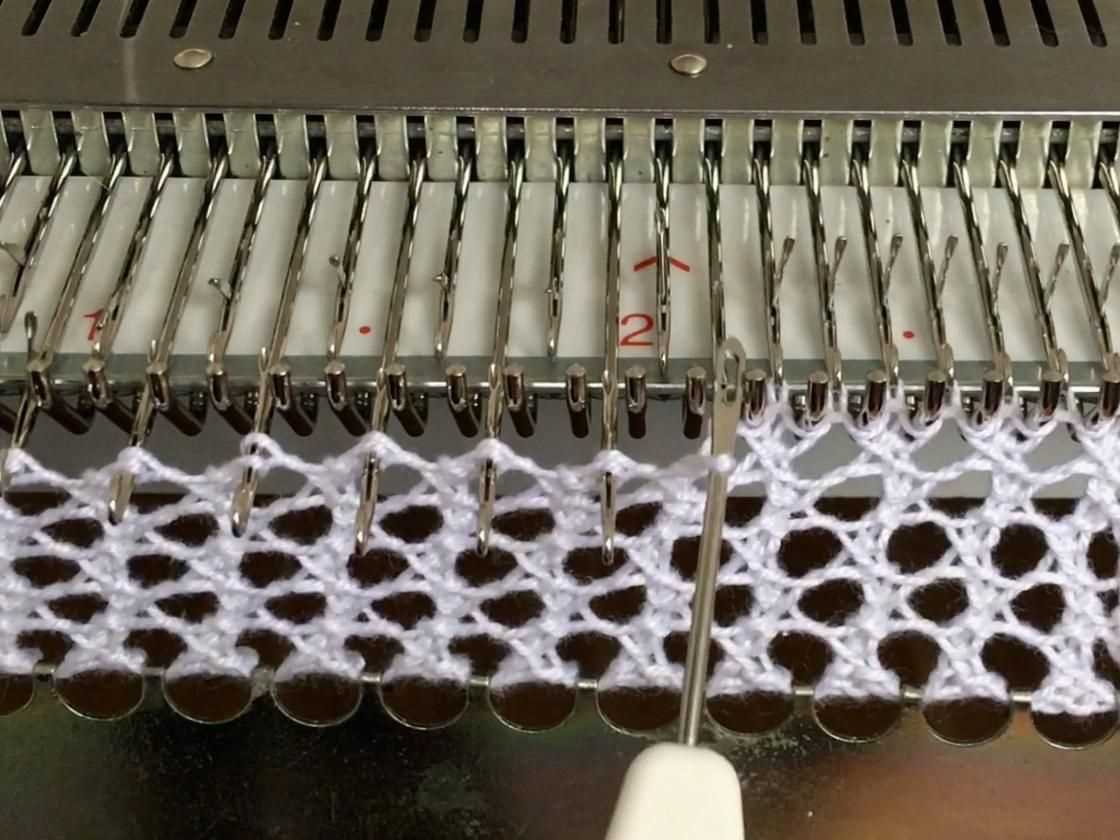
4. Lace Patterns: The ribber can also be used to create delicate lace patterns. By using lace transfer tools and manipulating the needles on the ribber bed, you can create intricate lace designs in your knitted fabric. Lace patterns can be used to add a touch of elegance and femininity to your projects, whether it’s a lacy shawl, a delicate blouse, or decorative doilies.
With the knitting machine ribber attachment, the possibilities for creating unique and beautiful patterns are endless. Whether you’re a beginner or an experienced knitter, the ribber can expand your knitting capabilities and take your projects to the next level.
What Is a Knitting Machine Ribber?
A knitting machine ribber is an accessory that can be attached to a knitting machine to add ribbing or textured patterns to knitted fabric. It works in conjunction with the main knitting machine to create alternating knit and purl stitches, resulting in a stretchy and elastic fabric. The ribber can be used to create various types of ribbing, such as 1×1 or 2×2 rib, as well as other stitch patterns like cables, seed stitch, or fisherman’s rib.
The ribber consists of a set of needles that are positioned parallel to the main knitting machine needles. These ribber needles can be set to knit the same stitches as the main needles, or they can be set in a different configuration to create different patterns. The ribber is usually operated using a separate carriage that moves the ribber needles across the fabric to create the desired pattern.
The knitting machine ribber is a versatile tool that allows knitters to add professional-looking ribbing to their projects with ease. It can be used to create cuffs, collars, waistbands, or any other part of a garment that requires stretchiness. The ribber can also be used to create decorative patterns and textures, adding an extra level of interest to knitted fabric.
Benefits of Using a Knitting Machine Ribber:
- Efficiency: The ribber allows for faster and more efficient knitting of ribbed fabric compared to hand-knitting. It can knit multiple rows of stitches at once, making it ideal for large-scale projects or production knitting.
- Precision: The ribber ensures consistent tension and stitch size, resulting in evenly knitted ribbing. This is especially beneficial when working on complex stitch patterns or colorwork.
- Versatility: With a ribber, knitters have a wide range of stitch patterns and ribbing options to choose from. They can easily switch between different patterns and experiment with different textures to create unique and customized fabric.
- Time-saving: The ribber eliminates the need for manual manipulation of stitches to create ribbing, saving knitters valuable time and effort.
- Professional finish: Using a ribber can result in a more polished and professional-looking finished product. The ribbing created by the ribber has a neat and uniform appearance, enhancing the overall quality of the knitted fabric.
In conclusion, a knitting machine ribber is a versatile accessory that allows knitters to easily create ribbing and textured patterns on their knitted fabric. It offers efficiency, precision, versatility, and a professional finish, making it a valuable tool for knitters of all skill levels.
The Importance of Using Ribbers in Knitting
When it comes to knitting, ribbers play a crucial role in creating various patterns and designs. They are a specialized attachment for knitting machines that allow for the creation of ribbed fabrics, which are commonly used in garments such as cuffs, collars, and hems. Ribbed fabrics not only add texture to knitted items but also provide additional flexibility and stretch. This makes them particularly suitable for garments that require a snug fit or need to accommodate body movements.
The use of ribbers in knitting machines offers several advantages. Firstly, ribbers enable knitters to easily create different rib patterns, such as 1×1 rib, 2×2 rib, or fisherman’s rib. These patterns can be used to add visual interest to knitted items or to create specific effects, such as a more elastic fabric or a scalloped edge. With a ribber, knitters have more flexibility and control over the design options they can achieve.
Ribbers also allow for the production of knit fabrics with a double bed construction. This means that the fabric is created simultaneously on two beds of the knitting machine, resulting in a more stable and balanced fabric. Double bed knitting offers additional design possibilities, such as reversible fabrics or the creation of intricate stitch patterns that require multiple yarn colors. The use of ribbers expands the range of techniques and effects that can be achieved with knitting machines, providing knitters with endless creative possibilities.
In summary, ribbers are an essential tool for knitters who want to explore and experiment with different rib patterns and double bed knitting techniques. They offer increased flexibility, control, and design options, allowing for the creation of unique and high-quality knitted items. Whether you are a beginner or an experienced knitter, incorporating ribbers into your knitting practice can open up a world of creative opportunities.
Choosing the Right Ribber for Your Knitting Machine
When it comes to knitting machines, having a ribber attachment can greatly expand your capabilities and the designs you can create. A ribber allows you to add ribs, purls, and other textured stitches to your knitting projects. However, choosing the right ribber for your knitting machine is crucial to ensure compatibility and achieve the desired results.
1. Compatibility: The first thing you should consider when choosing a ribber is its compatibility with your knitting machine. Different knitting machines may require specific ribber models or attachments that are designed to be used together. Consult the manufacturer’s guidelines or your knitting machine’s manual to determine which ribber options are suitable for your specific machine.
2. Needle Selection: Ribbers come with different needle options, such as single bed, double bed, or half-pitch. The needle selection will impact the type of stitches and patterns you can create. Single bed ribbers are suitable for basic ribbing, while double bed ribbers allow for more complex stitch patterns. Half-pitch ribbers can produce finer gauge fabrics with more intricate designs. Consider your knitting projects and desired stitch patterns when choosing the needle type.
3. Ease of Use: It is important to choose a ribber that is user-friendly and easy to install and operate. Look for ribbers that come with clear instructions or tutorials, and check if they have any additional accessories or tools that can make the ribbing process easier. Consider the maintenance requirements as well, such as cleaning and oiling, to ensure that the ribber can be easily maintained.
4. Quality and Durability: Investing in a high-quality ribber is essential to ensure its longevity and performance. Check the material used in the construction of the ribber, such as metal or high-quality plastic, to ensure its durability. Look for reviews or recommendations from other knitters to help you gauge the quality and reliability of the ribber you are considering.
Overall, choosing the right ribber for your knitting machine is an important decision that should be based on compatibility, needle selection, ease of use, and quality. By taking these factors into consideration, you can find a ribber attachment that will enhance your knitting capabilities and allow you to create beautiful and intricate designs.
Basic Ribber Patterns for Beginners
If you’re new to knitting machine ribbers, there are a few basic patterns that you can try to get started. These patterns are simple and easy to follow, making them perfect for beginners. With a little practice, you’ll be able to create stunning ribbed designs in no time.
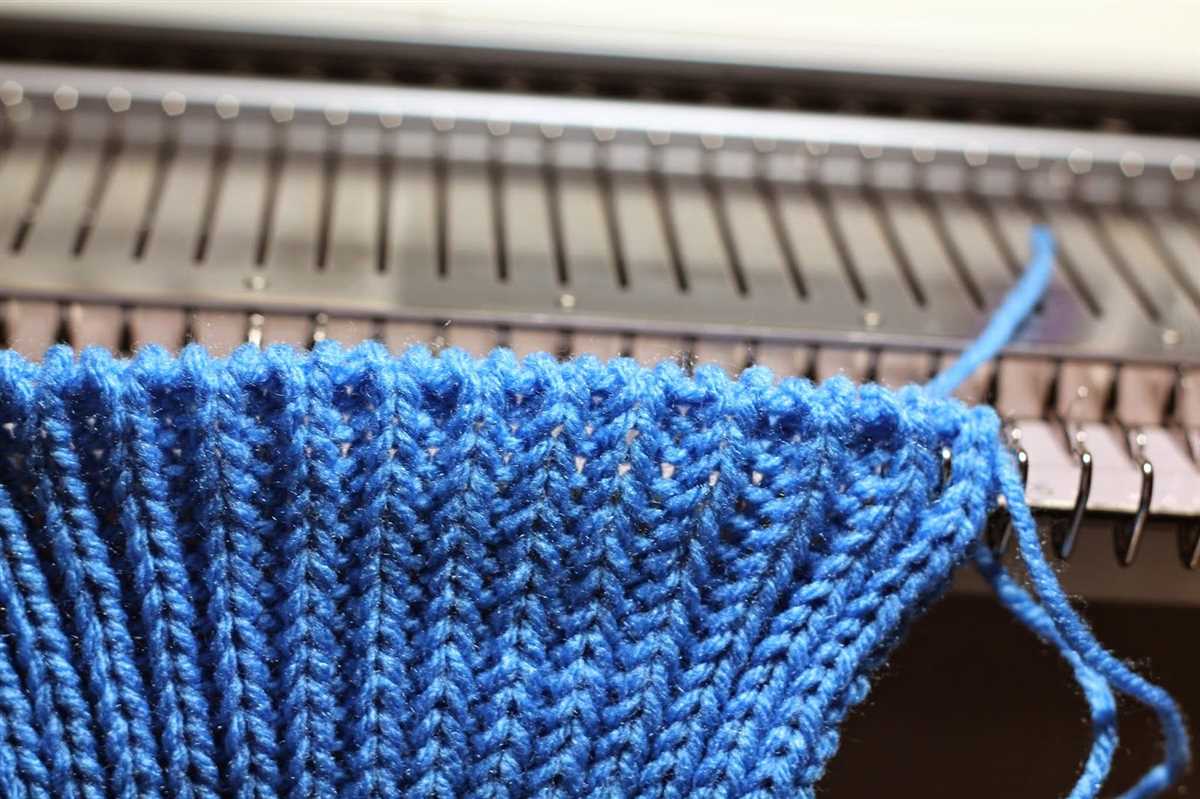
One basic ribber pattern that you can start with is the 1×1 rib pattern. This pattern creates a fabric with alternating columns of knit and purl stitches, giving it a stretchy and textured look. To create this pattern, simply knit one stitch and then purl one stitch, repeating this sequence until the desired length is reached. This pattern is great for creating cuffs, collars, and borders.
Another simple ribber pattern is the 2×2 rib pattern. This pattern creates a fabric with two columns of knit stitches followed by two columns of purl stitches, repeating this sequence throughout the fabric. To create this pattern, knit two stitches and then purl two stitches, repeating this sequence until the desired length is reached. This pattern is commonly used for creating ribbed scarves, sweaters, and hats.
For a more intricate ribber pattern, you can try the twisted rib pattern. This pattern creates a fabric with columns of twisted stitches, which gives it a unique and textured look. To create this pattern, knit one stitch through the back loop and then purl one stitch, repeating this sequence until the desired length is reached. This pattern is great for creating decorative panels or adding interest to garments.
These are just a few basic ribber patterns that you can try as a beginner. Once you get comfortable with these patterns, you can experiment with different stitch combinations, colors, and yarn weights to create your own unique designs. Remember to practice and have fun with your knitting machine ribber to unleash your creativity and create beautiful knitwear.
Advanced Ribber Patterns for Experienced Knitters
Skillful and experienced knitters who are looking to take their knitting projects to the next level can explore advanced ribber patterns. Ribber patterns provide an opportunity to create intricate and detailed designs that add texture and dimension to knitted garments. With the right techniques and an understanding of how to use a knitting machine ribber, knitters can produce unique and eye-catching creations.
1. Double Bed Ribbing: One advanced ribber pattern technique is double bed ribbing, which involves using both the main bed and the ribber bed to create a combination of knit and purl stitches. This technique allows knitters to produce complex ribbing patterns, such as half fisherman’s rib or full fisherman’s rib. Double bed ribbing requires careful manipulation of the knitting machine and a deep knowledge of the ribber settings.
2. Tuck Stitch Ribbing: Tuck stitch ribbing is another advanced ribber pattern technique that adds texture and depth to knitted fabric. Tuck stitches are created by selecting certain needles on the ribber bed to hold stitches in place while the main bed knits. This creates a raised design on the fabric. By experimenting with different tuck stitch patterns and combinations, knitters can achieve unique and intricate ribbed textures.
Knitters should keep in mind that advanced ribber patterns require attention to detail and careful monitoring of the knitting machine settings. It is important to practice and familiarize oneself with the techniques before attempting complex designs. Additionally, it is recommended to refer to detailed ribber pattern guides and seek guidance from experienced knitters to ensure successful results.
Tips and Tricks for Successful Ribber Knitting
Using a ribber attachment on a knitting machine can open up a whole new world of knitting possibilities. However, it can also be a bit tricky to master. Here are some tips and tricks to help you achieve successful ribber knitting:
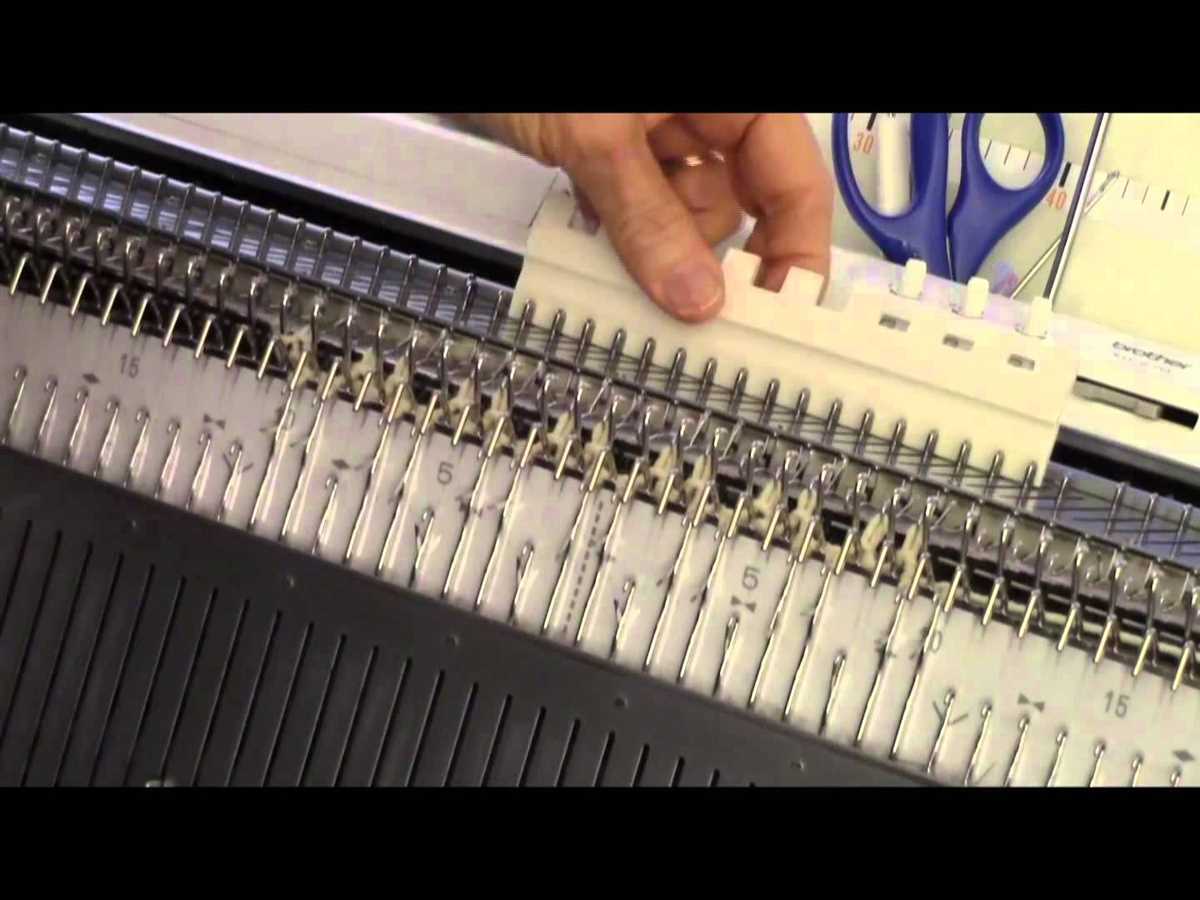
1. Proper Set-up
Before you begin ribber knitting, make sure your ribber is properly set up and aligned with your main knitting bed. This includes ensuring that both beds are at the same tension, the ribber is parallel to the main bed, and the ribber comb and weights are properly positioned.
2. Tension Adjustment
Tension adjustment is key to successful ribber knitting. The tension on both the main knitting bed and ribber should be set to the same value. Be sure to check and adjust the tension as needed, especially when switching between different types of yarn or stitch patterns.
3. Needle Selection

Choosing the right needles for ribber knitting is essential. Use a needle that matches the gauge and thickness of your yarn. Additionally, using ribber-specific needles, such as circular or latch needles, can help prevent dropped stitches and ensure smooth, even knitting.
4. Start with Simple Patterns
If you’re new to ribber knitting, start with simple stitch patterns, such as 1×1 or 2×2 ribbing, before moving on to more complex designs. This will help you become familiar with the ribber attachment and build your confidence before attempting more intricate patterns.
5. Practice Proper Takedown
When finishing your ribber knitting project, it’s important to practice proper takedown techniques. This includes removing the project from the machine carefully to avoid dropping stitches or distorting the fabric. Taking your time and being gentle will yield better results.
By following these tips and tricks, you’ll be well on your way to successful ribber knitting. Don’t be afraid to experiment and try new techniques to create unique and beautiful ribbed designs with your knitting machine.
Creating Ribbed Textures with Your Knitting Machine
When it comes to creating ribbed textures with your knitting machine, there are a few key techniques and patterns that you can use to achieve beautiful results. Ribbing is a popular knitting technique that creates a stretchy and textured fabric, often used for cuffs, hems, and collars. With a knitting machine, you can easily create ribbed textures in a fraction of the time it would take to hand knit.
One common technique for creating ribbed textures is using a ribber attachment. A ribber attachment is an additional piece of equipment that works in conjunction with your knitting machine. It allows you to create various types of ribbing, including 1×1, 2×2, and tuck ribbing. The ribber attachment has its own set of needles that work alongside the main bed of the knitting machine, allowing for intricate patterns and textures.
1. Single-bed Ribbing:
To create single-bed ribbing without a ribber attachment, you can simply use the main bed of your knitting machine. This technique involves using different stitch types and tensions to create the appearance of ribbed textures. For example, you can alternate between knit and purl stitches, or use a combination of slip stitches and tuck stitches to achieve ribbing effects.
2. Double-bed Ribbing:
Double-bed ribbing is achieved by using both the main bed and the ribber attachment of your knitting machine. This technique allows for more intricate ribbing patterns, such as 2×2 or 3×3 ribbing. By adjusting the settings on both the main bed and ribber, you can create different combinations of knit and purl stitches, resulting in unique ribbed textures.
In conclusion, whether you use a ribber attachment or work solely with the main bed of your knitting machine, there are various techniques and patterns that you can utilize to create beautiful ribbed textures. Experimenting with different stitch types, tensions, and settings will allow you to achieve unique and personalized ribbing effects for your knitting projects.
Exploring Different Ribber Stitches and Techniques
The knitting machine ribber is a versatile tool that allows you to create a variety of unique ribbing stitches and textures in your knitted fabrics. By experimenting with different techniques and patterns, you can achieve interesting and visually appealing designs that add depth and interest to your projects.
One popular ribbing stitch is the 1×1 rib. This stitch is created by alternating knit and purl stitches across the row. The ribber machine makes it easy to produce a consistent and uniform 1×1 rib, perfect for cuffs, collars, and hems. You can also experiment with variations of the 1×1 rib, such as twisted rib, where you twist the knit stitches to create a more textured appearance.
Some popular ribber patterns and techniques to explore include:
- 2×2 Rib: This rib pattern is created by alternating two knit stitches followed by two purl stitches across the row. The 2×2 rib creates a stretchy and reversible fabric, making it ideal for hats, scarves, and sweaters.
- Ribbed Cables: By combining ribbing stitches with cable patterns, you can create intricate and textured designs. The ribbing adds elasticity and structure to the cables, resulting in a visually appealing and unique fabric.
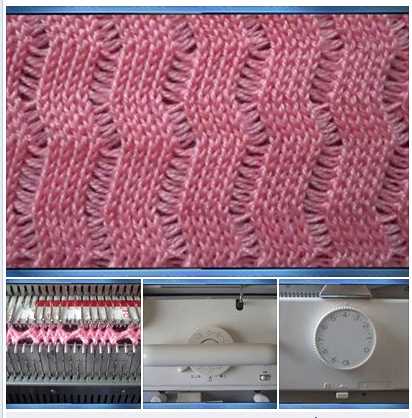
- Tuck and Slip Stitch Ribbing: This technique involves using tuck and slip stitches on the ribber to create raised stitches and textured patterns. By selectively tucking or slipping stitches, you can create interesting patterns and designs that add dimension to your knitted fabric.
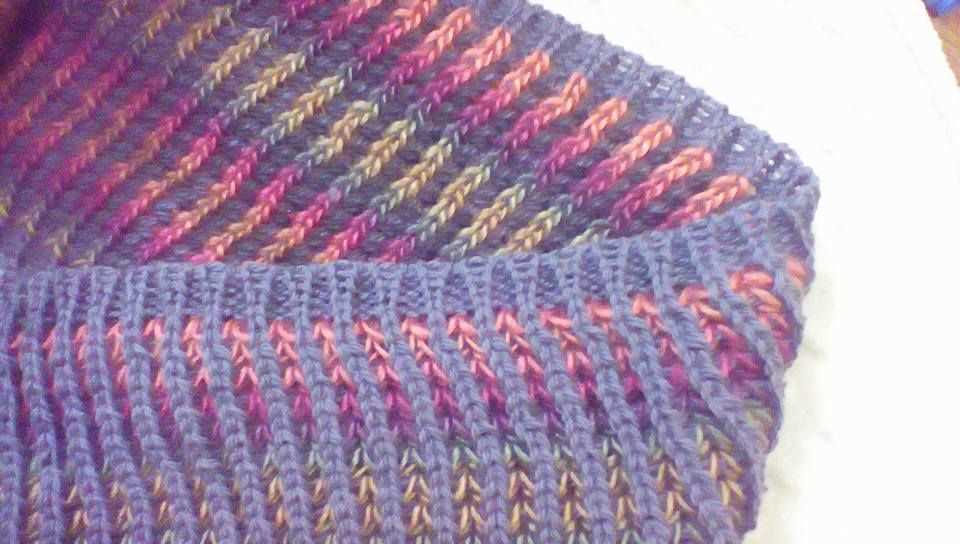
- Double Bed Racking: Racking is a technique in which the ribber bed is shifted sideways to create diagonal lines and patterns. By combining racking with ribbing stitches, you can create unique and visually striking designs that add movement and interest to your knits.
When exploring different ribber stitches and techniques, it is important to experiment and practice to achieve the desired results. By adjusting the tension settings, stitch size, and stitch patterns, you can create a wide range of ribbing styles and textures that suit your personal preferences and design ideas.
Remember to keep track of your experiments and document the settings and techniques you used. This way, you can replicate successful designs and refer back to them for future projects. The knitting machine ribber opens up a world of possibilities for creating intricate and unique ribbing stitches, so don’t be afraid to let your creativity shine.
Using Ribbers to Add Decorative Elements to Your Knits
A knitting machine ribber is an essential tool for adding decorative elements to your knits. With a ribber, you can create different textures, patterns, and designs that will elevate the overall appearance of your knitted pieces. Whether you are a beginner or an experienced knitter, incorporating ribber techniques into your projects can give them a professional and polished look.
One of the key advantages of using a ribber is the ability to create ribbed patterns. Ribbing is a popular knitting technique that adds stretch and elasticity to fabric, making it ideal for cuffs, collars, and waistbands. The ribber allows you to easily knit a variety of ribbed patterns, such as 1×1 rib, 2×2 rib, or even more complex variations. The result is a beautifully textured fabric that adds interest and dimension to your knits.
Intarsia and Fair Isle Techniques
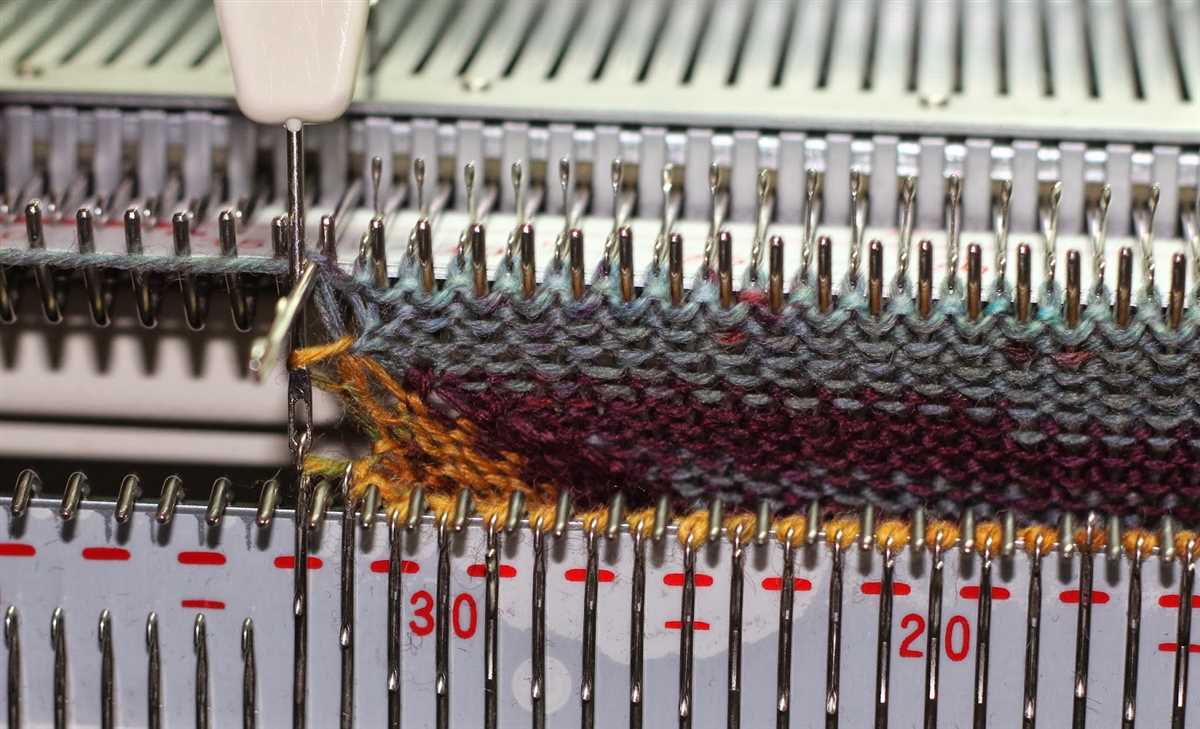
The ribber can also be used to incorporate intarsia and Fair Isle techniques into your knitting projects. Intarsia is a method of knitting that involves working with multiple colors to create large, distinct motifs or designs. With a ribber, you can easily switch between colors and knit intarsia patterns seamlessly.
Fair Isle, on the other hand, is a technique that involves knitting with two or more colors in a row to create intricate, stranded patterns. Using a ribber, you can knit Fair Isle patterns with ease and precision, ensuring that the floats of the unused colors are neatly trapped and hidden on the wrong side of the fabric. This technique allows you to incorporate stunning colorwork into your knits.
Adding Lace and Eyelet Details
In addition to ribbing and colorwork, a ribber can also be used to create delicate lace and eyelet details on your knits. Lace patterns are created by utilizing transfers and lace carriages, which allow for the automatic creation of eyelets and complex stitch patterns. The ribber provides the necessary support and stability, making it easier to execute intricate lace designs.
By taking advantage of the capabilities of a ribber, you can explore a wide range of techniques and create unique and visually appealing knitted pieces. Whether you want to add ribbing, colorwork, or lace details, the ribber is an invaluable tool that will enhance the aesthetic appeal of your knitted garments and accessories.
Adjusting Ribber Tension for Different Fabrics
When using a knitting machine ribber, it is important to adjust the tension properly to achieve the desired results with different fabrics. The tension settings can greatly affect the appearance and quality of the knit, so it is crucial to make the necessary adjustments based on the fabric type.
1. Understanding the fabric: Before adjusting the ribber tension, it is essential to have a good understanding of the fabric being used. Different fabrics have different characteristics, such as thickness, stretch, and texture. These factors can all influence the tension required for the ribber. For example, a lightweight and stretchy fabric may require a looser tension, while a thicker and less stretchy fabric may need a tighter tension.
2. Testing the tension: To determine the suitable tension for a specific fabric, it is recommended to test the ribber tension on a small sample first. Start by knitting a few rows with the desired stitch pattern and tension settings. Examine the fabric to see if it has the desired stretch, drape, and evenness. If the fabric appears too tight or loose, adjust the ribber tension accordingly. Gradually increase or decrease the tension until the desired result is achieved.
3. Keeping track of adjustments: It is helpful to keep a record of the ribber tension adjustments made for different fabrics. This will serve as a valuable reference for future projects and save time in determining the correct tension setting. Note down the fabric type, stitch pattern, and the tension settings used for each sample. This record can be modified and refined over time to create a comprehensive guide for ribber tension adjustments.
4. Consultation and experimentation: If unsure about the appropriate ribber tension for a specific fabric, it is always helpful to consult the machine’s manual or seek advice from experienced knitters. Sharing tips and experiences with other knitters can provide valuable insights and help in finding the right tension adjustment for different fabrics. Additionally, through experimentation and practice, one can develop a better understanding of how ribber tension affects various fabric types.
5. Regular adjustments: It is important to note that ribber tension may need to be adjusted regularly, even within the same project. For example, when transitioning from a ribbed section to a smooth stockinette stitch, the tension may need to be changed to accommodate the different stitch patterns. Regularly checking and adjusting the ribber tension throughout the knitting process ensures consistent and high-quality results.
Common Issues and Troubleshooting for Ribber Knitting
In the world of knitting, a ribber is an essential tool for creating beautiful and intricate designs. However, like any knitting machine, ribbers can sometimes encounter issues that may affect the quality of your knitted fabric. Here are some common problems that you may encounter when using a ribber, along with troubleshooting tips to help you overcome them.
1. Dropped or Misaligned Stitches
One common issue when using a ribber is dropped or misaligned stitches. This can be caused by several factors, such as incorrect tension settings, incorrect needle alignment, or worn-out needles. To fix this issue, start by checking the tension settings on your ribber and adjusting them if necessary. Then, ensure that all the needles on the ribber are properly aligned and not bent or damaged. If any needles are worn out, replace them with new ones. Finally, double-check that the ribber carriage is moving smoothly across the knitting bed without any obstructions.
2. Uneven or Loose Stitches
Another common issue with ribber knitting is uneven or loose stitches. This can occur if the tension settings on your ribber are too loose or if the yarn is not properly feeding into the machine. To troubleshoot this problem, try tightening the tension settings on your ribber gradually while making test swatches until you achieve the desired stitch tension. Ensure that the yarn is properly feeding into the machine by checking the tension arm and the yarn path. Also, make sure that the yarn is not getting caught or tangled anywhere in the machine.
3. Puckering or Curling Fabric
When knitting ribbed fabric, you may sometimes encounter issues with puckering or curling. This can be caused by improper tension settings, incorrect needle alignment, or using the wrong yarn type for the ribber. To resolve this issue, start by adjusting the tension settings on your ribber to achieve a balanced tension between the main bed and the ribber. Check the needle alignment and make sure all the needles are correctly positioned. Also, consider using a yarn that is suitable for ribber knitting, such as a wool blend or a yarn specifically designed for ribbing.
Overall, troubleshooting issues with a ribber knitting machine requires patience and attention to detail. By checking and adjusting the tension settings, ensuring proper needle alignment, and using the right yarn, you can overcome common problems and achieve beautiful ribbed fabric with your knitting machine.
Resources for Finding Ribber Patterns and Inspiration
Knitting machine ribber patterns can be found in various resources, both online and offline. These resources offer a wide range of patterns and inspiration for different types of garments and designs. Whether you are a beginner or an experienced knitter, these resources can enhance your creativity and help you create unique and beautiful knitted pieces.
Here are some resources where you can find ribber patterns and get inspired:
1. Knitting Machine Manuals:
Most knitting machine manuals come with ribber patterns and instructions on how to use them. These manuals provide valuable information on ribber techniques, settings, and designs. You can find these manuals from knitting machine manufacturers or on online platforms that offer vintage knitting machine manuals.
2. Online Forums and Communities:
Online forums and communities dedicated to machine knitting are excellent resources for finding ribber patterns and inspiration. These platforms allow knitters to share their experiences, patterns, and ideas. You can find patterns, tips, and tricks from experienced knitters who are willing to help and inspire others.
3. Knitting Magazines and Books:
Knitting magazines and books often feature ribber patterns and designs. These publications provide step-by-step instructions for various projects and showcase the latest trends in machine knitting. They are a great source of inspiration and can help you learn new techniques and stitches.
4. Online Pattern Databases:
There are several websites and online platforms that offer a wide range of knitting machine patterns, including ribber patterns. These databases allow you to search for specific designs, browse through different categories, and download patterns for your knitting machine. Some platforms may require a subscription or purchase, while others offer free patterns.
5. Social Media:
Social media platforms like Instagram, Pinterest, and Facebook can be great sources of inspiration for ribber patterns. Follow knitting machine enthusiasts, designers, and knitting communities to see their latest creations and get inspired. You can also join knitting machine-related groups and participate in discussions to exchange ideas and find new patterns.
Conclusion:
Finding ribber patterns and inspiration for your knitting machine projects is easier than ever, thanks to the various resources available online and offline. Whether you prefer traditional knitting magazines, online pattern databases, or social media platforms, there are numerous options to explore. Take advantage of these resources to enhance your knitting skills, discover new designs, and create stunning garments with your knitting machine.