A Festive Countdown: Knit Your Own Advent Calendar

Are you ready for the holiday season? One great way to count down the days until Christmas is with an advent calendar. While there are many options available in stores, why not create your own unique knitted advent calendar? Not only will it add a personal touch to your holiday decor, but it will also be a fun project to work on leading up to the festive season.
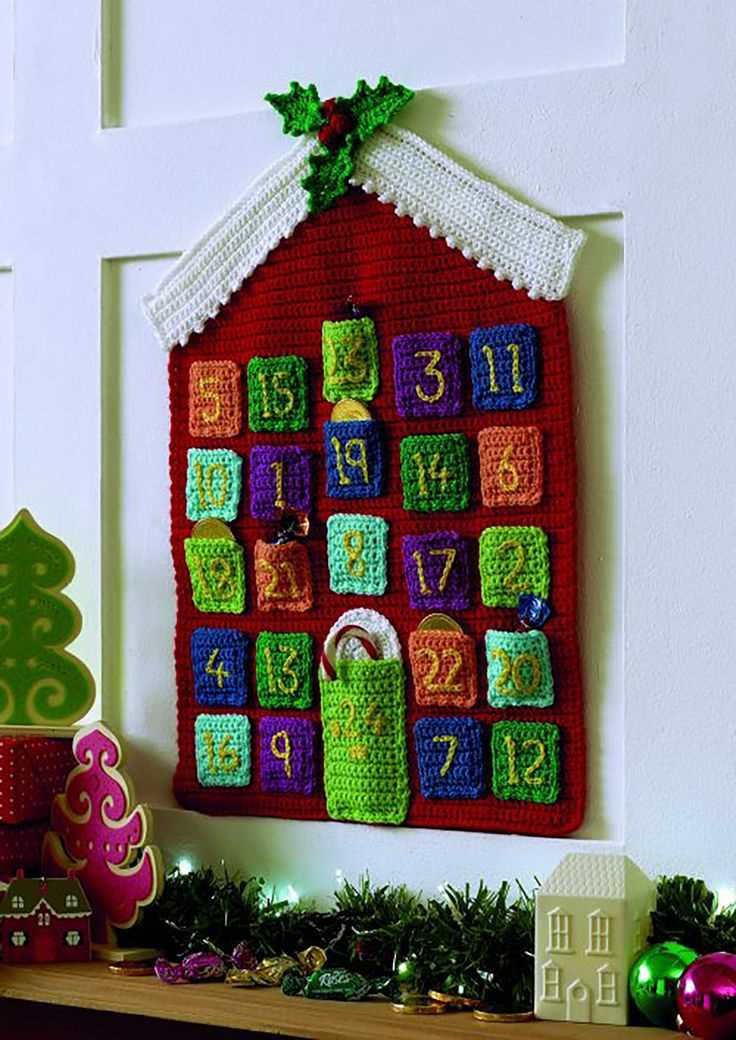
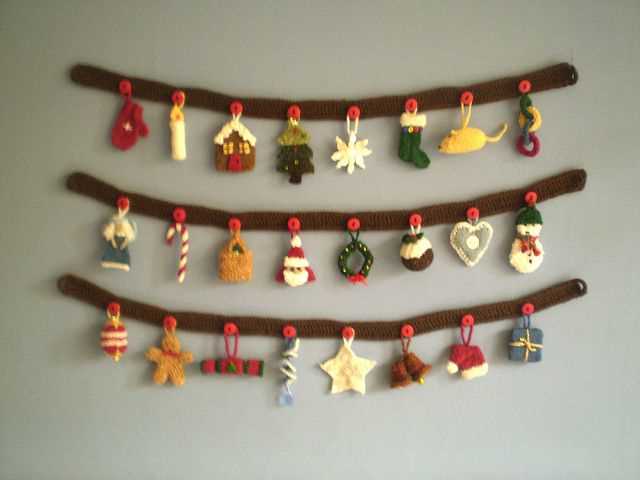
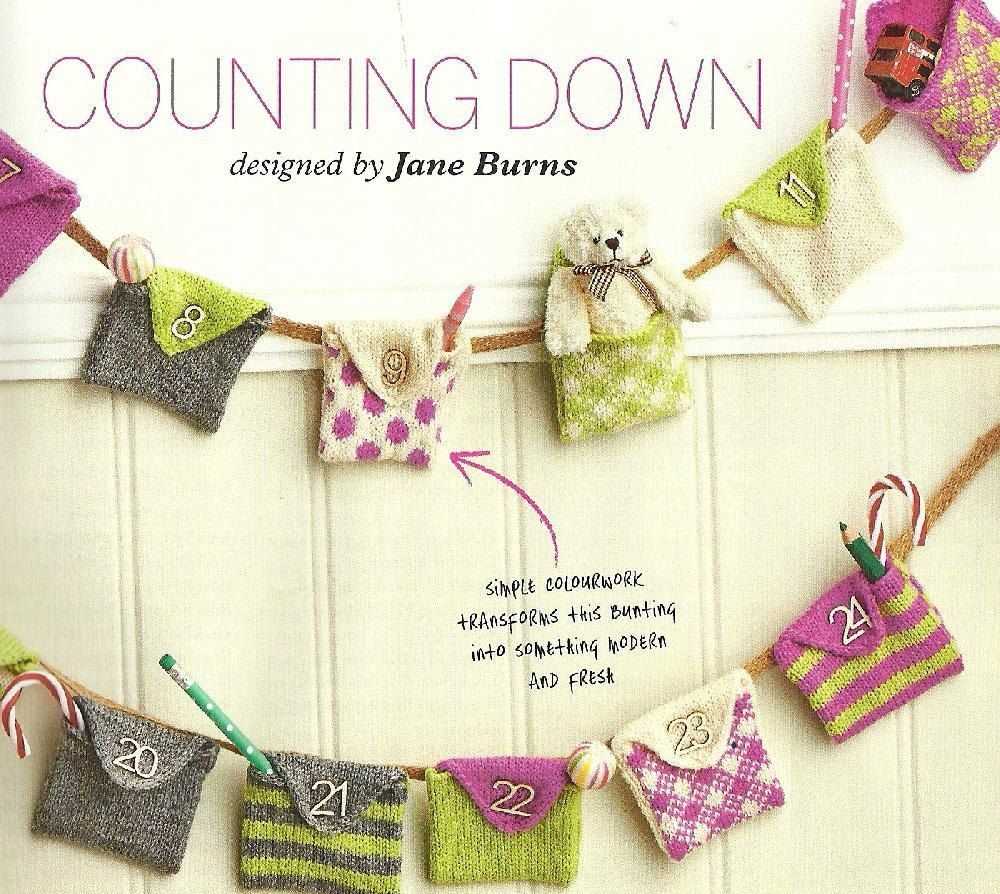
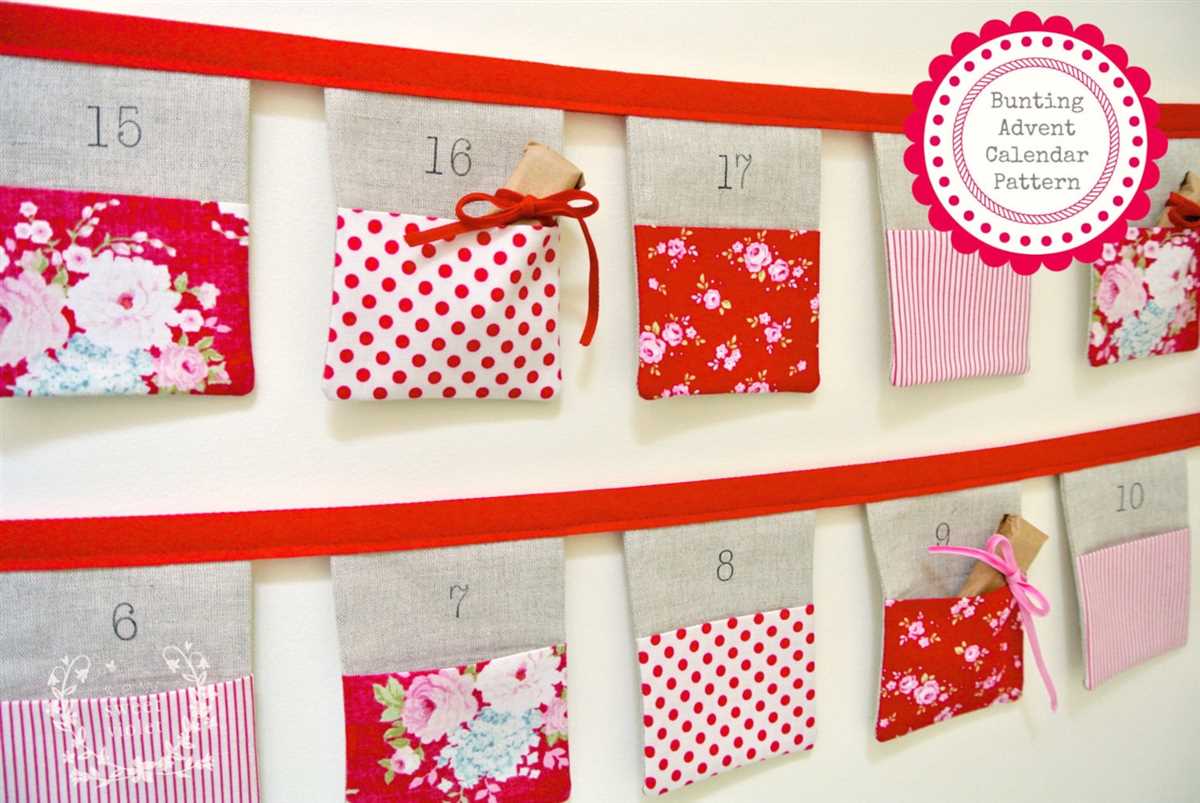
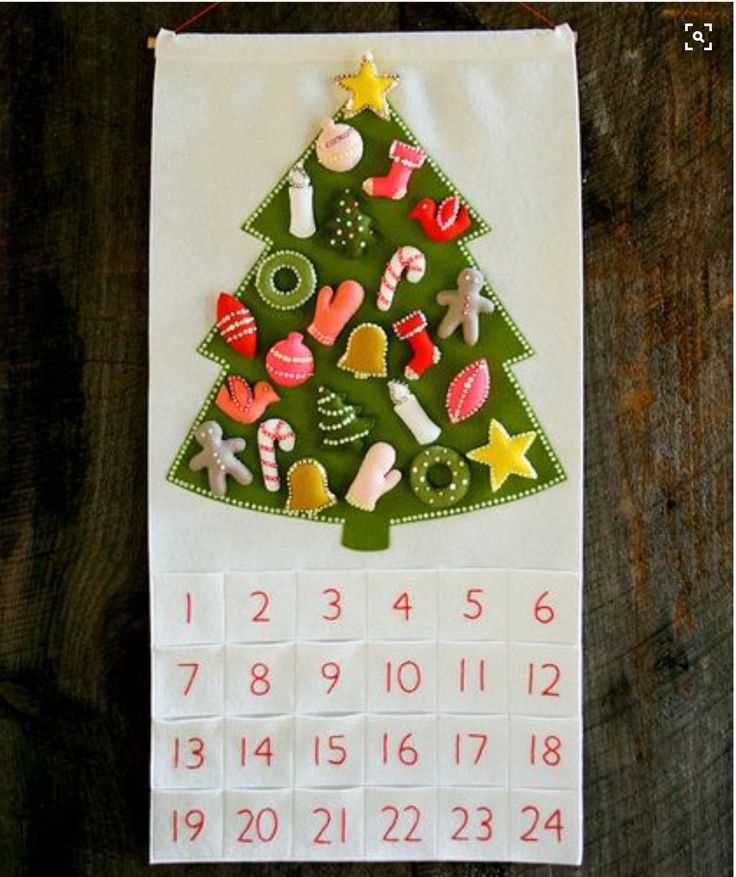
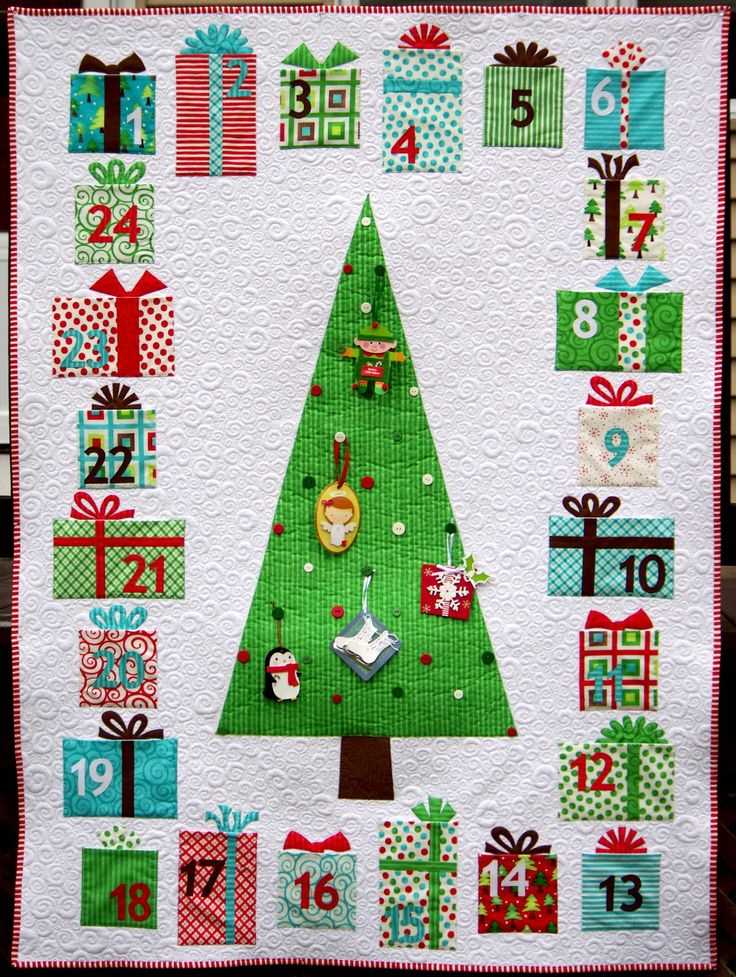
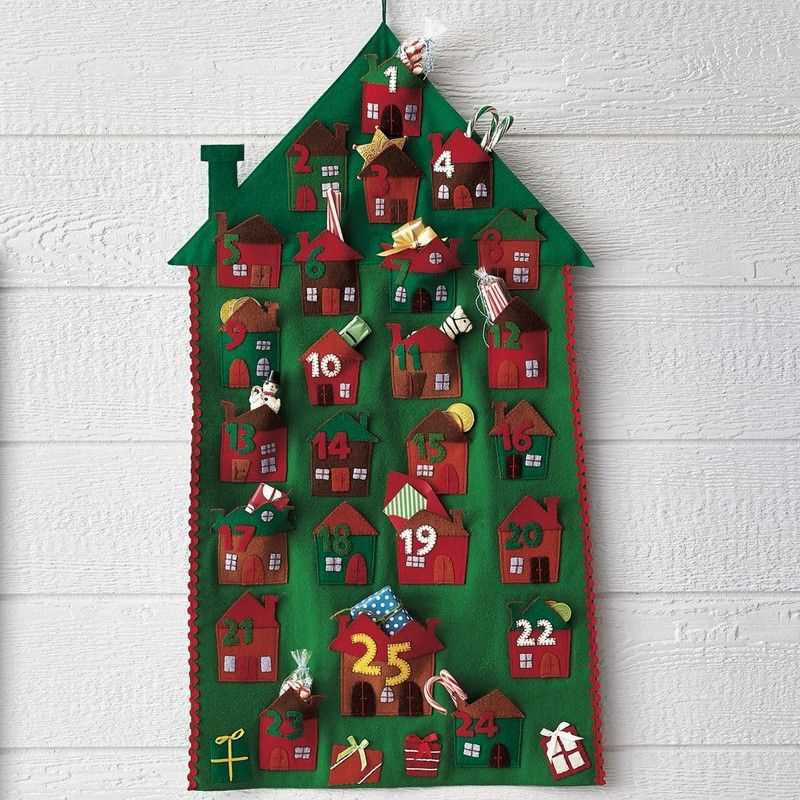
Knitting an advent calendar allows you to customize the design and colors to match your home decor or personal style. You can choose from a variety of patterns, from traditional to modern, depending on your preferences. Whether you prefer a more intricate design with pockets or a simpler version with hanging ornaments, there’s a pattern out there for everyone.
Not only is knitting an advent calendar a fun project, but it can also be a great way to involve the whole family. You can assign each family member a day to knit a small item or ornament to hang on the calendar. This collaborative effort will not only make the advent calendar more special, but it will also create lasting memories and traditions for years to come.
So, grab your knitting needles and yarn and get ready to create a beautiful and meaningful advent calendar. With a little bit of creativity and patience, you’ll have a one-of-a-kind decoration that will bring joy and excitement to your home throughout the holiday season. Get started on your knitted advent calendar today!
Why You Should Knit Your Own Advent Calendar
Are you tired of the same old store-bought advent calendars? Why not try something different this year and knit your own advent calendar? There are many reasons why knitting your own calendar can be a fun and rewarding project.
- Personalization: When you knit your own advent calendar, you have the freedom to personalize it to your liking. You can choose your own colors, patterns, and designs to create a calendar that reflects your unique style and taste. This can make the advent calendar even more special and meaningful.
- Keepsake: An advent calendar that you knit yourself can become a cherished keepsake that you can use year after year. Each time you bring it out, it will bring back memories of the time and effort you put into creating it. It can also be passed down through generations as a family heirloom.
- Handmade Touch: There’s something special about receiving a gift that has been handmade with love and care. Knitting your own advent calendar allows you to create a gift that is truly one-of-a-kind and shows the recipient that you took the time to create something special just for them.
- Learning Experience: Knitting your own advent calendar can be a great learning experience, especially if you’re new to knitting or want to improve your skills. It can introduce you to new techniques and patterns, and give you the opportunity to practice your knitting skills in a fun and practical way.
- Countdown Excitement: The anticipation of opening a new door or pocket on an advent calendar is always exciting, and knitting your own calendar adds an extra element of anticipation. As you work on the calendar, you can imagine the joy and excitement it will bring to the person who receives it, making the countdown to Christmas even more special.
So why not give knitting your own advent calendar a try this year? It can be a fun and rewarding project, allowing you to create a personalized and meaningful gift that will be cherished for years to come.
The Benefits of Knitting
Knitting is a popular craft that offers a multitude of benefits for both the mind and body. It is a relaxing and meditative activity that allows individuals to express their creativity and produce beautiful and practical items. Knitting can also help to improve cognitive function and mental well-being.
Stress Relief: Knitting has been proven to have a calming effect on the mind and body. The repetitive and rhythmic motions help to reduce stress and anxiety, similar to the effects of meditation. Knitting can help to lower heart rate and blood pressure, providing a sense of relaxation and tranquility.
Physical Health Benefits
- Hand Strength and Dexterity: Knitting involves the use of fine motor skills, which can help to improve hand strength and dexterity. This can be especially beneficial for individuals with arthritis or other hand-related conditions.
- Brain Stimulation: Knitting requires concentration and focus, which can help to keep the brain active and stimulated. It can enhance cognitive function and memory, and may even help to reduce the risk of developing conditions such as dementia and Alzheimer’s disease.
- Pain Management: Knitting can help to distract from chronic pain and provide a sense of purpose and accomplishment. It can be a therapeutic activity for individuals dealing with physical pain or undergoing medical treatments.
Mental and Emotional Benefits
- Stress Reduction: Knitting can help to alleviate stress and promote relaxation. It can provide a sense of accomplishment and satisfaction, boosting self-esteem and confidence.
- Mood Enhancement: Knitting releases endorphins, which are natural feel-good chemicals in the brain. It can improve mood and promote a sense of happiness and well-being.
- Community and Connection: Knitting can be a social activity, allowing individuals to connect with others who share the same interest. It can foster a sense of belonging and create a supportive community.
In conclusion, knitting offers a wide range of benefits for individuals of all ages and abilities. Whether you are seeking relaxation, mental stimulation, physical health improvements, or a creative outlet, knitting can provide a fulfilling and enjoyable experience.
History of Advent Calendars
The first known advent calendar dates back to the early 19th century in Germany. It was a simple version made of paper and consisted of 24 small doors, each hiding a religious image. This calendar was used as a way for children to count down the days until Christmas and learn about the nativity story.
Over the years, advent calendars evolved and became more elaborate. In the early 20th century, calendars made of wood or metal were introduced, with small drawers or compartments that held treats or small gifts. This added an element of surprise and excitement to the countdown to Christmas.
During the mid-20th century, advent calendars started to incorporate chocolate. The first chocolate-filled advent calendar was produced in the early 1950s by the Swedish confectionery company, Frykstrand. This innovation made advent calendars even more popular among children and adults alike.
Today, advent calendars come in various forms and designs, catering to different tastes and interests. From traditional religious-themed calendars to ones featuring popular characters or filled with cosmetics, there is an advent calendar to suit everyone. The tradition of counting down the days until Christmas continues to bring joy and anticipation, making advent calendars a beloved part of the holiday season.
Advantages of DIY Advent Calendars

Advent calendars are a fun and festive way to count down the days until Christmas. While store-bought advent calendars are readily available, there are many advantages to creating your own DIY advent calendar.
1. Creativity: DIY advent calendars allow you to showcase your creativity and create a unique calendar that reflects your personal style. You can choose the colors, patterns, and materials that you love, and even personalize it with special messages or small gifts.
2. Cost savings: Making your own advent calendar can be a cost-effective option compared to buying a pre-made one. You can use materials you already have at home or purchase affordable supplies, making it a budget-friendly project that can be enjoyed by the whole family.
3. Customization: One of the biggest advantages of DIY advent calendars is the ability to customize it to fit your specific needs. You can choose the size, shape, and design of the calendar, as well as the number and size of the pockets or compartments. This allows you to tailor the calendar to your family’s traditions, preferences, and the items you plan to include.
4. Personal touch: When you create your own advent calendar, you can add a personal touch that can’t be found in store-bought versions. Whether it’s using photos of loved ones, handwritten notes, or adding special embellishments, your DIY advent calendar will have a unique and sentimental value that can’t be replicated.
5. Fun family activity: Making a DIY advent calendar can be a fun family activity that brings everyone together. Children can participate in choosing the materials, decorating the calendar, and filling it with small treats or surprises. It can become a cherished tradition that the whole family can enjoy year after year.
- Creativity
- Cost savings
- Customization
- Personal touch
- Fun family activity
Choosing the Right Pattern
When it comes to creating a knitted advent calendar, choosing the right pattern is essential to ensure a successful and enjoyable project. There are a few important factors to consider when selecting a pattern that will suit your needs and preferences.
1. Design and Aesthetics: The first thing to consider is the design and aesthetics of the advent calendar pattern. Do you prefer a traditional or modern look? Are you drawn to bold, bright colors or more subtle, neutral tones? Take some time to browse through different patterns and choose one that matches your personal style and complements your home decor.
2. Level of Difficulty: Another important aspect to consider is the level of difficulty. Are you an experienced knitter looking for a challenging project, or are you a beginner looking for something simpler? Be honest with yourself about your skill level and choose a pattern that you feel comfortable with. It’s always better to start with a slightly easier pattern and work your way up as you gain more experience.
3. Size and Shape: Consider the size and shape of the advent calendar as well. Do you want a small, compact calendar that can be hung on a wall, or do you prefer a larger and more elaborate design? Think about where you plan to display the calendar and how much space you have available. This will help you determine the appropriate size and shape for your project.
4. Materials and Yarn: Lastly, consider the materials and yarn required for the pattern. Some patterns may specify a certain type of yarn or recommend specific colors. Make sure you have access to the required materials and check if there are any specific yarn recommendations or substitutions. This will ensure that you can easily gather all the necessary supplies before starting your project.
By considering these factors and taking the time to choose the right pattern, you can ensure that your knitted advent calendar project turns out exactly as you envision. Whether you’re a beginner or an experienced knitter, there’s a pattern out there that will suit your needs and help you create a beautiful and festive advent calendar to enjoy during the holiday season.
Materials You’ll Need
Before you start knitting your advent calendar, make sure you have all the necessary materials. Here’s a list of what you’ll need:
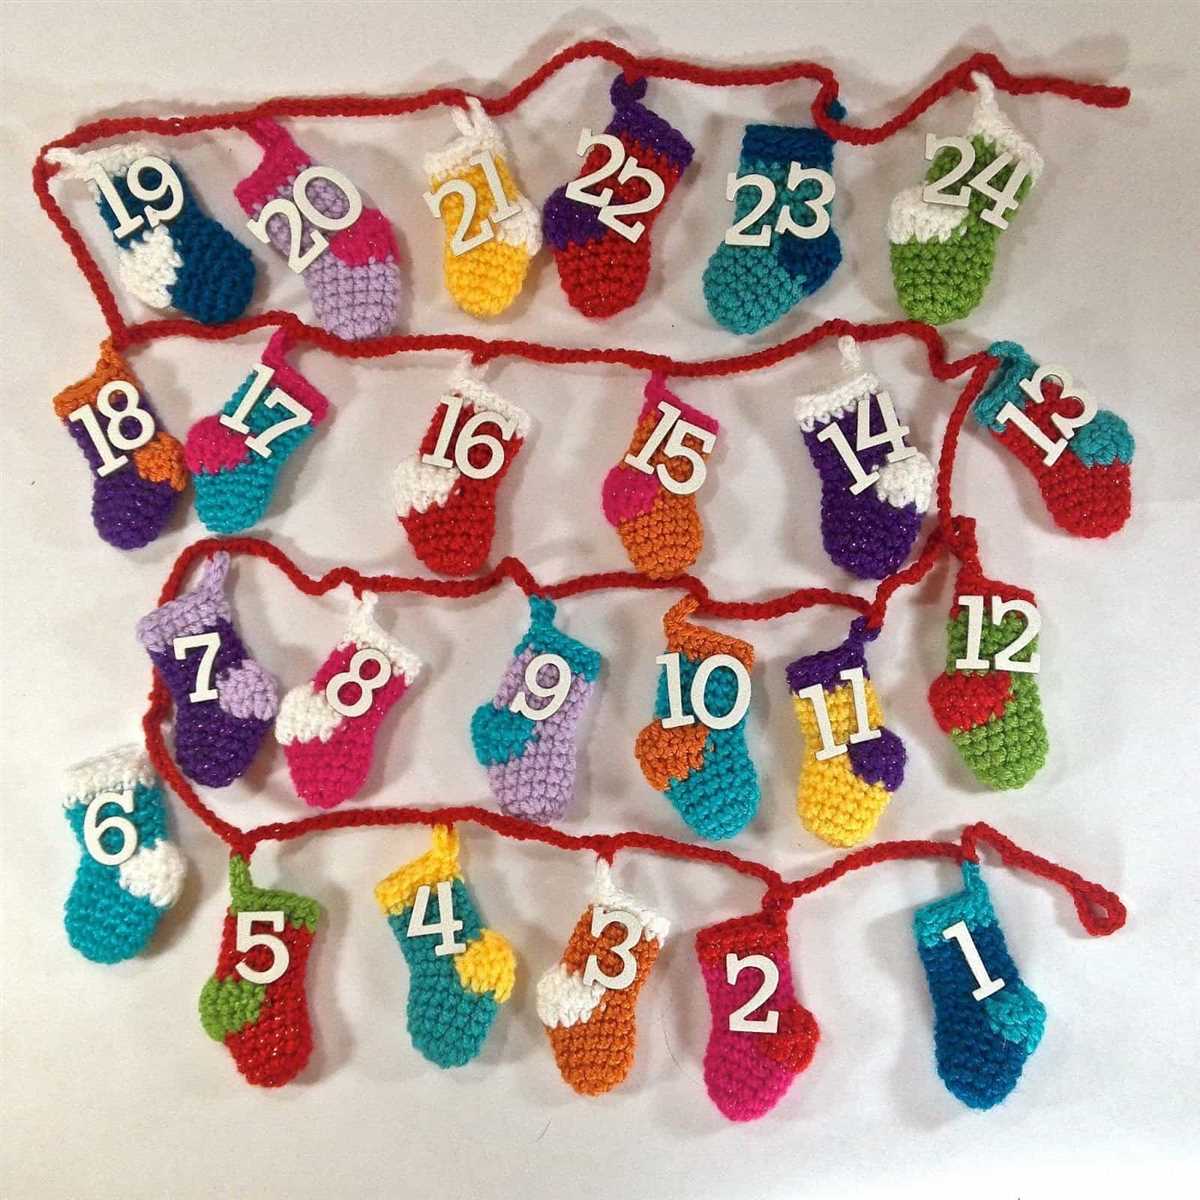
- Yarn: Choose a soft and durable yarn in various colors. You’ll need enough yarn to make 24 small pockets.
- Knitting Needles: Use the appropriate size knitting needles for your chosen yarn. Double-pointed needles or circular needles will work best for this project.
- Tapestry Needle: You’ll need a tapestry needle with a large eye to sew the pockets together.
- Scissors: A pair of sharp scissors will come in handy to cut the yarn and trim any excess.
- Markers: Use stitch markers to keep track of your progress and mark specific points in the pattern.
- Measuring Tape: A measuring tape will help you ensure that your knitted pockets are evenly sized and spaced.
- Buttons or Embellishments: If you’d like to add extra decorations to your advent calendar, consider purchasing buttons, ribbons, or other embellishments.
Having these materials ready will ensure that your knitting process goes smoothly and that you have everything you need to create a beautiful and functional advent calendar.
Getting Started: Casting On
When starting a knitted advent calendar project, the first step is to cast on the desired number of stitches. Casting on is the process of creating a foundation row of loops that will later be used to knit the first row of the calendar. There are several different methods to cast on, but for this project, we will be using the long-tail cast on method.
To begin, you will need a pair of knitting needles and yarn in the color of your choice. Make sure the yarn is suitable for the size of needles you are using, as indicated in the pattern. It’s also a good idea to use a contrasting color for the cast on row, as it will make it easier to see.
Step 1: Measure out a length of yarn that is roughly four times the width of the calendar. This will be used for the long tail of the cast on.
Step 2: Make a slipknot by folding the yarn into a loop and pulling the tail through the loop. Slide the slipknot onto one of the knitting needles and tighten the loop by pulling on the tail.
Step 3: Hold the knitting needle with the slipknot in your right hand, and the other knitting needle in your left hand. With the yarn in the back, insert the right needle into the slipknot from front to back.
Step 4: With your left hand, hold the yarn between your thumb and index finger, and bring it over the right needle from front to back.
Step 5: Insert the right needle through the loop on the left needle from front to back, and use it to pull the yarn through the loop.
Step 6: Slip the new loop onto the left needle, and tighten the loop by gently pulling on the yarn. Repeat steps 3-6 until you have cast on the desired number of stitches indicated in the pattern.
Once you have successfully cast on the required number of stitches, you are ready to begin knitting the first row of the advent calendar. Take a moment to make sure all the stitches are even and not twisted on the needle before proceeding. With the cast on completed, you can now move on to the next step in the pattern.
Knitting the Pockets
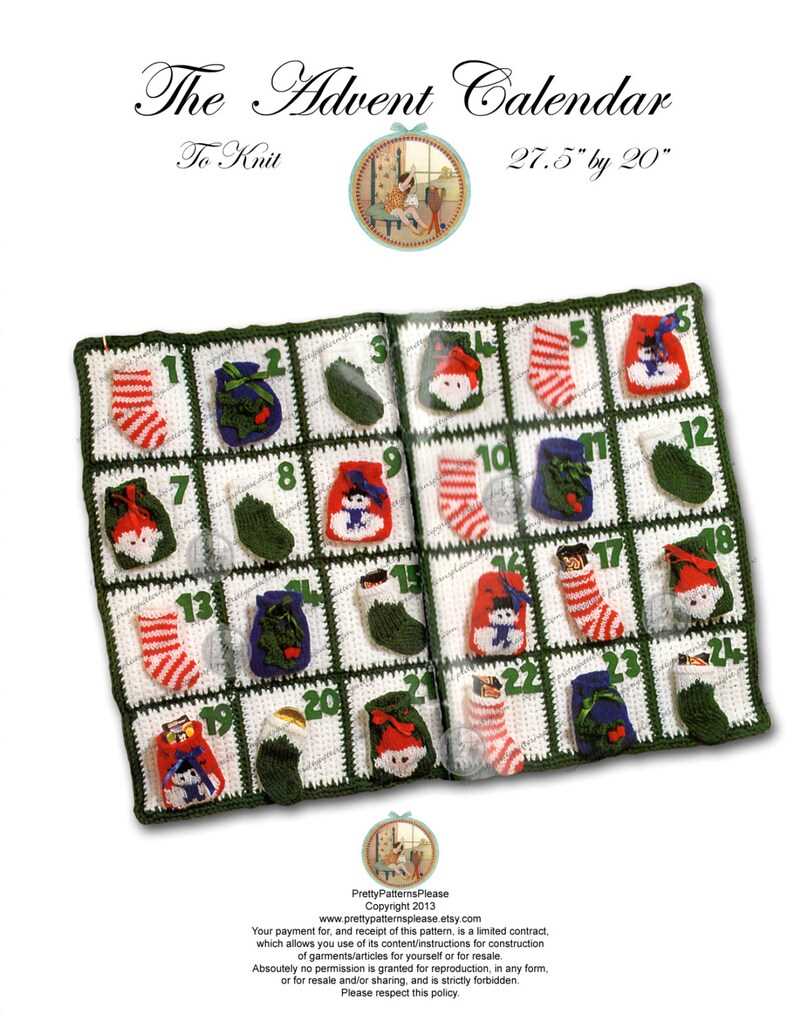
The pockets are an essential part of the knitted advent calendar, providing a place to store small treats or surprises for each day leading up to Christmas. Knitting the pockets requires attention to detail and precision to ensure they are the perfect size and shape.
Choosing the yarn: When selecting yarn for the pockets, it is important to choose a yarn that is durable, yet soft enough to hold small items without snagging. Worsted weight yarn is a popular choice for its versatility and sturdiness.
Knitting the pocket base: To begin knitting the pockets, you will first need to cast on the desired number of stitches for the width of each pocket. It is recommended to use a smaller needle size for the pocket base to ensure a tight gauge. Knit in stockinette stitch for the desired length of the pocket, making sure to leave enough yarn for finishing later.
Adding the pocket flap: Once the pocket base is complete, it is time to add the pocket flap. This is done by knitting a separate piece, similar in size to the pocket base. The pocket flap can be knit in the same color as the pocket base or a coordinating color for added visual interest.
Assembling the pocket: To assemble the pocket, fold the pocket flap in half and sew the sides and bottom edges to the corresponding edges of the pocket base. Make sure the flap is securely attached and able to withstand the weight of small items.
Final touches: After all the pockets have been knitted and assembled, it is important to give them a final finishing touch. This can include blocking the pockets to ensure they lay flat and even, adding any desired embellishments such as buttons or ribbons, and weaving in any loose ends to create a clean and polished look.
Adding Embellishments
One of the great things about knitting your own advent calendar is that you can add embellishments to make it unique and personalized. There are many different ways to embellish your calendar, depending on your preferences and the theme you are going for.
Ribbon: Adding ribbon to your advent calendar can give it a festive and decorative touch. You can choose ribbon in different colors, patterns, and widths to match your overall design. Use the ribbon to hang the mini stockings or to tie bows on each day.
Buttons: Buttons are another great way to embellish your advent calendar. You can sew buttons onto the mini stockings or use them to fasten the pockets. Choose buttons that match or contrast with your yarn color for a playful look.
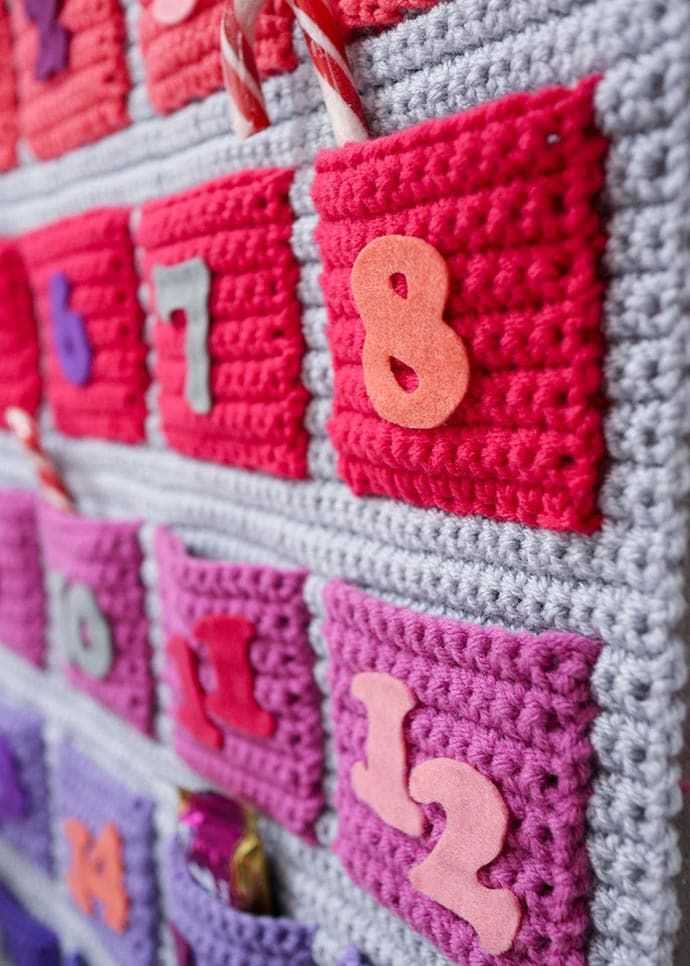
Embroidery: If you enjoy hand embroidery, you can add intricate designs or simple patterns to your advent calendar. Embroider numbers on each pocket or add festive motifs like snowflakes or reindeer. Embroidery adds a personalized and handmade touch to your calendar.
Pom-poms: Pom-poms are a fun and whimsical embellishment for your advent calendar. You can make pom-poms in different sizes and colors and attach them to the corners of each pocket or to the top of the calendar. They add a playful and festive element to your creation.
Remember, the key to embellishing your advent calendar is to have fun and let your creativity shine. Experiment with different materials, colors, and techniques to create a truly unique and eye-catching calendar. Whether you choose to add ribbon, buttons, embroidery, or pom-poms, your advent calendar will surely become a cherished holiday decoration.
Personalizing Your Calendar
When it comes to creating a knitted advent calendar, personalization is key. By adding your own unique touches, you can create a calendar that truly reflects your style and interests. One way to personalize your calendar is by choosing colors that align with your home decor or personal preferences. Whether you prefer traditional holiday colors like red and green or want to go for a more modern and eclectic color scheme, the choice is yours.
Another way to personalize your calendar is by adding custom decorations or embellishments. This could include things like buttons, beads, or even small charms that represent special memories or interests. You could also consider adding embroidered initials or names to each pocket to make the calendar even more personal.
Additionally, you can personalize your advent calendar by selecting patterns that have special meaning to you. Whether it’s a pattern that reminds you of a favorite holiday tradition or a design that incorporates elements that are meaningful to you, choosing patterns with personal significance can make your calendar even more special.
Considerations for Personalizing Your Calendar
- Choose colors that align with your home decor or personal preferences.
- Add custom decorations or embellishments like buttons, beads, or charms.
- Consider embroidering initials or names on each pocket for a personal touch.
- Select patterns that have special meaning to you or incorporate elements that are meaningful to create a more personalized calendar.
By taking the time to personalize your knitted advent calendar, you can create a truly unique and special holiday decoration that will bring joy and excitement to the countdown to Christmas.
Tips and Tricks for a Perfect Knit
Knitting can be a very enjoyable hobby, but it can also be frustrating if things don’t turn out as planned. Here are some tips and tricks to help you achieve a perfect knit.
1. Choose the right yarn
When starting a knitting project, it’s important to choose the right yarn for your pattern. Check the recommended yarn weight and fiber content, and make sure to match it with your chosen yarn. Using the wrong yarn can affect the gauge and the overall look of your finished project.
2. Gauge is key
Always take the time to make a gauge swatch before starting your project. This will help you ensure that you are using the correct needle size and that your stitches are the right size. It’s also important to check your gauge as you progress through the project to make sure that you are on track.
3. Use stitch markers
Stitch markers are incredibly useful tools for keeping track of your progress and marking important points in your pattern. They can help you keep track of stitch count, the beginning of a round, or any other important points where you need to pay attention to your knitting.
4. Take breaks
Knitting for long periods of time can lead to tension in your hands and wrists, which can affect the quality of your knitting. Take regular breaks to stretch your hands and rest your eyes. This will help prevent discomfort and ensure that you can enjoy knitting for longer periods of time.
5. Fix mistakes as you go
Don’t wait until the end of your project to fix mistakes. If you notice a mistake, such as a dropped stitch or a wrong stitch, fix it right away. This will make it easier to correct and will result in a neater finished project. Don’t be afraid to use a crochet hook to pick up dropped stitches or to use a knitting needle to unknit stitches and fix mistakes.
By following these tips and tricks, you can improve your knitting skills and achieve a perfect knit every time. Remember to be patient and enjoy the process, and don’t be afraid to experiment and try new techniques.
Finishing Touches: Sewing the Pockets
Once you have knitted all the pieces for your advent calendar, it’s time to sew the pockets onto the main panel. Sewing the pockets not only adds functionality to your calendar but also adds a decorative touch. Follow the steps below to complete this final step:
1. Positioning the Pockets
Start by laying out your main panel and the knitted pockets. Arrange the pockets in a pattern that you like, making sure they are evenly spaced and aligned. You can use pins to hold the pockets in place temporarily.
2. Sewing the Pockets
Thread a needle with a matching yarn color and knot the end. Beginning with the first pocket, position it back on the main panel and start sewing along one side. Use a simple whipstitch or blanket stitch to attach the pocket to the panel, making sure to sew through both layers of fabric for additional durability. Continue sewing along the remaining sides of the pocket until it is securely attached. Repeat this process for each pocket.
3. Reinforcing the Edges
To prevent the pockets from fraying or loosening over time, reinforce the edges by sewing a row of backstitches or running stitches around the perimeter of each pocket. This additional stitching will provide extra stability and longevity to your advent calendar.
Once all the pockets are properly attached and reinforced, your knitted advent calendar is ready to be filled with small gifts or treats for the countdown to Christmas. Hang it on a wall or door using a dowel rod or decorative hooks and enjoy the festive anticipation it brings to your home!
Enjoying Your Handmade Advent Calendar
As the holiday season approaches, there’s nothing quite like the excitement of opening a door on your Advent calendar each day to reveal a special surprise or treat. With the added element of having handmade advent calendars, the joy is doubled as you appreciate the time and effort put into creating each individual pocket or pouch.
Whether you’ve knitted a traditional Christmas-themed advent calendar or opted for a modern and unique design, here are some ideas for enjoying and making the most of your handmade creation:
- Personalize the treats: Instead of using store-bought chocolates or candies, consider adding personalized treats or handwritten notes in each pocket. This could include small trinkets, quotes, or even jokes that are meaningful to you and your loved ones.
- Create a family tradition: Use the advent calendar as a way to bring your family together each day. Take turns opening the pockets or pouches and enjoy the surprise or treat as a group. This can be a special moment of shared excitement and joy.
- Display it proudly: Find a prominent place in your home to display your handmade advent calendar. Whether it’s hanging on a wall, displayed on a table, or placed on a mantel, make sure it’s easily accessible and visible to everyone. This not only adds to the festive atmosphere but also serves as a beautiful piece of holiday décor.
- Take photos: Capture the joy and excitement of opening each door by taking daily photos. Create a photo album or scrapbook to document the memories and look back on them in the years to come. This is a wonderful way to reminisce and appreciate the time spent together during the holiday season.
- Share the love: If you have the time and resources, consider making additional handmade advent calendars as gifts for loved ones. This is a heartfelt and personal gift that shows you’ve put thought and effort into creating something special for them. It’s sure to be cherished and enjoyed each year.
Remember, the beauty of a handmade advent calendar lies not only in the final product but also in the love and care that goes into making it. So, as you enjoy the countdown to Christmas, savor each moment of anticipation and happiness that your handmade advent calendar brings.