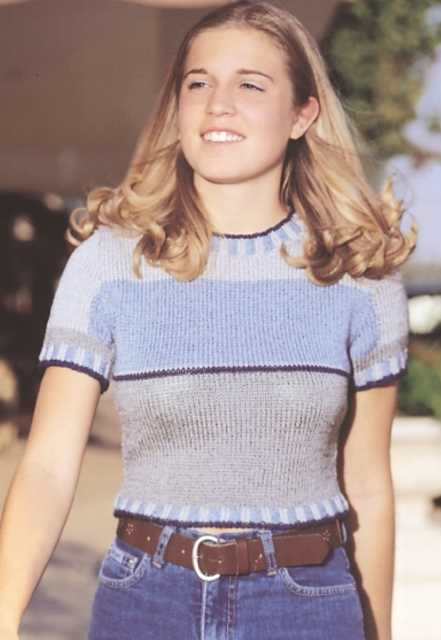
Knit your own stylish crop top with this free pattern

In recent years, crop tops have made a major comeback in the fashion world. From runways to street style, these trendy tops are a must-have in every fashionista’s wardrobe. If you’re a knitter looking to stay on-trend, we have the perfect project for you – a crop top free knitting pattern! With this pattern, you can create your own stylish crop top that will have everyone asking where you got it.
This crop top pattern is great for both beginner and experienced knitters. It features an easy-to-follow design that allows you to practice basic knitting techniques and create a trendy garment. The pattern includes step-by-step instructions and detailed explanations, making it perfect for knitters of all skill levels. Plus, it’s completely free!
With this pattern, you can customize your crop top to suit your style and preferences. You can choose from a variety of yarns and colors to create a unique look. Whether you prefer a bold and colorful crop top or a more subtle and neutral design, the possibilities are endless.
So, if you’re ready to add a trendy and fashionable crop top to your wardrobe, grab your knitting needles and get started with our crop top free knitting pattern. You’ll love the process of creating your own stylish top and showing off your knitting skills. Get ready to turn heads with your fabulous handmade creation!
What is a crop top?

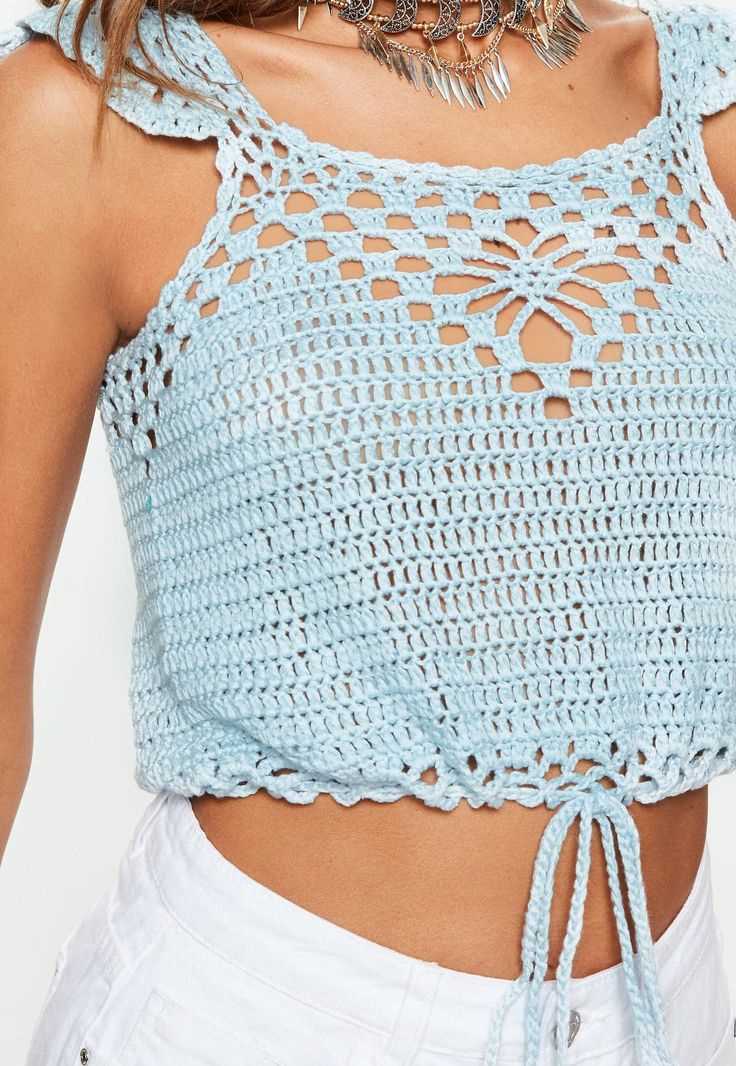
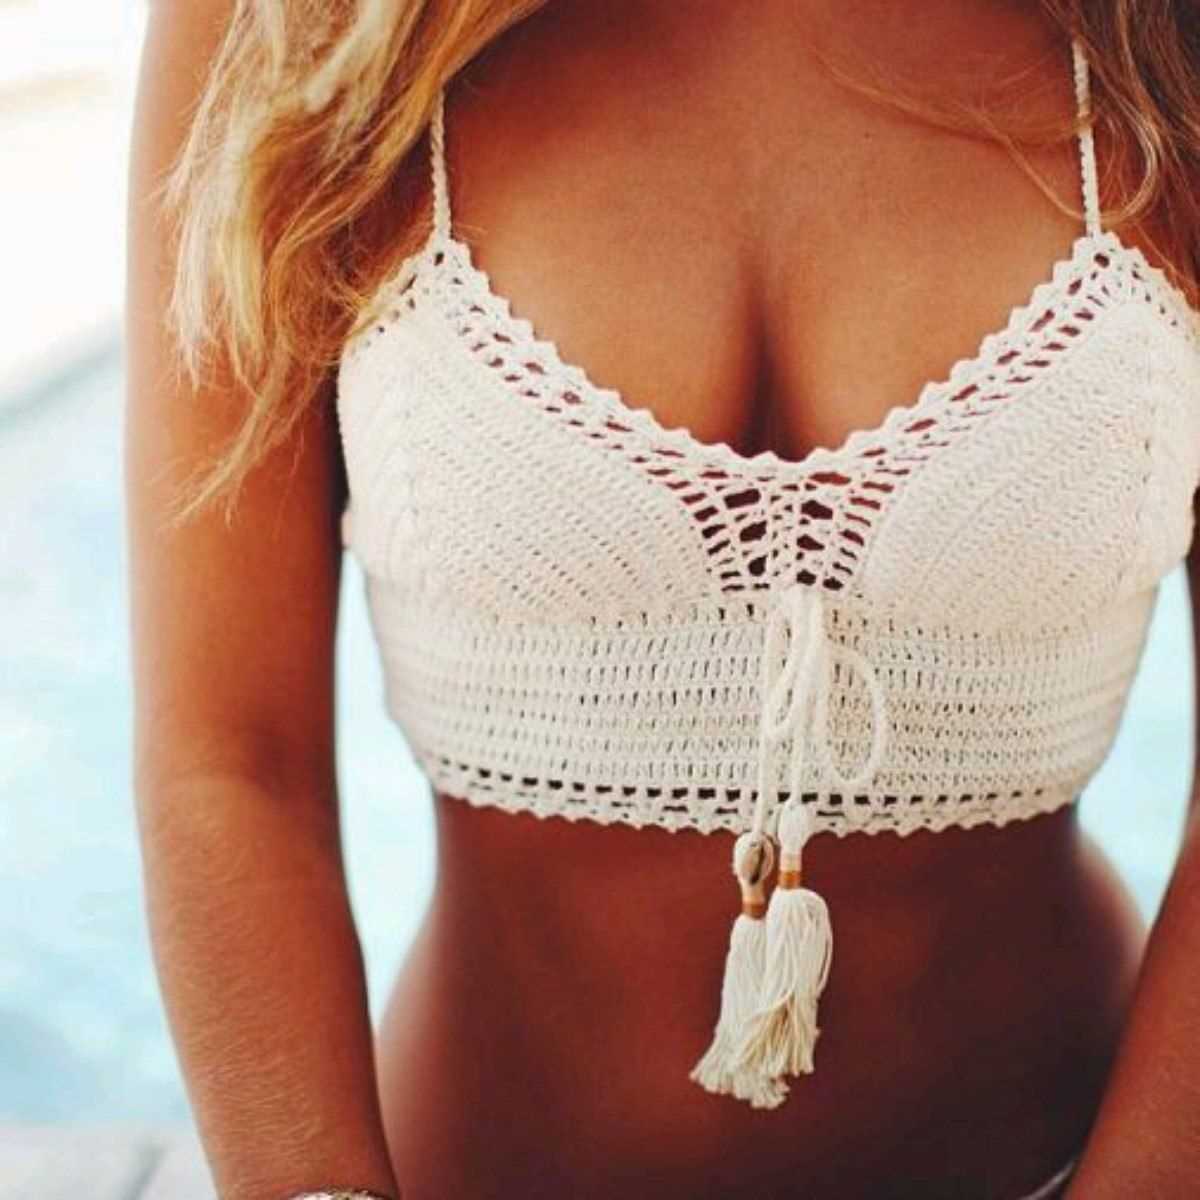
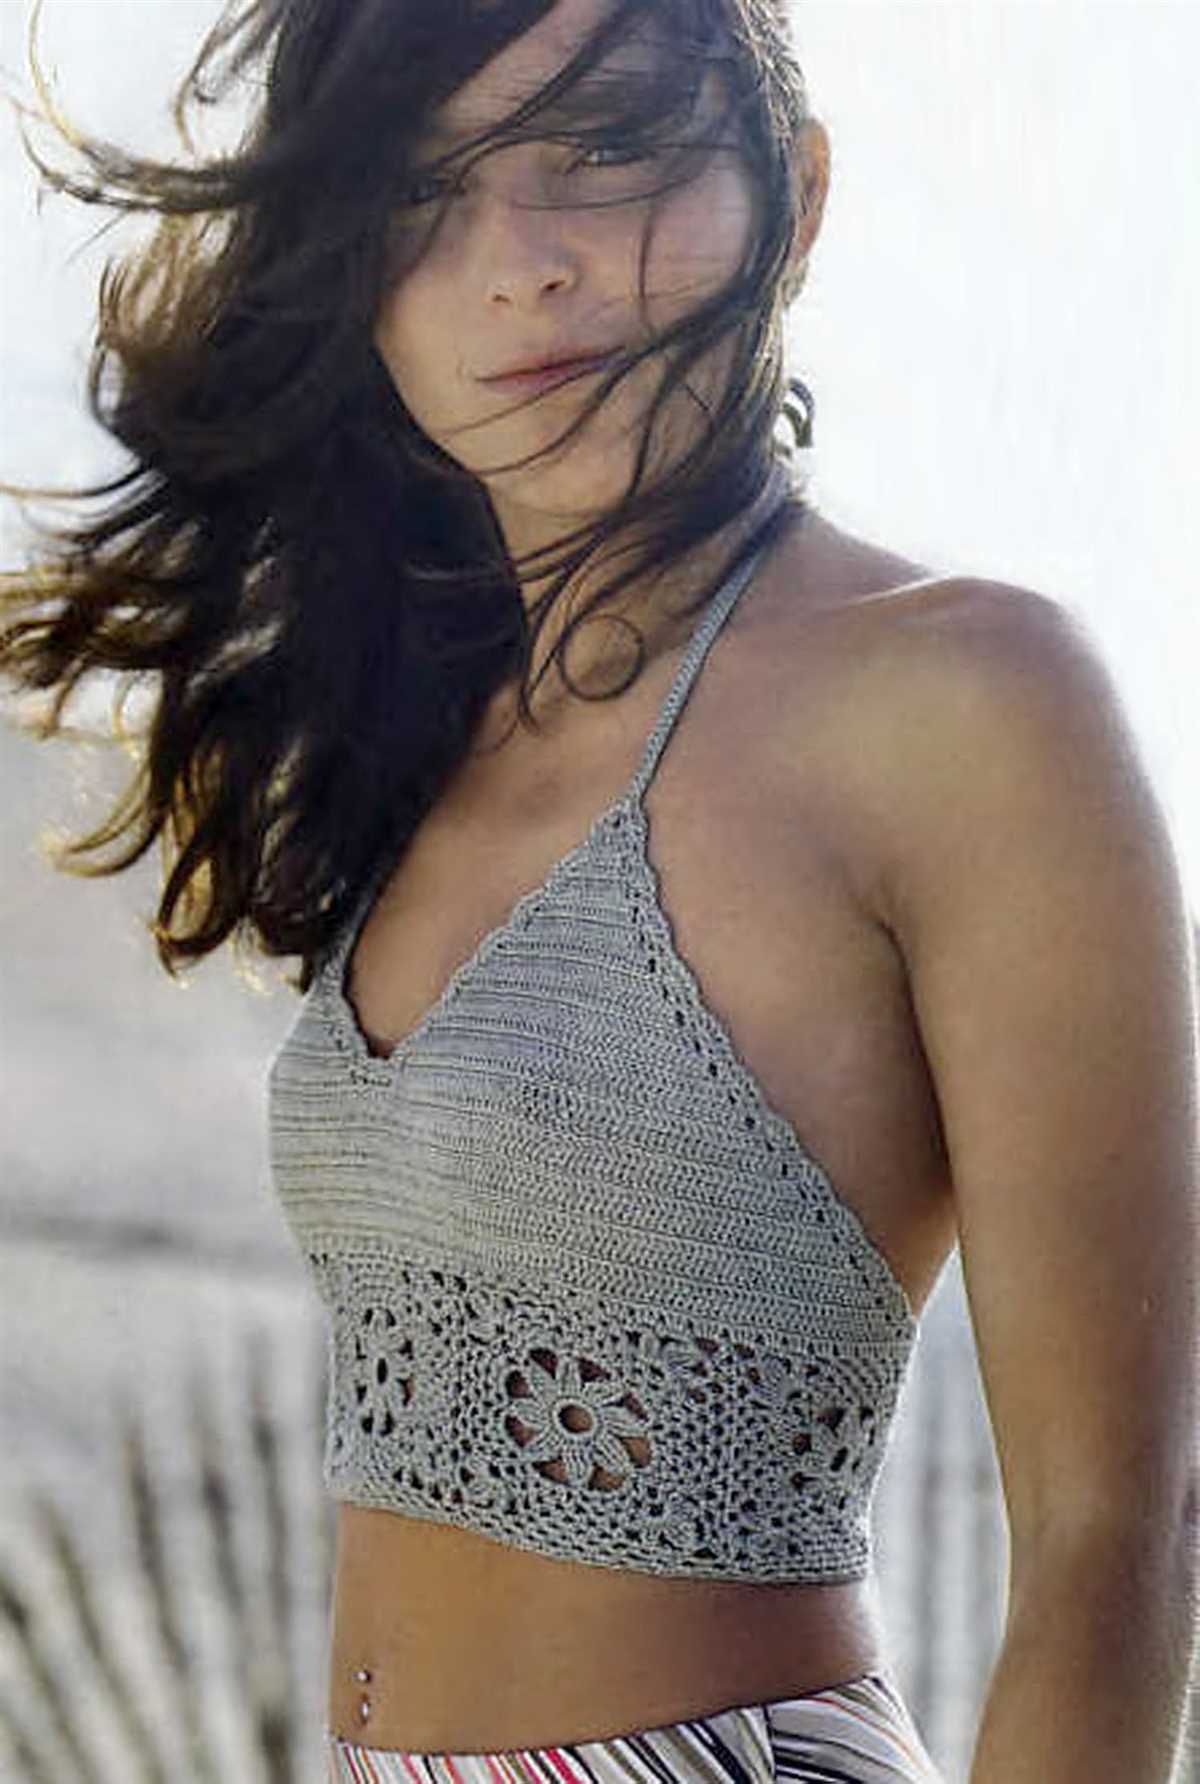
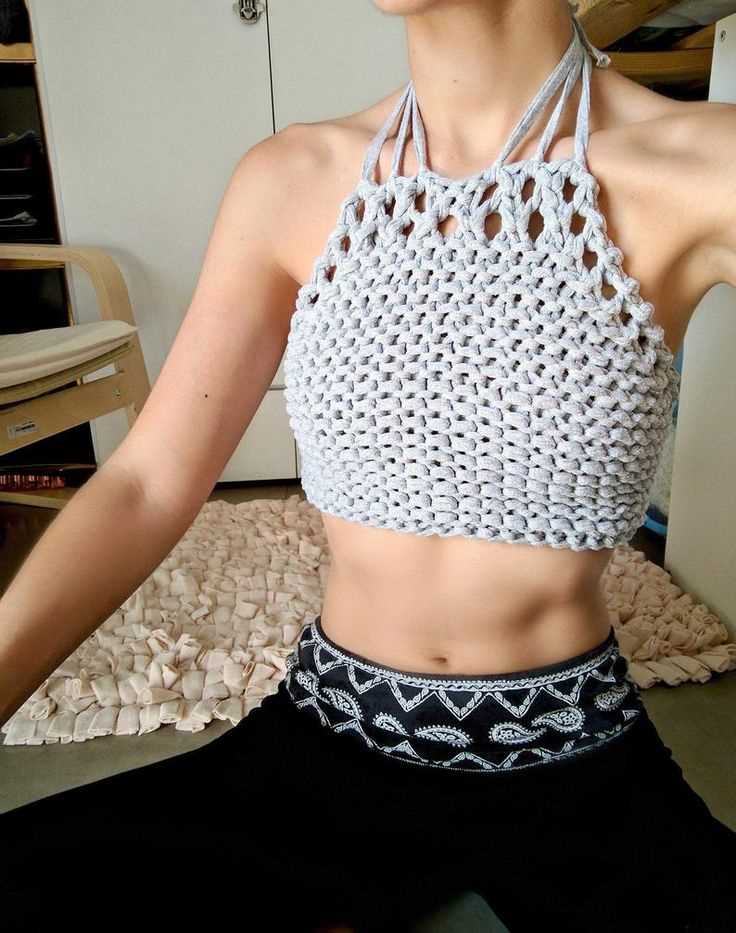
A crop top is a type of women’s clothing that is characterized by its short length, typically ending above the navel. It is a popular fashion trend that has been around for decades and has seen various variations and interpretations over the years.
Crop tops are often worn as a fashion statement and can be found in a variety of styles, colors, and materials. They can be sleeveless, short-sleeved, or long-sleeved, and can be made from fabrics such as cotton, lace, or knit. Some crop tops have a tight, fitted silhouette, while others are loose and flowy.
The versatility of crop tops makes them suitable for various occasions. They can be dressed up or down depending on the desired look. They can be paired with high-waisted pants, skirts, or shorts for a trendy and fashionable outfit. Crop tops are often seen in casual settings but can also be part of more formal ensembles, especially when paired with tailored bottoms and accessories.
As a fashion item, crop tops have been embraced by women of all body types and sizes. They can be worn by anyone who wants to flaunt a little skin and feel confident. Crop tops are a great way to highlight the waistline and create an hourglass silhouette. They can be worn by themselves as a statement piece or layered with other clothing for added style and modesty.
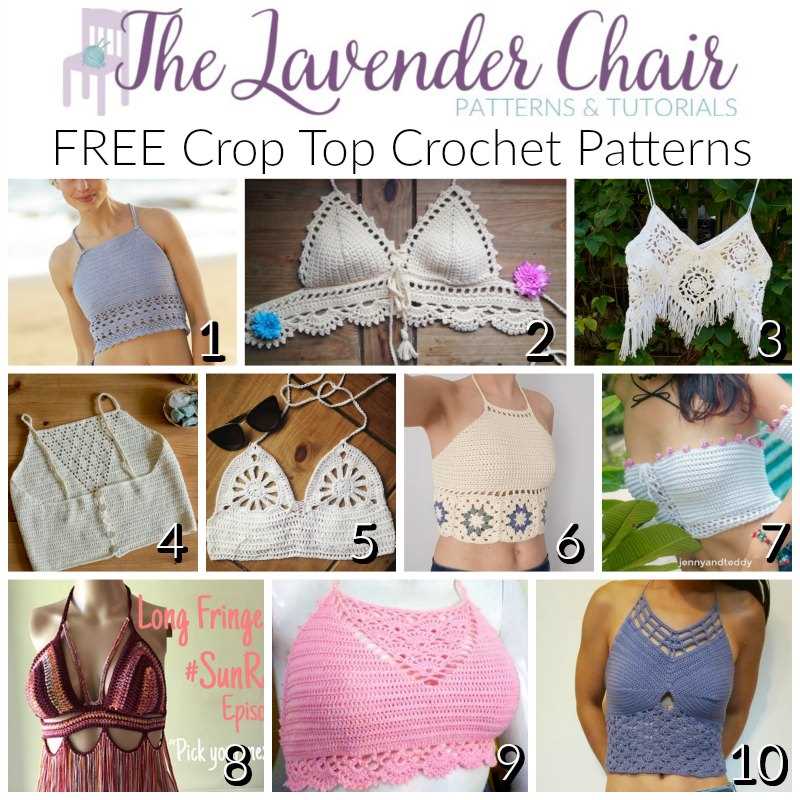
In recent years, crop tops have become increasingly popular in the world of knitting. Many knitting patterns are available for creating custom-made crop tops. Knitting a crop top allows for endless possibilities in terms of style, design, and customization. Whether you prefer a classic, simple design or something more intricate and detailed, there is a knitting pattern out there to suit your taste.
Overall, crop tops are a versatile and fashionable clothing item that can be incorporated into any wardrobe. Whether you prefer a casual or dressy look, a crop top can add a touch of style and confidence to your outfit. With their short length and variety of styles, there is a crop top out there for everyone.
Why knit your own crop top?

Knitting your own crop top can be a rewarding and fulfilling project for several reasons. Not only does it allow you to express your creativity and personal style, but it also provides you with a unique and one-of-a-kind garment that you won’t find in stores. By knitting your own crop top, you have the opportunity to customize the design, colors, and textures to perfectly match your preferences.
One of the main advantages of knitting your own crop top is the control you have over the fit. Unlike store-bought crop tops, which may not always be tailored to your exact measurements, knitting allows you to create a piece that fits you perfectly. You can easily adjust the length, width, and shaping to ensure a flattering and comfortable fit. This customization can make a world of difference in how confident and comfortable you feel while wearing your crop top.
Unleash your creativity
Knitting your own crop top gives you the freedom to unleash your creativity and design something truly unique. You can experiment with different stitch patterns, textures, and color combinations to make a crop top that reflects your personal style. Whether you prefer a classic and elegant look or a bold and vibrant statement piece, knitting allows you to bring your vision to life.
Eco-friendly and sustainable
Knitting your own crop top also aligns with a more sustainable lifestyle. By using yarns made from natural fibers, such as cotton or linen, you can create a garment that is environmentally friendly and free from harmful chemicals. Additionally, knitting allows you to use leftover yarn from other projects or repurpose thrifted yarn, reducing waste and promoting a more sustainable approach to fashion.
A fulfilling and relaxing hobby
Knitting is not only a practical skill but also a fulfilling and relaxing hobby. The repetitive motions of knitting can be calming and meditative, providing a way to unwind and destress. Knitting your own crop top allows you to combine the joy of creating something with the pleasure of wearing it, resulting in a truly fulfilling experience.
Choosing the right materials
When it comes to knitting a crop top, choosing the right materials is essential in achieving the desired outcome. The type of yarn and needles you select can greatly impact the final look and feel of your project.
Yarn: Selecting the right yarn for your crop top is crucial. Opt for a lightweight and breathable yarn, such as cotton or bamboo, to ensure comfort and flexibility. These fibers are also ideal for warm weather, as they allow your skin to breathe. Alternatively, you can choose a blend of yarns that offer a soft and stretchy texture.
Needles: The needles you choose will depend on the gauge of your yarn and the desired drape of your crop top. For a loose and airy crop top, larger needles will create a more open stitch pattern. Alternatively, if you prefer a tighter and more structured crop top, smaller needles will give you a denser fabric. Make sure to check the recommended needle size on the yarn label and adjust accordingly.
Don’t forget to test your gauge before starting your crop top to ensure the right fit. A smaller or larger gauge can greatly affect the fit and overall size of your garment. Happy knitting!
Getting started with knitting
If you’re interested in learning how to knit, you’ve come to the right place! Knitting is a versatile and enjoyable craft that allows you to create beautiful garments and accessories with just a few basic tools: yarn and knitting needles.
Choosing the right supplies
Before you start knitting, it’s important to choose the right supplies. You’ll need knitting needles, which come in various sizes and materials. Beginners usually start with medium-sized needles (around US size 8) and wooden or bamboo needles, as they provide better grip. Additionally, you’ll need yarn, which also comes in different weights and fibers. It’s recommended to start with a smooth, medium-weight yarn that is easy to work with.
Learning the basic stitches
Once you have your supplies ready, it’s time to learn the basic stitches. The two most fundamental stitches in knitting are the knit stitch and the purl stitch. The knit stitch creates the familiar “v” pattern and the purl stitch creates a bump or ribbed texture on the fabric. These stitches can be combined in various ways to create intricate patterns and textures.
Following a knitting pattern
As you gain confidence with the basic stitches, you can start working on knitting patterns. A knitting pattern provides step-by-step instructions for creating a specific project, such as a scarf, hat, or sweater. It typically includes the materials needed, gauge information, and detailed instructions for each section of the project. It’s important to read the pattern carefully and follow the instructions precisely to achieve the desired outcome.
Joining a knitting community
Knitting is a social hobby, and joining a knitting community can provide support, inspiration, and opportunities to learn from more experienced knitters. You can join local knitting groups, participate in online forums and communities, or even attend knitting retreats and workshops. These communities are a great way to share your progress, discover new patterns, and connect with fellow knitters.
Basic knitting stitches
When it comes to knitting, mastering the basic stitches is essential. These stitches form the foundation for a wide variety of knitting projects, including the popular crop top. Whether you’re a beginner or an experienced knitter, understanding and practicing these stitches will help you create beautiful and professional-looking knitted pieces.
Knit Stitch
The knit stitch is the fundamental stitch in knitting. To create a knit stitch, insert the right-hand needle into the first stitch on the left-hand needle, from left to right, and wrap the yarn around the right-hand needle. Pull the right-hand needle through the stitch, bringing the new loop of yarn through the old stitch. Slide the old stitch off the left-hand needle, and the knit stitch is complete. Repeat this process for each stitch until the row is finished.
Purl Stitch
The purl stitch is another basic stitch in knitting. It creates a textured, bumpy surface on the fabric. To purl, insert the right-hand needle into the first stitch on the left-hand needle from right to left. Wrap the yarn around the right-hand needle, and pull it through the stitch, bringing the new loop of yarn through the old stitch. Slide the old stitch off the left-hand needle, and the purl stitch is complete. Repeat this process for each stitch until the row is finished.
Learning and practicing these basic knitting stitches will give you the foundation you need to create a crop top or any other knitting project. With these stitches in your repertoire, you’ll be able to follow knitting patterns and customize your creations with various stitch patterns and designs. So grab your needles and start practicing those knit and purl stitches!
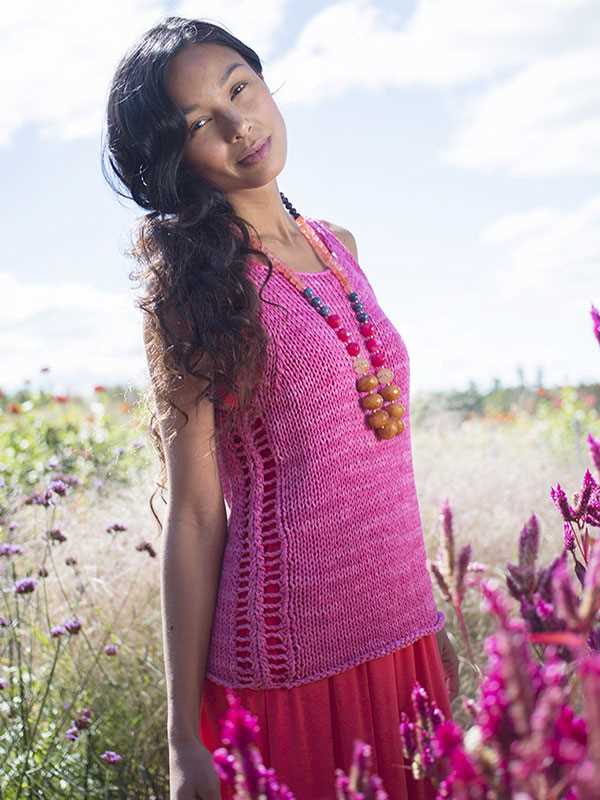
Following the crop top pattern
Making your own crop top is a fun and creative project for knitters of all skill levels. With a simple and versatile pattern, you can customize the design to match your personal style. Here are the steps to follow when knitting your own crop top.
Materials needed:
- Yarn: Choose a medium-weight yarn in the color of your choice.
- Knitting needles: Use a pair of size 8 (5mm) knitting needles.
- Tape measure: This will help you ensure the right fit.
- Scissors: For cutting the yarn.
- Yarn needle: For weaving in the ends.
Instructions:
- Start by casting on the desired number of stitches, based on your measurements. For the bodice, you’ll want to cast on enough stitches to comfortably fit around your bust.
- Knit in the round for a few rows to create the ribbed hem. This will give your crop top a neat and finished edge.
- Begin working in your chosen stitch pattern (such as stockinette stitch or a lace pattern) for the main body of the crop top. Continue knitting until the piece measures the desired length, ranging from just below the bust to the waistline.
- When you reach the desired length, start the decrease rounds for the neckline. This can be done by knitting two stitches together every few rows or following a specific decrease pattern.
- Once you’ve finished the neckline, continue knitting until the crop top reaches the desired total length. This could be just above the waistline or slightly longer, depending on your preference.
- Finally, bind off all stitches and weave in any loose ends. Try on the crop top to ensure the fit is perfect and make any adjustments if needed.
With these simple instructions, you can easily create your own custom crop top using a free knitting pattern. Enjoy the process of knitting and wear your handmade crop top with pride!
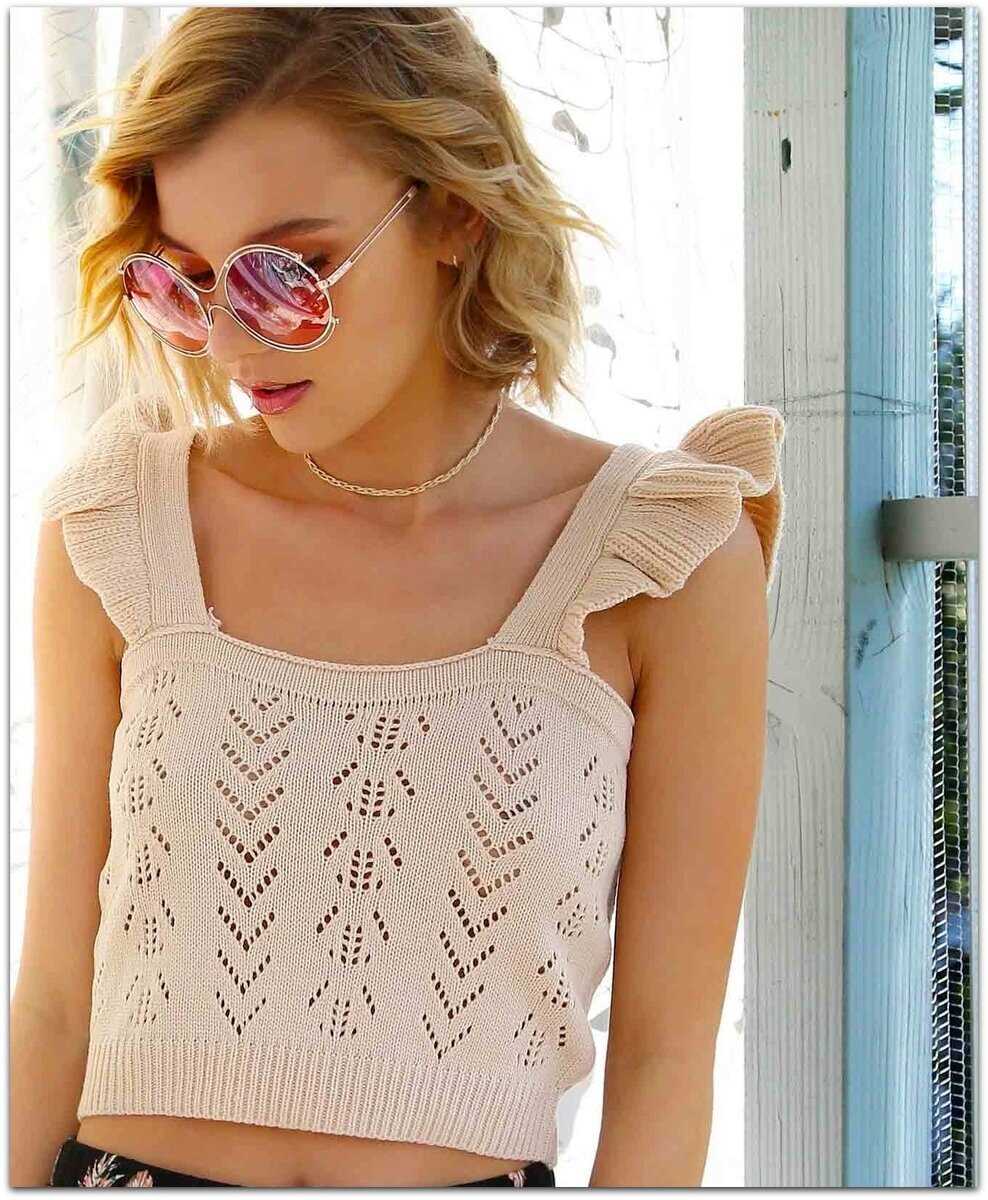
Adding variations and personal touches

Once you have mastered the basic crop top knitting pattern, you can start adding variations and personal touches to make your design unique. One way to do this is by experimenting with different stitch patterns. For example, you could try incorporating lace patterns or cable stitches to add texture and visual interest to your crop top. You could also play around with the length of the crop top, making it longer or shorter depending on your preference.
Another way to personalize your crop top is by choosing different colors of yarn. You can opt for a neutral color for a classic and versatile look, or go bold with vibrant shades to make a statement. You can also consider adding stripes or color blocks to create a more dynamic design. Don’t be afraid to mix and match colors to create a unique color combination that suits your style.
Embellishments can also be added to enhance the overall look of your crop top. Consider adding buttons, ribbons, or even beads to give your crop top a touch of elegance or playfulness. You can sew these embellishments onto the front or back of the top, or create a pattern with them along the edges.
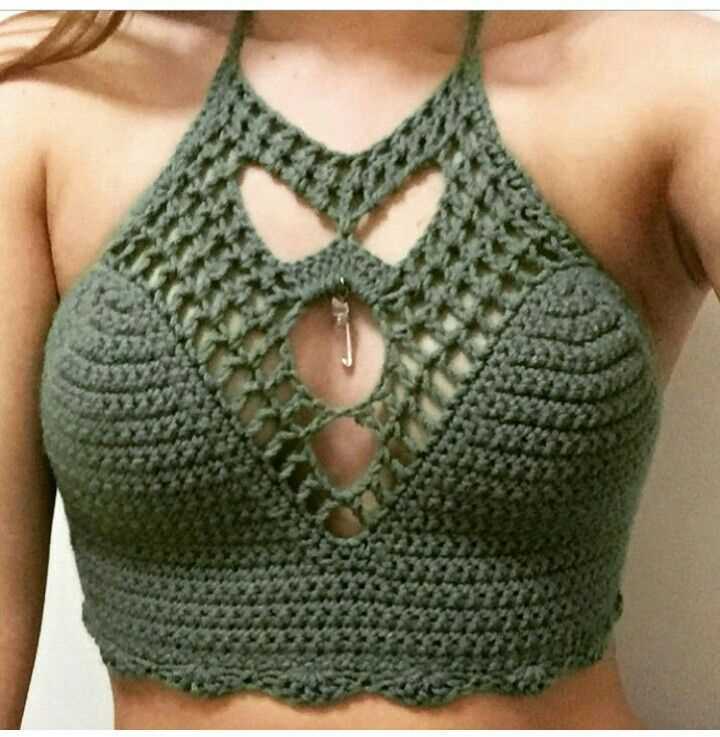
Furthermore, you can experiment with the neckline and sleeves of your crop top. Try different necklines such as V-neck, scoop neck, or boat neck to create a varied look. You can also add sleeves to your crop top by knitting them separately and then sewing them onto the body. This will give you more options for wearing your crop top in different seasons and occasions.
Remember, the beauty of knitting is that you can adapt and customize patterns to suit your own style and preferences. Don’t be afraid to get creative and make your crop top truly unique.
Understanding gauge and sizing
When knitting a garment, it is important to understand the concept of gauge and how it affects the sizing of the finished product. Gauge refers to the number of stitches and rows in a given measurement, usually measured over a 4×4 inch square. It is a crucial factor in ensuring that the final measurements of the garment match the desired size.
Choosing the right yarn and needles: To achieve the correct gauge, it is essential to select the appropriate yarn and needles for your project. The pattern you are following will usually specify the recommended yarn weight and needle size. It is important to follow these guidelines to ensure that your gauge matches the pattern’s gauge. Using a different yarn weight or needle size can result in your finished garment being too small or too large.
Working a gauge swatch: Before starting your project, it is recommended to work a gauge swatch. This involves knitting a small sample using the specified yarn and needle size and measuring the resulting gauge. The swatch should ideally be larger than the required gauge measurement to account for blocking and any potential changes in tension. By comparing your swatch’s gauge to the pattern’s gauge, you can determine if any adjustments need to be made to achieve the correct sizing.
Making adjustments: If your gauge does not match the pattern’s gauge, adjustments may be necessary. If your gauge is too loose and has more stitches and rows than the pattern, you may need to decrease your needle size. On the other hand, if your gauge is too tight and has fewer stitches and rows than the pattern, you may need to increase your needle size. It may also be necessary to adjust your tension while knitting to achieve the desired gauge.
Understanding sizing: Sizing in knitting patterns is typically provided in a range of sizes, such as small, medium, and large. The key to achieving the correct size is to follow the measurements provided in the pattern and work towards achieving the specified gauge. It is important to measure yourself accurately and compare your measurements to the pattern’s sizing chart to ensure a proper fit.
By understanding the importance of gauge and sizing in knitting, you can confidently start your project and create a garment that fits perfectly. Remember to always check your gauge and make adjustments as necessary to achieve the desired size. Happy knitting!
Finishing Techniques for a Professional Look
When knitting a crop top, the finishing techniques you use can make a big difference in the final appearance of the garment. Whether you’re designing your own pattern or using a pre-made one, there are a few key techniques you can employ to give your crop top a professional look.
Blocking: Blocking is an essential step in finishing any knitted garment. It helps to shape the fabric, even out stitches, and give the crop top a polished look. To block your crop top, soak it in lukewarm water for about 15 minutes, gently squeeze out the excess water, and then lay it flat to dry, shaping it to the desired size and dimensions. You can use blocking mats or a clean towel to help with shaping.
Seaming: When it comes to joining the different pieces of the crop top together, it’s important to use a seaming technique that creates an invisible finish. One method is to use mattress stitch, where you sew through the edge loops of the stitches, creating an almost seamless look. Another technique is to use the whip stitch, where you sew through both layers of fabric, creating a visible seam on the right side of the garment. Choose a seaming method that is appropriate for the look you want to achieve.
Edging: Adding a professional-looking edging to your crop top can elevate its overall appearance. You can choose to add ribbing, garter stitch, or a picot edge for a finished look. The type of edging you choose will depend on the style of the crop top and your personal preference. Be sure to pick an edging that complements the overall design and enhances the final look of the garment.
Weaving in Ends: It’s important to take the time to properly weave in the ends of yarn to ensure a neat and tidy finish. Use a tapestry or yarn needle to weave the ends through the stitches on the wrong side of the fabric, making sure to secure them tightly. Trim any excess yarn, being careful not to cut any of the stitches. This will help prevent the ends from unraveling and give the crop top a polished appearance.
Finishing Touches: Once all the main finishing techniques are completed, don’t forget about the small details that can give your crop top a professional touch. This can include adding buttons, attaching a label or tag, or even adding decorative elements such as beads or embroidery. These extra touches can take your crop top to the next level and give it a unique and polished look.
By incorporating these finishing techniques into your knitting process, you can achieve a professional look for your crop top. Remember to take your time, pay attention to the details, and don’t be afraid to experiment with different techniques to find the perfect finishing touches for your garment.
Blocking your finished crop top
Blocking is an important step in the finishing process for any knitting project, including a crop top. It helps to even out your stitches, shape your garment, and give it a professional finish. Here are some steps on how to block your finished crop top:
1. Prepare your blocking materials
Before you begin blocking, gather all the necessary materials. You will need a blocking mat or towel, rustproof pins, a measuring tape, and a spray bottle filled with water. Make sure your blocking mat or towel is large enough to accommodate the size of your crop top.
2. Soak your crop top
Fill a basin or sink with lukewarm water and add a few drops of gentle soap or wool wash. Gently submerge your crop top in the water, making sure it is fully saturated. Let it soak for about 15-20 minutes to allow the fibers to relax.
3. Remove excess water
After soaking, gently squeeze out the excess water from your crop top. Avoid wringing or twisting the fabric, as this can damage the fibers. Instead, lightly press the garment between your hands to remove as much water as possible.
4. Shape and pin the crop top

Lay your damp crop top flat on your blocking mat or towel. Use your measuring tape to ensure that it is the correct dimensions and shape. Smooth out any wrinkles or unevenness in the fabric. Pin the edges and any areas that need shaping, such as the neckline or armholes, using rustproof pins. Make sure the pins are evenly spaced and secure.
5. Let it dry
Leave your crop top to dry completely in a well-ventilated area. Depending on the thickness of the yarn and the climate, this can take anywhere from a few hours to a day or two. Avoid exposing your garment to direct sunlight or excessive heat, as this can cause the fibers to become brittle.
Blocking your crop top will not only improve the overall appearance of your finished project, but it will also help it retain its shape and fit better. Once your crop top is dry, remove the pins and try it on to see the results of your blocking efforts. Enjoy wearing your beautifully blocked crop top!
Styling your crop top
Once you have finished knitting your crop top, it’s time to start thinking about how to style it. Here are some ideas to help you create different looks with your crop top:
- High-waisted bottoms: Pair your crop top with high-waisted jeans, shorts, or skirts for a chic and trendy look. The high-waisted bottoms will balance out the shorter length of the crop top and create a flattering silhouette.
- Layering: If you prefer a more modest look, you can layer your crop top over a fitted tank top or a crisp white shirt. This way, you can still show off the style of the crop top without revealing too much skin.
- Accessorize: Add some statement jewelry, such as bold earrings or a chunky necklace, to elevate your crop top outfit. You can also experiment with belts, hats, and scarves to add a personal touch and complete your look.
- Play with textures: Mix and match different textures to add dimension to your crop top outfit. For example, pair a chunky knit crop top with a silky skirt or leather pants for an interesting contrast.
- Dress it up or down: Depending on the occasion, you can dress your crop top up or down. For a casual day out, pair it with sneakers and denim shorts. To dress it up for a night out, wear it with heels and a maxi skirt or tailored pants.
Remember, the most important thing is to have fun and feel confident in your crop top. Experiment with different styles and combinations to find what works best for you. Happy styling!
Q&A:
1. What is a crop top?
A crop top is a type of clothing that is typically shorter in length compared to a traditional top. It exposes the midriff and is worn by women.
3. Can I adjust the length of the crop top in the pattern?
Yes, you can adjust the length of the crop top by knitting more or fewer rows in the stockinette stitch section. Keep in mind that adjusting the length may require you to modify the number of decreases and increases in the pattern.
4. Are there any other knitting patterns available for crop tops?
Yes, there are many other knitting patterns available for crop tops. You can find a wide variety of patterns with different stitches, designs, and difficulty levels online. Some websites offer these patterns for free, while others may charge a fee.
5. Can I use a different yarn weight for the crop top?
Yes, you can use a different yarn weight for the crop top, but keep in mind that it will affect the size and drape of the finished garment. Make sure to check the gauge of the pattern and adjust your needle size and stitch count accordingly to achieve the desired fit.
Can you recommend a free knitting pattern for a crop top?
Yes, I can recommend a free knitting pattern for a crop top. You can try the “Simple Crop Top” pattern by Yarnspirations. It is a beginner-friendly pattern and comes with instructions for various sizes.
What materials do I need to knit a crop top?
To knit a crop top, you will need a suitable yarn in your desired color and thickness, knitting needles in the recommended size for the yarn, a tapestry needle for weaving in ends, and any additional notions or embellishments you might want to add.