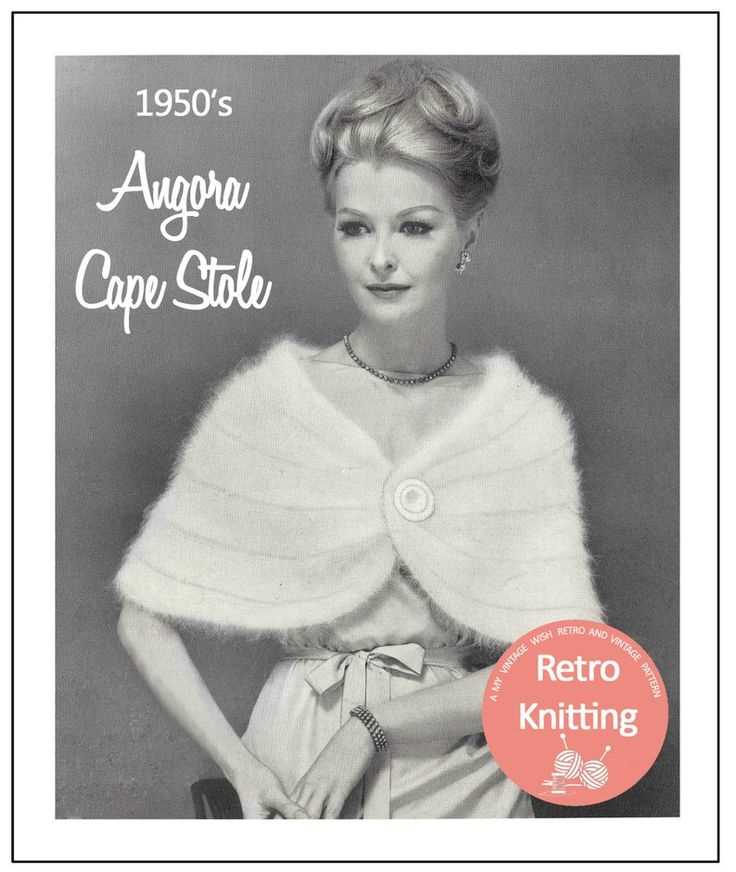
Stylish Cape Knitting Pattern: Perfect for the UK Weather!

Knitting is a popular craft that has been enjoyed by people all over the world for centuries. It is a skill that requires patience and creativity, but the end result is always worth it. One of the most versatile and stylish items that can be knitted is a cape. Capes can be worn in all seasons and can be dressed up or down depending on the occasion. They are also a great way to add a touch of elegance to any outfit.
If you are in the UK and looking for a cape knitting pattern, you are in luck. There are many knitting patterns available online and in local craft stores that cater specifically to the styles and trends in the UK. Whether you are a beginner knitter or an experienced one, you can find a pattern that suits your level of expertise.
When choosing a cape knitting pattern, it is important to consider the style and fit you are looking for. The pattern should also be easy to follow with clear instructions and diagrams. Additionally, consider the type of yarn you want to use. Different types of yarn will create different effects and textures, so choose one that suits your desired finished look.
Once you have chosen a cape knitting pattern and gathered your materials, it’s time to get started. Knitting a cape can be a time-consuming project, but the end result is sure to be worth the effort. As you work on your cape, make sure to take breaks and stretch your hands and fingers to avoid strain. Before you know it, you will have a beautiful and stylish cape to wear and show off to your friends and family!
Cape Knitting Pattern UK
Knitting capes has become a popular trend in the United Kingdom, with many knitters seeking out beautiful patterns to create their own stylish and cozy capes. Whether you’re a beginner or an experienced knitter, there are plenty of options available to suit your skill level.
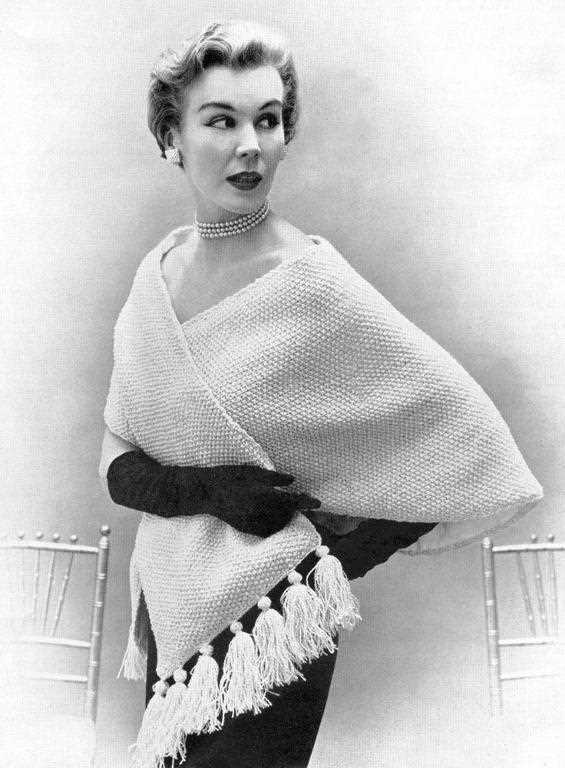
One popular cape knitting pattern in the UK is the “Garter Stitch Cape.” This pattern features a simple garter stitch design, making it perfect for beginners. The cape is knitted in one easy piece, with no seaming required. The garter stitch creates a textured and cozy fabric that is perfect for keeping warm during the colder months.
If you’re looking for something more intricate, the “Lace Cape” pattern is a great option. This pattern features a delicate lace design that adds a touch of elegance to the cape. The lace pattern is created using a combination of knit and purl stitches, and the cape is knitted in separate pieces that are later sewn together. This pattern is perfect for more experienced knitters looking for a challenge.
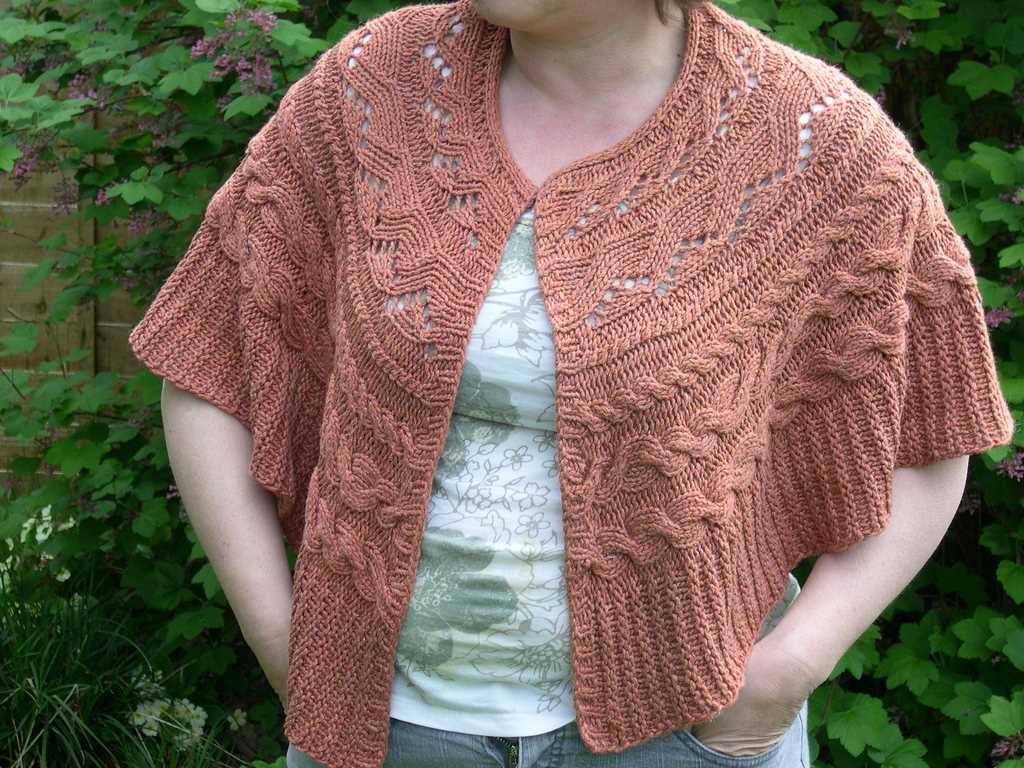
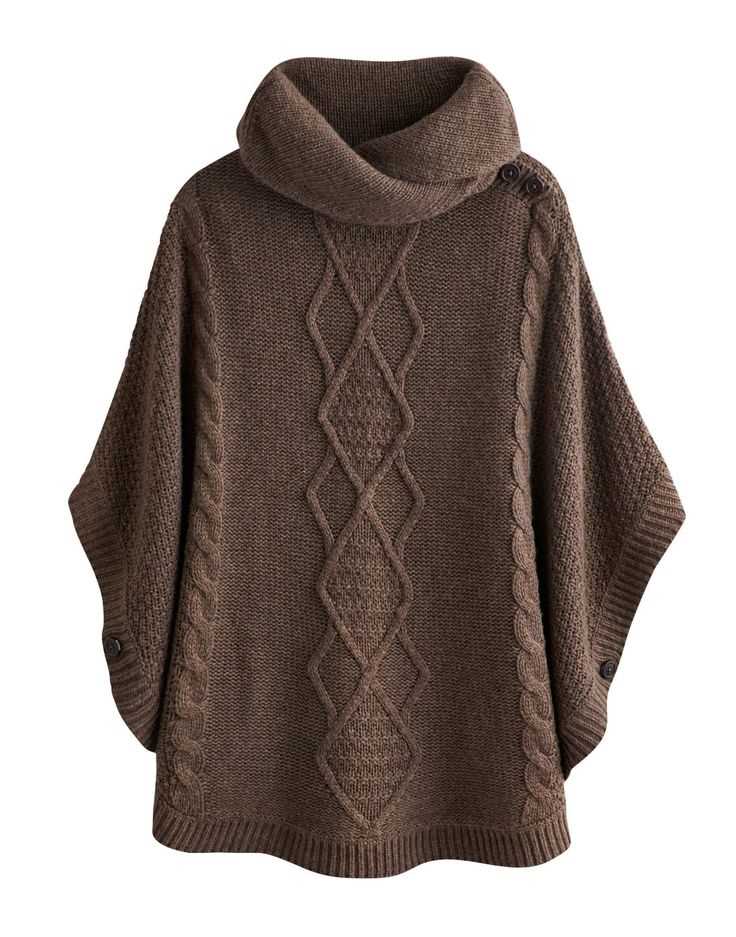
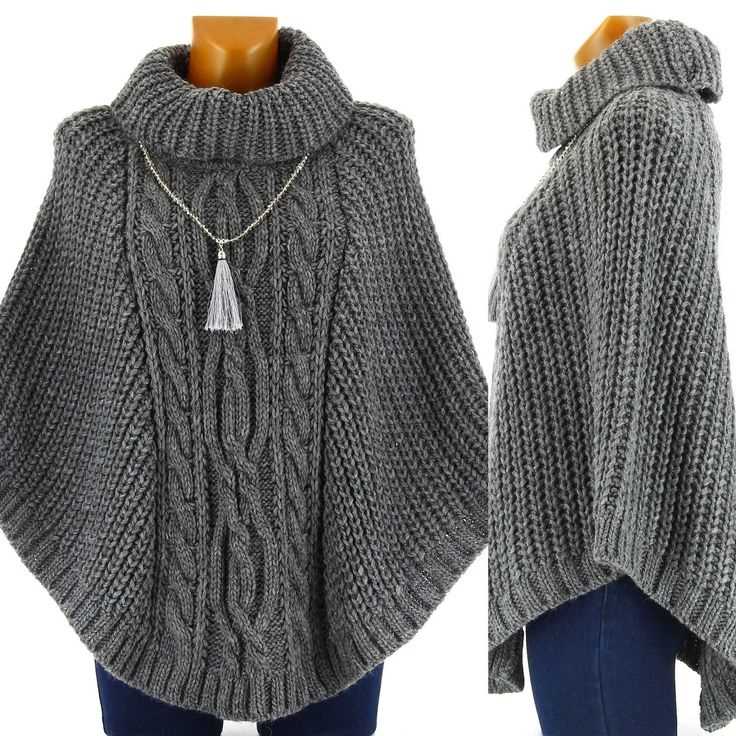
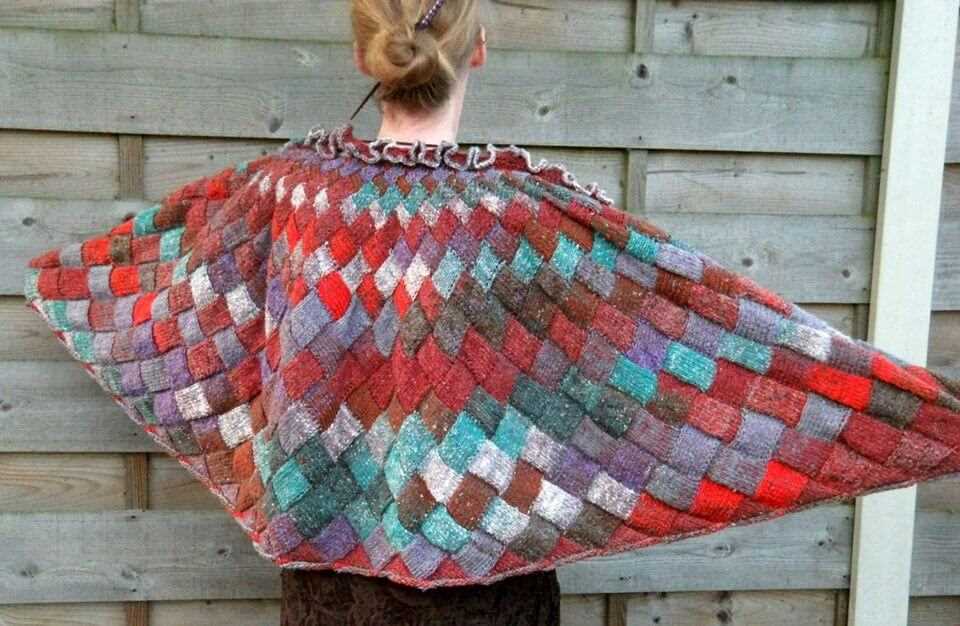
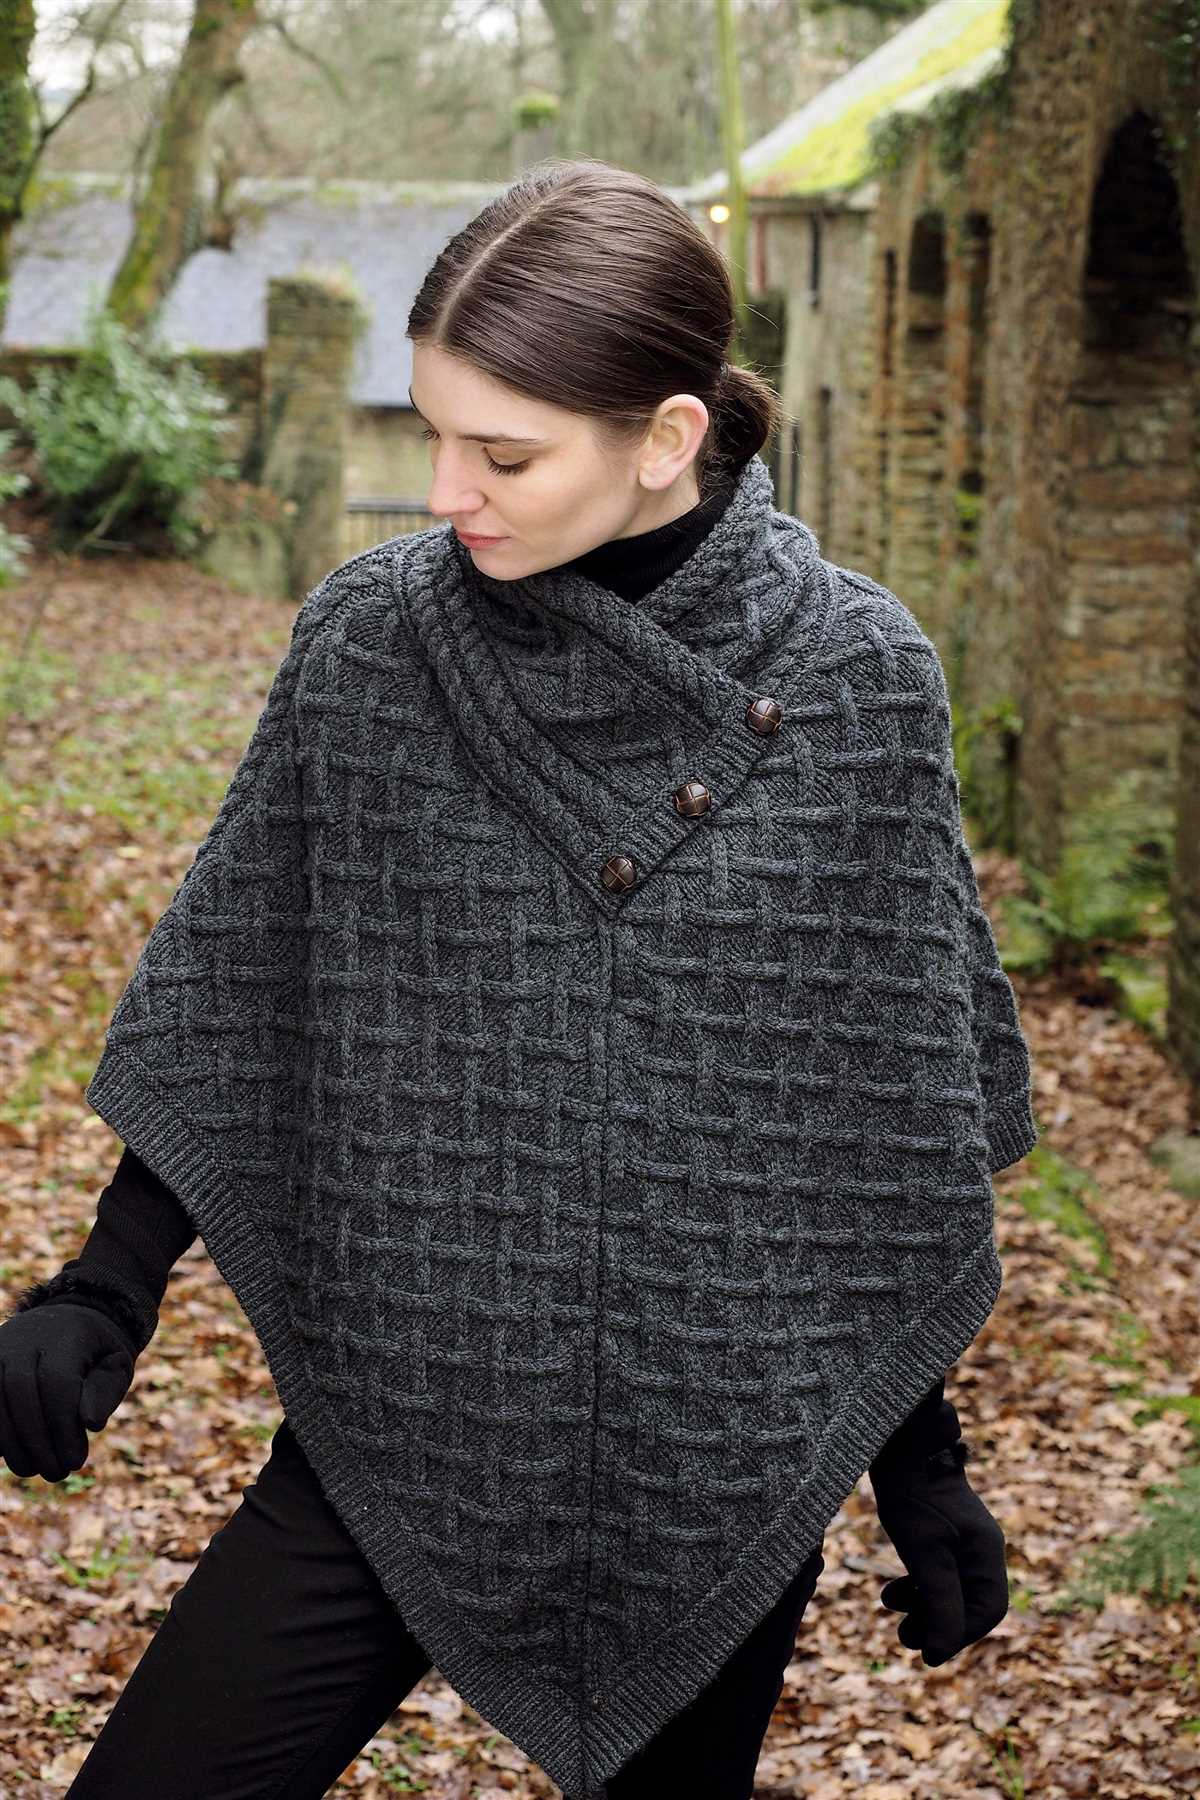
For those who prefer a more modern and stylish cape, the “Cable Knit Cape” pattern is a popular choice. This pattern features a cable knit design that creates a beautiful and unique texture. The cape is knitted in separate pieces and then sewn together, creating a structured and fashionable look.
If you’re new to knitting or looking for inspiration, there are many online resources available to help you find the perfect cape knitting pattern in the UK. Websites and forums dedicated to knitting often have a wide variety of patterns to choose from, with options for all skill levels. You can also find knitting books and magazines that feature cape patterns, providing you with endless options for creating your own stylish and cozy cape.
- Garter Stitch Cape
- Lace Cape
- Cable Knit Cape
Choosing the right yarn for your cape
When it comes to knitting a cape, choosing the right yarn is essential to ensure a successful and beautiful finished product. The type and quality of the yarn can greatly impact the drape, warmth, and overall look of the cape. With a wide variety of yarn options available, it’s important to consider factors such as fiber content, weight, and texture.
Fiber content: The fiber content of the yarn will determine its characteristics and performance. Common fibers used for capes include wool, alpaca, acrylic, and blends. Wool is known for its warmth and durability, making it a popular choice. Alpaca offers a luxurious softness and drape, perfect for creating a cozy and elegant cape. Acrylic yarns are budget-friendly and easy to care for, but may lack the natural warmth and breathability of other fibers. Blends can offer a combination of different fiber properties, allowing you to customize your cape’s characteristics.
Weight: The weight of the yarn is another important consideration. The weight refers to the thickness of the yarn, which can range from lace weight to bulky. For a delicate and lightweight cape, lace or fingering weight yarns are ideal. These will create a more open and airy fabric. Worsted or bulky weight yarns are better suited for thicker and more substantial capes, providing warmth and structure.
Texture: The texture of the yarn can add visual interest and enhance the overall design of your cape. Smooth and even yarns create a classic and polished look, while textured or novelty yarns can add unique patterns or effects. Consider the stitch pattern or design of your cape and choose a yarn that complements it. It’s also important to ensure that the texture of the yarn doesn’t interfere with the functionality of the cape, such as causing it to snag or stretch excessively.
In conclusion, selecting the right yarn for your cape involves considering the fiber content, weight, and texture. By understanding these factors and carefully choosing the yarn that best suits your project, you can create a gorgeous and perfectly tailored cape that you’ll be proud to wear.
Essential Tools for Knitting a Cape
Knitting a cape can be a fun and rewarding project, but it’s important to have the right tools on hand to ensure a successful outcome. Here are some essential tools that every knitter should have when working on a cape:
- Knitting Needles: A pair of high-quality knitting needles is essential for any knitting project, including a cape. Opt for needles that are the appropriate size for your chosen yarn and have a comfortable grip for extended periods of knitting.
- Yarn: Choose a yarn that is suitable for a cape, such as a bulky or chunky weight yarn. Consider the fiber content and color of the yarn, as well as the amount needed to complete your project.
- Tape Measure: Accurate measurements are crucial when knitting a cape. A tape measure will help you determine the length and width of your cape, as well as any shaping or sizing adjustments that may be necessary.
- Stitch Markers: Stitch markers are handy tools that can help you keep track of your progress and mark important points in your pattern. They can be especially useful when working on a cape, which may have various sections or stitch patterns.
- Row Counter: A row counter is a useful tool that can help you keep track of the number of rows you have knitted. This is particularly important when working on a pattern with repeating sections or when making adjustments to the length of your cape.
These tools are just a few of the essentials that every knitter should have when working on a cape. By having the right tools on hand, you’ll be well-equipped to tackle any knitting project and create a beautiful and functional cape.
Understanding knitting patterns for capes
Knitting patterns for capes can be a great way to create unique and stylish outerwear. Whether you are a beginner or an experienced knitter, understanding these patterns is essential for successful and enjoyable knitting.
1. Choose the right pattern: When looking for a knitting pattern for a cape, it is important to choose one that suits your skill level and desired style. Some patterns may be more intricate and require advanced knitting techniques, while others may be simpler and suitable for beginners. Additionally, consider the type of cape you want to create, whether it be a long flowing cape or a shorter capelet.
2. Read the pattern carefully: Before starting your knitting project, carefully read through the pattern from start to finish. Pay attention to the materials needed, the gauge, and any special instructions or abbreviations used. Familiarize yourself with the different sections of the pattern, such as the cast-on, body, and finishing details.
3. Take accurate measurements: Before knitting, take accurate measurements of the recipient’s body. This will ensure that the cape fits well and drapes nicely. Measure the width of the shoulders, length from the neck to desired hemline, and any other necessary dimensions according to the pattern’s instructions.
4. Gauge swatch: Making a gauge swatch is essential to ensure that your finished cape will have the right size and fit. Take the time to knit a small sample using the recommended needle size and yarn specified in the pattern. Measure the number of stitches and rows per inch to confirm that your gauge matches the pattern’s requirements. If your gauge is off, you may need to adjust your needle size.
5. Follow the instructions step by step: Once you have gathered all the necessary materials and have completed your gauge swatch, it’s time to start knitting! Follow the instructions step by step, paying attention to any special stitches or techniques. Take your time and check your work frequently to avoid mistakes that could affect the finished look of your cape.
6. Finishing touches: Once you have completed knitting the main body of the cape, it’s time for the finishing touches. This may include seaming the edges, adding buttons or other closures, and blocking the cape to give it a polished and professional look. Follow the pattern’s finishing instructions carefully to achieve the desired final result.
Knitting patterns for capes can be a fun and rewarding project. By choosing the right pattern, reading it carefully, taking accurate measurements, completing a gauge swatch, following the instructions step by step, and adding the finishing touches, you can create a beautiful and unique cape that will keep you warm and stylish.
How to Cast On for Your Cape
When starting your cape knitting project, it’s important to begin with a strong cast on that will provide a stable foundation for your work. There are several methods you can use to cast on, but we’ll focus on two popular options: the long tail cast on and the cable cast on.
Long Tail Cast On:
- Start by creating a slipknot at the end of your yarn, leaving a long tail.
- Hold the slipknot in your right hand, with the tail end over your index finger and the working yarn over your thumb.
- Insert your needle under the loop of the slipknot, from front to back, and pull the working yarn through to create a new loop on the needle.
- Slide this new loop onto your needle, making sure to keep it fairly loose.
- Repeat steps 3 and 4 until you have cast on the desired number of stitches for your cape.
Cable Cast On:
- Start by creating a slipknot at the end of your yarn, leaving a short tail.
- Insert your needle through the slipknot from left to right, and hold both the slipknot and the needle in your right hand.
- Bring the working yarn under the needle, towards you.
- Insert your right hand needle between the stitches on your left hand needle, from top to bottom, underneath the working yarn.
- Wrap the working yarn around the right hand needle, from back to front, and pull it through the stitch on your left hand needle.
- Slide this new stitch onto your left hand needle, and repeat steps 4 and 5 until you have cast on the desired number of stitches for your cape.
By following these casting on techniques, you’ll be well-equipped to start your cape knitting project with confidence. Remember to practice and take your time to ensure a neat and tidy cast on edge.
Basic stitches for knitting a cape
When knitting a cape, there are a few basic stitches that you should be familiar with. These stitches will help you create the foundation of your cape and give it a beautiful texture.
Garter Stitch
The garter stitch is one of the simplest and most common stitches used in knitting. To create a garter stitch, simply knit every row. This stitch creates a bumpy texture on both sides of the fabric, making it perfect for adding warmth and thickness to your cape.
Stockinette Stitch
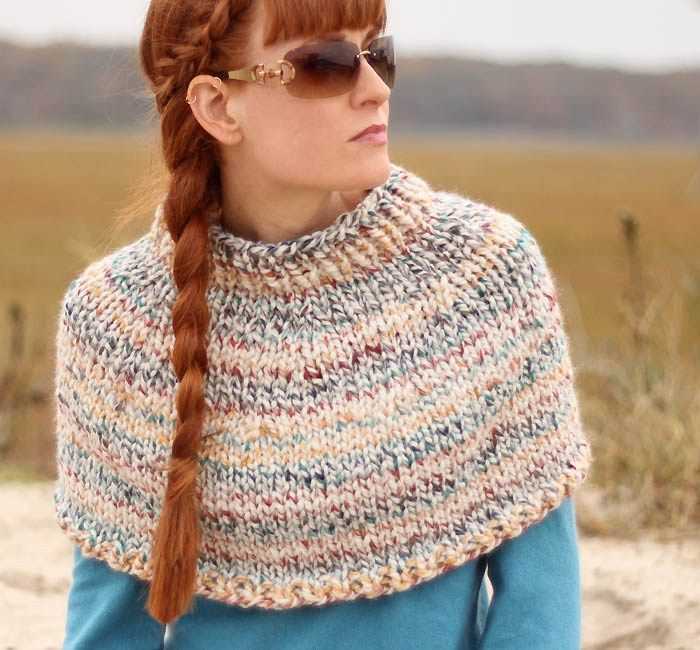
The stockinette stitch is another basic stitch that is often used in knitting. To create a stockinette stitch, alternate between knitting one row and purling the next. This stitch creates a smooth and flat fabric, with one side showing the knit stitches and the other side showing the purl stitches. It’s a versatile stitch that works well for creating a clean and polished look for your cape.
Rib Stitch
The rib stitch is a popular choice for adding stretch and elasticity to your cape. It is created by alternating between knitting and purling stitches in the same row. This stitch pattern creates vertical columns of knit and purl stitches, giving your cape a ribbed texture. Depending on the number of knit and purl stitches, you can create different types of rib stitches, such as 1×1 rib (alternating between one knit and one purl stitch) or 2×2 rib (alternating between two knit and two purl stitches).
Seed Stitch
The seed stitch is a textured pattern that adds visual interest to your cape. It is created by alternating between knit and purl stitches within the same row, but in a specific pattern. For example, you can knit one stitch, purl one stitch, and continue repeating this pattern across the row. Then, on the next row, you would purl the knit stitches and knit the purl stitches. This stitch pattern creates a bumpy texture that resembles little seeds, hence the name “seed stitch.”
These are just a few examples of the basic stitches that you can use when knitting a cape. By mastering these stitches, you will be able to create a variety of patterns and textures to customize your cape and make it truly unique.
Increasing and Decreasing Techniques for Shaping Your Cape
When knitting a cape, it is important to know the different techniques for increasing and decreasing to shape your garment. These techniques are crucial in creating the desired fit and silhouette.
Increasing Techniques:
- M1 (Make One): This is a simple and commonly used technique for increasing stitches. It involves creating a new stitch by lifting the strand between the last stitch worked and the next stitch on the left-hand needle, and knitting into the back loop of this lifted strand.
- Yarn Over (YO): Yarn overs are another way to increase stitches. Simply bring the yarn to the front of your work, then wrap it around the right-hand needle from front to back, and continue with the next stitch. On the next row, the yarn over will create an eyelet hole.
- KFB (Knit Front and Back): This is another commonly used increase technique. To work a KFB, knit into the front of the stitch as usual, but do not slide it off the left-hand needle. Instead, bring the right-hand needle around to the back of the stitch and knit into the back of the same stitch. Then, slide the stitch off the left-hand needle.
Decreasing Techniques:
- SSK (Slip Slip Knit): SSK is often used for left-leaning decreases. To work an SSK, slip the next two stitches knitwise, one at a time, from the left-hand to the right-hand needle. Then, insert the left-hand needle into the fronts of these slipped stitches and knit them together.
- K2tog (Knit Two Together): K2tog is a popular right-leaning decrease. Simply knit the next two stitches together as if they were one stitch.
- Sl 1, K1, PSSO (Slip 1, Knit 1, Pass the Slipped Stitch Over): This decrease involves slipping one stitch knitwise from the left-hand to the right-hand needle, knitting the next stitch, and then passing the slipped stitch over the knit stitch. It creates a left-leaning decrease with a decorative flair.
By using these increasing and decreasing techniques effectively, you can shape your cape to fit your body and achieve the desired style. Experiment with different combinations of these techniques to create unique and customized designs.
Creating a textured pattern for your cape
When it comes to knitting a cape, adding a textured pattern can provide a unique and interesting look to your finished garment. There are many different options for creating texture, from simple stitches like ribbing or seed stitch, to more intricate cable or lace designs.
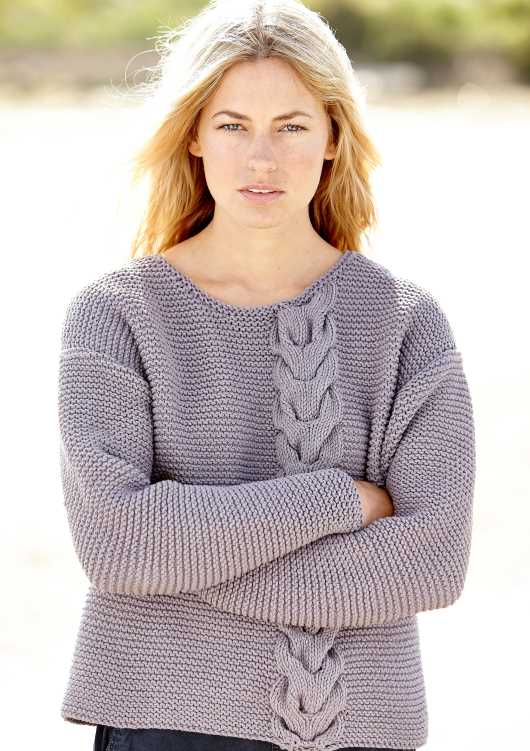
One popular textured pattern for capes is the classic cable stitch. Cable stitches involve crossing stitches over each other to create a twist or braid-like effect. By alternating cable stitches with plain knit or purl stitches, you can create a visually appealing pattern that adds depth and dimension to your cape.
Another option for adding texture to your cape is through the use of lace stitches. Lace stitches often involve yarn overs and decreases, creating an open and delicate look. You can choose from a wide variety of lace stitch patterns, ranging from simple and repetitive to complex and intricate. Lace stitches are especially popular for adding a feminine touch to capes.
If you prefer a simpler textured pattern, consider using ribbing or seed stitch. Ribbing involves alternating knit and purl stitches in a regular pattern, creating vertical columns. Seed stitch is made up of alternating knit and purl stitches within each row, creating a bumpy texture. Both ribbing and seed stitch are easy to knit and provide a classic and timeless look to your cape.
Lastly, you can also experiment with combining different textured stitches to create your own unique pattern. For example, you could alternate rows of seed stitch with sections of lace or cable stitches. This can add even more visual interest and complexity to your cape, allowing you to showcase your creativity and knitting skills.
Overall, adding a textured pattern to your cape can elevate its design and make it stand out. Whether you choose to incorporate cables, lace, ribbing, or a combination of different stitches, the possibilities are endless. Have fun experimenting with different patterns and create a textured cape that is truly one-of-a-kind.
Adding a Collar or Hood to Your Cape
Adding a collar or hood to your cape can add both style and functionality to your garment. Whether you want to keep your neck warm or protect yourself from the rain, a collar or hood can be a great addition to a cape knitting pattern.
Collar: If you prefer a more sophisticated look, adding a collar to your cape can elevate its style. You can choose from different collar styles, such as a classic stand-up collar or a shawl collar. A stand-up collar adds structure to the cape and can be created by picking up stitches around the neckline and knitting in ribbing or a pattern of your choice. A shawl collar, on the other hand, gives a more draped and cozy look. It is created by knitting an additional piece that wraps around the neckline and attaches to the front edges of the cape.
Hood: A hood is a perfect addition if you want extra protection from the elements. It provides warmth and coverage for your head and can be easily added to a cape knitting pattern. You can choose from different hood styles, such as a regular hood or a cowl hood. A regular hood can be created by knitting a rectangular piece and then attaching it to the neckline of the cape. A cowl hood, on the other hand, is a more voluminous option that drapes around the neck and shoulders, providing extra warmth and style.
When adding a collar or hood to your cape, make sure to consider the overall design and fit of the garment. You will need to adjust the pattern to accommodate the additional fabric and ensure that it blends seamlessly with the rest of the cape. Additionally, consider the type of yarn you are using and how it will interact with the collar or hood. Some yarns may be more suitable for a structured collar, while others may work better with a more relaxed and draped hood.
Remember to experiment and have fun with your design! Adding a collar or hood to your cape can give it a unique and personalized touch, making it a statement piece in your wardrobe.
Finishing touches: blocking and weaving in ends
Once you have finished knitting your cape using the chosen knitting pattern, it’s time to add the finishing touches to make it look polished and professional. Two important steps in this process are blocking and weaving in the ends.
Blocking
Blocking is the process of shaping and stretching the knitted piece to its final dimensions. This step is especially important for a cape, as it helps to even out any inconsistencies in tension and gives the final product a clean, crisp appearance.
To block your cape, start by filling a basin or sink with lukewarm water and add a small amount of gentle detergent. Submerge the cape in the water and gently agitate it to ensure that it is fully saturated. Let the cape soak for about 15 minutes.
After soaking, carefully squeeze out the excess water from the cape without twisting or wringing it. Lay the cape flat on a clean towel and roll it up, pressing down on the towel to remove more water. Unroll the towel and reshape the cape to its desired dimensions, carefully stretching and pinning it into place on a blocking board or foam mat.
Allow the cape to dry completely in this stretched-out shape. This could take a day or two, depending on the thickness of the yarn and the ambient humidity. Once dry, remove the pins and enjoy your perfectly shaped and blocked cape.
Weaving in ends
Weaving in ends is the process of hiding the loose yarn tails that are left over after completing each section or color change. It is important to weave in ends neatly and securely to ensure that they do not come unraveled during wear or washing.
To weave in ends, thread the tail onto a tapestry needle and carefully weave it back and forth through the stitches on the wrong side of the fabric. Make sure to follow the same path as the stitches, going up and down in a zigzag pattern to secure the end.
Once you have woven the end in for a sufficient distance, trim off the excess yarn close to the fabric. Be careful not to cut any of the stitches or pull the yarn too tight, as this could distort the fabric. Repeat this process for all the loose ends in your cape, and you will have a beautifully finished garment ready to wear.
Styling your cape for different occasions
When it comes to styling your cape, the possibilities are endless. Whether you’re attending a formal event or running errands around town, there are a few key factors to consider when choosing the right outfit to complement your cape.
For a casual day out: Pair your cape with a simple white t-shirt, a pair of skinny jeans, and ankle boots. This effortlessly chic look is perfect for running errands or meeting friends for brunch. Add a stylish crossbody bag and some oversized sunglasses for an extra touch of sophistication.
For a formal event:
- For a classic and elegant look, style your cape with a little black dress. Opt for a sleek, fitted silhouette to balance out the volume of the cape. Finish the look with a pair of heels and statement earrings.
- For a more modern and trendy twist, pair your cape with wide-leg trousers and a tailored blouse. Add some strappy heels and a clutch bag for a polished and sophisticated ensemble.
For a cozy winter outfit:
- Layer your cape over a chunky knit sweater and leggings for a cozy and comfortable look. Complete the outfit with knee-high boots and a beanie hat.
- If you’re heading out for a winter hike or outdoor adventure, style your cape with a thermal base layer, waterproof pants, and hiking boots. Don’t forget to top it off with a warm and stylish beanie or hat.
Remember, when styling your cape, it’s important to consider the occasion, the weather, and your personal style. Don’t be afraid to experiment and have fun with different combinations to create unique and stylish outfits.
Troubleshooting common issues when knitting a cape
Knitting a cape can be a rewarding and enjoyable project, but sometimes you may encounter common issues that can cause frustration. Here are some troubleshooting tips to help you overcome these challenges:
Tangled yarn:
If you find yourself with tangled yarn while knitting your cape, take a deep breath and resist the urge to tug and pull at it. This can make the situation worse. Instead, gently unravel any knots or tangles with your fingers or a knitting needle. If the yarn is particularly stubborn, try lightly misting it with water or using a bit of fabric softener to help loosen it.
Uneven tension:
Uneven tension is a common problem that can result in an unattractive finished cape. To avoid this, make sure to maintain consistent tension throughout your knitting. If you notice that your stitches are too tight or too loose, take a moment to adjust your tension before continuing. Practice and experience will help you develop a more even tension over time.
Incorrect stitch count:
It’s easy to lose track of your stitch count, especially if you’re working on a complex cape pattern. To ensure that you have the correct number of stitches, double-check your work at the end of each row or round. Count the stitches and compare them to the pattern instructions. If you notice a discrepancy, carefully undo the stitches and repeat the row or round, paying close attention to the pattern’s instructions.
Remember, knitting is a skill that improves with practice. Don’t get discouraged if you encounter challenges while knitting your cape. Take your time, be patient with yourself, and don’t be afraid to ask for help from more experienced knitters. With perseverance, you’ll be able to overcome these common issues and create a beautiful cape.
Finding inspiration for your next cape knitting project
Knitting a cape can be a fun and rewarding project, allowing you to create a unique and stylish accessory to add to your wardrobe. Whether you’re a beginner or an experienced knitter, finding inspiration for your next project is important to keep your creativity flowing and to ensure you enjoy the process of knitting.
One of the best ways to find inspiration for your cape knitting project is to explore different knitting patterns and designs. There are countless websites, blogs, and online communities dedicated to knitting where you can find a wide variety of cape patterns. From classic and timeless designs to modern and trendy ones, you can easily find a pattern that suits your style and skill level.
Here are some places where you can find knitting patterns:
- Knitting websites: Many knitting websites offer a wide range of cape knitting patterns, including both free and paid options. They often include detailed instructions and helpful tips for each pattern.
- Knitting magazines: Subscribe to knitting magazines or visit your local bookstore to find a variety of knitting patterns for capes and other projects. Magazines often feature new and innovative designs.
- Online knitting communities: Joining online knitting communities can provide you with a wealth of inspiration and resources. Connect with other knitters, participate in discussions, and share your own projects.
- Knitting books: There are numerous knitting books available that focus specifically on cape patterns. These books often include beautiful photos, detailed instructions, and variations to suit different tastes.
Aside from knitting patterns, you can also find inspiration for your cape knitting project by exploring different yarns and color combinations. Visit your local yarn store to see and feel different types of yarns, and experiment with different color combinations to create a unique look for your cape. Swatching with different yarns and colors can help you envision how the final product will look and feel.
In conclusion, whether you’re looking for a traditional cape design or a more modern twist, the key to finding inspiration for your next cape knitting project is to explore knitting patterns, join online communities, visit yarn stores, and experiment with different colors and textures. Enjoy the process and let your creativity guide you as you create your own beautiful and unique cape.
Q&A:
Where can I find Cape knitting patterns in the UK?
You can find Cape knitting patterns in the UK at various places such as online knitting pattern stores, craft stores, and knitting magazines. Additionally, there are many websites and online communities where you can find free Cape knitting patterns.
What are some popular Cape knitting patterns in the UK?
Some popular Cape knitting patterns in the UK include the hooded cape, shawl cape, and poncho cape. These patterns are versatile and can be customized to suit your style and preferences.
Are Cape knitting patterns suitable for beginners?
Yes, Cape knitting patterns can be suitable for beginners. However, it is recommended to start with simpler patterns that use basic stitches and techniques. As you gain more experience and confidence, you can then progress to more complex Cape knitting patterns.
Can I modify Cape knitting patterns to fit different sizes?
Yes, you can modify Cape knitting patterns to fit different sizes. Most Cape knitting patterns provide instructions on how to adjust the size by changing the number of stitches or rows. Additionally, you can always customize the pattern further by adding or subtracting stitches to achieve the desired fit.
What type of yarn is typically used for Cape knitting patterns?
There is a wide variety of yarns that can be used for Cape knitting patterns. Some common choices include wool, acrylic, alpaca, and blend yarns. The choice of yarn will depend on the desired drape, warmth, and texture of the finished garment.
Where can I find a cape knitting pattern in the UK?
You can find cape knitting patterns in the UK at various places. Some popular options include knitting shops and craft stores, as well as online platforms such as Ravelry, LoveKnitting, and Etsy. Additionally, many knitting pattern books and magazines also feature cape patterns that can be purchased online or in physical stores.