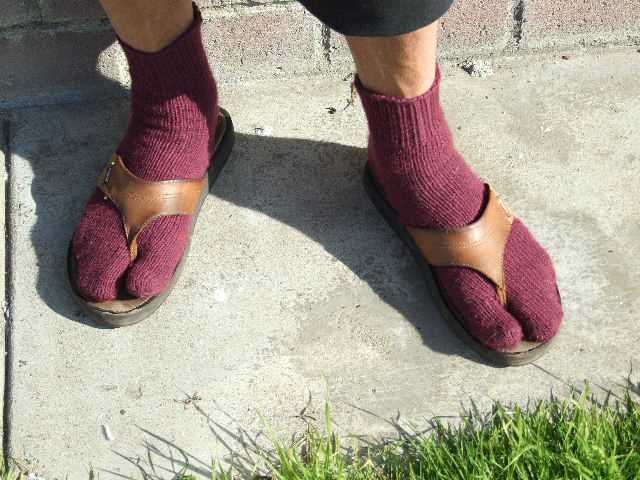
Creating Stylish Split Toe Socks with this Knitting Pattern

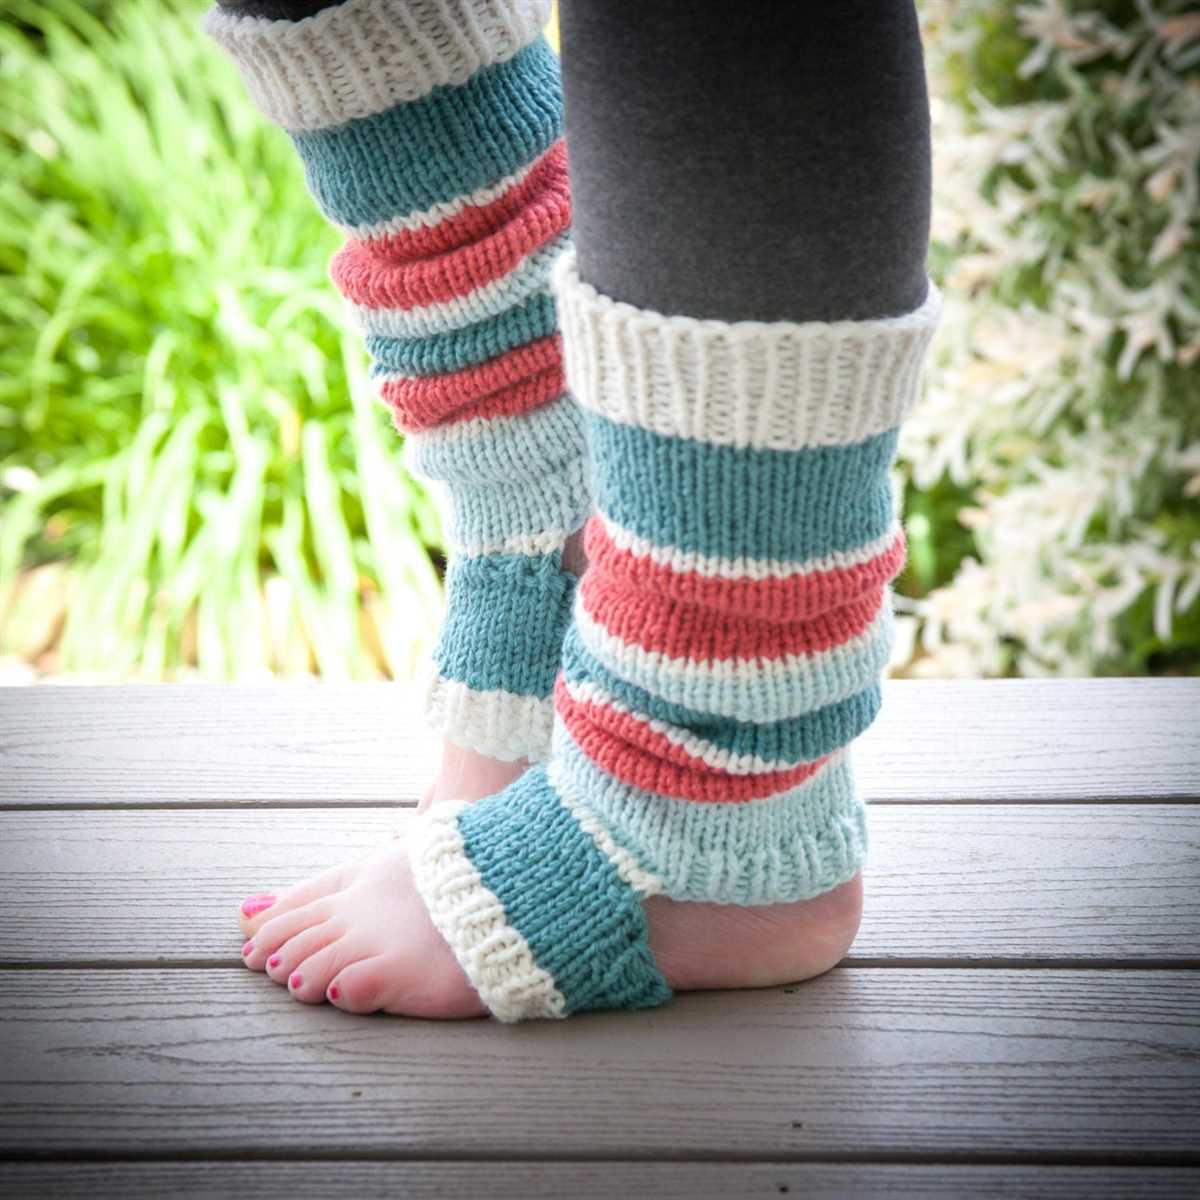
If you’re an avid knitter looking for a new project, or if you’re just starting out and want to try something fun and unique, then split toe socks are the perfect choice. Made to keep your toes warm and cozy while still allowing for the freedom of movement, these socks are a great addition to any wardrobe.
Knitting split toe socks may seem challenging, but with the right pattern and a bit of practice, you’ll be able to create a pair that fits perfectly and looks fantastic. In this article, we’ll take a closer look at a popular split toe socks knitting pattern and provide you with step-by-step instructions to help you get started.
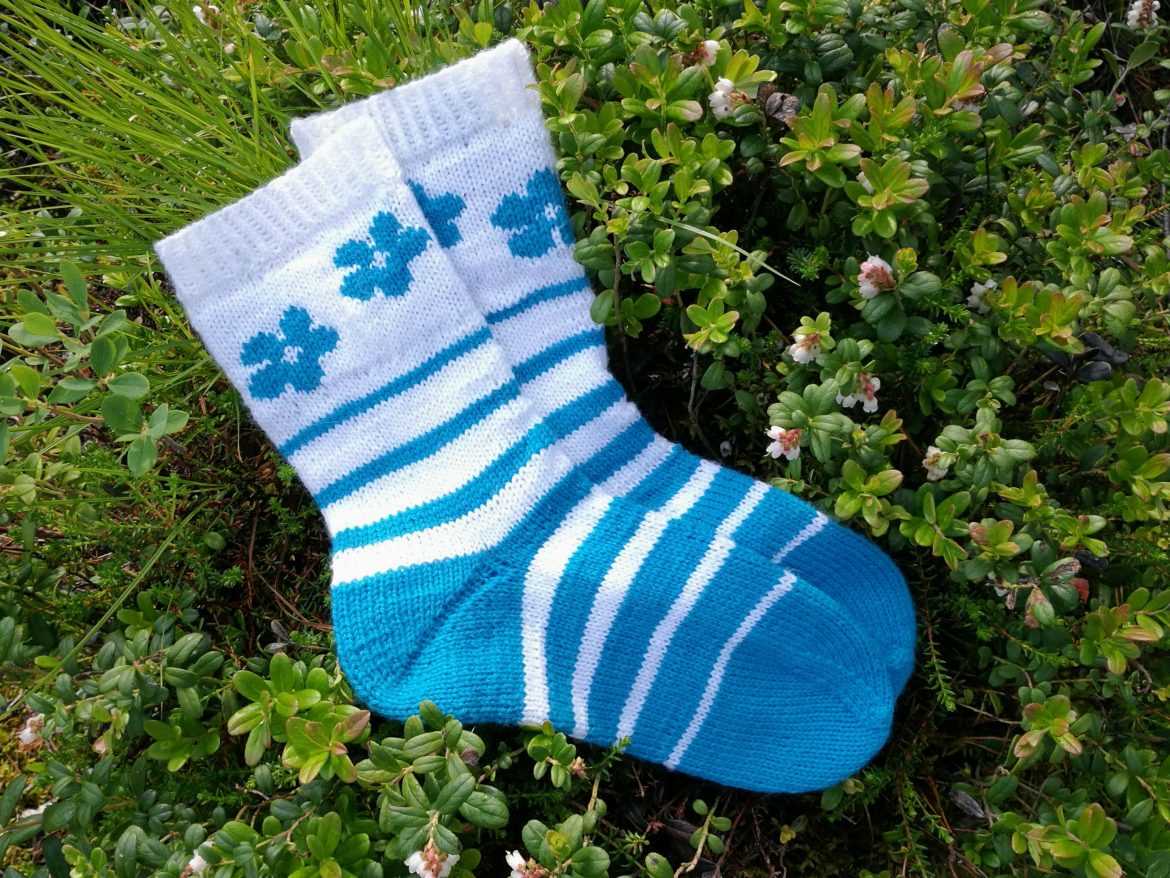
One of the great things about split toe socks is that they can be customized to fit your exact needs and preferences. Whether you prefer a traditional sock design or something more unique, there’s a pattern out there for you. From solid colors to intricate patterns, the possibilities are endless.
So, grab your knitting needles and a ball of your favorite yarn, and let’s get started on creating your very own pair of split toe socks!
How to Knit Split Toe Socks: A Step-by-Step Guide
If you’re looking to try something new in your knitting projects, why not give split toe socks a shot? These unique socks feature a split toe design that allows for added comfort and freedom of movement. In this step-by-step guide, we’ll walk you through the process of knitting your very own split toe socks.
Materials Needed:
- Yarn: Choose a yarn that is soft and comfortable for socks, such as merino wool or a wool-blend.
- Knitting Needles: Use a set of double-pointed needles in the appropriate size for your yarn.
- Tapestry Needle: This will be used for sewing up any seams.
- Stitch Markers: These will help you keep track of your stitches.
Step 1: Cast on
Using your preferred cast on method, cast on the required number of stitches for your sock size. Split toe socks typically require a smaller number of stitches for the toe section and then increase for the foot section.
Step 2: Work the Toe
Divide your stitches evenly onto 3 or 4 needles, depending on your preference. Begin working in the round, starting with the toe section. Use a series of increases, such as kfb (knit front and back), to shape the toe. Follow a toe-up sock pattern or create your own custom shaping.
Step 3: Knit the Foot
Once the toe section is complete, continue knitting in the round for the foot section. You can choose to add a stitch pattern or keep it plain, depending on your preference.
Step 4: Create the Split Toe
When you reach the desired length for the foot section, it’s time to create the split toe. To do this, work half of the stitches onto one needle and the other half onto a separate needle. You can place these stitches on stitch holders or separate needles.
Step 5: Work the Opening
Using a separate strand of yarn, work back and forth on the stitches for the split toe opening. This can be done in stockinette stitch or another pattern of your choice, such as ribbing. Work the opening to the desired length, making sure to keep track of your stitch count.
Step 6: Finish the Sock
Once the opening is complete, rejoin the two halves of the sock and continue knitting in the round for the leg section. Again, you can add a stitch pattern or keep it plain.
Step 7: Bind off
When you reach your desired length for the leg section, bind off your stitches. Use a stretchy bind off method, such as a sewn bind off, to ensure a comfortable fit.
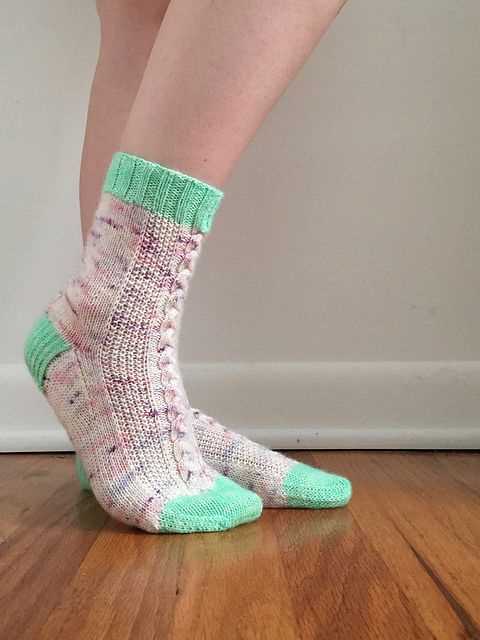
And there you have it! By following these steps, you’ll have your very own pair of split toe socks. Enjoy the unique design and added comfort of these special socks!
Choosing the Right Yarn and Needles
When knitting split toe socks, it is important to choose the right yarn and needles to ensure a successful outcome. The yarn you select should be soft and comfortable, as it will be in direct contact with your skin. Opt for a yarn that has a high percentage of natural fibers, such as merino wool or cotton, as these materials are breathable and moisture-wicking.
In terms of thickness, a fingering weight yarn is ideal for split toe socks. This weight will create socks that are lightweight and comfortable, perfect for wearing inside shoes. It is also important to consider the durability of the yarn, as socks are subjected to a lot of wear and tear. Look for yarns that have a sturdy twist and are designed specifically for sock knitting.
When it comes to choosing needles, double-pointed needles (DPNs) are the most common choice for knitting split toe socks. DPNs allow you to work in the round, which is necessary when knitting socks. Make sure to select a set of DPNs that are the appropriate size for your chosen yarn. You may also want to consider using stitch markers to help keep track of your rounds and ensure that your sock is coming out correctly.
Overall, choosing the right yarn and needles for your split toe socks is essential for creating a comfortable and functional garment. Take the time to find the perfect yarn that meets your preferences in terms of fiber content, thickness, and durability. Similarly, invest in a set of DPNs that are suitable for your chosen yarn to ensure a smooth knitting experience. With the right materials, you’ll be able to create a cozy pair of split toe socks that will keep your feet warm and stylish.
Casting on and Creating the Toe

To start knitting split toe socks, you will need to cast on enough stitches to create the toe section. The number of stitches will depend on the size of the sock and the desired fit. One common method for casting on is the Turkish cast on method, which creates a seamless edge.
To use the Turkish cast on method, begin by creating a slipknot and placing it on one needle. Next, place a second needle through the slipknot, crossing it in front of the first needle. Hold both needles in your right hand, with the slipknot on the front needle.
With your working yarn, bring the yarn behind the back needle and wrap it counterclockwise around the front needle. Then, insert the tip of the back needle through the slipknot to create a new loop. Pull the working yarn tightly to secure the new stitch. Repeat this process until you have cast on the desired number of stitches.
Knitting the Foot
Once you have finished knitting the ribbed cuff and the gusset of your split toe socks, it’s time to move on to the foot section. The foot is where all the magic happens, as it is where your toes will be comfortably nestled inside the cozy knit fabric.
The first step in knitting the foot is to distribute the stitches evenly across four double-pointed needles. Using a stitch marker, divide the stitches so that there is an equal number on each needle. This will ensure that the sock fits snugly and comfortably on your foot.
With the stitches evenly distributed, you can start knitting the foot using your preferred stitch pattern. You can choose to continue with the ribbed pattern from the cuff, or switch to a different stitch pattern to add some variety to your sock. Remember to follow the pattern instructions carefully to create a well-fitting and visually appealing foot section.
As you knit the foot, make sure to periodically try the sock on to check the fit and length. This will help you ensure that the sock is shaping up correctly and that it will fit your foot comfortably once finished. Keep in mind that the foot section should be slightly shorter than the actual length of your foot, as the toe section will add additional length.
Once you have knitted the desired length for the foot, it’s time to shape the toe section. This is typically done by decreasing the number of stitches gradually to create a tapered shape. Again, make sure to follow the pattern instructions for the correct decrease method and rate.
- After shaping the toe section, bind off the remaining stitches and cut the yarn, leaving a tail for weaving in.
- Repeat the same steps to knit the second sock, ensuring that both socks are identical in size and shape.
Once the foot section is complete, you are one step closer to finishing your split toe socks. The next step is to knit the toe section, where you will create separate compartments for each toe. Stay tuned for the next tutorial to learn all about knitting the toe section!
Creating the Split Toe

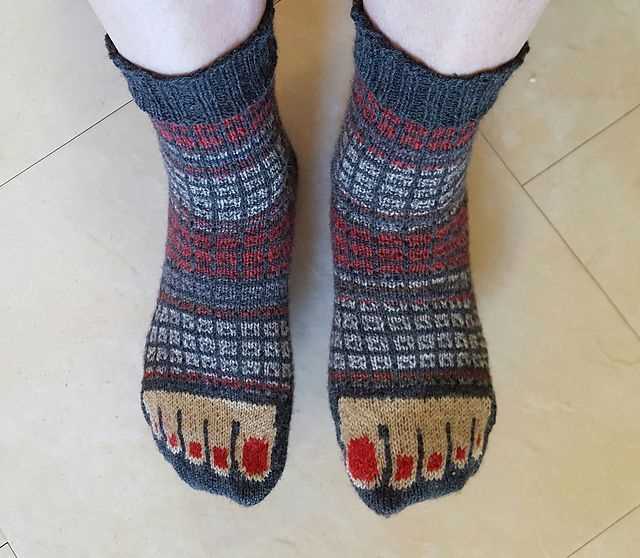
When it comes to knitting split toe socks, one of the most important and challenging parts is creating the split toe. This unique design feature allows for greater flexibility and movement in the toes, making the socks more comfortable and functional.
To create the split toe, you will need to follow a specific knitting pattern that incorporates a dividing line between the big toe and the rest of the toes. This dividing line is created by knitting a separate section for the big toe and then joining it back to the rest of the sock. This can be achieved by using short rows or by knitting two separate pieces and then sewing them together.
Short Rows

One way to create the split toe is by using short rows. Short rows are a technique in knitting where you turn the work before reaching the end of the row, creating extra rows and shaping. To create the split toe using short rows, you will need to work the stitches for the big toe on separate needles, turning the work at specific points to create the shaping needed for the split. Once the shaping is complete, you can join the big toe stitches back to the rest of the sock and continue knitting in the round.
Two-Piece Method

Another method for creating the split toe is by knitting two separate pieces. This method involves knitting one piece for the big toe and another piece for the rest of the toes. The two pieces are then sewn together, joining the big toe section to the rest of the sock. This method allows for more precise shaping and customization, as each piece can be knit to fit the individual’s foot shape and size.
Overall, creating the split toe in split toe socks requires careful attention to detail and following a specific knitting pattern. Whether you choose to use short rows or the two-piece method, the end result will be a pair of socks that provide comfort and freedom for your toes. So grab your knitting needles and start creating your own pair of split toe socks!
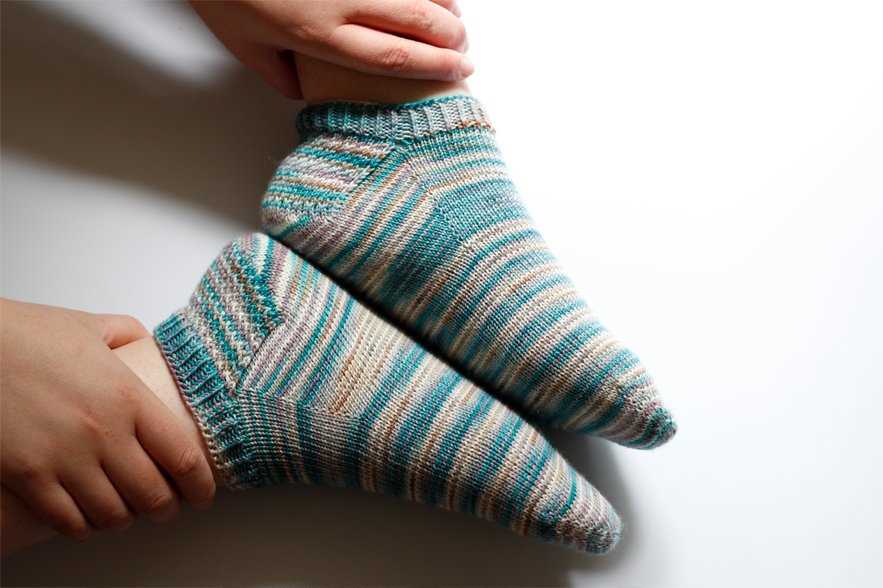
Working the Heel

Once you have completed the foot of your split toe socks, it’s time to move on to working the heel. The heel of the sock is an area of the sock that needs to be reinforced in order to provide extra durability and support. There are several different techniques you can use to work the heel, but one common method is the heel flap and gusset construction.
The heel flap is worked back and forth on half of the total stitches in the round. This creates a sturdy fabric that will protect and cushion the heel of the sock. To work the heel flap, you will typically knit back and forth in rows, slipping the first stitch of each row to create a neat edge. This creates a fabric that is double thickness and helps to prevent wear and tear on the heel of the sock.
Once the heel flap is complete, you will begin working the gusset. The gusset is a series of decreases and increases that shape the foot of the sock and provide a comfortable fit. The gusset is typically worked by picking up stitches along the sides of the heel flap and then decreasing them in subsequent rows. This helps to create a snug fit around the instep of the foot.
After working the gusset, you will continue knitting the foot of the sock until you reach the desired length. Once the foot is complete, you can move on to working the toe of the sock. The toe is typically worked using a technique called grafting or Kitchener stitch, which creates a seamless and invisible join between the stitches. Once the toe is complete, you can weave in any loose ends and your split toe socks will be ready to wear!
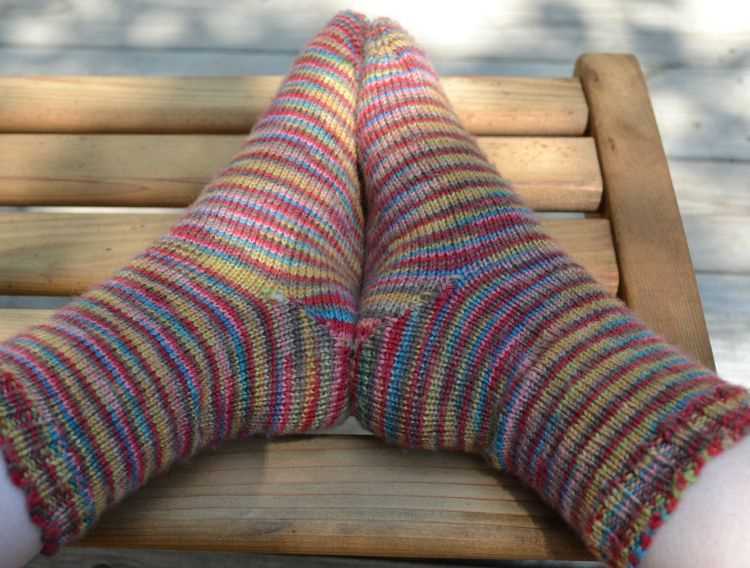
Knitting the Leg
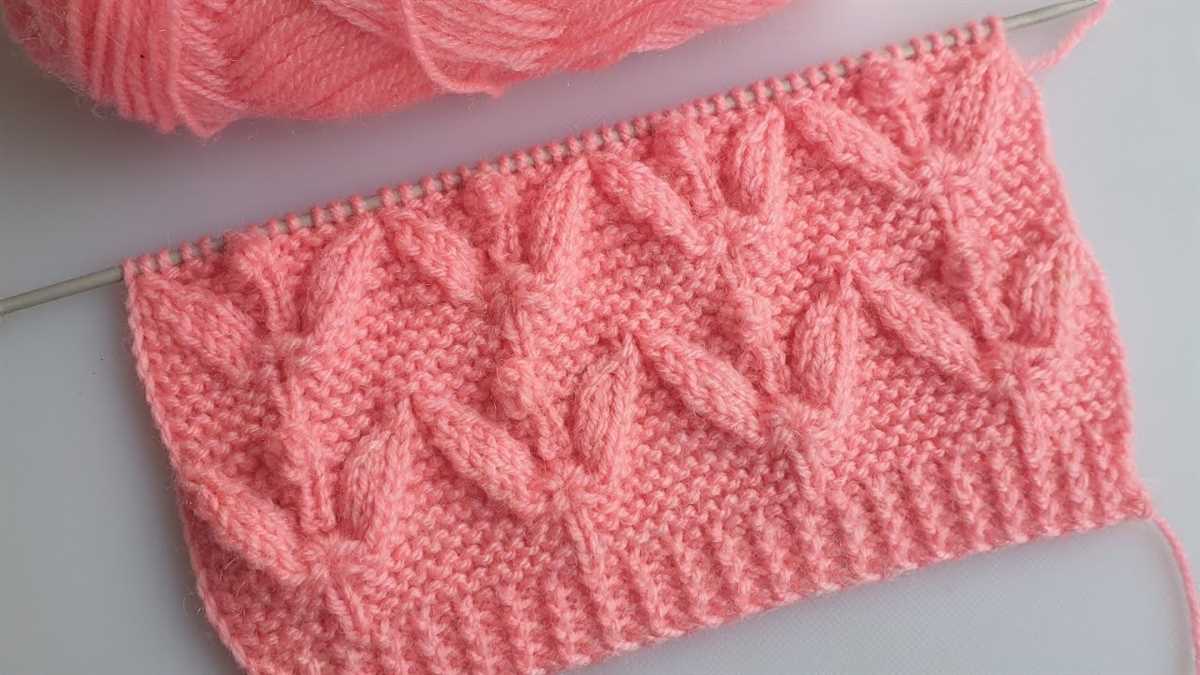
Once you have completed the ribbing for the cuff of your split toe socks, it’s time to start knitting the leg. The leg is the part of the sock that extends up from the cuff and sits on the calf. This is where you can get creative and experiment with different stitch patterns and designs to make your socks unique.
A common stitch pattern used for the leg of socks is the stockinette stitch. To create this simple and classic look, alternate between knitting one row and purling the next row. This will result in a smooth, flat fabric with a subtle texture. You can also add stripes or colorwork to the stockinette stitch by using different color yarns or incorporating different stitches like the slip stitch or fair isle.
Knitting in the round

When knitting the leg, it’s important to continue working in the round. This means that you will be knitting on a circular needle or using double-pointed needles, depending on your preference. By knitting in the round, you avoid having to seam up the sides later and create a seamless, stretchy fabric that is comfortable to wear.
As you knit the leg, pay attention to your tension and gauge to ensure that the sock fits properly. You may need to adjust your needle size or stitch count to accommodate the size and shape of your leg. Remember to periodically check the length of your sock as you knit to ensure that it reaches the desired height before moving on to the heel construction.
Adding Ribbing and Cuff
Once you have finished knitting the main body of your split toe socks, it’s time to add the ribbing and cuff. The ribbing is an important part of the sock, as it helps the sock stay in place and provides a snug fit around the leg. To create the ribbing, you will need to switch to a smaller needle size and work in a rib stitch pattern.
The rib stitch pattern typically consists of alternating knits and purls, creating a stretchy and textured fabric. It is commonly used for cuffs, collars, and waistbands in knitting. To begin the ribbing, you will need to determine the number of stitches to cast on. This will depend on the desired width of your ribbing. A common number is to cast on multiples of 4 stitches, but you can adjust this to your preference.
Once you have cast on the desired number of stitches, start working the rib stitch pattern. This can be a basic 1×1 rib (alternating knits and purls), 2×2 rib (two knits, two purls), or any other rib pattern of your choice. Make sure to check your stitch count periodically to ensure that you are maintaining the correct number of stitches.
Continue working the rib stitch pattern for the desired length of your cuff. As a general guideline, a cuff length of 1-2 inches is common for socks. Once you have reached the desired length, you can either bind off all stitches or use a stretchy bind off method to ensure a comfortable fit around the leg.
With the ribbing and cuff added, your split toe socks are now complete! The ribbing not only adds a decorative touch to the sock but also helps to keep your feet warm and cozy. Enjoy wearing your unique and comfortable split toe socks!
Finishing and Binding Off

Once you have completed knitting the split toe socks, it is time to finish off your project and bind off the stitches. Here are the steps to follow:
1. Cut the Yarn

Start by cutting the yarn, leaving a tail that is long enough for weaving in later. The tail should be at least several inches long to ensure that it does not unravel.
2. Bind Off
To bind off the stitches, work the first two stitches as normal. Then, pass the first stitch over the second stitch and off the needle. Continue this process until you have bound off all the stitches.
3. Weave in Ends
After binding off, thread the yarn tail onto a tapestry needle. Insert the needle into the stitches on the wrong side of the work, weaving the yarn in and out of the stitches to secure it. Trim any excess yarn once you are finished weaving in the ends.
4. Block the Socks
Blocking is an optional step but can help to improve the overall appearance of the finished socks. To block the socks, dampen them with water and then gently shape them by stretching and pinning them into the desired shape. Allow them to dry completely before removing the pins.
Following these steps will help you to properly finish off your split toe socks and ensure that they are ready to be worn and enjoyed. Happy knitting!
Blocking and Washing
Blocking and washing your split toe socks is an important step to ensure they maintain their shape and fit properly. It is recommended to block your socks after knitting them to smooth out any uneven stitches and improve the overall appearance of the finished product.
To block your split toe socks, start by filling a basin or sink with lukewarm water and adding a small amount of mild detergent. Gently submerge the socks in the water, making sure they are fully saturated. Allow the socks to soak for about 15 minutes to loosen any dirt or oils.
After soaking, gently squeeze the excess water out of the socks without wringing or twisting them. Lay the socks flat on a clean towel and roll the towel up to absorb more moisture. Repeat this process with a dry towel if necessary.
Once the socks are damp, you can begin the blocking process. Pin the socks to the desired shape on a blocking mat or towel, paying special attention to the split toe area. Use rust-proof pins to secure the socks in place, stretching the fabric slightly if needed.
Allow the socks to air dry completely in a well-ventilated area, avoiding direct sunlight or heat sources. This may take several hours or even overnight, depending on the humidity and air circulation in your home.
Once dry, the split toe socks should be softer, smoother, and perfectly shaped. If desired, you can also lightly steam the socks using a garment steamer or iron on a low setting to further improve their appearance.
Troubleshooting and Tips
If you encounter any difficulties while knitting split toe socks, don’t worry! Here are some common issues and tips to help you troubleshoot and improve your knitting experience.
1. Uneven tension
Uneven tension can result in socks with inconsistencies in size and fit. To achieve a more even tension, make sure to maintain consistent tension on your working yarn while knitting. It may also help to regularly check your gauge throughout the project.
2. Holes or gaps in the toe area

If you notice holes or gaps in the toe area of your split toe socks, you may be accidentally dropping stitches. Pay close attention to your stitches while knitting and make sure to catch any dropped stitches as soon as possible. You can use a crochet hook or a small knitting needle to pick up dropped stitches and secure them back in place.
3. Difficulty with the split toe technique
The split toe technique can be challenging, especially for beginners. If you’re having trouble with the technique, try practicing on a small swatch first to get comfortable with the movements. You can also try watching video tutorials or seeking help from more experienced knitters.
4. Choosing the right yarn
Using the right yarn is crucial for the success of your split toe socks. Opt for a yarn that has good stretch and durability, as well as being comfortable against the skin. It’s also important to check the recommended gauge for the pattern and choose a yarn that matches it closely.
5. Keep track of your stitches
Split toe socks often involve shaping and different stitch patterns. It’s important to keep track of your stitches and follow the pattern instructions closely to avoid any mistakes. Using stitch markers and row counters can be helpful in keeping track of your progress.
By following these troubleshooting tips and practicing your knitting skills, you’ll be able to create beautiful split toe socks with ease. Enjoy the process and happy knitting!