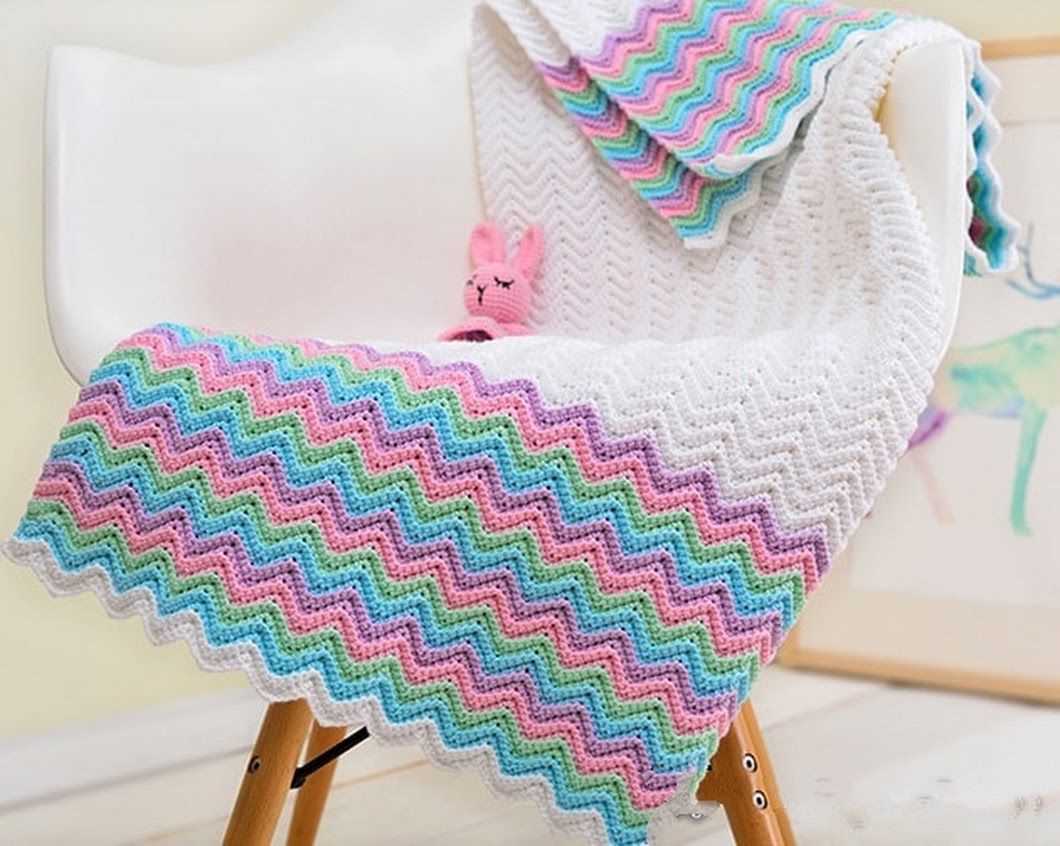
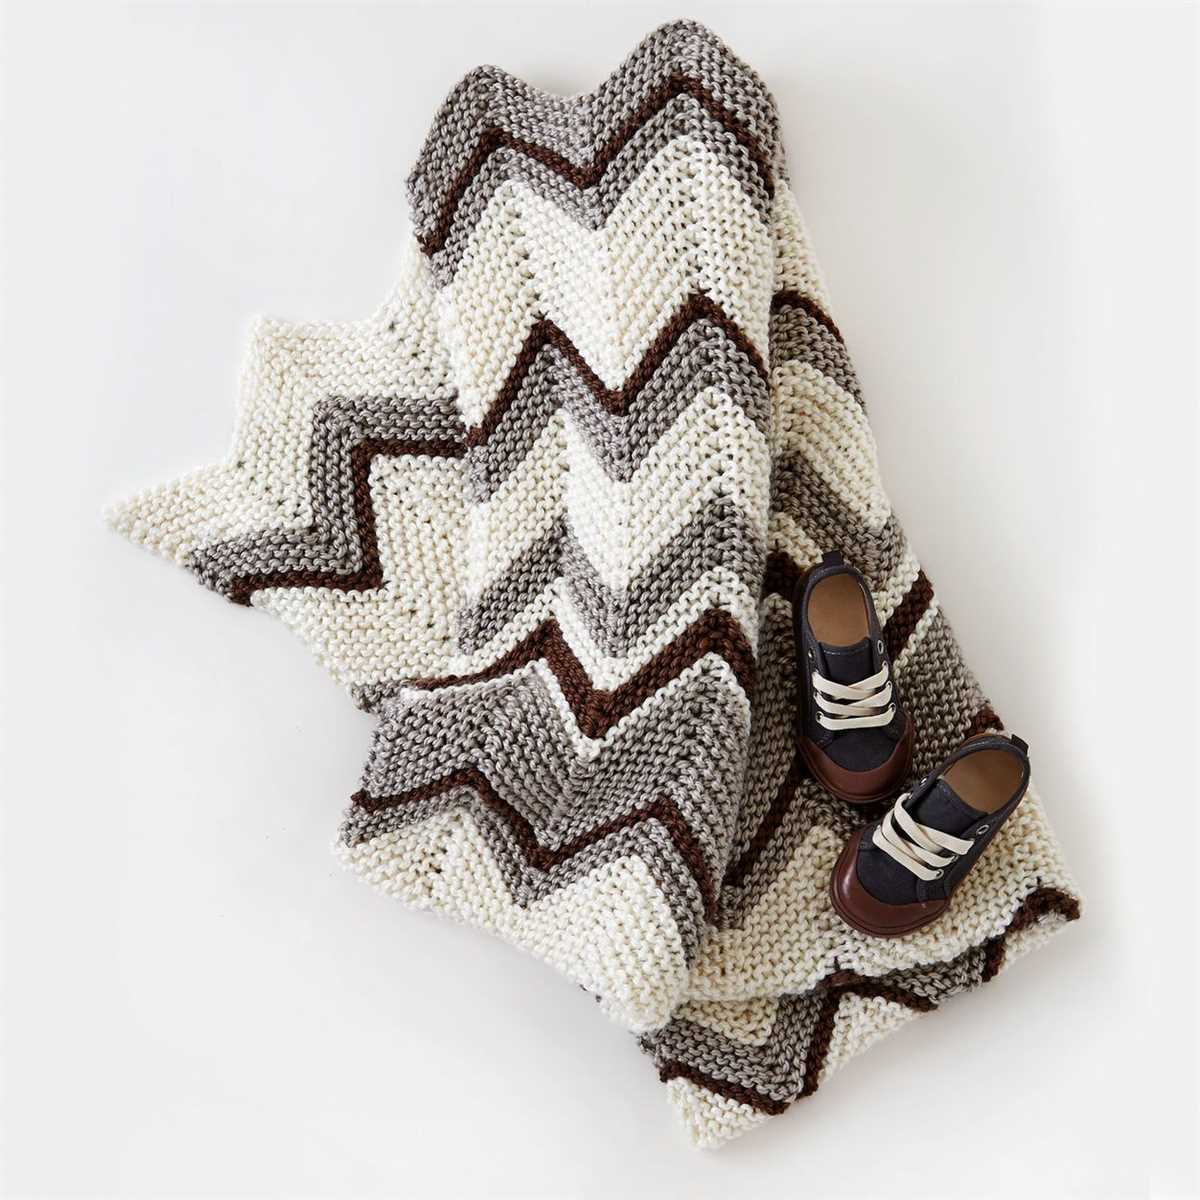
Create this beautiful zig zag blanket for free with this knitting pattern

Are you looking for a beautiful and versatile knitting project? Look no further than the free zig zag blanket knitting pattern! This pattern is perfect for knitters of all skill levels, whether you are a novice or an experienced pro. With its striking zig zag design, this blanket is sure to impress.
The zig zag blanket is not only visually appealing, but it is also incredibly cozy and warm. Made with soft and luxurious yarn, this blanket will keep you snug and comfortable on those chilly winter nights. The pattern provides step-by-step instructions on how to create the blanket, making it easy to follow along and create your own masterpiece.
Whether you want to make a blanket for yourself or as a gift for a loved one, this pattern is a great choice. The finished blanket will be a cherished item that can be passed down through generations. So grab your knitting needles and get started on this wonderful project today!
Free Zig Zag Blanket Knitting Pattern

A zig zag blanket is a classic and timeless design that adds a touch of style to any home. With this free zig zag blanket knitting pattern, you can create a beautiful and cozy blanket that will be perfect for snuggling up on chilly evenings.
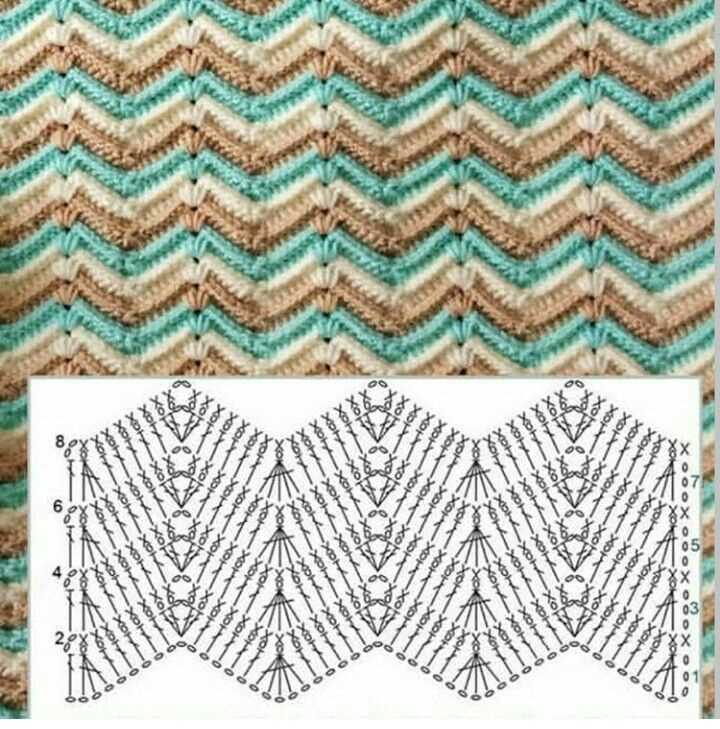
This pattern is suitable for knitters of all skill levels, from beginners to advanced. The zig zag design is created by using a combination of knit and purl stitches, making it a great project for practicing your knitting skills. The pattern also includes detailed instructions and a stitch chart to help you create the perfect blanket.
To start knitting the zig zag blanket, you will need to gather the necessary materials, including your choice of yarn and knitting needles. The pattern suggests using a soft and warm yarn, such as merino wool, for a cozy feel. You can also choose your own color combination to match your home decor.
Once you have all your materials ready, you can cast on and begin knitting the pattern. The zig zag design is created by repeating a series of knit and purl rows, with increases and decreases at the edges to create the zig zag shape. The pattern also includes instructions for finishing the blanket, such as binding off and weaving in the ends.
When your blanket is complete, you will have a beautiful and unique piece that you can proudly display in your home or give as a thoughtful gift. Whether you’re a seasoned knitter or just starting out, this free zig zag blanket knitting pattern is a great project to challenge your skills and create something special.
Choosing the Right Yarn and Needles

When it comes to knitting a zig zag blanket, choosing the right yarn and needles can make all the difference. The type and weight of yarn you select will affect the final look and feel of your blanket, while the size of your needles will determine the overall gauge and drape of the finished piece.
Yarn: When choosing yarn for your zig zag blanket, consider both the fiber content and the weight. Acrylic yarn is a popular choice for blankets due to its affordability and durability. Wool and wool blends are also great options, as they provide warmth and softness. It’s important to choose a yarn that is suitable for the size and weight of your project. Look for a worsted or Aran weight yarn, as these will give you a nice, medium-weight blanket.
Needles: The size of your needles will determine the tension and drape of your zig zag blanket. For a worsted or Aran weight yarn, using size 8 or 9 (5 or 5.5 mm) needles will usually create a nice, balanced fabric. However, always check the gauge listed in your pattern to be sure. Circular needles are recommended for larger projects like blankets, as they can hold a large number of stitches and distribute the weight evenly. Using circular needles will also make it easier to knit the zig zag pattern, as you won’t have to constantly turn your work.
Remember, the yarn and needles you choose should ultimately depend on the desired outcome of your zig zag blanket. Take the time to consider the fiber content, weight, and gauge to ensure that your finished blanket will be both beautiful and functional.
Getting Started: Casting On
Before you can start knitting your zig zag blanket, you need to cast on your stitches. Casting on is the process of creating the foundation row of stitches on your knitting needle. There are various methods you can use to cast on, but for this pattern, we recommend using the long-tail cast on method.
Long-Tail Cast On: To begin, measure out a length of yarn that is about four times the width of your finished blanket. Make a slipknot at one end of the yarn and place it on your knitting needle. Hold the needle in your right hand and the yarn tail in your left hand.
- Bring the yarn over the needle from back to front, creating a loop.
- Insert the needle into the loop from front to back, and catch the yarn under the needle tip.
- Draw the yarn through the loop, creating a new stitch on the needle.
- Repeat steps 2 and 3 until you have cast on the desired number of stitches.
Once you have finished casting on, you can begin working the first row of your pattern. In the case of the zig zag blanket, you will follow the instructions for the first row of the pattern repeat, which typically involves a combination of knit and purl stitches. As you work through the pattern, the zig zag design will gradually emerge.
Knitting the Chevron Pattern

The chevron pattern, also known as a zig zag pattern, is a popular choice for knitters looking to add visual interest to their projects. This eye-catching design is created by alternating increases and decreases in a specific sequence, resulting in a series of V-shaped motifs.
To knit the chevron pattern, you will need to know basic knitting techniques such as knit and purl stitches, as well as how to increase and decrease stitches. The pattern typically consists of multiple repeats of the same sequence, which creates the zig zag effect.
To begin, cast on the desired number of stitches for your project. The number of stitches in each repeat of the chevron pattern may vary depending on the desired width of each V-shaped motif. Once you have cast on, follow the sequence of stitches and instructions provided in the pattern.
The chevron pattern often involves knitting stitches together to decrease and using yarn overs to increase. These increases and decreases are what create the distinctive V-shaped motifs. Pay close attention to the pattern instructions and stitch counts to ensure that your chevron pattern is symmetrical and consistent.
When knitting the chevron pattern, it can be helpful to use stitch markers to keep track of the different sections of the pattern. This can make it easier to count stitches and ensure that you are maintaining the correct stitch count throughout your project. Additionally, using a row counter can help you keep track of which row you are on, especially if the pattern has multiple repeats.
The chevron pattern is a versatile design that can be used for a variety of projects, such as blankets, scarves, and shawls. It can be customized by using different colors or yarn weights to create different effects. Whether you’re a beginner or an experienced knitter, the chevron pattern is a fun and rewarding technique to try.
Changing Colors
The zig zag blanket pattern allows you to be creative with your color choices. By changing colors, you can create a unique and personalized design for your blanket. With a variety of vibrant and muted colors available, you can choose a combination that matches your personal style or the intended recipient’s preferences.
When changing colors in the zig zag pattern, it is important to pay attention to the color placement to achieve the desired effect. You can choose to alternate colors in a regular pattern, creating a symmetrical design. Alternatively, you can choose to change colors at longer intervals, creating a more random and eclectic look.
Tips for changing colors:
- Choose a color palette: Before starting your blanket, take some time to plan out your color choices. Consider the overall look you want to achieve and select colors that complement each other.
- Create a swatch: Before committing to a color scheme, it can be helpful to create a small swatch with your chosen colors. This will give you an idea of how the colors interact and help you make any adjustments if needed.
- Joining new yarn: When changing colors, it is important to join the new yarn in a way that creates a seamless transition. There are various techniques you can use, such as the Russian join or the braided join, to achieve a neat and secure join.
- Weave in ends: After changing colors, be sure to weave in the ends of the yarn to secure them. This will prevent the ends from unraveling and ensure that your blanket stays intact.
By following these tips and being mindful of your color choices, you can create a beautiful and eye-catching zig zag blanket that is unique to you or your recipient. Whether you opt for bold and contrasting colors or a more subtle and monochromatic palette, your blanket is sure to be a treasured item that provides warmth and comfort for years to come.
Adding a Border
Adding a border to your zig zag blanket can be a great way to finish off the design and add some extra visual interest. There are a few different options you can consider when it comes to choosing a border, so it’s important to think about what will work best with your overall design.
Mitered Corners: One popular option is to add mitered corners to your border. This involves making diagonal decreases at each corner to create a neat and professional-looking finish. To achieve this, you can simply knit or crochet two stitches together on either side of the corner stitch.
Ribbed Border: If you want to add some texture to your blanket, a ribbed border can be a great choice. You can achieve this by alternating knit and purl stitches in a specific pattern. For example, you could work a few rows of k2, p2 ribbing to create a stretchy and visually appealing border.
Simple Garter Stitch: For a clean and classic look, a simple garter stitch border can work well. This involves knitting every row for a specific number of stitches. You can adjust the width of the border by knitting more or fewer rows.
Eyelet Lace Border: If you want to add a delicate and feminine touch to your blanket, an eyelet lace border can be a beautiful option. This involves creating yarn over and knit two together stitches to create a lacy pattern. You can find various lace stitch patterns online or in knitting stitch dictionaries to use for your border.
Regardless of which border option you choose, it’s important to take your time and ensure that it is well-executed. A neatly finished border can really elevate the overall look of your zig zag blanket and make it appear more professional. So, don’t rush through this step and enjoy the process of adding the final touches to your knitting project.
Blocking the Blanket
Blocking is an important step in finishing your zig zag blanket knitting project. It involves soaking the completed blanket in water and then shaping it into its final dimensions before allowing it to dry. This helps to even out the stitches, improve the drape of the fabric, and make the pattern more pronounced.
To block your blanket, start by filling a basin or sink with cool water. Gently place the blanket into the water, making sure it is fully submerged. Let it soak for about 15 minutes, ensuring that all the fibers are thoroughly saturated.
Next, carefully remove the blanket from the water, taking care not to wring or twist it. Lay it flat on a clean towel and gently press out any excess water. Then, using rustproof T-pins or blocking wires, begin shaping the blanket into its desired dimensions. If you want the zig zag pattern to really stand out, be sure to stretch the fabric slightly in the direction of the pattern.
Once the blanket is in the desired shape, let it dry completely. This can take anywhere from a few hours to a day or two, depending on the thickness of the yarn and the humidity of the room. Avoid moving or adjusting the blanket while it is drying, as this can disrupt the blocking process.
After the blanket is completely dry, remove the pins or wires and admire your finished project! The blocking process not only gives the blanket a professional, polished look, but it also helps to preserve the shape and structure of the zig zag pattern for years to come.
Tips for Making the Zig Zag Pattern Pop
Adding a zig zag pattern to a blanket can create a stunning visual effect. Here are some tips to make sure your zig zag pattern pops:
- Color selection: Choose colors that contrast well with each other to highlight the zig zag design. Consider using complementary colors or colors that are opposite on the color wheel for maximum impact.
- Yarn weight: Using a thicker yarn weight can help make the zig zag pattern more prominent. Thicker yarns tend to have more texture and create deeper ridges, which make the zig zag design stand out.
- Tension: Pay attention to your tension while knitting the zig zag pattern. Make sure your stitches are consistent in size and tension to maintain the sharp lines and angles of the zig zag design. Using a stitch marker or counting your stitches regularly can help keep your tension even.
- Blocking: Blocking your finished blanket can help accentuate the zig zag pattern. Gently stretch and shape the blanket while it’s damp, then let it dry flat. This can help smooth out any uneven stitches and make the zig zag design more defined.
- Pattern placement: Consider how you want the zig zag pattern to appear on your blanket. You can create a striking effect by alternating the direction of the zig zag across the blanket or by starting the pattern in different positions. Experiment with different placements to find the most visually appealing arrangement.
By following these tips, you can take your zig zag blanket to the next level and create a stunning piece that will catch the eye and impress everyone who sees it.
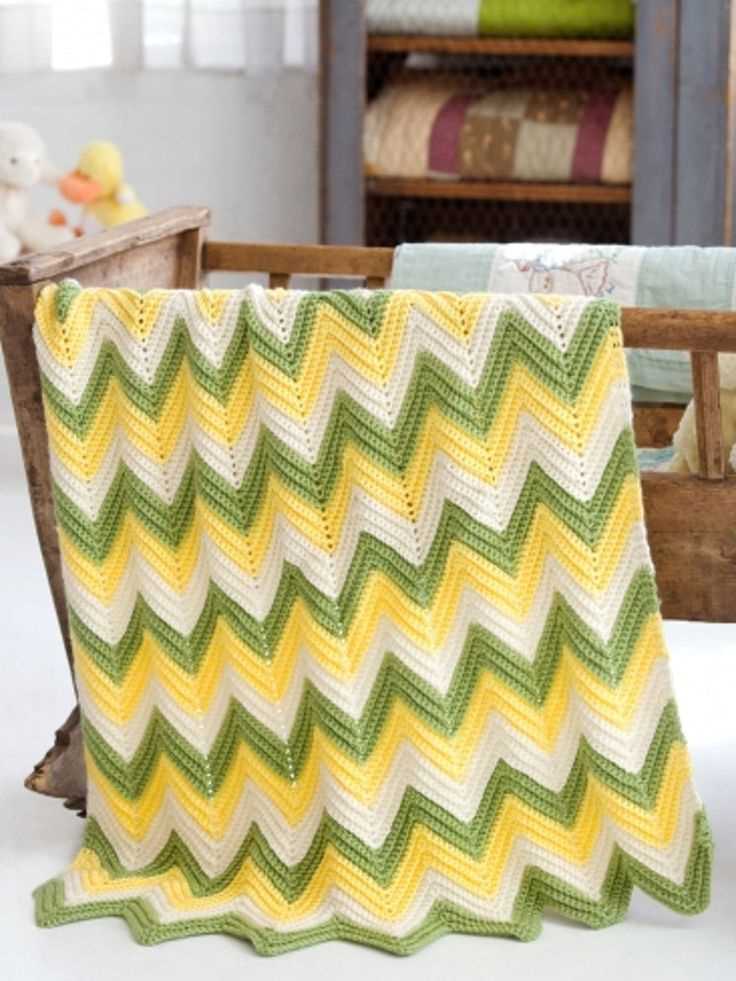
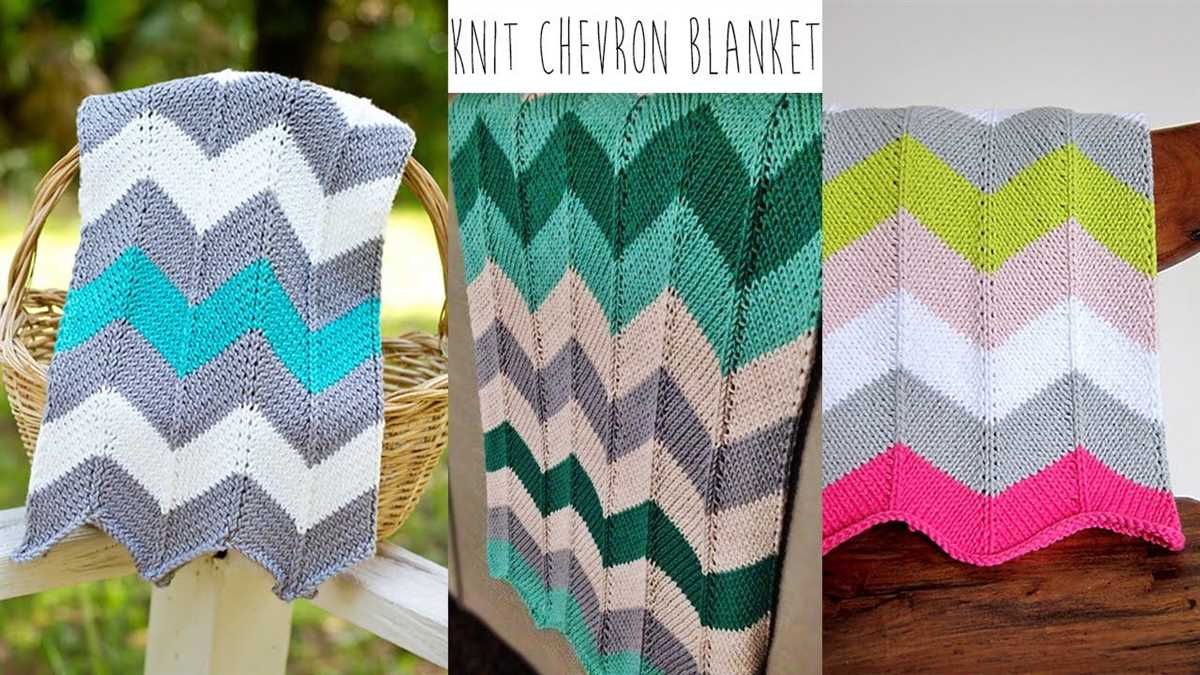
Different Variations of Zig Zag Blankets
There are countless variations of zig zag blankets that you can create using different knitting patterns. One popular variation is the classic chevron zig zag pattern, which features sharp peaks and valleys. This pattern is achieved by alternating between knitting and purling stitches in a specific sequence.
Another variation is the twisted stitch zig zag pattern, which adds a unique texture to the blanket. This pattern involves knitting through the back loop to create twisted stitches, which create a more intricate and visually interesting zig zag design.
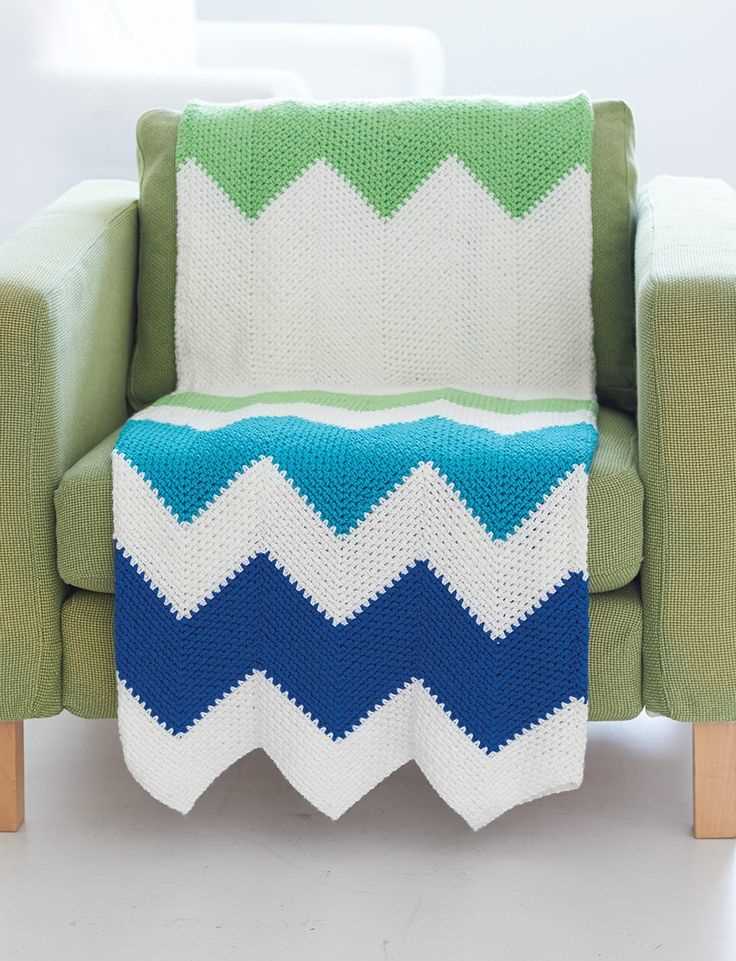
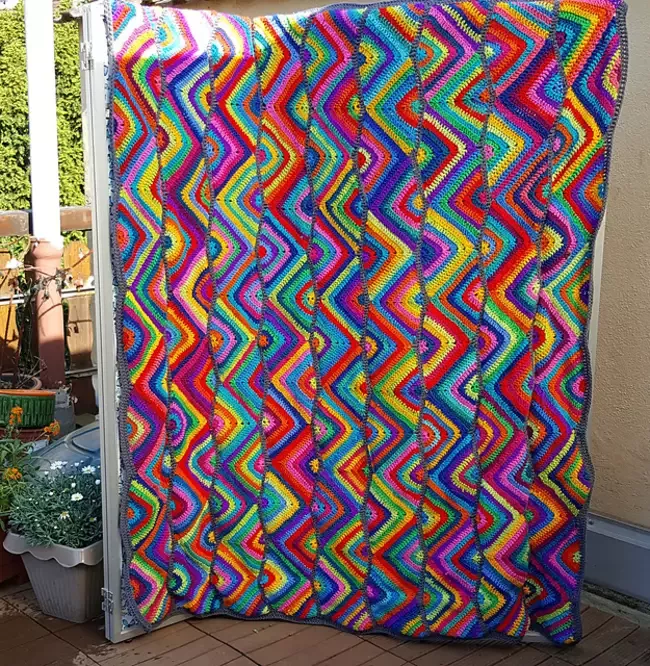
If you’re looking for a more colorful and playful zig zag blanket, you can try using multiple colors of yarn to create a striped zig zag pattern. This pattern involves changing colors at specific intervals to create bold and vibrant stripes that zig zag across the blanket.
For a more cozy and warm blanket, you can try knitting a chunky zig zag blanket using thick yarn and larger needles. This will create a blanket with a more pronounced zig zag pattern and a chunkier texture.
Regardless of the variation you choose, knitting a zig zag blanket can be a fun and rewarding project. With so many different patterns and techniques to explore, you can create a unique and personalized blanket that will keep you warm and stylish. Whether you’re a beginner knitter or an experienced one, there is a zig zag blanket pattern out there that is perfect for you.
Troubleshooting Common Issues
While working on the free zig zag blanket knitting pattern, you may encounter some common issues that can be easily resolved. Here are a few troubleshooting tips to help you overcome these challenges:
Problem: Uneven tension in knitting stitches
Uneven tension in your knitting stitches can result in an irregular pattern. To fix this issue, make sure you are consistently applying the same amount of tension to each stitch. Take your time and practice maintaining an even tension throughout your knitting project. You can also try using smaller knitting needles to help create more even stitches.
Problem: Stitch count is off
If you find that your stitch count is off and it doesn’t match the pattern instructions, double-check your counting and make sure you haven’t accidentally added or skipped any stitches. If the stitch count is consistently off, you may need to adjust your tension or consider using stitch markers to help you keep track of your stitches.
Problem: Yarn tails are getting tangled
If you find that your yarn tails are getting tangled as you knit, try winding them into small balls or using yarn bobbins to keep them organized. Avoid pulling yarn from the center of the skein, as this can sometimes lead to tangling. Instead, pull the yarn from the outside of the skein and unravel as needed.
By following these troubleshooting tips, you can overcome common issues that may arise while working on the free zig zag blanket knitting pattern. Remember to stay patient and practice, and soon you’ll be creating a beautiful blanket to keep you warm and cozy!
Frequently Asked Questions
Here are some frequently asked questions about knitting the zig zag blanket.
1. How long does it take to knit the zig zag blanket?

The time it takes to knit the zig zag blanket will vary depending on your knitting speed and the amount of time you can dedicate to the project. On average, it may take several weeks to complete.
2. Can I make the zig zag blanket in different sizes?

Yes, you can easily adjust the size of the zig zag blanket by changing the number of cast on stitches and the number of pattern repeats. Just keep in mind that changing the dimensions will also affect the amount of yarn you will need.
3. Can I use different yarn for the zig zag blanket?
Yes, you can use different types and brands of yarn for the zig zag blanket. Just make sure that the yarn you choose has a similar gauge to the recommended yarn in the pattern to ensure the finished blanket has the desired size and drape.
4. How do I join new yarn colors when knitting the zig zag blanket?

To join new yarn colors when knitting the zig zag blanket, you can use the intarsia or fair isle knitting techniques. Intarsia involves twisting the two different color yarns at the edges of the color change to prevent holes, while fair isle involves carrying the unused yarn along the back of the work.
5. Can I add fringe to the zig zag blanket?
Yes, you can add fringe to the zig zag blanket if desired. To add fringe, simply cut lengths of yarn, fold them in half, and attach them to the edges of the blanket using a crochet hook or by weaving them through the stitches.
Conclusion
Knitting the zig zag blanket can be a fun and rewarding project. With this free pattern, you can create a beautiful and cozy blanket that will keep you warm throughout the colder months. Whether you’re a beginner or an experienced knitter, this pattern is perfect for practicing new techniques and creating a stunning finished piece. So grab your knitting needles and get started on your zig zag blanket today!
Q&A:
What is a Zig Zag blanket?
A Zig Zag blanket is a type of knitted blanket that features a zig zag pattern. It is characterized by alternating rows of knit and purl stitches, creating a diagonal design.
Where can I find a free Zig Zag blanket knitting pattern?
You can find free Zig Zag blanket knitting patterns on various websites and knitting blogs. Some popular sources include Ravelry, Lion Brand Yarn, and LoveCrafts.
What materials do I need to knit a Zig Zag blanket?
To knit a Zig Zag blanket, you will need yarn in your chosen colors, knitting needles in the appropriate size for your yarn, scissors, and a yarn needle for finishing.
Can I modify the size of the Zig Zag blanket?
Yes, you can modify the size of the Zig Zag blanket by adjusting the number of cast on stitches and the number of pattern repeats. Keep in mind that altering the dimensions may also affect the yardage of yarn needed for the project.