Stylish Knitting Ideas for Cozy Blanket Patterns

Knitting blankets is not only a great way to relax and unwind, but it also allows you to create beautiful and cozy pieces for your home. Whether you are a beginner knitter or have years of experience, there are plenty of blanket patterns out there to suit your skill level and personal style.
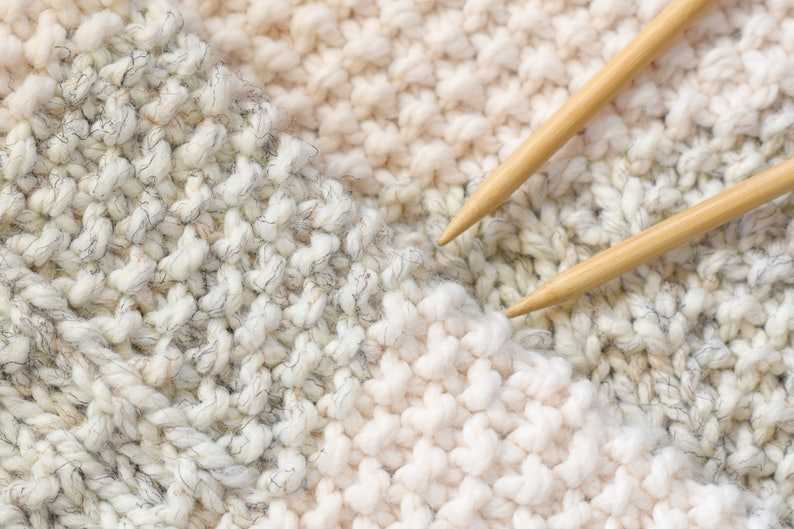
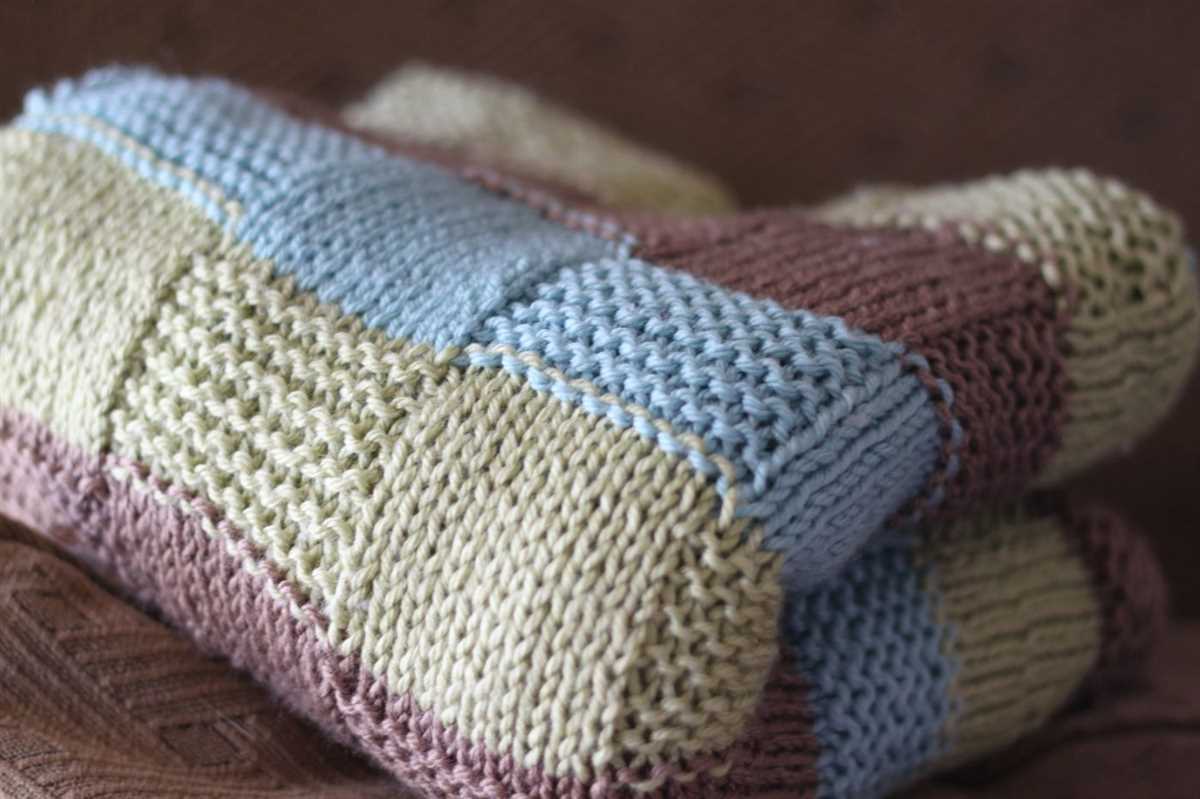
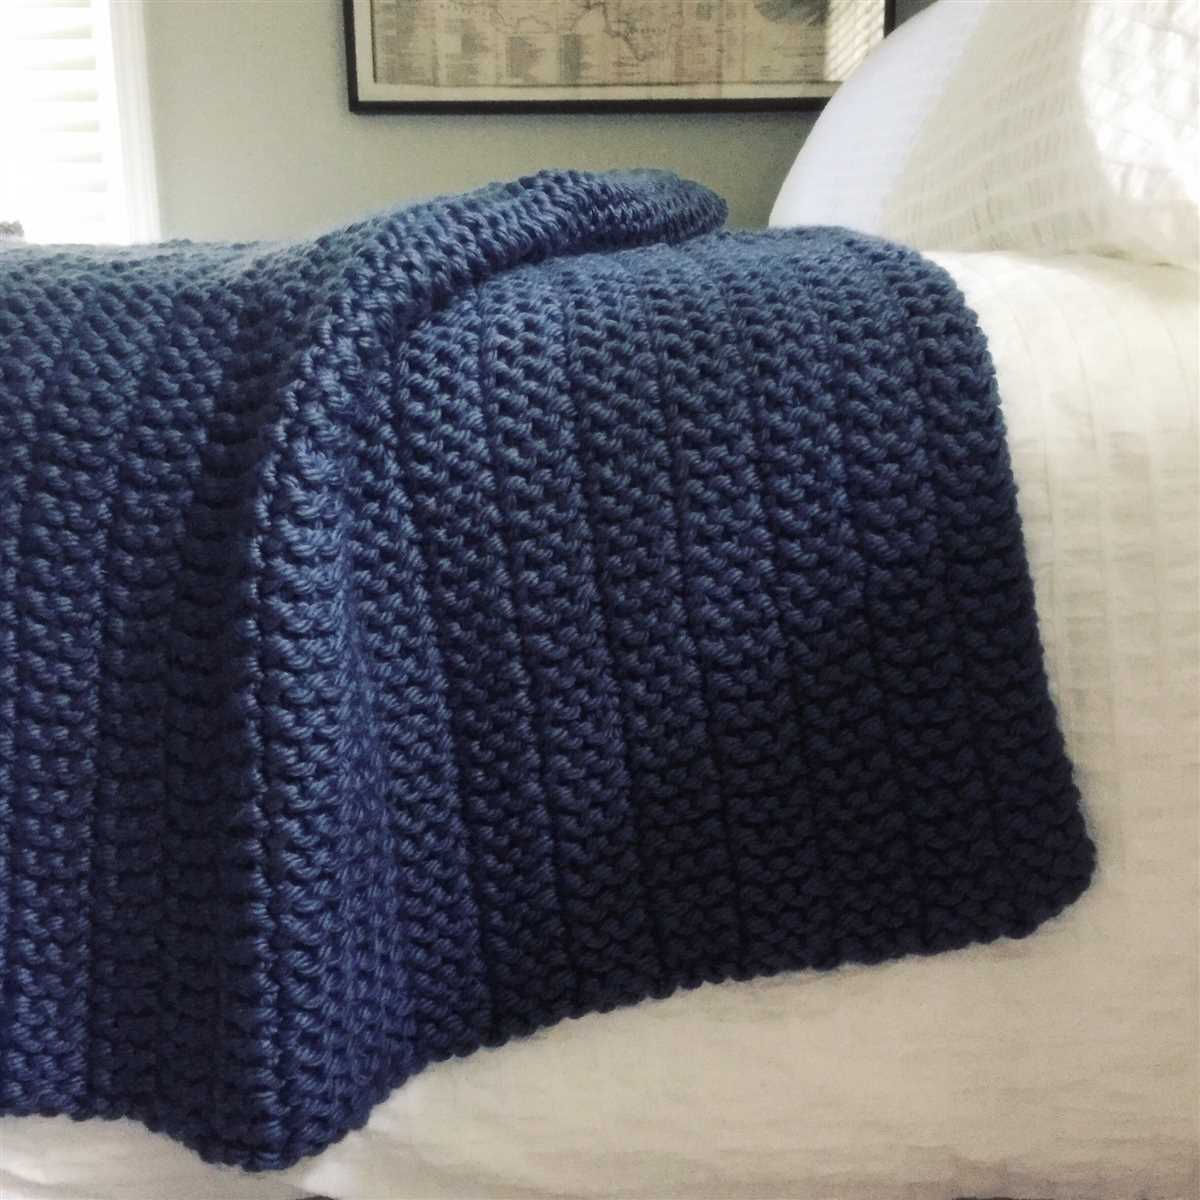
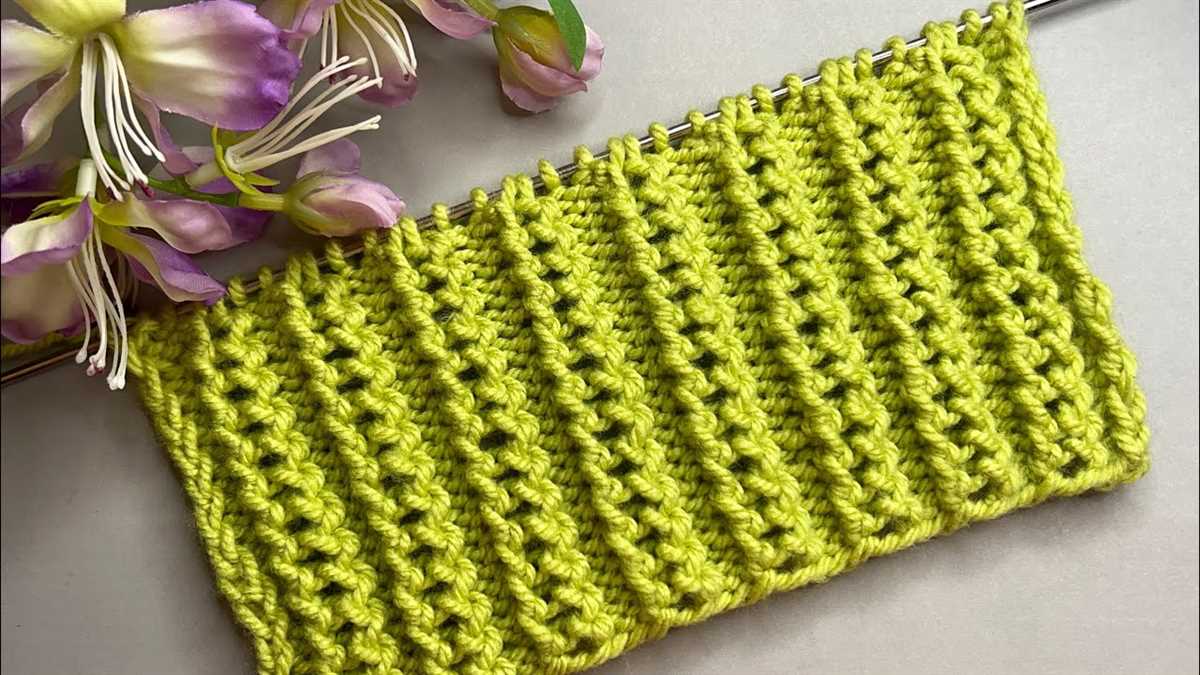
Blankets can be made using a variety of stitches and techniques, allowing you to create different textures and patterns. From simple garter stitch to intricate lace or cable patterns, the possibilities are endless. You can also experiment with different yarn weights and colors to achieve the desired look and feel.
One popular blanket pattern is the classic granny square blanket. This pattern is perfect for beginner knitters as it involves simple stitches and repetitive motifs. The granny square blanket can be made using one color or multiple colors, and the size can easily be adjusted by adding more squares.
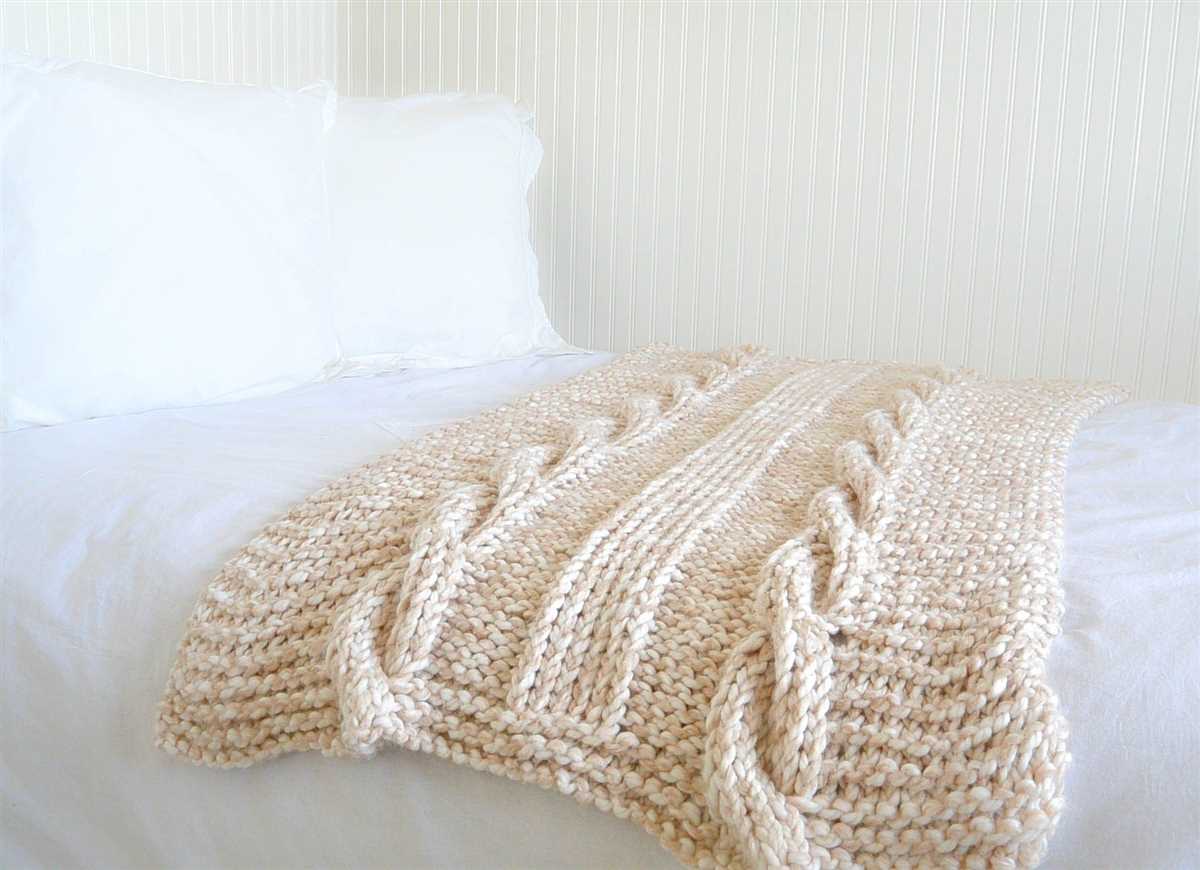
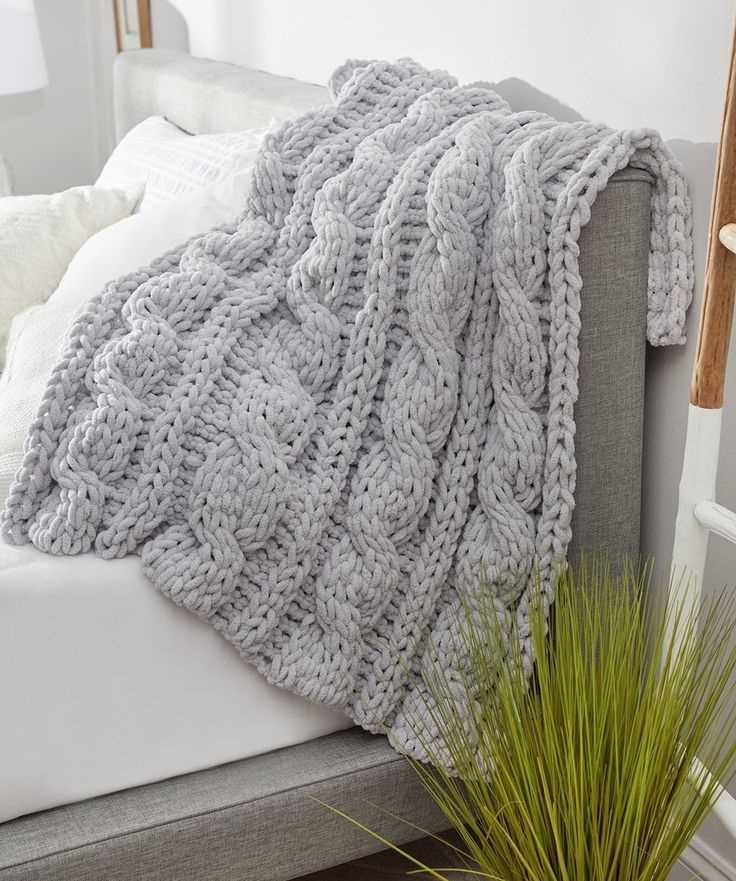
If you are looking for a more challenging project, you can try knitting a cable blanket. Cable knitting creates a beautiful raised pattern that adds depth and interest to your blanket. This pattern requires more advanced knitting skills, but the end result is definitely worth the effort.
Whether you prefer a simple and cozy design or a more intricate and decorative pattern, knitting blankets allows you to create unique and personalized pieces that will keep you warm and bring style to your home. So grab your knitting needles, choose your favorite pattern, and start creating your own beautiful blanket.
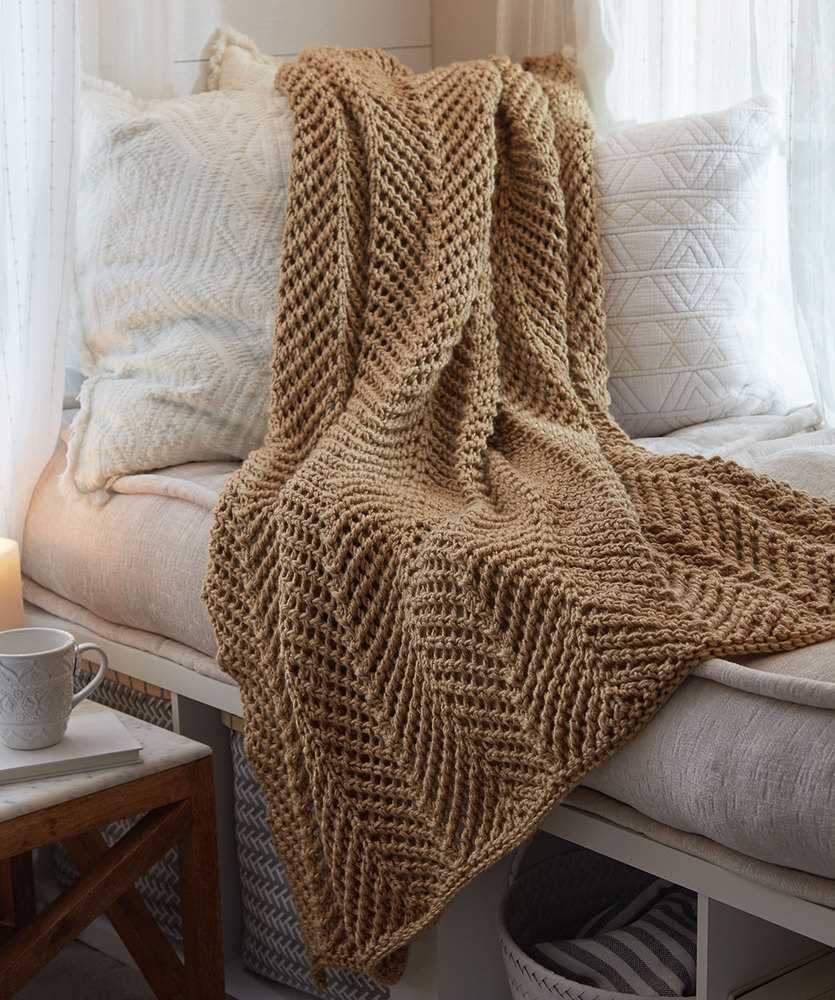
Chevron Pattern
A chevron pattern is a popular choice for knitting blankets. It creates a visually striking design with its zigzag pattern. The pattern is named after the shape of a chevron, which is a V-shaped symbol. Chevron patterns can be created using different color combinations, making it a versatile choice for knitters looking to add some geometric flair to their projects.
To knit a chevron pattern, you will need to follow a specific stitch sequence. The most common way to create a chevron pattern is by alternating knit and purl stitches in a specific sequence. This sequence creates the distinctive V-shaped design. Some knitters also incorporate decrease and increase stitches to further enhance the chevron effect.
When choosing colors for a chevron pattern, you can opt for contrasting colors to make the zigzag pattern more pronounced. Alternatively, you can choose colors that blend together to create a more subtle effect. The choice of yarn also plays a role in the overall appearance of the chevron pattern. A smooth yarn will create clean lines, while a textured yarn can add additional visual interest.
There are countless variations of chevron patterns, allowing knitters to customize the design to their liking. Some patterns feature wider chevrons, while others have narrower ones. You can also experiment with different stitch patterns within the chevron, such as cables or lace stitches, to add even more dimension to your blanket.
Whether you’re a beginner or an experienced knitter, the chevron pattern offers a fun and engaging project. It’s a great way to showcase your knitting skills and create a beautiful and unique blanket.
Cable Pattern
In knitting, cable patterns are a popular choice for creating interesting textures and designs on blankets. Cable patterns involve crossing stitches over each other to create a twisted or braided effect. This technique adds depth and visual interest to the blanket, making it a standout piece.
One common cable pattern used in blanket knitting is the basic cable. This pattern typically involves crossing a few stitches over each other, either to the left or to the right. The result is a diagonal cable that adds a touch of elegance to the blanket. Knitters can experiment with different sizes and placements of the cables to create unique designs.
Another cable pattern that is often used in blanket knitting is the honeycomb cable. This pattern creates a hexagonal shape that resembles a honeycomb. It involves crossing six or more stitches over each other to create the intricate pattern. The honeycomb cable adds a cozy and timeless look to the blanket, making it a great choice for classic designs.
When knitting with cable patterns, it is important to keep track of the pattern’s repetition and the number of stitches involved. Using a cable needle or a stitch marker can help ensure that the cables are crossed correctly and in the right sequence. With practice, knitters can become more comfortable with cable patterns and create beautiful blankets that showcase their knitting skills.
Lace Pattern
The lace pattern is a beautiful and intricate design that can add elegance and sophistication to any knitted blanket. With its delicate and lacy appearance, the lace pattern is perfect for adding a touch of femininity to your blanket. This pattern typically features openwork stitches and intricate motifs, creating a delicate and airy texture.
There are various lace patterns that you can choose from to create your knitted blanket. Some popular lace patterns include the diamond lace, leaf lace, and feather lace. These patterns often involve repeating stitches and intricate lace motifs, resulting in a stunning and visually appealing design. The lace pattern can be incorporated into the main body of the blanket or used as a border or edging.
To knit a lace pattern, you will need to have intermediate to advanced knitting skills. The lace pattern typically involves complex stitch combinations and requires careful attention to detail. However, with practice and patience, you can create a beautiful lace pattern that will impress everyone who sees your blanket. There are many resources available online and in knitting books that offer step-by-step instructions and charts for various lace patterns. These resources can help guide you through the process and ensure that your lace pattern turns out perfectly.
When knitting a lace pattern, it is important to use a lightweight yarn and small knitting needles to achieve the delicate and airy look. The yarn should have good stitch definition and drape to showcase the intricate lace stitches. Additionally, blocking the finished blanket will help to open up the lace pattern and give it a polished and finished appearance.
Striped pattern
One popular and versatile pattern for knitting blankets is the striped pattern. This pattern involves alternating colors to create stripes across the blanket. Striped patterns can be simple, with just two colors, or more complex with multiple colors. They can be used to create bold, graphic designs or more subtle, muted looks.
To create a striped pattern, you will need to select your colors and determine the width of each stripe. You can use contrasting colors for a bold and eye-catching design or choose colors that are more similar for a softer, blended look. The width of each stripe can vary depending on your preference and the overall design you are trying to achieve.
When knitting a striped pattern, it is important to carry the yarn up the side of the work when switching colors. This will prevent loose and untidy ends that need to be woven in later. To carry the yarn, simply twist it around the working yarn every few rows. This will create a neat and secure edge.
There are many different ways to incorporate the striped pattern into your blanket design. You can create equal-width stripes that run horizontally across the blanket, or you can vary the width and direction of the stripes for a more dynamic effect. Additionally, you can experiment with different stitch patterns within each stripe to add texture and interest to your blanket.
Overall, the striped pattern is a classic and timeless choice for knitting blankets. Whether you prefer a bold and graphic design or a more subtle and blended look, the striped pattern can be customized to create the perfect blanket for any occasion.
Fair Isle Pattern
A Fair Isle pattern is a traditional knitting technique that originated in the Fair Isle, a small island in Scotland. It is characterized by its intricate and colorful designs, created by using multiple colors in each row of knitting. This technique is commonly used in creating beautiful and unique blanket patterns.
The Fair Isle pattern is created by knitting with two colors at a time, with the unused color being carried along the back of the work. This creates small floats on the wrong side of the fabric, adding an extra layer of warmth and insulation to the blanket. The design possibilities with the Fair Isle technique are endless, making it a popular choice for knitters looking to create eye-catching and detailed patterns.
The Fair Isle pattern is known for its geometric shapes, intricate motifs, and contrasting color combinations. Traditional Fair Isle designs often feature motifs inspired by nature, such as flowers, animals, and geometric patterns. However, modern interpretations of the Fair Isle technique can include a wide range of designs, from traditional to contemporary.
To knit a Fair Isle blanket, you will need to have a good understanding of colorwork knitting and be comfortable knitting with multiple colors. It is important to keep your tension consistent and to catch the floats at the back of the work to prevent them from snagging or catching on fingers and toes.
If you are new to Fair Isle knitting, it is recommended to start with a small project, such as a hat or a pair of mittens, before attempting a larger project like a blanket. Practice and patience are key to mastering this technique and creating beautiful Fair Isle blanket patterns.
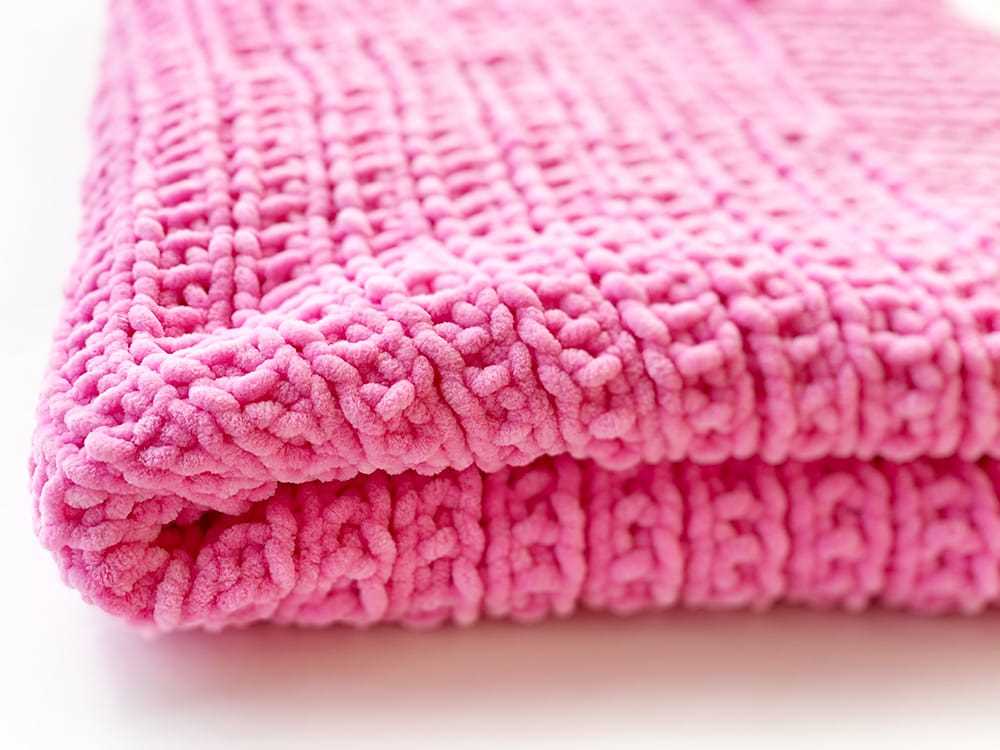
Basketweave Pattern
The basketweave pattern is a classic knitting pattern that creates a textured, woven look. It is a great option for knitting blankets as it adds visual interest and warmth. The pattern consists of alternating blocks of knit and purl stitches, creating a beautiful and sturdy fabric.
To create the basketweave pattern, you will need to have a multiple of 8 stitches plus 5 additional stitches. The pattern is worked over a 12-row repeat, with rows 1, 3, 5, 7, and 9 being the right side rows and rows 2, 4, 6, 8, 10, and 12 being the wrong side rows.
Here is how to knit the basketweave pattern:
- Row 1 (right side): Knit all stitches.
- Row 2 (wrong side): Purl all stitches.
- Row 3 (right side): *K5, p3; repeat from * to the last 5 stitches, k5.
- Row 4 (wrong side): Purl all stitches.
- Row 5 (right side): Knit all stitches.
- Row 6 (wrong side): Purl all stitches.
- Row 7 (right side): K3, *p3, k5; repeat from * to the last 2 stitches, p3, k2.
- Row 8 (wrong side): Purl all stitches.
- Rows 9-12: Repeat rows 1-4.
Continue knitting these 12 rows until you reach your desired length for the blanket. You can end with a row 2 (wrong side) or a row 4 (wrong side) to maintain the pattern consistency.
The basketweave pattern is versatile and can be worked with any color of yarn. It creates a beautiful textured fabric that is perfect for snuggling up in on chilly nights. Whether you’re a beginner or an experienced knitter, the basketweave pattern is a great choice for your next blanket project.
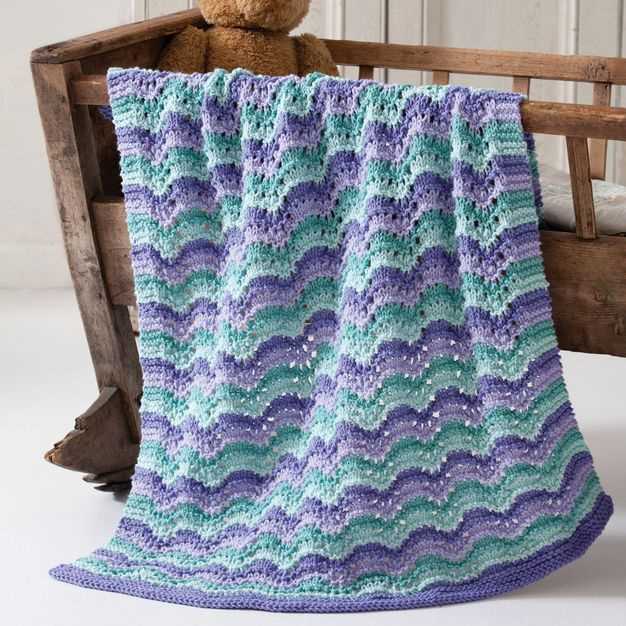
Ripple pattern
The ripple pattern is a classic design that adds texture and movement to any knitted blanket. The pattern consists of repeating waves or ripples that create an eye-catching effect. This pattern is perfect for creating cozy and stylish blankets for any occasion.
To create the ripple pattern, you will need to have a good understanding of basic knitting stitches, such as knit and purl. The pattern usually requires a multiple of stitches, so make sure to cast on the appropriate number for your desired blanket size.
Instructions:

- Cast on the desired number of stitches.
- Row 1: Knit all stitches.
- Row 2: Purl all stitches.
- Row 3: *Knit 2 stitches together, yarn over, repeat from * to the end of the row.
- Row 4: Knit all stitches.
- Repeat rows 1-4 until the blanket reaches your desired length.
- Bind off all stitches.
The ripple pattern can be customized by using different colors or yarn weights. It can also be modified by adjusting the number of stitches or rows between the ripple repeats. Whether you choose to make a small baby blanket or a large throw, the ripple pattern is sure to create a beautiful and unique piece.
Once you have mastered the ripple pattern, you can experiment with different variations, such as vertical or diagonal ripples. You can also combine the ripple pattern with other stitch patterns, such as cables or lace, to create even more intricate designs. The possibilities are endless when it comes to the ripple pattern, and it is a great way to showcase your knitting skills.
Herringbone pattern
The herringbone pattern is a classic and timeless design that adds a touch of elegance to any knitted blanket. This pattern features a distinct V-shaped pattern that resembles the bones of a fish, hence its name. The herringbone pattern is created by alternating knits and purls in a specific sequence, creating a textured and visually appealing pattern.
The herringbone pattern is a great choice for knitters looking to add some variety and interest to their blankets. Its unique and intricate design creates a beautiful finished product that is sure to impress. Whether you’re knitting a baby blanket or a large throw, the herringbone pattern will add a touch of sophistication to your project.
The herringbone pattern can be easily customized to fit your style and preferences. You can experiment with different colors to create a bold and vibrant blanket or stick to monochromatic tones for a more subtle and classic look. Additionally, you can choose to knit the herringbone pattern in a small scale for a delicate and intricate design or go for a larger scale to make a bold statement.
To knit a blanket using the herringbone pattern, you will need a basic understanding of knitting techniques such as knit stitches, purl stitches, and yarn overs. The herringbone pattern is achieved through a series of specific stitches and increases, so it may require a bit more attention and concentration compared to simpler patterns. However, the end result is well worth the effort.
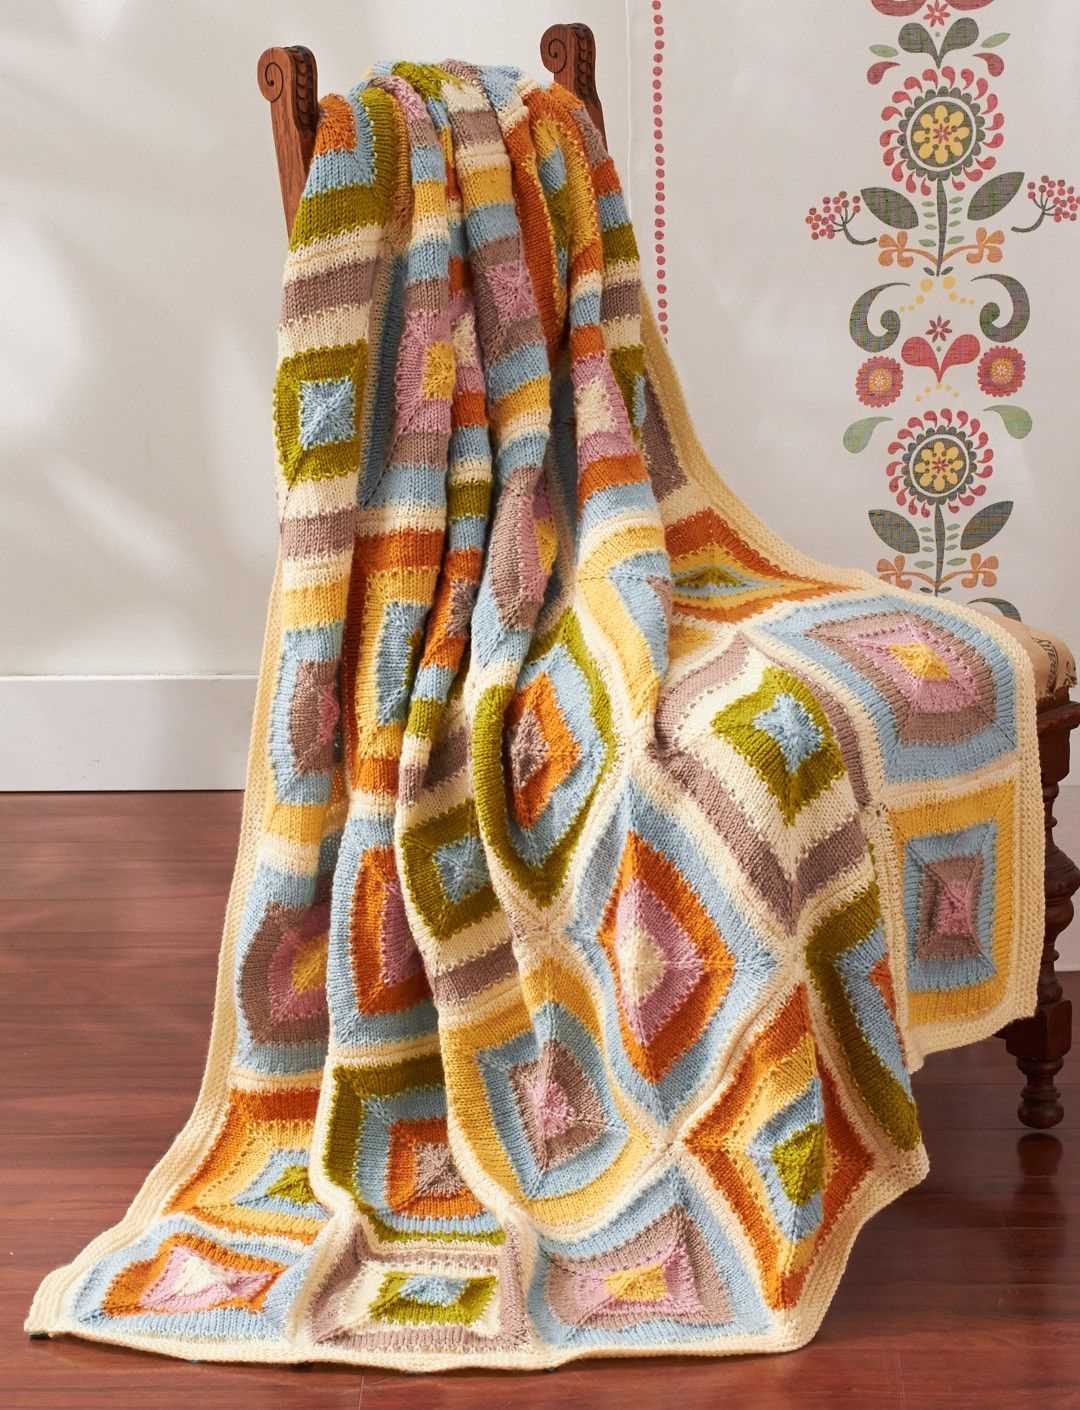
Mosaic Pattern
A mosaic pattern is a popular choice for knitting blankets as it creates a visually stunning and textured design. This pattern involves knitting blocks of different colors to create a mosaic-like effect. The blocks can be simple geometric shapes or more intricate patterns, depending on the desired look.
To create a mosaic pattern, you can use a combination of knit and purl stitches, as well as basic colorwork techniques such as slipped stitches or mosaic knitting. The use of contrasting colors in the blocks can create striking effects and make the pattern stand out.
- Color Combination: Choosing the right color combination is crucial for a successful mosaic pattern. You can experiment with different shades and hues to create your desired effect. A high contrast between the colors will make the pattern more vibrant and eye-catching.
- Pattern Options: There are numerous mosaic patterns to choose from, ranging from simple checkerboard designs to more intricate motifs such as flowers or geometric shapes. You can also find mosaic patterns with varying levels of difficulty, making it suitable for both beginners and experienced knitters.
- Blanket Size: Mosaic patterns can be adapted to any blanket size, from baby blankets to large throws. Depending on the size, you may need to adjust the number of stitches and the pattern repeat to ensure the blanket turns out as desired.
One of the advantages of knitting a blanket with a mosaic pattern is the versatility it offers. You can customize the design to match any room decor or personal style. Whether you prefer bold and vibrant colors or soft and subtle hues, there is a mosaic pattern that will suit your taste.
Bobble Pattern
If you’re looking to add some texture and dimension to your knitted blanket, the bobble pattern is a great choice. The bobble pattern creates small, raised bumps on the surface of the fabric, giving it a unique and playful look.
To create the bobble pattern, you will need to follow a specific set of instructions. Start by knitting a row of stitches in your base color. Then, on the next row, you will begin making the bobbles. To make a bobble, insert your needle into the next stitch, and knit a stitch, leaving it on the left-hand needle. Then, yarn over and knit into the same stitch again, leaving it on the needle once more. Repeat this process a few more times, depending on the size of bobble you want to create. Once you have knitted the desired number of stitches, turn your work and purl all the stitches from the bobble onto the right-hand needle. This will create a small, raised bump on the surface of your fabric. Continue knitting rows in your base color, and repeat the bobble pattern on the designated rows to create the desired effect.
- Use a smaller needle size than the one recommended for your yarn to make the bobbles stand out even more.
- Experiment with different yarn colors to make the bobbles pop.
- The bobble pattern works well when paired with a simple stitch pattern, such as garter stitch or stockinette stitch.
- If you want to add even more texture, you can alternate rows of the bobble pattern with rows of a different stitch pattern.
Once you have mastered the bobble pattern, you can incorporate it into your knitted blankets to create unique and eye-catching designs. Whether you choose to make a blanket with all-over bobbles or use them as accents, the bobble pattern is sure to add a touch of whimsy to your knitting projects.
Scales Pattern
If you are looking for a unique and eye-catching pattern for your knitted blanket, the scales pattern may be just what you need. This pattern creates a beautiful texture that resembles the scales of a fish or reptile, making it a great choice for a blanket that stands out.
Materials:
- Knitting needles in the appropriate size for your yarn
- Yarn in the color(s) of your choice
- Tapestry needle
- Scissors
Instructions:
- Begin by casting on an even number of stitches.
- Row 1: Knit all stitches.
- Row 2: Purl all stitches.
- Row 3: *Knit 1, slip 1 purlwise with yarn in front*. Repeat from * to end of row.
- Row 4: Purl all stitches.
- Repeat rows 3 and 4 until your blanket reaches the desired length.
- Knit all stitches on your last row.
- Bind off all stitches.
Tips:
- Make sure to keep your tension relaxed when knitting the slip stitch to create the beautiful scales texture.
- You can experiment with different colors of yarn to create a gradient or striped effect.
- If you prefer a denser scale pattern, you can repeat rows 3 and 4 more times before finishing the blanket.
With the scales pattern, you can create a unique and visually interesting knitted blanket that is sure to impress. Whether you choose bold and vibrant colors or subtle neutrals, this pattern will add a touch of elegance to any room.
Diamond pattern
The diamond pattern is one of the most classic and elegant patterns to incorporate in a knitted blanket. It features a repeating diamond shape that adds visual interest and dimension to the blanket.
To create the diamond pattern, you will need to follow a specific stitch sequence. Typically, this involves knitting or purling stitches together and then increasing or decreasing stitches to form the diamond shape. You can customize the size and number of diamonds based on your preferences.
Tips for knitting a blanket with a diamond pattern:
- Choose a soft and cozy yarn to ensure a comfortable blanket.
- Use stitch markers to keep track of the diamond pattern and prevent mistakes.
- Take your time and pay attention to the stitch sequence to maintain the integrity of the pattern.
- Consider adding border stitches to frame the diamond pattern and give the blanket a finished look.
Overall, the diamond pattern is a timeless choice for a knitted blanket. Its classic look and intricate design make it a beautiful addition to any home. Whether you’re making a blanket for yourself or as a gift, the diamond pattern is sure to impress.