Easy and Free Knitting Patterns for Scarves for Beginners

Knitting is a wonderful craft that allows you to create beautiful and functional items with just a few simple tools and some yarn. If you’re a beginner knitter looking to practice your skills and create something wearable, a scarf is the perfect project for you. Scarves are versatile, practical, and make great gifts for friends and loved ones.
One of the best things about knitting a scarf is that there are so many different patterns and styles to choose from. Whether you prefer a classic garter stitch scarf or something more intricate like a cable knit design, there is a pattern out there that will suit your skill level and personal style.
And the best part? There are plenty of free knitting patterns available for beginners, so you don’t have to spend a fortune on a pattern book or online class. In this article, we will explore some of the best beginner scarf knitting patterns that you can download for free and get started on your knitting journey.
Beginner Scarf Knitting Patterns Free
Do you want to learn how to knit a scarf, but don’t know where to start? Look no further! We have gathered a collection of beginner scarf knitting patterns that are completely free to help you get started on your knitting journey. Whether you are a complete beginner or have some basic knitting skills, these patterns are perfect for you.
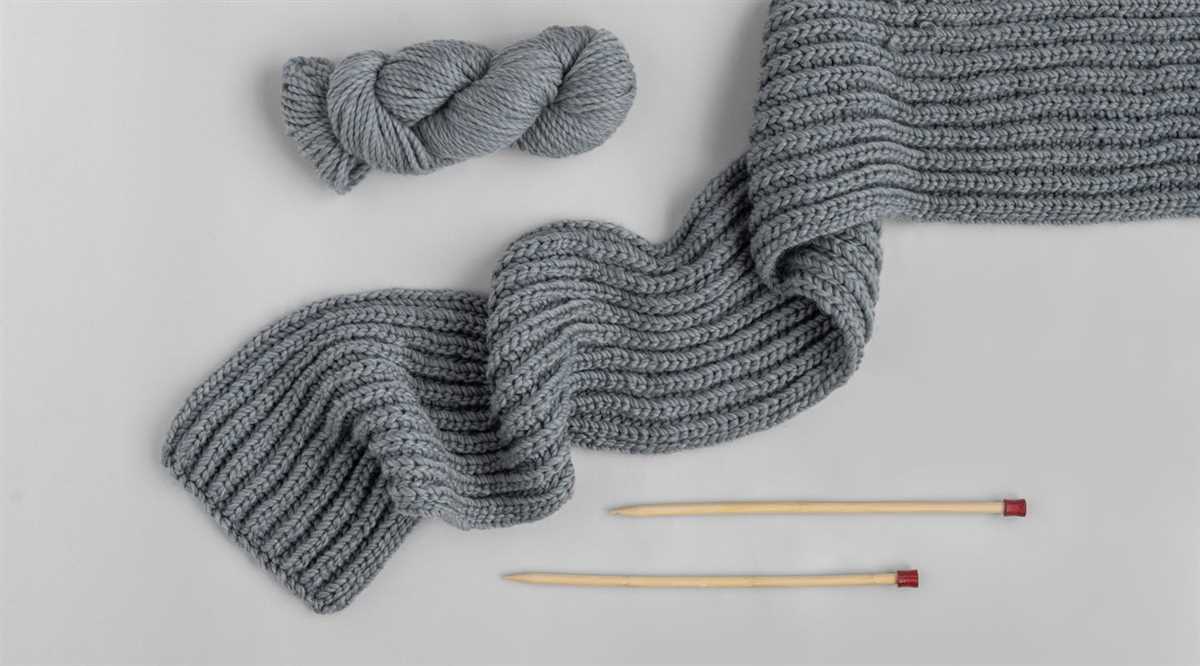
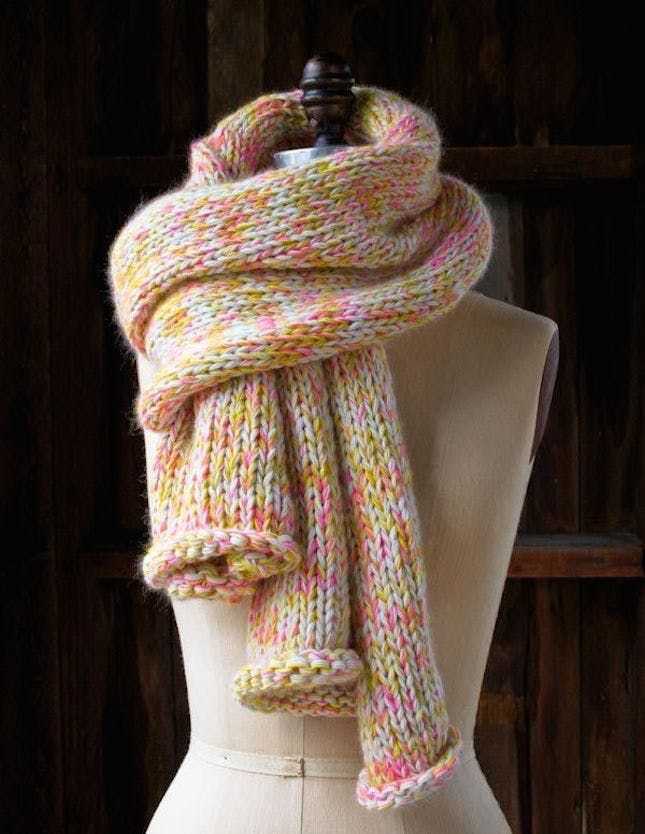
1. Garter Stitch Scarf: The garter stitch is the most basic stitch in knitting, making it ideal for beginners. This scarf pattern uses only the garter stitch, so you can practice your knitting technique while creating a stylish and cozy scarf.
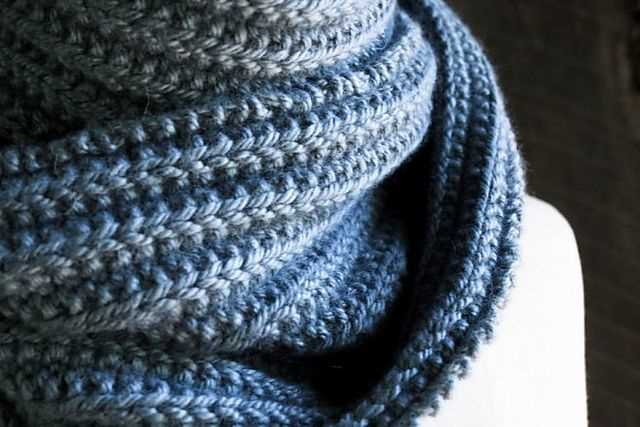
2. Ribbed Scarf: The ribbed stitch is another easy stitch pattern that adds texture and stretch to your knitting. This pattern alternates between knit and purl stitches, creating a beautiful ribbed effect. With this pattern, you can create a timeless and versatile scarf.
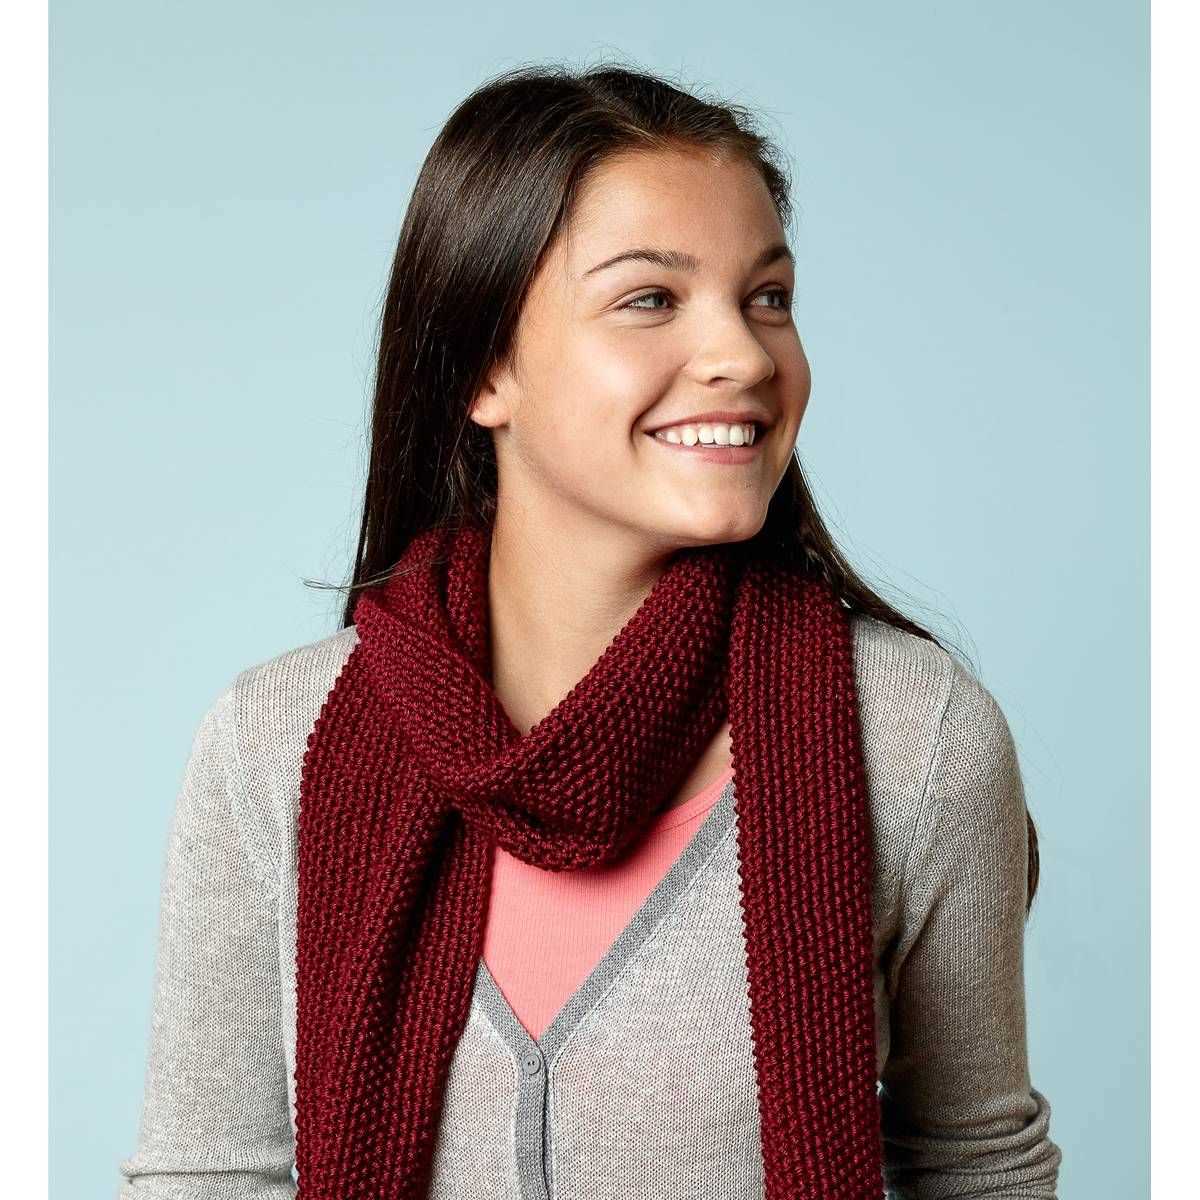
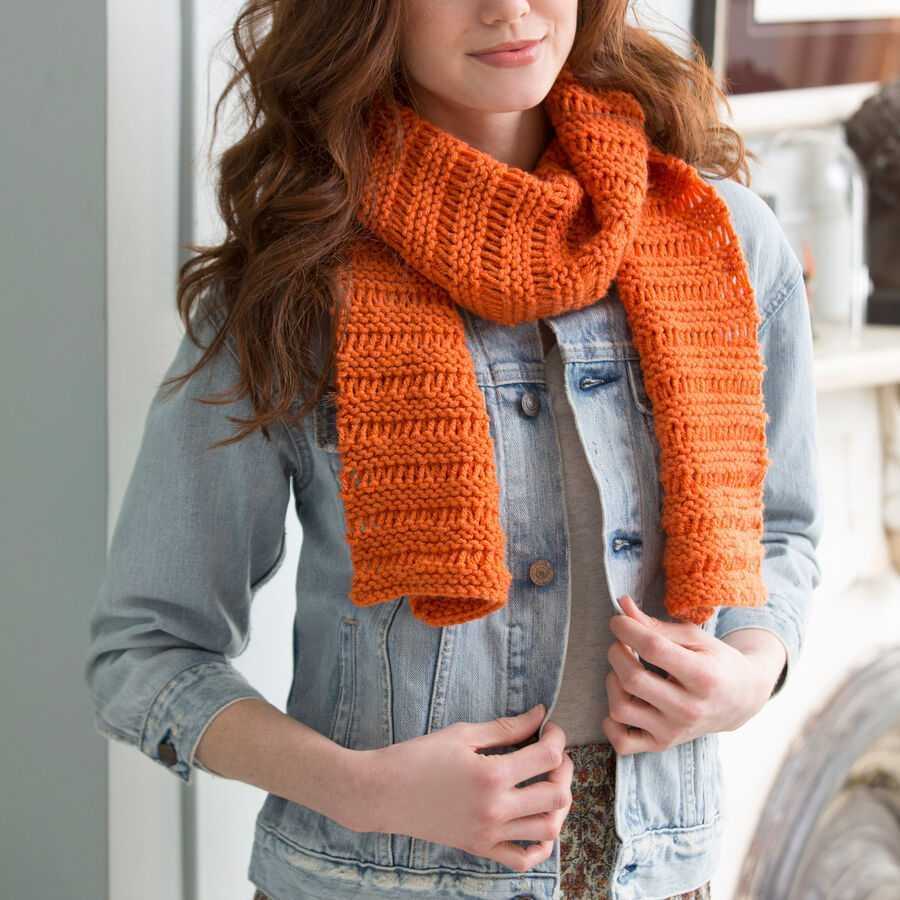
3. Seed Stitch Scarf: The seed stitch is a simple yet elegant stitch pattern that creates a bumpy texture. This pattern alternates between knit and purl stitches, giving your scarf a unique and interesting look. It’s a great pattern for beginners looking to add some variety to their knitting projects.
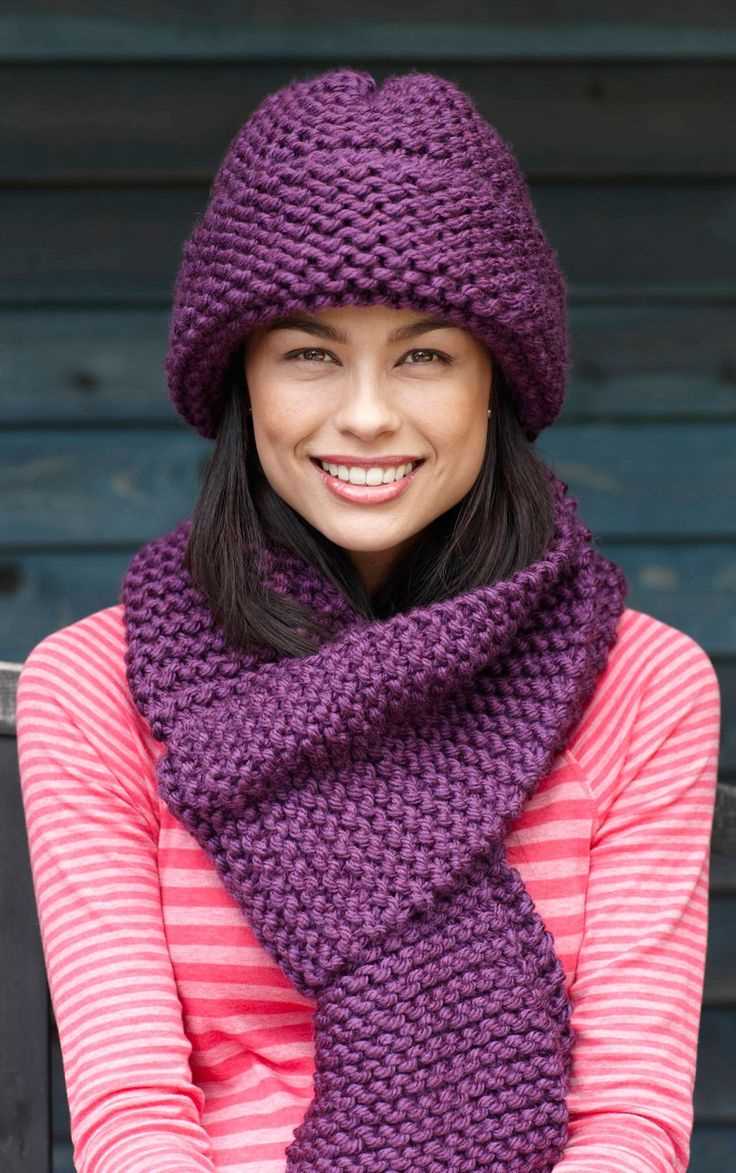
4. Basketweave Scarf: The basketweave stitch is a slightly more advanced pattern, but it’s still suitable for beginners who want to challenge themselves. This pattern involves knitting and purling in a specific pattern to create a woven effect, resembling a basket. The result is a stunning scarf that will impress everyone.
These free beginner scarf knitting patterns are great for practicing your knitting skills and creating beautiful accessories. They are perfect for keeping yourself warm or gifting to your loved ones. So grab your knitting needles, choose your favorite pattern, and start knitting!
Why knitting scarves is a great project for beginners

Knitting scarves is an excellent project for beginners who are just starting out in the world of knitting. Scarves are simple to knit, making them a perfect choice for those who are new to this craft. With a basic knowledge of knit and purl stitches, beginners can easily create beautiful scarves that are both functional and fashionable.
One of the main benefits of knitting scarves as a beginner project is that they require only a few knitting supplies. All you really need is a pair of knitting needles and a ball of yarn, making it an affordable and accessible project for anyone interested in learning how to knit. Scarves can also be made in any size or length, giving beginners the opportunity to practice their knitting skills and experiment with different stitch patterns.
Key Benefits
- Simple Patterns: Scarves typically involve simple stitch patterns such as garter stitch or stockinette stitch, which are easy for beginners to learn and master.
- Portable Project: Knitting a scarf is a portable project that can be taken on the go. Whether you’re commuting, waiting at a doctor’s office, or sitting in a coffee shop, you can easily work on your scarf wherever you are.
- Quick to Finish: Scarves are generally smaller projects compared to other knitting projects like sweaters or blankets. This means that beginners can experience the joy of completing a project relatively quickly, which can help build confidence and keep motivation high.
- Endless Creativity: While scarves may seem simple, there are endless possibilities for creativity. Beginners can experiment with different yarn colors, textures, and stitch patterns to customize their scarf and make it unique.
In conclusion, knitting scarves is an ideal project for beginners due to its simplicity, affordability, and versatility. It allows beginners to practice and develop their knitting skills while creating beautiful and functional accessories. So grab your knitting needles and yarn, and start your knitting journey with a cozy and fashionable scarf!
When it comes to knitting a scarf, choosing the right yarn is essential for creating a beautiful and functional accessory. The yarn you select will determine the drape, warmth, and overall appearance of the finished scarf. There are several factors to consider when choosing the right yarn for your project.
Fiber Content:

The first thing to consider is the fiber content of the yarn. Common options include wool, acrylic, cotton, and blends of various fibers. Wool is a popular choice for scarves as it is warm and insulating. Acrylic is a budget-friendly option that is easy to care for and comes in a wide range of colors. Cotton is great for lightweight and breathable scarves, perfect for warmer weather. Blends of fibers can offer the benefits of different materials, such as the softness of alpaca combined with the durability of nylon.
Weight:
The weight of the yarn will also impact the finished design of your scarf. Yarn is typically categorized into different weights, such as lace, fingering, sport, DK, worsted, bulky, and super bulky. Lace and fingering weight yarns create delicate, lightweight scarves, while bulky and super bulky yarns produce thick and cozy scarves. Consider the desired thickness and warmth of your scarf when selecting the yarn weight.
Color and Texture:
Another important aspect to consider is the color and texture of the yarn. Choose a color that complements your wardrobe and personal style. Solid colors highlight stitch patterns and textures, while variegated or self-striping yarns can add visual interest to a simple design. Texture can be created through the yarn itself, such as using a boucle or mohair yarn, or through different knitting techniques, such as cables or lacework.
By taking these factors into consideration, you can choose the perfect yarn for your scarf knitting project. Whether you prefer a cozy woolen scarf, a lightweight cotton accessory, or a colorful variegated design, the right yarn will ensure your finished scarf is both beautiful and functional.
Essential knitting supplies you’ll need
Knitting is a popular craft that allows you to create beautiful and cozy items, like scarves, hats, and blankets. To get started with knitting, there are a few essential supplies that you’ll need.
1. Knitting needles
One of the most important supplies for knitting is a set of knitting needles. These come in various sizes and materials, such as bamboo, aluminum, or plastic. The choice of needle size will depend on the type of project you’re working on and the weight of yarn you’re using. It’s a good idea to have a range of needle sizes on hand to accommodate different projects.
2. Yarn
Another crucial supply for knitting is yarn. Yarn comes in a wide variety of fibers, weights, and colors, so you’ll have plenty of options to choose from. Beginners may find it helpful to start with a medium-weight yarn, as it’s easier to work with. As you gain more experience, you can explore different types of yarn and experiment with different textures.
3. Scissors

Having a good pair of scissors is essential for any knitting project. You’ll need them to cut the yarn when you’re finished with a row or when changing colors. Make sure to choose a pair of sharp scissors that are comfortable to hold.
4. Stitch markers
Stitch markers are handy tools that help you keep track of your stitches and patterns. They can be used to mark important points in your work, such as the beginning of a round or a specific stitch pattern. You can buy stitch markers or make your own using small pieces of yarn or safety pins.
5. Tapestry needles
Tapestry needles are used for weaving in loose ends and sewing pieces of your knitting project together. These needles have a blunt tip, making them safe to use without fear of poking yourself. Choose a tapestry needle with a large eye so that it’s easy to thread yarn through.
6. Measuring tape
A measuring tape is essential for checking the gauge of your knitting and ensuring that your finished project has the correct dimensions. It’s also useful for measuring body parts when knitting garments like sweaters or hats. Look for a flexible measuring tape that is easy to handle.
With these essential knitting supplies, you’ll be well-equipped to start your knitting journey. As you gain more experience, you can expand your collection and try new techniques and patterns. Happy knitting!
Tips for mastering basic knitting stitches
Knitting is a beautiful craft that allows you to create unique and personal items. Whether you’re a beginner or an experienced knitter, it’s important to master the basic knitting stitches. Here are some tips to help you improve your knitting skills:
1. Practice the knit stitch
The knit stitch is the most basic and fundamental stitch in knitting. It’s important to practice this stitch until you can do it without thinking. Start by casting on a few stitches, then work on knitting them. Pay attention to your tension and make sure your stitches are even. The more you practice, the easier it will become.
2. Learn the purl stitch
The purl stitch is another essential stitch in knitting. It creates a smooth, textured surface on your knitted fabric. Once you’ve mastered the knit stitch, it’s time to learn the purl stitch. Practice creating a pattern of knit and purl stitches to create different textures and designs.
3. Experiment with different yarns and needles
One of the best ways to improve your knitting skills is to experiment with different types of yarns and needles. Different yarns will create different textures, while different needle sizes will create different gauges and finished products. Try using different combinations to see what works best for you.
4. Take it slow and be patient
Knitting takes time and patience. It’s important to take it slow and not rush through your stitches. Keep a steady pace and focus on each stitch. If you make a mistake, don’t get discouraged. Practice fixing mistakes and continue knitting. With time and practice, you’ll become more confident and skilled.
- Remember, knitting is a journey.
- Don’t be afraid to ask for help.
- Join a knitting group or take a class.
- Keep practicing and don’t give up.
Creating different textures with simple knitting patterns
Knitting is a versatile craft that allows you to create different textures using simple patterns. By utilizing various stitch combinations and techniques, you can add depth and interest to your knitwear projects. Whether you’re a beginner or have some experience in knitting, experimenting with different textures can take your projects to a whole new level.
Stockinette stitch: One of the most basic knitting patterns, the stockinette stitch creates a smooth and flat fabric with a visible right and wrong side. By simply alternating knit and purl rows, you can achieve a classic and clean texture that is perfect for scarves, sweaters, and other garments. The stockinette stitch is great for showcasing the beauty of yarn colors and is often used as the foundation for more complex stitch patterns.
Garter stitch: Another simple pattern, the garter stitch is created by knitting every row. This results in a bumpy and textured fabric that works well for scarves, blankets, and dishcloths. The garter stitch is reversible, meaning it looks the same on both sides, making it an ideal choice for projects where both sides will be visible. It is also a great stitch for beginners to practice their knitting skills.
Ribbing: Ribbing is a technique that creates a stretchy and textured fabric by alternating knit and purl stitches in a specific pattern. This pattern is commonly used for cuffs, collars, and waistbands as it helps to give the finished piece a snug yet flexible fit. Depending on the number of knit and purl stitches repeated, you can create different types of ribbing, such as 1×1 ribbing (knit one, purl one) or 2×2 ribbing (knit two, purl two).
Seed stitch: The seed stitch is a simple yet effective pattern that creates a textured fabric with small, alternating knits and purls. By knitting one stitch and purling the next, and then alternating the pattern on the next row, you can achieve a unique texture that looks like little seeds or bumps. The seed stitch is great for adding visual interest to scarves, hats, and baby blankets.
With these simple knitting patterns, you can create a variety of textures to elevate your projects. Whether you prefer a smooth and sleek finish or a bumpy and textured look, experimenting with different stitch combinations and techniques will allow you to achieve the desired effect. So grab your knitting needles and get creative!
How to read knitting patterns and charts
Knitting patterns and charts are essential tools for knitters who want to create beautiful and intricate designs. Understanding how to read these patterns and charts is crucial for successful knitting projects. Here are some key tips to help you decipher knitting patterns and charts.
1. Start with the key: Every knitting pattern and chart comes with a key that explains the symbols and abbreviations used. Familiarize yourself with the key before you begin knitting. This will help you understand the instructions and follow the chart accurately.
2. Follow the stitch pattern: The stitch pattern is the basic pattern that repeats throughout the project. It is usually represented in the chart or written instructions. Pay attention to the stitch pattern and follow it consistently to create the desired design.
3. Read row-by-row instructions: Knitting patterns often include row-by-row instructions to guide you through each step. It is important to read these instructions carefully and follow them in the correct order. Make sure to keep track of your progress by checking off each row as you complete it.
4. Understand repeat instructions: Many knitting patterns include repeat instructions, which indicate certain sections of the pattern that need to be repeated multiple times. Pay attention to these repeat instructions and ensure that you are repeating the correct number of times to achieve the desired result.
5. Use stitch markers and highlighters: To make it easier to follow knitting patterns and charts, use stitch markers to keep track of important points in the pattern, such as increases or decreases. You can also use highlighters to mark the sections of the pattern that you have already completed.
6. Check your gauge: Before starting a knitting project, it is important to check your gauge, which refers to the number of stitches and rows per inch. Following the gauge specified in the pattern will ensure that your finished project has the correct size and fit.
7. Practice and patience: Reading knitting patterns and charts may seem overwhelming at first, but with practice and patience, it will become easier. Start with simpler patterns and gradually work your way up to more complex designs. Remember to take your time and enjoy the process of creating beautiful knitted items.
Adding decorative elements to your scarf
When knitting a scarf, there are many ways to add decorative elements that can elevate the design and make it more unique. These elements can be both functional and ornamental, adding style and interest to your finished piece.
1. Cable Knitting: One popular decorative technique is cable knitting. Using a cable needle or a special cable stitch holder, you can create intricate patterns and textures that resemble twisted ropes or braids. This technique adds depth and visual interest to your scarf.
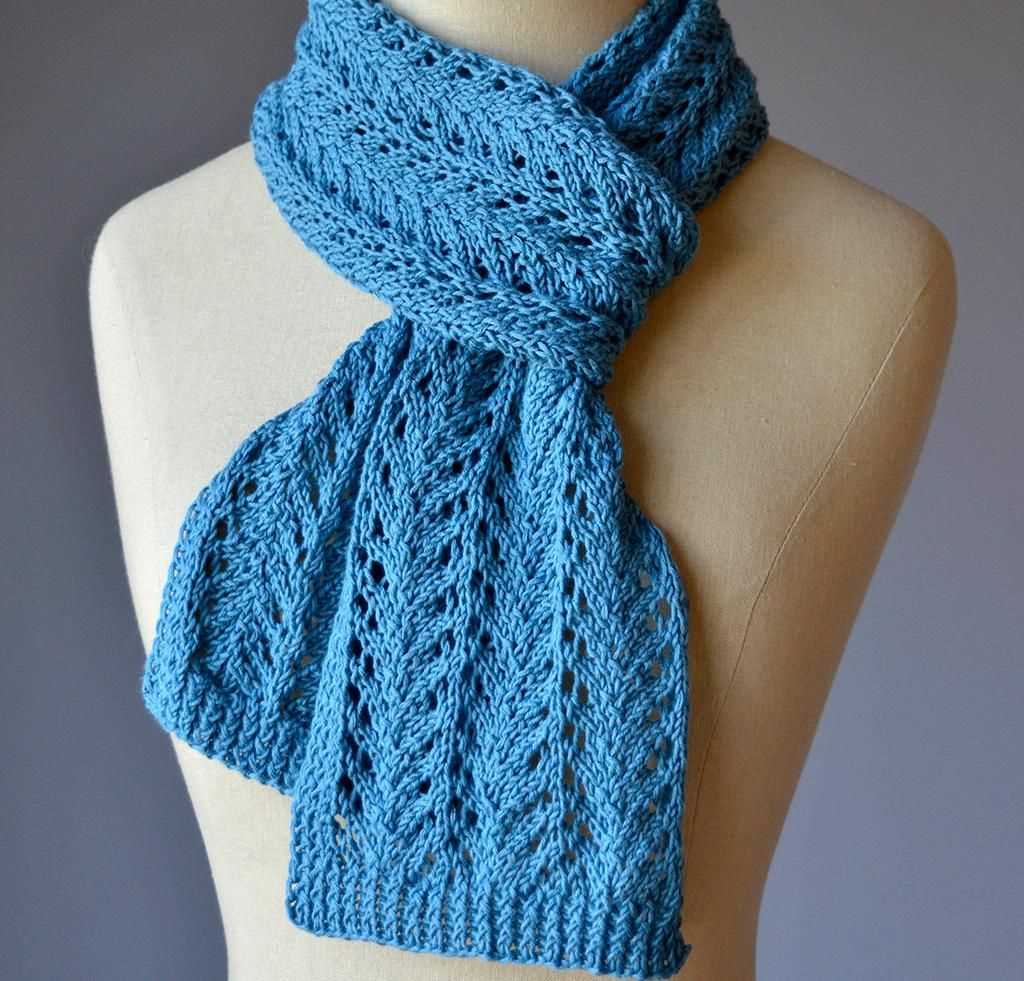
2. Lace Knitting: Lace knitting involves creating patterns with intentionally placed holes or eyelets. This delicate and intricate technique can add a feminine touch to your scarf. Lace patterns can range from simple designs like yarn overs to more complex motifs.
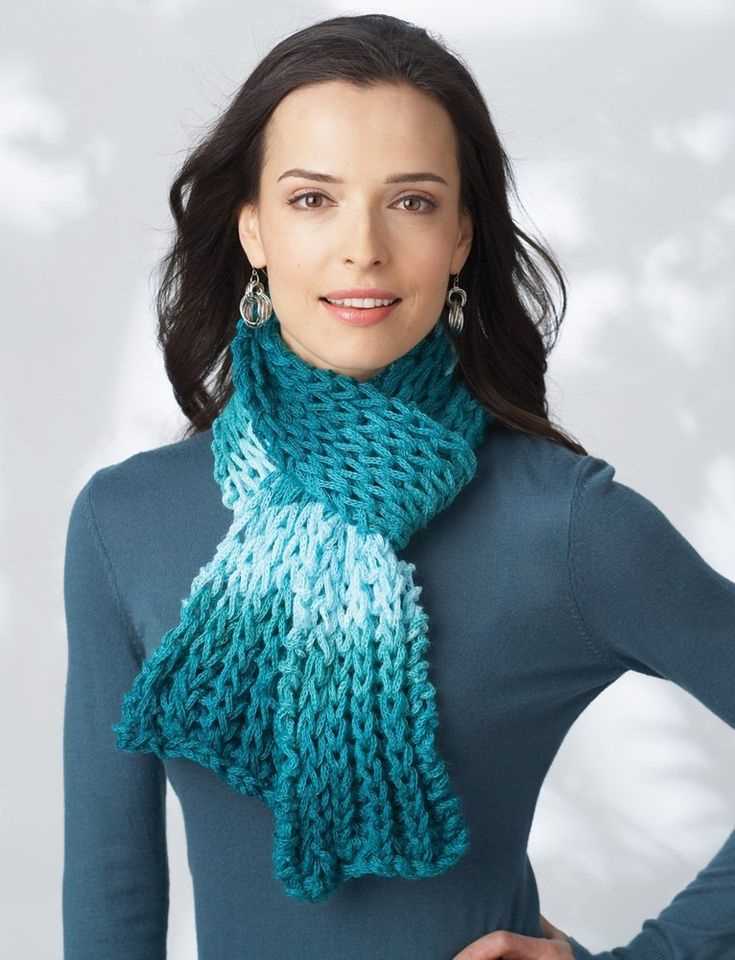
3. Colorwork: Adding colorwork to your scarf can create stunning visual effects. You can incorporate different colored yarns in various patterns, such as stripes, fair isle, or intarsia. Colorwork gives you the opportunity to experiment with different color combinations and create a truly eye-catching scarf.
4. Embellishments: If you want to add a touch of glamour to your scarf, consider embellishing it with beads, sequins, or buttons. These small decorative elements can be sewn onto your scarf to add a bit of sparkle and personality. You can also use embroidery techniques to add intricate designs or initials.
5. Fringe: Fringe is a classic decorative element that can be added to the ends of your scarf. It can be made by attaching strands of yarn to the edge of the scarf and can be short or long, depending on your preference. Fringe adds a playful and bohemian touch to your scarf.
By incorporating these decorative elements into your scarf knitting, you can create a one-of-a-kind piece that stands out from the rest. Whether you choose to experiment with different stitch patterns, add pops of color, or embellish with beads, the possibilities are endless. Have fun exploring different techniques and let your creativity shine!
How to fix and prevent common knitting mistakes
Knitting is a beautiful and rewarding craft, but it’s not without its challenges. Even experienced knitters can make mistakes from time to time. The good news is that most mistakes can be fixed, and with a little knowledge and patience, you can prevent them from happening in the first place. Here are some tips to help you fix and prevent common knitting mistakes.
1. Dropped stitches
One of the most common knitting mistakes is dropping a stitch. If you notice a stitch has unraveled or dropped off your needle, don’t panic. To fix a dropped stitch, use a crochet hook or a smaller knitting needle to pick up the dropped stitch and bring it back onto your needle. Take care to make sure the stitch is oriented correctly, and give it a gentle tug to even out the tension.
2. Tension issues
Tension refers to how tightly or loosely you knit your stitches. Uneven tension can result in a finished project that looks wonky or doesn’t drape properly. To fix tension issues, practice knitting consistently and evenly. Pay attention to how you hold your yarn and adjust your grip if necessary. You can also try using different needle sizes or yarn weights to achieve the desired tension.
3. Twisted stitches
Twisted stitches can happen when you accidentally twist the stitch before knitting it. This can result in a twisted or crossed appearance in your fabric. To fix a twisted stitch, carefully insert your needle into the stitch from the front to back, making sure it is not twisted, and then knit or purl as usual. To prevent twisted stitches, double-check your stitches before knitting them and make sure they are not twisted on your needle.
4. Yarn overs
A yarn over is an intentional increase in your knitting, but it can also be a common mistake if you accidentally wrap the yarn around your needle when it shouldn’t be. To fix a yarn over mistake, simply drop the extra loop off your needle and continue knitting. To prevent yarn overs, pay attention to your knitting and make sure you are only wrapping the yarn around the needle when the pattern calls for it.
5. Forgetting pattern repeats
Many knitting patterns have repeat sections, and it can be easy to forget to repeat the designated stitches or rows. To fix this mistake, carefully read the pattern instructions and count your stitches or rows to determine where you need to start the repeat. To prevent forgetting pattern repeats, use stitch markers or write down the repeat sections of the pattern to help you keep track.
By being aware of these common knitting mistakes and taking the time to fix them or prevent them, you can ensure that your knitting projects turn out beautifully every time. Remember, knitting is a journey, and even mistakes can be opportunities to learn and grow as a knitter.
Blocking and Finishing Techniques for Your Scarf

After you have completed knitting your scarf, it’s important to block and finish it to give it a polished and professional look. Blocking helps to even out the stitches and open up the pattern, while finishing techniques add those final touches that make your scarf stand out.
Blocking
To block your scarf, you will need a blocking board or a flat, clean surface, along with rustproof T-pins. Start by soaking your scarf in lukewarm water for about 15 minutes, then gently squeeze out the excess water. Lay your scarf on the blocking board and shape it to the desired measurements, ensuring that the edges are straight and smooth. Use the T-pins to secure the edges of the scarf to the blocking board. Leave it to dry completely, which may take several hours or even overnight, depending on the yarn used. Once dry, carefully remove the pins and your scarf will be beautifully blocked and ready to wear.
Finishing
Once your scarf is blocked, it’s time to add those finishing touches. One common finishing technique is adding fringe. To do this, you can cut several strands of yarn to the desired length and then attach them to the ends of your scarf. Alternatively, you can create tassels by wrapping yarn around a piece of cardboard or a tassel maker, then cutting one end and attaching the other end to the scarf. Another option is to add a decorative edge, such as a picot or scalloped border, by picking up stitches along the edges of the scarf and working a specific pattern. Finally, weave in any loose ends from the cast-on and bind-off edges to give your scarf a neat and tidy appearance.
By following these blocking and finishing techniques, you can take your basic knitted scarf and elevate it to a whole new level. Whether you choose to add fringe, a decorative edge, or both, these final touches will make your scarf truly unique and ready to keep you warm and stylish during the colder months.
Exploring advanced scarf knitting techniques
Once you’ve mastered the basic knitting stitches and completed a few beginner scarf patterns, you may be ready to explore some more advanced techniques to take your knitting skills to the next level. These techniques will not only add interest and complexity to your scarf projects, but they will also expand your repertoire of knitting skills.
1. Lace knitting: Lace knitting involves creating intricate patterns and designs by incorporating deliberate holes or eyelets into your knitting. This technique is accomplished by following specific lace stitch patterns and can add a delicate and elegant touch to your scarf. It requires concentration and attention to detail, but the end result is well worth the effort.
2. Cables: Cabling is a technique used to create raised patterns that resemble braids or ropes. It involves crossing stitches over each other, which creates a visually stunning effect. Adding cables to your scarf can give it a luxurious and textured look. While cables may seem intimidating at first, with practice, you’ll quickly become comfortable with this technique.
3. Fair Isle: Fair Isle, also known as stranded knitting, is a technique that involves working with multiple colors in each row to create intricate designs and patterns. This technique is often associated with traditional Fair Isle sweaters, but it can also be used to create stunning scarves. Fair Isle knitting requires precision and attention to tension, as you’ll be working with two different colors at once.
4. Entrelac: Entrelac is a technique that creates a woven or basketweave effect in your knitting. It involves knitting small rectangles or squares in alternating directions, which are then connected to create a larger fabric. Incorporating entrelac into your scarf will add a unique texture and visual interest.
5. Double knitting: Double knitting allows you to create a reversible fabric, with a different design or color on each side. It involves knitting with two strands of yarn and using a specific technique to create a double-layered fabric. This technique is perfect for creating scarves that are warm, cozy, and visually appealing from both sides.
These advanced knitting techniques will challenge you and push your skills to new heights. With practice and patience, you’ll be able to create scarves that are not only functional but also true works of art.
Where to find additional free scarf knitting patterns
If you’re a beginner looking for more free scarf knitting patterns, there are several resources available online where you can find a wide variety of options to choose from. These patterns range from basic and simple designs for newcomers to more intricate and complex patterns for those with more experience.
One great place to start your search is on knitting websites and blogs. Many knitting enthusiasts and experts share their favorite patterns for free on their personal online platforms. These websites often categorize patterns by skill level, making it easy for beginners to find appropriate options. Popular knitting websites such as Ravelry and Knitting Pattern Central have extensive libraries of free patterns for scarves and other projects.
If you’re looking for a specific type of scarf pattern, such as a cowl or infinity scarf, you can also check out specialty knitting websites or online communities. These platforms often have dedicated sections for different types of scarf patterns, making it easier to find exactly what you’re looking for. Additionally, you can join online knitting groups or forums where members often share and discuss their favorite patterns.
Another useful resource to explore is YouTube. Many knitters and knitting channels offer free video tutorials that walk you through the process of creating a scarf. These tutorials are especially helpful for visual learners who prefer to see the knitting techniques in action. You can search for specific scarf patterns or general knitting techniques to find instructional videos that suit your needs.
Sharing your finished scarf projects with the knitting community
Once you have completed your scarf project using one of these free beginner scarf knitting patterns, it’s time to share your work with the knitting community. Sharing your finished projects can be a great way to connect with other knitters, get feedback on your work, and inspire others to try their hand at knitting.
Here are a few ways you can share your finished scarf projects:
- Social media: Share photos of your finished scarf on platforms like Instagram, Facebook, or Pinterest. Use hashtags like #knitting, #scarfknitting, or #knitcommunity to reach a wider audience and connect with fellow knitters.
- Online knitting forums: Join online knitting forums or communities where you can post photos of your finished scarf and engage in discussions with other knitters. This is a great way to get feedback, ask for advice, or simply share your accomplishment.
- Local knitting groups: If you have a local knitting group or yarn store, consider bringing your finished scarf to a meeting or event. This allows you to showcase your work in person, receive feedback, and connect with fellow knitters in your area.
Remember, sharing your finished scarf projects is not only a way to showcase your skills, but also an opportunity to learn from others, gain inspiration, and become part of a supportive knitting community. So don’t shy away from sharing your work and embracing the wonderful world of knitting!
Conclusion
In conclusion, these free beginner scarf knitting patterns provide a great starting point for anyone interested in learning to knit. They offer simplicity, versatility, and a chance to develop essential knitting skills. Whether you choose a basic garter stitch pattern or experiment with more advanced techniques, the possibilities are endless.
So gather your knitting needles, choose your favorite yarn, and get started on your scarf knitting journey. With some patience, practice, and a little bit of creativity, you’ll soon have a beautiful hand-knit scarf to call your own.