Exploring Simple Knit Stitch Patterns

Knitting is a popular craft that has been practiced for centuries. It involves creating fabric by interlocking loops of yarn with two or more needles. While there are countless stitch patterns to choose from, beginners often start with basic knit stitch patterns. These simple patterns are easy to learn and perfect for practicing the fundamental technique of knitting.
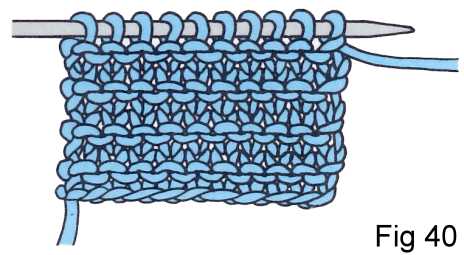
The most basic stitch pattern is called the garter stitch. It is created by simply knitting every row. This pattern produces a fabric that is reversible and has a textured appearance. The garter stitch is commonly used for scarves, blankets, and other items where both sides of the fabric will be visible.
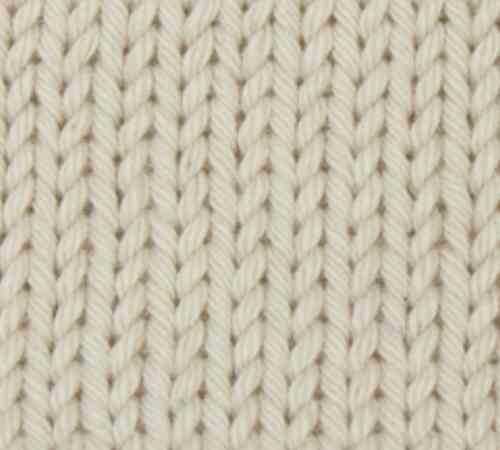
Another simple stitch pattern is the stockinette stitch. This pattern is created by alternating rows of knitting and purling. The knit side of the fabric has a smooth, V-shaped texture, while the purl side has a bumpy texture. The stockinette stitch is often used for garments such as sweaters and socks.
Basic Knit Stitch Patterns

Knitting is a popular craft that allows you to create beautiful, warm and cozy items such as scarves, hats, and blankets. One of the first things you will learn when you start knitting is the basic knit stitch. This stitch is the foundation for many other stitch patterns and is essential to master before moving on to more complex designs.
The basic knit stitch creates a smooth and even texture on your fabric. It is formed by inserting the right needle into the front loop of the stitch on the left needle, wrapping the yarn around the right needle, and pulling it through the loop to form a new stitch. This process is repeated across the row until the desired length is reached. The resulting fabric has a series of V-shaped stitches on the right side and horizontal rows of bumps on the wrong side.
Once you have mastered the basic knit stitch, you can explore different stitch patterns to add texture and variety to your knitting projects. Some popular stitch patterns include the garter stitch, which is created by knitting every row, the stockinette stitch, which alternates between knit rows and purl rows, and the seed stitch, which alternates between knit and purl stitches within the same row. These stitch patterns can be combined in various ways to create intricate designs and patterns.
When working with basic knit stitch patterns, it is important to maintain an even tension and consistent gauge throughout your knitting. This will ensure that your stitches are uniform and your finished project has a professional look. Practice makes perfect, so don’t be afraid to start with small projects and gradually work your way up to more complex patterns. With time and practice, you will be able to create beautiful, one-of-a-kind knitted items.
So grab your knitting needles, some soft yarn, and get started on mastering the basic knit stitch and exploring different stitch patterns. The possibilities are endless, and the satisfaction of creating something with your own hands is truly rewarding.
Garter Stitch
The garter stitch is a basic and easy knitting stitch pattern that is perfect for beginners. It is created by knitting every row, so there is no purling involved. The result is a fabric with a bumpy texture and great elasticity.
One of the great things about the garter stitch is that it lies flat and does not curl at the edges, making it ideal for projects like scarves, blankets, and dishcloths. It is also reversible, so both sides of the fabric look the same.
To create the garter stitch, simply knit every stitch on every row. This creates rows of knit stitches on both sides of the fabric, resulting in the bumpy texture. You can use any type of yarn and needles for this stitch pattern, but keep in mind that different yarn weights and needle sizes will produce different results.
The garter stitch is a versatile pattern that can be used on its own or combined with other stitch patterns to create more complex designs. It can be used as a border or edging, or as the main stitch pattern for an entire project. Experiment with different variations, such as adding stripes or changing colors, to create unique and personalized pieces.
Stockinette Stitch
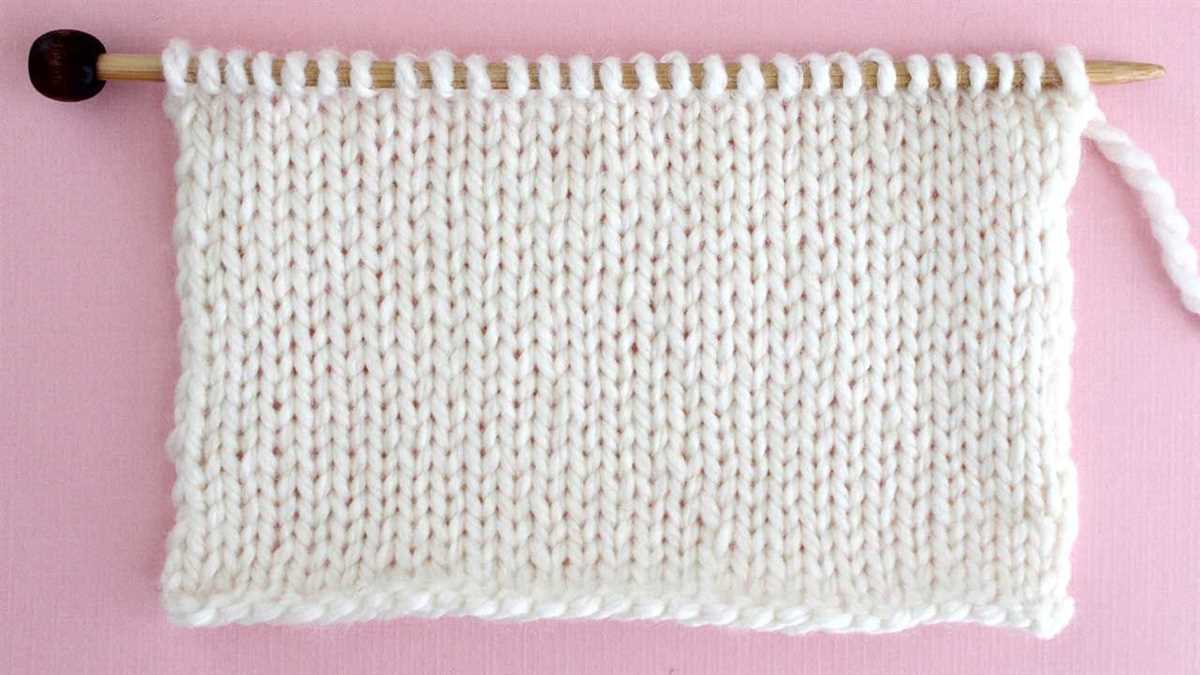
The stockinette stitch is one of the most basic knitting stitch patterns and is often the first stitch pattern that beginners learn. It creates a smooth and even fabric with a “V” pattern on the right side and a flat, purl pattern on the wrong side.
To knit the stockinette stitch, you simply alternate between knitting and purling rows. On the right side, you knit every stitch, and on the wrong side, you purl every stitch. This creates the contrast between the two sides of the fabric.
Key Features:
- The right side of the fabric has a smooth, “V” pattern.
- The wrong side of the fabric has a flat, purl pattern.
- The fabric created is relatively stretchy and has a good drape.
- Stockinette stitch is often used as a base for other stitch patterns and is a popular choice for creating simple and classic garments.
Tips for working the Stockinette Stitch:
- Remember to always knit on the right side and purl on the wrong side.
- Pay attention to your tension, as a loose tension can result in uneven stitches.
- To prevent the edges from curling, consider adding a border or working a few rows of garter stitch at the beginning and end of your project.
- If you want to add some visual interest to your stockinette stitch fabric, you can experiment with different colors, yarn weights, or by incorporating other stitch patterns.
Rib Stitch
The rib stitch is a popular and versatile knitting stitch pattern that creates a stretchy and textured fabric. It is commonly used for making cuffs, collar bands, and borders on garments, as well as for creating ribbed scarves and hats. The rib stitch is created by alternating knit stitches and purl stitches in a specific pattern, which gives the fabric its distinctive ribbed appearance.
To create the rib stitch, you can use any number of stitches that is divisible by two. The most common rib stitch pattern is the 1×1 rib, which alternates one knit stitch and one purl stitch. This creates a fabric that has columns of raised knit stitches and recessed purl stitches. Another popular rib stitch pattern is the 2×2 rib, which alternates two knit stitches and two purl stitches. This pattern creates wider columns of raised and recessed stitches, giving the fabric a more pronounced ribbed texture.
One of the advantages of the rib stitch is its elasticity. The alternating knit and purl stitches create a fabric that can stretch and recover, making it ideal for cuffs and other areas that need to fit snugly. Additionally, the rib stitch is reversible, meaning that both sides of the fabric look the same. This makes it suitable for projects where both sides will be visible, such as scarves or blankets.
The rib stitch can be used with different types of yarn and needle sizes to create different effects. Thicker yarn and larger needles will create a more pronounced ribbed texture, while thinner yarn and smaller needles will result in a tighter and more delicate rib. You can also experiment with different color combinations by using contrasting yarns for the knit and purl stitches or by working stripes in different colors.
In summary, the rib stitch is a versatile and popular knitting stitch pattern that creates a stretchy and textured fabric. It is commonly used for cuffs, collar bands, and borders on garments, as well as for creating ribbed scarves and hats. The rib stitch can be created in different patterns, such as the 1×1 or 2×2 rib, and can be modified by using different yarns and needle sizes. Its elasticity and reversible nature make it a favorite among knitters for a wide range of projects.
Seed Stitch

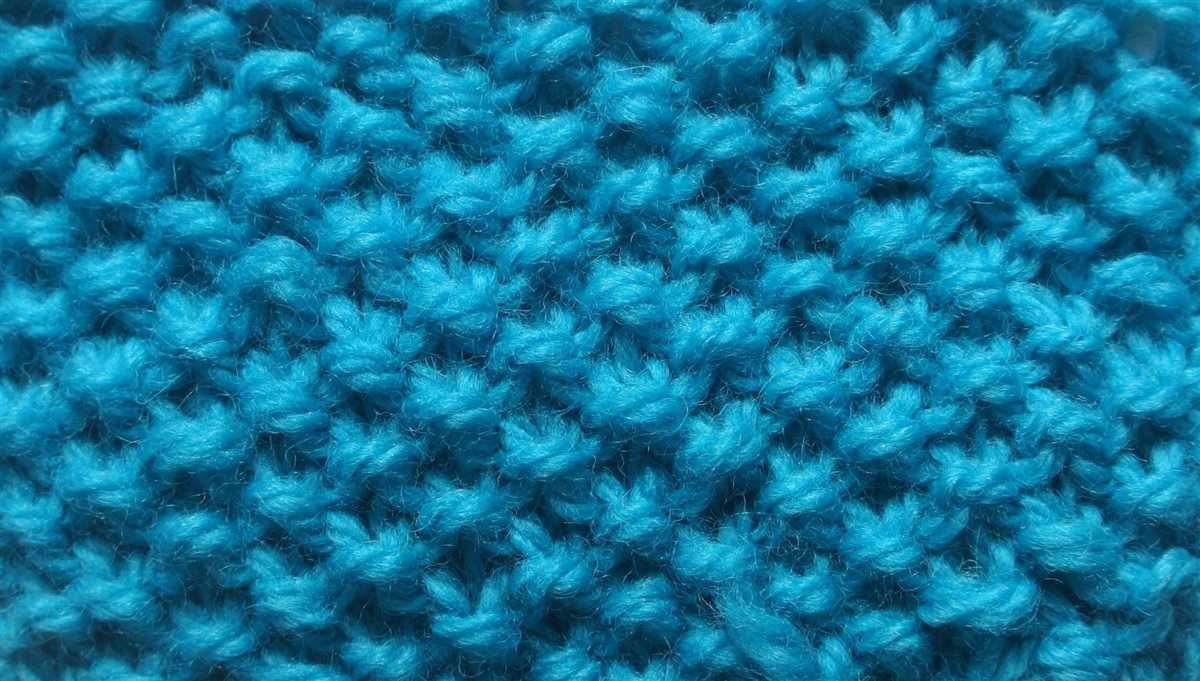
The seed stitch is a simple yet versatile knitting pattern that creates a rich texture. It consists of alternating knit and purl stitches in a 1×1 pattern. As a result, it forms small, uniform seed-like bumps across the fabric, hence its name. This stitch is reversible and looks the same on both sides, making it an excellent choice for scarves, blankets, and other projects where both sides will be visible.
To knit the seed stitch, you begin by casting on an odd number of stitches. On the first row, you knit the first stitch, then purl the next stitch. Repeat this pattern of knitting and purling until the end of the row. On the second row, you start with purling the first stitch and then knitting the next stitch. Again, repeat this pattern until the end of the row. Continue alternating between knitting and purling rows to create the seed stitch pattern.
The seed stitch is a great option for beginners as it helps to practice both the knit and purl stitches. It adds a beautiful texture to any project and can be used for borders, cuffs, or even the entire garment. This stitch is often used in combination with other stitch patterns to create interesting designs. When using the seed stitch, it’s essential to pay attention to tension as it can create a stretchy fabric. By experimenting with different yarn weights and needle sizes, you can achieve various results and create unique pieces.
- The seed stitch creates a rich texture with small seed-like bumps.
- It is reversible and looks the same on both sides.
- Beginners can practice both knit and purl stitches with this pattern.
- It can be used for borders, cuffs, or the entire garment.
- The tension should be carefully controlled for the desired fabric.
Moss Stitch

The moss stitch is a simple knitting pattern that creates a textured fabric with alternating knit and purl stitches. Also known as the seed stitch, the moss stitch is an easy way to add visual interest to your knitting projects.
To knit the moss stitch, you will need an odd number of stitches. Start by casting on the desired number of stitches onto your knitting needle. The first row of the moss stitch is worked as follows: knit one stitch, purl one stitch. Repeat this pattern until the end of the row. For the second row, you will reverse the pattern: purl one stitch, knit one stitch. Repeat this pattern for each row until the desired length of your project.
The moss stitch is perfect for a variety of knitting projects, including scarves, blankets, and even garments. Its texture adds depth and visual interest to the fabric, making it stand out from a simple stockinette or garter stitch.
When working with the moss stitch, it’s important to keep in mind that it tends to create a tighter fabric compared to other knit stitch patterns. Make sure to use the appropriate needle size to achieve the desired gauge and avoid a stiff finished project.
The moss stitch is also great for creating borders or edgings for your knitting projects. You can use it to add a decorative touch to the edges of a sweater, shawl, or baby blanket. Experiment with different yarn weights and colors to create unique and eye-catching designs!
Pros of the Moss Stitch:
- Creates a textured fabric
- Works well for a variety of projects
- Easy to memorize and knit
- Great for borders and edgings
Cons of the Moss Stitch:
- Tends to create a tighter fabric
- Requires an odd number of stitches
- May take longer to knit than other stitch patterns
- Not ideal for projects that require a lot of stretch
In conclusion, the moss stitch is a versatile knitting pattern that adds texture and visual interest to your projects. Whether you’re knitting a cozy scarf or a stylish sweater, the moss stitch is a simple yet effective way to elevate your knitting skills and create beautiful, unique pieces.
Basketweave Stitch

The basketweave stitch is a classic knitting pattern that creates a textured fabric resembling a woven basket. This stitch is popular for its simplicity and versatility, making it a great choice for a variety of projects such as blankets, scarves, and pillows.
To create the basketweave stitch, you will need to know basic knitting skills such as casting on, knitting, purling, and binding off. The pattern consists of alternating blocks of knit and purl stitches, creating a visually appealing and textured surface.
How to knit the basketweave stitch:
- Cast on an even number of stitches.
- Row 1: *Knit 4, purl 4.* Repeat from * to * until the end of the row.
- Row 2: *Purl 4, knit 4.* Repeat from * to * until the end of the row.
- Repeat rows 1 and 2 until you reach your desired length.
- Bind off all stitches.
The basketweave stitch is not only visually appealing but also creates a thick and warm fabric, making it perfect for cozy winter accessories or home decor items. You can experiment with different yarn weights and colors to create unique and personalized projects.
Whether you’re a beginner or an experienced knitter, the basketweave stitch is a great pattern to have in your repertoire. Its simple yet elegant design will add texture and interest to any knitting project.
Cable Stitch
The cable stitch is a popular knit stitch pattern that creates a textured and braided look. It is characterized by its twisted and crossing knit stitches, which give the illusion of cables running across the fabric. The cable stitch is often used in various knitting projects, such as sweaters, scarves, and blankets, to add interest and depth to the design.
To create the cable stitch, you will need a cable needle, which is a short and narrow needle specifically designed for working with cables. The cable needle is used to hold a few stitches while you work on the other stitches in the pattern. The process involves moving stitches onto the cable needle, holding them either in front or in the back of your work, and then knitting the next set of stitches. This creates the crossing effect that defines the cable stitch.
There are different types of cable stitches, ranging from simple to complex designs. Some common cable stitch patterns include the basic cable, twisted cable, braided cable, and horseshoe cable. Each pattern has its own unique arrangement and combination of cables, resulting in a distinct and intricate look. Knitters often enjoy experimenting with different cable stitch patterns to create their own unique designs.
The cable stitch requires focus and attention to detail, as it involves manipulating stitches and working with multiple needles. However, with practice and experience, it becomes easier to execute this stitch pattern. It is a versatile and timeless technique that adds sophistication and elegance to any knitting project. Whether you’re a beginner or an experienced knitter, the cable stitch is a great way to elevate your knitting skills and create stunning and textured garments.
Bobble Stitch
The Bobble Stitch is a fun and textured stitch pattern that adds a playful touch to any knitting project. It creates small, raised bobbles or clusters of stitches, that give a three-dimensional effect to the fabric. The Bobble Stitch can be used to create various designs, such as polka dots, flower motifs, or simply add an interesting texture to a plain piece of knitting.
To create the Bobble Stitch, you will need to knit several stitches into one stitch. The number of stitches you knit into one stitch will determine the size of the bobble. Typically, the Bobble Stitch is created by knitting 5 stitches into one stitch. Here is a step-by-step guide on how to work the Bobble Stitch:
- Knit into the next stitch, but do not slide the stitch off the left needle.
- Yarn over.
- Knit into the same stitch again.
- Yarn over.
- Knit into the same stitch for the third time.
- Yarn over.
- Knit into the same stitch for the fourth time.
- Yarn over.
- Knit into the same stitch for the fifth and final time.
After completing these steps, you will have created a bobble. To continue with the pattern, simply knit the next stitch as usual, and repeat the process for creating more bobbles as desired. The bobbles can be worked on the right side or wrong side of the fabric, depending on the desired effect.
The Bobble Stitch can be used in a variety of knitting projects, such as hats, scarves, shawls, and even blankets. It adds an element of interest and texture to the fabric, making it a great stitch pattern for those looking to add some flair to their knitting. So why not give the Bobble Stitch a try and see what creative designs you can come up with!
Eyelet Stitch
The eyelet stitch is a simple yet beautiful knitting pattern that creates small holes or eyelets in your fabric. It adds a delicate and airy texture to your knitted projects. This stitch is perfect for creating lacy scarves, shawls, and lightweight garments. It is also commonly used as an accent stitch in larger projects, such as sweaters or blankets.
To create the eyelet stitch, you will need to know the basic knit stitch and yarn over techniques. The stitches are worked in a pattern of alternating knit stitches and yarn overs. The yarn over creates a new stitch and leaves a hole in the fabric, creating the eyelet effect.
To knit the eyelet stitch, follow these steps:
- Start by knitting a few rows of your desired stitch pattern.
- On the next row, knit the first stitch.
- Next, bring the yarn to the front of your work.
- Bring the yarn over the right-hand needle, from front to back.
- Knit the next stitch.
- Repeat steps 3-5 until the end of the row.
- Continue knitting rows in this pattern until your desired length is achieved.
The eyelet stitch is a versatile pattern that can be customized in various ways. You can change the size and placement of the eyelets by adjusting the number of knit stitches between the yarn overs. You can also experiment with different yarn weights and needle sizes to create different effects. Additionally, you can combine the eyelet stitch with other stitch patterns to create unique and intricate designs.
Overall, the eyelet stitch is a great technique to master if you want to add some elegance and sophistication to your knitting projects. With its delicate appearance and relatively easy execution, it is a favorite among both beginners and experienced knitters.
Basic Knit Stitch Patterns: Lace Stitch

The lace stitch is a versatile and popular knit stitch pattern that adds an elegant and delicate touch to any project. With its openwork design, the lace stitch creates beautiful patterns that resemble lace. It is often used for shawls, scarves, and even lightweight sweaters.
To create the lace stitch, you will need to know how to do yarn overs and knit two together stitches. Yarn overs create the holes in the fabric, while knit two together stitches decrease the number of stitches and create the lacy pattern. These two techniques are the foundation of the lace stitch.
To knit the lace stitch, start by casting on an even number of stitches. Then, follow the lace stitch pattern instructions, which will typically consist of a series of rows with a combination of knit stitches, purl stitches, and yarn overs. The pattern will guide you through the process of creating the lace stitch design.
One of the benefits of knitting lace stitch patterns is that they are highly customizable. You can easily modify the pattern to make it larger or smaller or add extra repeats to create a more intricate design. Additionally, you can experiment with different yarns and needle sizes to achieve different effects with the lace stitch.
When knitting the lace stitch, it’s important to pay attention to your tension and stitch count. Lace stitch patterns can be more challenging than basic knit stitches, so it’s essential to stay focused and count your stitches regularly. Mistakes can be easily spotted and corrected if caught early on.
In conclusion, the lace stitch is a beautiful and versatile knit stitch pattern that adds a touch of elegance to any project. With its openwork design and intricate patterns, the lace stitch is perfect for creating shawls, scarves, and lightweight garments. Take your knitting skills to the next level by mastering the lace stitch and experimenting with different variations and modifications.
Herringbone Stitch

The herringbone stitch is a popular knitting pattern that creates a unique textured fabric resembling the bones of a fish. It is a versatile stitch that can be used for various projects, such as scarves, blankets, and sweaters.
To create the herringbone stitch, you will need to know how to knit and purl. The pattern involves a combination of these two basic stitches, which creates the distinctive crossed pattern. The herringbone stitch is worked over an even number of stitches and multiple rows.
To start the herringbone stitch, you will knit the first two stitches together, inserting your needle through both stitches and wrapping the yarn around as you would for a regular knit stitch. Then, instead of slipping the stitches off the needle, you will leave them there.
Next, you will knit the first stitch again, this time slipping both stitches off the needle. This creates a twisted stitch. You will repeat this process across the row, creating a pattern of crossed stitches.
The herringbone stitch is known for its elasticity and warmth, making it a great choice for garments. It also looks impressive when used as a border or as an accent in more complex knitting patterns. With its unique texture and timeless appeal, the herringbone stitch is a valuable addition to any knitter’s repertoire.
Brioche Stitch
The Brioche stitch is a unique and textured knitting pattern that is characterized by its thick and squishy appearance. It is achieved by knitting certain stitches together with their corresponding yarnovers from the previous row. This creates a rib-like effect with a pronounced and reversible design.
To work the Brioche stitch, you will need to have a good grasp of basic knitting techniques such as knitting, purling, and yarnovers. It is also helpful to be comfortable with reading and understanding knitting patterns, as the Brioche stitch often involves specific instructions for different rows.
The Brioche stitch can be used to create a wide variety of projects, such as scarves, hats, sweaters, and blankets. It is especially well-suited for creating garments with extra warmth and thickness, making it a popular choice for winter wear.
To summarize, the Brioche stitch is a versatile and visually appealing knitting pattern that adds texture and depth to your projects. While it may require some practice and attention to detail, the end result is well worth the effort. Whether you’re a beginner or an experienced knitter, the Brioche stitch is a great technique to add to your repertoire.