Easy Knitting Pattern for Kids’ Poncho

A poncho is a versatile and stylish garment that can be worn by children of all ages. Whether you’re knitting for your own child or as a gift, a children’s poncho is a perfect addition to any wardrobe. It can be worn in any season, and with the right color and pattern, it can be a fun and fashionable accessory.
Knitting a children’s poncho is a great project for both beginners and experienced knitters. The pattern is relatively simple, using basic stitches and techniques, and can be customized to fit any child’s size and style. With endless possibilities for color combinations and patterns, you can create a one-of-a-kind poncho that your child will love.
In this article, we will provide you with a step-by-step children’s poncho knitting pattern. We will guide you through the materials needed, the measurements, and the knitting techniques required. Whether you’re a beginner or an experienced knitter, you’ll find all the information you need to successfully complete this project.
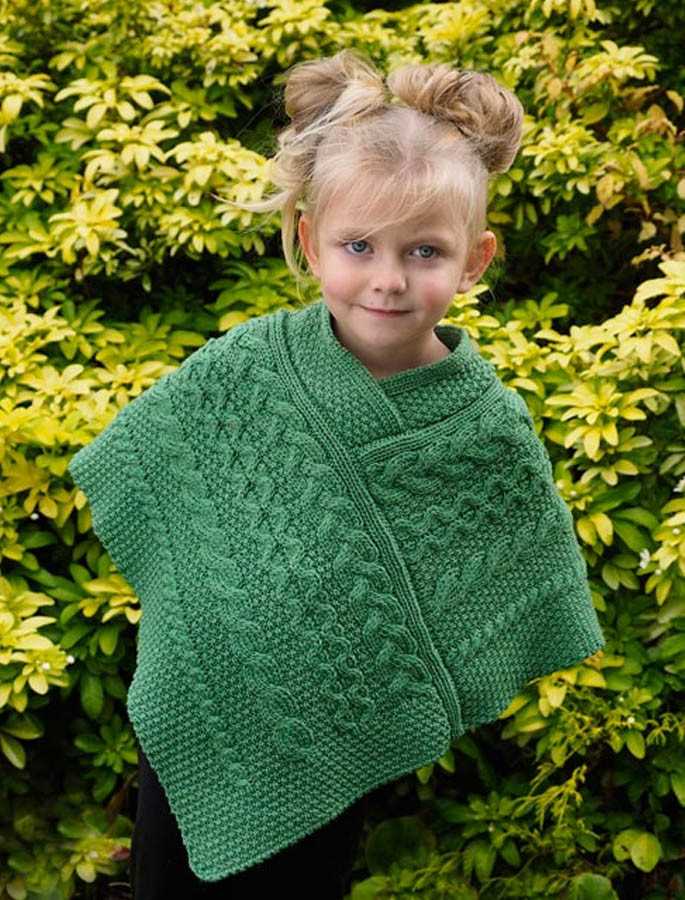
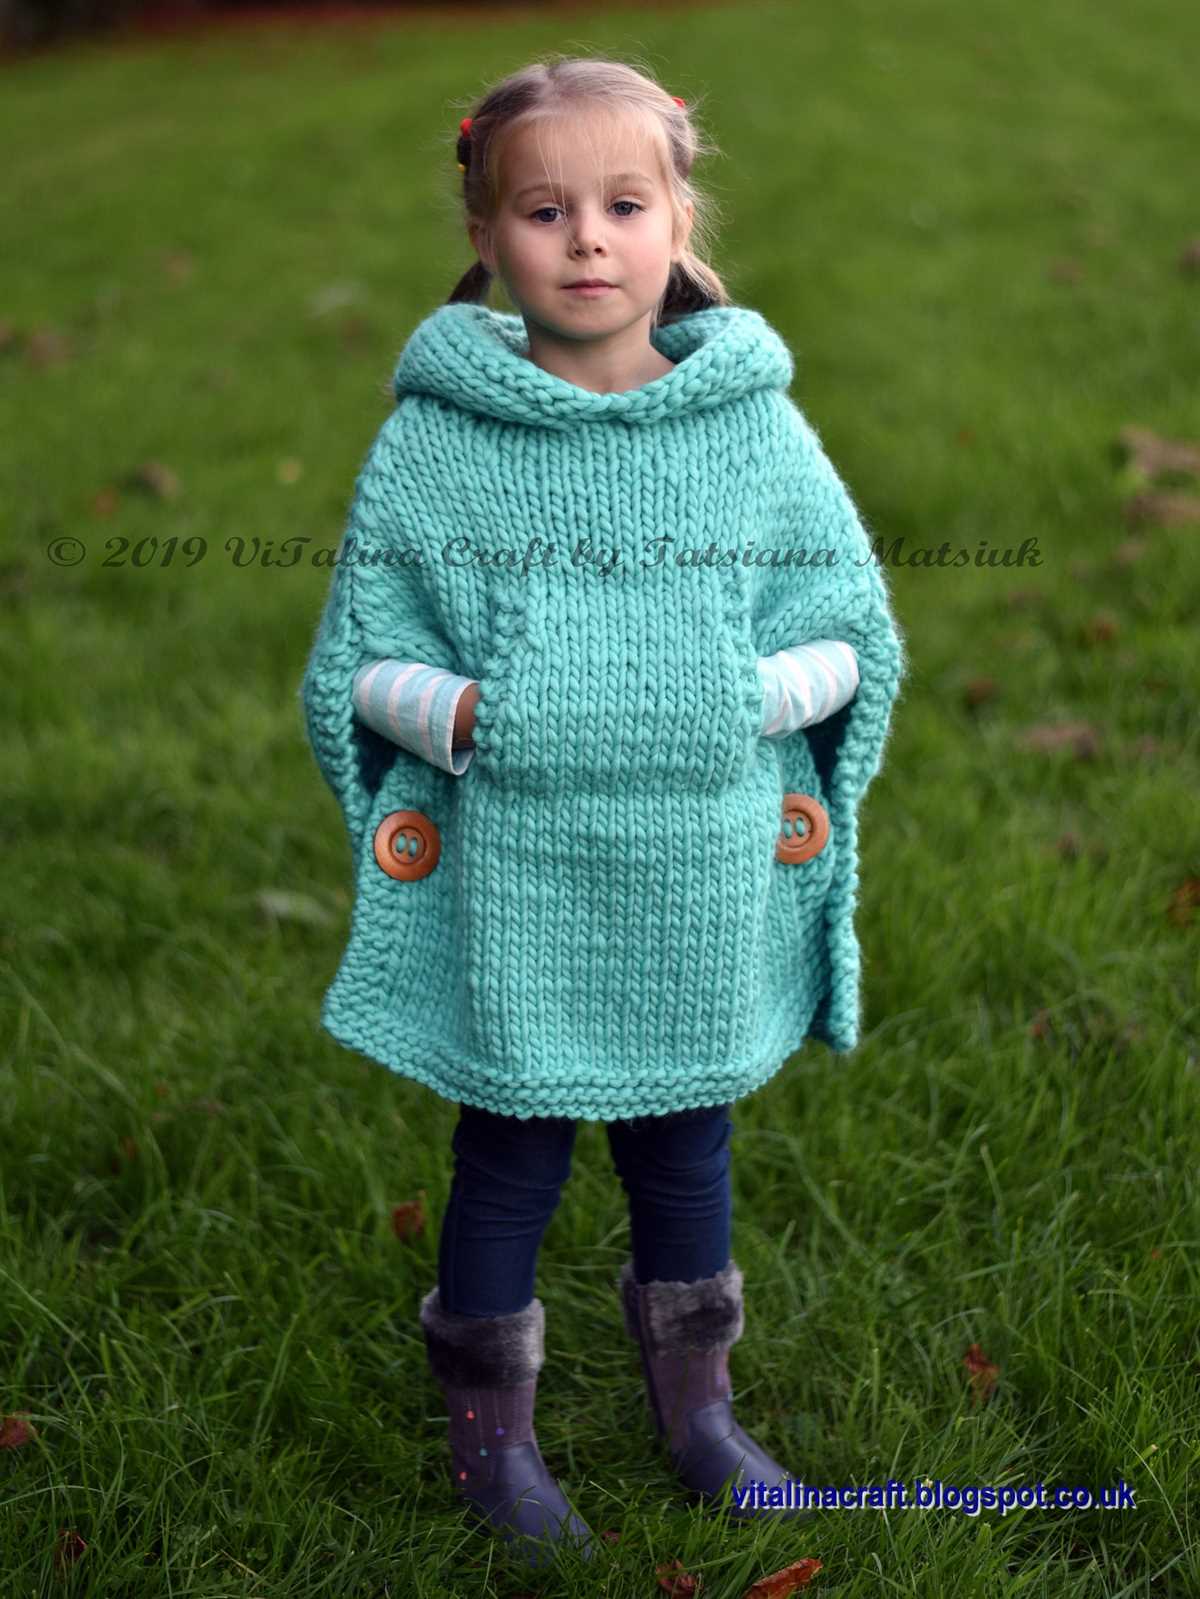
Childrens Poncho Knitting Pattern
Are you looking for a cute and cozy poncho pattern to knit for your child? Look no further! Our Childrens Poncho Knitting Pattern is perfect for keeping your little one warm and stylish.
This pattern features a simple yet elegant design that is suitable for knitters of all skill levels. With its easy-to-follow instructions, you’ll have a beautiful poncho ready in no time. Whether you’re a beginner or an experienced knitter, this pattern is sure to delight.
To create this poncho, you’ll need a few basic knitting supplies, including needles and yarn. The pattern provides suggestions for yarn weight and needle size, but feel free to experiment and use what you have on hand. The beauty of this pattern is that it’s versatile and allows you to customize it to your child’s preferences.
The Childrens Poncho Knitting Pattern includes detailed instructions and helpful tips to guide you through each step of the process. From casting on to binding off, you’ll learn the techniques needed to create a beautiful and comfortable poncho for your child to enjoy. Plus, with its adjustable size options, you can easily adapt the pattern to fit children of different ages.
Whether you’re knitting this poncho as a gift or for your own child, it’s sure to be a cherished and practical addition to their wardrobe. So grab your knitting needles, choose your favorite yarn, and get started on the Childrens Poncho Knitting Pattern today!
Why Choose a Poncho for Your Child?
When it comes to keeping your child warm and stylish during the colder months, a poncho is a perfect choice. Ponchos are not only practical, but they also make a fashion statement with their unique and trendy designs.
Comfort and Freedom of Movement: Ponchos are loose-fitting garments that allow for unrestricted movement. Unlike coats or jackets, they don’t have sleeves that can restrict arm movement. This makes them ideal for active children who love to play and explore.
Easy to Put On and Take Off: One of the main advantages of a poncho is its simplicity. With no buttons or zippers to deal with, putting on and taking off a poncho is a breeze. This makes it easier for children to dress themselves independently, promoting their sense of accomplishment and self-sufficiency.
Versatility and Style: Ponchos come in a variety of colors, patterns, and designs, making them a versatile accessory for any outfit. Whether your child is heading to school, a playdate, or a special occasion, a poncho can be effortlessly paired with jeans, leggings, dresses, or skirts to create a stylish ensemble.
Protection from the Elements: Ponchos provide excellent coverage, protecting your child from wind, rain, and cold temperatures. Their loose, flowy design ensures that your child’s entire upper body is kept warm and snug, making them an excellent choice for outdoor activities and adventures.
Cost-Effective and Sustainable: Investing in a high-quality poncho for your child can save you money in the long run. Ponchos are durable and can withstand multiple seasons of wear, making them a cost-effective choice. Additionally, opting for a poncho made from sustainable and eco-friendly materials can contribute to a more environmentally conscious lifestyle.
In conclusion, choosing a poncho for your child is a practical and stylish decision. From their comfort and easy wearability to their versatility and protection from the elements, ponchos offer numerous benefits that make them an excellent addition to your child’s wardrobe.
Benefits of Knitting Your Own Poncho
Knitting your own poncho can be a rewarding and fulfilling experience, providing several benefits that make it worth the effort. Whether you are a beginner or an experienced knitter, creating your own poncho allows you to personalize the design, choose the perfect colors, and tailor it to your preferences.
1. Customization: When you knit your own poncho, you have full control over the design. You can choose from various knitting patterns, stitch combinations, and textures to create a unique and one-of-a-kind poncho. This allows you to express your creativity and showcase your personal style.
2. Perfect Fit: One of the greatest advantages of knitting your own poncho is the ability to achieve a perfect fit. Unlike store-bought ponchos that may not fit your body shape or size perfectly, knitting your own gives you the opportunity to adjust the measurements to accommodate your specific needs. You can easily customize the length, width, and even the neckline to ensure a comfortable and flattering fit.
3. Quality Craftsmanship: By knitting your own poncho, you can ensure that it is made with high-quality materials and excellent craftsmanship. You have the freedom to choose the type of yarn you prefer, whether it’s soft and cozy or lightweight and breathable. Additionally, you can devote the necessary time and attention to detail, resulting in a well-crafted and durable poncho that will last for years to come.
4. Therapeutic Benefits: Knitting has been known to have therapeutic benefits, such as reducing stress and anxiety. The repetitive motions of knitting can help relax the mind and promote a sense of calm and focus. Creating a poncho through knitting allows you to engage in a calming and creative activity, providing a much-needed break from the hustle and bustle of daily life.
5. Sense of Achievement: Completing a knitting project, such as a poncho, can give you a great sense of achievement and pride. It is a tangible representation of your skills and creativity. Being able to wear or gift something that you have created with your own hands can be incredibly fulfilling, and it can also inspire you to take on more knitting projects in the future.
6. Cost Savings: Knitting your own poncho can also be a cost-effective option compared to purchasing one from a store. While the initial investment in knitting supplies may be higher, you can save money in the long run by using your own yarn and tools for multiple projects. Additionally, you have the opportunity to create a high-quality poncho at a fraction of the price of a store-bought one.
In conclusion, knitting your own poncho offers various benefits, including customization, a perfect fit, quality craftsmanship, therapeutic benefits, a sense of achievement, and cost savings. Whether you are a beginner or an experienced knitter, embarking on a poncho knitting project can be a worthwhile and enjoyable endeavor.
Choosing the Right Yarn and Needles

When it comes to knitting a children’s poncho, choosing the right yarn and needles is crucial to ensure a successful and comfortable finish. The right yarn and needle combination will not only affect the overall look and texture of the poncho, but also its size, drape, and ease of care.
Yarn: Selecting the appropriate yarn for a children’s poncho requires considering factors such as warmth, durability, and softness. Opting for a soft and cozy yarn, such as merino wool or a blend of acrylic and wool, can provide comfort and warmth for little ones. It’s also important to choose a yarn that is easy to care for, as children’s clothing often requires frequent washing. Machine-washable yarns or those labeled as “easy care” can be great options in this case.
Needles: The size and material of the needles used can affect the overall gauge and tension of the knitting, ultimately determining the size and drape of the poncho. In most cases, the pattern will specify the recommended needle size, but it’s important to consider your own knitting style. Some knitters may find they need to go up or down a needle size to achieve the correct gauge. As for the needle material, metal or bamboo needles are popular choices for their durability and smoothness. It may be worth trying out different needle materials to find the one that feels most comfortable to work with.
Ultimately, choosing the right yarn and needles for a children’s poncho requires considering factors such as warmth, durability, softness, ease of care, and personal knitting preferences. By carefully selecting these materials, you can ensure a successful knitting project that results in a beautiful and comfortable poncho for the little one in your life.
Essential Knitting Techniques
When it comes to knitting, there are several essential techniques that every knitter should know. Whether you are a beginner or an experienced knitter, mastering these techniques will help you create beautiful and professional-looking projects. In this article, we will discuss some of the most important knitting techniques and how to execute them.
Casting On
Casting on is the first step in any knitting project. It is the process of creating the first row of stitches on your knitting needle. There are several methods for casting on, but the most commonly used is the long-tail cast on. To do this, you will need to measure out a long tail of yarn, and then create a slipknot. From there, you will proceed to cast on the desired number of stitches using the long tail and the working yarn.
Knit Stitch
The knit stitch is the most basic and commonly used stitch in knitting. It creates a smooth, V-shaped fabric that is perfect for a wide range of projects. To execute the knit stitch, you will insert the right-hand needle into the first stitch on the left-hand needle from front to back, wrap the working yarn around the right-hand needle, and then pull the loop of yarn through the stitch, transferring it onto the right-hand needle.
Purl Stitch
The purl stitch is another fundamental stitch in knitting. It creates a raised, bumpy texture on the fabric and is often used in combination with the knit stitch to create interesting patterns. To purl, you will insert the right-hand needle into the first stitch on the left-hand needle from back to front, wrap the working yarn around the right-hand needle, and then pull the loop of yarn through the stitch, transferring it onto the right-hand needle.
Increasing and Decreasing Stitches
Increasing and decreasing stitches are essential techniques for shaping your knitted fabric. There are several methods for increasing stitches, such as yarn over (YO) and knit front and back (KFB). These techniques add stitches to your work, allowing you to create wider or fuller sections. On the other hand, decreasing stitches involve knitting multiple stitches together or slipping stitches to create a more tapered or narrower fabric.
Binding Off
Binding off, also known as casting off, is the final step of any knitting project. It is the process of finishing the last row of stitches and securing them so that they do not unravel. To bind off, you will knit the first two stitches, and then pass the first stitch over the second stitch and off the needle. Repeat this process until you have one stitch left, then cut the yarn and pull it through the last stitch to secure it.
Mastering these essential knitting techniques will give you a solid foundation to tackle a wide range of knitting projects. From casting on to binding off, each technique plays a crucial role in creating beautiful and professional-looking knitted items. So grab your needles and yarn, and start practicing these techniques to take your knitting skills to the next level!
Understanding Pattern Abbreviations
When knitting a children’s poncho, it is important to understand the pattern abbreviations. These abbreviations are used throughout the pattern to indicate specific knitting techniques or stitches. By familiarizing yourself with these abbreviations, you will be able to confidently follow the pattern and create a beautiful poncho for your child.
Here are some common pattern abbreviations you may come across:
- K: Knit stitch – insert the needle into the stitch from left to right, wrap the yarn around the right-hand needle, and pull it through the stitch.
- P: Purl stitch – insert the needle into the stitch from right to left, wrap the yarn around the right-hand needle, and pull it through the stitch.
- YO: Yarn over – bring the yarn to the front of the work, then over the right-hand needle to create a new stitch.
- SSK: Slip, slip, knit – slip two stitches one at a time as if to knit, insert the left-hand needle into the front of the slipped stitches, and knit them together through the back loop.
- K2tog: Knit two stitches together – insert the needle into two stitches at the same time, from left to right, and knit them together as one stitch.
- P2tog: Purl two stitches together – insert the needle into two stitches at the same time, from right to left, and purl them together as one stitch.
These are just a few examples of pattern abbreviations you may encounter. It is important to consult the specific pattern you are working on for its unique abbreviations and their meanings. By understanding and following these abbreviations, you will be well-equipped to successfully complete your child’s poncho.
Step-by-Step Instructions for Casting On
When starting a knitting project, one of the first steps is to cast on. Casting on is the process of creating loops on the needle, which will serve as the foundation for your stitches. Here are step-by-step instructions for casting on:
1. Make a Slip Knot
To begin, make a slip knot by creating a loop with the yarn and passing the end of the yarn through the loop. Pull the knot tight, but not too tight as you will need to insert the needle into the loop.
2. Hold the Needle
Hold the knitting needle with the slip knot in your right hand. The pointy end of the needle should be facing towards your left hand.
3. Insert the Needle
Insert the needle into the slip knot from front to back, creating a new stitch on the needle. Make sure the loop of the slip knot is not too tight, as you need to be able to easily slide the needle through the loops.
4. Tighten the Stitch
Tighten the stitch by gently pulling on the tail of the yarn. Make sure not to pull too tightly, as you want the stitch to be snug but still able to slide along the needle.
5. Repeat
Repeat steps 1-4 until you have cast on the desired number of stitches for your project. This will vary depending on the pattern you are following. Be sure to count each stitch as you go to ensure accuracy.
Once you have finished casting on, you are ready to begin knitting your project. These step-by-step instructions should help you get started with casting on and create a solid foundation for your knitting project. Happy knitting!
Creating the Body of the Poncho
Once you have completed the neck opening and the ribbing, it’s time to move on to creating the body of the poncho. This is where the main part of the poncho will be knitted, and it’s important to follow the pattern closely to ensure the correct measurements and fit.
Start by casting on the required number of stitches, as indicated in the pattern. You may need to use a stitch marker to mark the beginning of the round. From here, you will be working in rounds to create a seamless and continuous fabric.
Knit each round using the specified stitch pattern, making sure to maintain an even tension throughout. If the pattern calls for any increases or decreases, be sure to follow those instructions carefully to shape the poncho as desired.
As you work through the body of the poncho, the fabric will begin to grow and take shape. It’s important to periodically check your gauge to ensure that you are still on track. If your gauge is off, you may need to adjust your needle size or the number of stitches to maintain the correct measurements.
Continue knitting the body of the poncho until you reach the desired length, as specified in the pattern. This may involve knitting for a certain number of rounds or until you have reached a specific measurement. Once you have reached this point, you can then move on to finishing the poncho.
Adding the Neckline and Sleeves
Once you have completed the main body of the poncho, it is time to add the neckline and sleeves. This will help give the poncho its shape and make it more comfortable for the child to wear.
To start, you will need to fold the poncho in half, with the right sides facing each other. This will create a seam down the back of the poncho. Using a tapestry needle and the same yarn you used for the main body, begin sewing the back seam together. Make sure to leave a gap at the top for the neck opening.
Next, it’s time to add the neckline. Starting at the center front of the poncho, measure out the desired width for the neck opening. Mark this measurement with stitch markers on either side of the center front. Using the stitch markers as a guide, knit or crochet the required number of stitches in the next row to create the neck opening.
Once the neckline is complete, it’s time to add the sleeves. Measure the circumference of the child’s arm and determine how long you want the sleeves to be. Mark the desired length on the side seams of the poncho. Using the same yarn and a smaller needle or hook, pick up stitches along the markings to create the sleeves.
Continue knitting or crocheting the sleeves in the desired pattern until you reach the desired length. You can add ribbing or cuffs to the sleeves for a finished look. Once the sleeves are complete, weave in any loose ends and your poncho is ready to be worn!
Summary:
- Fold the poncho in half and sew the back seam together, leaving a gap for the neck opening.
- Measure and mark the desired width for the neck opening.
- Knit or crochet the required number of stitches to create the neck opening.
- Measure the child’s arm circumference and mark the desired length for the sleeves.
- Pick up stitches along the side seams to create the sleeves.
- Continue knitting or crocheting the sleeves in the desired pattern until you reach the desired length.
- Add ribbing or cuffs to the sleeves for a finished look.
- Weave in any loose ends.
Finishing Touches: Blocking and Weaving in Ends
Once you have finished knitting your child’s poncho, there are a few important finishing touches to complete before it’s ready to be worn. These include blocking the poncho to shape and size and weaving in all the loose ends.
Blocking
The first step in finishing your child’s poncho is blocking. Blocking is the process of shaping and stretching your knitted garment to the desired size and shape. This is especially important for a poncho, as it helps to ensure that the finished piece drapes nicely and looks its best when worn.
To block your poncho, start by soaking it in lukewarm water for about 10 minutes. Gently squeeze out the excess water, being careful not to wring or twist the fabric. Lay the poncho flat on a clean towel and gently roll it up to remove any remaining moisture.
Next, lay the poncho on a blocking board or a clean, flat surface. Use rust-proof T-pins or blocking wires to pin the edges of the poncho to the desired shape and size. Pay attention to any lace or textured patterns in the design and make sure they are lying flat and evenly spaced. Allow the poncho to dry completely before unpinning.
Weaving in Ends
Once your poncho is blocked and dry, the next step is to weave in all the loose ends. This is an important step to ensure that the poncho looks neat and finished, and also helps to secure the stitches and prevent unraveling.
To weave in the ends, thread a tapestry needle with the loose end of yarn. Starting on the wrong side of the fabric, insert the needle under several stitches to anchor the end. Then, weave the needle in and out of the stitches along the seam or edge, following the natural path of the yarn. Repeat this process for each loose end, making sure to trim any excess yarn once the end is secured.
By blocking your child’s poncho and weaving in all the loose ends, you can ensure that your knitting project looks its best and is ready to be worn and enjoyed. These finishing touches may require a bit of time and patience, but the result is a beautifully finished poncho that will keep your child warm and stylish.
Tips and Tricks for a Perfect Poncho
If you’re planning on knitting a poncho for a child, here are some helpful tips and tricks to ensure that your project turns out perfect:
1. Choose the Right Yarn: When selecting yarn for your poncho, it’s important to choose a child-friendly material that is both soft and durable. Look for yarns that are machine washable and gentle on sensitive skin.
2. Consider the Season: Think about the time of year your child will be wearing the poncho. If it’s for colder months, choose a yarn with good insulation properties to keep your little one warm. For warmer weather, opt for a lightweight and breathable yarn.
3. Measure Properly: Take accurate measurements of the child to ensure a proper fit. Consider their chest circumference and length from shoulder to waist. Adjust the pattern if necessary to accommodate for the child’s size.
4. Pay Attention to Gauge: Always check your gauge before starting the project. This will help ensure that your poncho turns out the right size and shape. Adjust your needle size if needed to match the pattern’s gauge.
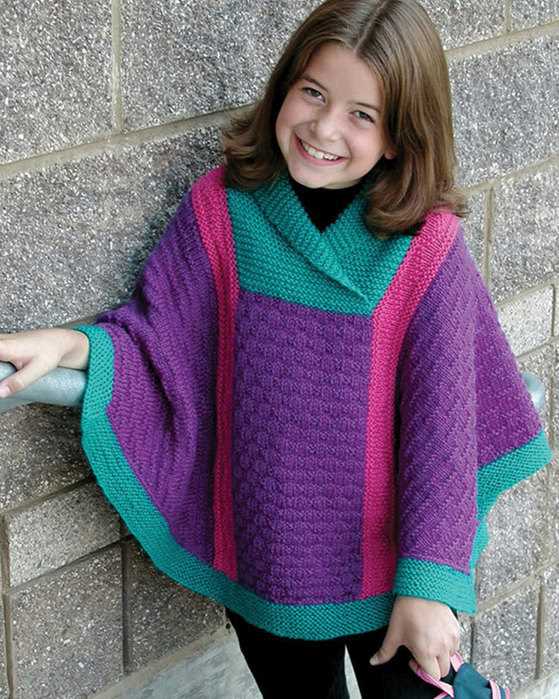
5. Customize with Colors and Patterns: Have fun with your poncho project by incorporating different colors and patterns. Stripes, geometric shapes, or even a personalized motif can add a unique touch to the finished piece.
6. Mind the Neckline: Consider the child’s comfort when determining the neckline. A wider neck opening may be easier for little ones to slip on and off. Alternatively, you can add buttons or a tie closure to secure the poncho around the neck.
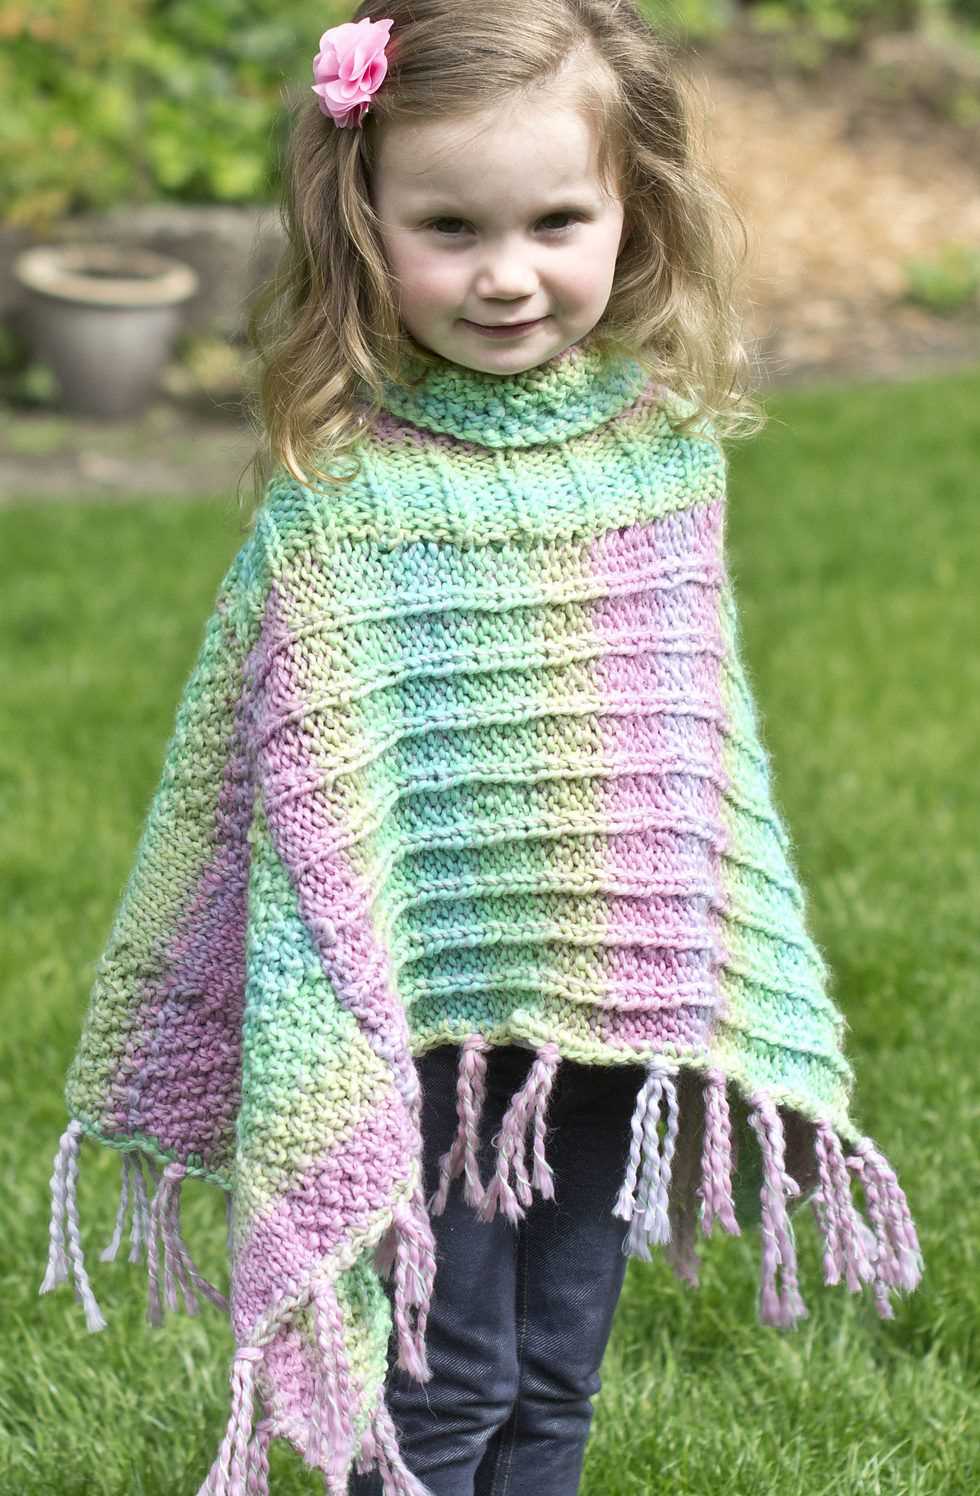
7. Add Fringe or Tassels: If you want to give your poncho a playful and stylish look, consider adding fringe or tassels to the bottom edge. This simple embellishment can make the poncho extra fun for kids to wear.
8. Block and Finish: Once you’ve completed knitting the poncho, it’s important to block and finish it properly. Blocking will help even out any uneven stitches and give the poncho a polished appearance. Don’t forget to weave in any loose ends for a neat finish.
By following these tips and tricks, you’ll be well on your way to creating a perfect poncho that your little one will love to wear!
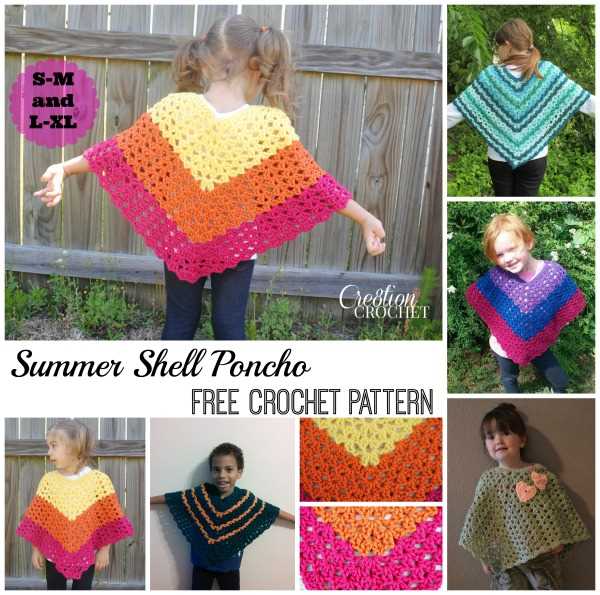
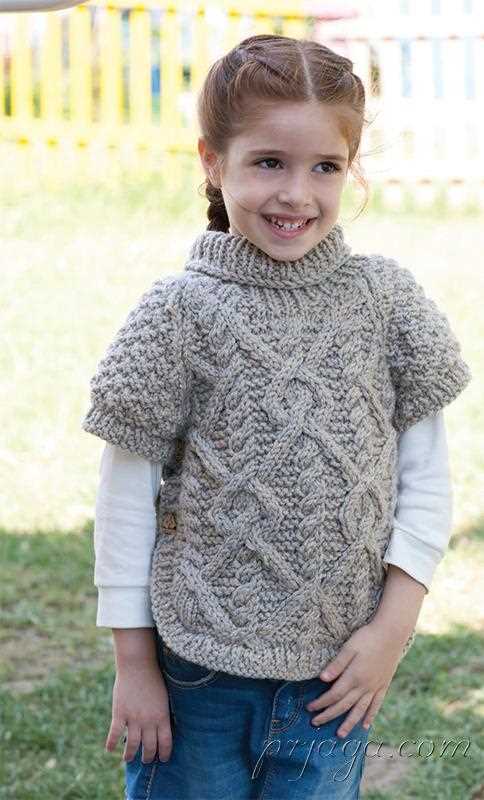
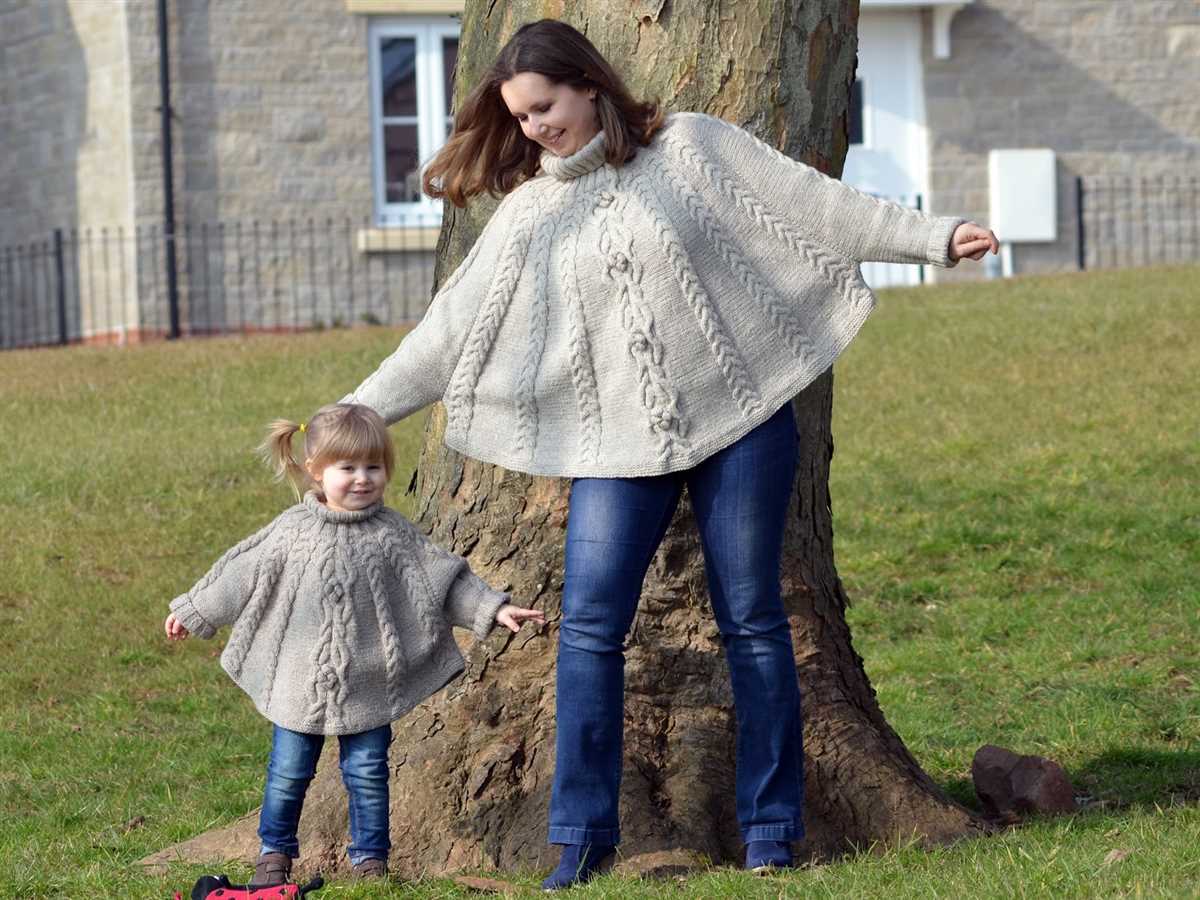
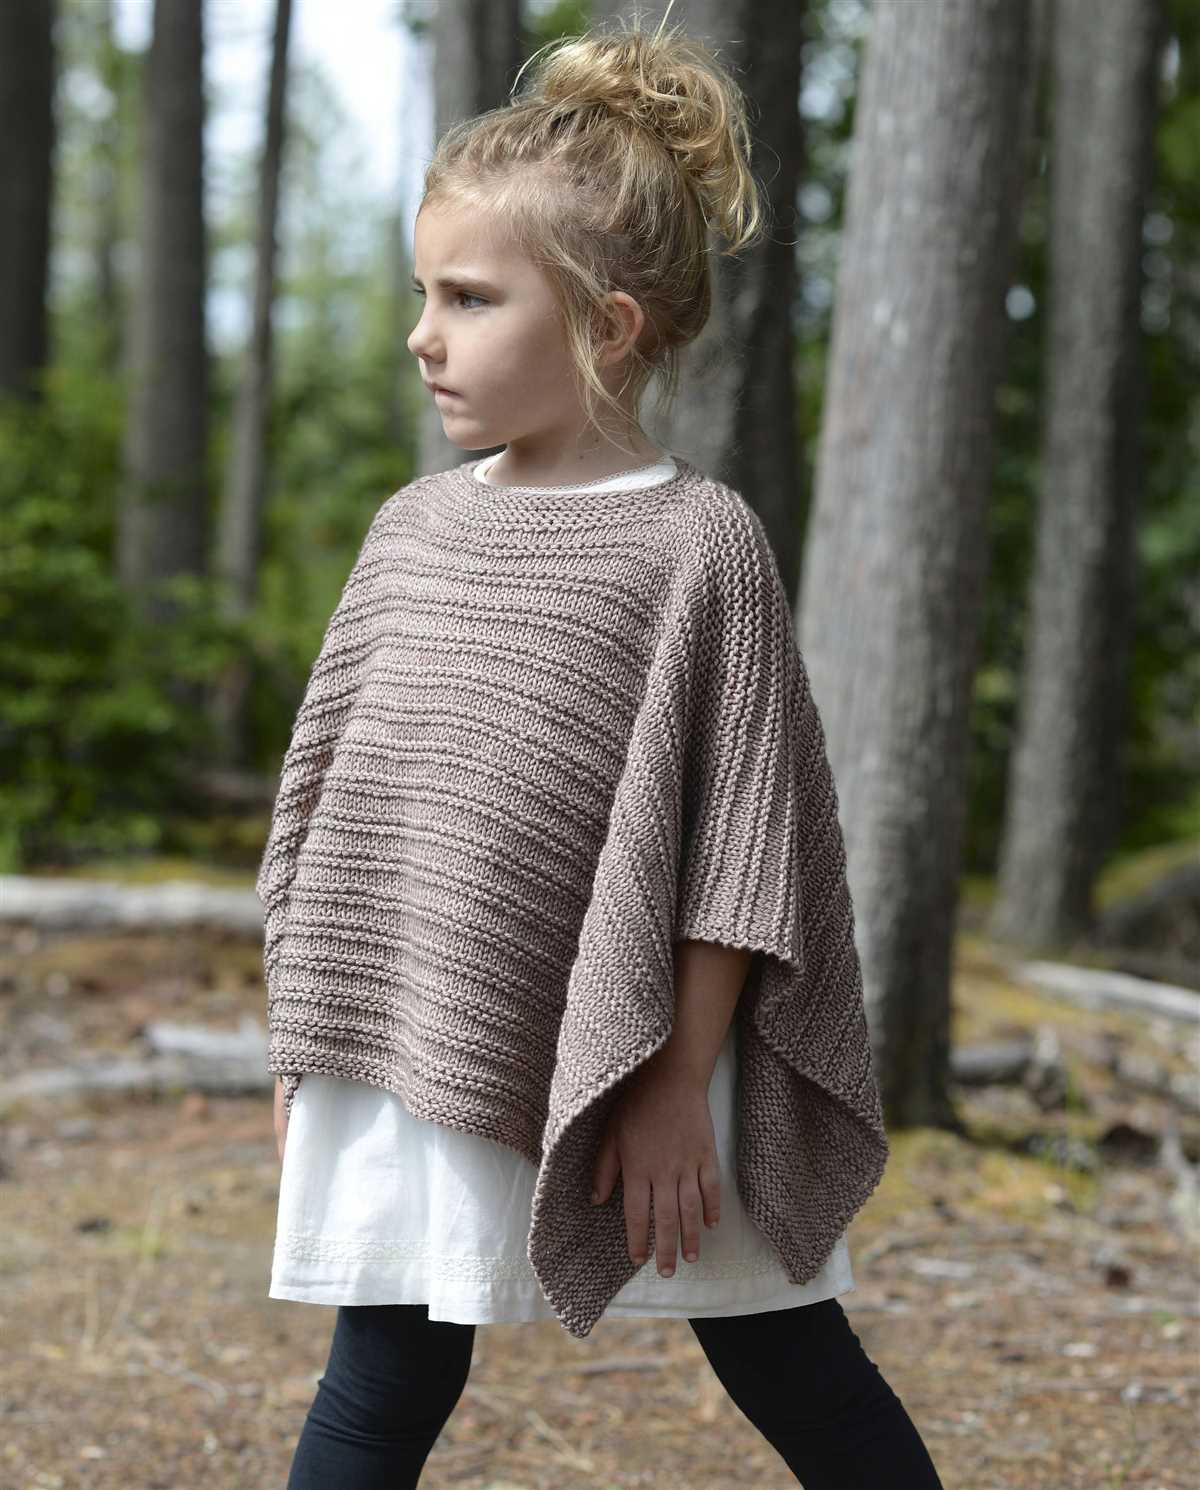
Inspiration: Different Styles and Variations
After exploring the basic children’s poncho knitting pattern, there are endless possibilities for customization and creating unique styles. Here are some inspirations for different variations:
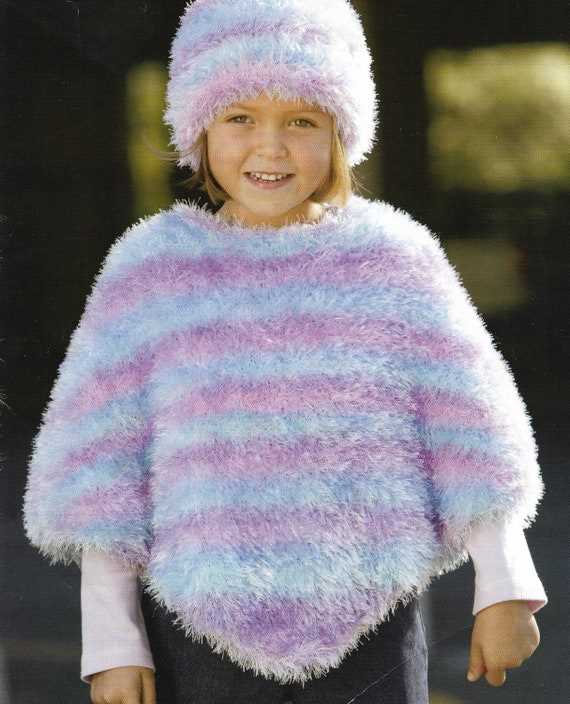
1. Colorful and Striped Poncho
Add a touch of fun and vibrancy to the poncho by incorporating multiple colors. You can create stripes using different shades or even experiment with color blocking. This style is perfect for making a statement and adding a playful touch to your child’s wardrobe.
2. Lace Poncho
If you want to add a delicate and elegant touch to the poncho, consider incorporating lace patterns. Knitting lace patterns may require some additional skills, but the result is worth it. Lace ponchos are perfect for special occasions or when you want to dress up your little one.
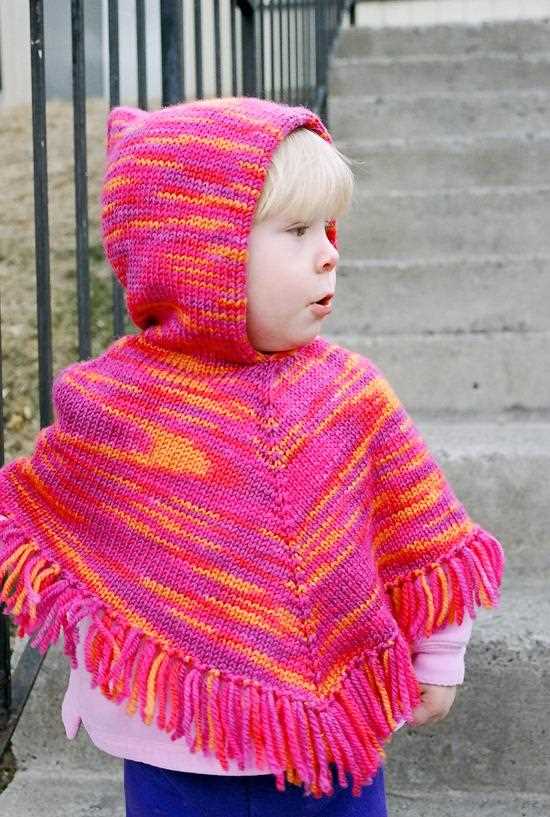
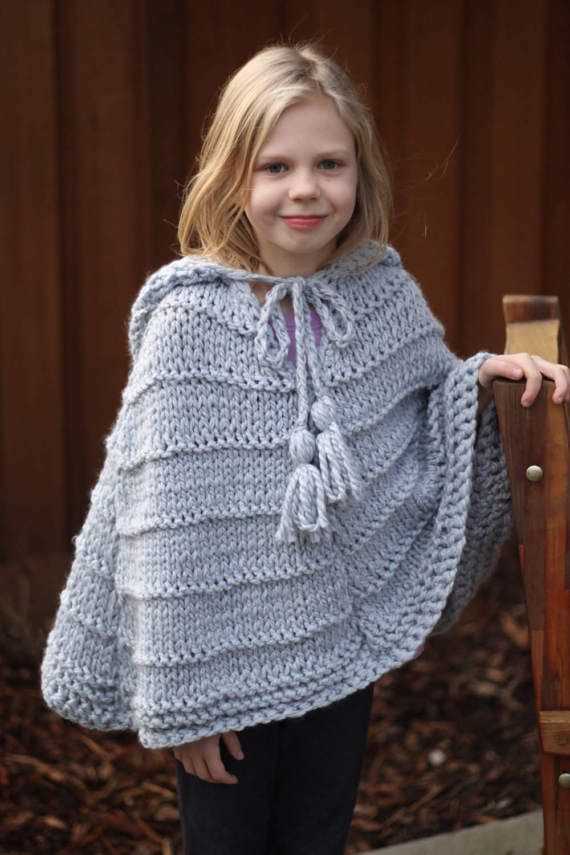
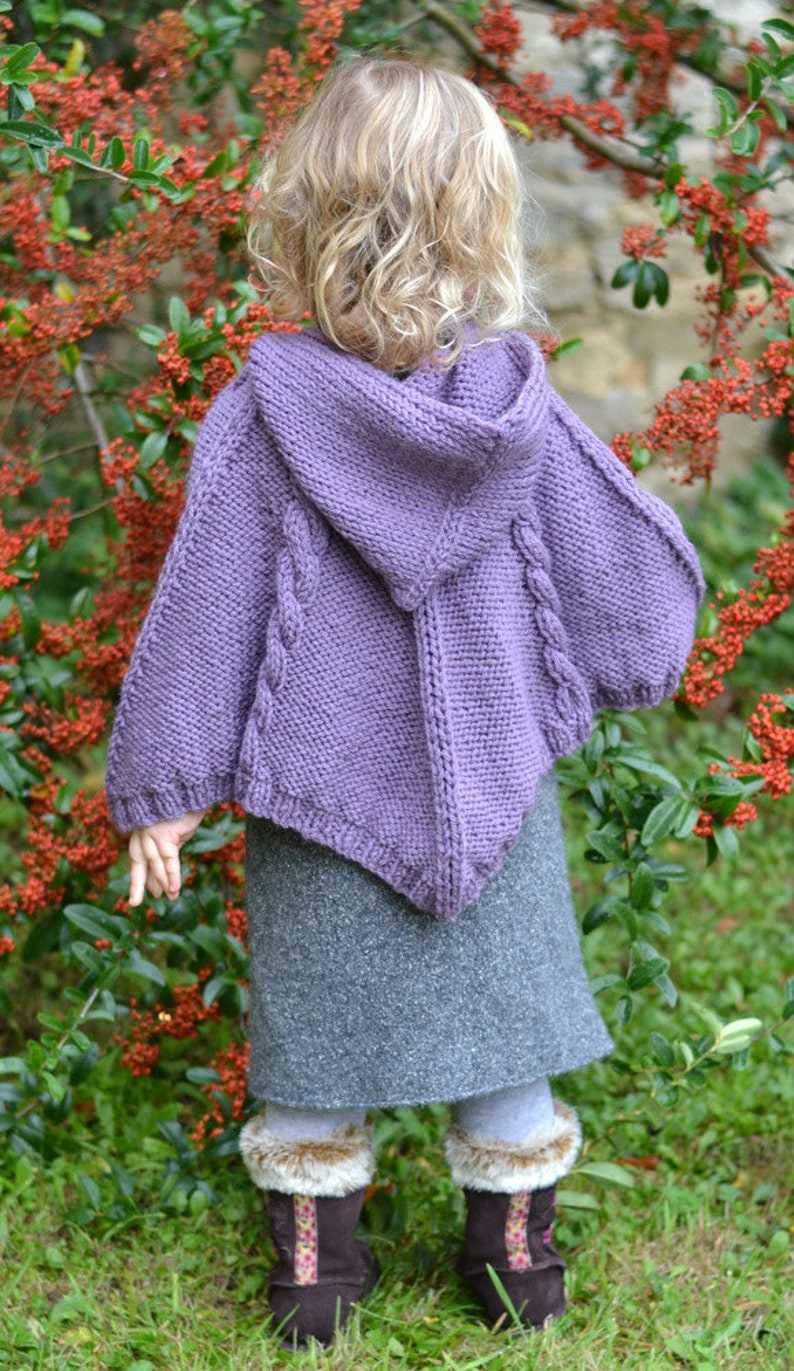
3. Hooded Poncho
A hooded poncho is not only stylish but also practical, especially during colder months. Adding a hood to the poncho adds an extra layer of warmth and can protect your child’s head and neck from chilly winds. It also gives the poncho a cozy and cozy look.
4. Fringed Poncho
Add a touch of boho-chic to the poncho by incorporating fringe details. Fringed ponchos give a playful and stylish look and can be a great addition to your child’s outfit. You can add fringe to the bottom edge or all around the poncho. Choose different colors for the fringe to make it more eye-catching.
Overall, the children’s poncho knitting pattern provides a great starting point for creating unique and personalized ponchos. Whether you choose to add colors, lace patterns, a hood, or fringe, these variations allow you to showcase your creativity and create a poncho that your child will love to wear.