Cozy and Textured: A Unique Chunky Knit Sweater Pattern

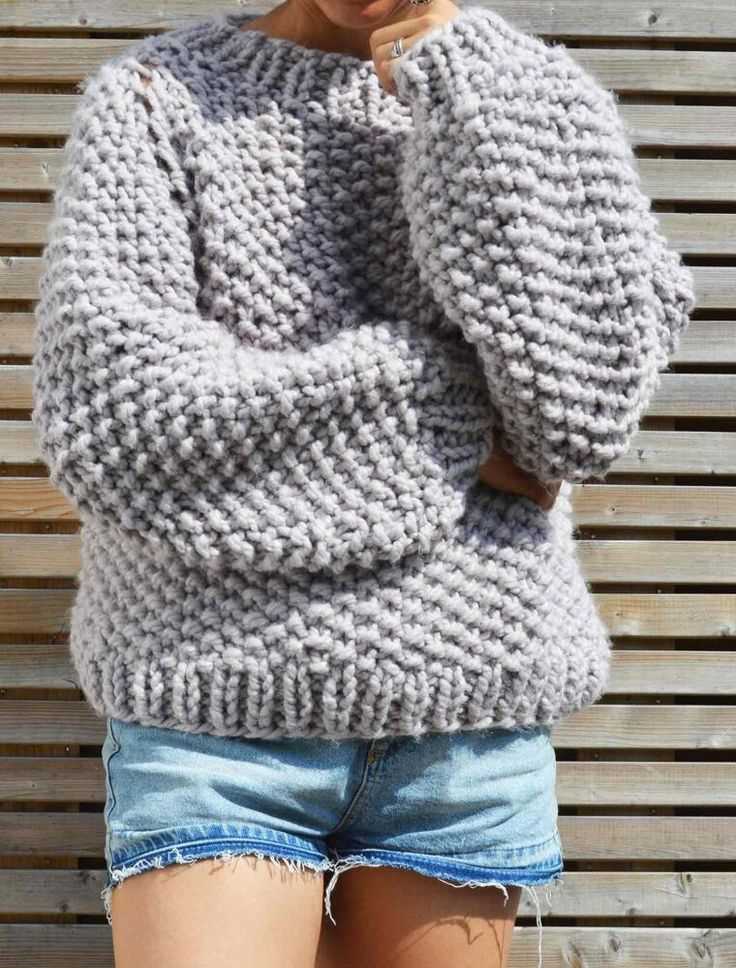
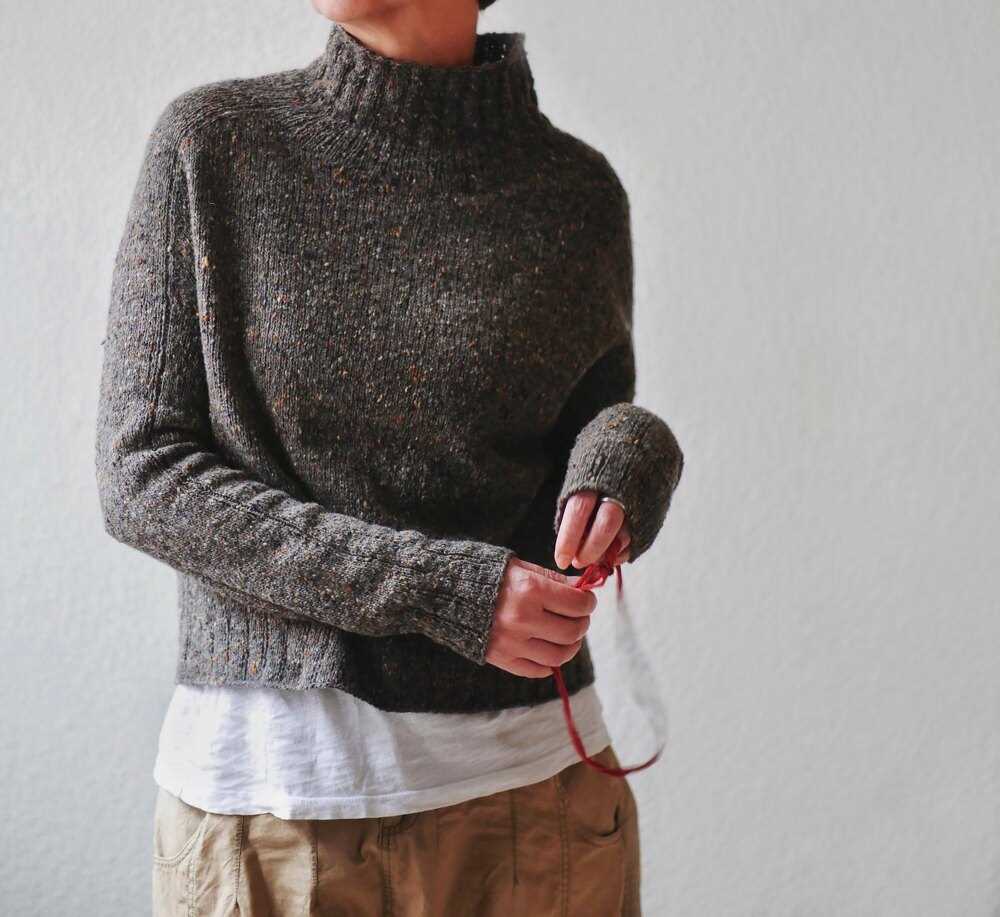
Chunky knit sweaters are a cozy and stylish addition to any wardrobe. The thick yarn and large needles used to create these sweaters result in a unique texture that is both warm and visually appealing. Whether you’re an experienced knitter or just starting out, a chunky knit sweater pattern is a great project to tackle.
One of the benefits of knitting a chunky knit sweater is that it works up quickly. The larger needles and thick yarn mean that each stitch covers more ground, allowing you to see progress with each row. This makes chunky knit sweaters a perfect option for those who want to knit a garment but don’t have the time or patience for a more intricate pattern.
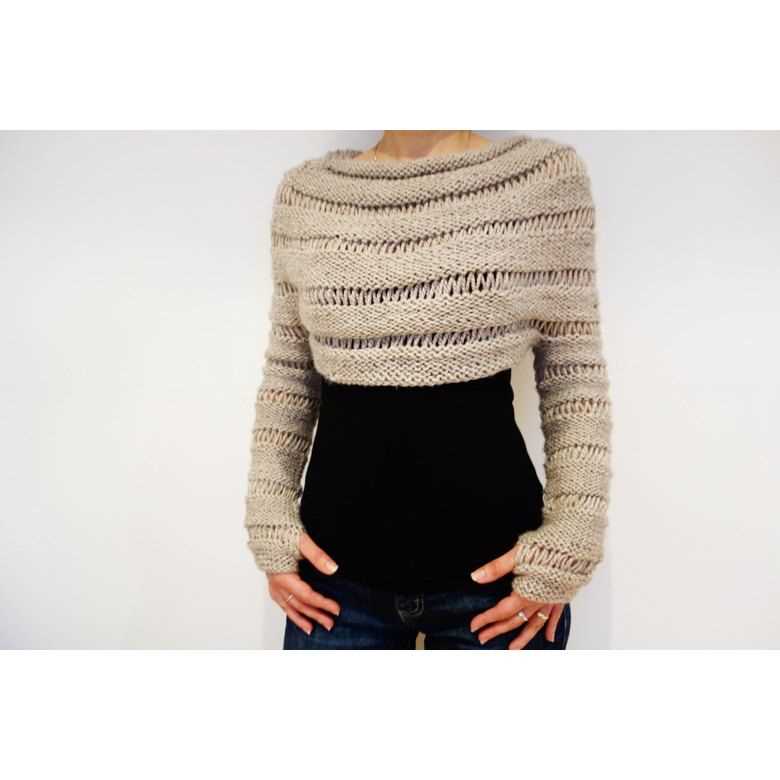
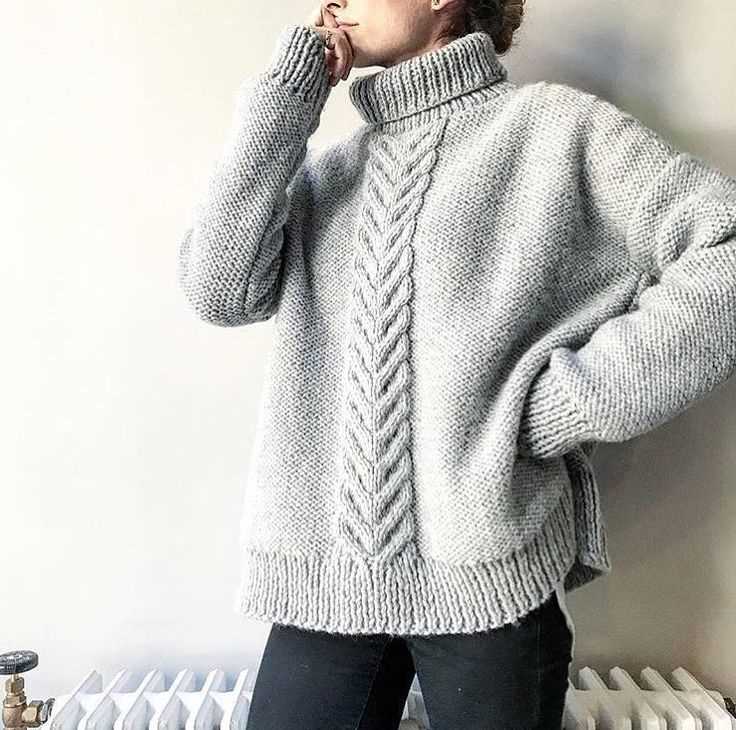
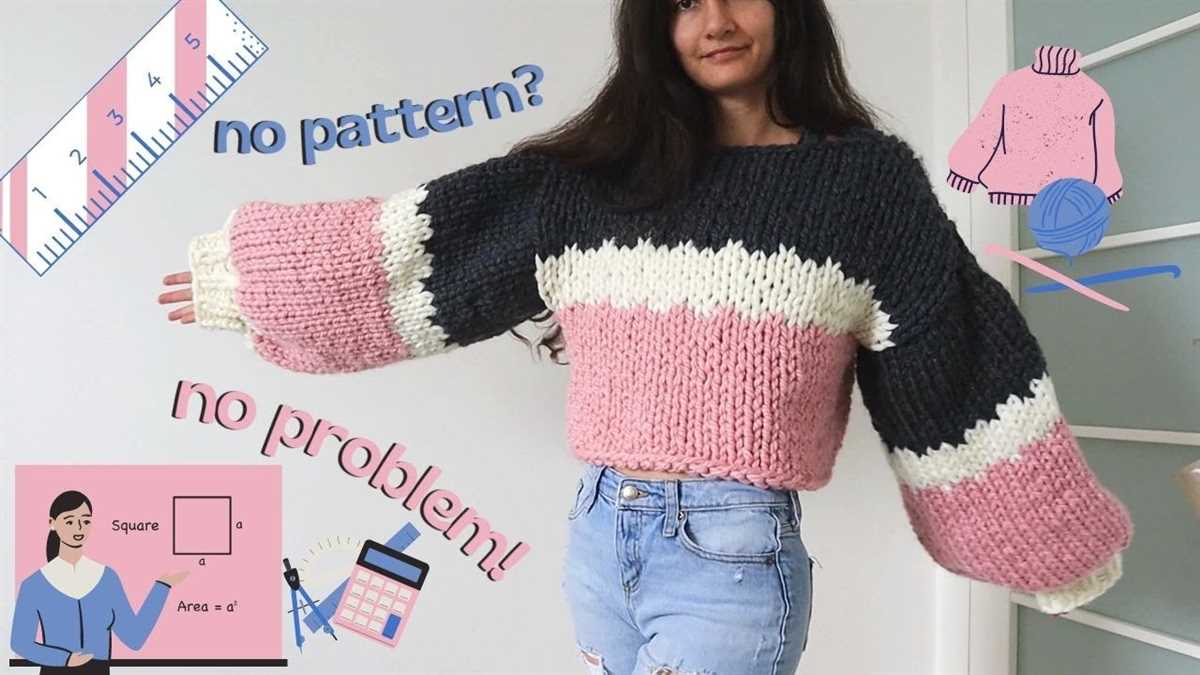
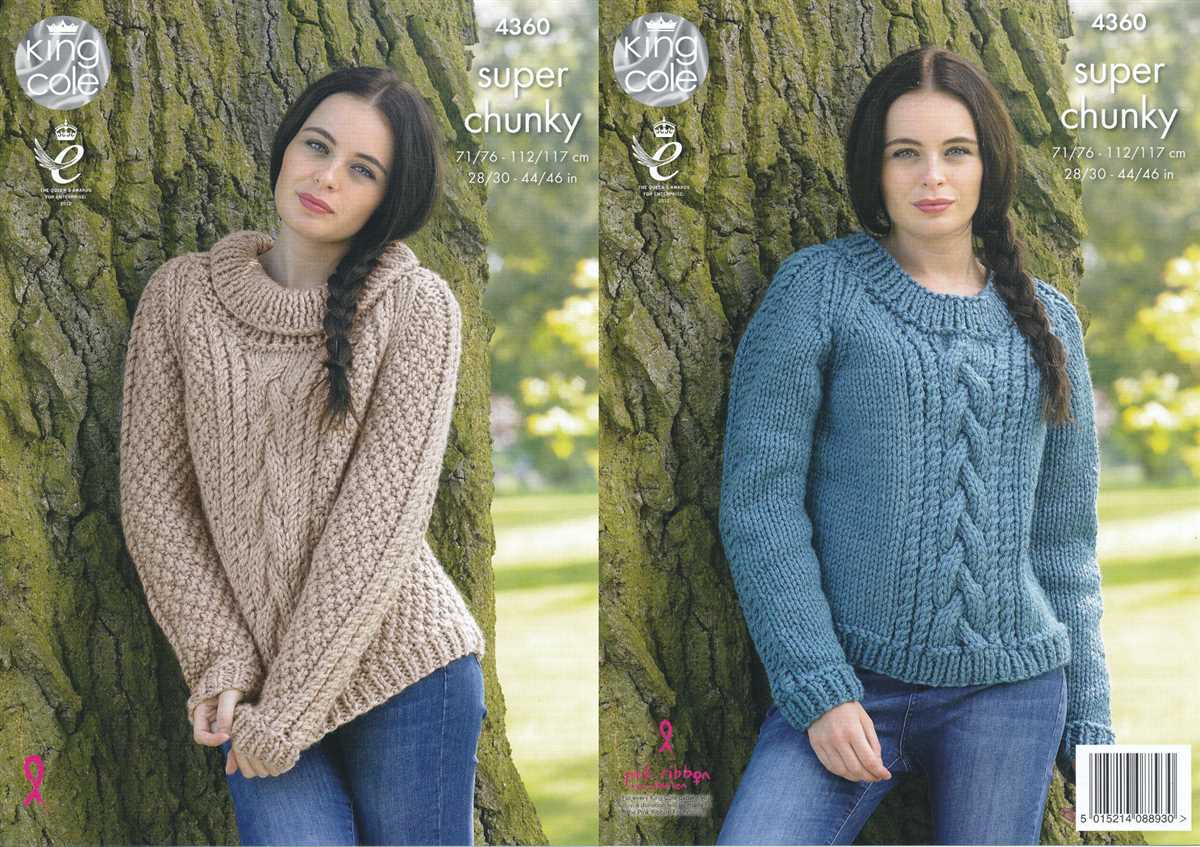
When choosing a chunky knit sweater pattern, there are endless options to suit your personal style. From classic cable knit designs to trendy oversized silhouettes, you can find a pattern that matches your preferences. Additionally, chunky knit sweaters can be customized with various stitch patterns, colors, and necklines to create a one-of-a-kind piece.
Whether you’re looking to cozy up in a chunky knit sweater or want to explore your knitting skills, a chunky knit sweater pattern is a great choice. With a wide range of options and the satisfaction of creating a warm and stylish garment, it’s no wonder why chunky knit sweaters are a favorite among knitters.
Chunky Knit Sweater Pattern

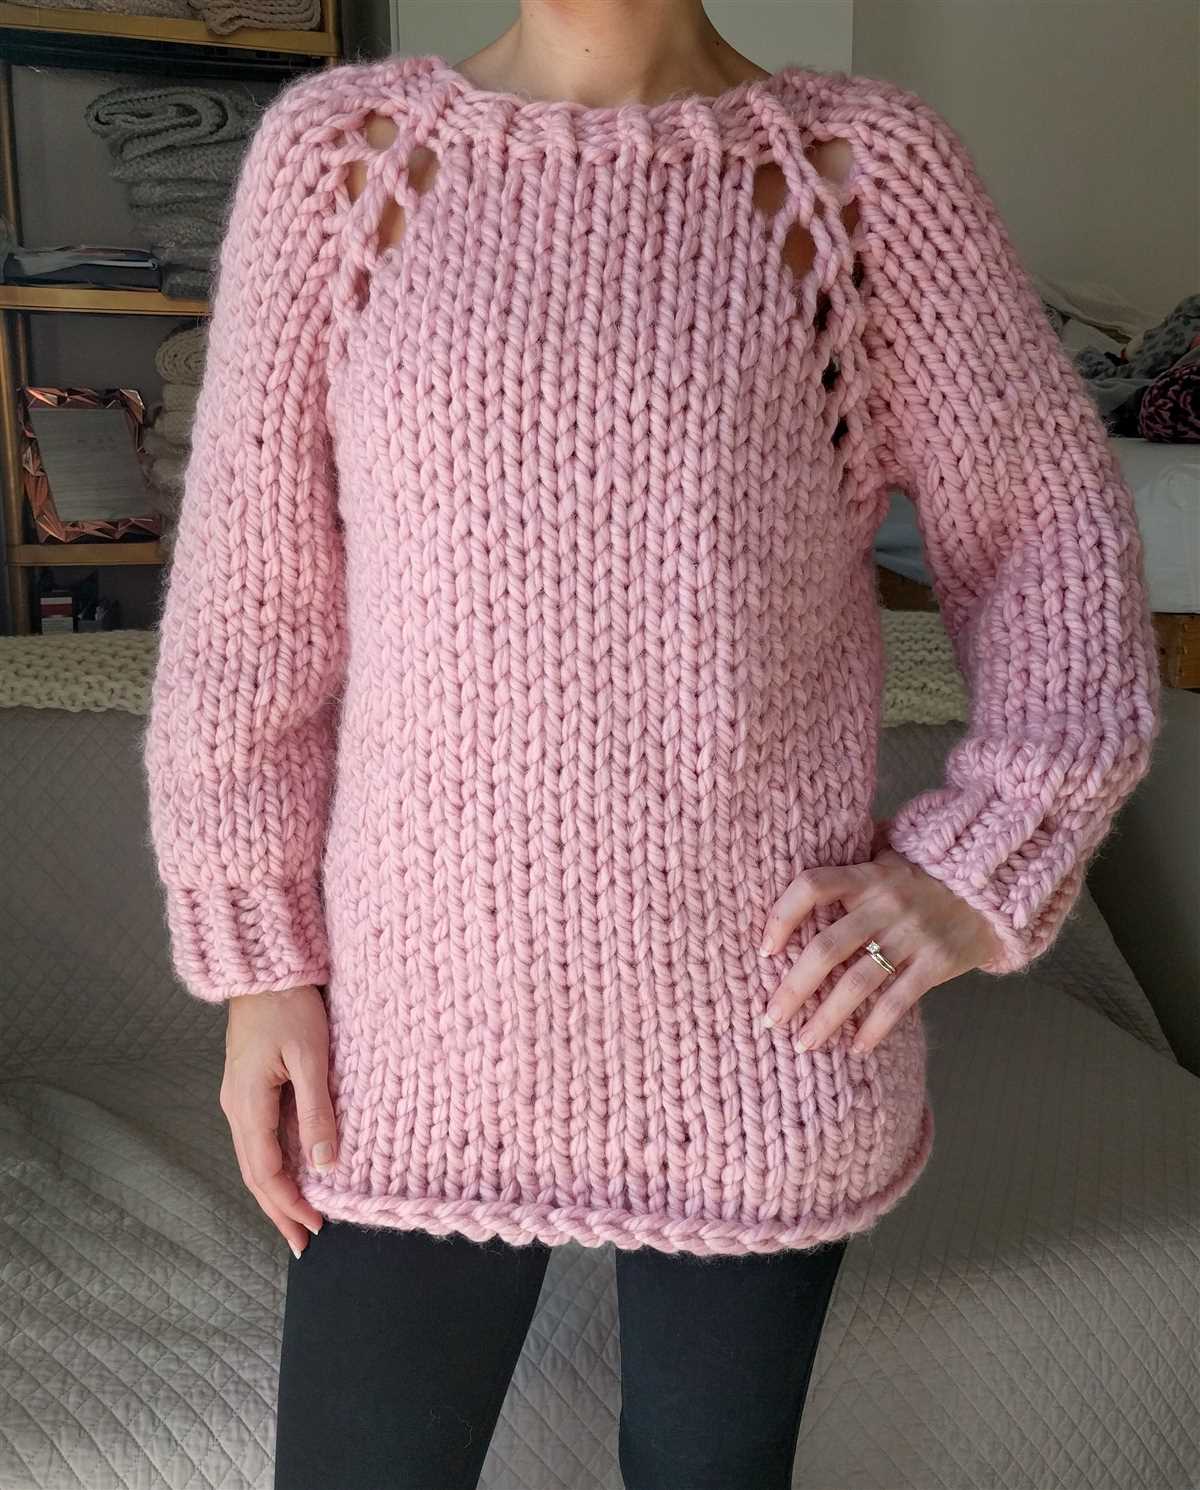
If you’re looking for a cozy and stylish winter project, look no further than a chunky knit sweater. Chunky knit sweaters have become a fashionable staple in many wardrobes, and they are also surprisingly easy to make yourself. With the right pattern and materials, you can create a beautiful and warm sweater that will keep you comfortable all season long.
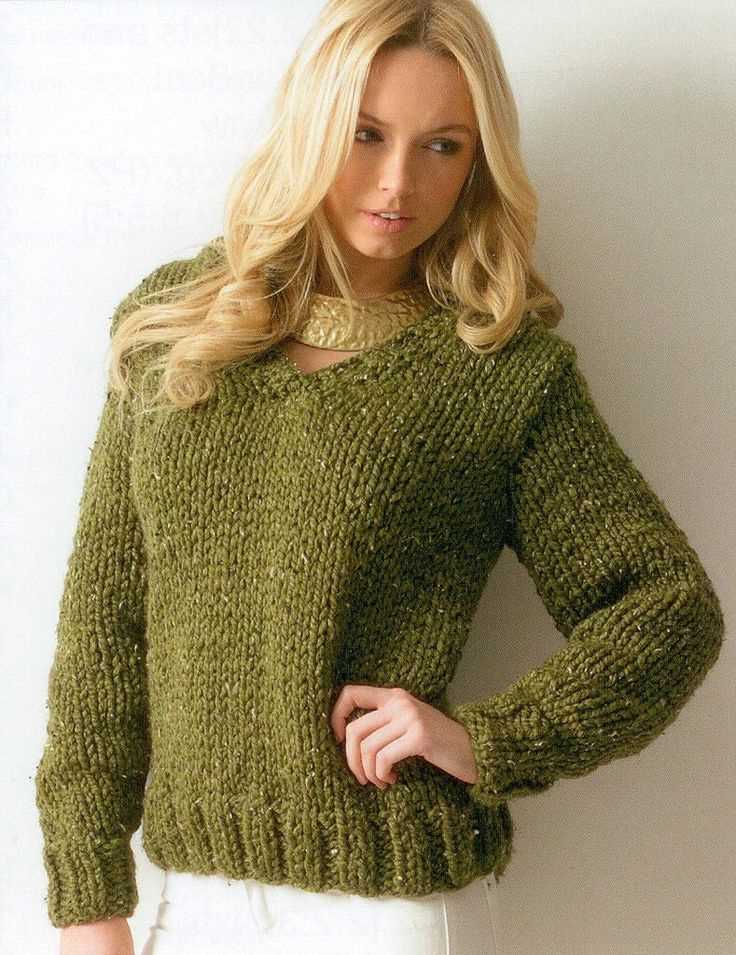
When choosing a chunky knit sweater pattern, it’s important to consider the level of difficulty and the style you’re looking for. There are many different patterns available, ranging from simple and basic designs to more intricate and detailed patterns. It’s also a good idea to choose a pattern that matches your skill level as a knitter. If you’re a beginner, you may want to start with a simpler pattern, such as a basic crewneck or v-neck sweater.
Materials Needed:
- Chunky yarn
- Knitting needles in the appropriate size
- Tape measure
- Scissors
- Yarn needle
- Stitch markers
Instructions:
- Start by choosing your desired size and gauge for your sweater.
- Cast on the required number of stitches for the back piece of the sweater.
- Follow the pattern instructions to create the desired stitch pattern and shape for the back, front, and sleeves of the sweater.
- Once all pieces are completed, seam them together using a yarn needle.
- Finish off any remaining edges, such as the collar, cuffs, and bottom hem.
A chunky knit sweater is a perfect addition to any winter wardrobe. Whether you choose a classic cable-knit design or a more modern oversized style, you’re sure to stay warm and stylish all winter long. So grab your knitting needles and get started on your own chunky knit sweater today!
Choosing the Right Yarn for Your Sweater
When it comes to knitting a chunky knit sweater, choosing the right yarn is essential for achieving the desired look and comfort. The right yarn can make all the difference in how the final piece feels and drapes on your body. Here are some considerations to keep in mind when selecting yarn for your sweater.
Weight and Thickness

One of the first things to consider is the weight and thickness of the yarn. For a chunky knit sweater, you’ll want to choose a yarn that is thick enough to create the cozy, warm texture you desire. Look for yarns that are labeled as bulky or super bulky, as these will typically give you the chunkiness you’re looking for. The weight and thickness of the yarn will also affect the size of the needles you need to use, so keep that in mind as well.
Fiber Content
Another important factor to consider is the fiber content of the yarn. Different fibers have different qualities, so think about the characteristics you want your sweater to have. Do you want it to be soft and luxurious? Consider using a yarn with a high percentage of natural fibers like merino wool or alpaca. Are you looking for a more durable and easy-care option? Acrylic or cotton blends may be a better choice. Remember that the fiber content will also affect the warmth and breathability of the sweater, so consider the climate you’ll be wearing it in.
Color and Texture
Finally, consider the color and texture of the yarn. The color of the yarn can greatly impact the overall look of your sweater, so choose a color that you love and that complements your personal style. Additionally, consider the texture of the yarn. Chunky knit sweaters often have a beautiful, rustic texture that adds visual interest to the finished piece. Look for yarns with a textured or tweed effect to achieve this look.
By considering the weight and thickness, fiber content, and color and texture of the yarn, you can choose the perfect yarn for your chunky knit sweater. Remember to take your time and consider your preferences and needs to ensure that your finished sweater is everything you envisioned. Happy knitting!
Selecting the Appropriate Needles
When knitting a chunky knit sweater, it is important to select the appropriate needles that will give you the desired finished product. The size of the needles you choose will determine the overall gauge and texture of the sweater.
The recommended needle size for a chunky knit sweater pattern is typically between US 10.5 (6.5mm) and US 13 (9mm). However, you should always check the gauge provided in the pattern and choose your needles accordingly. If your gauge doesn’t match the pattern, you may need to go up or down a needle size to achieve the correct tension. Remember, the gauge is crucial for ensuring that your sweater turns out the right size and fit.
Another important factor to consider when selecting needles for a chunky knit sweater is the material. Different materials can affect the drape and feel of the finished garment. Wooden or bamboo needles are a popular choice for chunky knits as they provide a smooth and warm knitting experience. Metal needles, on the other hand, can be slicker and allow the stitches to glide more easily, making them suitable for knitters who prefer faster knitting speeds.
Overall, when selecting the appropriate needles for a chunky knit sweater, it is crucial to consider both the size and material. The right choice will ensure that your stitches are even and that your finished garment has the desired look and feel.
Understanding Gauge and Swatching
When starting a knitting project, one of the most important steps is understanding gauge and swatching. Gauge refers to the number of stitches and rows that can be formed in a given measurement. It determines the size and fit of the final knitted piece. Swatching, on the other hand, involves creating a small sample of the pattern using the recommended yarn and needle size to accurately measure gauge.
Why is gauge important?
Gauge is crucial because it ensures that the finished item will be the correct size and fit. If the gauge is too loose, the knitting will result in a larger, looser fabric. If the gauge is too tight, the knitting will yield a smaller, tighter fabric. This is particularly important when working on patterns for garments such as sweaters, where the fit matters. Additionally, gauge can affect the amount of yarn needed for the project and the drape of the fabric.
How to swatch for gauge?
When swatching for gauge, it is important to use the specified yarn and needle size in the pattern. Start by casting on an appropriate number of stitches and work a few inches in the desired stitch pattern. Make sure to measure the swatch both horizontally and vertically using a ruler or gauge tool. Compare these measurements to the gauge specified in the pattern. If the gauge matches, congratulations! You can begin the project with confidence. If the gauge is different, try changing the needle size and swatch again until the gauge matches.
Key points to remember:
- Gauge refers to the number of stitches and rows that can be formed in a given measurement.
- Gauge ensures the correct size and fit of the finished knitted piece.
- Swatching involves creating a small sample using the recommended yarn and needle size.
- Measure the swatch both horizontally and vertically to compare against the specified gauge.
- If the gauge is different, adjust the needle size and swatch until it matches.
By understanding gauge and swatching correctly, you can confidently embark on your chunky knit sweater pattern and create a beautiful garment that fits perfectly.
Casting On the Stitches
Before you can begin knitting your chunky knit sweater, you first need to cast on the stitches. Casting on is the process of creating the foundation row of stitches that will be used to build your sweater. There are several different methods for casting on, but for a chunky knit sweater, the long-tail cast-on method is commonly used.
To begin casting on, you will need a pair of knitting needles and your chunky yarn. Start by creating a slipknot at the end of your yarn, leaving a long tail of yarn about four times the width of your finished sweater. Insert one needle into the slipknot and tighten it, ensuring that the slipknot is secured but not too tight.
Next, hold the needle with the slipknot in your right hand and the other needle in your left hand. With your left hand, weave the long tail of yarn around your thumb and hold it in place with your other fingers. This will create a loop of yarn that will be used to cast on your first stitch.
To cast on the first stitch, insert the needle in your right hand into the loop of yarn on your left thumb from front to back. With your right hand, bring the yarn over the needle and pull it through the loop. This will create a new stitch on your right needle. Repeat this process for the desired number of stitches, ensuring that the stitches are evenly spaced along the needle and not too tight or too loose.
Once you have cast on all of your stitches, you can continue with the next step in your chunky knit sweater pattern. Keep in mind that the number of stitches you cast on will depend on the size of your sweater and the desired fit. It is always a good idea to double-check your stitch count before moving on to avoid any issues later on in your knitting project.
Learning Basic Knit Stitches
If you’re new to knitting, learning the basic knit stitches is an essential step. Knit stitches are the foundation of many knitting patterns, including the popular chunky knit sweater pattern. Whether you’re looking to create a cozy sweater or venture into more intricate designs, mastering these stitches will give you a solid foundation in knitting.
The first stitch you’ll need to learn is the knit stitch. This is the most basic stitch and forms a smooth, v-shaped pattern on your fabric. To knit, insert the right needle into the first stitch on the left needle from left to right. Wrap the yarn around the right needle and pull it through the loop, sliding the stitch off the left needle. Repeat this process until you’ve worked all the stitches on the left needle.
Once you’ve mastered the knit stitch, you can move on to the purl stitch. The purl stitch creates a raised, bumpy texture on the fabric. To purl, insert the right needle into the first stitch on the left needle from right to left. Wrap the yarn around the right needle and pull it through the loop, sliding the stitch off the left needle. Repeat this process until you’ve worked all the stitches on the left needle.
With just these two stitches, you’ll be able to create a variety of patterns and textures in your knitting. Practice these stitches on small swatches of fabric before tackling larger projects, like the chunky knit sweater pattern. As you become more comfortable with the basic stitches, you can begin to experiment with different techniques and patterns to create unique and beautiful knitwear.
Knitting the Body of the Sweater
Once you have finished knitting the ribbing for the hem of your chunky knit sweater, it’s time to move on to the body of the sweater. This is where you will create the main portion of the sweater, which will determine its overall length and width.
To begin knitting the body, you will continue using the same size needles you used for the ribbing. Start by knitting the first row in your chosen stitch pattern, whether it’s a simple stockinette stitch or a more intricate cable pattern. Make sure to follow the pattern instructions carefully to ensure proper stitch placement.
If you are knitting your sweater in the round, you will continue working in the chosen stitch pattern and shaping as needed for your size. This may involve increasing or decreasing stitches to achieve the desired fit. Keep in mind that the body of the sweater should be slightly wider than the ribbing to allow for ease of movement.
If you are knitting your sweater flat, you will need to work the right side rows in the chosen stitch pattern and the wrong side rows in purl. Similar to knitting in the round, you may need to increase or decrease stitches to shape the body. Remember to keep track of your stitch count and follow any shaping instructions provided in the pattern.
Continue knitting the body of the sweater until you have reached your desired length, which can vary depending on your personal preference. It’s a good idea to periodically try on the sweater to check the fit and make any necessary adjustments. Once you are satisfied with the length, you can proceed to the next step of the sweater construction, whether it’s knitting the sleeves or adding any finishing details.
Shaping the Neckline and Shoulders

When knitting a chunky knit sweater, one of the important steps in the process is shaping the neckline and shoulders. This is done to ensure a comfortable fit and to create a pleasing aesthetic. There are several techniques and methods that can be used to achieve this.
One common method for shaping the neckline is to work short rows. Short rows are partial rows of knitting that are used to create curves or angles in the fabric. To shape the neckline, you would typically work a series of short rows at the center front and back of the sweater. This creates a gentle slope in the fabric, allowing it to lie nicely around the neck. By working short rows on both sides of the center stitches, you can create a symmetrical neckline.
Another technique for shaping the neckline and shoulders is to use decreases. Decreases are stitches that are worked together to reduce the number of stitches in a row. For the neckline, you can use decreases to create a V-shaped or scoop neck. For the shoulders, decreases can be used to shape the armholes. By decreasing stitches at regular intervals, you can create a smooth curve that follows the natural contours of the body.
In addition to these techniques, it’s also important to consider the overall design of the sweater when shaping the neckline and shoulders. For example, if you’re knitting a sweater with a cable pattern, you may need to make adjustments to the shaping to ensure that the cables flow smoothly from the body of the sweater into the neck and shoulder areas. Likewise, if you’re incorporating colorwork into the design, you may need to plan the shaping to accommodate the color changes.
Overall, shaping the neckline and shoulders of a chunky knit sweater requires careful planning and attention to detail. Whether you choose to use short rows, decreases, or a combination of both, it’s important to consider the desired fit and style of the sweater to create a flattering and comfortable garment.
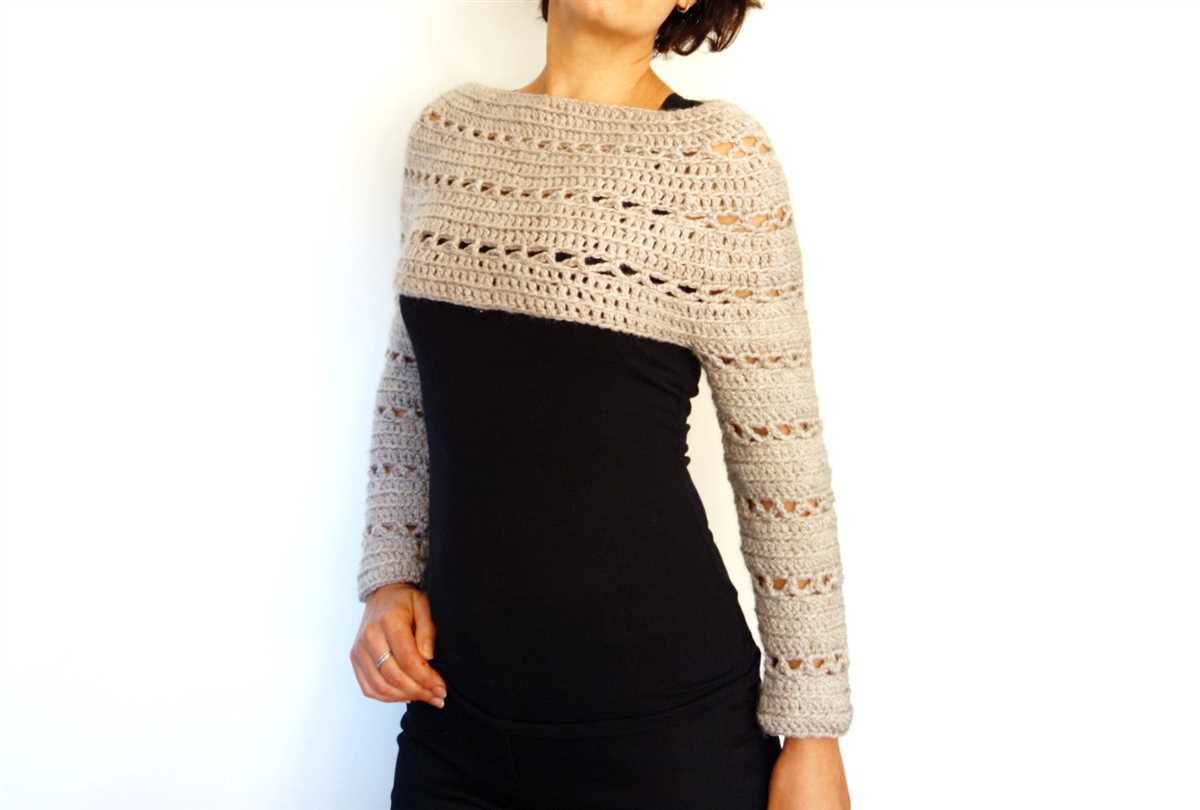
Creating the Sleeves
Once you have completed the body of your chunky knit sweater, it is time to move on to the sleeves. The sleeves are an essential part of the sweater, providing warmth and comfort. Follow these steps to create the sleeves:
1. Measure and determine the length: Start by measuring the length of your arm from the shoulder to the wrist. This measurement will determine the length of your sleeves. Make sure to account for any desired cuff length.
2. Cast on stitches: To begin the sleeves, you will need to cast on the appropriate number of stitches. Refer to the pattern instructions or calculate the number of stitches based on your gauge and desired sleeve width. Use a stitch marker to mark the beginning of the round.
3. Knit in the desired pattern: Knit in the desired stitch pattern for the sleeves, whether it is stockinette stitch, ribbing, or a cable pattern. Continue knitting until you reach the desired length for the sleeves.
4. Shape the sleeves: When you have reached the desired length, it is time to shape the sleeves. Follow the pattern instructions to decrease or increase stitches, depending on whether you are shaping the sleeves for a raglan or set-in sleeve construction. Pay attention to the location and frequency of the shaping to ensure a proper fit.
5. Finish the sleeves: Once the sleeve shaping is complete, continue knitting in the desired pattern until you reach the desired cuff length. Bind off all stitches and repeat the process for the second sleeve.
By following these steps, you will be able to create the sleeves for your chunky knit sweater. Remember to refer to the pattern instructions for any specific details and measurements.
Adding Ribbing and Finishing Touches
Once you have completed the main body of your chunky knit sweater, it’s time to add ribbing to the cuffs, neckline, and hem. Ribbing not only adds a polished and finished look to your sweater, but it also helps to create a snug and comfortable fit.
To add ribbing, you will need to switch to a smaller set of knitting needles. This will help to create a tighter fabric and ensure that the ribbing has enough stretch to fit comfortably. You can choose to use the same yarn as your main body or a contrasting yarn for a stylish accent.
Cuffs: Begin by picking up stitches along the edge of the sleeve. You can use a circular needle or double-pointed needles, depending on your preference. Knit the ribbing pattern of your choice, such as a basic K1, P1 ribbing, for the desired length. Bind off loosely to maintain the elasticity of the ribbing.
Neckline: Pick up stitches along the neckline, ensuring an even distribution around the entire neck. Knit the ribbing pattern of your choice, such as a K2, P2 ribbing, for the desired height. Bind off loosely to create a comfortable fit that doesn’t constrict the neck.
Hem: Pick up stitches along the bottom edge of the sweater. Knit the ribbing pattern of your choice, such as a K1, P1 ribbing, for the desired length. Bind off loosely to allow the hem to flare slightly and create a relaxed look.
Once you have finished adding ribbing to all the necessary areas, it’s time for the finishing touches. This includes weaving in any loose ends of yarn and blocking the sweater to ensure its final shape and size. Blocking involves wetting the sweater, shaping it to the desired dimensions, and allowing it to dry flat.
Now that you have completed all the steps, your chunky knit sweater is ready to be worn and enjoyed. Its cozy texture and beautiful ribbing details will make it a standout piece in your wardrobe, perfect for layering or as a statement piece on its own.
Blocking and Sewing the Sweater
After completing the knitting process of the chunky knit sweater, the next step is to block and sew the garment. Blocking is an important technique that helps to shape and size the sweater, ensuring that it fits properly and looks neat and professional.
Blocking the Sweater

The first step in blocking the sweater is to wet it. This can be done by soaking the sweater in a basin of lukewarm water with a small amount of mild detergent. Gently agitate the sweater to ensure that it is fully saturated. Once the sweater is wet, gently squeeze out any excess water, being careful not to wring or twist the fibers.
Next, lay the sweater flat on a clean towel or blocking mat. Take care to shape the sweater to the desired dimensions, pulling gently on the edges to smooth out any wrinkles or unevenness. Use blocking pins to secure the sweater in place, placing them evenly around the edges. Allow the sweater to dry completely in this position. This process may take several days, depending on the humidity and air circulation in the room.
Sewing the Sweater
Once the sweater is fully dry, it is time to sew the pieces together. Using a yarn needle and the same yarn used for knitting the sweater, start by attaching the sleeves to the body. Lay the sweater pieces flat and use the mattress stitch to join them together. This stitch creates an invisible seam, giving the sweater a seamless and professional finish. Repeat the process for the other sleeve.
Finally, sew up the side seams of the sweater using the same technique. Take care to line up the stitches on each side to ensure a neat and even seam. Once all the seams have been sewn, weave in any loose ends using the yarn needle. Trim any excess yarn from the seams and ends, being careful not to cut the sweater itself.
Tips and Tricks for a Professional Finish
Creating a chunky knit sweater can be a fulfilling and rewarding project, but achieving a professional finish can sometimes be tricky. Here are some tips and tricks to help you achieve a polished and well-executed final product.
1. Use High-Quality Yarn
Investing in high-quality yarn is essential for creating a professional-looking chunky knit sweater. Look for yarn that is sturdy, soft, and able to withstand the weight and thickness of the sweater. Cheap or low-quality yarn may result in a finished product that looks and feels cheap.
2. Pay Attention to Gauge
One of the most important factors in achieving a professional finish is maintaining the correct gauge throughout the project. Make sure to swatch and measure your gauge to ensure that your stitches are the correct size. Adjust your needle size if necessary to match the pattern’s gauge requirements.
3. Block Your Finished Sweater
Blocking is a process that involves wetting your finished sweater and shaping it to the desired dimensions. This step helps to even out stitches and give the sweater a smoother and more polished appearance. Follow the blocking instructions provided by the pattern or consult resources on how to properly block your chunky knit sweater.
4. Pay Attention to Finishing Details
Take the time to pay attention to finishing details that can enhance the overall look of your chunky knit sweater. Weave in any loose ends neatly, sew buttons securely, and ensure that seams are well-sewn and evenly aligned. These small finishing touches can make a big difference in the overall appearance of your sweater.
- Make sure your stitching is even and consistent throughout.
- Take the time to properly sew up any seams.
- Neatly weave in any loose ends and trim excess yarn.
- Pay attention to buttonhole placement and reinforcement.
By following these tips and tricks, you can achieve a professional and polished finish for your chunky knit sweater. Remember to take your time, be patient with the process, and enjoy the journey of creating your own cozy and stylish sweater.