Knit a Beautiful Crescent Shawl with this Free Pattern

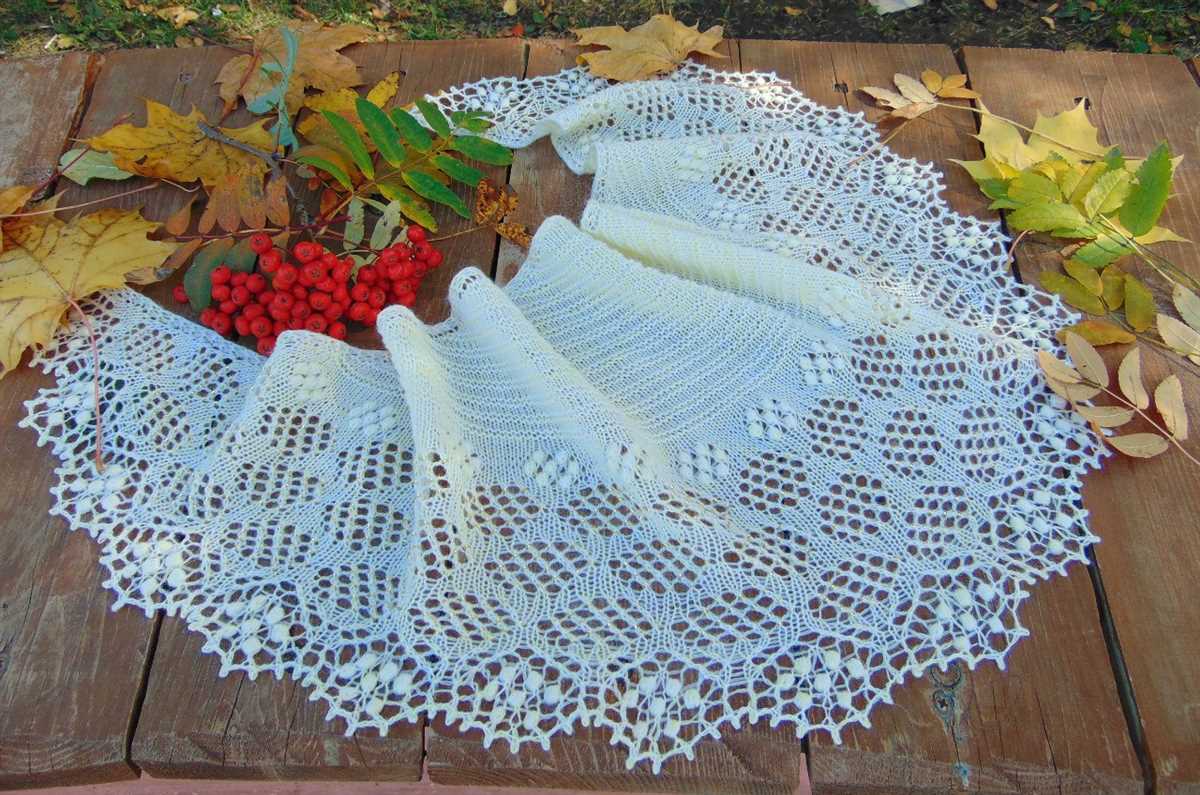
If you are a knitting enthusiast looking for a new project, we have just the thing for you – a free crescent shawl knitting pattern! Shawls are not only a stylish accessory, but they also provide warmth and comfort. The crescent shape adds an elegant touch to any outfit, making it the perfect addition to your wardrobe.
This knitting pattern is suitable for knitters of all skill levels, from beginners to advanced. With just a few basic stitches and techniques, you can create a beautiful crescent shawl that will impress everyone who sees it. Plus, since it’s a free pattern, you can enjoy the satisfaction of making something amazing without breaking the bank.
With this pattern, you can unleash your creativity by choosing your favorite yarn colors and adding personal touches. Whether you prefer a solid color for a classic look, or a variegated yarn for a more vibrant design, the possibilities are endless. You can also experiment with different stitch patterns to create unique textures and effects.
So gather your knitting needles, grab a cup of tea, and get ready to embark on a knitting adventure. Follow the step-by-step instructions in this free crescent shawl knitting pattern, and soon you’ll have a stunning accessory that will not only keep you warm, but also showcase your knitting skills. Happy knitting!
Free Crescent Shawl Knitting Pattern

If you are looking for a stylish and versatile accessory to add to your wardrobe, a crescent shawl is the perfect choice. The crescent shape provides a flattering silhouette, while the intricate knitting pattern adds a touch of elegance. Plus, the best part is that you can easily create your own crescent shawl with a free knitting pattern!
The free crescent shawl knitting pattern offers you the opportunity to showcase your knitting skills while creating a beautiful and functional accessory. The pattern typically includes detailed instructions and a list of necessary materials, such as yarn and knitting needles. It may also provide a stitch chart or written instructions for the intricate design, allowing you to personalize your shawl to suit your style.
Why choose a crescent shawl?
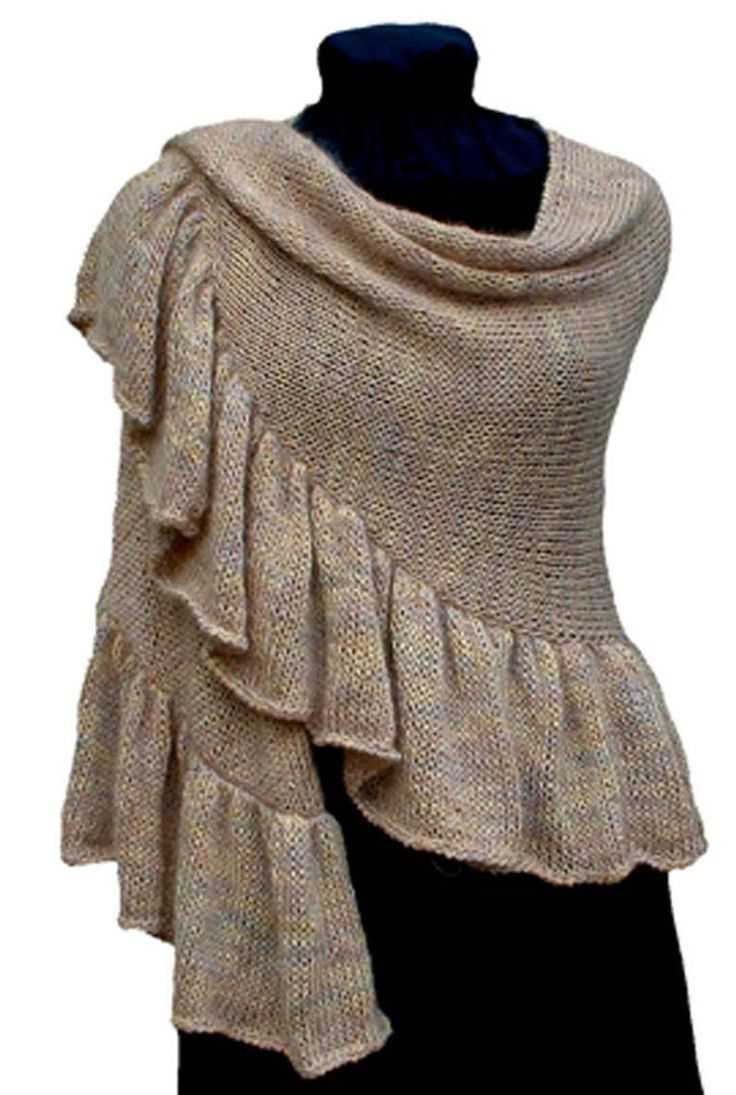
- Versatility: A crescent shawl can be worn in various ways, making it a versatile addition to any outfit. You can drape it over your shoulders as a traditional shawl, wrap it around your neck as a scarf, or wear it as a stylish accessory by pinning it in place.
- Comfort: The crescent shape is designed to provide ample coverage and warmth, allowing you to stay cozy and comfortable in any weather.
- Style: The intricate knitting pattern of a crescent shawl adds a touch of sophistication and style to any ensemble. Whether you prefer a simple lace design or a more complex cable pattern, there are countless options to choose from.
With a free crescent shawl knitting pattern, you have the freedom to create a unique and personalized accessory that reflects your own style and creativity. Whether you are a beginner or an experienced knitter, this project allows you to challenge yourself and create a stunning piece that you can wear with pride.
Choosing the Right Yarn and Needles
When it comes to knitting a free crescent shawl, choosing the right yarn and needles is essential to achieve the desired results. The type of yarn you choose will greatly impact the drape, feel, and overall appearance of your shawl.
Yarn: Opting for a yarn that is lightweight yet warm is ideal for creating a comfortable and cozy shawl. Look for yarn that has a good blend of natural fibers such as wool, silk, or alpaca. These fibers provide warmth and softness, while also allowing the shawl to drape beautifully. Additionally, consider the color of the yarn and how it will complement your overall style and wardrobe.
Needles: The size and material of the needles will also affect the final outcome of your shawl. The needle size recommended in the pattern is a good starting point, but it’s always a good idea to make a gauge swatch to ensure the correct tension. For a lacy and delicate shawl, choose needles with a sharp tip to easily work intricate stitches. If you prefer a denser fabric, opt for needles with a blunter tip. When it comes to material, bamboo or wood needles can provide better grip, while metal needles can create faster knitting.
In conclusion, selecting the right yarn and needles is crucial for creating a beautiful and well-fitting free crescent shawl. Consider the type of yarn that will provide the desired drape and warmth, and choose needles that will help you achieve the desired stitch pattern and tension. With the right materials, you’ll be on your way to knitting a stunning shawl that you’ll be proud to show off.
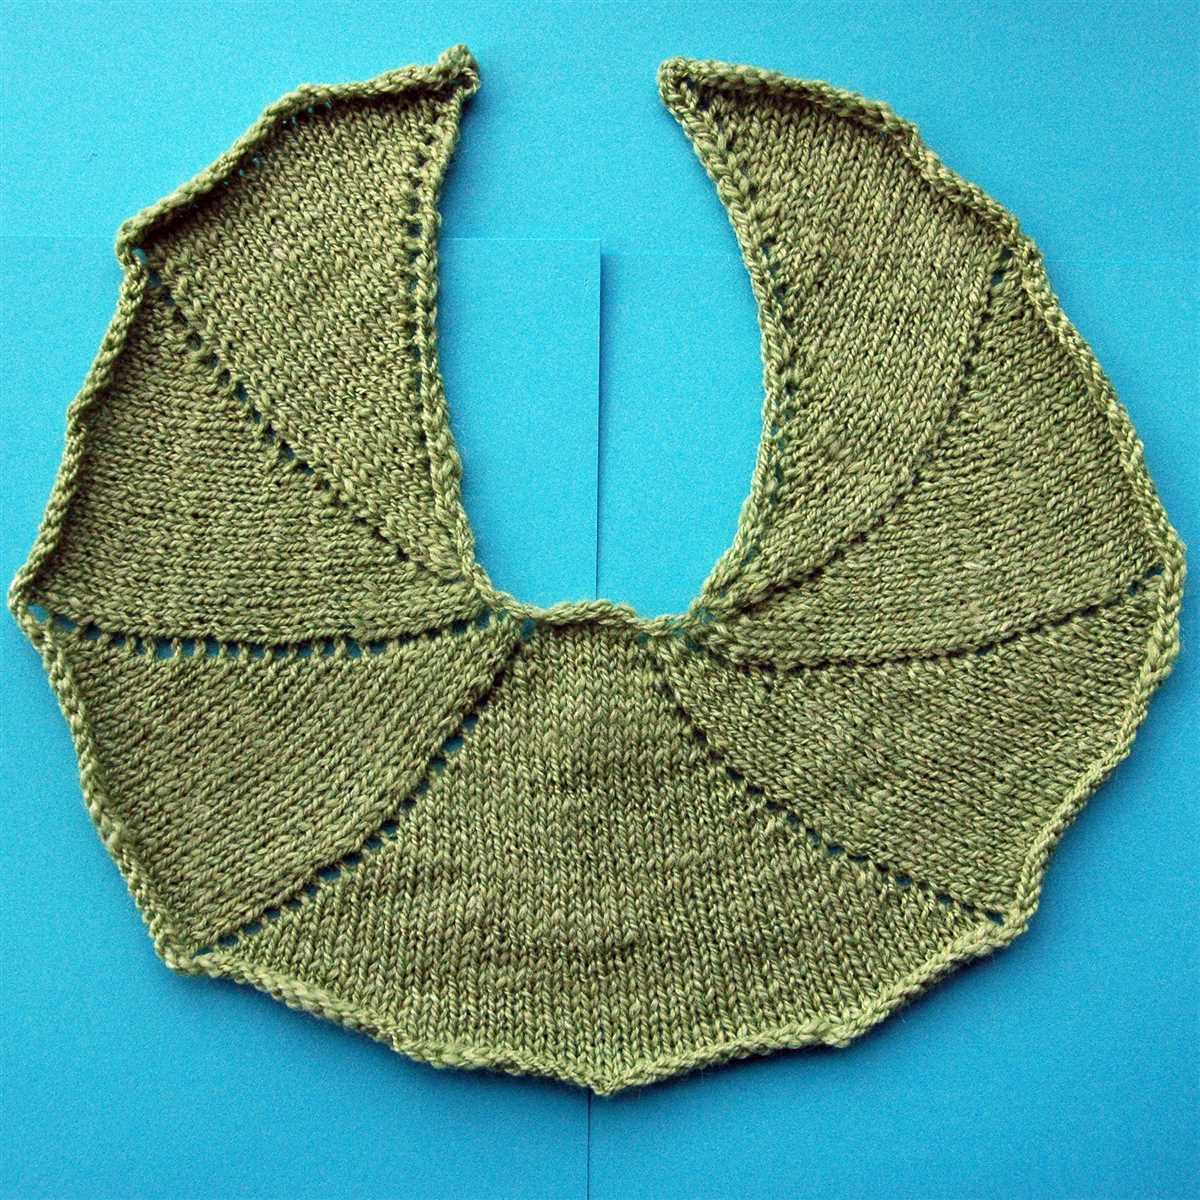
Understanding the Basic Crescent Shawl Construction

The basic crescent shawl construction is a popular choice among knitters due to its versatility and simple yet elegant design. This style of shawl is created by knitting a triangle shape and then gently curving the edges to form the crescent shape. It can be worn draped over the shoulders or wrapped around the neck for added warmth and style.
To begin knitting a basic crescent shawl, you will need to cast on a certain number of stitches, which will vary depending on the desired size and gauge of your project. Typically, a garter stitch or stockinette stitch is used for the body of the shawl, allowing the yarn to shine and the fabric to drape beautifully.
As you progress in your knitting, you will gradually decrease stitches at the beginning and end of each row. This is what gives the shawl its distinctive crescent shape. The rate of decrease can vary depending on the pattern, but a common rule of thumb is to decrease one stitch on each side every few rows.
A common technique used to create a smooth and polished edge on the crescent shape is to add a garter stitch border. This border can be added while knitting the body of the shawl or as a separate finishing touch. It not only helps to prevent curling of the fabric but also adds a decorative element to the overall design.
Once the desired size and shape of the shawl are achieved, you can bind off the stitches and block the shawl to help even out the stitches and give it a professional finish. Blocking is an important step in the process as it helps to relax the fabric and allows the stitches to open up and reveal their true beauty.
- Key Takeaways:
- – The basic crescent shawl construction involves knitting a triangle shape and curving the edges to form a crescent shape.
- – Casting on a certain number of stitches and gradually decreasing on each row creates the crescent shape.
- – Adding a garter stitch border can enhance the overall design and prevent curling.
- – Blocking the finished shawl helps to create an even and polished fabric.
Cast On and Set Up
The first step in knitting the free crescent shawl pattern is to cast on your stitches. For this pattern, you will need to cast on 199 stitches using the long-tail cast-on method or any other preferred method. Make sure to leave a long tail of yarn for later. Once your stitches are cast on, you are ready to begin the set up rows.
To set up the shawl, you will knit two rows. The first row is a right-side row, so you will knit all the stitches. This will create the foundation for the shawl. On the second row, which is a wrong-side row, you will purl all the stitches. These two set up rows will create a nice base for the main body of your shawl.
Row 1 (RS): Knit all stitches.
Row 2 (WS): Purl all stitches.
Knitting the Body of the Shawl
Once you have completed the setup and lace border of the crescent shawl, you are ready to start knitting the body. This is where the majority of the shawl is worked, creating a beautiful fabric that will drape over your shoulders.
To begin knitting the body, you will continue using the main color yarn and the same needle size that you used for the border. The body of the shawl is worked in garter stitch, which means you will knit every row. This creates a lovely texture and allows the shawl to lay flat.
As you knit the body, you may find it helpful to use stitch markers to separate sections. This can be especially helpful if you are working any pattern repeats or increases/decreases. It ensures that you stay on track and helps to keep your stitch count accurate.
Remember to periodically check your gauge as you knit the body of the shawl. This will ensure that your finished piece turns out the correct size and shape. Adjust your tension if necessary to maintain the desired measurements.
Continue knitting the body of the shawl until you have reached the desired length or until the pattern instructs you to move on to the next section. Once the body is complete, you will move on to the final steps of finishing the shawl, including binding off and blocking.
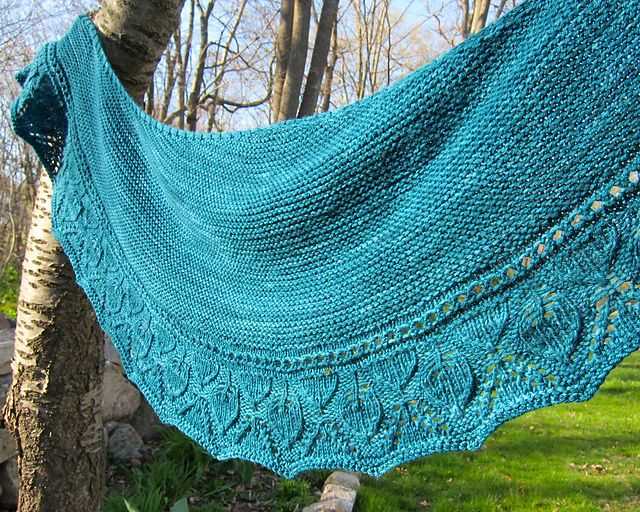
Adding Lace or Cable Patterns

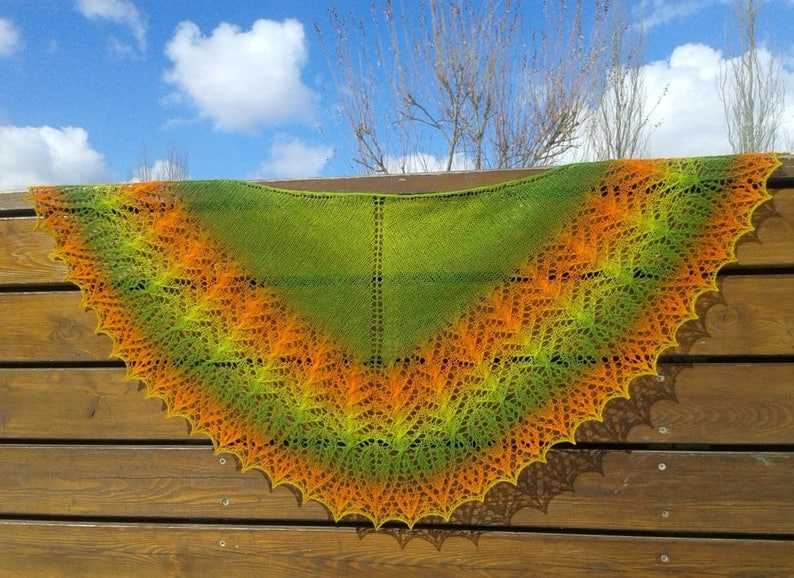
Adding lace or cable patterns to your crescent shawl can elevate the design and create a stunning finished piece. Lace patterns, with their delicate and intricate motifs, can add an elegant and feminine touch to your shawl. Cable patterns, on the other hand, can create a more textured and cozy look, perfect for colder weather.
When choosing lace or cable patterns for your crescent shawl, it’s important to consider the overall design and desired effect. Lace patterns often feature yarn overs, decreases, and intricate stitch combinations to create open and lacy motifs. These patterns can range from simple and geometric to more floral and organic designs. By incorporating lace patterns into your shawl, you can create a light and airy fabric that drapes beautifully.
Examples of Lace Patterns:
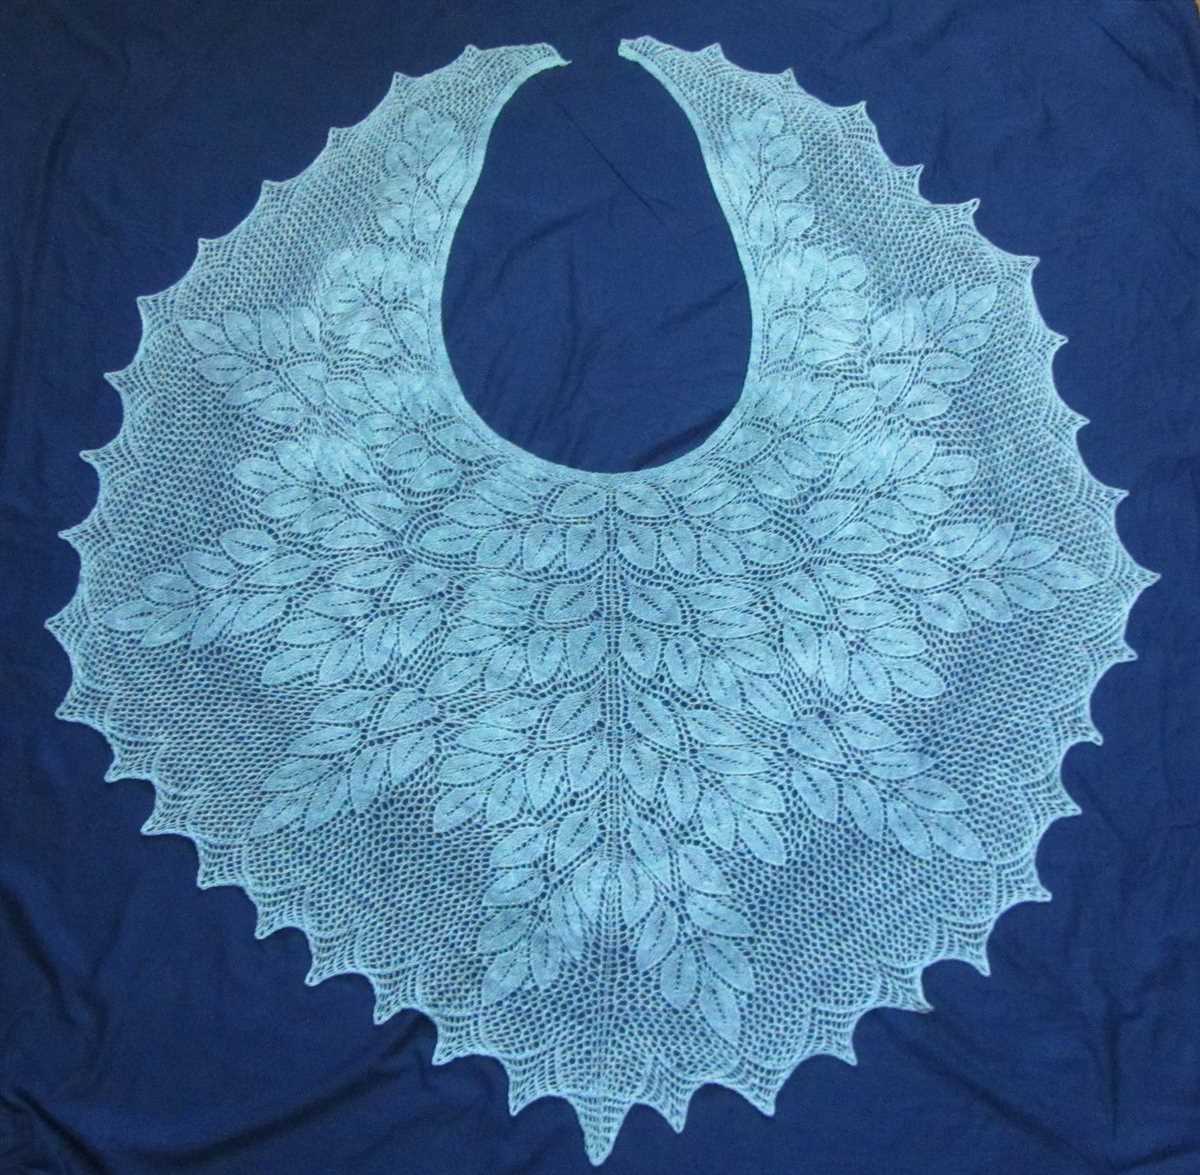
- Fern Lace: This lace pattern resembles delicate fern leaves and can add a natural and organic touch to your shawl.
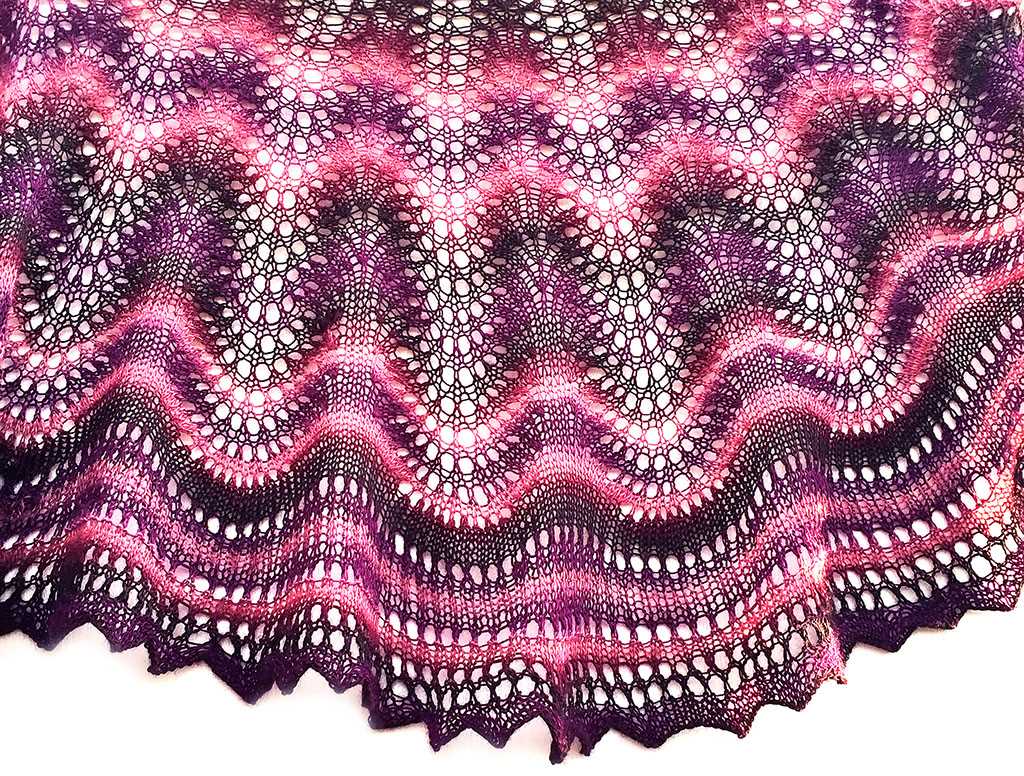
- Feather and Fan: Also known as Old Shale, this lace pattern creates a wave-like effect and adds a timeless charm to your shawl.
- Honeycomb Lace: This intricate lace pattern resembles the pattern found in honeycombs and can create a unique and eye-catching design.
Cable patterns, on the other hand, involve twisting stitches to create intricate and textured motifs. These patterns can range from simple and classic cables to more elaborate and complex designs. By adding cable patterns to your crescent shawl, you can create a cozy and warm fabric that is perfect for colder climates.
Examples of Cable Patterns:

- Braided Cable: This classic cable pattern features interlocking strands that resemble braids and can create a timeless and sophisticated look.
- Twisted Rope Cable: This cable pattern mimics the appearance of twisted ropes and adds a unique and intricate texture to your shawl.
- Openwork Cable: This cable pattern combines twisted stitches and yarn overs to create a lacy and open design that is both delicate and cozy.
Whether you choose to incorporate lace or cable patterns into your crescent shawl, the addition of these intricate designs can take your knitting project to the next level. With a variety of lace and cable patterns available, you can find the perfect motif to suit your style and create a truly beautiful and unique shawl.
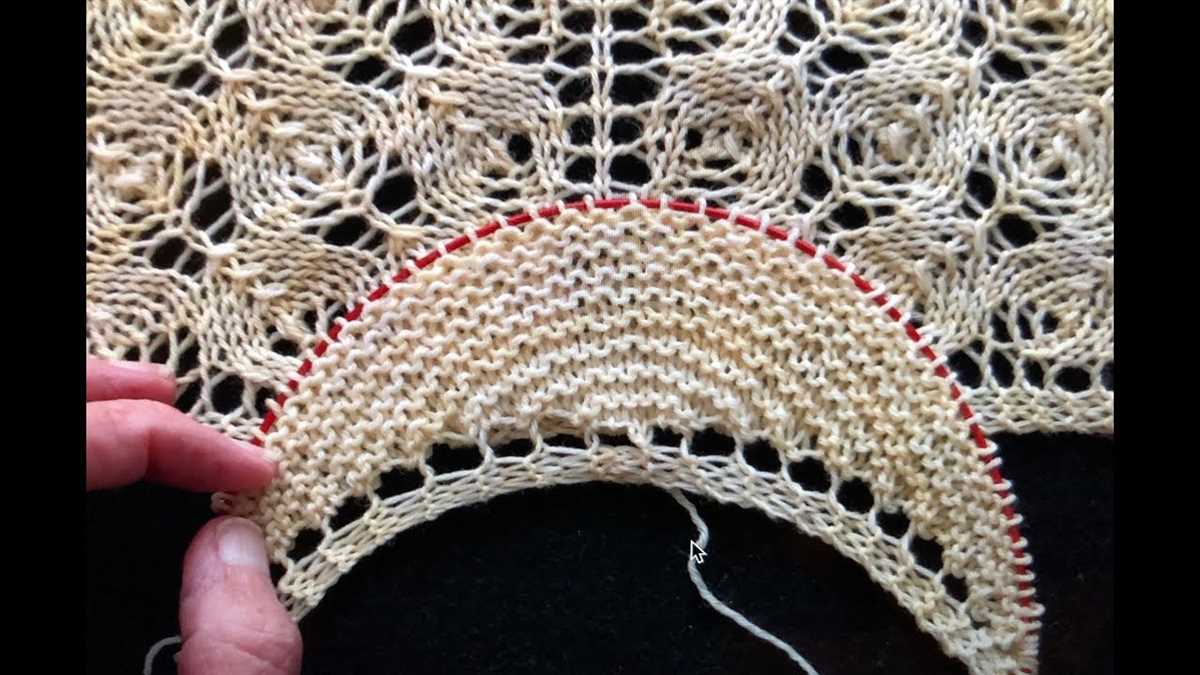
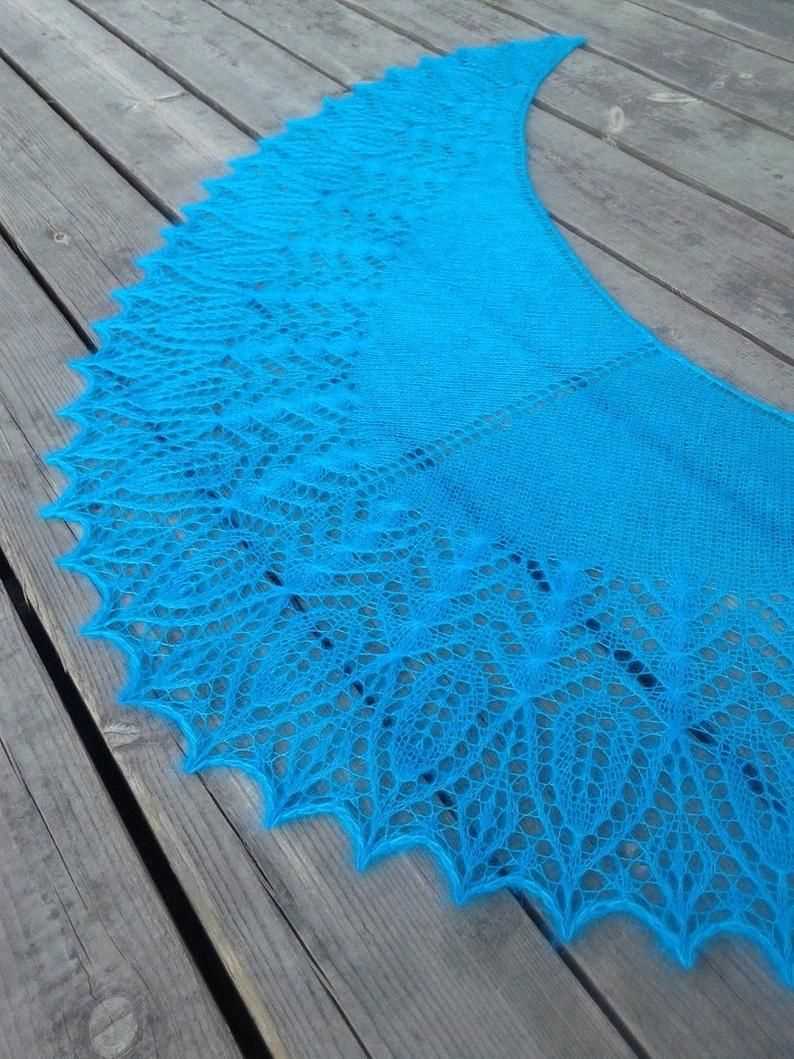
Creating the Crescent Shape
To create the crescent shape in your shawl, you will start by casting on a small number of stitches. This will form the center of the shawl, where the crescent shape will be most pronounced. As you knit each row, you will gradually increase the number of stitches in order to create the curved shape. The exact method of increasing stitches can vary depending on the specific pattern you are following, but common methods include yarn overs or make one (M1) increases.
As you continue knitting, the number of stitches will increase at a faster rate towards the edges of the shawl, while the center of the shawl remains relatively unchanged. This creates a gentle, curved shape that resembles a crescent moon. The number of stitches and the rate of increase will depend on the specific pattern, but the overall effect is a gracefully curved shawl that can be wrapped around the shoulders or worn as a scarf.
Once you have reached the desired size and shape for your crescent shawl, you will typically begin decreasing stitches to create a straight edge. This can be done through techniques such as knitting two stitches together (k2tog) or slipping one stitch knitwise, knitting the next stitch, then passing the slipped stitch over (ssk). By gradually decreasing the number of stitches, you will create a finished edge that is straight and even, allowing the shawl to drape nicely when worn.
Overall, creating a crescent shawl involves a combination of increasing and decreasing stitches to achieve the desired shape. The exact techniques and stitch patterns can vary, but the result is a beautiful and versatile accessory that can be worn in a variety of ways.
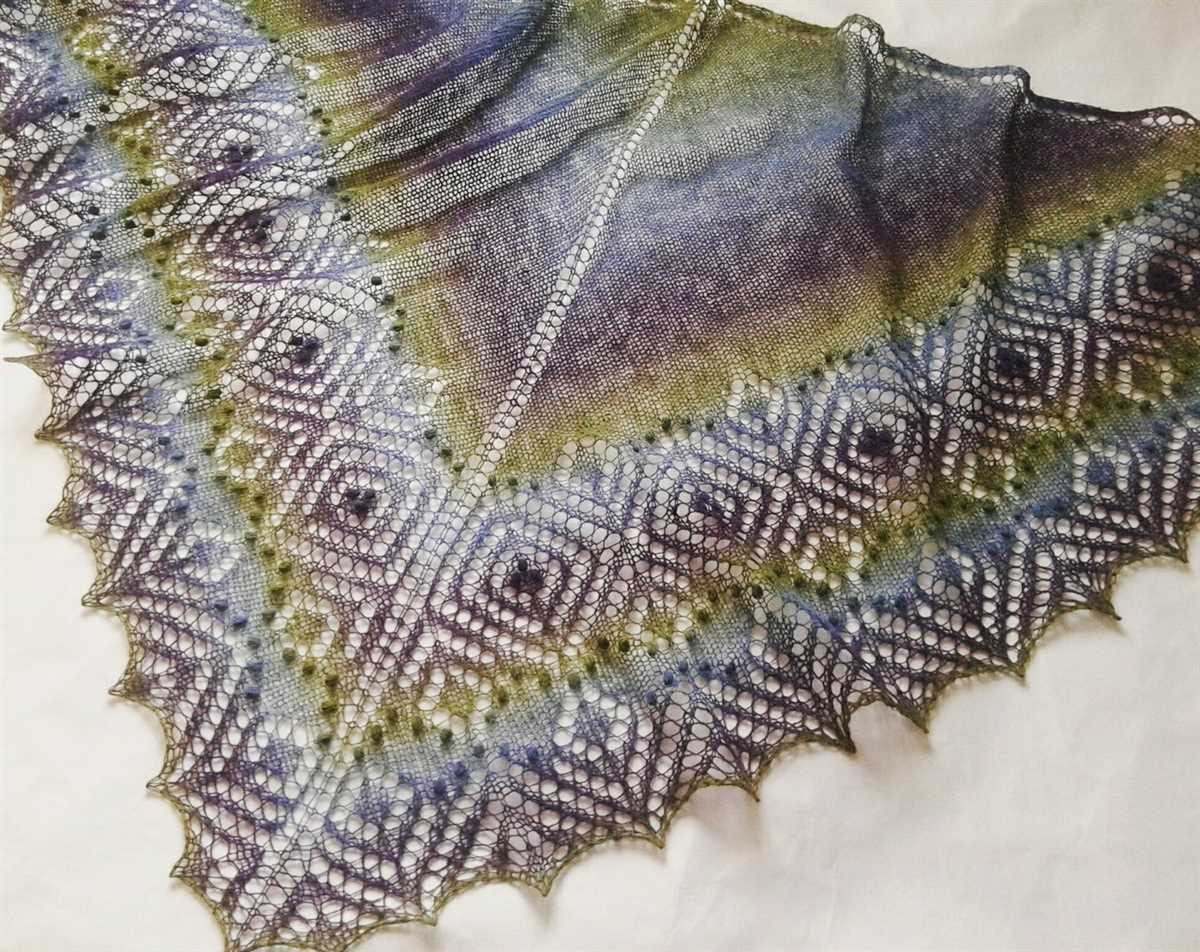
Shaping the Border
The border of a crescent shawl is an important aspect of the design. It adds a decorative element and helps to frame the shawl when worn. There are several different ways to shape the border, depending on the desired effect and the skill level of the knitter.
1. Lace Border: One popular option for shaping the border of a crescent shawl is to incorporate a lace pattern. Lace adds an elegant and delicate look to the shawl and can be created using a variety of stitches, such as yarn overs and decreases. Knitters with intermediate to advanced skills may enjoy the challenge of working with lace and creating intricate designs.
2. Garter Stitch Border: For a simpler and more classic look, a garter stitch border can be used. Garter stitch is created by knitting every row and produces a textured fabric with a lot of stretch. This type of border is great for beginner knitters or for those who prefer a more minimalist style.
3. Ribbing Border: Another option for shaping the border is to use ribbing. Ribbing is created by alternating knit and purl stitches and produces a stretchy and flexible fabric. This type of border is great for adding some visual interest and can be easily adjusted to create different widths.
4. Textured Border: If you’re looking for a unique and eye-catching border, consider incorporating textured stitches. This can include bobbles, cables, or other stitch patterns that create a three-dimensional effect. Knitters with intermediate to advanced skills may enjoy experimenting with different textured stitches to create a one-of-a-kind border.
Overall, shaping the border of a crescent shawl allows knitters to customize the design and create a finished piece that suits their individual style. Whether you choose a lace, garter stitch, ribbing, or textured border, the border can enhance the overall look of the shawl and add that extra touch of detail and sophistication.
Binding Off
Binding off is the final step in completing your crescent shawl. It is the process of finishing the edge of your knitting project to prevent it from unraveling. Here are some key steps to follow when binding off your crescent shawl.
1. Knit the first two stitches
To begin binding off, knit the first two stitches as you normally would.
2. Pass the first stitch over the second stitch
Insert your left needle into the first stitch on the right needle and then lift it up and over the second stitch, dropping it off the needle. You will now have one stitch on your right needle.
3. Knit the next stitch
Knit the next stitch on the left needle as usual.
4. Repeat steps 2 and 3
Continue to pass the first stitch over the second stitch and knit the next stitch until you have bound off all the stitches on your needle. Make sure to keep your tension consistent throughout this process.
5. Cut the yarn and pull it through the final stitch
Once you have completed binding off all the stitches, cut the yarn, leaving a tail of several inches. Thread the tail through the final stitch and pull it tight to secure the edge.
Binding off is an essential skill to master in knitting, as it gives your project a clean and finished look. With these steps, you can confidently bind off your crescent shawl and showcase your knitting skills!
Blocking and Finishing
Blocking is a crucial step in finishing your crescent shawl to achieve the desired shape and drape. It involves wetting the knitted piece and shaping it while it dries. This helps to even out the stitches, open up lace patterns, and give the shawl its final dimensions.
To block your crescent shawl, start by filling a basin or sink with lukewarm water and adding a small amount of wool wash or gentle detergent. Gently submerge the shawl in the water, making sure it is fully saturated. Let it soak for about 15-20 minutes, then carefully remove it from the water, taking care not to wring or twist it.
Next, you will need to lay the shawl out on a clean, dry surface. Use rustproof pins or blocking wires to pin the shawl into shape. Start with the center of the shawl and work your way out, carefully stretching and pinning the edges. Pay special attention to the points of the crescent shape and any lace motifs to ensure they are well defined.
Once the shawl is pinned into shape, allow it to dry completely. This can take anywhere from a few hours to a day or two, depending on the humidity in your area. Avoid moving or disturbing the shawl while it dries to maintain its shape. Once it is fully dry, carefully remove the pins or blocking wires.
To finish your crescent shawl, weave in any loose ends using a yarn needle. Trim any excess yarn if necessary. Give the shawl a final inspection to ensure all stitches are secure and the shawl is ready to be worn or gifted.
Variations and Customizations
The free crescent shawl knitting pattern offers endless opportunities for customization. Once you have mastered the basic pattern, you can experiment with different yarns, colors, and stitch patterns to create a shawl that reflects your personal style. Here are some ideas for variations and customizations:
1. Yarn choices:
Try using different types of yarn to achieve different effects. For a lightweight shawl, choose a lace-weight yarn. For a cozy and warm shawl, opt for a bulky or chunky yarn. You can also experiment with variegated yarns to add interesting color patterns to your shawl.
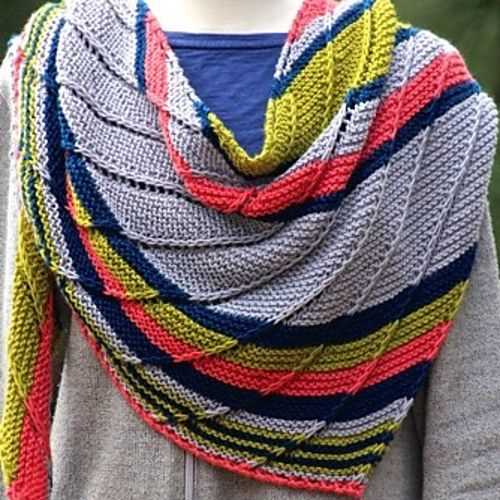
2. Color combinations:
Play with color combinations to create unique and eye-catching shawls. Choose contrasting colors for bold and striking shawls, or opt for complementary colors for a harmonious and delicate look. You can also create gradient effects by using different shades of the same color.
3. Stitch patterns:
Add texture and interest to your shawl by incorporating different stitch patterns. You can experiment with lace stitches, cables, bobbles, or any other stitch pattern you like. Mix and match different stitch patterns to create a truly one-of-a-kind shawl.
4. Embellishments:
Add extra flair to your shawl by including embellishments such as beads, ribbon, or embroidery. These small details can take your shawl to the next level and make it even more unique and special.
With these variations and customizations, you can create a crescent shawl that is truly your own. Let your creativity shine and enjoy the process of creating a beautiful and personalized accessory.