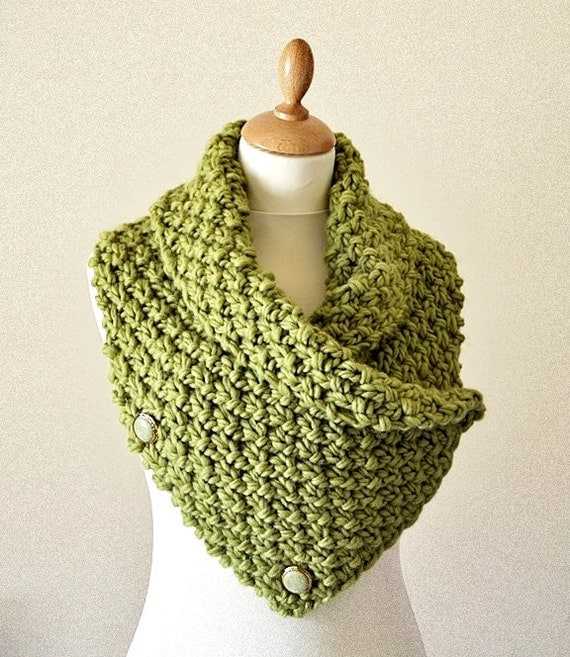
Cozy Neck Warmer Knitting Pattern

Knitting is a wonderful hobby that allows you to create beautiful and functional items with just a pair of needles and some yarn. One such item that is perfect for the colder months is a neck warmer. A neck warmer is a shorter version of a scarf that sits snugly around the neck, providing warmth and protection from the cold.
If you are new to knitting or looking for a quick and easy project, we have a free knitting pattern for a neck warmer that you can try. This pattern is suitable for beginners and can be completed in just a few hours. With this pattern, you can make a stylish and cozy neck warmer to keep yourself or a loved one warm during the chilly winter months.
To get started, you will need some bulky weight yarn in a color of your choice and a pair of size 10 knitting needles. The pattern uses a simple rib stitch, which is beginner-friendly and creates a stretchy and comfortable fabric. The neck warmer is knit in a flat panel and then sewn together at the ends.
With this free knitting pattern, you can create a neck warmer that is not only practical but also a fashionable accessory. Whether you wear it with your winter coat or as a statement piece with a cozy sweater, a neck warmer is a versatile and stylish addition to any outfit. So grab your needles and yarn and start knitting your very own neck warmer today!
Knitting Pattern for Neck Warmer: Stay Warm and Stylish

Are you tired of feeling cold during the winter months? Do you want to stay warm and stylish at the same time? Look no further than this free knitting pattern for a neck warmer. With this pattern, you can create a cozy and fashionable accessory that will keep you nice and toasty when the temperature drops.
Materials Needed:
- Chunky weight yarn (about 100-150 grams)
- Size 10 knitting needles
- Tapestry needle
- Scissors
Instructions:
- Cast on 50 stitches.
- Knit in garter stitch (knit every row) for 10 inches.
- Bind off all stitches.
- Sew the two ends of the knitted piece together using the tapestry needle.
- Weave in any remaining yarn ends.
This simple knitting pattern is perfect for beginners and experienced knitters alike. The chunky weight yarn will provide extra warmth, and the garter stitch pattern gives the neck warmer a nice texture. You can customize the size of the neck warmer by adjusting the number of stitches you cast on and the length you knit. You can also experiment with different yarn colors to create a unique accessory that matches your personal style.
Once you’ve finished knitting your neck warmer, you can pair it with a winter coat, sweater, or even a dress for a chic and cozy look. This accessory is not only practical but also a fashionable addition to any outfit.
Choosing the Right Yarn and Needles
When it comes to knitting a neck warmer, choosing the right yarn and needles is essential for achieving the desired result. The yarn you select will determine the warmth, softness, and overall appearance of your neck warmer, while the needles you use will affect the gauge and drape of the finished piece.
Yarn: When choosing yarn for your neck warmer, consider both the fiber content and the weight. For a cozy and warm neck warmer, opt for a yarn that contains natural fibers such as wool or alpaca. These fibers have excellent thermal properties and will provide the necessary insulation against cold weather. Additionally, natural fibers tend to have better stitch definition, which means that your knitted pattern will stand out more clearly. As for the weight, consider the thickness of the yarn and the desired thickness of your neck warmer. Bulky or chunky weight yarns will create a thicker and warmer neck warmer, while lighter weight yarns will result in a more delicate and lightweight piece.
Needles: The size and material of your knitting needles will affect the tension and drape of your neck warmer. The size of the needles will determine the gauge of your knitting, which is especially important if you are following a specific pattern. Be sure to check the recommended gauge and adjust your needle size accordingly to achieve the correct measurements. Additionally, the material of the needles can affect how the yarn slides and interacts with the needles. Metal or aluminum needles tend to be slicker, making them suitable for faster knitting, while wooden or bamboo needles provide more grip and can make the knitting process slightly slower but more controlled. Experimenting with different needle sizes and materials can help you find the perfect combination for your specific project.
By carefully considering the yarn and needles for your neck warmer, you can ensure that your finished piece is both functional and visually appealing. Take the time to explore different options and make swatches to see how the yarn and needles work together before diving into your project. With the right materials, you’ll be on your way to creating a beautiful and cozy neck warmer.
Getting Started: Casting On
Before you begin knitting your neck warmer, you will need to cast on the stitches. Casting on is the first step in any knitting project, and it creates the foundation row of stitches that you will work with.
There are several methods you can use to cast on your stitches, but one of the most common methods for beginners is the long-tail cast on. To begin, you will need to estimate the amount of yarn you will need for your desired number of stitches. This can be done by measuring out a length of yarn about three times the width of your neck warmer.
To perform the long-tail cast on, start by creating a slipknot at the end of your yarn. Slide this loop onto one of your knitting needles, making sure to leave a tail that is long enough to account for all of your stitches. Then, hold the tail of the yarn in your left hand and the working yarn (the yarn attached to the ball) in your right hand.
Next, bring the knitting needle with the slipknot in your right hand behind the yarn held in your left hand. Reach over the yarn with the needle and grab the working yarn with the needle, pulling it through the loop of the slipknot. This will create a new loop on your needle.
Continue this process, inserting the needle behind the yarn held in your left hand, grabbing the working yarn with the needle, and pulling it through the loop on your needle. Each time you do this, a new loop is added to your needle. Repeat this process until you have the desired number of stitches on your needle, keeping in mind the width of your neck warmer.
Once you have cast on all of your stitches, you can begin knitting the first row of your neck warmer following the pattern instructions. Remember to keep the tension of your stitches even and consistent to ensure a smooth and professional-looking finished product.
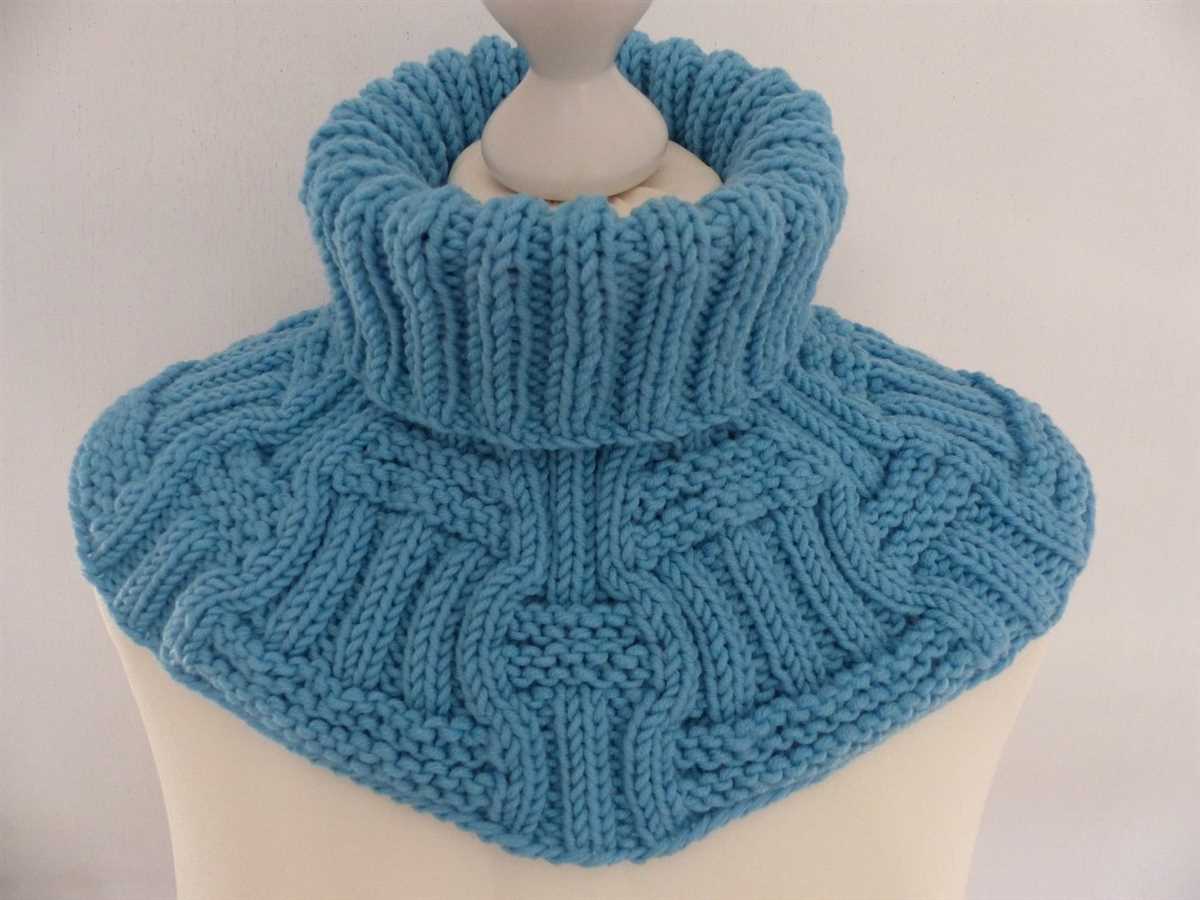
Creating the Ribbed Pattern
When knitting a neck warmer, one popular pattern choice is the ribbed pattern. This pattern creates a stretchy and textured fabric that is perfect for keeping your neck warm and cozy.
To start, you will need to cast on an odd number of stitches. This allows for the ribbing pattern to be created by alternating knit and purl stitches. For example, you might cast on 27 stitches for a narrower neck warmer or 35 stitches for a wider one.
Once you have cast on the desired number of stitches, begin the first row of the ribbed pattern by knitting the first stitch. Then, purl the next stitch. Continue this knit-purl pattern until you reach the end of the row.
For the second row, you will want to purl the first stitch and then knit the next stitch. Repeat this pattern until the end of the row.
This alternating pattern of knit and purl stitches creates the ribbed effect. It is important to maintain consistency throughout the project to ensure a neat and uniform pattern.
Continue alternating the knit and purl stitches for each row until the neck warmer reaches the desired length. Typically, a neck warmer is around 15-18 inches long, but you can adjust the length to your personal preference.
Increasing for Size and Fit
When knitting a neck warmer, it is important to ensure a proper fit for the wearer. One way to achieve this is by increasing the number of stitches in the pattern. By adding more stitches, the neck warmer will have a larger circumference and will fit snugly around the neck.
To increase for size and fit, you can use different methods such as yarn overs or make one (m1) increases. Yarn overs create an eyelet or decorative hole in the knitted fabric, while m1 increases create a new stitch without leaving a hole.
Yarn Overs:
- Before beginning the next row, bring the yarn to the front of the work.
- Knit into the next stitch as usual.
- Continue knitting the rest of the row.
- On the following row, the yarn over will appear as a new stitch, which can be worked as normal.
Make One (M1):
- Insert the left needle from front to back under the horizontal strand between the last stitch worked and the next stitch on the left needle.
- Knit through the back loop of this strand.
- Continue knitting the rest of the row.
- The m1 increase will create a new stitch, which can be worked as normal on the following rows.
By incorporating these increasing techniques into your knitting project, you can easily customize the size and fit of your neck warmer to ensure it is comfortable and stylish for the wearer.
The Main Knitting Pattern
When knitting a neck warmer, there are a few key elements that make a successful garment. The main knitting pattern is one of the most important aspects of creating a functional and stylish neck warmer.
The main knitting pattern determines the overall look and texture of the neck warmer. It can be simple or complex, depending on the desired outcome and skill level of the knitter. One popular option is the ribbed pattern, which creates a stretchy and flexible fabric.
To start the main knitting pattern, cast on the desired number of stitches. For a snug fit, it’s recommended to use a smaller needle size than what is suggested on the yarn label. This will create a tighter and warmer fabric. Once the stitches are cast on, begin working the pattern as instructed.
The main knitting pattern can be a combination of different stitches and techniques. For example, the pattern may call for alternating between knit and purl stitches to create a ribbed effect. It may also include increases and decreases to shape the neck warmer and add visual interest.
When working the main knitting pattern, it’s important to pay attention to gauge. Gauge refers to the number of stitches and rows per inch of fabric. It ensures that the neck warmer will fit properly and have the right amount of stretch. If the gauge is too tight or loose, adjust the needle size accordingly.
Overall, the main knitting pattern is the foundation of a well-crafted neck warmer. It sets the tone for the entire project and determines the final outcome. With the right pattern and attention to detail, knitters can create beautiful and functional neck warmers for themselves or as gifts.
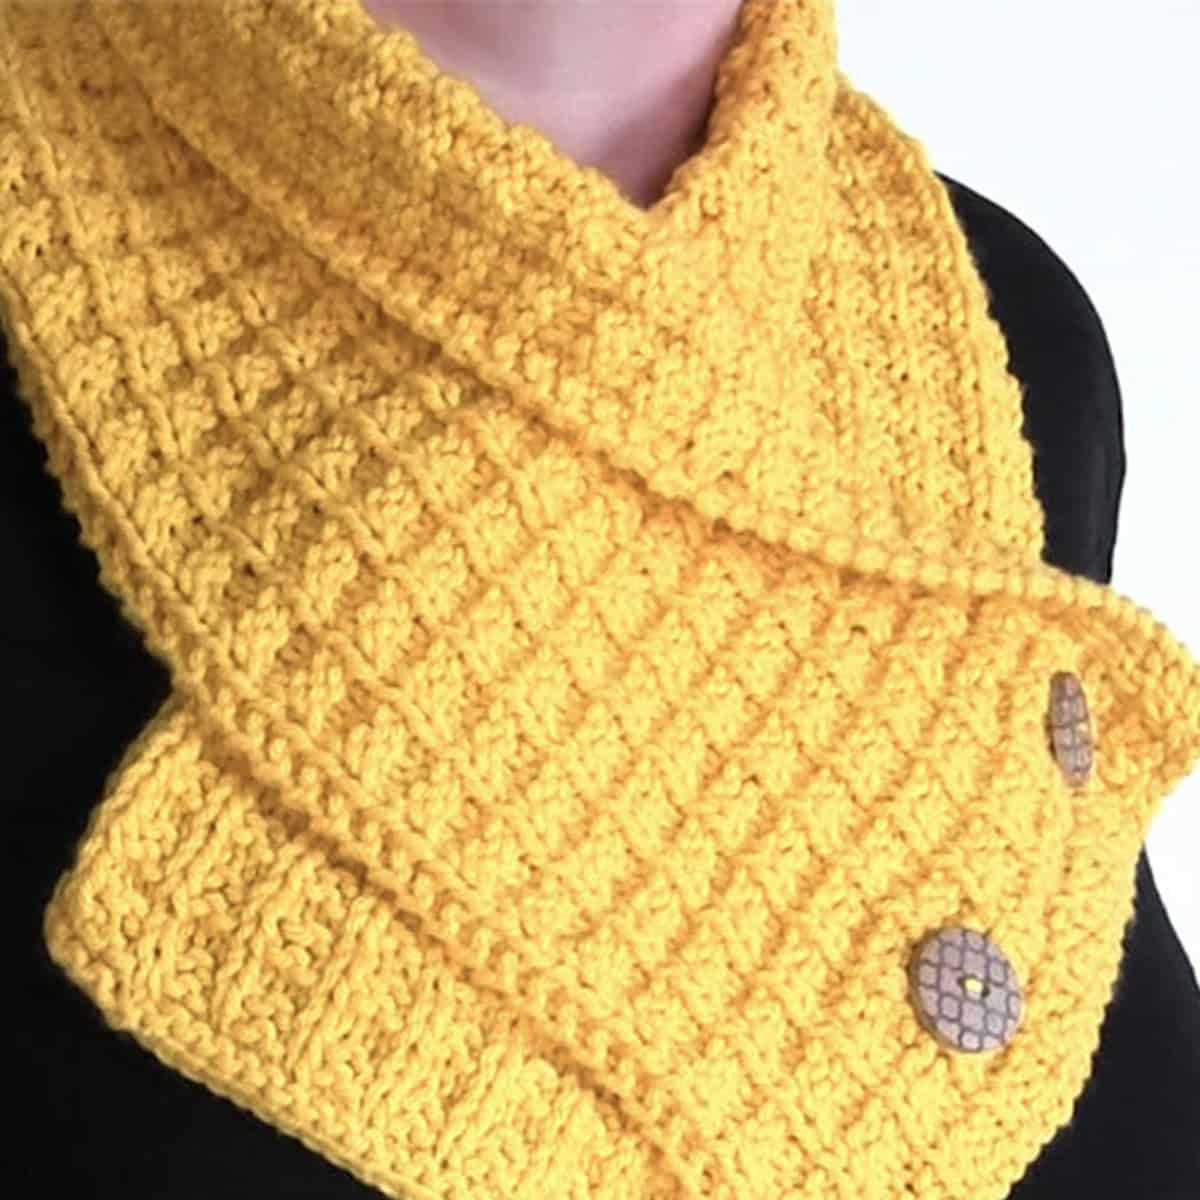
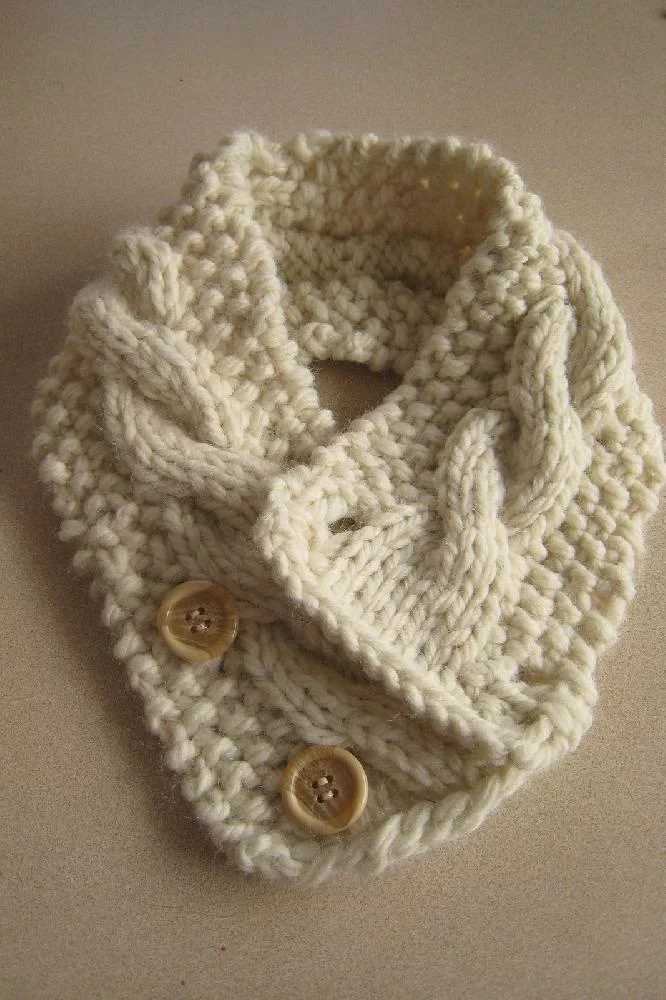
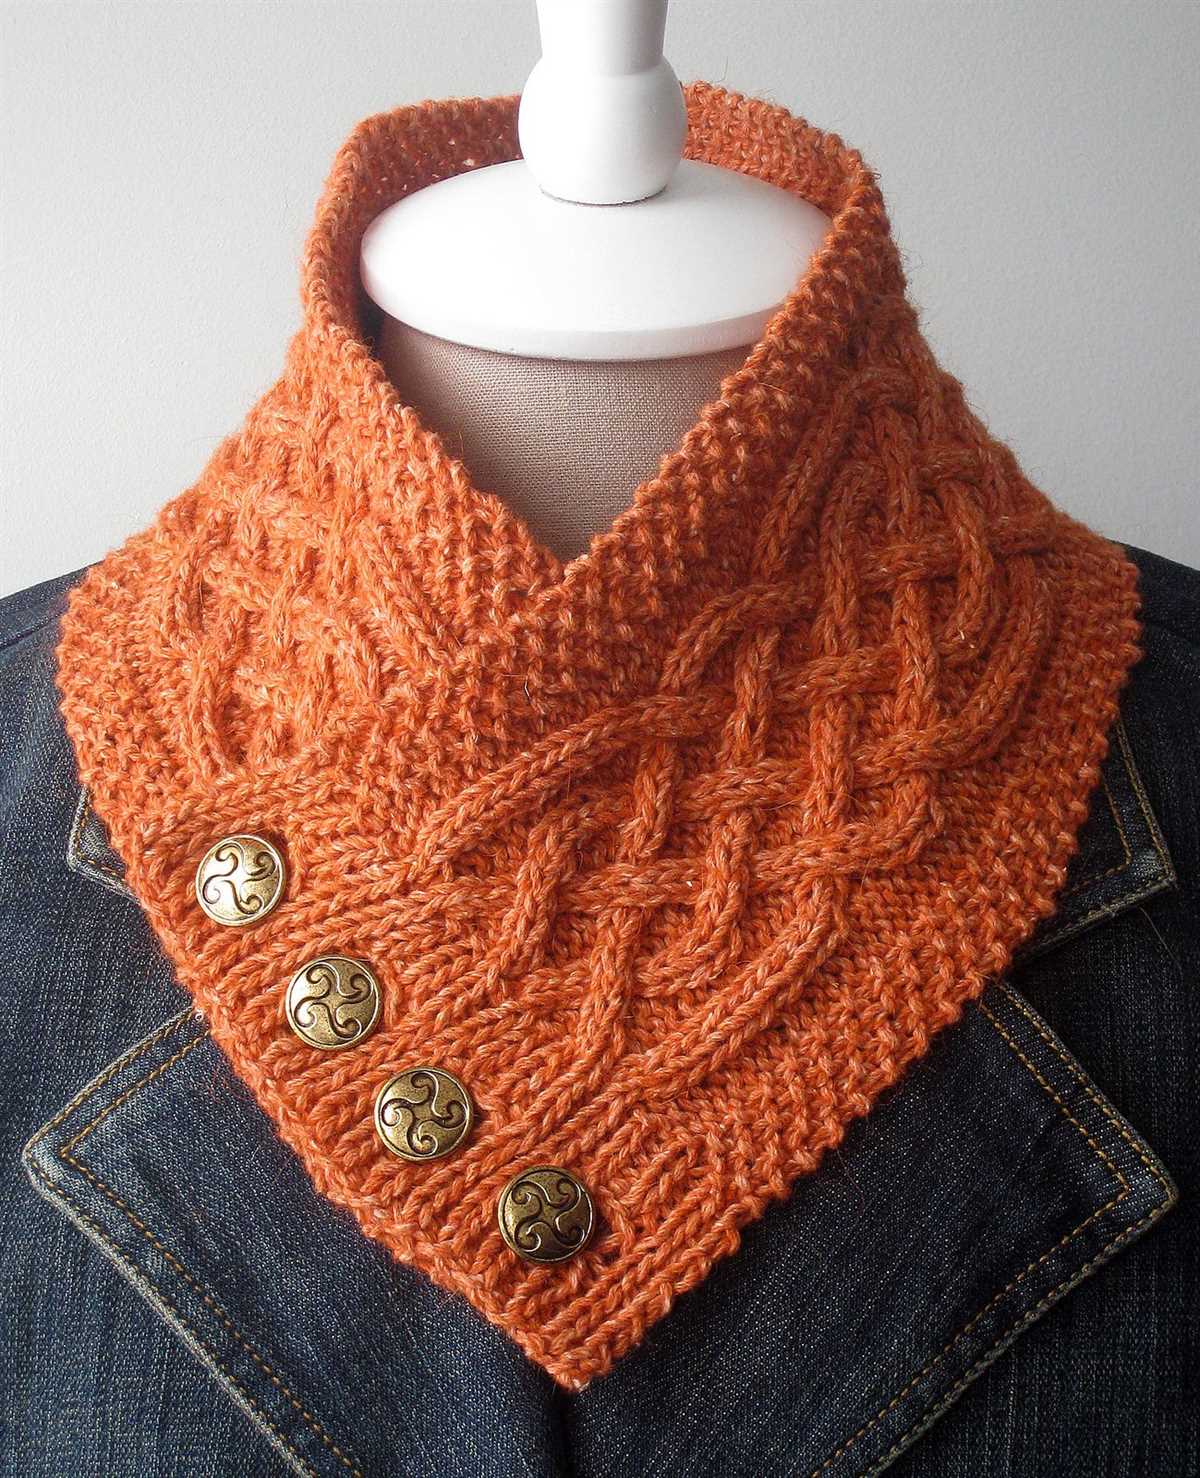
Adding Decorative Stitches
If you want to add some flair to your neck warmer, consider incorporating decorative stitches into your knitting pattern. These stitches can add texture, visual interest, and a unique touch to your finished piece.
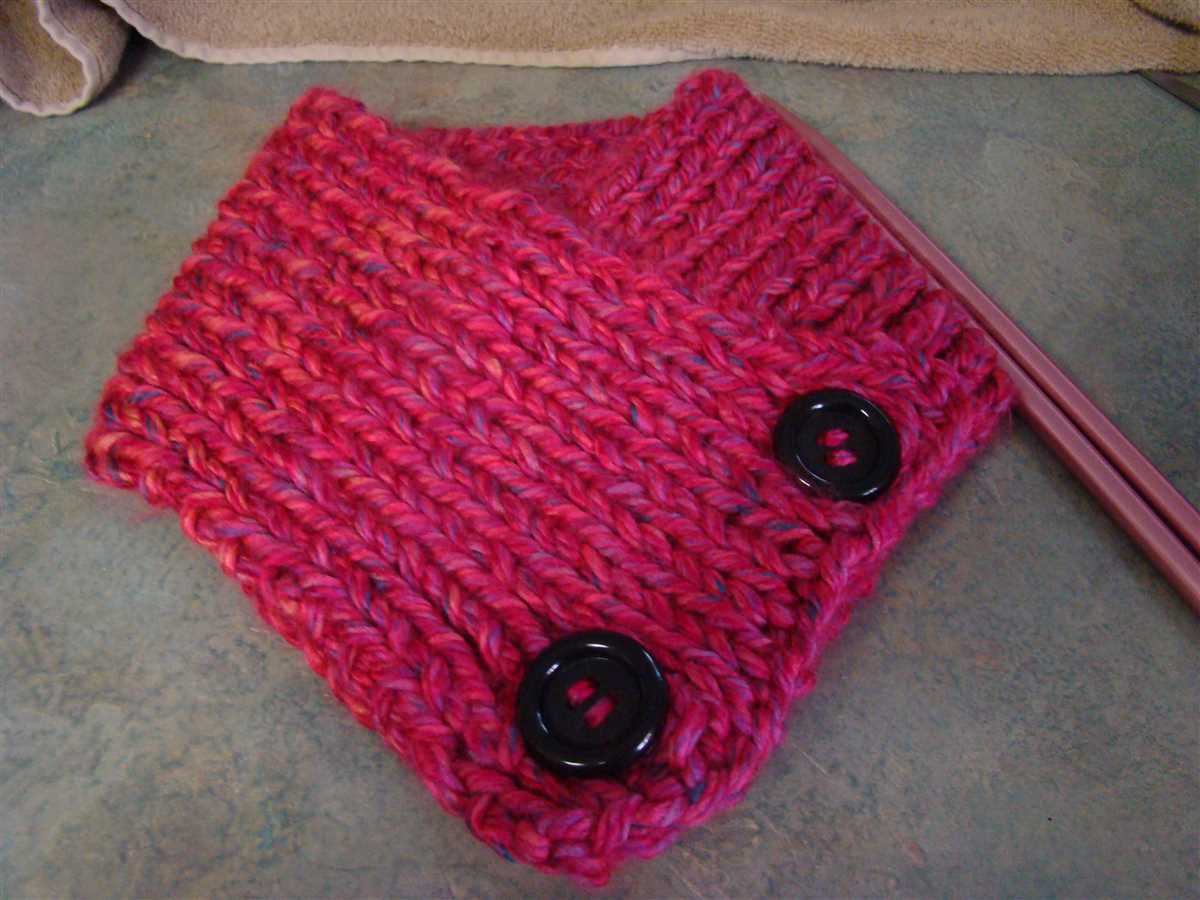
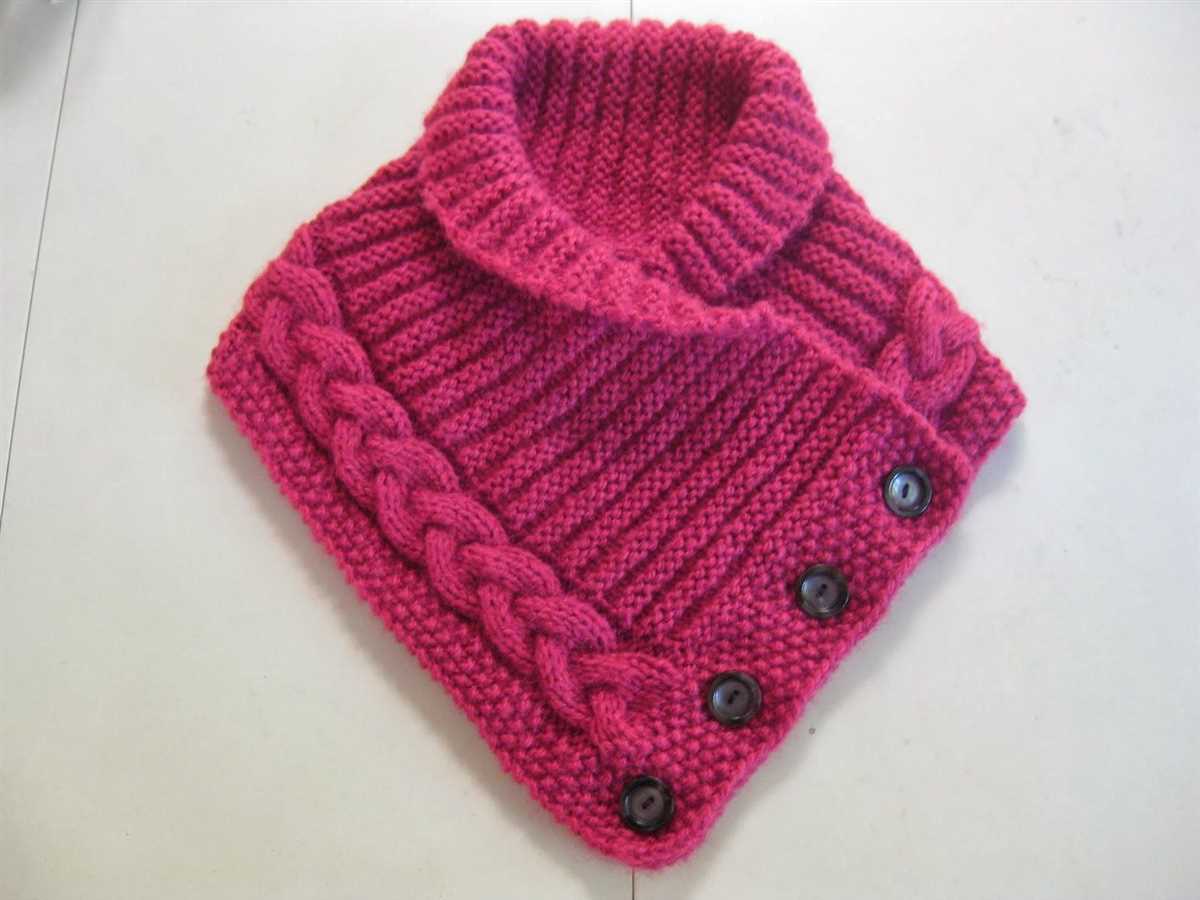
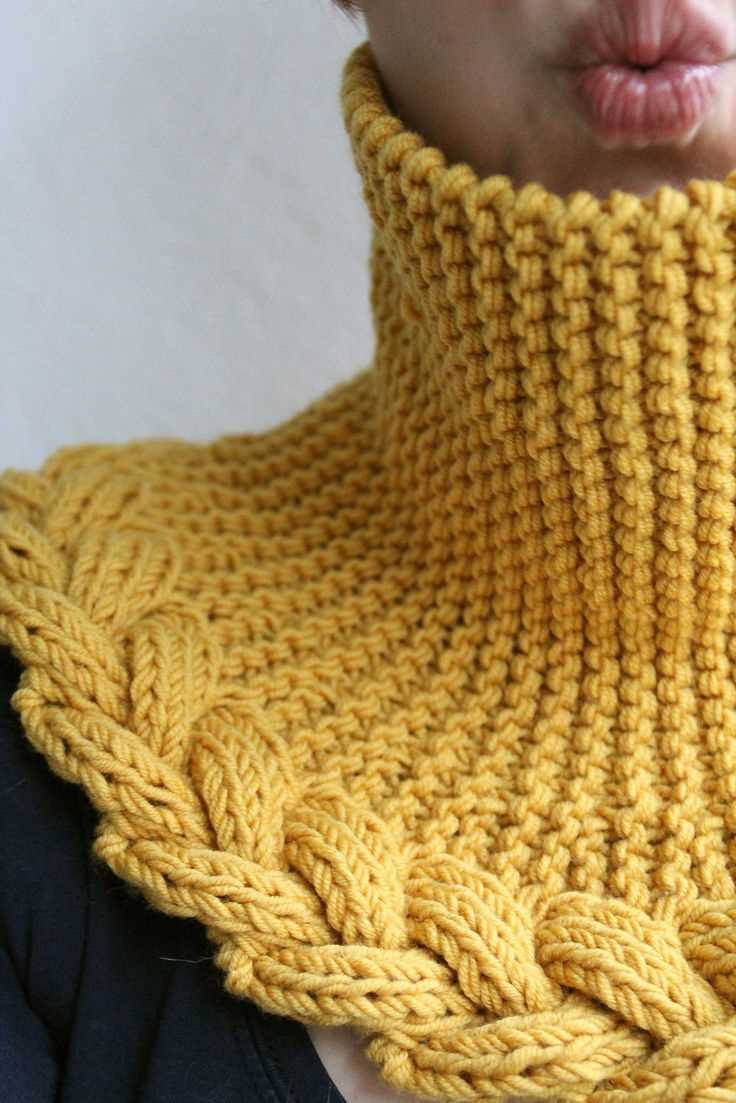
One option is to incorporate cables into your pattern. Cables are created by crossing stitches over each other, creating a twisted or braided effect. You can choose from a variety of cable patterns, such as simple twists or more intricate designs. Adding cables to your neck warmer can give it a stylish and sophisticated look.
Another option is to include lace stitches in your pattern. Lace stitches are created by making deliberate yarn overs and decreases, resulting in an open and delicate pattern. You can use lace stitches to create intricate motifs or a more subtle, dainty pattern. Adding lace stitches to your neck warmer can give it a feminine and elegant touch.
Alternatively, you can experiment with different textured stitches, such as ribbing, seed stitch, or moss stitch. These stitches can add depth and dimension to your neck warmer, making it more visually appealing. You can use these stitches throughout the entire piece or strategically place them in specific sections.
Overall, adding decorative stitches to your neck warmer allows you to personalize your project and make it truly unique. Whether you choose cables, lace stitches, or textured stitches, these additions can elevate your knitting pattern and create a stylish and eye-catching accessory.
Shaping the Neck Warmer
When knitting a neck warmer, it’s important to shape it correctly so that it sits comfortably on the neck and provides the desired coverage. Here are some key steps to consider when shaping your neck warmer:
1. Start with a provisional cast on
Using a provisional cast on method, such as the crochet chain method or the long tail method, allows you to easily pick up stitches later for a neat and seamless finish. This is especially important when knitting a neck warmer, as you want smooth edges that won’t rub against the skin.
2. Work ribbing for a snug fit

Ribbing is great for providing a stretchy and snug fit around the neck. You can choose to work a simple 1×1 rib (knit 1, purl 1) or a 2×2 rib (knit 2, purl 2) depending on your preference. Ribbing also adds texture and visual interest to the neck warmer.
3. Shape the neck gradually

To shape the neck, you’ll need to gradually decrease stitches at the center of the neck warmer. This can be done by knitting two stitches together (k2tog) or by using other decrease techniques such as slip-slip-knit (ssk). The number of decrease rows and the frequency of decreases will depend on the pattern and desired fit.
4. Check the fit as you go
As you work on shaping the neck, it’s important to periodically try on the neck warmer to ensure the fit is correct. You can use stitch markers to mark the center of the neck and the sides. This way, you can easily see if the decreases are in the right place and if any adjustments need to be made.
5. Finish with a tidy bind off
Once you have completed the shaping and are happy with the fit, it’s time to bind off. Choose a bind off method that is stretchy but secure, such as the traditional bind off or the stretchy bind off. Make sure to bind off loosely to avoid any discomfort or tightness around the neck.
Finishing Off: Binding Off
Binding off is the final step in completing your knitted neck warmer. It involves securing the live stitches, or loops, at the end of your knitting so that they don’t unravel. There are several methods for binding off, but the basic technique involves knitting two stitches, then passing the first stitch over the second stitch and off the needle. This process is repeated until only one stitch remains, which is then cut and the tail is pulled through the final loop to secure it.
One common method of binding off is the standard bind off, also known as the basic bind off. To do this, knit the first stitch, then knit the second stitch. Using the left needle, lift the first stitch over the second stitch and off the right needle. Repeat this process, knitting one stitch, then passing the previous stitch over, until only one stitch remains. Cut the yarn, leaving a tail, and pull the tail through the final loop to secure it.
Another option is the stretchy bind off, which is ideal for neck warmers as it provides more flexibility and ensures a comfortable fit. This method is similar to the standard bind off, but involves knitting two stitches together, then passing the previous stitch over the knit stitch and off the needle. The process is repeated until only one stitch remains, which is then cut and the tail is pulled through the final loop.
When binding off, it’s important to remember to keep your tension loose so that the edge doesn’t become too tight or constricting. This will ensure that your neck warmer drapes nicely and is comfortable to wear. Take your time and practice the binding off method that works best for you to achieve the desired result.
Overall, binding off is a crucial step in finishing your knitted neck warmer. It ensures that your stitches are secure and prevents any unraveling. By choosing the appropriate bind off method and maintaining a loose tension, you can complete your neck warmer with a professional and polished finish. Happy knitting!
Seaming the Edges
To finish your neck warmer, you will need to seam the edges together. This will create a loop that you can easily slip over your head. Here is a step-by-step guide to help you seam the edges of your neck warmer:
- Thread your needle: Start by threading a yarn needle with a length of yarn that matches the color of your neck warmer.
- Align the edges: Place the two edges of your neck warmer together, ensuring that the right sides are facing each other. This will hide the seam once it’s finished.
- Insert the needle: Insert the needle under the first stitch on one edge, going from the back to the front. Pull the yarn through, leaving a small tail.
- Stitch the edges: Begin stitching the edges together using a whip stitch. Take the needle under the next stitch on the opposite edge, then bring it back over the top and under the next stitch on the first edge. Repeat this process until you have stitched the entire length of the edges together.
- Tie off the yarn: Once you reach the end of the edges, secure the yarn by tying it in a double knot. Trim any excess yarn.
By following these steps, you will be able to seam the edges of your neck warmer and complete your knitting project. Remember to take your time and make sure the stitches are even and secure.
Blocking for a Professional Finish
If you want your knitted neck warmer to have a professional finish, blocking is an essential step. Blocking refers to the process of shaping and stretching your knitting to achieve the desired measurements and appearance. It helps to even out stitches, open up lace patterns, and ensure that your garment drapes nicely when worn.
Before you begin blocking, make sure to read the instructions of your chosen knitting pattern to determine the specific blocking requirements. Some patterns may recommend wet blocking, while others may suggest steam blocking.
Wet Blocking
Wet blocking is the most common method used to block knitted items. To wet block your neck warmer, follow these steps:
- Fill a basin or sink with lukewarm water and add a few drops of mild detergent.
- Gently submerge your neck warmer into the water, making sure it is completely saturated.
- Leave the garment to soak for about 10-15 minutes, allowing the fibers to relax.
- Remove the neck warmer from the water and gently squeeze out any excess moisture. Do not wring or twist the garment.
- Lay out a clean towel and place the neck warmer on top, shaping it to the desired measurements.
- Roll up the towel tightly, pressing down to squeeze out even more moisture.
- Transfer the neck warmer to a blocking board or foam mats, pinning it in place to maintain its shape.
- Leave the neck warmer to dry completely, which may take 24-48 hours depending on the thickness of the yarn.
- Once dry, unpin the neck warmer and it should be beautifully blocked and ready to wear.
Steam Blocking
If your pattern recommends steam blocking, follow these steps:
- Fill a steam iron with water and set it to the appropriate heat setting for your yarn.
- Hold the iron a few inches above the neck warmer and move it back and forth, allowing the steam to penetrate the fibers.
- Gently shape the neck warmer to the desired measurements using your hands or blocking pins.
- Leave the neck warmer to cool and dry completely before removing the pins.
- Your neck warmer should now be nicely blocked and ready to wear.
Blocking is an important step in the knitting process that can make a significant difference in the final appearance of your neck warmer. Take the time to block your project properly, and you’ll be rewarded with a beautifully finished garment.
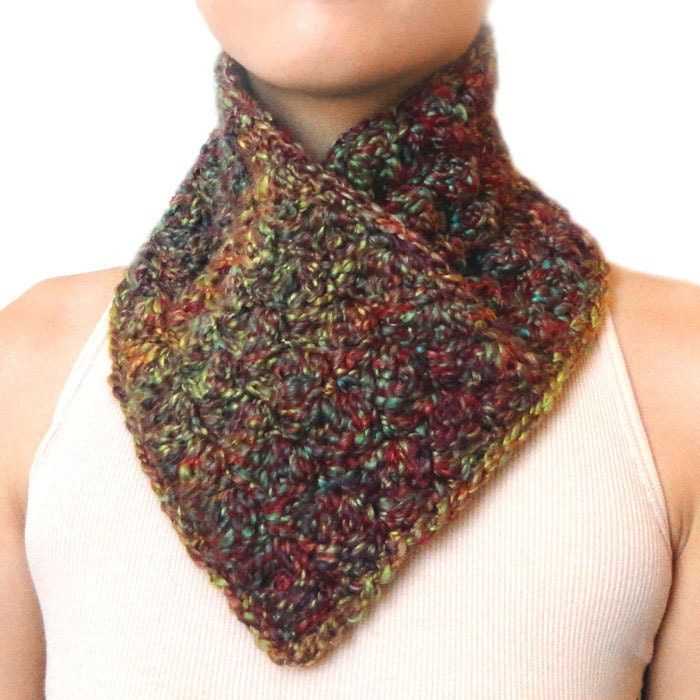
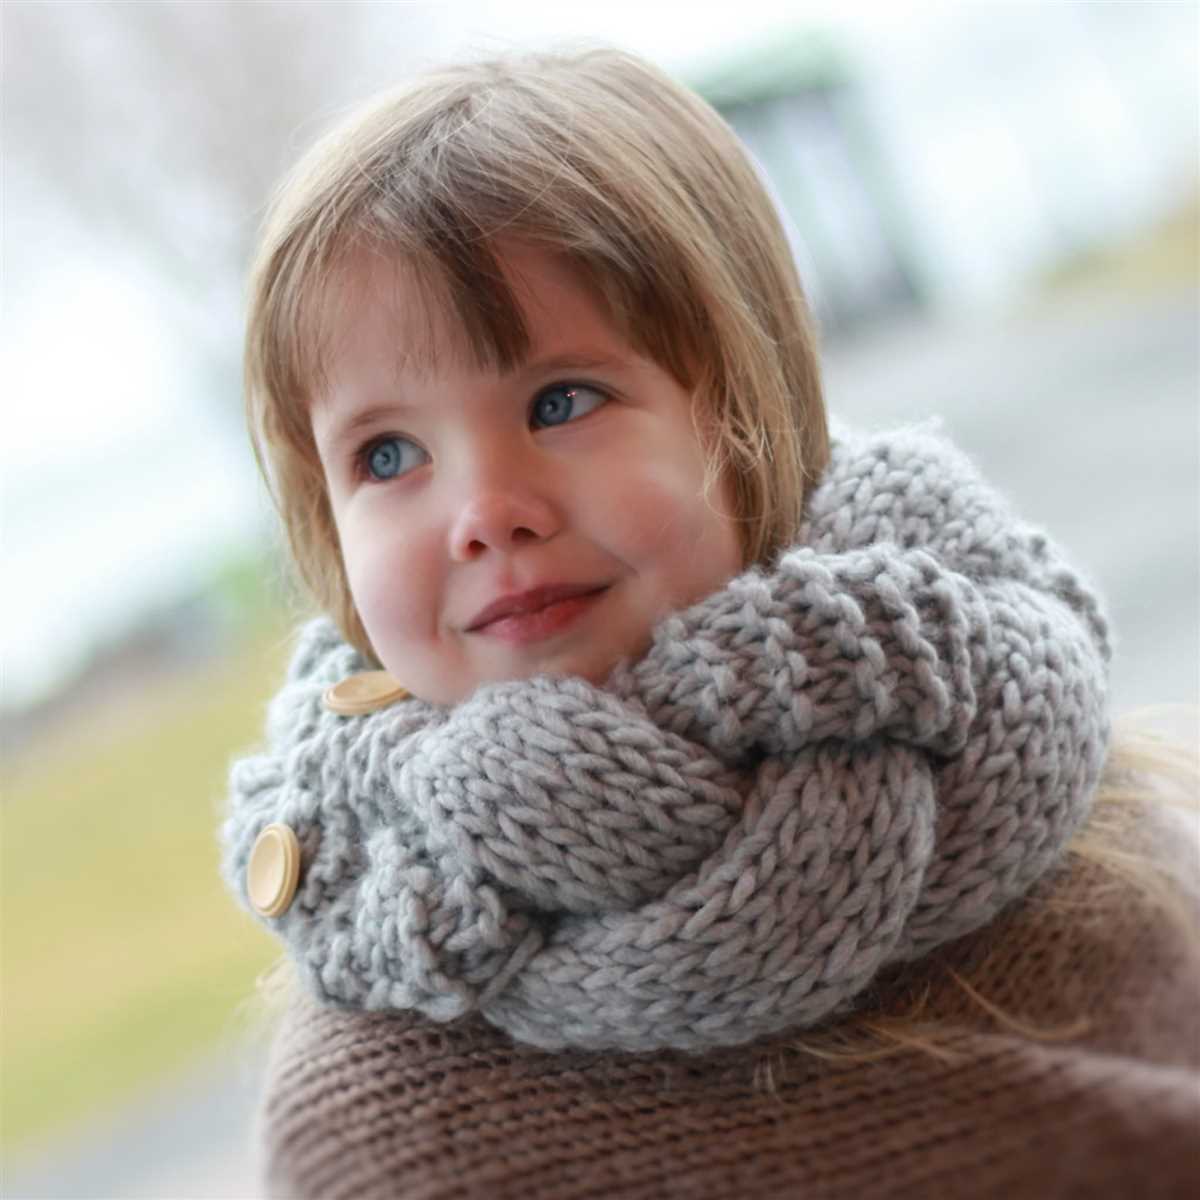
Styling and Wearing Your Neck Warmer
Once you have completed knitting your neck warmer using the free pattern provided, it’s time to style and wear it. The neck warmer can be a versatile accessory that can be easily incorporated into your everyday outfits, adding warmth and style to your look.
1. Pairing with a Coat or Jacket: One of the easiest ways to wear your neck warmer is to simply slip it around your neck and pair it with a coat or jacket. This not only adds an extra layer of warmth but also gives a cozy and fashionable touch to your outerwear. You can choose a neutral-colored neck warmer to go with any coat or opt for a vibrant shade to add a pop of color to your outfit.
2. Layering with Sweaters or Cardigans: Another way to style your neck warmer is by layering it with sweaters or cardigans. Simply fold or scrunch up the neck warmer and wear it around your neck over your favorite knitwear. This creates a chic and trendy look, perfect for colder days. You can experiment with different textures and colors to create interesting combinations.
3. Adding a Belt: For a more unique and creative styling, you can add a belt to your neck warmer. Simply wrap the belt around your neck and secure it with a knot or a stylish buckle. This adds a fashionable twist to your neck warmer, creating a faux-necklace effect. It’s a great way to transform a simple neck warmer into a statement accessory.
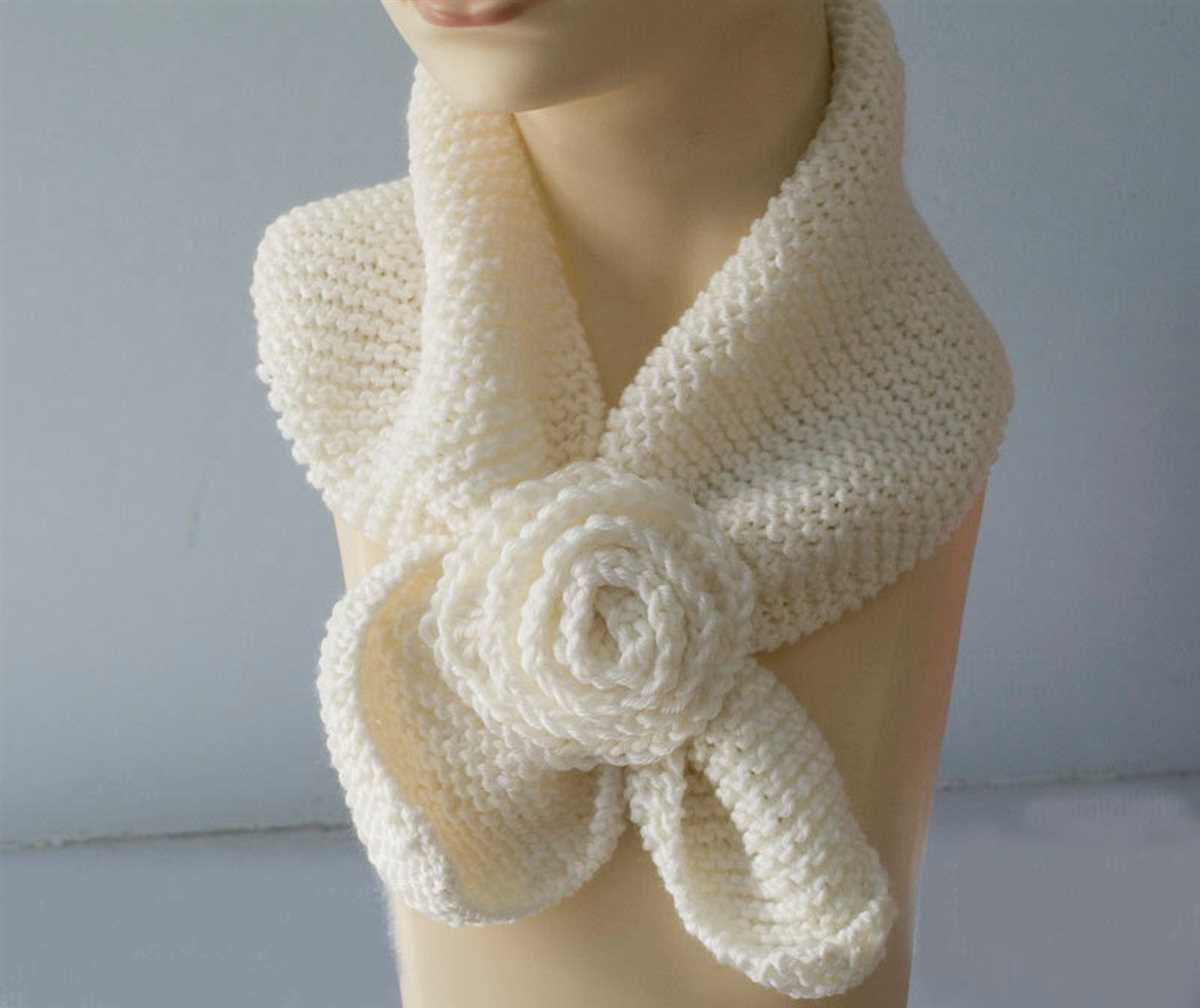
4. Creating a Bow: If you’re in the mood for a feminine and playful look, you can tie your neck warmer into a bow. Fold the neck warmer in half and wrap it around your neck, then tie it in a bow. This adds a cute and charming touch to your outfit, making it perfect for special occasions or casual outings.
With these styling tips, you can make the most out of your neck warmer and elevate your winter wardrobe. Get creative with different ways of wearing it and show off your knitting skills with pride.
Sharing Your Creation: Tag Us on Social Media

After you have completed knitting your neck warmer using our free pattern, we would love to see your finished creation! Share your photos on social media and help inspire other knitters to try out our pattern.
To make sure we don’t miss your post, don’t forget to tag us using our official social media handles:
- Instagram: @knitpatterns
- Twitter: @knitpatterns
- Facebook: @knitpatterns
We can’t wait to see your unique twists and color combinations on the neck warmer. Tag us and be part of our knitting community!
By sharing your creation, you also have a chance to be featured on our website and social media accounts. Help us inspire other knitters by showcasing your talent and creativity. Together, let’s spread the joy of knitting!