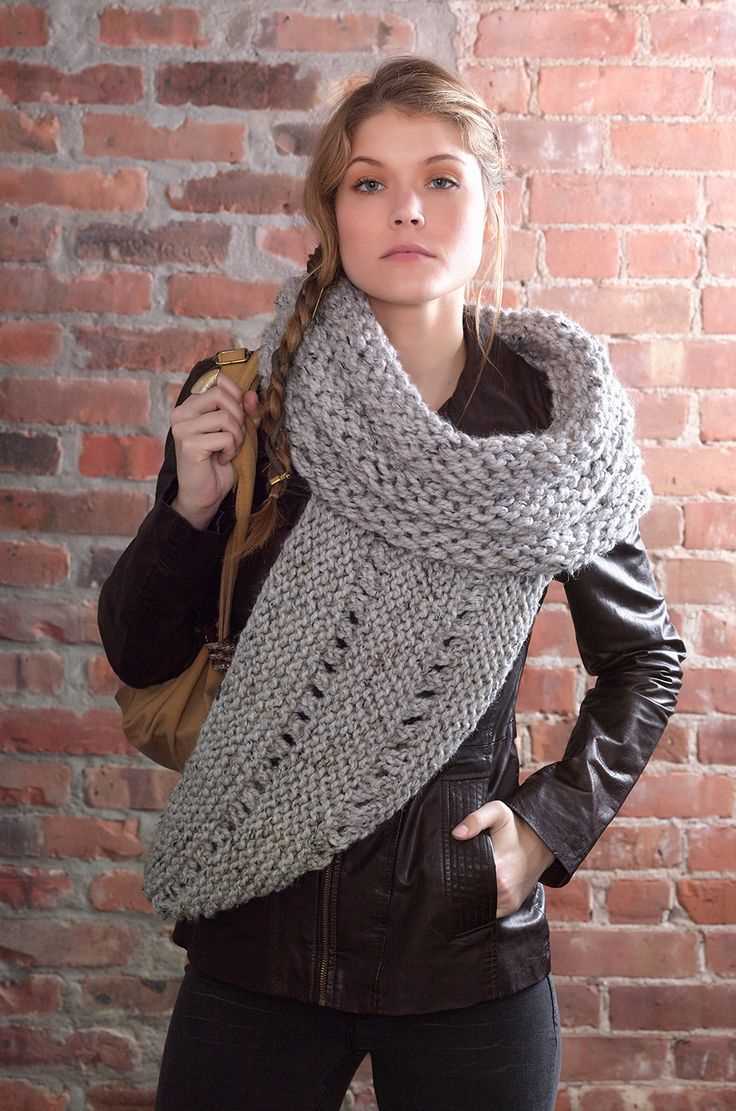
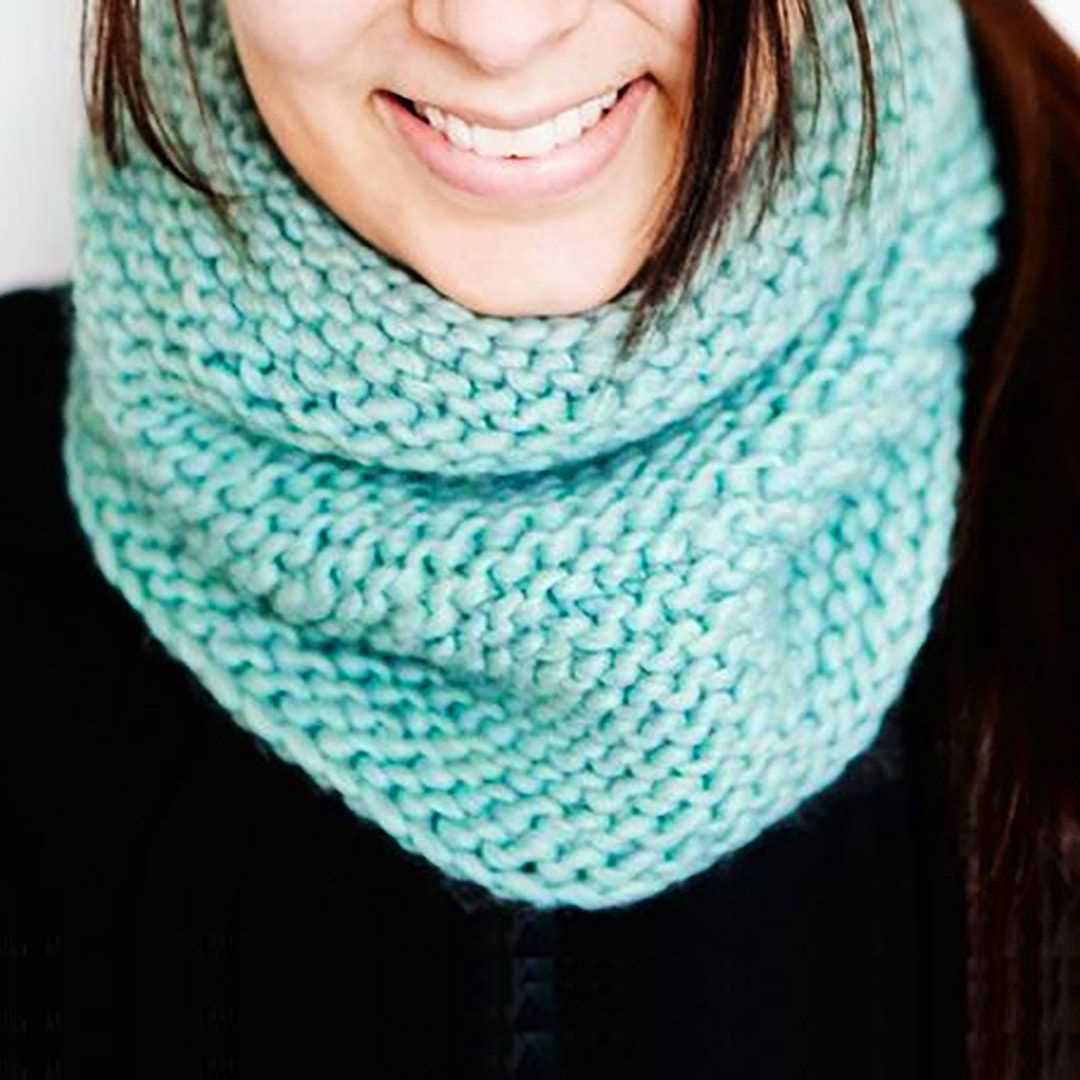
Cozy Cowl: Knit Up a Stylish Snood with this Free Pattern

Knitting is an enjoyable and versatile craft that allows you to create beautiful and practical items. One popular project is a snood, which is a snug and cozy accessory that can be worn around the neck or pulled up over the head like a hood. Snoods are not only stylish but also provide extra warmth during the cold winter months.
If you are an avid knitter or just getting started, this free knitting pattern for a snood is a great project to try. This pattern is suitable for knitters of all skill levels, from beginners to advanced. The design features a simple yet elegant stitch pattern, making it an ideal introduction to lace knitting. The snood can be customized to any size, allowing you to create a garment that fits perfectly.
To start knitting your snood, you will need a few basic supplies. These include a pair of knitting needles, yarn in your preferred color and weight, a tapestry needle for weaving in ends, and a stitch marker to keep track of your progress. The pattern provides step-by-step instructions and a stitch chart to guide you through the knitting process.
What is a snood and why is it popular in knitting?
A snood is a type of knitted accessory that is worn around the neck. It is essentially a tube of fabric that can be pulled up over the head to cover the hair or worn around the neck like a scarf. Snoods can be made in various lengths and widths, depending on the desired style and level of warmth needed.
Snoods have become increasingly popular in knitting for several reasons. Firstly, they are versatile and can be worn in different ways, making them a practical accessory for changing weather conditions. They can be pulled up to cover the ears and head in cold weather, or worn loosely around the neck for a more stylish look.
- Snoods are also popular because they are relatively easy and quick to knit, making them an ideal project for both beginner and experienced knitters.
- They require minimal shaping and can be made using a variety of stitch patterns, allowing knitters to experiment and get creative with their designs.
- Snoods are also a great way to use up leftover yarn, as they usually require only a small amount of yarn to make.
Furthermore, snoods have a timeless and classic appeal. They can add a touch of elegance and sophistication to any outfit, whether it’s a casual or formal occasion. They also provide warmth and insulation, making them an essential accessory during colder months.
In summary, snoods have gained popularity in knitting due to their versatility, ease of knitting, and stylish appeal. They are a practical and fashionable accessory that can be customized to suit individual preferences and styles. Whether you’re a beginner or an experienced knitter, a snood is a great project to add to your knitting repertoire.
How to choose the right yarn and needle size for your snood
When making a snood, it is essential to select the right yarn and needle size to achieve the desired result. The yarn and needle size will not only affect the final look and texture of the snood but also its warmth and drape. Here are some factors to consider when choosing the yarn and needle size for your snood.
Yarn Weight

The weight of the yarn refers to its thickness and can range from lace weight (the thinnest) to jumbo weight (the thickest). It is crucial to choose a yarn weight that matches the project’s requirements to ensure the snood turns out as intended. If the pattern specifies a particular yarn weight, it is advisable to follow it closely. Alternatively, if you are designing your own snood, consider the desired warmth and texture to determine the appropriate yarn weight.
Needle Size
The needle size is another critical factor in knitting a snood. The needle size will affect the overall gauge and tension of the knitting, which in turn affects the size and appearance of the finished snood. It is recommended to use the needle size recommended in the pattern or to create a gauge swatch using different needle sizes to achieve the desired fabric texture and gauge.
When choosing the needle size, consider the intended drape and thickness of the snood. A smaller needle size will yield a tighter fabric with less drape, making it suitable for a more structured snood. On the other hand, a larger needle size will result in a looser fabric with more drape, ideal for a softer and more flowing snood.
- Take into account the yarn weight and the pattern’s needle size recommendation.
- Consider the desired warmth, drape, and texture of the snood.
- Experiment with gauge swatches using different needle sizes to achieve the desired fabric.
By carefully selecting the right yarn weight and needle size, you can create a snood that not only matches your style but also fulfills your desired functionality, whether it be warmth, drape, or texture.
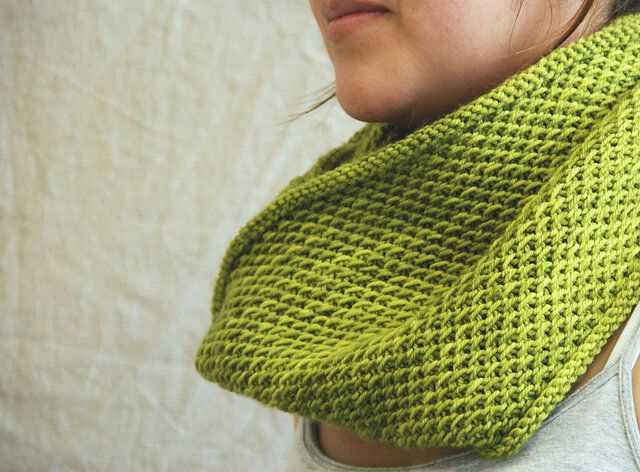
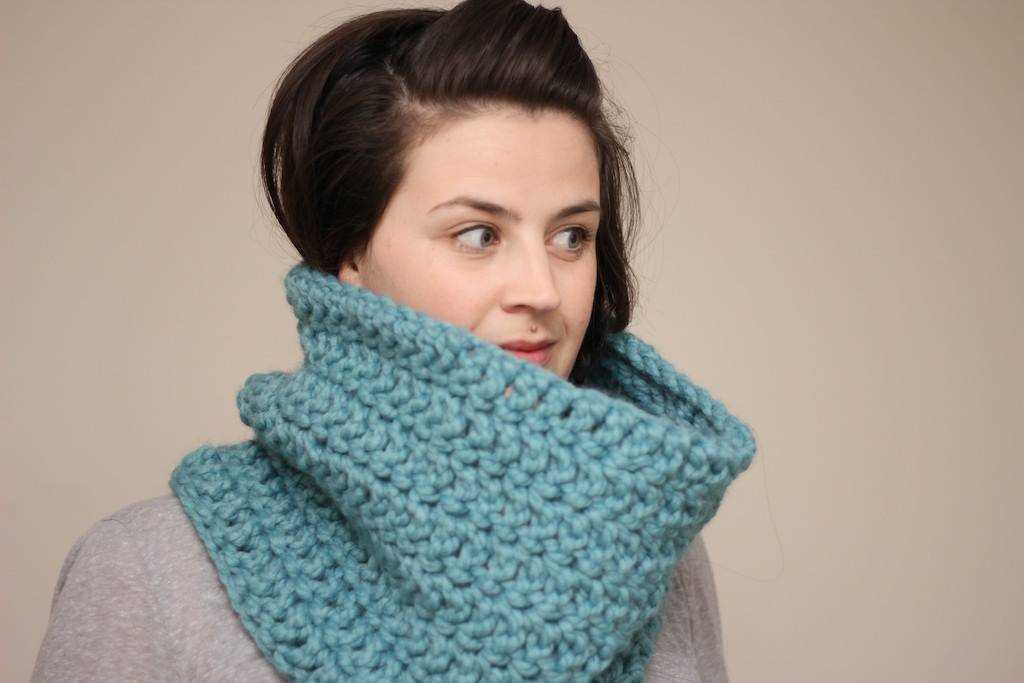
Free knitting pattern for a basic snood
If you’re looking for a simple and versatile knitting project, a basic snood is a great option. Snoods are like scarves, but they are sewn into a loop, making them easy to wear and style. With this free knitting pattern, you’ll be able to create a cozy and fashionable snood that will keep you warm during the colder months.
To get started, you’ll need a pair of knitting needles and some yarn in your desired color. Choose a chunky or bulky weight yarn for a snood that is extra cozy. Cast on an even number of stitches, usually around 60-80, depending on your preferred width. This will determine how loose or tight the snood will be. If you want a longer snood, cast on more stitches.
Pattern:
- Row 1: *Knit 2, purl 2* repeat from * to end of row
- Row 2: *Purl 2, knit 2* repeat from * to end of row
- Repeat rows 1 and 2 until the snood reaches your desired length, usually around 24-30 inches.
- Bind off all stitches and weave in any loose ends.
Once you’ve finished knitting your snood, you can seam the ends together using a yarn needle and some matching yarn. Make sure the seam is secure and invisible to create a seamless loop. You can also add decorative touches like pom poms or tassels to personalize your snood.
A basic snood is a versatile accessory that can be worn in different ways. It can be draped around your neck for a classic look, or pulled up over your head for extra warmth. Experiment with different styles and find the one that suits you best.
With this free knitting pattern, you can create a basic snood that is both stylish and practical. Whether you’re a beginner knitter or an experienced crafter, this project is sure to be a fun and rewarding one. Happy knitting!
How to Adapt the Pattern for Different Sizes
When working with a free knitting pattern for a snood, it is important to adjust the pattern to fit different sizes. Whether you are making a snood for a child or an adult, there are a few steps you can take to ensure the finished item fits perfectly.
1. Determine the desired dimensions: Before starting the project, decide on the dimensions of the snood. Measure the circumference and height of the wearer’s head to determine the ideal size. Keep these measurements in mind as you work on the pattern.
2. Adjust the number of stitches: To adapt the pattern for different sizes, you may need to increase or decrease the number of stitches. This will depend on the desired circumference of the snood and the gauge of your yarn and needles. Calculate how many stitches you need to cast on by dividing the desired circumference by the gauge per inch. Make sure to round to the nearest whole number.
Example: If the desired circumference is 20 inches and the gauge is 4 stitches per inch, you would need to cast on 80 stitches (20 inches x 4 stitches per inch).
3. Adjust the length: In addition to adjusting the number of stitches, you may also need to adjust the length of the snood. This can be done by adding more or fewer rows to the pattern. Measure the height of the wearer’s head and compare it to the pattern’s length to determine if any adjustments are needed.
4. Consider the yarn weight: If you are using a different yarn weight than the one specified in the pattern, you may need to make additional adjustments. Heavier yarns may require larger needles and fewer stitches, while lighter yarns may require smaller needles and more stitches. Make sure to swatch and measure your gauge to ensure the snood turns out the right size.
By following these steps and making the necessary adjustments, you can easily adapt a free knitting pattern for a snood to fit different sizes. Don’t be afraid to experiment and make changes as needed to create a snood that is the perfect fit.
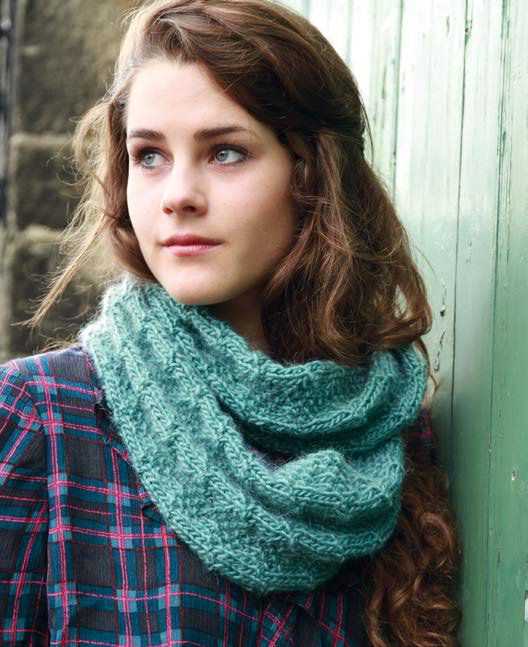
Tips for Knitting a Snood with Intricate Stitch Patterns
Knitting a snood with intricate stitch patterns can be a challenging yet rewarding project for advanced knitters. These stylish accessories can add a touch of elegance to any outfit and showcase your knitting skills. However, working with intricate stitches requires careful attention to detail and patience. Here are some tips to help you successfully create a beautiful snood with intricate stitch patterns:
Select the Right Yarn
Choosing the right yarn is crucial when working with intricate stitch patterns. Opt for a yarn that has good stitch definition, meaning the stitches will be clearly visible and well-defined. Consider using a smooth, tightly spun yarn in a solid color that will highlight the intricacy of the stitches. Avoid variegated or highly textured yarns, as they may distract from the stitch patterns.
Use Stitch Markers
When working with intricate stitch patterns, it’s easy to lose track of where you are in the pattern. To avoid any confusion, use stitch markers to mark important stitch counts or pattern repeats. Place markers at regular intervals and move them up as you progress through the pattern. This will help you stay organized and ensure the accuracy of your stitch count.
Take Regular Breaks and Count Stitches
Working on intricate stitch patterns can be mentally demanding and tiring. To maintain focus and accuracy, take regular breaks to rest your hands and clear your mind. During these breaks, count your stitches to make sure you haven’t made any mistakes. This will save you time and frustration in the long run and ensure that your snood turns out perfectly.
Read and Understand the Pattern
Before starting your project, carefully read and understand the pattern instructions. Intricate stitch patterns often involve complex stitch repeats and charts. Familiarize yourself with the pattern abbreviations, symbols, and any special instructions. Take the time to fully understand the pattern before you begin knitting to avoid any confusion or mistakes.
Practice with Swatches
Before diving into your snood project, it can be helpful to practice the intricate stitch patterns on smaller swatches. This will allow you to become familiar with the stitch pattern and gauge your tension. Swatching also gives you an opportunity to make any necessary adjustments to your needle size or knitting technique to ensure a perfect finished project.
By following these tips, you’ll be well-prepared to tackle the challenge of knitting a snood with intricate stitch patterns. With patience, practice, and attention to detail, you’ll create a stunning accessory that showcases your knitting skills and adds a unique touch to your wardrobe.
Customizing your snood
Adding your own personal touch to your knitted snood can make it truly unique and reflect your individual style. There are several creative ways you can customize your snood to give it a special flair that sets it apart from others.
1. Embroidery: Embroidery is a great way to add intricate and detailed designs to your snood. You can use different colored threads to create patterns or even add your initials or favorite motifs. This will give your snood a personalized touch and make it stand out.
2. Beading: Adding beads to your snood can instantly elevate its appearance. You can sew small beads onto the edges or throughout the body of the snood for a touch of sparkle. Choose beads in colors that complement your snood or opt for contrasting shades to create a striking effect.
3. Appliques: Appliques are fabric shapes or designs that can be attached to your snood to add dimension and visual interest. You can find pre-made appliques or create your own using fabric scraps. Simply sew or glue them onto your snood to give it a unique and artistic touch.
4. Pom poms: Adding pom poms to the ends of your snood can give it a playful and fun look. You can make pom poms using yarn in matching or contrasting colors and attach them to the corners of your snood. This will not only add a decorative element but also make your snood more cozy and warm.
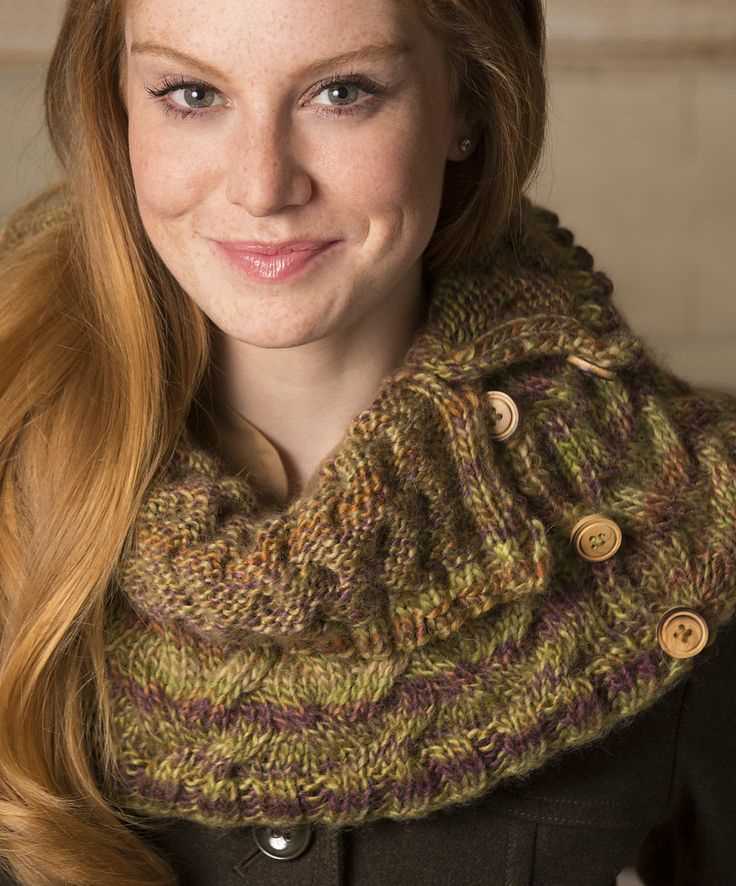
5. Buttons: Sewing buttons onto your snood can instantly transform its appearance. Choose buttons in different shapes, sizes, and colors to create a visually interesting pattern. You can sew them sporadically or in a specific design to give your snood a unique and eye-catching look.
Conclusion
Customizing your snood allows you to turn a simple and basic accessory into a personalized and stylish statement piece. Whether you choose to embroider, bead, add appliques, attach pom poms, or sew buttons onto your snood, these creative touches will make it one-of-a-kind and reflect your own personal style.
How to add buttons or other closures to your snood
The snood is a versatile accessory that can be worn in various ways, and adding buttons or other closures can give it a unique and customizable look. Here are a few simple steps to help you add closures to your snood:
1. Choose your closure
There are many options for closures that you can add to your snood, such as buttons, toggles, snaps, or even a zipper. Consider the style and functionality you want, and choose a closure that fits your design.
2. Placement
Decide where you want to place the closure on your snood. This could be on the side, front, or even at the back. Keep in mind the desired look and ease of use when determining the placement.
3. Secure the closure
If you are using buttons, sew them onto the snood by hand or with a sewing machine. Make sure they are securely attached. For other closures, such as toggles or snaps, follow the manufacturer’s instructions for installation.
4. Test and adjust
Once you have added the closure, try on your snood to ensure it fits comfortably and stays in place. If needed, make any adjustments or reinforce the closure for added durability.
With these simple steps, you can easily add buttons or other closures to your snood and create a unique and personalized accessory. Have fun experimenting with different closures and designs to make your snood truly your own!
How to care for your knitted snood

Proper care and maintenance of your knitted snood are essential to ensure its longevity and keep it looking its best. Follow these simple steps to keep your snood in great condition:
- Hand wash: It is recommended to hand wash your knitted snood to avoid shrinking or damaging the fabric. Fill a basin with lukewarm water and add a mild detergent specifically designed for delicate items. Gently submerge the snood and agitate the water to remove any dirt or debris. Rinse with fresh water until all the soap is gone.
- Dry flat: After washing, avoid wringing or twisting the snood, as this can stretch or distort the shape. Instead, gently squeeze out the excess water and lay the snood flat on a clean towel or drying rack. Reshape the snood if necessary, and allow it to air dry away from direct sunlight or heat sources.
- Store properly: When not in use, fold or roll the snood neatly and store it in a dry, well-ventilated area. Avoid hanging the snood, as this can cause it to stretch. If desired, you can also place the snood in a breathable fabric bag to protect it from dust and moths.
- Avoid harsh chemicals: Keep your knitted snood away from harsh chemicals, including bleach and strong detergents, as they can weaken the fibers and cause color fading. If necessary, spot clean any stains with a mild detergent or take it to a professional cleaner for help.
- Handle with care: Be gentle when wearing or handling your knitted snood to prevent snagging or pulling the yarn. Avoid sharp objects or rough surfaces that could damage the fabric. If any loose threads appear, carefully trim them with a pair of scissors to prevent unraveling.
Following these care instructions will help ensure that your knitted snood stays soft, cozy, and beautiful for years to come. Enjoy wearing your snood and stay warm in style!
Free knitting pattern for a lace snood
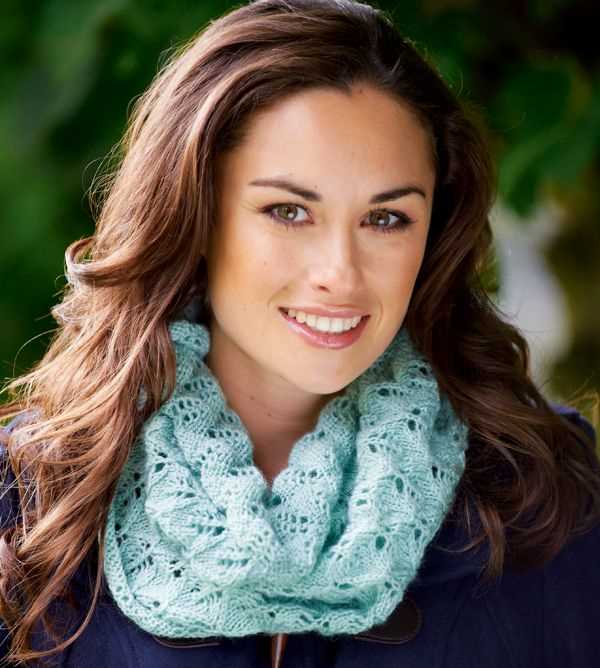
A snood is a versatile accessory that can add a touch of elegance to any outfit. With this free knitting pattern, you can create a beautiful lace snood that will not only keep you warm but also make a fashion statement.
To knit this lace snood, you will need the following materials:
- Yarn: Choose a light-weight, soft yarn in your favorite color. Approximately 200 yards (183 meters) of yarn will be enough for this project.
- Knitting needles: Use a pair of US size 7 (4.5mm) knitting needles.
- Circular knitting needles: You will also need a pair of US size 7 (4.5mm) circular knitting needles, 16 inches (40cm) long.
- Stitch markers: These will help you keep track of your progress.
- Tapestry needle: You will need this to weave in the loose ends of yarn.
Once you have gathered all the materials, you can start knitting your lace snood following these instructions:
- Cast on 150 stitches using the circular knitting needles.
- Join your work in the round, making sure not to twist the stitches.
- Knit the first four rounds in a basic rib pattern: *K2, P2*.
- Switch to the lace pattern: *Yo, K2tog*. Repeat this pattern until the end of the round.
- Continue knitting the lace pattern for approximately 12 inches (30cm) or until the desired length is reached.
- Knit the last four rounds in the basic rib pattern: *K2, P2*.
- Bind off all stitches and weave in the loose ends of yarn.
Once you have finished knitting your lace snood, you can wear it around your neck as a stylish accessory. It can be worn with both casual and formal outfits, adding a touch of femininity and elegance. This lace snood also makes a great gift for friends and family who appreciate handmade items.
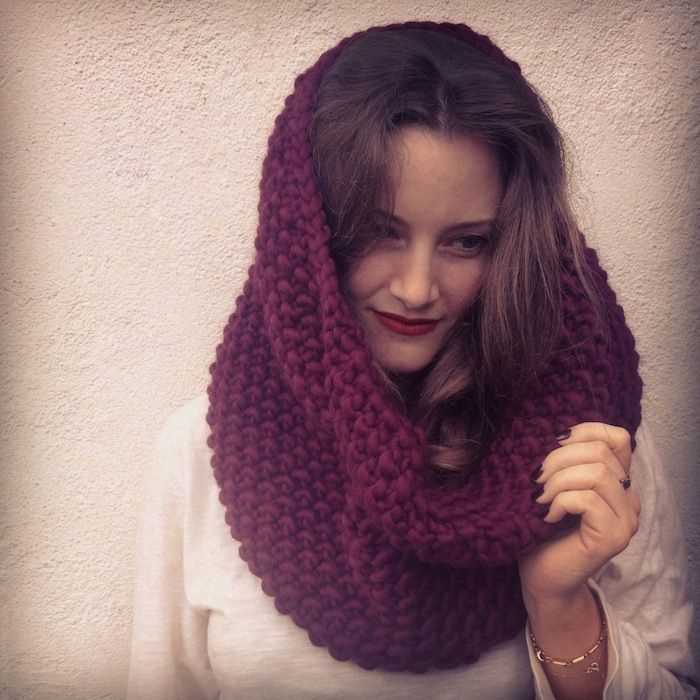
Free Knitting Pattern for a Cable-Knit Snood

If you’re looking for a cozy accessory to keep you warm during the colder months, a cable-knit snood is the perfect choice. This free knitting pattern will guide you through the steps to create your own stylish and functional snood.
Materials:
- Size 8mm knitting needles
- Super bulky weight yarn
- Cable needle
- Tapestry needle
Instructions:
- Cast on 60 stitches.
- Row 1: Knit all stitches.
- Row 2: Purl all stitches.
- Repeat rows 1 and 2 until your work measures approximately 12 inches.
- Next, you will start the cable pattern. Follow the instructions below:
| Row | Instructions |
|---|---|
| 1 | *Knit 6, slip 3 stitches onto cable needle and hold in back, knit 3 from left needle, then knit 3 from cable needle. Repeat from * to end of row. |
| 2 | Purl all stitches. |
| 3 | Knit all stitches. |
| 4 | Purl all stitches. |
| 5 | *Knit 3, slip 3 stitches onto cable needle and hold in front, knit 3 from left needle, then knit 3 from cable needle. Repeat from * to end of row. |
| 6 | Purl all stitches. |
| 7 | Knit all stitches. |
| 8 | Purl all stitches. |
Continue repeating rows 1-8 of the cable pattern until your snood reaches your desired length. Finally, knit all stitches for a few rows and then bind off.
Once your snood is complete, weave in any loose ends and give it a gentle blocking to help it retain its shape. Enjoy your new cable-knit snood and stay warm in style!
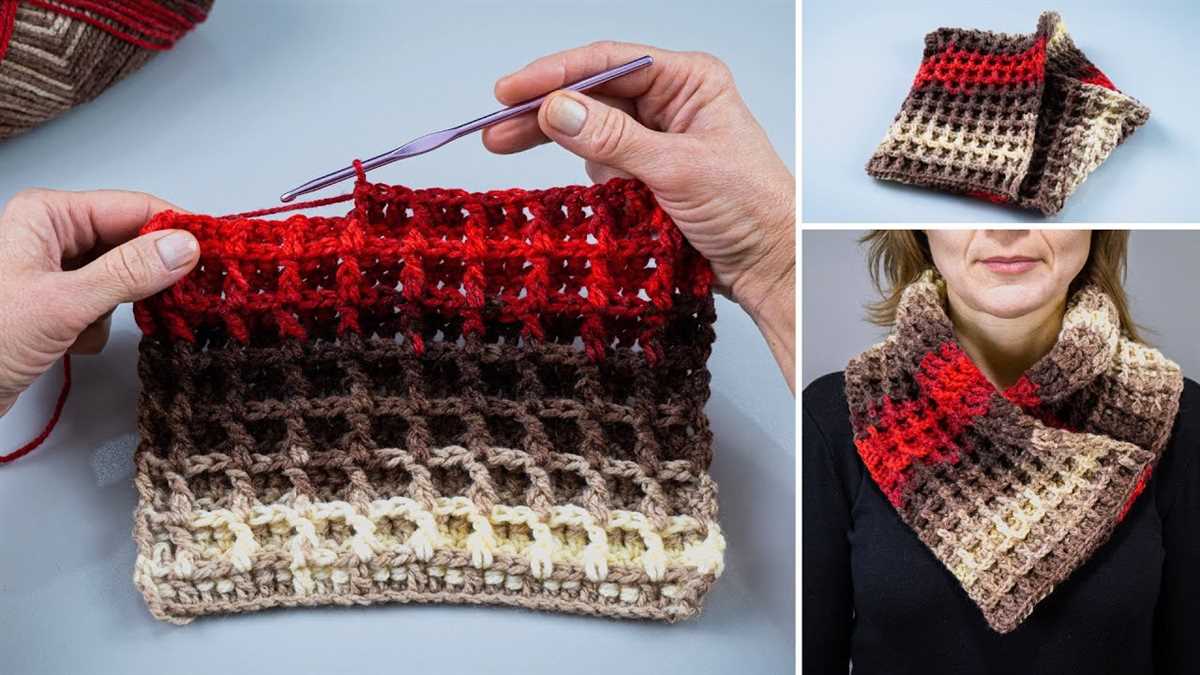
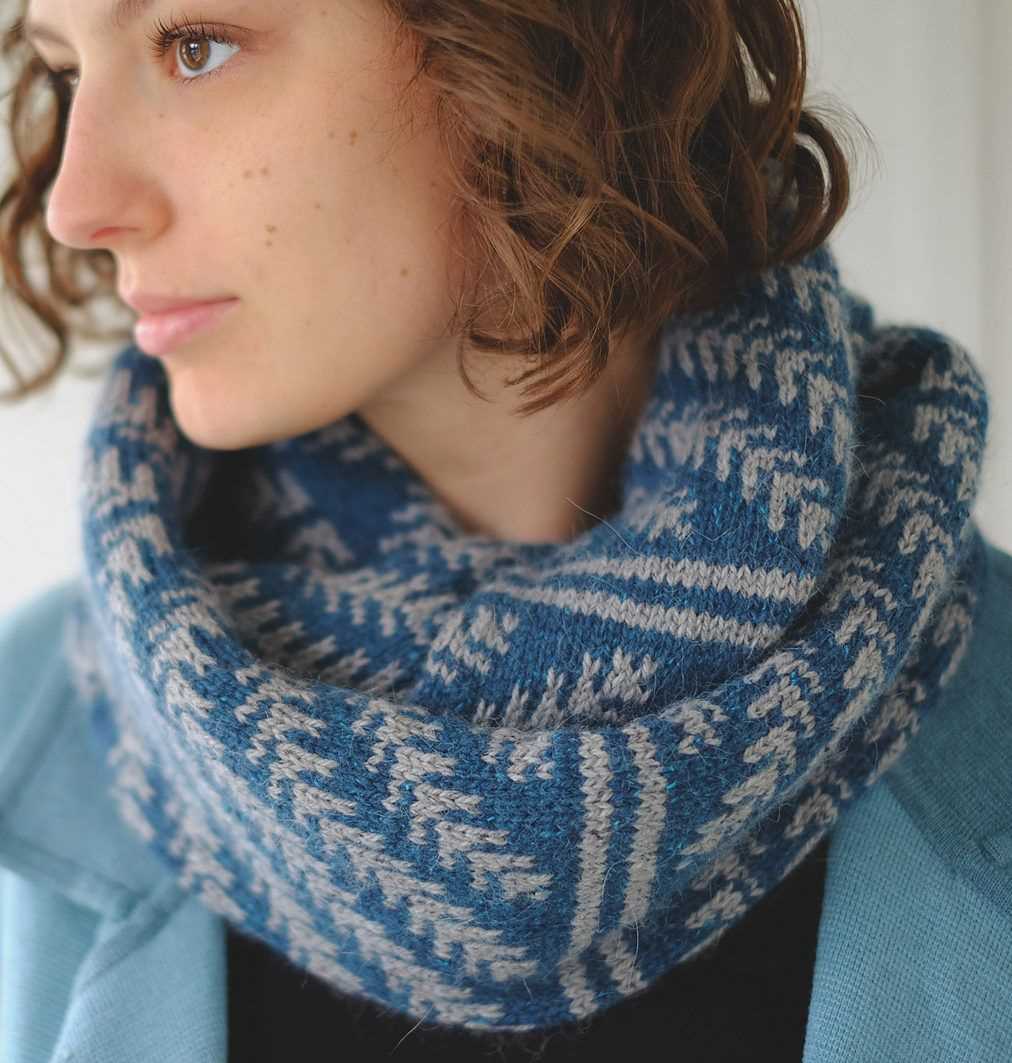
Free knitting pattern for a colorwork snood
Looking for a cozy and stylish accessory for the colder months? Knit yourself a colorwork snood with this free knitting pattern. This snood is not only functional, but it also adds a touch of flair to any outfit.
To begin, gather your materials. You will need two different colors of bulky weight yarn, size 10 knitting needles, a tapestry needle, and scissors. Once you have everything ready, cast on the desired number of stitches, keeping in mind that the snood will be worn around the neck and should have enough circumference to comfortably fit over the head.
Step 1: Begin by knitting a few rows in stockinette stitch with your main color yarn. This will give the snood a smooth and even base.
Step 2: Once the desired length of the snood’s body is reached, introduce the contrasting color yarn and start the colorwork pattern. You can choose any pattern you like, such as stripes, fair isle, or cables. Be creative and experiment with different designs!
Step 3: Continue knitting in the colorwork pattern until the snood reaches the desired width. Remember to keep the tension even to ensure a polished finished product.
Step 4: To finish, knit a few more rows in stockinette stitch with the main color yarn for a clean edge.
Once you’ve completed the knitting, bind off your stitches and weave in any loose ends. Then, seam the two ends of the snood together using a whip stitch or your preferred method. Finally, give your snood a gentle blocking to even out any stitches and enhance its drape.
Enjoy wearing your handmade colorwork snood and stay warm and fashionable all winter long!
How to use your snood in different hairstyles
A snood is not only a practical and warm accessory, but it can also be a stylish addition to your everyday hairstyle. Here are some different ways you can use your snood to enhance your look:
1. Classic Bun
Start by tying your hair up into a high or low bun. Then, place the snood over your bun, leaving the ends hanging down. Secure the snood in place with bobby pins if necessary. This will give your bun a vintage-inspired touch.
2. Half-Up Hairstyle
Create a half-up hairstyle by pulling the top half of your hair back and securing it with a hair elastic. Then, place the snood over the elastic, making sure to cover it completely. Adjust the snood as needed to achieve the desired look.
3. Braided Hair
Start by braiding your hair into a classic or fishtail braid. Once your braid is done, wrap it around your head like a crown and secure it in place with bobby pins. Finally, tuck the ends of the snood under the braid to complete the look.
4. Side Ponytail
Create a side ponytail by gathering all your hair to one side and securing it with a hair elastic. Place the snood over the hair elastic, letting the ends hang down. This will add an elegant touch to your side ponytail.
With these different hairstyles, you can easily incorporate your snood into your daily outfit and make a fashion statement. Whether you’re going for a casual or more formal look, the snood can add a unique touch to your overall style. Experiment with different hairstyles and have fun accessorizing with your snood!