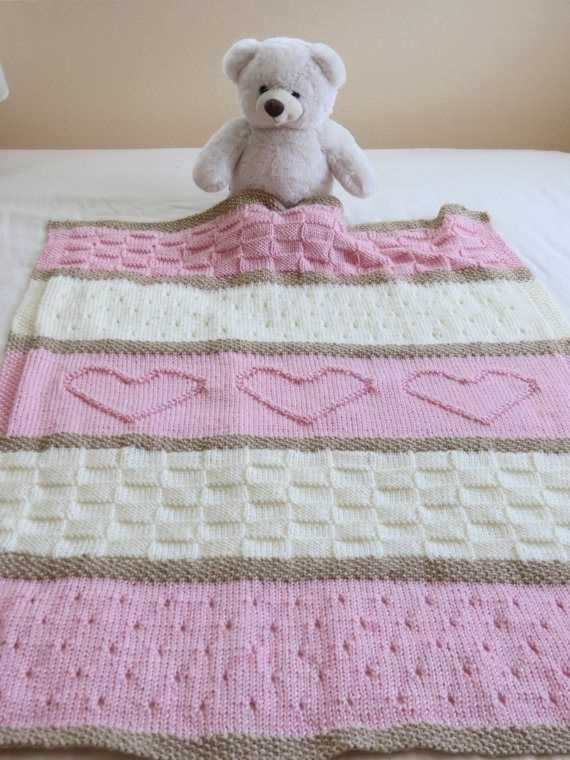
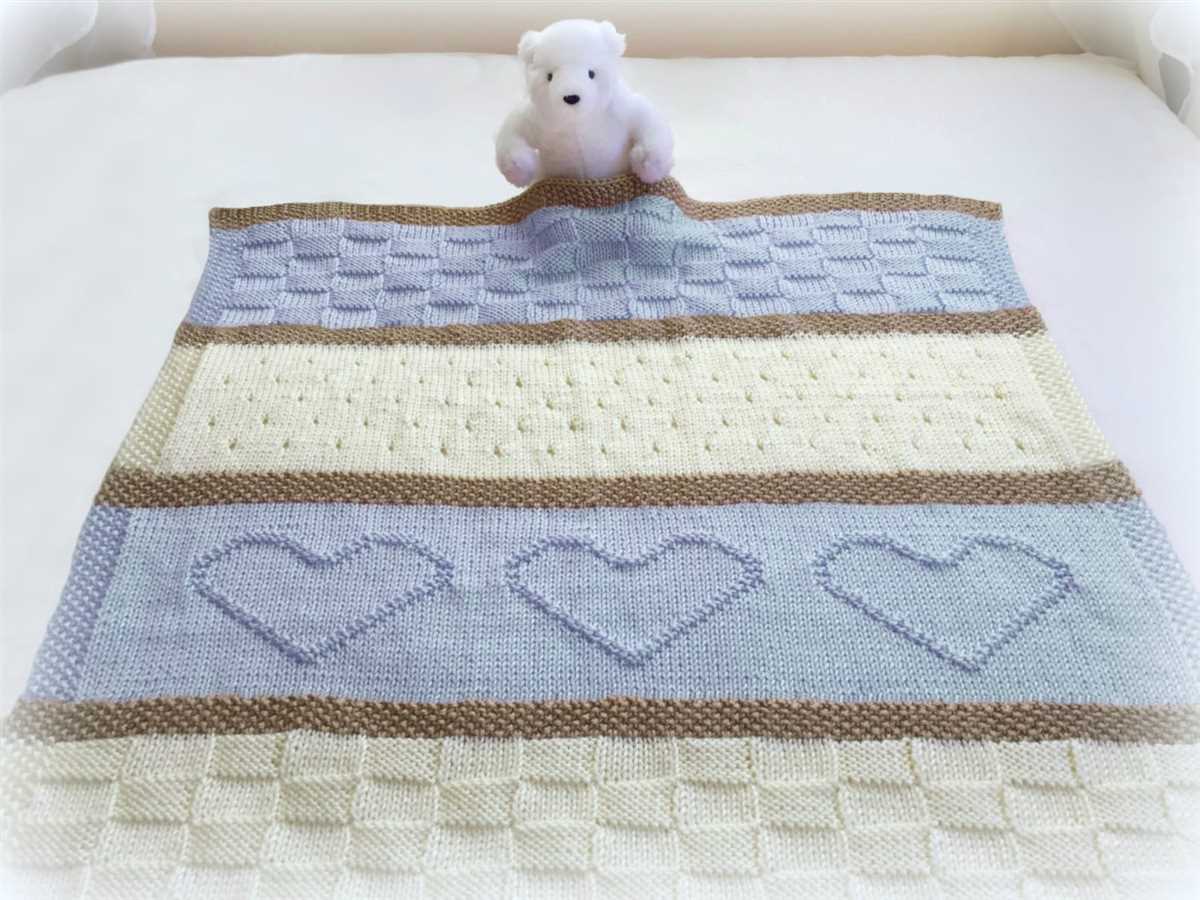
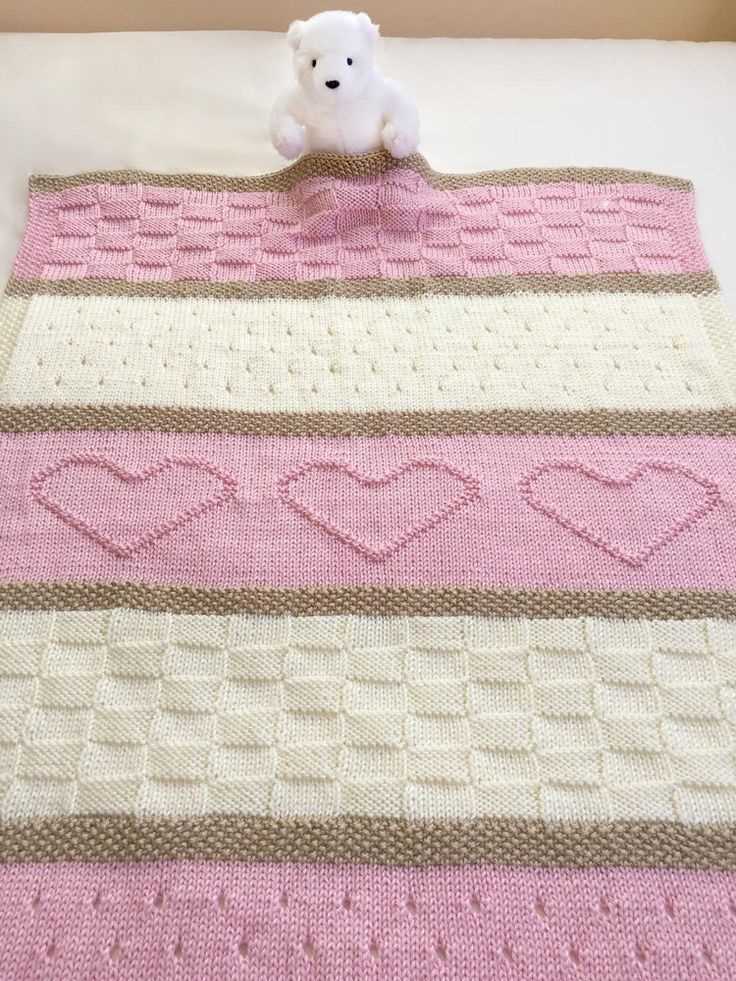
Cozy Heart Baby Blanket: Free Knitting Pattern

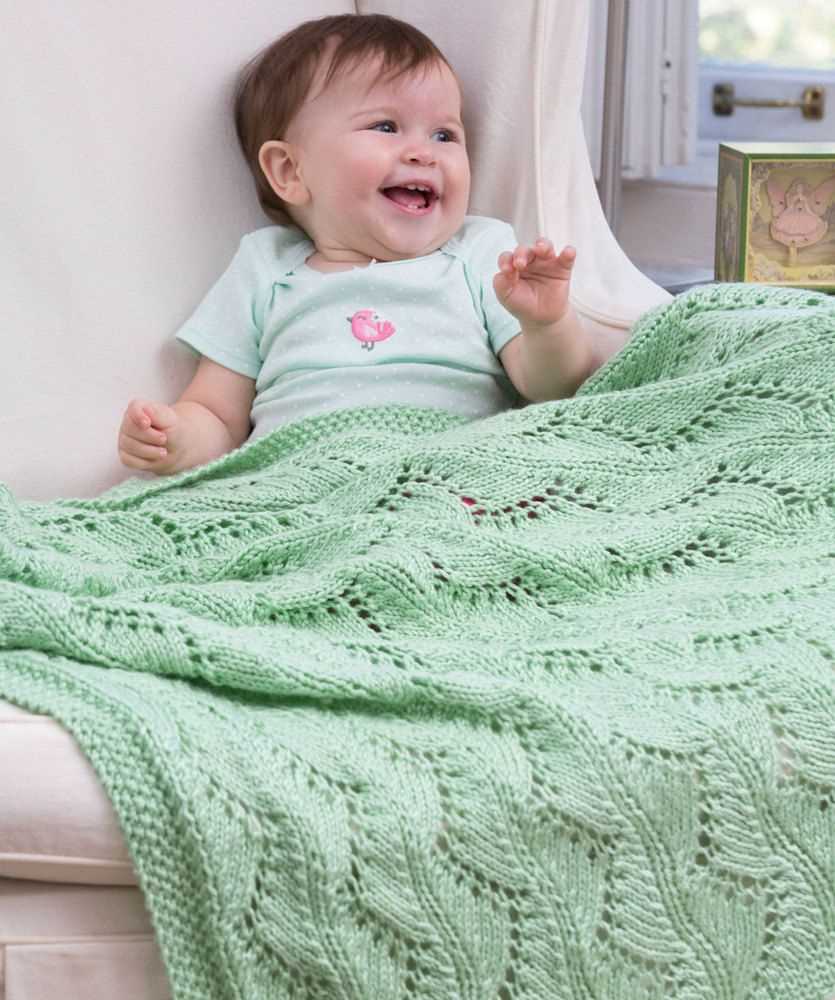
Knitting is a beloved craft, and what better way to show your love than by knitting a heart baby blanket? This adorable and cozy blanket is not only a practical item for keeping your little one warm, but it also makes for a thoughtful and heartwarming gift for any new parent. Whether you’re an experienced knitter or a beginner looking for a new project, this heart baby blanket pattern is perfect for you.
With its sweet heart design and soft texture, this baby blanket is sure to become a treasured keepsake. The pattern is straightforward and easy to follow, making it suitable for knitters of all skill levels. If you’re new to knitting, this project is a great way to practice basic stitches and techniques while creating something beautiful.
Knitted with soft and gentle yarn, this heart baby blanket is not only cozy, but it’s also hypoallergenic and safe for sensitive skin. The blanket can be made in any color you choose, allowing you to personalize it for the recipient. Whether you opt for traditional pastel shades or more vibrant hues, this blanket is sure to bring joy and comfort to any little one.
Heart Baby Blanket Knitting Pattern
Knitting a heart baby blanket is a beautiful way to show your love and affection for a little one. This pattern is both easy to follow and customizable, making it perfect for knitters of all skill levels. The finished blanket will not only keep the baby warm and cozy, but also serve as a treasured keepsake for years to come.
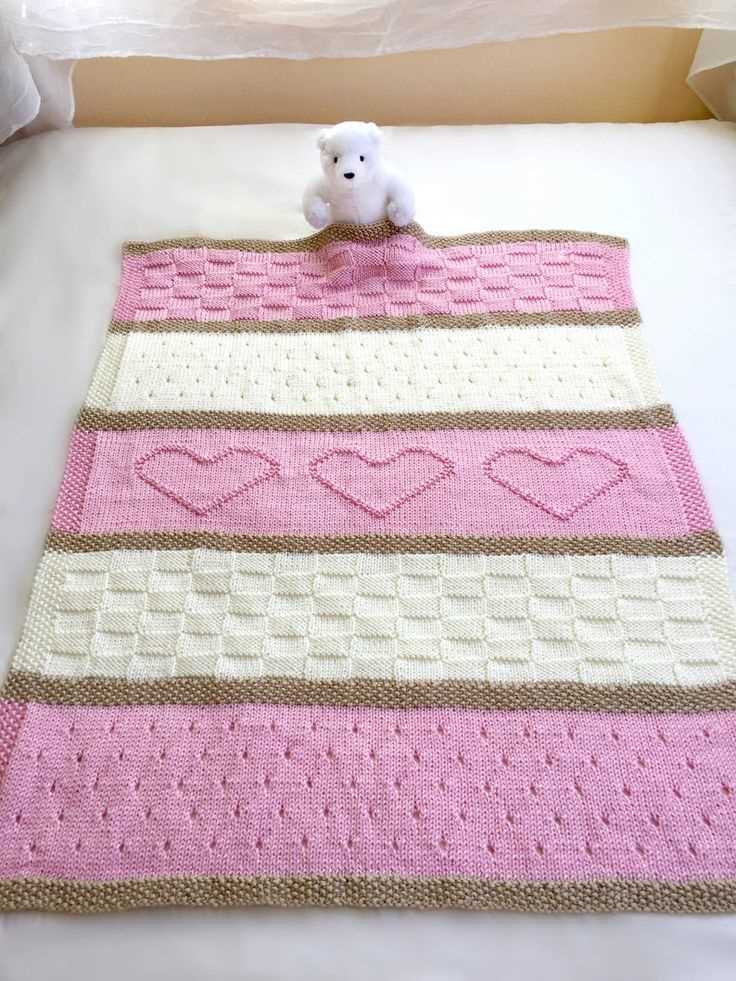
Materials needed for this pattern include soft baby yarn in your desired color, knitting needles in size US 8, and a tapestry needle for weaving in ends. The blanket is worked in a simple garter stitch pattern, making it ideal for beginner knitters. It features a repeating heart motif in the center, giving it a sweet and charming look.
To start, cast on the desired number of stitches for the width of your blanket. Then, begin knitting in garter stitch, which means knitting every row. When you reach the center of the blanket, follow the included heart chart to create the heart motif. The chart is easy to read and includes instructions for knitting the different shades of the heart in intarsia.
Continue knitting in garter stitch, repeating the heart motif as desired, until the blanket reaches your desired length. Finish off by binding off all stitches and weaving in any loose ends. The result will be a stunning heart baby blanket that is sure to be cherished. Whether you’re making it for your own little one or as a thoughtful gift, this knitting pattern is a beautiful choice.
Materials:
- Soft baby yarn
- Knitting needles size US 8
- Tapestry needle
Instructions:
- Cast on the desired number of stitches for the width of your blanket.
- Knit every row in garter stitch until the center of the blanket.
- Follow the heart chart to create the heart motif using intarsia.
- Continue knitting in garter stitch, repeating the heart motif as desired.
- Bind off all stitches and weave in any loose ends.
This heart baby blanket knitting pattern is a lovely project for any knitter. Whether you’re new to knitting or an experienced crafter, you’ll enjoy creating this special blanket for a precious little one. The blanket’s softness and the heart design will make it a treasured keepsake that can be passed down through generations.
Materials
To knit the heart baby blanket, you will need the following materials:
- Yarn: Choose a soft and cozy yarn in a weight suitable for baby blankets. You can use acrylic, cotton, or blend yarns.
- Knitting Needles: Use knitting needles in the size recommended for your chosen yarn. Circular needles are typically used for larger projects like blankets.
- Tapestry Needle: You will need a tapestry needle with a large eye to weave in the ends and sew the heart motif onto the blanket.
- Stitch Markers: Stitch markers can be helpful for keeping track of stitch patterns or marking sections of the blanket.
- Scissors: A pair of sharp scissors for cutting the yarn and trimming any loose ends.
- Measuring Tape: A measuring tape or ruler to check your gauge and measure the size of the blanket.
- Heart Motif Template (optional): If you are using a specific heart motif for the blanket, you may want to print or draw a template to guide your knitting.
Gauge
Gauge is an important factor to consider when knitting a baby blanket. It refers to the number of stitches and rows per inch that you achieve with a specific yarn and needle size. The gauge can vary depending on the tension of your knitting and the yarn you choose. It is crucial to match the gauge indicated in the pattern to ensure the correct size and fit of the finished blanket.
To determine your gauge, start by knitting a swatch with the recommended yarn and needle size. Cast on a few more stitches than indicated in the pattern and work in the specified stitch pattern for a few inches. Measure the number of stitches and rows within a 4-inch square. If your gauge does not match the pattern, you may need to adjust your needle size or try a different yarn to achieve the desired gauge.
Keep in mind that achieving the correct gauge is essential for the overall look and drape of the blanket. If your gauge is too loose, the blanket may appear too bulky and lose its shape. On the other hand, if the gauge is too tight, the blanket may be stiff and not have enough drape. It is worth taking the time to swatch and adjust your gauge to ensure a successful outcome for your heart baby blanket knitting project.
Size
When it comes to knitting a heart baby blanket, size is an important factor to consider. The size of the blanket will determine how long it will take to knit and how much yarn will be needed. Additionally, the size will also determine how big the final product will be and whether it will be suitable for a newborn or an older baby.
Most heart baby blanket knitting patterns provide instructions for different sizes, allowing you to choose the one that best fits your needs. Common sizes for heart baby blankets include 30×30 inches, 36×36 inches, and 40×40 inches. These sizes are ideal for newborns and infants, providing a cozy and snug fit for them.
Choosing the right size
When choosing the size of your heart baby blanket, it’s important to consider the recipient’s age and the intended use. If you’re knitting the blanket for a newborn, a smaller size like 30×30 inches or 36×36 inches will be perfect. These smaller sizes are also great for stroller blankets or car seat covers.
On the other hand, if you’re knitting the blanket for an older baby, a larger size like 40×40 inches might be more appropriate. This size will provide more coverage and ensure that the baby stays warm and comfortable. It can also be used as a playmat or a larger wrap for the baby.
Abbreviations
When diving into a knitting pattern, it’s important to understand the abbreviations that are commonly used. Abbreviations are shortcuts for longer words or phrases, making the pattern easier to read and follow. Here are some of the abbreviations you may come across when using a heart baby blanket knitting pattern:
- K: Knit
- P: Purl
- K2tog: Knit two stitches together
- P2tog: Purl two stitches together
- YO: Yarn over
- RS: Right side
- WS: Wrong side
- St(s): Stitch(es)
- Inc: Increase
- Dec: Decrease
These are just a few examples of the abbreviations you may encounter in a heart baby blanket knitting pattern. It’s important to familiarize yourself with these abbreviations before starting the pattern to ensure you understand the instructions correctly. Some patterns may also include specific abbreviations that are unique to that particular pattern, so always check the pattern key or legend for any additional abbreviations.
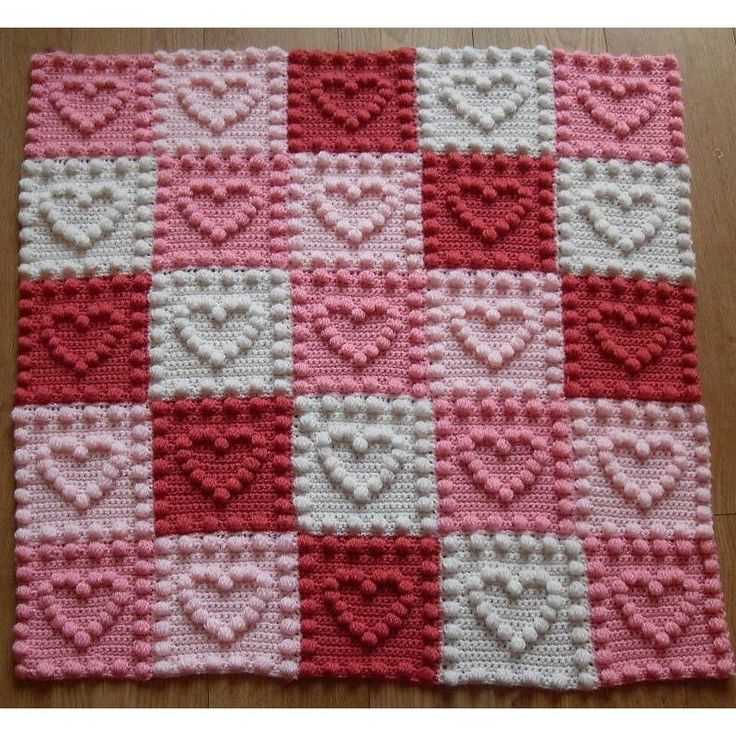
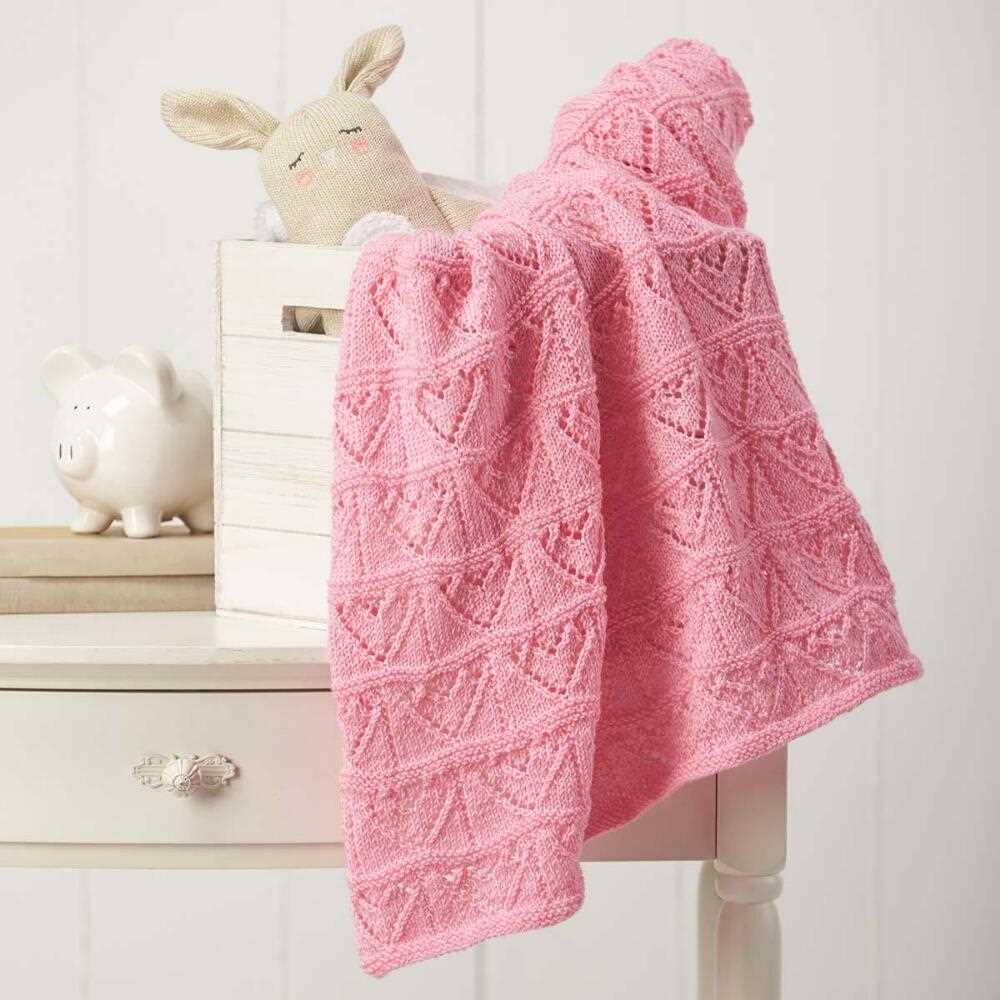
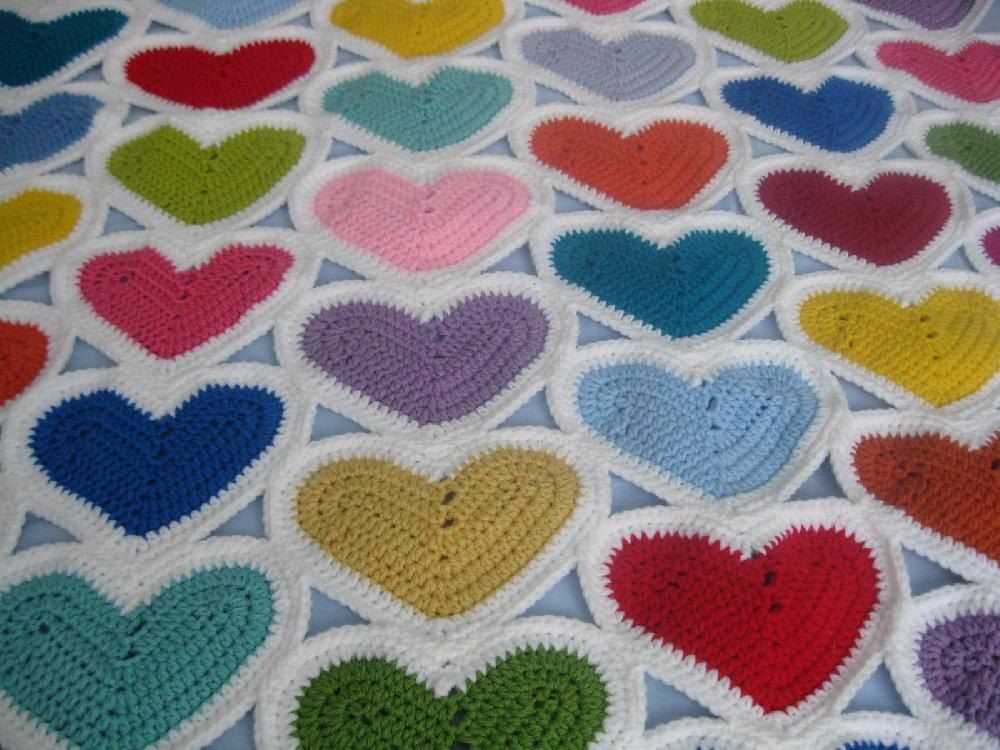
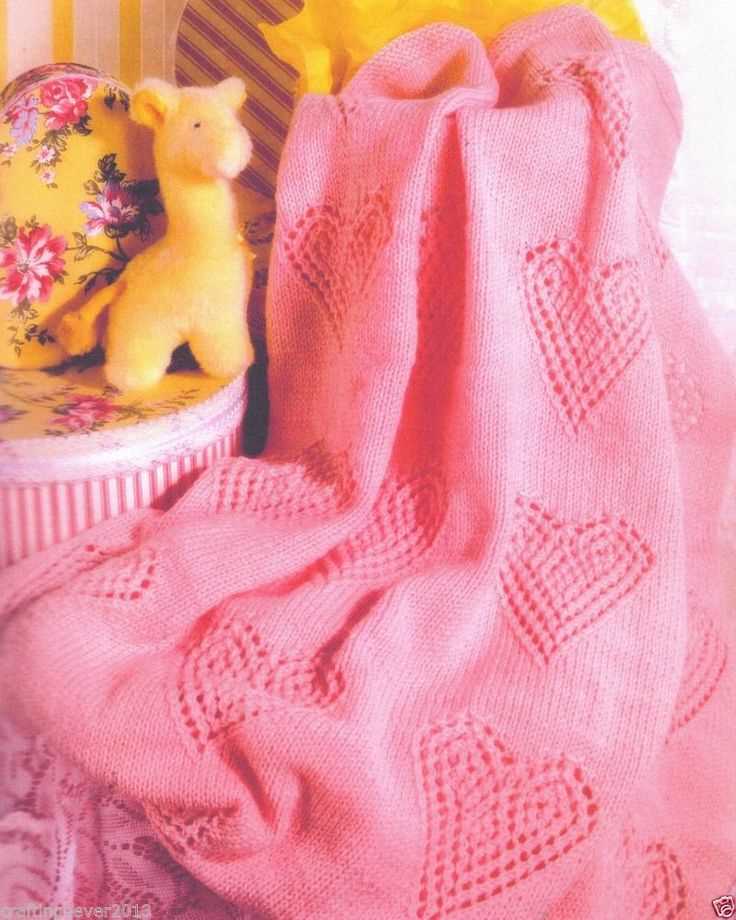
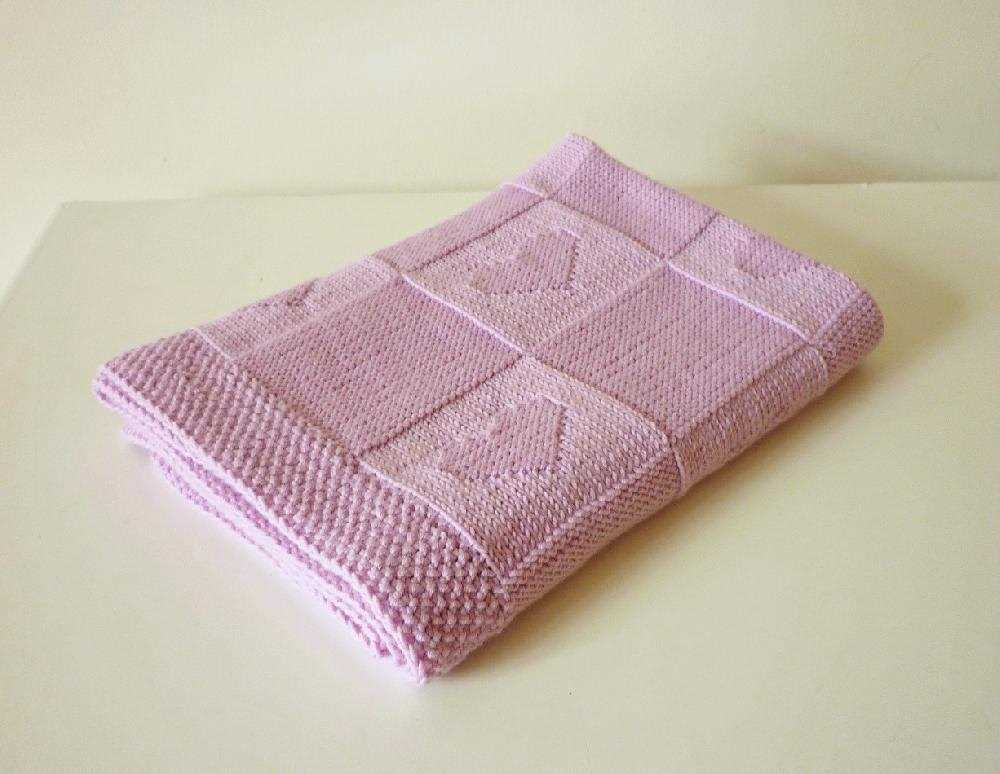
Heart Motif

The heart motif is a beloved symbol that represents love, affection, and warmth. It is often used in various craft projects to add a touch of sweetness and charm. Whether you’re knitting a baby blanket or creating a heartfelt card, incorporating a heart motif can instantly elevate your design and make it even more special.
In the context of knitting, the heart motif can be used in different ways. One popular technique is to create heart-shaped patterns within the fabric. This can be achieved through colorwork, where you use different colored yarns to knit the heart shapes. Another option is to use a stitch pattern that creates heart motifs, such as the lace stitch or the cable stitch.
Colorwork: To create heart-shaped patterns using colorwork, you can use the intarsia technique. This involves knitting different sections of the pattern with different colored yarns. By following a heart-shaped chart, you can knit the individual stitches that form the heart motif. This technique allows you to incorporate the heart motif into any knitted item, such as a baby blanket or a sweater.
Stitch Patterns: Another way to add heart motifs to your knitting is by using stitch patterns. Lace stitches can be used to create delicate and intricate heart designs. These stitches often involve yarnovers and decreases to form the shape of a heart. Cable stitches can also be used to create more pronounced and textured heart motifs. By crossing the stitches in a specific way, you can create a heart shape within the knitted fabric.
Overall, the heart motif is a versatile and beautiful element that can be incorporated into various knitting projects. Whether you choose to use colorwork or stitch patterns, adding a heart motif can make your item extra special and convey a heartfelt message to the recipient.
Making the Blanket
If you are looking to create a heart baby blanket using a knitting pattern, you are in the right place. This guide will walk you through the steps to create your very own heart-themed blanket that is perfect for keeping your little ones cozy and warm. Whether you are a beginner or an experienced knitter, this pattern is easily customizable to suit your skill level and preferences.
To start, you will need to gather the necessary materials. You will need knitting needles in the appropriate size for your chosen yarn, as well as a soft and warm yarn in your desired colors. Additionally, you will need a pair of scissors and a tapestry needle for finishing touches. Once you have everything you need, you can begin knitting the blanket by following the heart baby blanket knitting pattern.
The heart baby blanket pattern typically involves knitting the blanket in panels, which are then joined together to create the final piece. Each panel features a repeating heart pattern that adds a whimsical touch to the blanket. The pattern will guide you through the various stitches and techniques required to create the hearts, such as knit, purl, and decreasing stitches. It is important to take your time and follow the pattern carefully to ensure that your hearts turn out beautifully.
Once you have completed all the panels, it is time to assemble the blanket. This can be done by carefully joining the panels together using a tapestry needle and the same yarn that you used for knitting. Take your time and make sure that the seams are neat and secure. After the panels are joined together, you can add any desired finishing touches, such as a border or edging, to give your blanket a polished look.
Borders
When it comes to finishing a heart baby blanket, adding a border can give it a polished and professional look. There are several options for borders that can complement the heart design and enhance the overall appearance of the blanket.
1. Ribbed Border: A ribbed border adds texture and can help prevent the edges from rolling up. Knit a few rows of K1, P1 ribbing or K2, P2 ribbing around the blanket. This simple border is elegant and can be done in a contrasting color to make the heart design stand out even more.
2. Garter Stitch Border: A garter stitch border consists of all knit stitches on every row. It creates a nice flat border that is easy to knit and provides a clean finish. Knitting two or three rows of garter stitch around the blanket can frame the heart design beautifully.
3. Seed Stitch Border: The seed stitch border is created by alternating knit and purl stitches. This border is great for adding texture and visual interest to the blanket. Knit a couple of rows of seed stitch around the edges to give the blanket a unique and eye-catching border.
4. Picot Edge: For a delicate and feminine touch, consider adding a picot edge border. This border is created by knitting a small number of stitches, then binding off a larger number of stitches, creating a small loop. Repeat this pattern around the blanket for a dainty and decorative edging.
5. Lacy Border: If you’re looking for a more intricate and decorative border, a lacy border can be a beautiful choice. There are many lace patterns available that can be incorporated into the blanket’s edges. Knit a few rows of lace stitch to create an elegant and delicate border.
Regardless of the type of border chosen, it’s important to maintain an even tension and keep the stitches consistent throughout the entire blanket. This will ensure a professional-looking finish and make the heart baby blanket a cherished keepsake.
Finishing
After completing all the knitting, it’s time to finish off your heart baby blanket. This includes weaving in any loose ends, blocking the blanket, and adding any final touches.
Start by taking the time to weave in all the loose ends. Use a yarn needle to carefully thread each end through the stitches on the wrong side of the blanket. Make sure to secure the ends tightly to prevent any unraveling. Once all the ends are woven in, trim off any excess yarn.
Next, you’ll want to block your blanket to give it a polished and professional look. Lay the blanket flat on a clean surface and gently shape it into the desired dimensions. You can use blocking pins to hold the blanket in place if needed. Once the blanket is in the desired shape, mist it lightly with water and allow it to dry completely before removing the pins.
Finally, you can add any final touches to your heart baby blanket. This could include adding a decorative border, such as a simple garter stitch or a more complex lace pattern. You can also personalize the blanket by embroidering the baby’s name or initials onto one corner. Get creative and make the blanket your own!
Tips and Tricks
When it comes to knitting a heart baby blanket, there are a few tips and tricks that can help ensure the success of your project. Whether you’re a beginner knitter or an experienced one, these tips can help you create a beautiful and cozy blanket that will be loved by both baby and parents.
Use the Right Yarn
Choosing the right yarn for your heart baby blanket is essential. Opt for a soft and gentle yarn that is suitable for delicate baby skin. Look for yarn that is machine washable and easy to care for. For a heart baby blanket, you may want to choose a yarn in a soft pastel color or opt for a more vibrant hue to make the hearts stand out.
Check Your Gauge
Before you begin knitting your heart baby blanket, it’s important to check your gauge. This means knitting a small swatch with your chosen yarn and needles to ensure that your stitches and rows match the pattern’s recommended gauge. If your gauge is too loose, use smaller needles, and if it’s too tight, use larger needles. This step is crucial to ensure that your blanket turns out the correct size and shape.
Use Stitch Markers
When knitting the heart pattern on your baby blanket, using stitch markers can be incredibly helpful. Place a stitch marker after every repeat of the heart motif to help you keep track of where you are in the pattern. This will prevent any mistakes or confusion and will help you create a neat and symmetrical design.
Block Your Blanket
Once you’ve finished knitting your heart baby blanket, don’t forget to block it. Blocking is the process of shaping and stretching your knitted piece to ensure that it lays flat and the stitches are even. Wet-blocking is a common method where you soak your blanket in water, gently squeeze out the excess moisture, and then lay it flat to dry. This step can greatly enhance the finished appearance of your blanket and give it a professional touch.
Add Personal Touches

Finally, don’t be afraid to add personal touches to your heart baby blanket. You can stitch on a personalized tag or label with the baby’s name, or create an embroidered design on a corner of the blanket. These little touches can make the blanket even more special and create a lasting keepsake for the baby and their family.
Variations
You can easily modify this heart baby blanket knitting pattern to create different variations:
Change the size: To make a larger or smaller blanket, simply adjust the number of stitches and rows. Add or subtract stitches in multiples of 12 to make the blanket wider or narrower, and add or subtract rows to make it longer or shorter.
Change the colors: Experiment with different color combinations to create unique designs. You can use multiple colors for the hearts or change the color of the background. This pattern looks great with both pastel and bold color schemes.
Add embellishments: You can personalize the blanket by adding additional details such as buttons, bows, or appliques. Sewing on small heart-shaped buttons or attaching ribbon bows can give the blanket a charming touch.
Make it reversible: If you prefer a blanket that looks good from both sides, you can knit the hearts using a technique called double knitting. This creates a reversible fabric with hearts on both sides, perfect for snuggling.
With these variations, you can create a heart baby blanket that is truly unique and special. Whether you’re knitting it for your own little one or as a gift, this pattern is sure to bring warmth and love.