Unveiling the Intricacies of Knitting Lace Patterns

Knitting lace patterns is a beautiful and delicate technique that can add elegance and flair to your knitted projects. Whether you want to create a lacy shawl, a feminine scarf, or intricate lace details on a sweater, learning how to knit lace patterns will open up a world of possibilities for your knitting repertoire.
Before diving into a lace project, it’s important to understand the basics of knitting lace patterns. Lace knitting involves creating a series of holes or eyelets in the fabric by strategically increasing and decreasing stitches. These eyelets are then combined with various stitches to create intricate lace motifs and designs.
When knitting lace patterns, it’s essential to use lightweight yarn and smaller needles to achieve the delicate and airy look that lace is known for. Lace patterns often require the use of charts or written instructions, so be sure to familiarize yourself with these before starting your project. With a little practice and patience, you’ll be able to master the art of knitting lace patterns and create stunning pieces to showcase your knitting skills.
How to Knit Lace Pattern
Knitting lace patterns can add a beautiful and delicate touch to your knitting projects. Lace patterns are usually made up of a combination of yarn overs and decreases, creating an open and airy fabric. While lace knitting can seem intimidating at first, with some practice and patience, it is a skill that can be mastered.
Choose the right yarn and needles: When knitting lace, it is generally recommended to use a fine yarn and smaller needles. This allows for better stitch definition and helps to create a more delicate and intricate pattern. Lace patterns often look best when knit with natural fibers such as wool or silk, as they have good drape and can block well.
Read and understand the lace pattern: Lace patterns are typically presented in charts or written instructions, or sometimes a combination of both. Before starting your project, take the time to carefully read and understand the pattern. Pay attention to any special stitches or techniques used, and make sure you know how to do them before you begin.
Practice the lace pattern on a smaller swatch: If this is your first time knitting lace, it can be helpful to practice the pattern on a smaller swatch before diving into a larger project. This will allow you to get comfortable with the lace stitches and see how the pattern develops. It can also help you identify and fix any mistakes before starting your main project.
Remember, lace knitting requires concentration and attention to detail. Take your time and enjoy the process. With practice, you’ll soon be creating stunning lace patterns.
Choosing the Right Yarn and Needles
When it comes to knitting lace patterns, choosing the right yarn and needles is crucial. The type and weight of yarn can greatly affect the final look and drape of your lace project.
Yarn: Lace patterns often require a finer weight yarn, such as lace weight or fingering weight yarn. These thinner yarns create delicate and intricate lace designs. It is important to consider the fiber content of the yarn as well. Natural fibers, like wool or silk, tend to block better and hold their shape, giving your lacework a polished finish. Synthetic yarns may not block as well, so keep this in mind when selecting your yarn.
Needles: Lace patterns typically require smaller needle sizes to achieve the desired open and lacy effect. Circular needles are often preferred for lace knitting, as they can hold a large number of stitches and allow for easier manipulation of the yarn and stitches. The length of the circular needle should be long enough to accommodate the width of your project. Additionally, using needles with sharp tips can make it easier to work intricate lace stitches and increases or decreases.
Overall, choosing the right yarn and needles for your lace pattern can greatly impact the final result. Take the time to consider the weight, fiber content, and needle size that will best complement your desired lace design. With the right materials, you’ll be well on your way to creating beautiful and intricate lacework.
Understanding Lace Knitting Terminology
When diving into the world of lace knitting, it’s important to understand the terminology that is specific to this style of knitting. Lace knitting differs from other types of knitting in that it incorporates intricate patterns and designs created by strategically placed holes, decreases, and yarn overs. Below, we’ll explore some of the key terms and concepts you need to know to successfully knit lace patterns.
1. Yarn over (YO)
A yarn over is a simple technique used in lace knitting to create an extra stitch and a hole in your fabric. To perform a yarn over, bring the working yarn to the front of your work (if it’s not already there), then wrap the yarn over the right-hand needle from back to front. This creates a new loop on the needle, which will be knit or purled on the following row.
2. Decreases

Decreases are used in lace knitting to shape the fabric and create intricate patterns. There are several types of decreases commonly used in lace knitting, including:
- K2tog – Knit two stitches together. This decrease leans to the right and is often used along the edges of lace patterns.
- SSK – Slip, slip, knit. This decrease also leans to the right and is often used in the middle of lace patterns.
- SK2P – Slip 1, knit 2 together, pass slipped stitch over. This decrease creates a centered double decrease and is commonly used to create a symmetrical lace pattern.
3. Chart reading
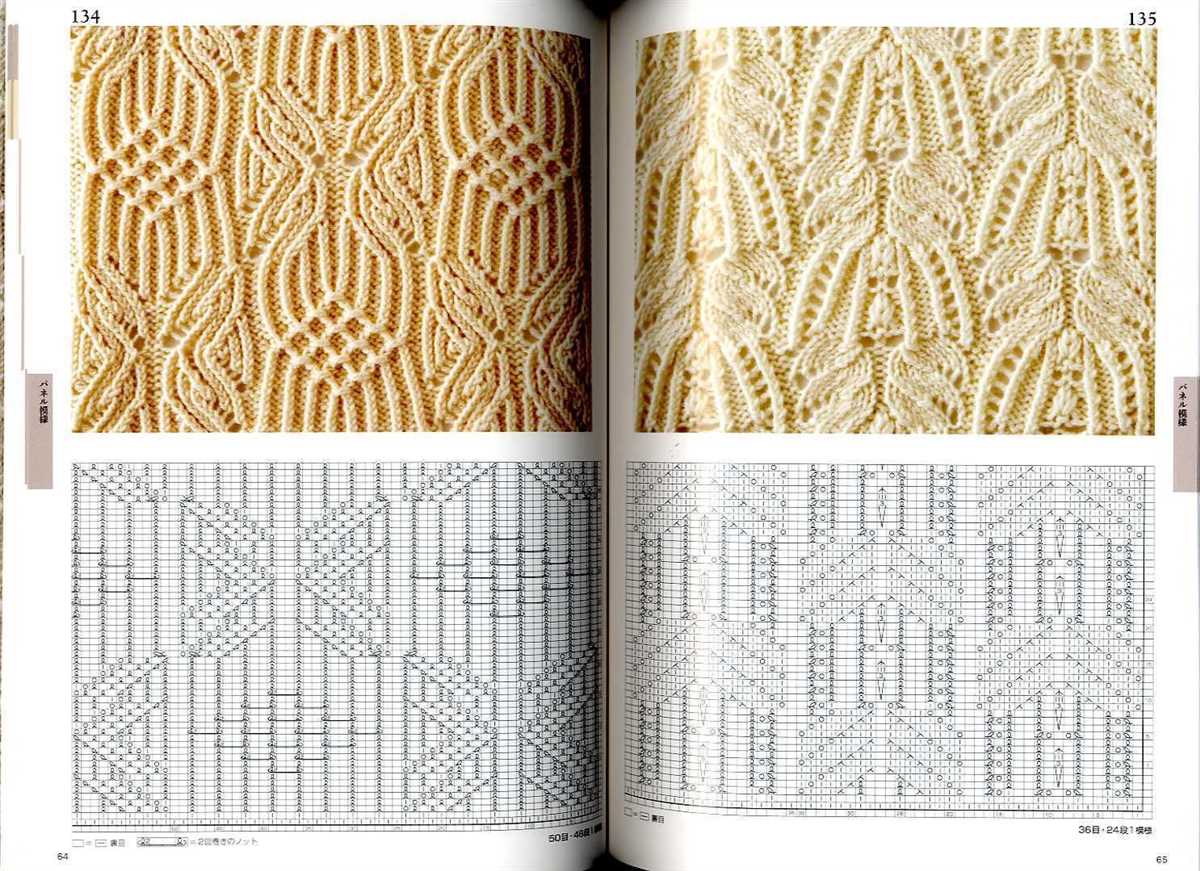
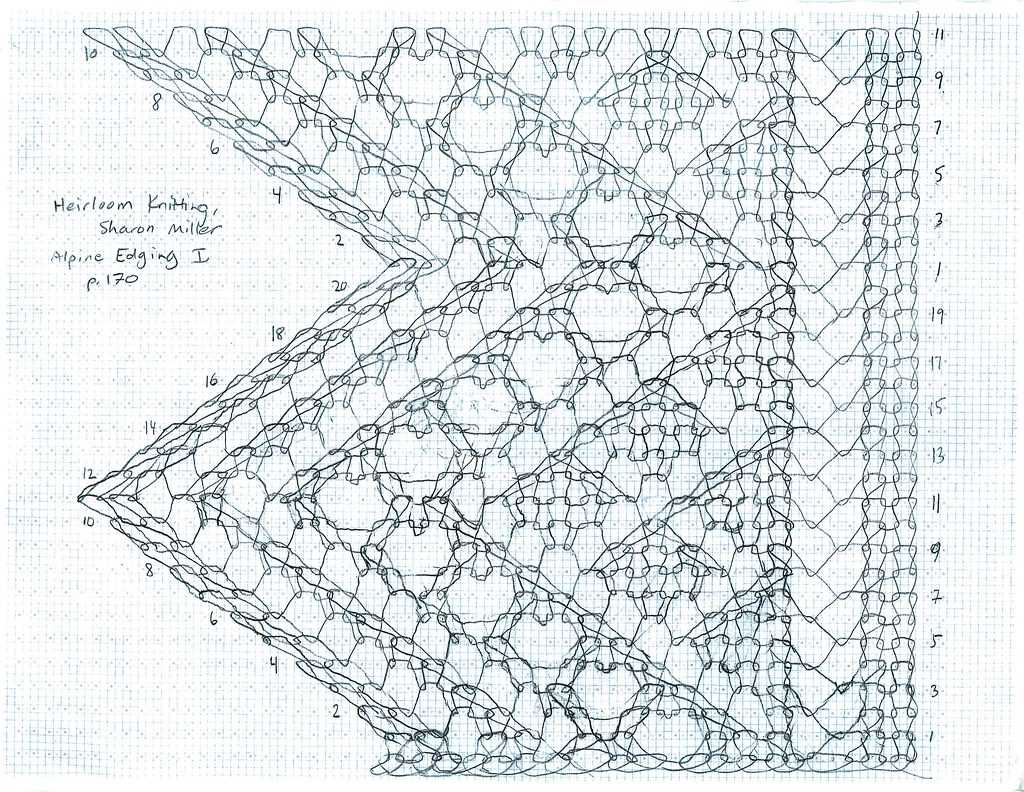
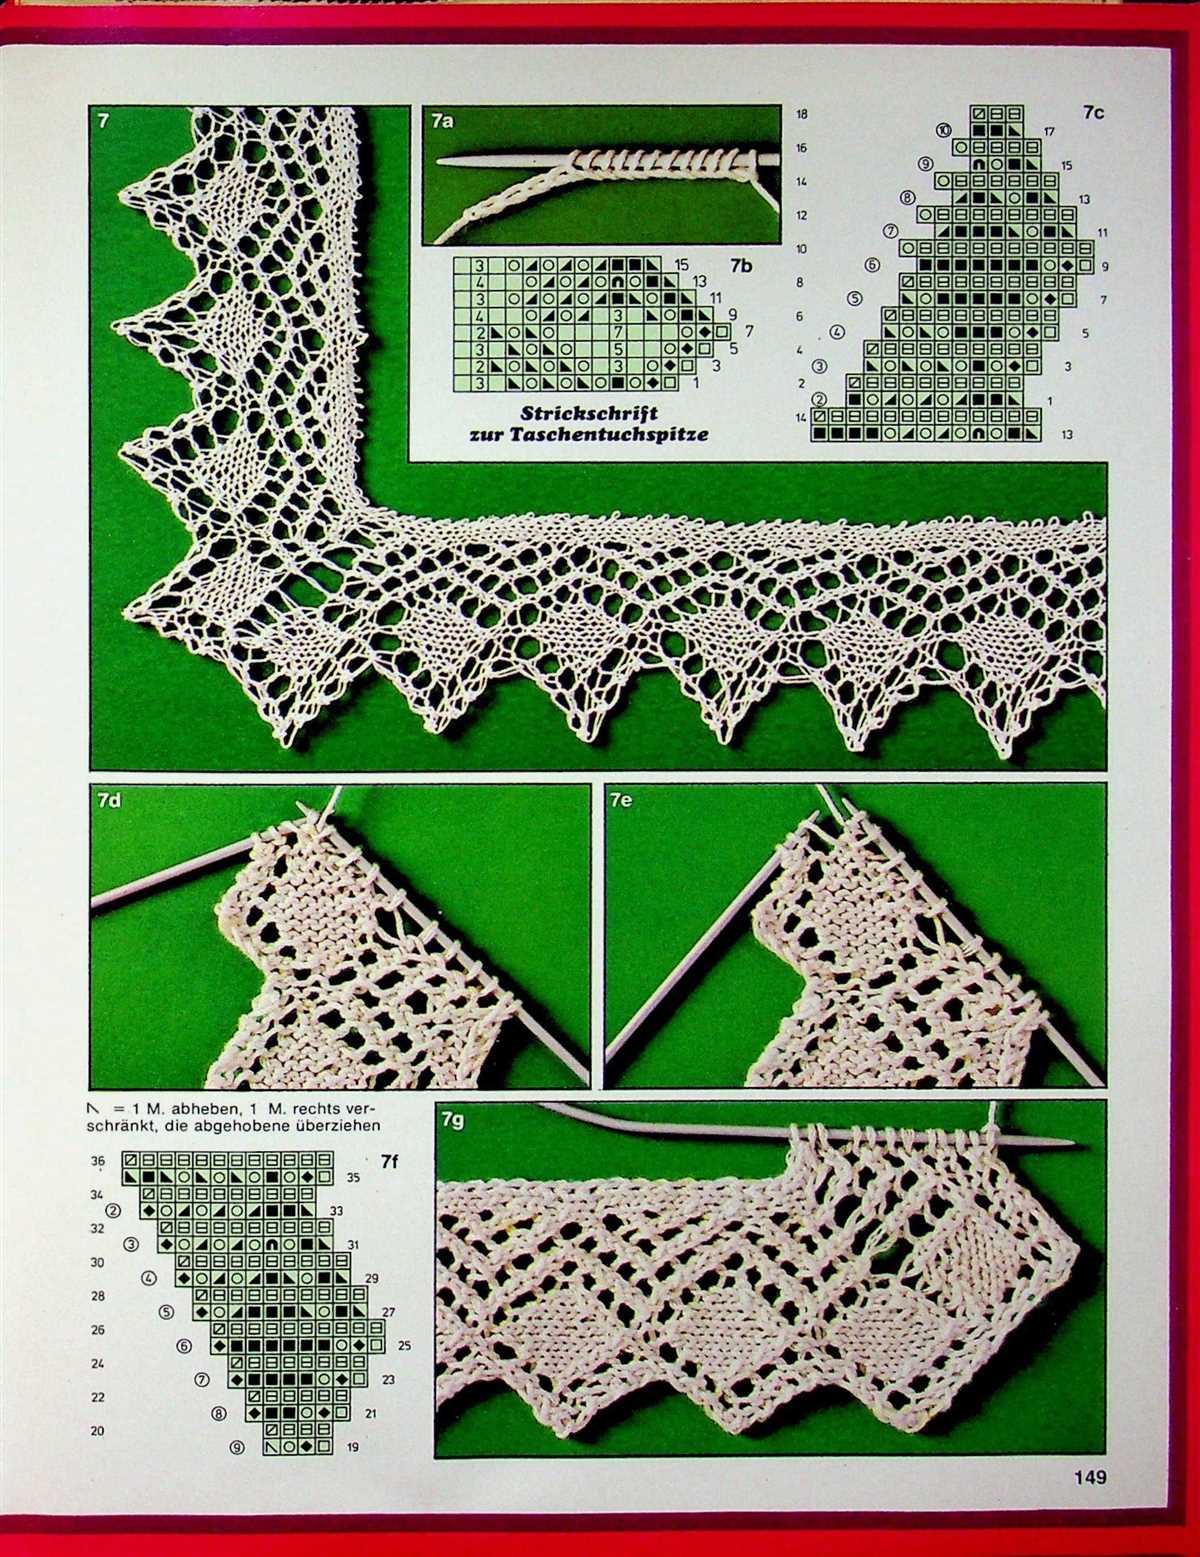
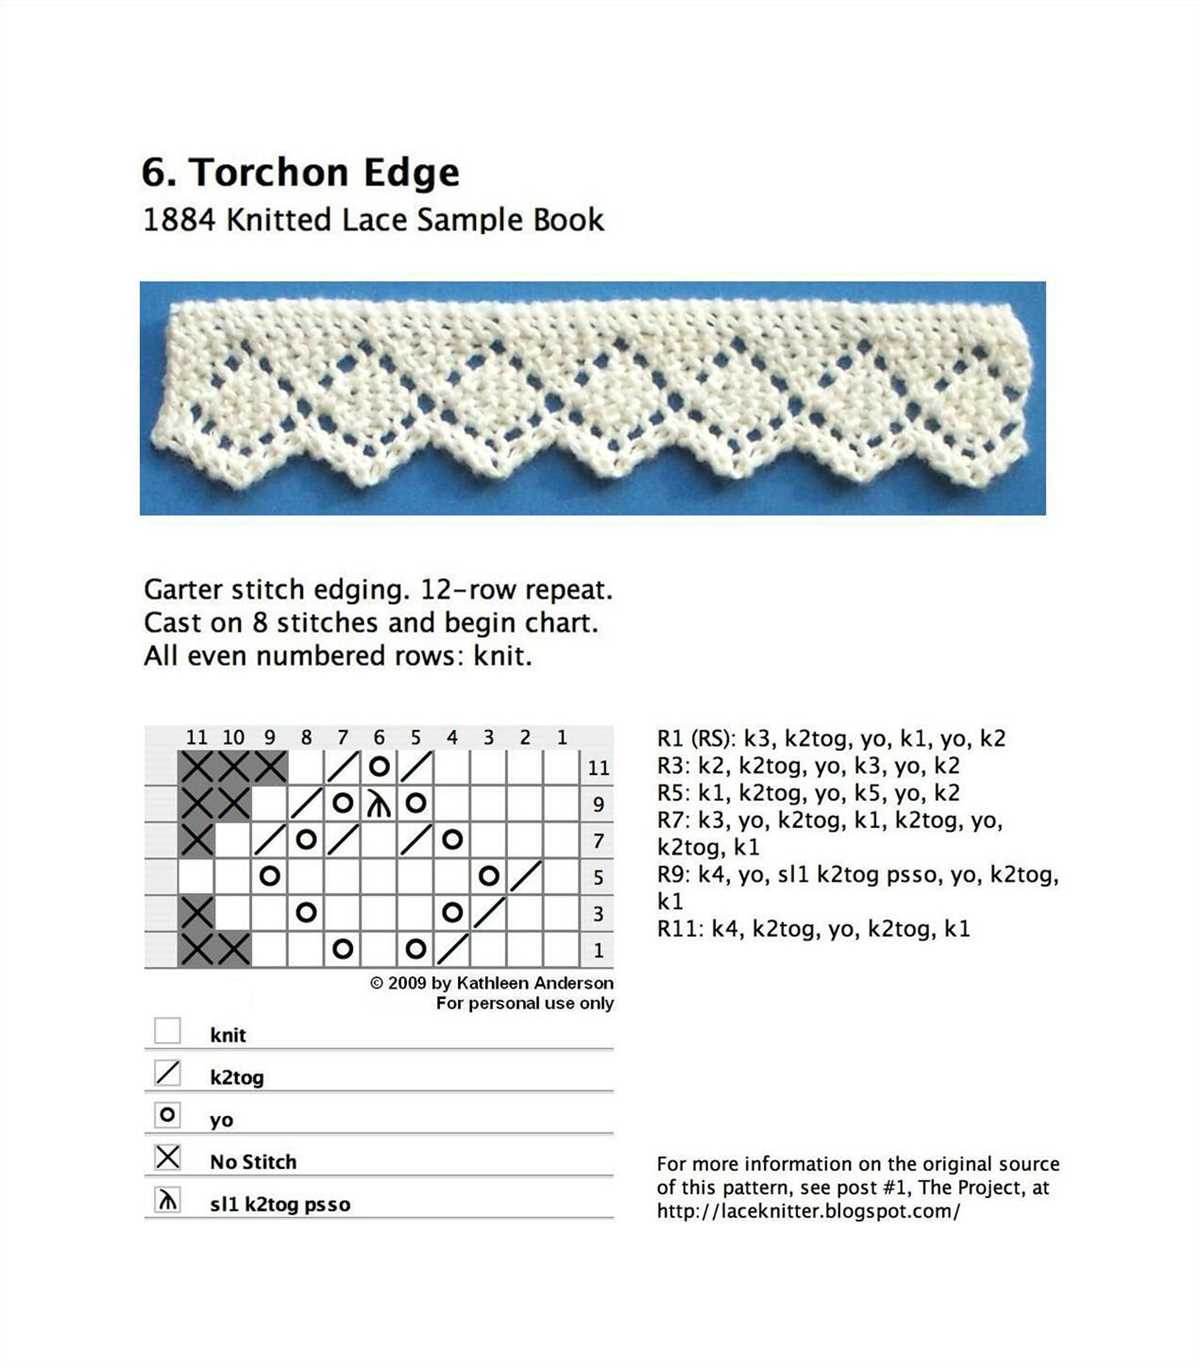
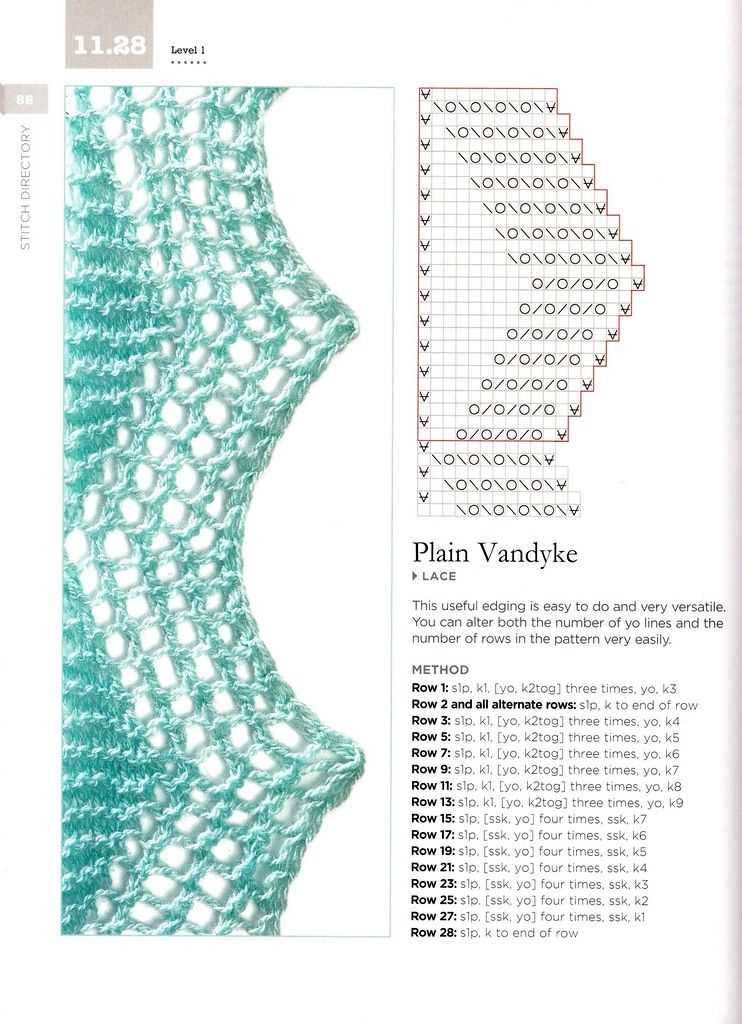
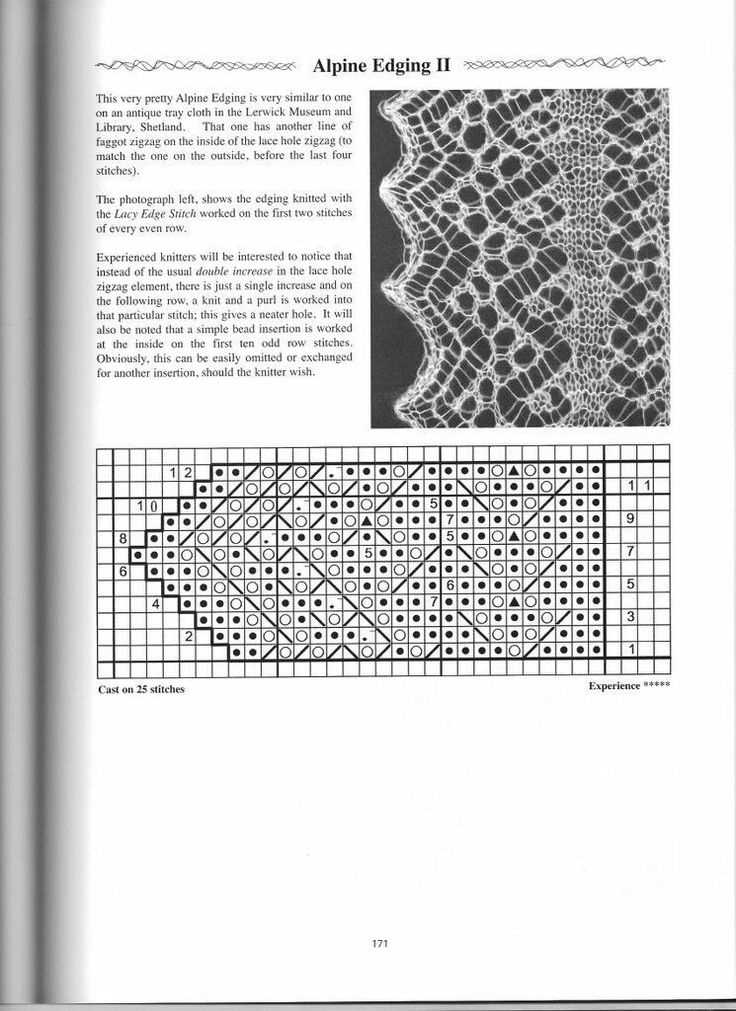
Lace patterns are often presented in chart form, which consists of a grid made up of squares. Each square on the chart represents a stitch or a group of stitches. The symbols or colors used in the squares indicate the type of stitch to be worked. It’s important to become familiar with the symbols and understand how to read the chart to successfully knit lace patterns.
4. Lifeline
A lifeline is a technique used in lace knitting to prevent losing your work if you make a mistake. It involves running a contrasting color thread, such as dental floss or waste yarn, through the stitches on a certain row. If you make a mistake, you can simply rip back to the lifeline and easily pick up the stitches without losing progress.
By understanding these lace knitting terminology and concepts, you’ll be well-equipped to tackle lace patterns and create beautiful, intricate designs in your knitting projects.
Reading Lace Knitting Charts
If you are new to knitting lace patterns, reading lace knitting charts may seem daunting at first. However, once you understand the symbols and techniques used in these charts, they can actually make lace knitting much easier to follow and execute. In this article, we will guide you through the process of reading lace knitting charts step by step.
Understanding the Symbols
Before you start working on a lace knitting pattern, it is important to familiarize yourself with the symbols used in the lace knitting charts. Common symbols include a circle or dot representing a knit stitch, a blank square representing a purl stitch, a line or diagonal slash representing a yarn over, and a line with a vertical bar representing a decrease stitch.
Circle or dot: This symbol represents a knit stitch. On the right side of the work, you will knit the stitch, and on the wrong side, you will purl the stitch.
Blank square: This symbol represents a purl stitch. On the right side of the work, you will purl the stitch, and on the wrong side, you will knit the stitch.
Line or diagonal slash: This symbol represents a yarn over. To create a yarn over, you simply bring the yarn to the front of the work (if it is not already there) and then continue knitting or purling the next stitch.
Line with a vertical bar: This symbol represents a decrease stitch. There are various types of decrease stitches, such as knit two together (k2tog), slip-slip-knit (ssk), and knit two together through the back loops (k2tog tbl). The specific decrease stitch used will depend on the pattern.
Following the Chart
Once you are familiar with the symbols, you can start following the lace knitting chart. Each row of the chart represents one row of knitting. Begin at the bottom right corner of the chart and read from right to left for right-side rows, and from left to right for wrong-side rows.
Right-side rows: On right-side rows, you will work the stitches as they appear on the chart. If the symbol is a dot or circle, knit the stitch. If it is a blank square, purl the stitch. If it is a line or diagonal slash, yarn over. If it is a line with a vertical bar, perform the specified decrease stitch.
Wrong-side rows: On wrong-side rows, you will work the stitches opposite to how they appear on the chart. If the symbol is a dot or circle, purl the stitch. If it is a blank square, knit the stitch. If it is a line or diagonal slash, you may not need to create a yarn over on wrong-side rows, unless specified in the pattern. If it is a line with a vertical bar, again, perform the specified decrease stitch.
By following the lace knitting chart and knitting the stitches according to the symbols provided, you will be able to create beautiful lace patterns in your knitting projects. Take your time, practice, and soon you will be knitting intricate lace designs with ease!
Starting a Lace Pattern
When starting a lace pattern, it’s important to have the right materials and tools on hand. You will need a pair of knitting needles suitable for the weight of yarn you are using, as well as your chosen yarn in the desired color. Lace patterns often look best when worked with fine, lightweight yarns, such as lace or fingering weight. You may also want to have stitch markers and a tapestry needle on hand to help you keep track of your progress and weave in any loose ends.
Before starting your lace pattern, it’s a good idea to swatch and block your gauge. This will help ensure that your finished piece will be the correct size and that the lace pattern will be evenly spaced. To swatch, cast on a few more stitches than the pattern calls for and work a few rows in the lace stitch pattern. Then, bind off and wash and block your swatch. Measure the gauge and compare it to the pattern specifications. If your gauge is too tight, try using larger needles. If it’s too loose, try using smaller needles. Adjust your needle size until you achieve the correct gauge.
Once you have your materials ready and your gauge swatched, it’s time to begin your lace pattern. Start by reading through the pattern carefully and familiarizing yourself with the stitches and techniques used. Make sure you understand any special abbreviations or instructions before you begin. It can be helpful to highlight or circle any important information in the pattern to make it easier to follow.
When starting the lace pattern, it’s often helpful to place stitch markers at the beginning and end of each repeat or pattern section. This will make it easier to keep track of where you are in the pattern and help you spot any mistakes more easily. As you work each row, check your work frequently to make sure the stitch count is correct and that the lace pattern is forming correctly. If you do make a mistake, don’t panic! Lace patterns can be forgiving, and you can often fix mistakes by carefully tinkling back to the error and reworking the stitches.
As you work through the lace pattern, take your time and enjoy the process. Lace knitting can be intricate and delicate, but it can also be incredibly rewarding. Take breaks as needed to rest your hands and keep your stitches even. Remember to block your finished lace piece to open up the lace stitches and give your project a professional finish. With practice and patience, you’ll soon be able to create beautiful lace patterns with confidence and skill.
Basic Lace Stitches
When it comes to knitting lace patterns, there are several basic stitches that every knitter should know. These stitches form the foundation of most lace patterns and can be combined in various ways to create intricate and beautiful designs.
Yarn Over (YO)
A yarn over is one of the simplest lace stitches and is used to create an eyelet or hole in the fabric. To work a yarn over, simply bring the working yarn to the front of the work, then wrap it over the needle and continue working the next stitch as normal. The yarn over creates an extra stitch, which is counted as part of the pattern.
K2tog (Knit Two Together)

K2tog is a decrease stitch commonly used in lace patterns to create a decrease in the number of stitches. To work a K2tog, insert the right needle into the next two stitches on the left needle as if to knit, then knit them together as one stitch.
SSK (Slip, Slip, Knit)
SSK is another decrease stitch often used in lace patterns. To work an SSK, slip the next two stitches one at a time from the left needle to the right needle as if to knit, then insert the left needle into the front loops of the slipped stitches and knit them together.
Double Decrease
A double decrease is used to decrease two stitches into one and is commonly used to create a pointed shape in lace patterns. There are several ways to work a double decrease, such as slipping two stitches together knitwise, knitting the next stitch, then passing the slipped stitches over the knit stitch.
By mastering these basic lace stitches, you will have the foundation to create a wide variety of lace patterns. Experiment with different combinations, yarns, and needle sizes to create your own unique lace designs.
Adding Increases and Decreases
In lace knitting, increases and decreases are essential techniques that create the open, lacy patterns. Increases add stitches to the knitting, while decreases remove stitches. By strategically placing these increases and decreases within the lace pattern, you can create the desired shaping and design.
Increases: There are several types of increases commonly used in lace knitting. One of the most common increases is the yarn over (YO), where you simply wrap the yarn around the needle to create a new stitch. This creates an eyelet or hole in the fabric. Another increase commonly used in lace knitting is the make one (M1) increase, where you pick up the bar between two stitches and knit into it to create a new stitch.
Decreases: Decreases are used to remove stitches from the knitting and create the shaping in lace patterns. The most common decrease used in lace knitting is the knit two stitches together (k2tog) decrease, where you insert the needle into the next two stitches on the left needle and knit them together as one stitch. Another common decrease is the slip-slip-knit (ssk) decrease, where you slip two stitches one by one as if to knit, then insert the left needle into the front loops of the slipped stitches and knit them together through the back loops.
Understanding how to add increases and decreases in lace knitting is crucial for creating beautiful, intricate lace patterns. By mastering these techniques, you can create stunning lace garments and accessories with delicate and intricate designs.
Blocking Lace Knitting
Lace knitting is a beautiful technique that creates intricate patterns of holes and stitches. After completing a lace project, it is important to block it to enhance the overall look and shape of the fabric. Blocking helps to open up the lace, making the stitches more defined and the pattern more visible.
There are several methods for blocking lace knitting, but the most common ones are wet blocking and steam blocking. Wet blocking involves soaking the knitted piece in water, then gently squeezing out the excess moisture and shaping it to the desired measurements. Steam blocking, on the other hand, involves passing steam over the fabric using an iron or a steamer, and then shaping it while it is still damp.
Before blocking your lace knitting, it is important to check the care instructions for the yarn you used. Some fibers, such as silk or wool, may require more delicate handling. It is also a good idea to pin your knitting to a blocking board or mat, using rust-proof T-pins or blocking wires, to ensure that it dries in the desired shape. You can also use blocking wires to straighten the edges of your lace project and create crisp, clean lines.
Once your lace knitting is completely dry, you can unpin it and admire the beautiful results. Blocking not only enhances the lace pattern, but it also helps the fabric to drape better and retain its shape for longer. So, whether you’re knitting a delicate lace shawl or a lacy sweater, don’t skip the blocking step – it’s well worth the extra effort!
Overall, blocking lace knitting is an essential step to achieve the desired shape and appearance of the finished piece. Whether you choose wet blocking or steam blocking, the process involves reshaping the knitted fabric and allowing it to dry in the new shape. It is important to follow the care instructions for the yarn used and to use rust-proof pins or blocking wires to secure the fabric while it dries. Blocking not only enhances the lace pattern, but it also helps the fabric to drape better and retain its shape for longer. So, take the time to block your lace knitting and enjoy the beautiful results!
Fixing Mistakes in Lace Knitting
Knitting lace patterns can be challenging but rewarding. However, it’s not uncommon to make mistakes along the way. Whether it’s a dropped stitch, a missed yarn over, or a wrong stitch count, there are ways to fix these mistakes without ripping out your entire project. Here are some tips for fixing mistakes in lace knitting.
1. Identifying the Mistake
Before you can fix a mistake, you need to identify what went wrong. Carefully examine your knitting and compare it to the lace pattern to determine which stitch or section is incorrect. This may involve counting stitches, following the yarn overs, or checking for any obvious errors.
2. Tinking
If you’ve made a mistake in just a few rows, you can use the technique called “tinking” to undo the incorrect stitches. Tinking is essentially knitting backward stitch by stitch to undo your work. This method is useful for fixing small mistakes or stitch misplacements.
3. Using a Lifeline
A lifeline is an excellent tool for fixing mistakes in lace knitting. It involves threading a separate piece of contrasting color yarn through a row of stitches, usually at regular intervals. This acts as a backup point, allowing you to easily rip back to that row if needed, without damaging the rest of your work.
4. Fixing Dropped Stitches

If you’ve accidentally dropped a stitch in your lace pattern, it’s essential to fix it promptly to avoid unraveling your work. Use a crochet hook or a small knitting needle to pick up the dropped stitch and carefully ladder it back up through the surrounding stitches. Work slowly and cautiously to avoid any further mistakes.
5. Consulting Lace Charts

If you’re following a lace pattern from a chart, make sure to consult it regularly to correct any mistakes. Lace charts provide a visual representation of the stitches, yarn overs, and decreases, making it easier to spot errors and fix them correctly. Take your time and double-check each row against the chart as you knit.
Knitting lace patterns requires patience and attention to detail. However, with these tips and techniques for fixing mistakes, you can confidently tackle any errors that may arise and continue creating beautiful lacework.
Incorporating Lace Patterns into Projects
Lace knitting is a delicate and beautiful technique that can elevate any knitting project. Whether you are creating a shawl, a scarf, or a sweater, incorporating lace patterns can add an elegant touch and create intricate designs. By choosing the right lace pattern and understanding how to read and follow the instructions, you can easily incorporate lace into your knitting projects.
To begin, it’s important to select a lace pattern that complements your project and fits your skill level. Lace patterns can vary in complexity, from simple eyelet stitches to intricate lace motifs. If you are new to lace knitting, it may be best to start with a simple pattern and gradually work your way up to more intricate designs as you gain confidence and experience.
Once you have chosen a lace pattern, it’s essential to follow the instructions carefully. Lace patterns are typically written in chart form, using symbols and abbreviations to represent different stitches. It’s important to familiarize yourself with these symbols and understand how they correspond to different knitting techniques. Taking the time to read and comprehend the instructions before starting your project will help ensure accurate and beautiful results.
- When incorporating a lace pattern into your project, it’s crucial to consider the overall design and placement of the lace. You can choose to incorporate lace throughout the entire project or use it as a decorative element in specific sections. Careful planning and swatching can help you determine the ideal placement and proportion of the lace pattern.
- One popular technique for incorporating lace is to use it for the borders or edges of your project. This can add a delicate and feminine touch to scarves, shawls, or even blankets. Lace can also be used as an accent on sleeves or bodices, creating an eye-catching detail.
- Another way to incorporate lace is by using it as an insert or panel within your project. For example, you can create a simple stockinette sweater with a lace panel running down the center front. This adds visual interest and creates a focal point for your garment.
Overall, incorporating lace patterns into your knitting projects can add an element of sophistication and elegance. With careful selection, understanding of instructions, and thoughtful placement, you can create stunning pieces that showcase your skills as a knitter. So, next time you’re looking to add a touch of delicate beauty to your knitting, consider incorporating lace patterns into your project.
Tips and Tricks for Successful Lace Knitting
In conclusion, lace knitting can be a beautiful and rewarding technique to incorporate into your knitting projects. By following these tips and tricks, you can achieve stunning results:
- Choose the right yarn: Opt for a lightweight and smooth yarn to ensure that the lace pattern is well-defined and the stitches can be easily manipulated.
- Use stitch markers: Place stitch markers between pattern repeats to help you keep track of your progress and catch any mistakes early on.
- Practice reading charts: Lace patterns are often presented in chart form. Take the time to familiarize yourself with how to read and interpret these charts, as they can be incredibly helpful in visualizing the pattern.
- Block your finished project: Blocking is essential for opening up the lace pattern and giving it a professional and polished appearance. Follow the blocking instructions for your specific yarn to achieve the best results.
- Take your time: Lace knitting requires focus and attention to detail. Take your time with each stitch and pattern repeat to ensure accuracy.
- Don’t be afraid to tink or frog: Mistakes happen, and it’s important to be comfortable with undoing your work when necessary. Don’t be afraid to tink (or unravel) a few stitches or even frog (rip out) a few rows if it’s necessary to fix an error.
By keeping these tips in mind, you’ll be well-equipped to tackle lace knitting projects with confidence and create stunning lace patterns in your knitted garments and accessories. Happy knitting!
Q&A:
What tools do I need to knit lace pattern?
You will need knitting needles, yarn, stitch markers, and a tapestry needle.
How do I read a lace knitting pattern?
A lace knitting pattern typically consists of written instructions or charts. The instructions will guide you on which stitches to make and when to make them. Charts use symbols to represent different stitches and you follow the chart from right to left for each row.
What is blocking in lace knitting?
Blocking is the process of shaping and stretching your finished lace knitting to even out the stitches and open up the lace pattern. It helps to enhance the overall look of the lace and make it more defined.
How do I fix a mistake in lace knitting?
If you make a mistake in lace knitting, you can use a crochet hook to carefully unravel and fix the stitches. Alternatively, you can use the “lifeline” technique, where you insert a contrasting thread through the stitches in a row before the mistake and then rip back to that row if needed.
What are some common lace knitting stitch patterns?
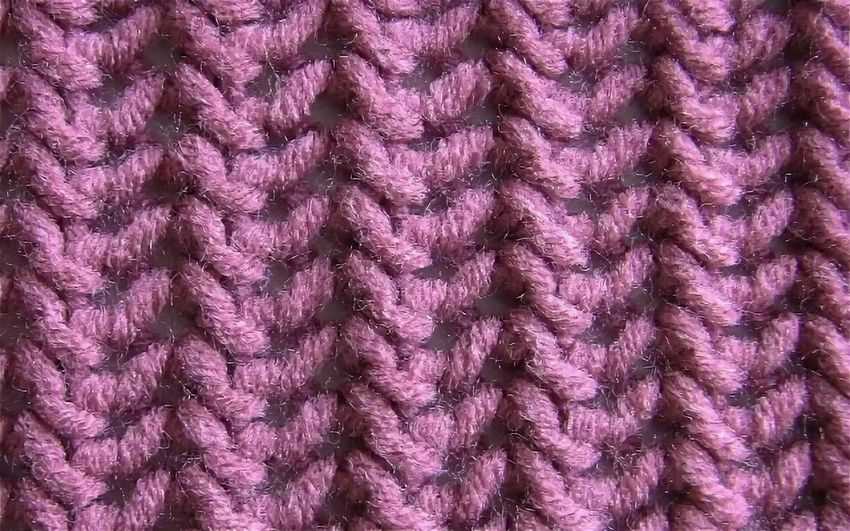
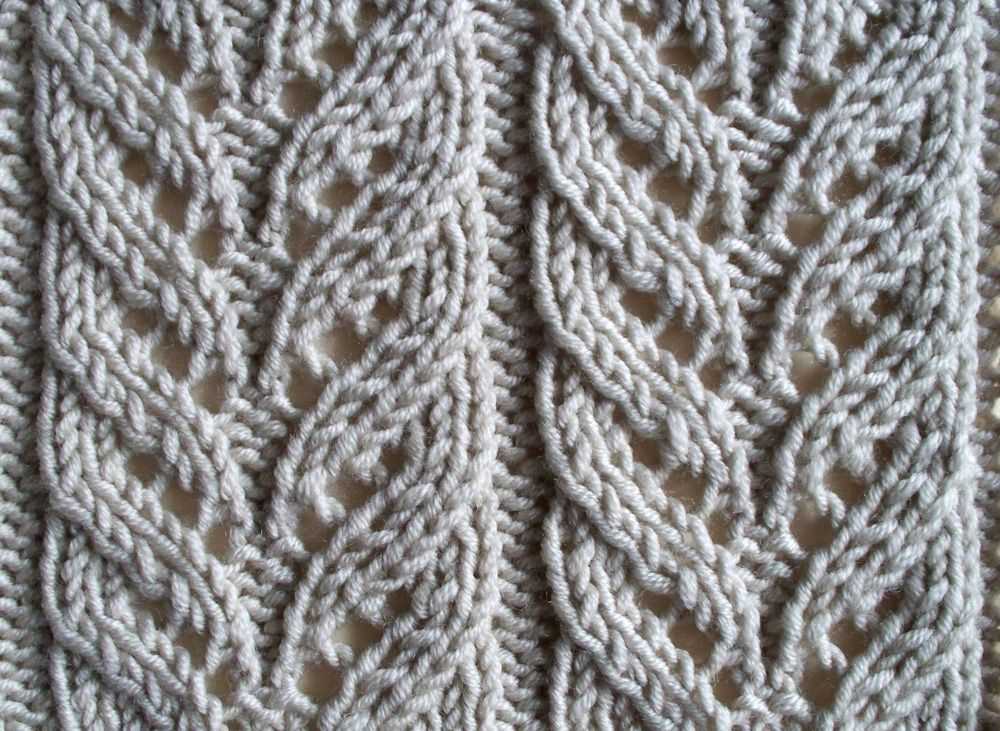
Some common lace knitting stitch patterns include the feather and fan, diamond lace, ripple stitch, and leaf lace. These patterns can create beautiful and intricate designs in your lace knitting projects.