Unraveling the Knit 1 Purl 2 Pattern: A Closer Look at the Intricate Stitch

Knitting is a versatile and timeless craft that has been enjoyed by people of all ages and backgrounds for centuries. One of the most iconic and widely recognized knitting techniques is the “knit 1 purl 2” pattern. This classic knitting pattern creates a beautiful and textured fabric that is both visually appealing and cozy to wear.
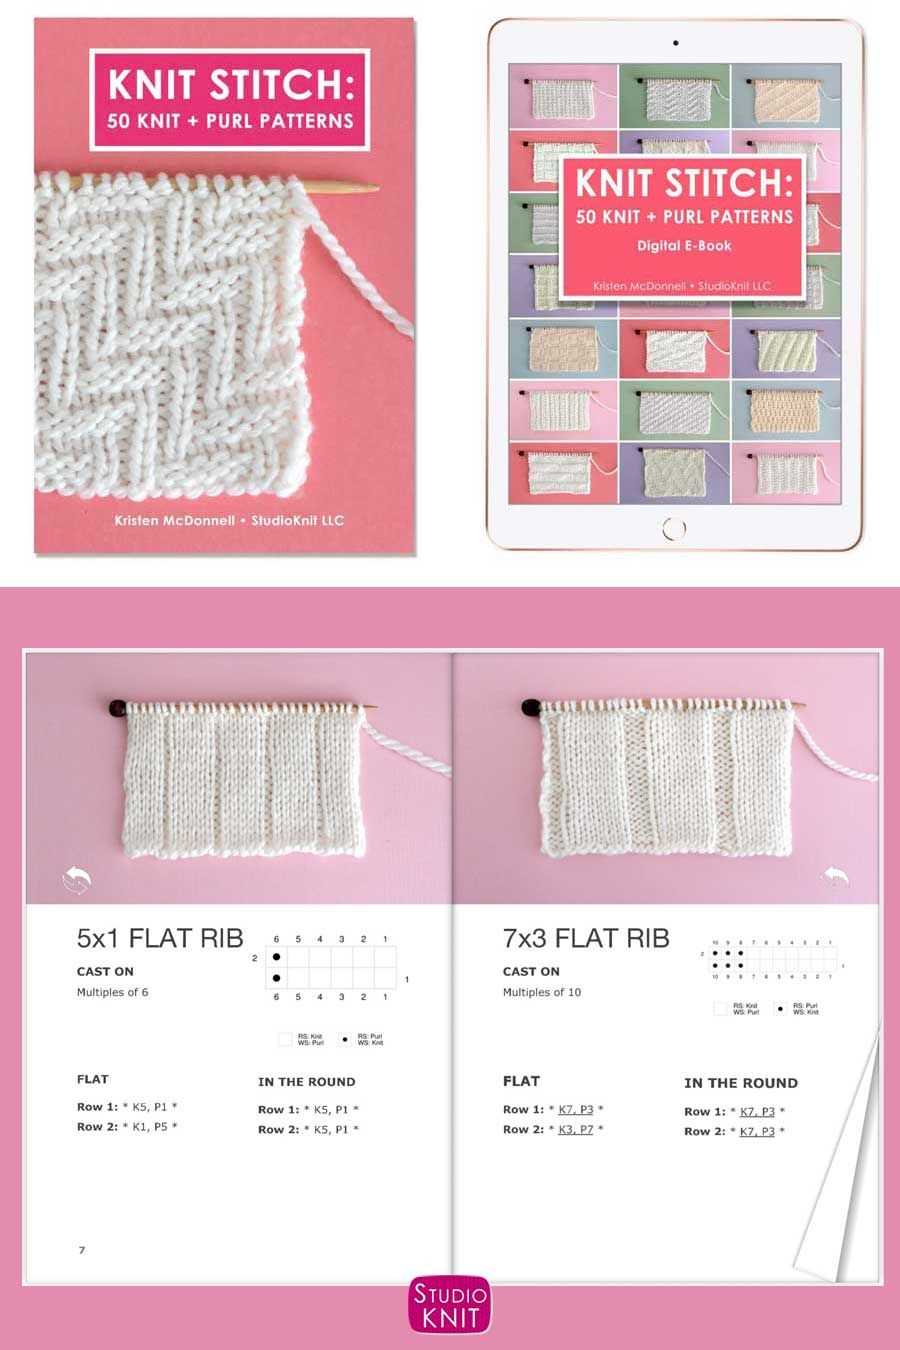
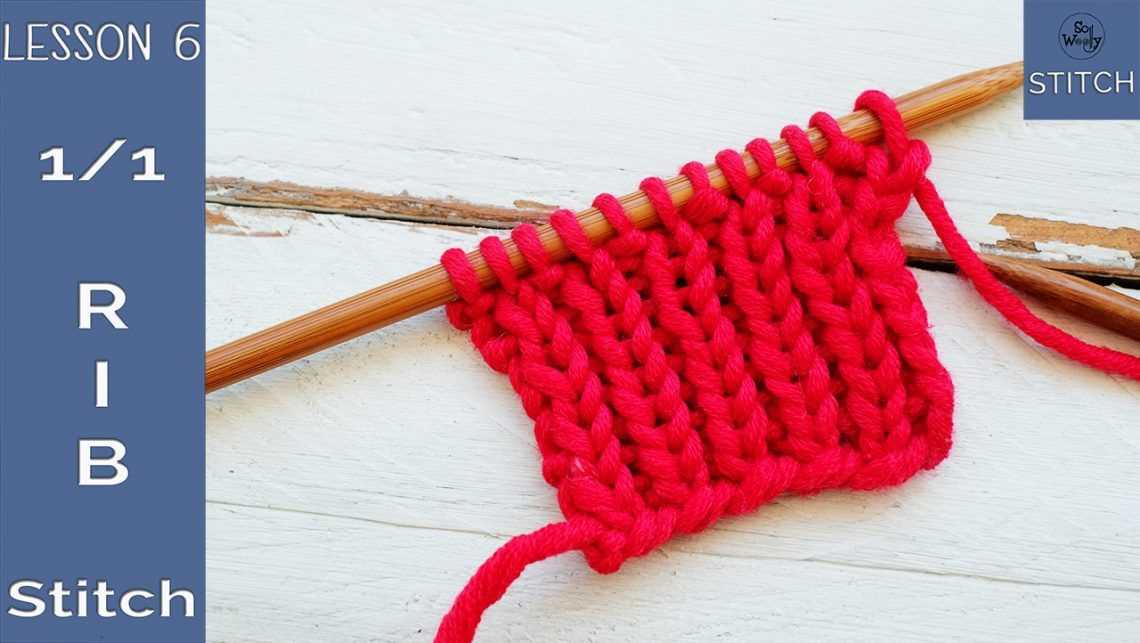
The “knit 1 purl 2” pattern, also known as the rib stitch, is a method that alternates between knitting and purling stitches to create a stretchy and elastic fabric. This technique is commonly used in a variety of knitting projects, including scarves, hats, socks, and sweaters. It adds a unique and decorative touch to any knitting project, making it a popular choice among knitters of all skill levels.
To create the “knit 1 purl 2” pattern, you will need a pair of knitting needles and a ball of yarn. Start by casting on an even number of stitches. Begin the pattern by knitting the first stitch, then purling the next two stitches. Repeat this sequence until the end of the row. When you start the next row, simply knit the knit stitches and purl the purl stitches to maintain the pattern.
The “knit 1 purl 2” pattern not only adds visual interest to your knitting projects but also creates a sturdy and durable fabric. The alternating knit and purl stitches create a more elastic and flexible piece, making it perfect for items that need to stretch, such as hats and socks. This pattern is also great for creating ribbed edges and cuffs, as the ribbing naturally pulls in and hugs the body.
What is the Knit 1 Purl 2 Pattern?
The knit 1 purl 2 pattern is a popular knitting technique that creates a ribbed fabric with a distinct texture. It is commonly used for creating cuffs, borders, and other decorative elements in knitted garments. The pattern is achieved by alternating knit stitches and purl stitches in a specific sequence, resulting in a stretchy and flexible fabric.
The knit stitch is formed by inserting the right knitting needle through the front of the stitch from left to right, pulling the yarn through the stitch and slipping the old stitch off the left needle. The purl stitch, on the other hand, is formed by inserting the right knitting needle through the back of the stitch from right to left, bringing the yarn forward, and slipping the old stitch off the left needle.
When working the knit 1 purl 2 pattern, you start by knitting one stitch, followed by purling two stitches, and then repeating this sequence across the row. This creates an alternating pattern of raised knit stitches and smooth purl stitches, resulting in the ribbed texture. The knit 1 purl 2 pattern is often used in projects such as scarves, hats, and sweaters to add elasticity and visual interest to the fabric.
- Knit stitch: insert right needle from left to right, pull yarn through, and slip old stitch off.
- Purl stitch: insert right needle from right to left, bring yarn forward, and slip old stitch off.
- Knit 1 purl 2 pattern: knit one stitch, purl two stitches, repeat across the row.
The knit 1 purl 2 pattern is suitable for both beginner and experienced knitters. It is a versatile technique that can be easily customized by varying the number of knit and purl stitches in the pattern. Whether you’re creating a simple ribbed border or an intricate textured design, the knit 1 purl 2 pattern can add depth and dimension to your knitted projects.
Understanding the Basics
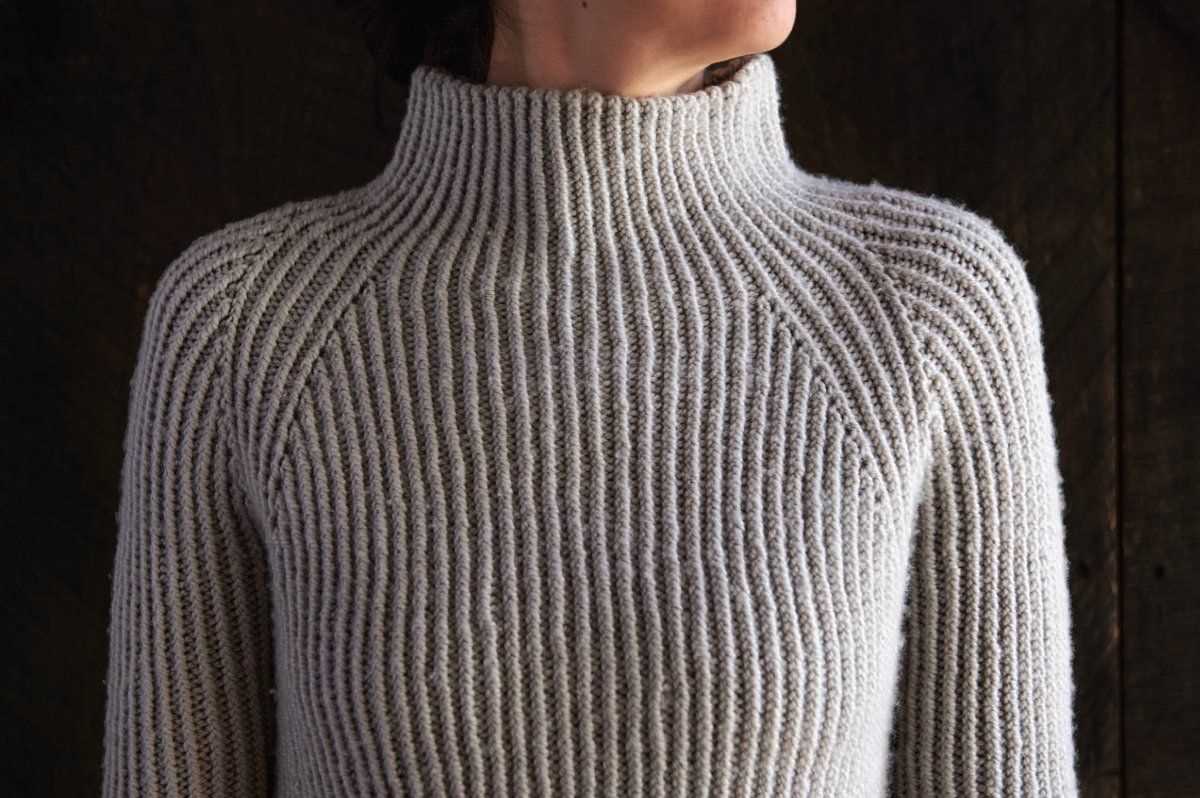
When it comes to knitting, the “Knit 1 purl 2” pattern is a fundamental technique that every knitter should master. This pattern, also known as the rib stitch, creates a stretchy and textured fabric that is commonly used for cuffs, collars, and hems. By understanding the basics of this pattern, you can create beautifully tailored garments and accessories.
The “Knit 1 purl 2” pattern is achieved by alternating knitting and purling stitches in a specific sequence. To begin, you will knit one stitch, which means inserting the needle into the first stitch on the left-hand needle and wrapping the yarn around the needle to create a new stitch. Then, you will purl two stitches, which involves inserting the needle into the stitch from right to left and wrapping the yarn around the needle in the opposite direction. This creates a raised ridge on the fabric.
To continue the pattern, you will repeat the sequence of knitting one stitch and purling two stitches until you reach the end of the row. Then, you will turn your work and start the next row with the same sequence. By consistently following this pattern, you will create a ribbed fabric with a neat and uniform appearance.
One of the benefits of the “Knit 1 purl 2” pattern is its versatility. It can be easily adjusted to create different variations, such as “Knit 2 purl 2” or “Knit 3 purl 1”, to achieve different effects and textures. Additionally, this pattern is ideal for knitting projects that require stretch, such as socks or hats, as the ribbing allows the fabric to conform to the body and retain its shape.
Whether you are a beginner or an experienced knitter, understanding the basics of the “Knit 1 purl 2” pattern is essential for your knitting repertoire. By mastering this technique, you can unlock a world of possibilities and create beautifully textured garments and accessories that are both stylish and functional.
History of the Knit 1 Purl 2 Pattern
The knit 1 purl 2 pattern, also known as the rib stitch, is one of the most commonly used patterns in knitting. It creates a fabric that is stretchy and flexible, making it ideal for a variety of knitting projects. The pattern is achieved by alternating one knit stitch and two purl stitches in a repeating sequence.
The origins of the knit 1 purl 2 pattern can be traced back to the early days of knitting. Knitting as a technique dates back to the 11th century, and was initially used for practical purposes such as creating warm clothing. The rib stitch was likely invented as a way to add elasticity to knitted garments, allowing them to fit snugly and comfortably.
The knit 1 purl 2 pattern became particularly popular in the 19th and 20th centuries, when knitting became a popular hobby for women. Knitted ribbed socks, scarves, and sweaters were in high demand, and the rib stitch was often used to create the stretchy cuffs, collars, and waistbands that were characteristic of these garments.
In addition to its practical uses, the knit 1 purl 2 pattern also offers a decorative element to knitted items. The alternating sequence of knit and purl stitches creates a textured pattern that adds visual interest to the fabric. This makes it a popular choice for a wide range of knitting projects, from simple accessories to intricate garments.
Today, the knit 1 purl 2 pattern remains a staple in the knitting world. It is often used as a beginner-friendly stitch pattern, as it is relatively easy to execute and produces impressive results. Whether you are a seasoned knitter or just starting out, the knit 1 purl 2 pattern is a versatile technique that can be used to create a wide variety of beautiful knitted items.
Benefits of Knitting with the Knit 1 Purl 2 Pattern

Knitting is not only a fun and creative hobby, but it also offers a wide range of benefits for both the mind and body. One popular knitting pattern that many knitters enjoy is the Knit 1 Purl 2 pattern. This pattern involves alternating between knitting and purling stitches, creating a unique and textured fabric. Here are some benefits of knitting with the Knit 1 Purl 2 pattern.
1. Stress Relief: Knitting has been proven to reduce stress and promote relaxation. The rhythmic and repetitive motion of knitting can help calm the mind and lower stress levels. The Knit 1 Purl 2 pattern adds an extra level of focus and concentration, making it even more effective in providing stress relief.
2. Enhanced Cognitive Skills: Knitting is often referred to as a “brain gym” because it stimulates various cognitive functions. The Knit 1 Purl 2 pattern requires knitters to switch between knitting and purling, which helps improve memory, attention, and concentration. It also boosts problem-solving skills as knitters have to follow and interpret complex patterns.
- 3. Versatility: The Knit 1 Purl 2 pattern can be used to create a wide range of items, from scarves and hats to sweaters and blankets. Its versatility makes it a favorite choice among knitters of all skill levels. Whether you’re a beginner or an experienced knitter, you can easily adapt this pattern to suit your project.
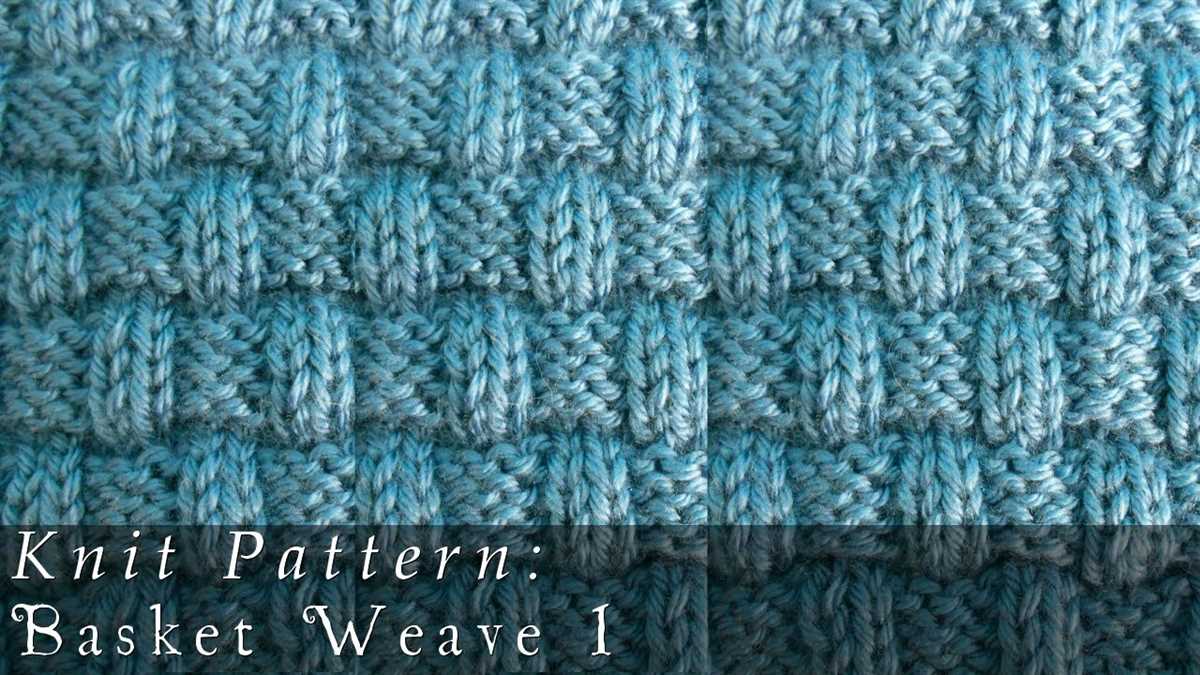
- 4. Texture and Visual Appeal: The alternating knit and purl stitches in the Knit 1 Purl 2 pattern create a beautiful texture that adds visual appeal to any knitted item. This textured fabric makes the finished product look more intricate and professional.
- 5. Relaxing and Meditative: Engaging in the Knit 1 Purl 2 pattern can be a soothing and meditative experience. The repetitive motion and focus required in this pattern can help knitters enter a state of relaxation and mindfulness. Many knitters find it a great way to unwind and de-stress after a long day.
In conclusion, knitting with the Knit 1 Purl 2 pattern offers numerous benefits, including stress relief, enhanced cognitive skills, versatility, texture, and a relaxing experience. Whether you’re a seasoned knitter or just starting out, this pattern is worth exploring and incorporating into your knitting projects. So grab your needles and yarn, and start enjoying the many advantages of knitting with the Knit 1 Purl 2 pattern!
Enhancing Texture and Design
In the world of knitting, the texture and design of a garment can truly make it stand out. Whether you’re a beginner or an experienced knitter, understanding how to enhance texture and design can take your projects to the next level. By incorporating different stitches, patterns, and techniques, you can create unique and visually stunning pieces that are sure to impress.
One way to enhance texture in your knitting is by using different stitch patterns. The “knit 1, purl 2” pattern is a classic example of this. By alternating between knitting and purling stitches, you create a ribbed effect that adds depth and interest to your project. This pattern is versatile and can be used in a variety of projects, such as scarves, hats, or sweaters, to create a more visually appealing texture.
Another way to enhance design in your knitting is through the use of color. Adding color to your project can create striking visual effects and highlight different aspects of the design. You can experiment with color blocking, stripes, or even create intricate colorwork patterns using multiple yarns. By carefully selecting your colors and incorporating them strategically into your design, you can create a visually stunning piece that is both unique and eye-catching.
- Experiment with different stitch patterns to create texture.
- Use color to enhance the design of your project.
- Incorporate techniques such as color blocking or colorwork.
- Challenge yourself with more complex stitch patterns and techniques.
- Take inspiration from existing patterns or create your own.
Overall, enhancing texture and design in your knitting allows you to showcase your creativity and create one-of-a-kind pieces. Whether you’re looking to add depth with different stitch patterns or make a bold statement with color, there are endless possibilities to explore. So grab your knitting needles, choose your yarn, and let your imagination run wild as you create beautiful and textured designs.
Creating Warm and Cozy Garments
Knitting is a wonderful craft that allows you to create warm and cozy garments for yourself and your loved ones. With the knit 1 purl 2 pattern, you can easily create beautiful and intricate designs that will keep you warm during the chilly winter months.
The knit 1 purl 2 pattern is a classic knitting technique that involves alternating between knitting one stitch and purling two stitches. This creates a textured pattern that is both visually appealing and adds extra warmth to the fabric. By using this pattern, you can create a variety of garments such as scarves, hats, and sweaters that are perfect for keeping you cozy all winter long.
When working with the knit 1 purl 2 pattern, it’s important to choose the right yarn and needle size to achieve the desired result. Thicker yarn and larger needles will create a looser and more relaxed fabric, while thinner yarn and smaller needles will create a tighter and more structured fabric. Experimenting with different yarns and needle sizes will allow you to create unique and personalized garments that are tailored to your taste.
In addition to being warm and cozy, knitted garments created using the knit 1 purl 2 pattern also have a timeless and classic appeal. The textured pattern adds a touch of elegance and sophistication to any outfit, making it perfect for both casual and formal occasions. Whether you’re knitting a cozy sweater for yourself or a stylish scarf as a gift, the knit 1 purl 2 pattern is sure to create a garment that will be treasured for years to come.
So why not grab your knitting needles and get started on your next project? With the knit 1 purl 2 pattern, you can create warm and cozy garments that are not only practical but also stylish and versatile. Whether you’re a beginner or an experienced knitter, this pattern is sure to inspire you to create beautiful and unique pieces that you’ll love to wear or gift to your loved ones.
Relaxing and Therapeutic

Knitting is not just a hobby or a way to create beautiful garments and accessories–it is also a relaxing and therapeutic activity that can have numerous benefits for your mental and emotional well-being. The repetitive and rhythmic nature of the knit 1 purl 2 pattern can be incredibly calming and soothing, helping to reduce stress and anxiety levels.
When you engage in knitting, your mind becomes focused on the task at hand, allowing you to enter a state of flow where you are fully immersed in the present moment. This can provide a much-needed break from the constant chatter and distractions of daily life, giving you the opportunity to find inner peace and clarity.
Studies have shown that knitting can have a similar effect on the brain as meditation, triggering the release of feel-good hormones such as serotonin and dopamine. These neurotransmitters help to elevate mood, promote relaxation, and increase feelings of happiness and well-being.
Furthermore, knitting can also be a form of self-expression and creativity, allowing you to channel your emotions and thoughts into each stitch. The act of creating something with your own hands can be empowering and satisfying, boosting your self-esteem and providing a sense of accomplishment.
Whether you are a beginner or an experienced knitter, taking the time to engage in the knit 1 purl 2 pattern can offer a much-needed escape from the stresses of everyday life. So grab your needles, pick up some soft yarn, and let the therapeutic benefits of knitting envelop you.
How to Knit the Knit 1 Purl 2 Pattern
The knit 1 purl 2 pattern is a popular knitting stitch pattern that creates a textured fabric with a combination of knit and purl stitches. It is commonly used in various knitting projects, such as scarves, hats, and sweaters. If you’re a beginner knitter, this pattern is a great way to practice and improve your knitting skills.
To knit the knit 1 purl 2 pattern, you will need a pair of knitting needles and yarn of your choice. Start by casting on an even number of stitches. The pattern works over a multiple of 3 stitches, so you can cast on any number that is divisible by 3.
Once you have cast on your stitches, you can begin working the knit 1 purl 2 pattern. The pattern is quite simple. You will knit one stitch, followed by purling two stitches. Repeat this sequence until the end of the row. When you reach the end of the row, turn your work and repeat the pattern on the next row.
It’s important to remember to keep your tension consistent throughout the pattern to create an even and uniform fabric. You may find it helpful to use stitch markers to help keep track of your stitches, especially if you’re working on a larger project.
The knit 1 purl 2 pattern creates a fabric with alternating knit and purl columns, which gives it a textured and ribbed appearance. It is also reversible, making it a great choice for projects where both sides of the fabric will be visible.
If you’re looking to add some variety to your knitting, you can also experiment with different combinations of knit and purl stitches. For example, you could try knitting two stitches, followed by purling one stitch (k2, p1) or knitting one stitch, purling one stitch, followed by knitting one stitch (k1, p1, k1). These variations can create different textures and patterns within the knit 1 purl 2 pattern.
Essential Needles and Yarn
In the world of knitting, having the right tools is absolutely essential. Two of the most important tools are needles and yarn. Knitting needles come in various sizes and materials, including metal, bamboo, and plastic. The size of the needles determines the gauge of the stitch, with larger needles creating looser stitches and smaller needles creating tighter stitches. Choosing the right size needle for your project is crucial to achieving the desired outcome.
When it comes to yarn, there are countless options available, each with its own unique characteristics. Yarn can be made from natural fibers like wool, cotton, and silk, or synthetic fibers like acrylic and nylon. The weight of the yarn also varies, ranging from super bulky to lace weight. The weight of the yarn determines the thickness of the fabric it creates, with thicker yarns producing chunkier knits and thinner yarns creating more delicate, lacy fabrics.
Types of Needles:
- Metal needles: These are durable and smooth, allowing the yarn to glide easily over them. They are great for creating tight, even stitches.
- Bamboo needles: These are lightweight and have a natural grip, making them a comfortable choice for longer knitting sessions. They also have a bit of flexibility, which can be helpful when working with certain yarns.
- Plastic needles: These are affordable and lightweight. They are often a popular choice for beginners due to their ease of use.
Types of Yarn:
- Wool: Wool yarn is warm, soft, and elastic, making it perfect for cozy winter garments. It can be machine-washed or hand-washed.
- Cotton: Cotton yarn is breathable and cool, making it ideal for summer projects like lightweight tops and baby blankets. It can be machine-washed.
- Silk: Silk yarn has a luxurious feel and a beautiful sheen. It is often used in more delicate, special occasion knits. It is typically hand-washed.
- Acrylic: Acrylic yarn is affordable and easy to care for, as it can be machine-washed and dried. It comes in a wide range of colors and is great for everyday items like hats and scarves.
- Nylon: Nylon yarn is strong and durable. It is often blended with other fibers to add strength and elasticity to the yarn. It can be machine-washed.
So whether you’re a beginner or an experienced knitter, having a variety of needles and yarn in your stash is essential for any knitting project. Experimenting with different combinations of needles and yarn can result in unique textures and stitch patterns, adding depth and character to your creations.
Step-by-Step Instructions
Are you ready to start knitting the “Knit 1 purl 2” pattern? Here are step-by-step instructions to guide you through the process:
Gather your materials
Before you begin, make sure you have all the necessary materials. You will need a pair of knitting needles, a ball of yarn in your chosen color, and a pair of scissors.
Cast on stitches
To start the pattern, you need to cast on an even number of stitches. Hold one knitting needle in your right hand and leave a long enough tail of yarn. Create a slipknot and slide it onto the needle. Then, using your right hand, wrap the yarn around the needle and pull it through the slipknot. Repeat this process until you have cast on the desired number of stitches.
Row 1: Knit 1
Hold the knitting needle with the cast on stitches in your left hand and the other needle in your right hand. Insert the right needle through the first stitch on the left needle from left to right. Take the yarn with your right hand and wrap it around the right needle, moving from back to front. Then, use the right needle to pull the yarn through the stitch, creating a new stitch on the right needle. Slip the old stitch off the left needle. Repeat this process for each stitch until you reach the end of the row.
Row 2: Purl 2

Turn your work and hold the knitting needle with the stitches in your left hand and the other needle in your right hand. Insert the right needle through the first stitch on the left needle from right to left. Take the yarn with your right hand and wrap it around the right needle, moving from front to back. Then, use the right needle to pull the yarn through the stitch, creating a new stitch on the right needle. Slip the old stitch off the left needle. Repeat this process for the next stitch, purling it. Continue alternating between knitting 1 stitch and purling 2 stitches until you reach the end of the row.
Repeat rows 1 and 2
Continue repeating rows 1 and 2 until you have reached the desired length for your project. Remember to always knit the knit stitches and purl the purl stitches to maintain the pattern. Once you have finished, bind off the stitches and weave in any loose ends. Your “Knit 1 purl 2” pattern is complete!
Knitting Tips and Tricks for the Knit 1 Purl 2 Pattern
Knitting the knit 1 purl 2 pattern can create a beautiful and textured fabric. While it may seem simple, there are a few tips and tricks that can help you achieve the best results. Here are some suggestions to help you master the knit 1 purl 2 pattern:
1. Pay attention to tension:
When knitting the knit 1 purl 2 pattern, it’s important to maintain an even tension throughout your work. Inconsistent tension can result in uneven stitches and an overall sloppy look. Take your time and make sure to knit each stitch with the same amount of pressure. You can also use stitch markers to ensure that your tension remains consistent.
2. Keep track of your stitches:
- When working the knit 1 purl 2 pattern, it’s easy to lose track of your stitches, especially if you’re multitasking or knitting in a distracting environment. To avoid mistakes, use knitting markers or a row counter to keep track of your stitches. This way, you can easily identify any errors and fix them before they become too difficult to undo.
- Additionally, it can be helpful to use a lifeline when working on complex knit 1 purl 2 patterns. A lifeline is a thin thread that you thread through your stitches after completing a set of rows. If you make a mistake later on, you can easily rip back to the lifeline and start again without losing all your progress.
3. Practice good tension control:
Tension control is key when working with the knit 1 purl 2 pattern. To achieve an even tension, make sure to pay attention to how tightly or loosely you’re pulling your yarn. If your stitches are too tight, they will be difficult to work with and can result in a stiff fabric. On the other hand, if your stitches are too loose, your fabric may be too loose and lack structure. Experiment with different tension techniques to find what works best for you.
4. Experiment with yarn choices:

While the knit 1 purl 2 pattern can be beautiful in any yarn, certain yarn choices can enhance the texture and look of this pattern. Consider using a yarn with a bit of stretch or elasticity to create a fabric that drapes nicely. Alternatively, you can experiment with different fiber blends or textured yarns for added visual interest.
5. Take breaks and stretch:
Knitting can be a repetitive activity that may strain your hands, wrists, and shoulders. It’s important to take breaks and stretch regularly to avoid discomfort or injury. Simple hand and wrist exercises, such as gentle stretches and rotations, can help prevent stiffness and maintain flexibility. Additionally, consider using ergonomic knitting tools, such as larger needles or padded handles, to reduce strain on your hands and joints.
Avoiding Common Mistakes
When it comes to the Knit 1 purl 2 pattern, there are a few common mistakes that beginners often make. By being aware of these mistakes and taking steps to avoid them, you can ensure that your knitting project turns out beautifully and without any issues.
1. Not paying attention to stitch count: One of the most important aspects of the Knit 1 purl 2 pattern is maintaining the correct stitch count. It’s easy to lose track and accidentally add or subtract stitches, which can throw off the entire pattern. Make sure to count your stitches regularly and double-check your work to avoid any inconsistencies.
2. Misreading the pattern instructions: The Knit 1 purl 2 pattern may seem simple, but it’s important to carefully read and understand the instructions. Misinterpreting the pattern can lead to mistakes in your knitting, such as knitting when you should be purling or vice versa. Take the time to read the instructions thoroughly and make sure you understand each step before starting.
3. Using the wrong yarn or needle size: Another common mistake is using the wrong yarn or needle size for the Knit 1 purl 2 pattern. This can result in a project that is either too tight or too loose. Be sure to use the recommended yarn weight and needle size stated in the pattern to achieve the desired gauge and ensure that your finished piece looks and fits as intended.
4. Not checking tension: Tension plays a crucial role in achieving consistent and even stitches. Failing to check your tension regularly can lead to uneven stitches and an overall sloppy appearance. Take the time to check your tension periodically throughout your knitting and make any necessary adjustments to maintain an even tension.
5. Rushing through the pattern: Lastly, it’s important to take your time and not rush through the Knit 1 purl 2 pattern. Knitting requires patience and attention to detail. Rushing can increase the likelihood of making mistakes and result in a finished project that doesn’t meet your expectations. Relax, take your time, and enjoy the process of creating something beautiful.
By being aware of these common mistakes and taking the necessary precautions, you can avoid potential pitfalls and create stunning knitting projects using the Knit 1 purl 2 pattern. Remember to stay focused, pay attention to detail, and enjoy the journey of knitting!
Adding Variations and Embellishments
Once you have mastered the basic knit 1 purl 2 pattern, you can start adding variations and embellishments to create unique and beautiful knitted projects. Here are some ideas to inspire your creativity:
Stripes

Add some color to your knitted pieces by incorporating stripes. You can use different colors of yarn and alternate between knitting and purling rows to create stripes of varying widths. Stripes can add visual interest and make your knitted items stand out.
Lace Detail
For a more delicate and intricate look, consider adding lace details to your knitwork. Lace patterns can be created using a combination of knit stitches, purl stitches, yarn overs, and decreases. They can be incorporated into different parts of your project, such as the edges, body, or even as an all-over pattern.
Cables
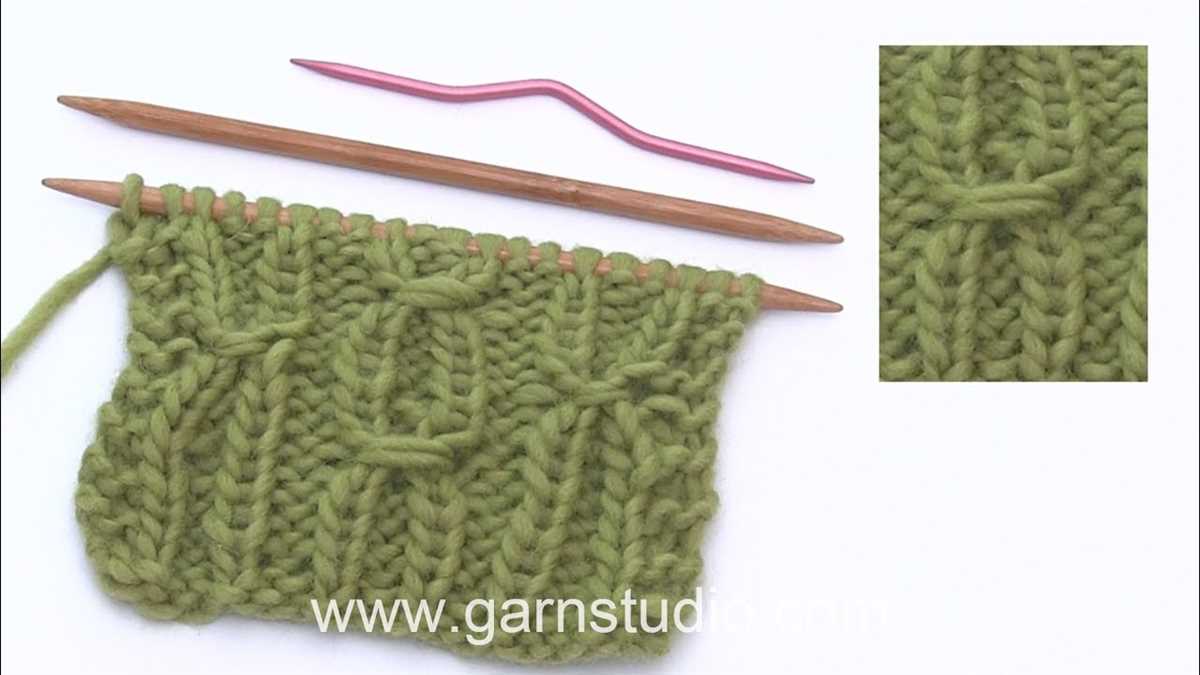
Cables are another way to add texture and depth to your knitted projects. They are created by crossing stitches over each other, creating a twisted or braided effect. Cables can be used as a central design element or as smaller accents on your knitted items.
Buttons and other embellishments
Buttons, beads, and other embellishments can add an extra touch of glamour to your knitted pieces. You can sew buttons onto your finished projects or incorporate them into the knitting process itself by creating buttonholes. Similarly, beads can be added to create a subtle sparkle or to highlight specific parts of your project.
By experimenting with these variations and embellishments, you can transform the basic knit 1 purl 2 pattern into something uniquely yours. Let your imagination run wild and enjoy the process of creating beautiful and personalized knitted items!