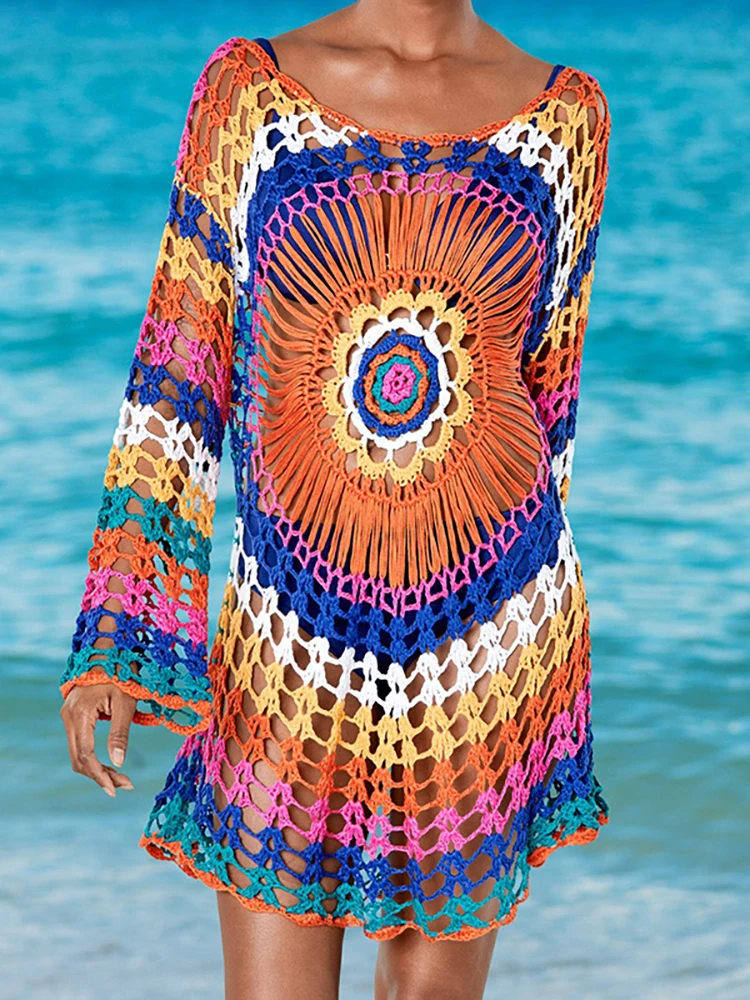
Stylish and Simple Knit Beach Cover Up Pattern

When you’re heading to the beach, it’s important to have a stylish cover up that you can easily throw on over your bikini or swimsuit. A knit beach cover up is the perfect solution – it’s lightweight, breathable, and has that effortless boho-chic vibe. Plus, knitting your own cover up allows you to customize it to your preferences, whether you want a simple design, intricate lacework, or fun patterns.
Knitting a beach cover up is a fun and rewarding project for knitters of all skill levels. If you’re a beginner, you can start with a basic pattern that uses simple stitches like garter or stockinette. As you gain more confidence, you can experiment with more complex stitch patterns and techniques, such as lace knitting or cable knitting, to create a cover up that truly stands out.
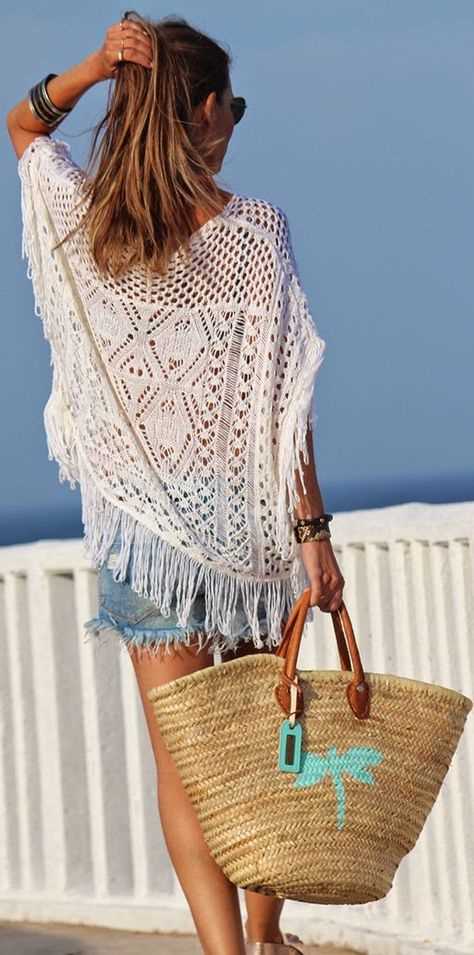
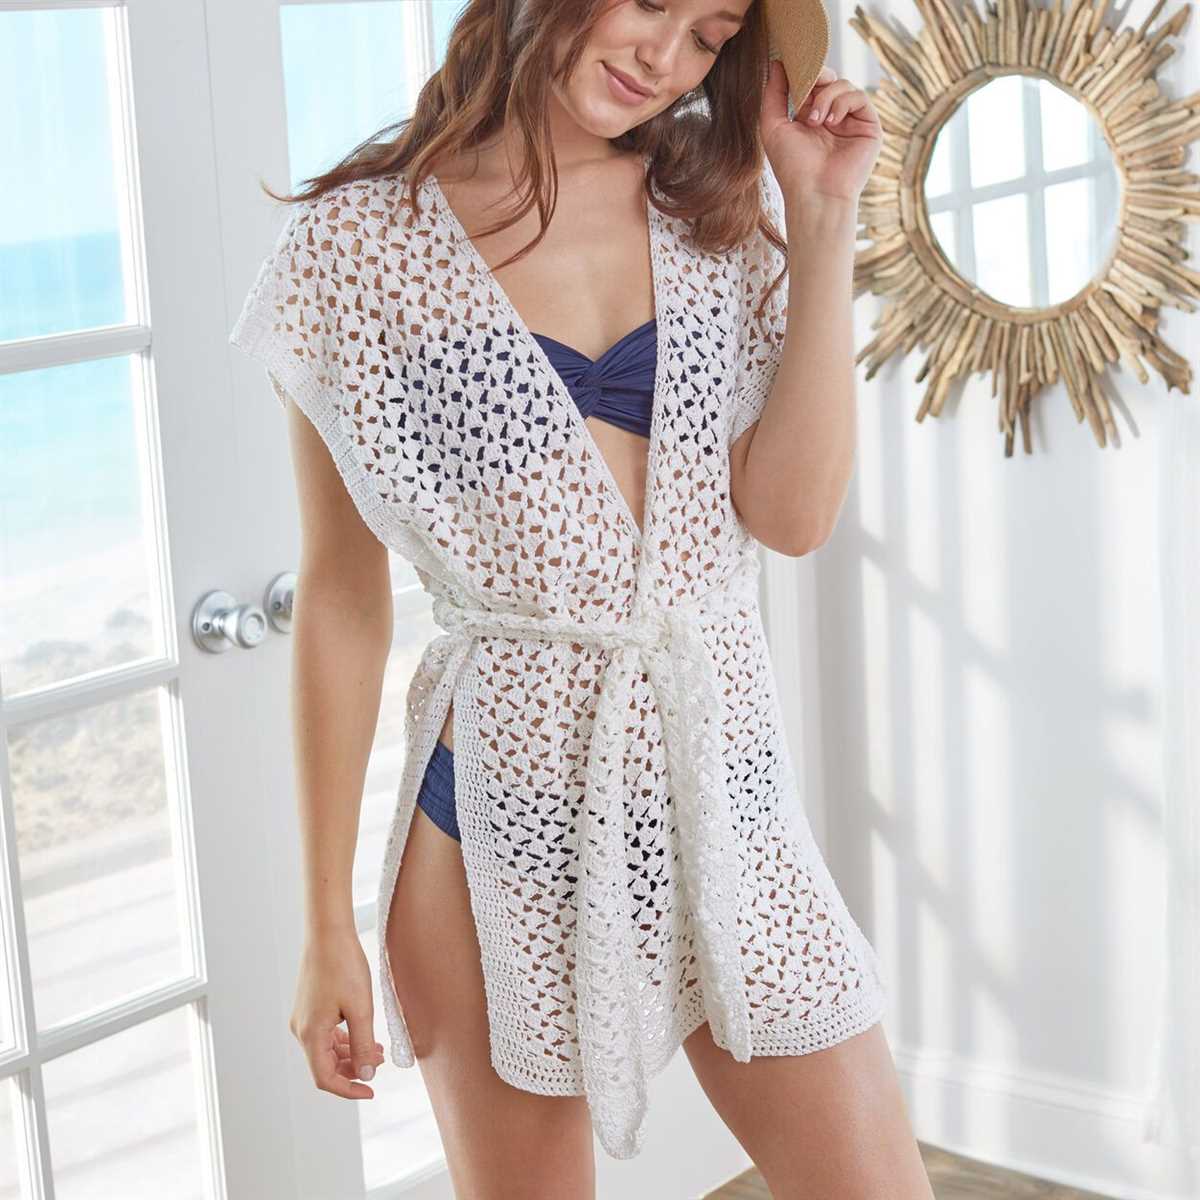
One of the great things about knitting a beach cover up is that you can choose the yarn and color that best suits your style. Opt for a cotton or linen blend yarn, which are lightweight and perfect for warm weather. You can go for a classic neutral shade like white or beige, or add a pop of color with bright blues, pinks, or yellows. The choice is yours!
With a knit beach cover up pattern, you’ll not only have a stylish and practical garment for your beach trips, but you’ll also have a unique piece that you can proudly say you made yourself. So grab your knitting needles, pick out your favorite yarn, and get ready to hit the beach in style!
Knit Beach Cover Up Pattern
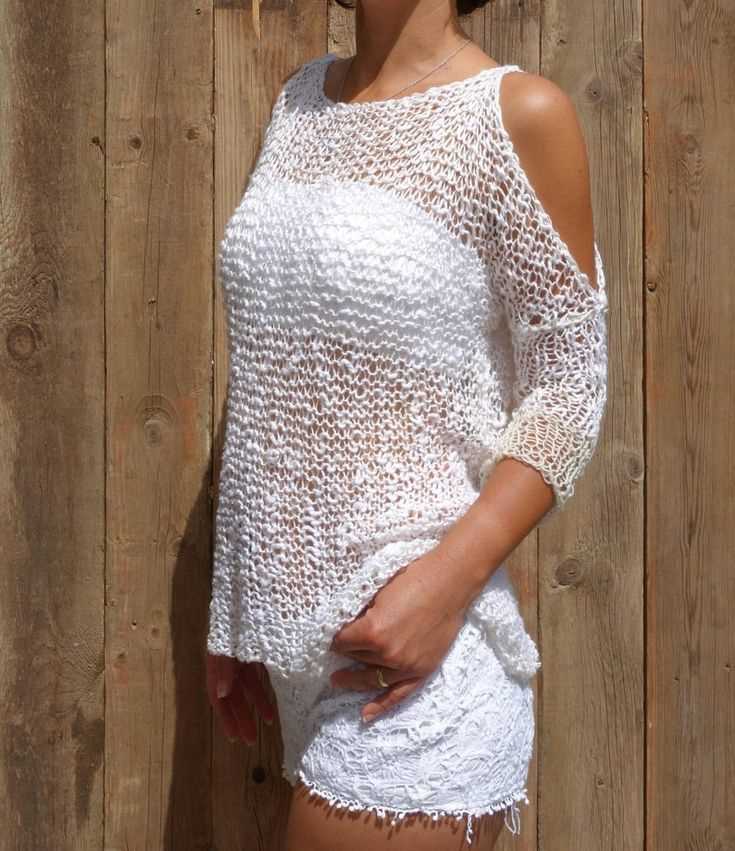
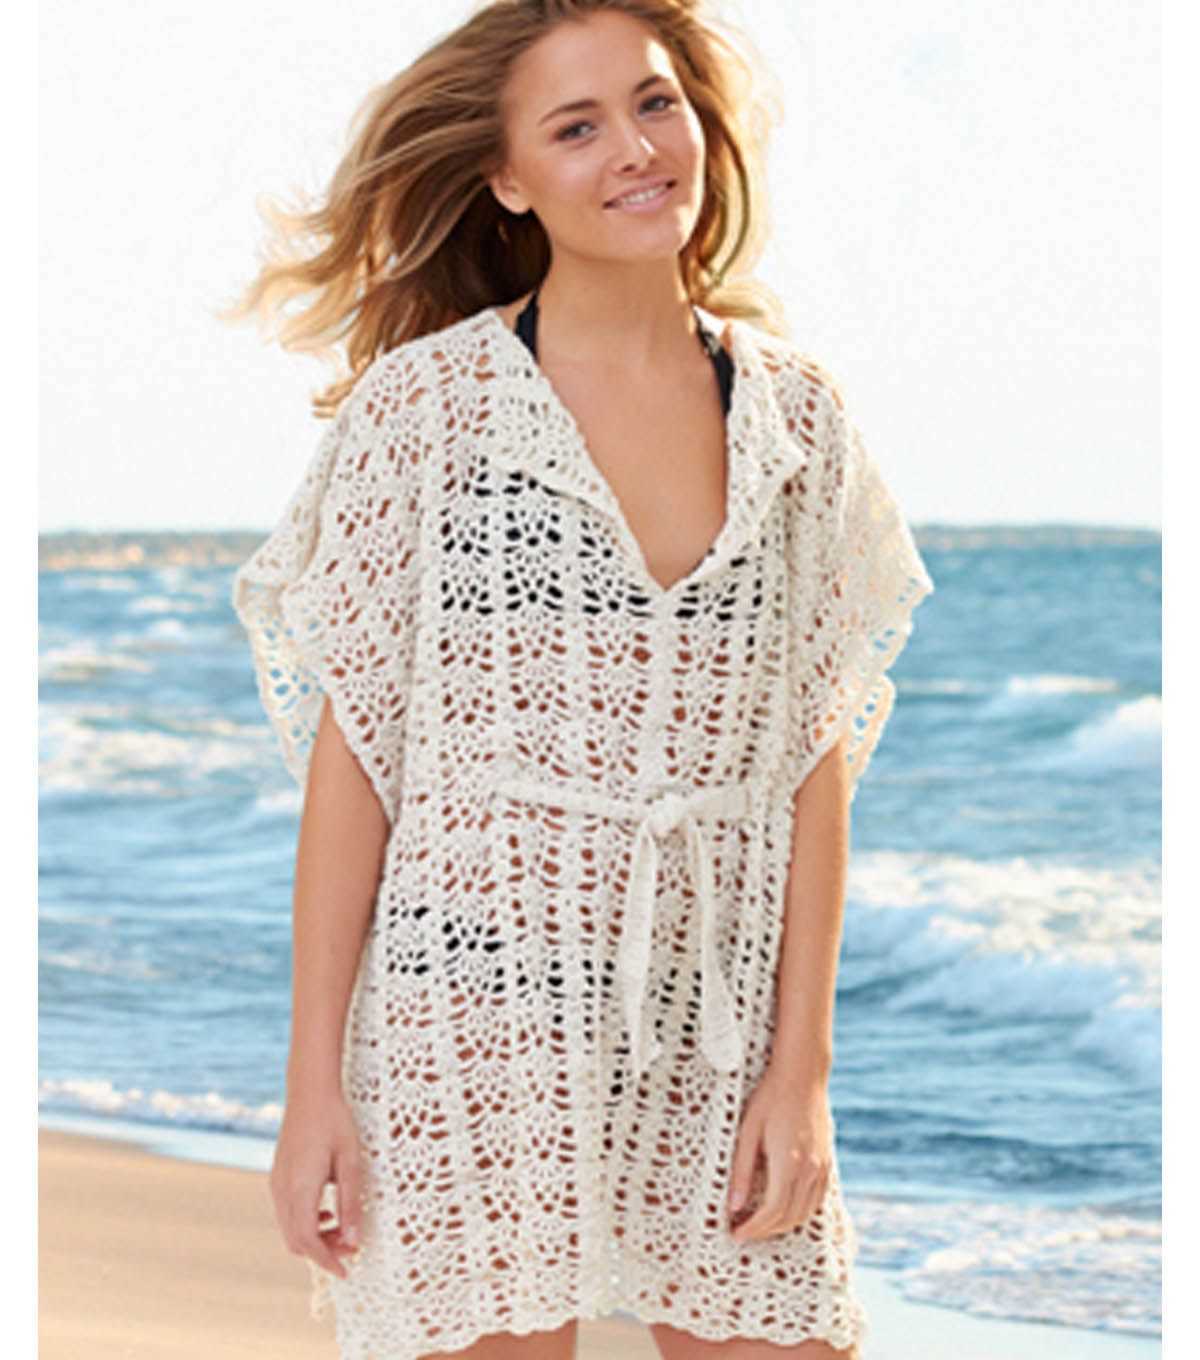
Looking for a stylish and practical cover up for your next trip to the beach? This knit beach cover up pattern is the perfect solution. With its lightweight and breathable design, it’s perfect for throwing on over your swimsuit for some extra coverage.
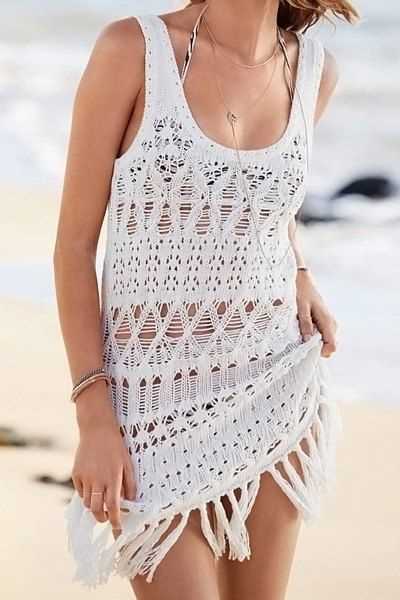
This pattern features a simple yet elegant lace stitch that adds an extra touch of femininity to the cover up. The lace stitch allows for plenty of ventilation, making it ideal for hot summer days. The pattern also includes instructions for adjusting the length and width of the cover up to suit your preferences.
Materials:

- Yarn: Choose a lightweight and breathable yarn, such as cotton or bamboo, in your desired color.
- Knitting needles: Use the recommended size for your chosen yarn.
- Tapestry needle: For weaving in ends.
- Stitch markers: Optional, but helpful for keeping track of stitches.
Instructions:
- Cast on the desired number of stitches, depending on the width you want for your cover up.
- Begin the lace stitch pattern, following the provided instructions. This lace stitch incorporates yarn overs and knit stitches to create an open and lacy pattern.
- Continue knitting in the lace stitch pattern until the desired length is reached. This can be adjusted to your preference, whether you want a shorter or longer cover up.
- Bind off all stitches and weave in any loose ends using a tapestry needle.
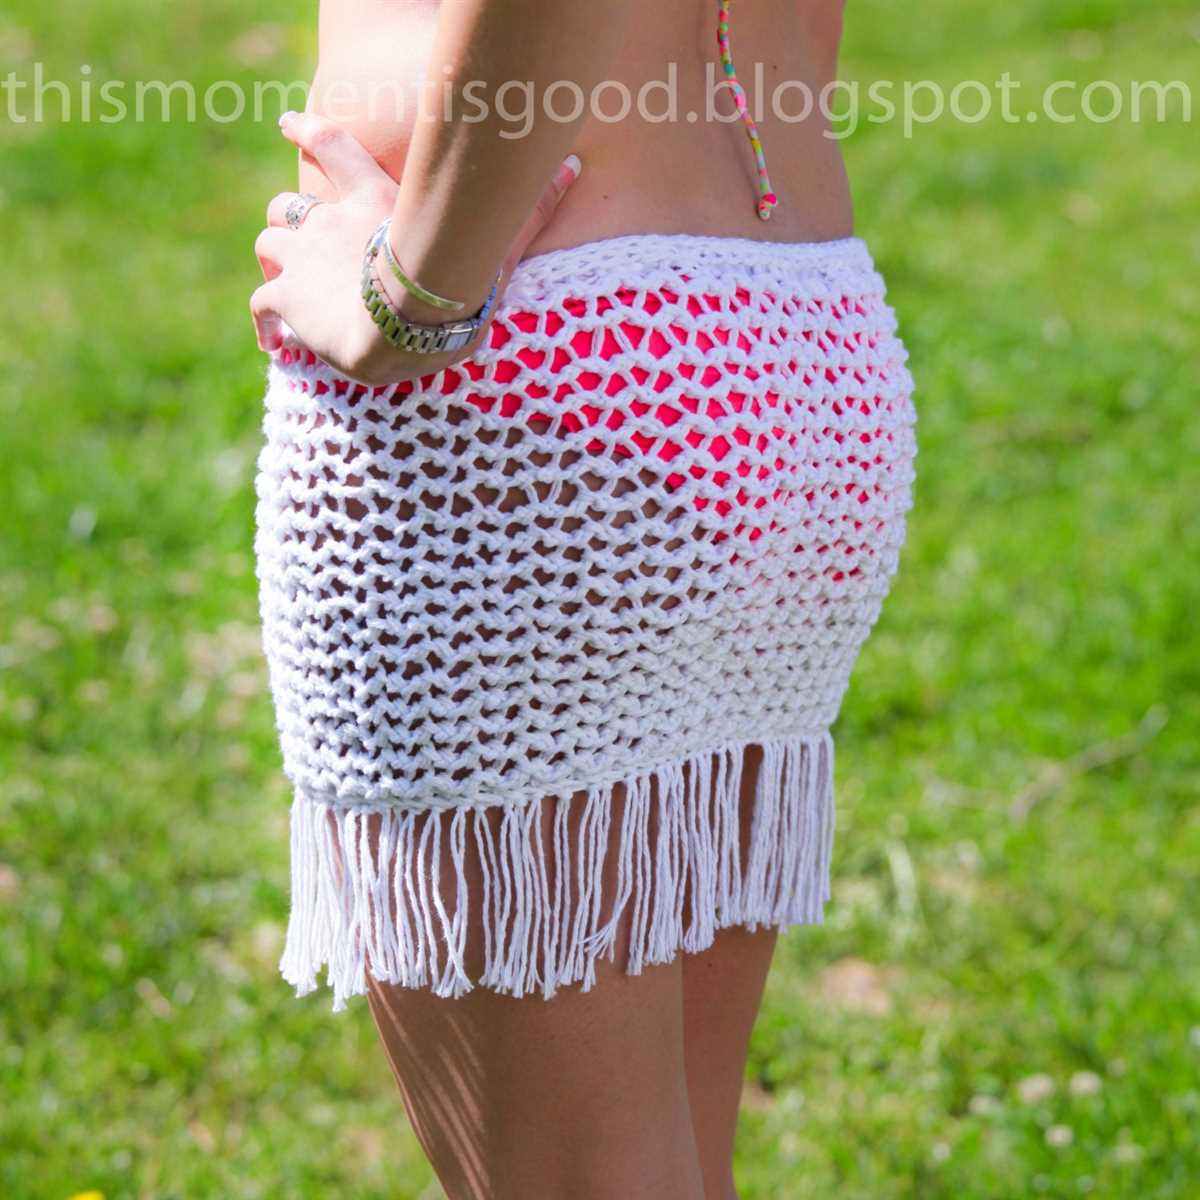
Once you’ve finished knitting the cover up, you can customize it further by adding tassels or fringe along the bottom edge or embellishing it with beads or sequins. The versatility of this pattern allows for endless possibilities to make it your own.
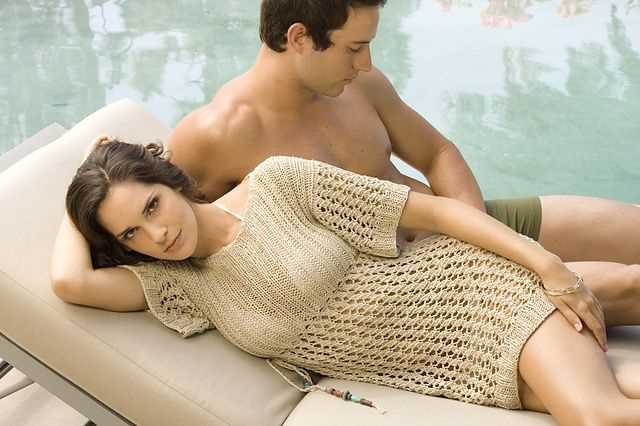
Whether you’re lounging by the pool or strolling along the sandy beaches, this knit beach cover up pattern is a must-have for any summer wardrobe. Its lightweight and breathable design, combined with the delicate lace stitch, make it both stylish and functional. So grab your knitting needles and get started on your own beach cover up today!
Choosing the Right Yarn and Needles
A key element in knitting a beach cover up is choosing the right yarn and needles. The type of yarn you select will impact the drape, texture, and overall look of your garment. Additionally, the size of your needles will determine the stitch and row gauge, which will affect the fit and size of the cover up.
When choosing yarn, consider the fiber content, weight, and recommended gauge. For a beach cover up, you’ll want a yarn that is lightweight, breathable, and suitable for warm weather. Natural fibers like cotton, linen, or bamboo are excellent choices, as they have moisture-wicking properties and will keep you cool. Look for yarns labeled as “sport,” “DK,” or “fingering” weight, as these are typically lighter and more suitable for summer garments.
fiber content: Cotton, linen, bamboo
weight: Sport, DK, or fingering
gauge: Follow the recommended gauge on your pattern
As for the needles, the size will need to match the gauge specified in your pattern. If you’re using a pattern, the recommended needle size will usually be listed. If you’re creating your own design or modifying a pattern, you’ll need to swatch to determine the appropriate needle size. Start with the recommended size and adjust as needed to achieve the correct gauge. Circular needles are often a good choice for larger projects like beach cover ups, as they can accommodate a larger number of stitches and provide more flexibility.
needle size: Follow the recommended size on your pattern or swatch to determine the appropriate size.
needle type: Circular needles are often preferred for larger projects.
By carefully selecting the right yarn and needles, you’ll be able to create a beach cover up that is both stylish and comfortable to wear. Consider the fiber content, weight, and gauge requirements, and don’t be afraid to experiment with different yarns and needle sizes to achieve the desired results.
Getting Started with the Pattern
Before starting to knit your beach cover up, it’s important to gather all the necessary materials. You will need a set of knitting needles, preferably in a size recommended in the pattern. It’s also important to choose the right yarn, preferably a lightweight and breathable yarn that is suitable for warm weather. Consider using cotton or linen yarn for a comfortable beach cover up.
Once you have the materials ready, take some time to read through the pattern carefully. Make sure you understand all the instructions and have a clear idea of how the finished piece should look. If there are any abbreviations or special stitches used in the pattern, familiarize yourself with them before you begin.
Here are some key steps to get started with the pattern:
- Cast on the required number of stitches as indicated in the pattern. It’s recommended to use a long-tail cast-on method for a neat and stretchy edge.
- Begin working the pattern stitch according to the instructions. Pay attention to any stitch repeats or stitch variations mentioned.
- Work each row or round as directed in the pattern. Keep track of your progress by using stitch markers if necessary.
- Continue knitting until you reach the desired length or until the pattern instructs you to stop.
- Once you’ve completed the main body of the cover up, follow the pattern instructions for any finishing touches, such as shaping the neckline or adding decorative details.
- Finally, bind off your stitches to secure the edges of your beach cover up. Make sure to weave in any loose ends for a polished finish.
Remember to take your time and enjoy the process of knitting your own beach cover up. With the right materials, attention to detail, and following the pattern instructions, you’ll soon have a stylish and comfortable garment to wear on your next trip to the beach.
Knitting the Body of the Cover Up
Once you have cast on the required number of stitches for the cover up, you can begin knitting the body. The body section of the cover up is usually worked in a simple stitch pattern, such as stockinette or garter stitch, to create a smooth and even fabric. You can choose the stitch pattern that you prefer, depending on the look and feel you want for your cover up.
As you work on the body, it is important to keep track of your stitches and rows to ensure that your cover up is symmetrical and the right length. You can use stitch markers or a stitch counter to help you keep track of your progress. It is also a good idea to regularly measure your work to make sure it is the desired length.
When knitting the body, you may want to consider adding shaping to create a more flattering fit. This can be done by increasing or decreasing stitches at certain points to create a more tapered silhouette. You can find detailed instructions on how to shape the body in the pattern you are following.
It is important to maintain an even tension while knitting the body to ensure a consistent fabric throughout. You can achieve this by keeping your stitches loose enough to allow the fabric to drape nicely, but not too loose that it becomes sloppy. You can practice your tension by experimenting with different needle sizes or by simply practicing knitting with a relaxed grip.
Once you have completed the desired length for the body, you can move on to the next step of the pattern, such as adding sleeves or finishing the edges. The body of the cover up is where most of the fabric is created, so it is important to take your time and ensure that you are happy with the results before moving on to the next stage.
Adding Texture and Patterns
When it comes to knitting beach cover ups, adding texture and patterns can be a wonderful way to elevate your design and make it stand out. Not only do textures and patterns add visual interest, but they also provide a tactile experience, making the cover up more enjoyable to wear.
Textures: There are various ways to incorporate texture into your beach cover up. One popular technique is using different stitch patterns such as cables, bobbles, or twisted stitches. These techniques create raised or textured areas on the fabric, giving it a unique and eye-catching look. Another way to add texture is by using different types of yarn, like boucle or mohair, which have a naturally textured appearance that can add dimension to your design.
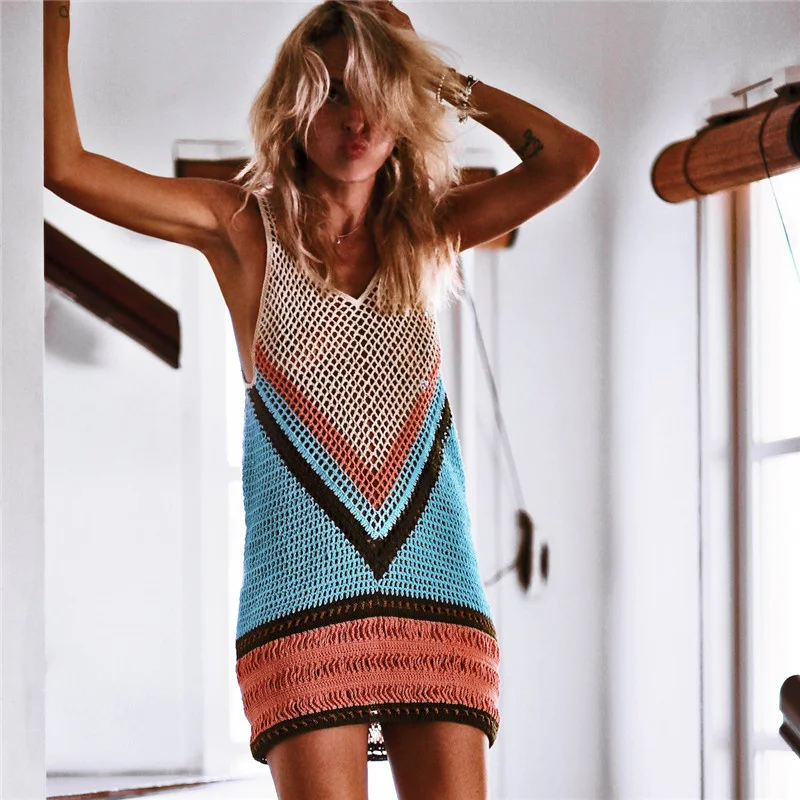
Patterns: Patterns are another great way to enhance your beach cover up. Stripes, chevron, lace, or even Fair Isle patterns can add visual interest and make your design truly unique. You can incorporate patterns throughout the entire cover up or use them as accents on specific sections, such as the neckline or hem. Don’t be afraid to mix and match different patterns for an eclectic and playful look.
Combining Texture and Patterns: For a truly stunning beach cover up, you can combine both texture and patterns in your design. For example, you could create a cover up with a textured stitch pattern like cable and incorporate a pattern such as lace on the sleeves or back. This combination will not only create a visually dynamic piece but will also add depth and complexity to the overall design.
To inspire your creativity, you can browse through knitting pattern books or websites to find a variety of textures and patterns that you can incorporate into your beach cover up. Experiment with different stitches, yarns, and patterns to create a one-of-a-kind piece that reflects your personal style and showcases your knitting skills.
Creating the Neckline
When it comes to creating the neckline of your knit beach cover up, there are several options to choose from. The type of neckline you decide to create will depend on your personal style and the overall look you are trying to achieve.
1. Round Neckline: One of the most common neckline options for a beach cover up is a round neckline. This type of neckline creates a classic and versatile look that can be easily customized to your desired depth. To create a round neckline, you can start by casting off stitches in the center front and then knitting across the remaining stitches. You can then join in a round and continue knitting in rounds to create the desired depth of the neckline.
2. V-Neckline: If you’re looking for a neckline that adds a touch of elegance to your beach cover up, a V-neckline might be the perfect choice. To create a V-neckline, you can start by knitting the front of your cover up with decreases on each side to shape the neckline. As you continue knitting, you can gradually increase stitches to create the V-shape. You can then finish the neckline by adding ribbing or other desired finishing techniques.
3. Boat Neckline: For a more relaxed and casual look, a boat neckline is a great option. To create a boat neckline, you can start by casting on stitches for the front and back panels of your cover up. Then, you can join the panels together and continue knitting in rows. To create the boat neckline, you can gradually decrease stitches on both sides of the front panel until you achieve the desired width. You can then finish the neckline with additional ribbing or other decorative techniques.
No matter which neckline option you choose, it’s important to remember to pay attention to the stitch pattern and gauge to ensure that the neckline fits properly and matches the overall design of your knit beach cover up. With a bit of creativity and skill, you can create a stunning and unique neckline that perfectly complements your style.
Shaping the Armholes
Once you have finished knitting the front and back panels of your beach cover up, it’s time to shape the armholes. This step is crucial for creating a comfortable and flattering fit.
The first thing you need to do is determine the number of stitches to bind off for the armholes. The pattern will usually specify this measurement, based on the size you are making. To accurately measure this, you can use a tape measure or try the garment on and mark where you want the armhole to start.
Next, you will need to divide the stitches evenly between the front and back panels. For example, if you are binding off 20 stitches, you could bind off 10 stitches from each panel. To do this, you can use a stitch marker or a contrasting color yarn to mark the stitches you will be binding off.
Once you have marked the stitches, you will then need to bind off the designated number of stitches on each panel. To do this, simply knit or purl the specified number of stitches, and then pass the first stitch over the second stitch as you normally would when binding off.
After binding off the specified number of stitches, you will continue knitting the remaining stitches in the row or round as instructed by the pattern. This will create the shape of the armhole.
Repeat the process for the other panel to shape both armholes. Take your time and follow the pattern instructions carefully to ensure accuracy.
Once the armholes are shaped, you can continue knitting the rest of the cover up as directed. Remember to check your gauge and make any necessary adjustments to ensure the correct fit.
Finishing Touches: Finishing the Edges
When it comes to knitting a beach cover up, one of the final steps is finishing the edges. This is an important step that not only adds a polished look to your garment but also helps to prevent the edges from curling or fraying. There are several techniques you can use to finish the edges, depending on the look you want to achieve.
Overcast or whip stitch: One simple way to finish the edges is to use a basic overcast or whip stitch. This technique involves sewing over the raw edges of the fabric with a needle and thread, securing them in place. It creates a clean edge and helps to prevent the yarn from unraveling.
Ribbing: If you want to add some texture and elasticity to the edges of your beach cover up, you can use ribbing. Ribbing is created by alternating knit and purl stitches in a specific pattern. It creates a stretchy and durable edge that is perfect for cuffs, collars, and hems.
I-cord: For a more decorative edge, you can use an I-cord. An I-cord is a narrow tube of knitting that is created by knitting a few stitches and then sliding them to the other end of the needle. It creates a smooth and rounded edge that is perfect for adding a pop of color or a decorative touch to your beach cover up.
Binding off: Another simple way to finish the edges is to bind off. This involves knitting or purling the last row of stitches and then cutting the yarn, leaving a long tail. You can then use this tail to sew the edges of the garment together, creating a neat and secure finish.
Overall, finishing the edges is an important step in knitting a beach cover up. Whether you choose to use a simple overcast stitch or get creative with ribbing or an I-cord, taking the time to finish the edges will ensure that your garment not only looks great but also lasts for many summers to come.
Customizing the Length of the Cover Up
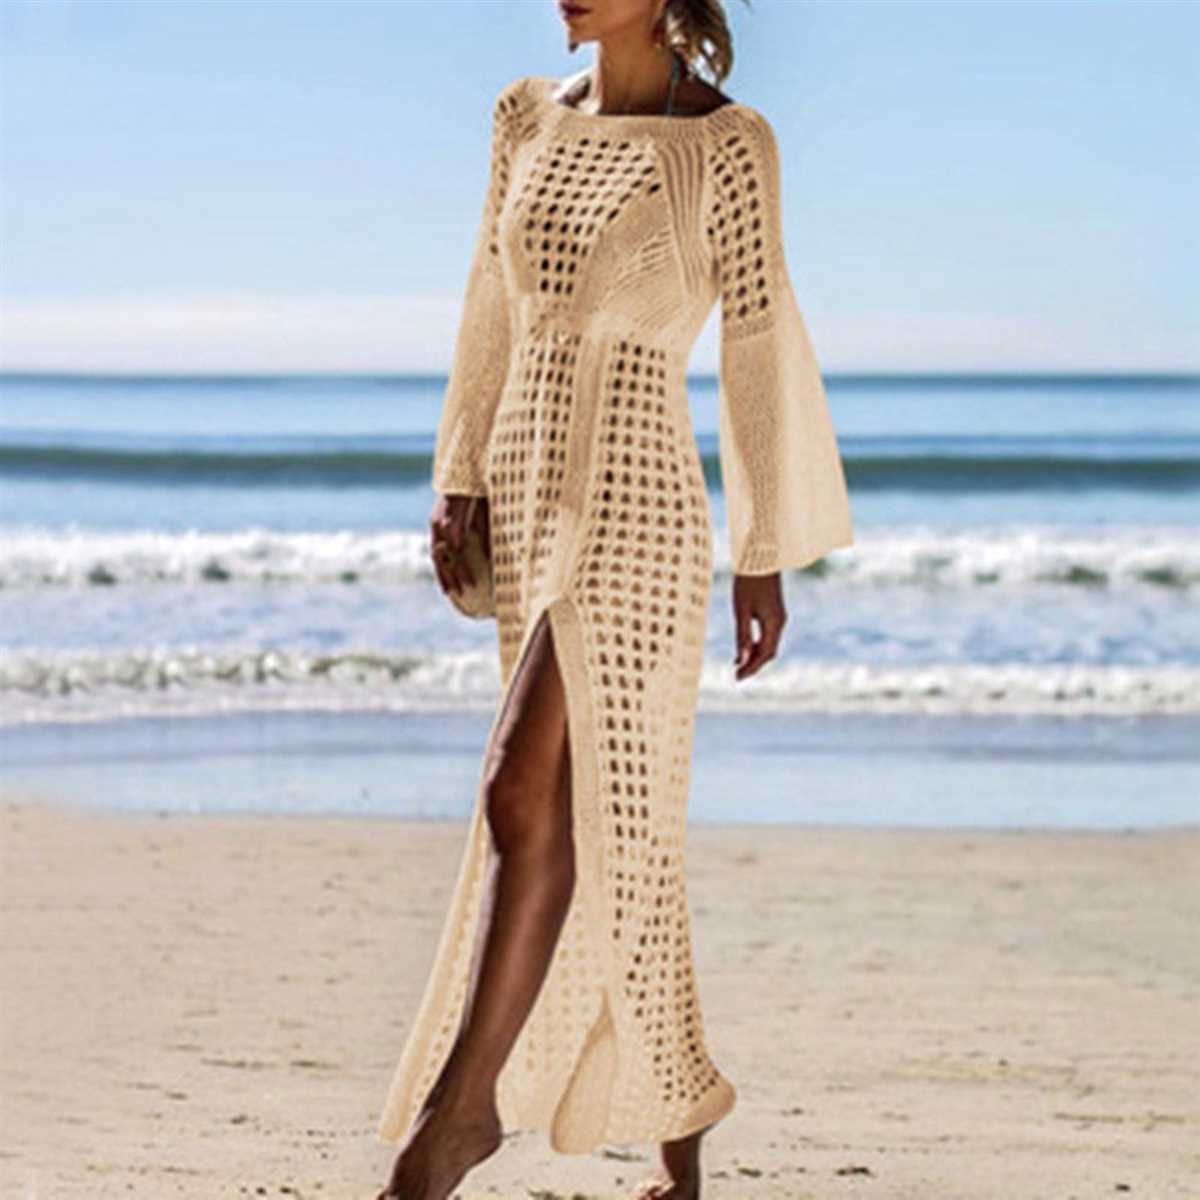
When it comes to knitting a beach cover up, one of the great things is that you can easily customize the length to fit your personal style and preferences. Whether you prefer a shorter, more flirty length or a longer, more modest option, you can easily adjust the pattern to create the perfect cover up for you.
To customize the length of your knit beach cover up, start by measuring from your desired starting point to your desired ending point. This will give you the total length you want the cover up to be. Keep in mind that the length may vary depending on whether you want the cover up to hit at the waist, hips, or knees.
If you want to make your cover up shorter, simply adjust the number of rows or rounds you knit between the starting point and ending point. For example, if the pattern calls for 10 rows between the waist and the hips, but you want a shorter cover up, you can reduce it to 8 rows or even 6 rows.
If you want to make your cover up longer, you will need to add more rows or rounds between the starting point and ending point. This can be done by simply repeating the same pattern rows or rounds a few more times until you reach your desired length.
Remember to keep track of your modifications as you go along, so you can easily replicate the changes if you decide to make another cover up in the future. Happy knitting!
Blocking and Finishing
Blocking is an important step in the finishing process when it comes to knitting a beach cover-up. It involves shaping the garment to its desired dimensions and ensuring that the stitches are even and the fabric lays flat. To block your knitted piece, you will need to soak it in water and then pin it to a flat surface, such as a blocking board, using rust-proof pins. Stretch the fabric gently to the desired dimensions, making sure that the edges are straight and the fabric is evenly taut. Allow the piece to dry completely before removing the pins.
Finishing touches can really make a difference in the final appearance of your beach cover-up. After blocking, it is important to weave in any loose ends using a yarn needle and trimming them to ensure that they are secure. This will give your garment a polished and professional look. Additionally, consider sewing on any buttons or adding decorative elements, such as tassels or pom-poms, to enhance the overall design of the cover-up.
When it comes to blocking and finishing, it is important to remember that each knitted piece is unique and may require different techniques or adjustments. Always refer to the specific blocking instructions and finishing techniques provided in the pattern you are using. By taking the time to block and finish your beach cover-up properly, you can achieve a beautiful and well-finished garment that you can be proud to wear on the beach!
Tips and Tricks for Knitting Beach Cover Ups
Thank you for taking the time to learn about knitting beach cover ups with us! We hope that this guide has inspired you to create your own stylish and functional cover ups for your beach outings. Before you begin your knitting adventure, here are some additional tips and tricks to help you along the way.
1. Choose the Right Yarn
• Consider the Fiber: When selecting yarn for your beach cover up, opt for natural fibers such as cotton or linen. These fibers are breathable and will keep you cool in hot weather.
• Gauge Matters: Check the gauge recommended on your pattern and make sure to match it. Using a different yarn weight or needle size can drastically affect the fit and drape of your cover up.
2. Use Breezy Stitch Patterns
• Openwork Stitches: Lace or eyelet stitch patterns create an airy and lightweight fabric perfect for beach cover ups. Experiment with different stitch patterns to achieve the desired look.
• Garter Stitch: Garter stitch is another great option as it creates a textured fabric that is stretchy and comfortable to wear. It also adds an interesting visual element to your cover up.
3. Incorporate Adjustable Sizing
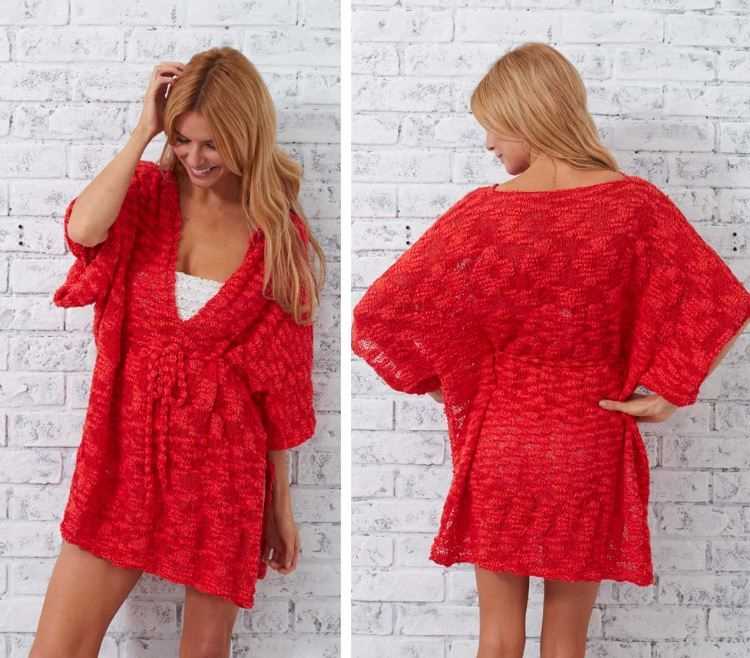
• Tie Closures: Consider adding ties or drawstrings to your beach cover up for easy adjustability. This allows you to customize the fit to your liking and accommodate different body sizes.
• Use Elastic Bands: If you prefer a more fitted look, try incorporating elastic bands or ribbing at the waist or cuffs. This will give your cover up a more tailored and flattering silhouette.
4. Experiment with Colors and Embellishments
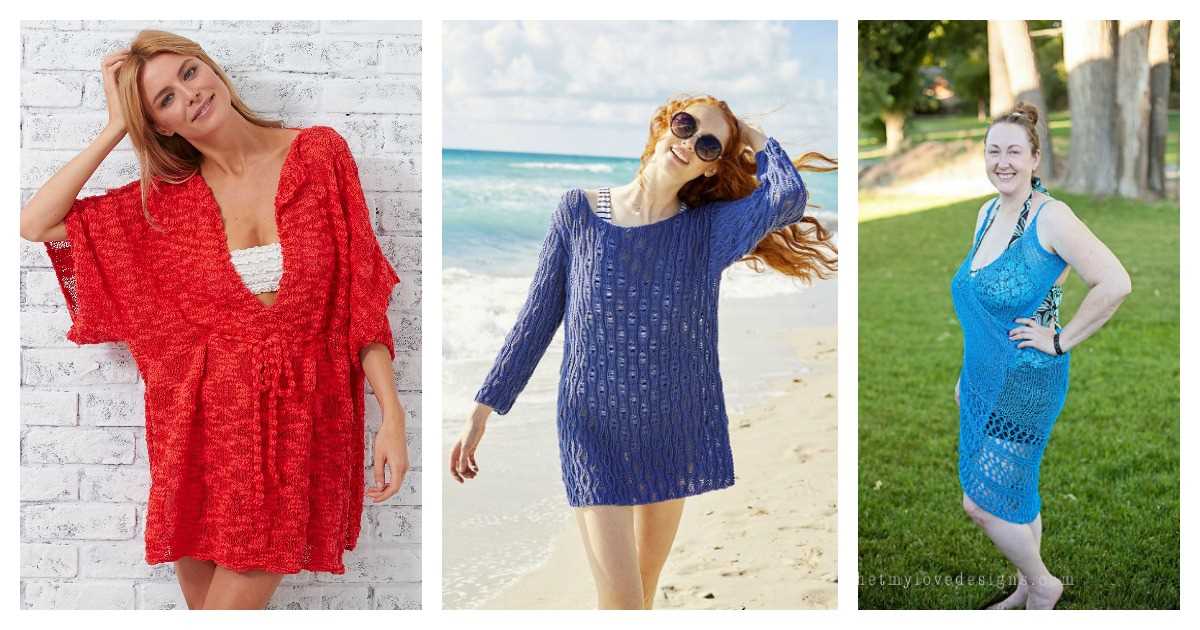
• Play with Color: Have fun with your color choices! Beach cover ups are a great opportunity to experiment with bold and vibrant hues that reflect the spirit of the beach.
• Add Embellishments: Consider adding fun trims, fringe, or tassels to further personalize your cover up. These small details can make a big impact and add personality to your finished piece.
We hope these tips and tricks have provided you with valuable insights to create beautiful and functional beach cover ups. Remember, knitting is a journey, and each project is an opportunity to learn and grow. So, grab your needles, choose a pattern, and let your creativity soar as you knit your way to the perfect beach cover up!