Whiskered Wonders: Get Your Paws on a Free Knit Cat Toy Pattern!

If you have a cat, you know how much they love toys. They can spend hours playing with a simple ball of yarn or a feather wand. But why not give your furry friend something special? Knitting cat toys is a fun and creative way to provide entertainment for your cat while also showing off your knitting skills.
In this article, we will provide you with a free pattern to knit cat toys. Whether you’re a beginner or an experienced knitter, these toys are simple and quick to make. Plus, they can be customized to suit your cat’s preferences.
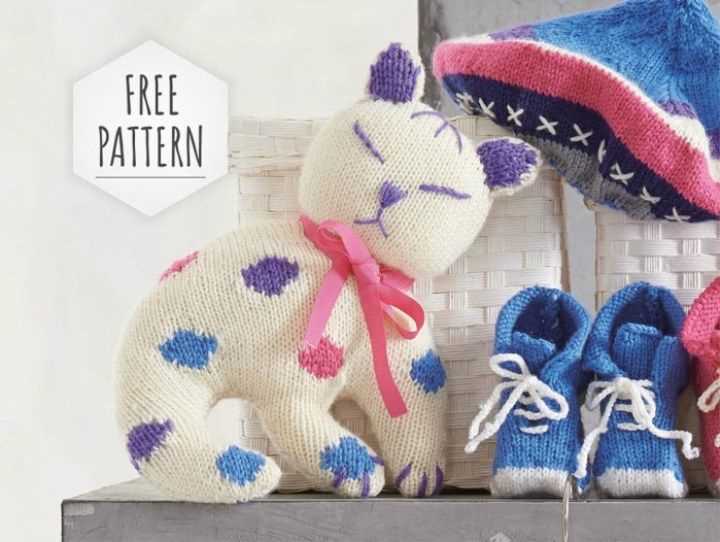
The pattern includes instructions for two different types of cat toys: a knitted mouse and a knitted fish. Both toys are filled with catnip to attract your cat and provide hours of fun. The mouse features a cute little tail and the fish has a fun, floppy tail that your cat will love to chase. These toys are sure to become your cat’s new favorite playthings.
Knit Cat Toys Free Pattern
If you are a cat owner and enjoy knitting, making your own cat toys can be a fun and rewarding project. Not only will you save money, but you will also be able to customize the toys to your cat’s preferences. In this article, we will provide you with a free knitting pattern for cat toys that you can easily follow.
Materials Needed:
- Worsted weight yarn in various colors
- Size 8 knitting needles
- Stuffing
- Tapestry needle
Instructions:
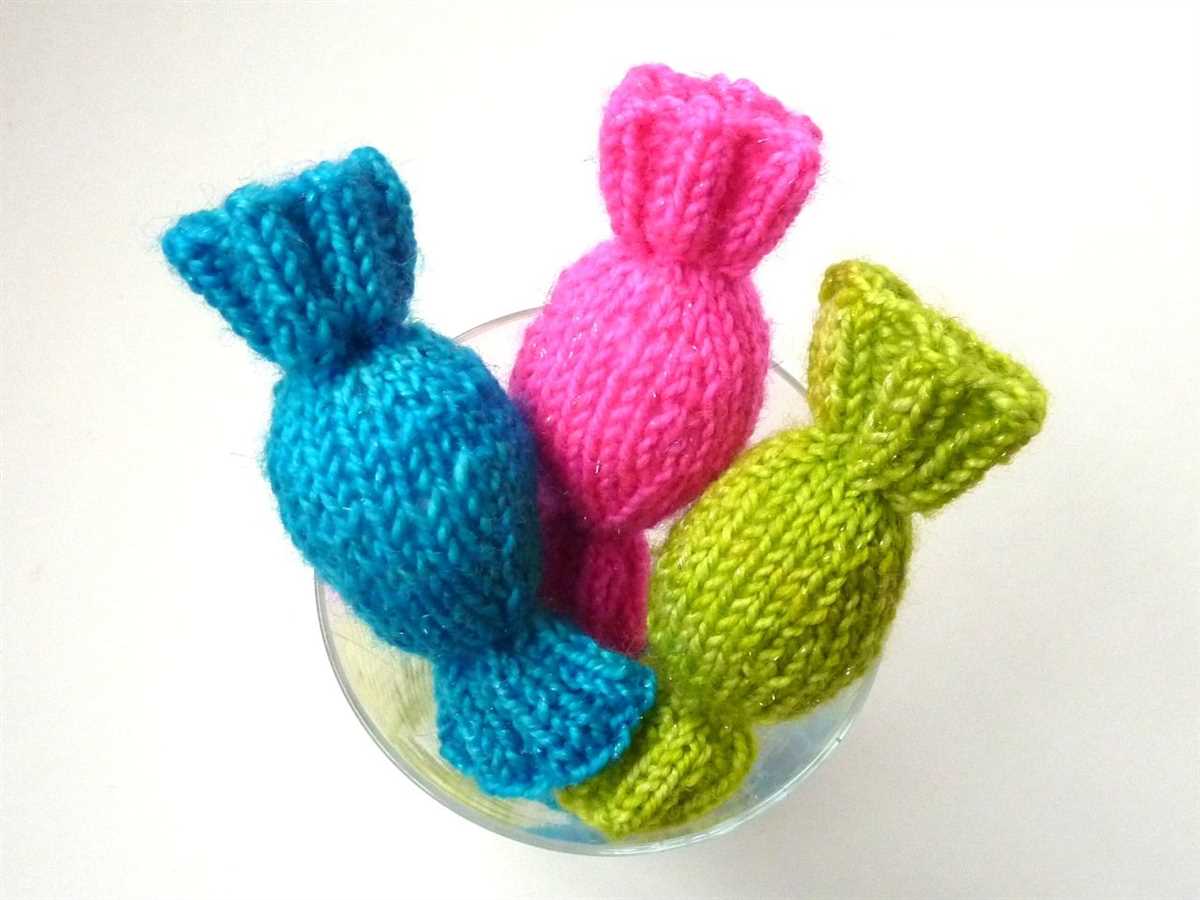
- Cast on 12 stitches
- Knit in garter stitch for 10 rows
- Switch to a contrasting color and knit in stockinette stitch for 15 rows
- Switch back to the first color and knit in garter stitch for 10 rows
- Bind off all stitches
- Using the tapestry needle, sew the sides of the rectangular piece together, leaving a small opening
- Stuff the toy with stuffing
- Sew the opening closed
Tips:
- You can experiment with different stitch patterns and colors to create unique toys for your cat
- Make sure to securely sew the openings shut to prevent the stuffing from coming out
- If your cat is prone to chewing on toys, avoid using small parts that can be easily swallowed
- Wash the toys regularly to keep them clean and hygienic for your cat
With this free knitting pattern, you can now have an endless supply of homemade cat toys for your furry friend to enjoy. Get creative and have fun with different colors and designs to keep your cat entertained for hours.
Choose the Right Yarn

When it comes to knitting cat toys, it’s important to choose the right yarn. The type of yarn you use can greatly affect the outcome of your project. Here are some factors to consider when selecting yarn for your knit cat toys.
1. Durability:
Since cat toys are often subjected to rough play and biting, it’s important to choose a yarn that is durable. Look for yarns that are known for their strength and resistance to tearing. Consider using acrylic or cotton yarns, as they are generally more durable compared to other types of yarn.
2. Safety:
Safety should always be a top priority when knitting cat toys. Avoid using yarns that contain small or easily detachable parts that could pose a choking hazard to cats. Opt for yarns that are made from non-toxic materials and have been tested for safety.
3. Texture:

Cats are known for their love of texture, so consider using yarns that have an interesting texture to engage your cat’s senses. Look for yarns with bumps, loops, or other unique textures that will provide sensory stimulation for your feline friend.
4. Washability:
Cat toys can get dirty quickly, so it’s important to choose yarns that are washable. Look for yarns that can be easily machine washed or hand washed without losing their shape or color. This will ensure that your knit cat toys stay clean and fresh for longer.
5. Color:
While cats are not known for their color preferences, you can still have fun with the yarn colors you choose for your knit cat toys. Consider using bright and vibrant colors to make the toys visually appealing for both you and your cat. Just make sure to use non-toxic dyes that won’t harm your cat if they happen to lick or chew on the toy.
Gather Your Knitting Supplies
When it comes to knitting cat toys, it’s important to gather all the necessary supplies before getting started. Having everything at hand will make the knitting process smooth and uninterrupted. Here is a list of essential knitting supplies you will need:
- Yarn: Choose a soft and durable yarn in your desired colors. Opt for natural fibers such as cotton or wool for a cat-friendly toy.
- Knitting Needles: Depending on your yarn thickness, select the appropriate knitting needles. Typically, size US 7 or US 8 needles work well for most cat toys.
- Tapestry Needle: This needle will be used for weaving in ends and joining knitted pieces together. Make sure it has a large eye that can accommodate your yarn.
- Scissors: A sharp pair of scissors is essential for cutting yarn and trimming any excess.
- Stitch Markers: These little plastic rings can be used to mark specific stitches or sections of your knitting, ensuring accurate shaping.
- Toy Stuffing: To give your cat toy a nice, plump shape, you will need some toy stuffing or polyester fiberfill. Make sure it is non-toxic and safe for pets.
- Optional Extras: Depending on the design of your cat toy, you may need additional supplies such as safety eyes, bells, or catnip for added sensory appeal.
Before you start knitting, double-check that you have all these supplies readily available. It’s always a good idea to have extra yarn and needles on hand in case you run out or need to make adjustments. Once you are fully equipped, you can dive into the world of knitting cat toys and enjoy creating playful and entertaining gifts for your furry friends.
Download the Free Pattern
If you’re looking to knit cat toys, we’ve got you covered with a free pattern! Whether you’re a beginner or an experienced knitter, this pattern is perfect for creating adorable toys that your furry friend will love.
To get started, simply click the link below to download the pattern. You’ll find step-by-step instructions and a list of materials needed. The pattern is available in PDF format, making it easy to print and refer to as you work on your project.
Download the Free Pattern here
Once you’ve downloaded the pattern, gather your yarn and knitting needles and get ready to start your project. The pattern includes different designs and sizes, so you can choose the one that best suits your cat’s preferences and personality.
Remember to take your time and enjoy the process of knitting these toys. The end result will be a fun and cozy toy that your cat will cherish for years to come. Happy knitting!
Learn the Basic Knitting Stitches
Knitting is a wonderful hobby that allows you to create beautiful and practical items such as clothing, accessories, and toys. In order to start your knitting journey, it’s important to learn the basic knitting stitches. These stitches form the foundation of all knitting projects and mastering them will enable you to explore more complex patterns and designs.
1. Knit stitch: The knit stitch, often represented by the letter “K” in knitting patterns, is the most basic stitch. It is created by inserting the right needle into the front of the stitch on the left needle, wrapping the yarn around the right needle, and pulling it through to create a new stitch.
2. Purl stitch: The purl stitch, represented by the letter “P”, is the reverse of the knit stitch. It creates a bumpy texture on the right side of the fabric. To purl, insert the right needle into the front of the stitch on the left needle from right to left, wrap the yarn around the right needle, and pull it through to create a new stitch.
These two stitches, knit and purl, are the foundation of all knitting patterns. By combining them in different sequences and patterns, you can create a wide variety of textures, patterns, and designs. Once you have mastered the basic knit and purl stitches, you can move on to learning more advanced stitches such as ribbing, cables, and lace.
As a beginner, it’s important to practice these stitches regularly to improve your technique and tension. Start with simple projects such as scarves or dishcloths that incorporate these stitches. With practice and patience, you will soon be able to tackle more complex knitting patterns and create beautiful and unique pieces.
Start Knitting the Toy
Before you begin knitting the cat toy, make sure you have all the necessary materials. You will need knitting needles, yarn in the color of your choice, a tapestry needle, stuffing for the toy, and any additional embellishments you want to add.
Once you have gathered your materials, it’s time to cast on and start knitting. The pattern for the cat toy will typically provide you with the number of stitches you need to cast on. Follow the pattern instructions to cast on the required number of stitches using your knitting needles.
To knit the cat toy, you will generally be using basic knitting stitches such as knit and purl. The pattern will guide you on when to knit and purl to create the desired texture or pattern for the toy. Follow the pattern instructions carefully, making sure to read each step and understand the knitting terminology used.
As you knit, make sure to keep track of your progress, especially if the pattern requires you to repeat certain sections or rows. You can use stitch markers or a row counter to help you keep track. Remember to take breaks and stretch your hands and fingers to avoid discomfort or strain.
Finishing and Assembling the Toy
Once you have completed all the knitting sections of the toy, it’s time to finish and assemble it. Depending on the pattern, this may involve binding off the stitches, sewing any additional components, or adding any decorative elements.
If the pattern requires you to bind off, follow the instructions to secure your knitting and create a neat edge. You may need to cut the yarn and weave in any loose ends using a tapestry needle.
If there are any additional components to sew, such as ears or tails, use the tapestry needle and yarn to attach them securely to the main body of the toy. Make sure to leave an opening for stuffing if required.
Once all the components are sewn together, you can start stuffing the toy with the stuffing material of your choice. Use small amounts of stuffing at a time and distribute it evenly to achieve the desired shape and firmness.
After stuffing the toy, sew the opening closed using the tapestry needle and yarn. Make sure to secure the stitches tightly to prevent the stuffing from escaping.
Finally, you can add any additional embellishments to customize your cat toy. This could include embroidery, buttons, or bows. Use your creativity to make the toy unique and special.
Add Embellishments to Your Toy
Once you have finished knitting your cat toy, you can add embellishments to make it even more special. These little details can enhance the toy’s appearance and make it more interesting for your cat to play with.
One way to embellish your toy is by adding embroidered features. You can use different colored threads to stitch eyes, nose, and mouth onto the toy. This will give the toy a more realistic look and make it even cuter. You can also use embroidery to add details like whiskers or patterns to the toy’s body.
If you want to give your toy a playful touch, you can add some colorful pom-poms or tassels. You can attach them to the toy’s body using a needle and thread. These fluffy and dangling elements will make the toy more visually appealing and fun for your cat to play with.
Another way to add embellishments is by sewing on small buttons or beads. You can use these to create eyes or decorative patterns on the toy. However, make sure that the buttons and beads are securely attached so that they don’t pose a choking hazard for your cat.
Furthermore, you can consider using different textures of yarn to add some texture to your toy. You can use yarn with sequins or metallic thread to make your toy shine. You can also experiment with various stitches and techniques to create raised or textured sections on the toy’s surface.
In conclusion, adding embellishments to your knit cat toy can elevate its overall look and make it even more appealing to your cat. Whether it’s embroidery, pom-poms, buttons, or different yarn textures, these little details will make your toy stand out and provide your cat with hours of entertainment.
Stuff and Shape the Toy
Once you have finished knitting the toy, it’s time to stuff and shape it. Fill the toy with stuffing material, such as polyester fiberfill, until it reaches your desired level of firmness. Make sure to stuff the toy evenly, pushing the stuffing into all corners and areas.
Ensure that the toy is well-stuffed, but not over-stuffed, as this may affect its shape and appearance.
Once you have finished stuffing the toy, shape it with your hands to give it the desired form. Use your fingers to smooth out any bumps or lumps, and shape the toy into its intended shape. If the toy has legs or ears, make sure to shape them as well to give them a defined look.
Pay attention to the details of the toy’s shape, such as the head, body, and limbs, to ensure that it looks like a cat toy.
Once you are satisfied with the shape of the toy, you can sew up any openings using a yarn needle and matching yarn. This will ensure that the stuffing stays in place and the toy remains intact during play.
Take your time to carefully sew up any openings, making small stitches to secure the yarn tightly. If desired, you can also add any additional details, such as embroidery for the toy’s face or yarn for whiskers, to enhance its appearance.
Once the toy is stuffed and shaped, it is ready for your cat to enjoy! Place it in their favorite spot or give it to them during playtime, and watch as they have hours of fun with their new toy.
Finish Off and Secure the Toy
Once you have finished knitting the cat toy, it’s time to finish off and secure it. This step is important to ensure that the toy doesn’t unravel and that it’s safe for your cat to play with. Here are a few steps to follow:
Weave in the Loose Ends
Begin by weaving in any loose ends of yarn. This can be done using a tapestry needle. Thread the loose end through the eye of the needle and carefully weave it in and out of the stitches on the backside of the toy. Make sure to do this securely, so the yarn won’t come undone.
Tie and Trim the Ends
After weaving in the loose ends, tie them securely in a knot. This will further ensure that the toy will not unravel. Once the knot is secure, trim the ends of the yarn close to the knot, being careful not to cut any of the stitches.
Check for Loose Parts
Before giving the toy to your cat, it’s important to check for any loose parts that could pose a choking hazard. Make sure all seams and stitches are secure and tight. If you find any loose parts, reinforce them by sewing them again or tying them off with extra yarn.
By following these steps, you can finish off and secure your knit cat toy, making it safe and ready for your cat to enjoy.
Care Tips for Knit Cat Toys
Cat toys are a great way to keep your feline friend entertained and engaged. If you have knitted toys for your cat, it is important to properly care for them to ensure they last and remain safe for your pet. Here are some care tips for knit cat toys:
1. Regularly inspect the toys
Check the toys regularly for any signs of wear and tear. Look for loose threads, unraveling, or damaged parts. If you notice any damage, immediately remove the toy from your cat’s reach to prevent them from swallowing or choking on any small parts.
2. Hand wash the toys
Most knit cat toys can be hand washed to keep them clean. Use a mild detergent and lukewarm water to gently wash the toy. Avoid using any harsh chemicals or bleach, as these can damage the fabric. Rinse the toy thoroughly and squeeze out excess water before allowing it to air dry.
3. Store toys in a safe place
When the toys are not being used, store them in a safe place where your cat cannot reach them. This will help prevent any accidental damage or swallowing of small parts. Consider using a designated toy box or container to keep all your cat’s toys organized and easily accessible.
4. Rotate the toys

Cats can easily get bored with the same toys. To keep your cat engaged, rotate their toys regularly. Put some toys away for a few weeks and then bring them out again to renew your cat’s interest. This will help keep their playtime exciting and prevent them from getting bored.
5. Trim your cat’s nails
Cats often use their claws to play with toys, and sharp nails can easily snag or pull at the knitted fabric. Regularly trim your cat’s nails to prevent any snags or tears in the toys. This will help prolong the life of the toys and ensure they remain safe for your cat to play with.
By following these care tips, you can ensure that your knit cat toys remain in good condition and continue to provide entertainment for your furry friend. Remember to always prioritize your cat’s safety and remove any damaged toys from their reach.
Enjoy Watching Your Cat Play
Now that you have learned how to knit cat toys and have a variety of patterns to choose from, it’s time to sit back and enjoy watching your cat play with them. Seeing your furry friend happily engaged with the toys you have made can bring a sense of joy and accomplishment.
Here are some tips to make the most out of your cat’s playtime:
- Rotate the toys: Keep your cat interested by rotating the toys you have made. Introduce a new toy every few days to keep their curiosity piqued.
- Interactive play: Engage in interactive playtime with your cat using the knitted toys. Use a wand or string attachment to simulate a prey-like movement, and let your cat chase and pounce on the toy.
- Supervise playtime: While the knitted toys are designed to be safe for your cat, it’s always a good idea to supervise their playtime. Ensure that they don’t chew on or swallow any parts of the toy.
- Observe your cat’s preferences: Pay attention to which toys your cat prefers. Every cat has their own unique preferences, and by observing them, you can create more toys that cater to their specific likes.
- Document the fun: Capture those adorable moments of your cat playing with the knitted toys. Take pictures or videos to cherish those memories and share them with fellow cat lovers.
Remember, playing with knitted toys not only provides entertainment for your cat but also offers mental stimulation and exercise. Have fun knitting and watching your cat enjoy their new toys!