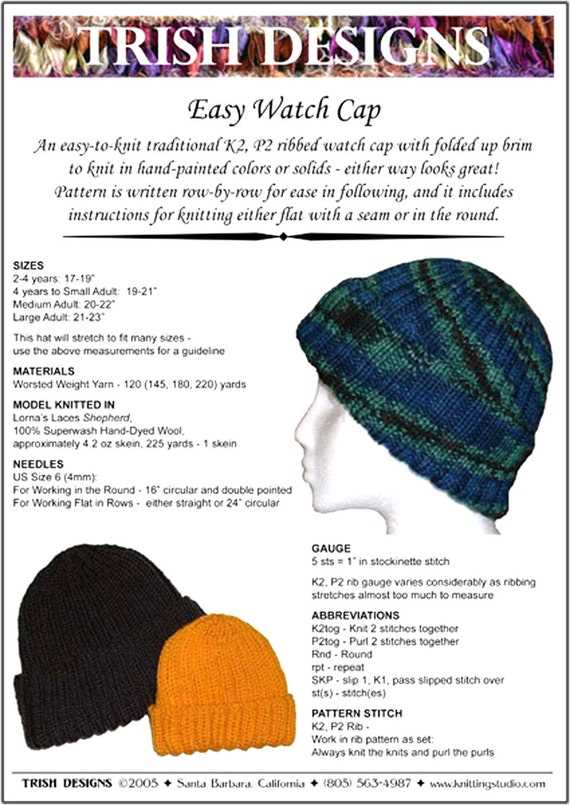
Cozy and Free: Knit Your Own Watch Cap Pattern

Looking for a new knitting project? Why not try your hand at knitting a watch cap? Watch caps are a classic accessory that not only keep you warm but also add a stylish touch to your winter wardrobe. And the best part is, you can find free knit watch cap patterns online!
Whether you’re a beginner knitter or an experienced one, there are patterns available for everyone. From simple and basic designs to more intricate patterns with cables and textures, you can choose a pattern that suits your skill level and personal style.
With a few skeins of yarn and your trusty knitting needles, you’ll be able to create a cozy and fashionable watch cap in no time. So grab your supplies, find a pattern, and get ready to knit your very own watch cap!
Knit Watch Cap Pattern Free

A watch cap is a classic knitted hat that is both stylish and practical. It is a versatile accessory that can be worn by both men and women, and it is perfect for keeping your head warm during the colder months.
If you’re looking for a free knitting pattern to make your own watch cap, you’re in luck! There are many patterns available online that provide step-by-step instructions and are suitable for knitters of all skill levels.
Materials

- Worsted weight yarn
- Size 8 knitting needles
- Stitch markers
- Tapestry needle
- Scissors
Pattern

Step 1: Cast on 80 stitches using the long-tail cast on method.
Step 2: Place a stitch marker at the beginning of the round.
Step 3: Knit in the round in a 2×2 rib stitch pattern (knit 2 stitches, purl 2 stitches) for 2 inches.
Step 4: Continue knitting in stockinette stitch (knit every round) until the cap measures 8 inches from the cast on edge.
Step 5: Decrease rounds: Note: Switch to double-pointed needles when necessary.
- Decrease Round 1: *Knit 6, knit 2 together; repeat from * to end of round (70 stitches).
- Decrease Round 2: Knit every stitch.
- Decrease Round 3: *Knit 5, knit 2 together; repeat from * to end of round (60 stitches).
- Decrease Round 4: Knit every stitch.
- Decrease Round 5: *Knit 4, knit 2 together; repeat from * to end of round (50 stitches).
- Decrease Round 6: Knit every stitch.
- Decrease Round 7: *Knit 3, knit 2 together; repeat from * to end of round (40 stitches).
- Decrease Round 8: Knit every stitch.
- Decrease Round 9: *Knit 2, knit 2 together; repeat from * to end of round (30 stitches).
- Decrease Round 10: Knit every stitch.
- Decrease Round 11: *Knit 1, knit 2 together; repeat from * to end of round (20 stitches).
- Decrease Round 12: Knit every stitch.
- Decrease Round 13: *Knit 2 together; repeat from * to end of round (10 stitches).
Step 6: Cut the yarn, leaving a long tail. Thread the tail through a tapestry needle, slide the needle through the remaining stitches, and pull tight to close the top of the hat.
Step 7: Weave in any loose ends and trim excess yarn.
Now you have your very own knit watch cap! Feel free to customize it by adding a pom-pom, a folded brim, or even a cable pattern. Knitting a watch cap is not only a fun and satisfying project, but it also allows you to create a personalized accessory that will keep you cozy all winter long.
The Basics of Knitting a Watch Cap

Knitting a watch cap is a fun and rewarding project for beginners and experienced knitters alike. This classic hat style is perfect for keeping warm during the colder months and can be customized to fit any style or preference. Whether you’re knitting a watch cap for yourself or as a gift, here are the basics you need to know to get started.
Materials:
- Yarn: Choose a soft and warm yarn that is suitable for the desired thickness of the watch cap. Wool or wool blends are often popular choices.
- Knitting Needles: The size of your knitting needles will depend on the thickness of the yarn you choose. Check the yarn label for recommended needle size.
- Stitch Markers: These are helpful for keeping track of your progress and marking important sections of your watch cap.
- Tapestry Needle: This will be used for weaving in loose ends and finishing off your watch cap.
Pattern:
1. Cast on: Start by casting on the desired number of stitches onto your knitting needles. This will depend on the size and fit of your watch cap. If you’re unsure, a common starting point is around 80-100 stitches.
2. Ribbing: Work a few inches of ribbing at the brim of the watch cap. This can be done in a: k1, p1 or k2, p2 pattern to create a stretchy and snug fit.
3. Main Body: Once you’ve completed the ribbing, switch to your desired stitch pattern for the main body of the watch cap. This can be simple stockinette stitch for a smooth finish or a pattern stitch for added texture.
4. Decreases: When the desired length of the watch cap is reached, it’s time to start decreasing stitches to shape the crown. This is typically done by knitting two stitches together (k2tog) or purling two stitches together (p2tog) at regular intervals.
5. Finishing: Once you have decreased enough stitches and reached the top of the watch cap, cut the yarn leaving a long tail. Thread the tail through a tapestry needle and weave it through the remaining stitches, pulling tight to close the top. Secure any loose ends and your watch cap is complete!
Customization:

One of the great things about knitting a watch cap is the ability to customize it to your liking. Feel free to experiment with different stitch patterns, colors, and yarn weights to create a unique and personalized hat. You can also add embellishments such as pom-poms, buttons, or patches to make your watch cap truly one-of-a-kind.
Remember, knitting is a skill that improves with practice, so don’t be discouraged if your first watch cap doesn’t turn out exactly as you envisioned. Enjoy the process and have fun creating something cozy and functional with your own two hands.
Choosing the Right Yarn and Needles
When it comes to knitting a watch cap, choosing the right yarn and needles is crucial for achieving the desired outcome. The yarn and needles you select can significantly impact the final look, feel, and fit of the cap. Therefore, it is essential to consider certain factors before making your decision.
Yarn
When selecting yarn for your watch cap, consider the weight, fiber content, and color. The weight of the yarn determines the thickness and warmth of the finished cap. Bulky or super bulky yarns are ideal for a chunky and cozy cap, while fingering or sport weight yarns create a lighter, more delicate cap.
The fiber content of the yarn affects its durability, softness, and warmth. Wool is a popular choice for watch caps as it is warm, breathable, and holds its shape well. Acrylic yarns are another option, offering affordability, easy care, and a wide range of colors. For added warmth and softness, consider blending wool with alpaca or cashmere.
Needles
The size and type of needles you use will determine the gauge and stitch pattern of your watch cap. Circular needles are often preferred for knitting a cap as they allow for working in the round with ease. Choose a needle size that matches the recommended gauge for the pattern you are following or adjust the size to achieve the desired fabric density.
Additionally, the length of the circular needle’s cable is important. A short cable is suitable for knitting a snug-fitting watch cap, while a longer cable is more comfortable for larger projects or those with a slouchy style. Double-pointed needles can also be used, especially for working the crown decreases.
- Consider the weight, fiber content, and color of the yarn when selecting for a watch cap.
- Choose the right needle size and type to achieve the desired gauge and stitch pattern.
- Circular needles are often preferred for knitting a cap, while double-pointed needles can be used for crown decreases.
By carefully considering the yarn and needles for your watch cap, you can ensure that your finished project is both functional and visually appealing. Experiment with different combinations to find the perfect match for your knitting style and the look you want to achieve.
Gathering Your Supplies
Before you begin knitting your watch cap, you will need to gather a few supplies to ensure a successful project. Here is a checklist of the essential items you will need:
- Yarn: Choose a high-quality, soft and warm yarn that is suitable for knitting a winter hat. Consider the color and thickness of the yarn based on your personal preference and the desired look of your watch cap.
- Knitting Needles: Select a pair of knitting needles that are appropriate for the yarn thickness you have chosen. Circular or double-pointed needles may be used, depending on your preferred knitting method.
- Tape Measure: This will be essential for measuring the size of your head and ensuring that your watch cap will fit properly.
- Stitch Markers: These small, removable markers will help you keep track of key points in your pattern, such as the beginning of rounds or specific stitch counts. They are especially useful when knitting in the round.
- Tapestry Needle: You will need this needle to weave in loose ends and sew any finishing touches on your watch cap.
- Scissors: You will need a pair of sharp scissors for cutting yarn and trimming any excess materials.
- Pattern: Find a free knit watch cap pattern that suits your skill level and desired style. Make sure to have a printed or digital copy of the pattern before you begin knitting.
Once you have gathered all of these supplies, you will be ready to start knitting your watch cap. Having everything organized and within reach will make the process smoother and more enjoyable. Take your time to find quality materials and follow the pattern instructions carefully to create a beautiful and cozy watch cap.
Getting Started: Casting on Stitches
Knitting a watch cap starts with casting on stitches. This is the process of creating the initial loops on the knitting needle that form the foundation of the cap. To cast on stitches for a watch cap, you can use a variety of methods, but the most common method is the long-tail cast on.
The long-tail cast on method involves using both the working yarn and a tail of yarn to create the stitches. To begin, make a slipknot near the end of the tail yarn and place it on the left needle. Then, hold the working yarn in your right hand and take the needle with the slipknot in your left hand.
To create the first stitch, bring the needle with the slipknot behind the working yarn. Using your right hand, insert the needle from front to back through the loop on your left needle, catching the working yarn on the way. From there, bring the needle back to the front, creating a new loop on the left needle. This process is repeated for each stitch, with the working yarn forming a loop around the needle and creating a new stitch each time.
Once you have cast on the desired number of stitches, you can continue with the next steps of the watch cap pattern, such as joining in the round or working in rows. The long-tail cast on method creates a neat and stretchy edge, making it a popular choice for many knitting projects, including watch caps.
Knitting the Body of the Watch Cap
After completing the ribbing, it is time to start knitting the body of the watch cap. To do this, continue working in the established rib pattern for the desired length. You can adjust the length to your preference, but around 4-6 inches is a good starting point.
With each row, make sure to maintain the rib pattern by knitting the knits and purling the purls. This will create the stretchy and textured fabric that is characteristic of a watch cap. It is helpful to use stitch markers to keep track of your progress and identify the beginning of each round.
If you would like to add decorative elements to the body of the watch cap, such as stripes or cables, now is the time to do so. Follow the pattern instructions or create your own design by incorporating different stitches or color changes.
Decreasing for the Crown
Once you have reached the desired length for the body of the watch cap, it is time to start decreasing for the crown. This will give the hat its tapered shape and ensure a snug fit.
There are several methods for decreasing, but a common approach is to knit two stitches together (k2tog) every few stitches. This can be done evenly across the row or in a pattern to create a more decorative crown. Continue decreasing in this manner until you have a small number of stitches remaining.
To finish off the watch cap, cut the yarn, leaving a long tail. Thread the tail through the remaining stitches, removing them from the needle. Pull tight to close the opening and secure the end. Weave in any remaining loose ends, and your watch cap is now complete and ready to be worn!
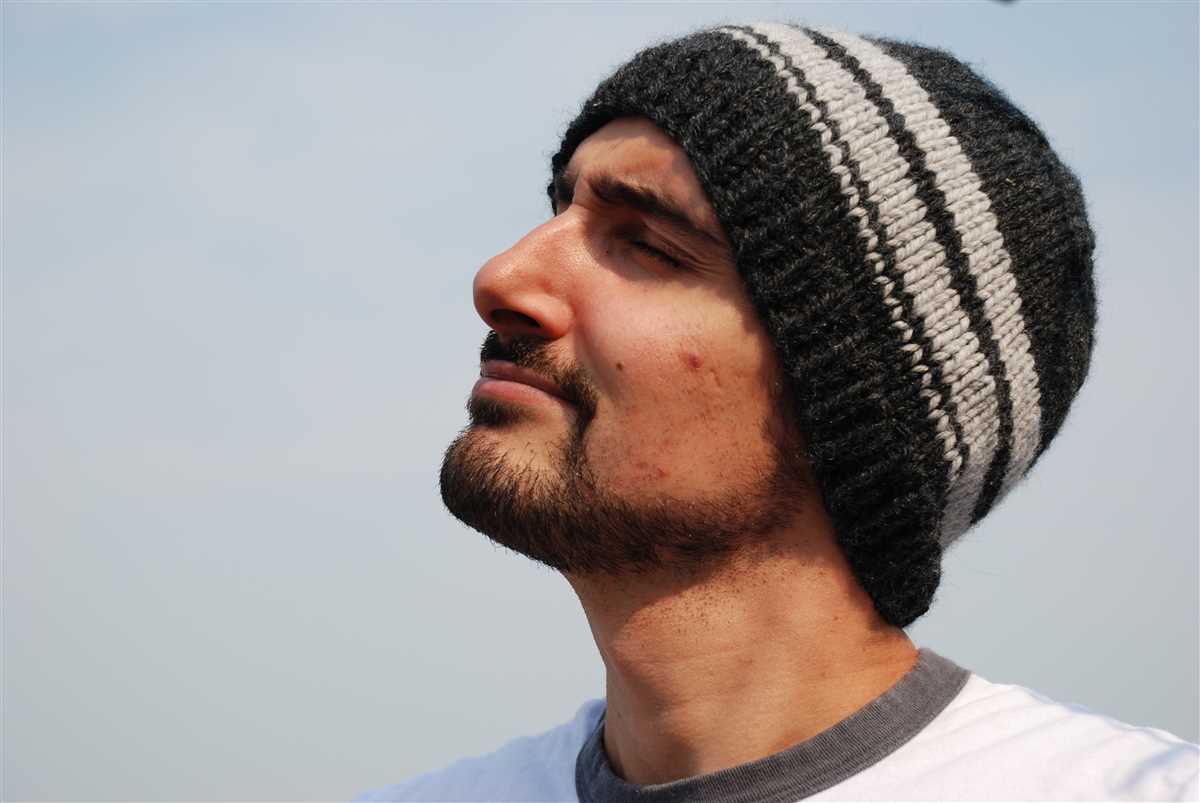
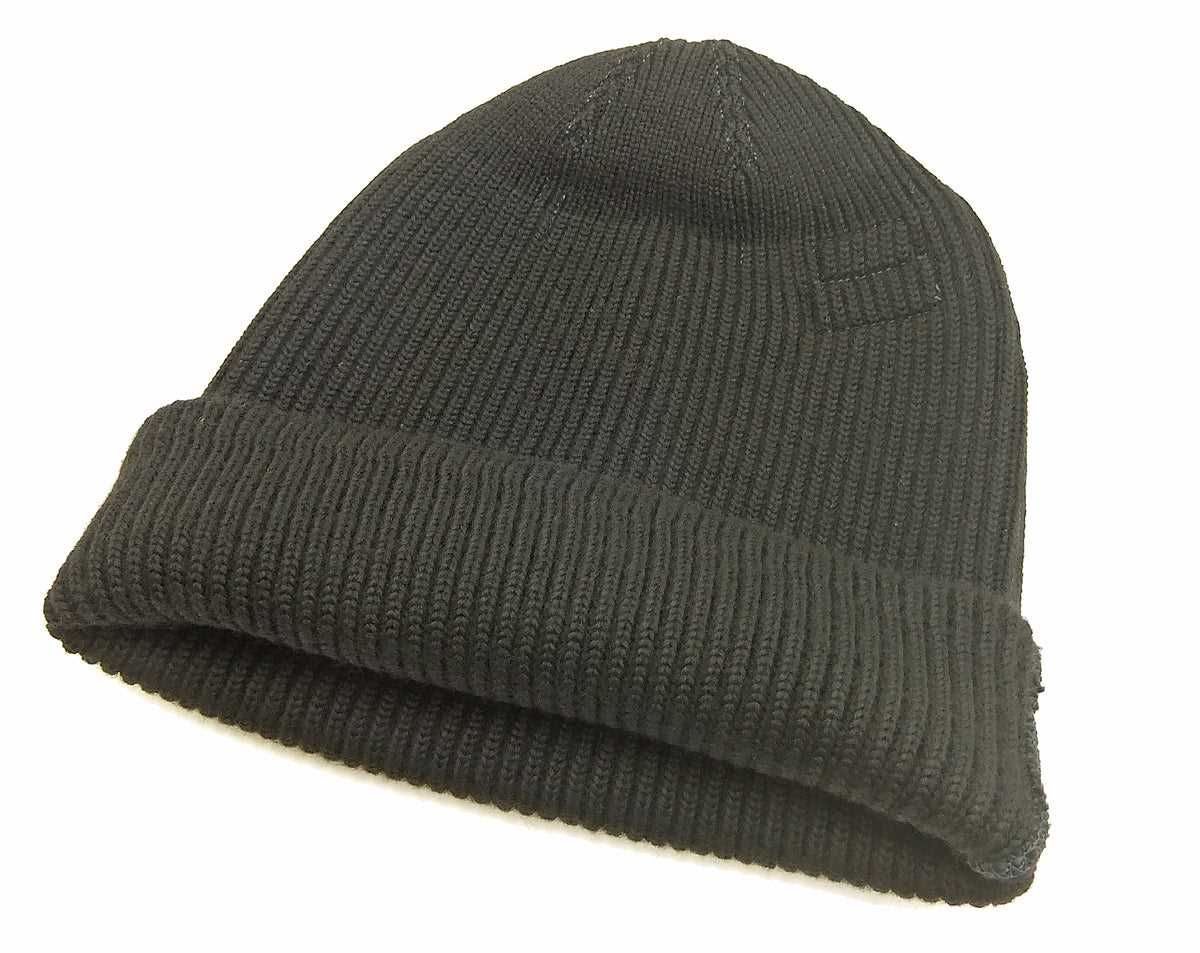
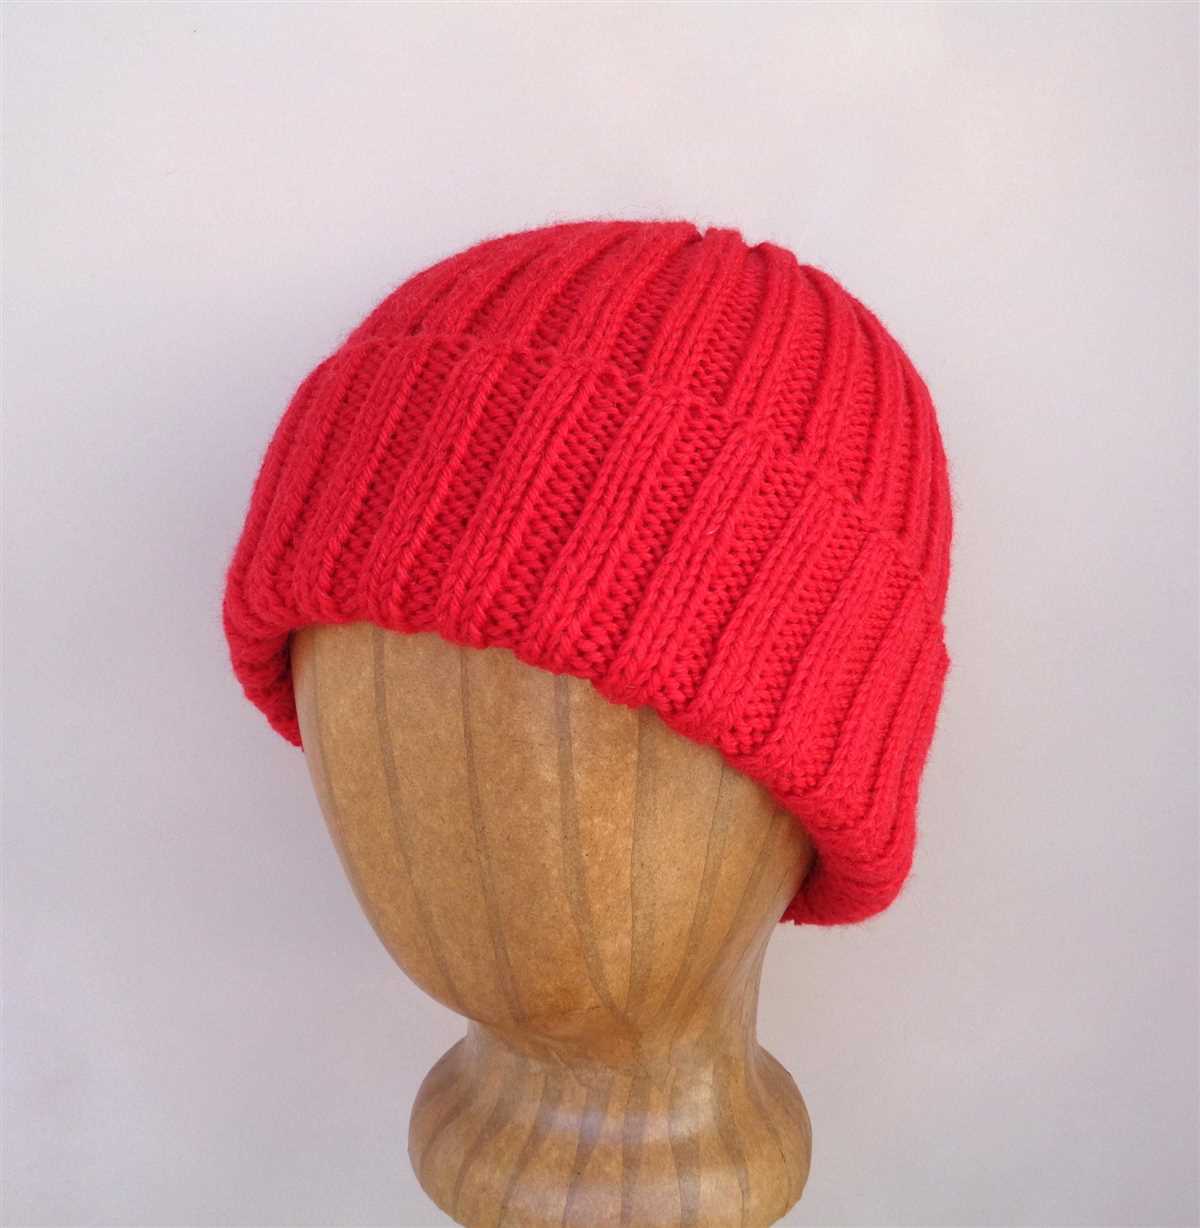
Adding Ribbing for a Snug Fit
When knitting a watch cap, it is important to ensure a snug fit so that it stays in place and keeps the wearer warm. One way to achieve this is by adding ribbing to the brim of the cap. Ribbing creates a stretchy and elastic band that hugs the head comfortably.
To add ribbing to your watch cap, you can use a basic knit and purl stitch pattern. This pattern creates alternating columns of knits and purls, which gives the fabric its stretchiness. The most common ribbing pattern is the 1×1 rib, where you alternate one knit stitch with one purl stitch across each row.
How to Knit 1×1 Ribbing
- Start by casting on the desired number of stitches for your watch cap.
- Row 1: *Knit 1, purl 1* – repeat this pattern across the entire row.
- Row 2: Repeat row 1.
- Continue these two rows, repeating the knit 1, purl 1 pattern, until the ribbing is the desired length.
- Once the ribbing is complete, you can switch to your main stitch pattern for the body of the cap.
By adding ribbing to your watch cap, you can ensure a snug and comfortable fit. The stretchiness of the ribbing allows the cap to adapt to different head sizes and provides a secure hold. Whether you’re knitting for yourself or someone else, incorporating ribbing into your watch cap pattern is a great way to elevate the design and functionality of the finished piece.
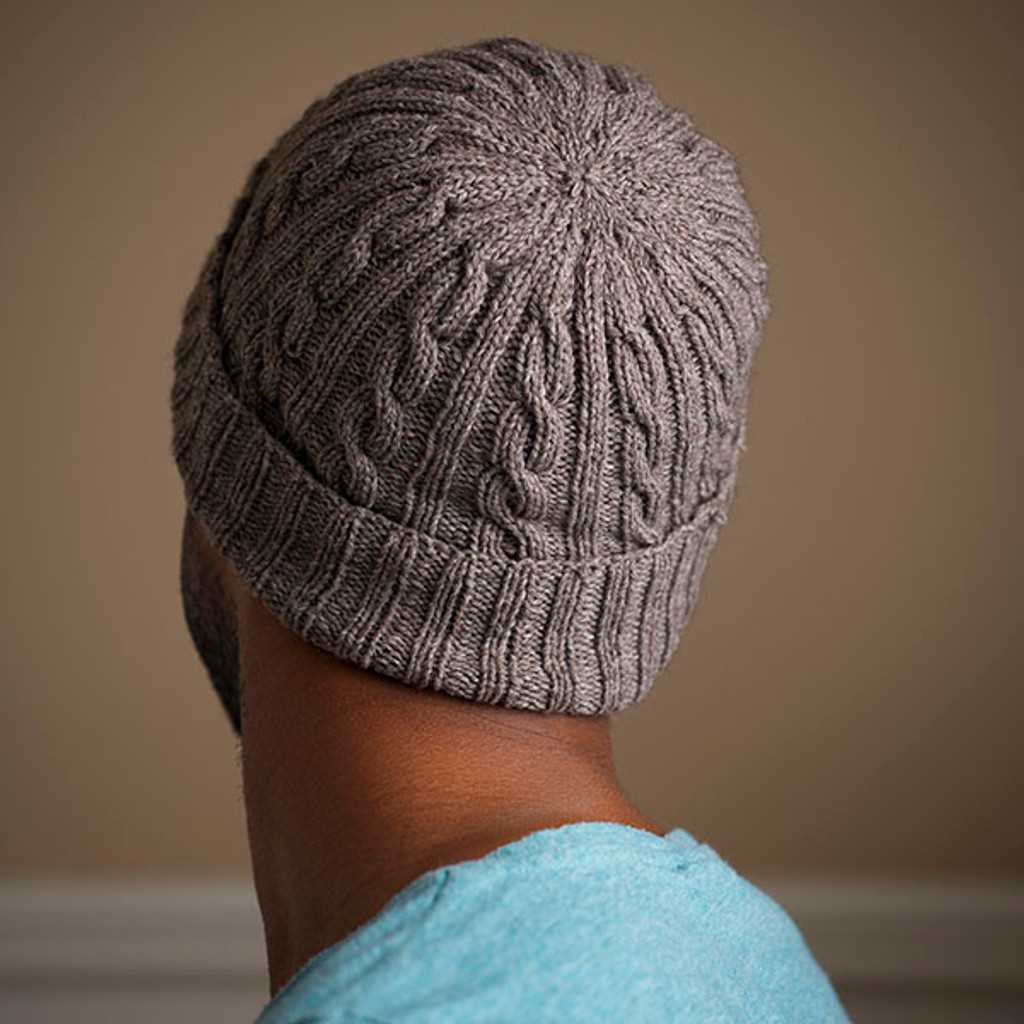
Creating the Watch Cap Crown
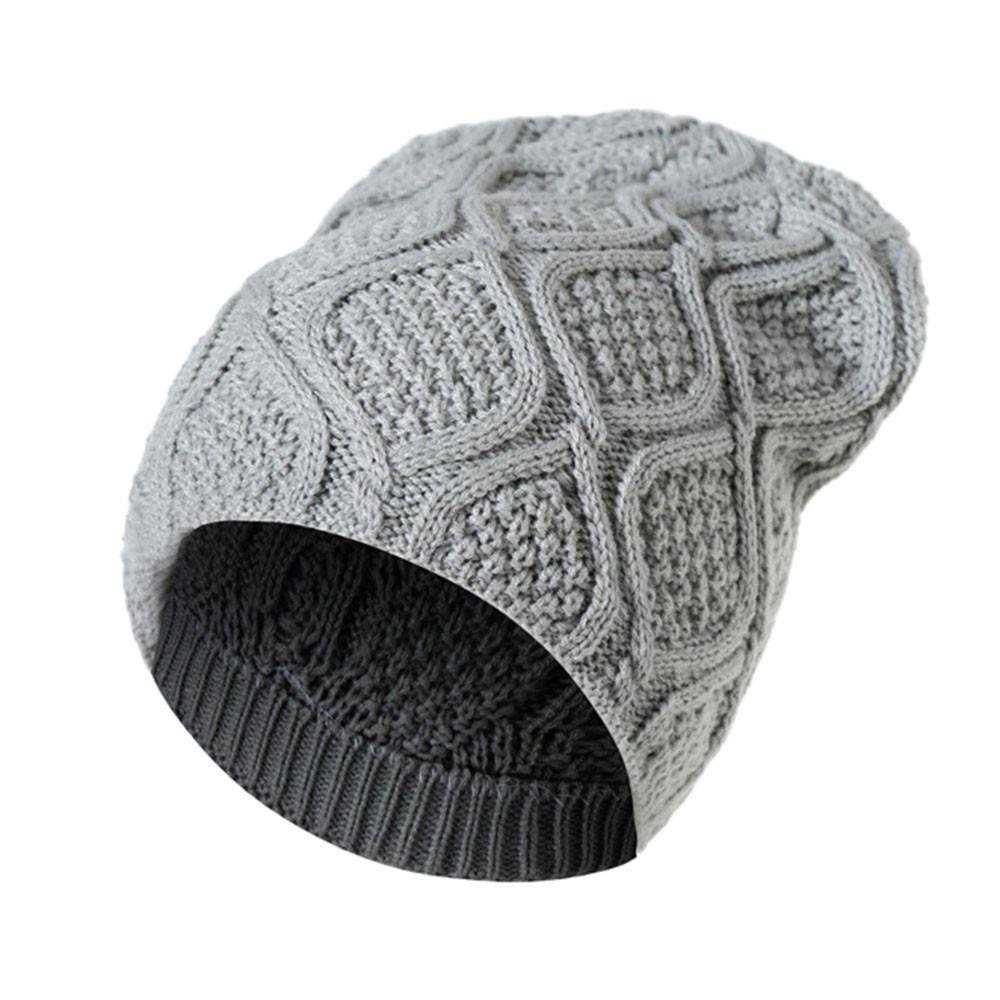
When knitting a watch cap, one of the key elements to focus on is creating the crown of the cap. The crown is the top portion, where the stitches come together to form a rounded shape. There are different techniques and patterns that can be used to achieve this, depending on the desired look and style of the cap.
One common method for creating the crown of a watch cap is to decrease the number of stitches gradually towards the top. This can be done by knitting two stitches together at regular intervals, usually on every other row, until the desired number of stitches remains. This technique creates a smooth and rounded crown.
To add more texture and dimension to the crown of a watch cap, another option is to incorporate cable knitting. This involves using a cable needle to hold a set of stitches to the front or back while knitting the next set of stitches. By crossing the stitches over each other, a cable pattern is created that adds an interesting design element to the crown.
An alternative approach to creating the crown of a watch cap is to use short row shaping. This technique involves knitting partial rows, turning the work before completing a full row, and creating a wedge-like shape. This can be done by wrapping the yarn around the needle before turning, which creates additional stitches and helps to shape the crown. Short row shaping can result in a more slouchy and relaxed crown.
Ultimately, the choice of technique for creating the crown of a watch cap depends on personal preference and the desired outcome. Whether it’s a smooth and rounded crown, a textured cable pattern, or a slouchy shape, there are endless possibilities to explore when knitting a watch cap.
Shaping the Crown with Decreases
The crown of a knit watch cap is the top part that covers the head. To shape the crown, you will need to decrease stitches gradually to create a rounded shape. There are different methods for decreasing stitches, and the one you choose will depend on the stitch pattern and the desired outcome. Here are a few common decrease methods:
1. K2tog (Knit Two Together)
The K2tog decrease is the most basic and widely used decrease method. It involves knitting two stitches together as if they were one, resulting in a single stitch decrease. To work a K2tog decrease, simply insert the right needle into the next two stitches on the left needle and knit them together as one stitch.
2. SSK (Slip, Slip, Knit)
The SSK decrease is another commonly used method. It creates a decrease that slants to the left, which can add an interesting design element to the crown. To work an SSK decrease, slip the next two stitches as if to knit onto the right needle one at a time, then insert the left needle into the fronts of these two slipped stitches and knit them together.
When shaping the crown of a knit watch cap, it’s important to follow the pattern instructions carefully and maintain an even tension as you work the decreases. By using the appropriate decrease methods and spacing them evenly throughout the crown, you can achieve a beautifully rounded shape that fits snugly on the head. Take your time, and enjoy the process of creating a cozy and stylish accessory!
Switching to Double Pointed Needles
Switching to double pointed needles is an essential skill for knitters who want to tackle more advanced projects, such as hats, socks, or mittens. Double pointed needles, often abbreviated as DPNs, are used when the number of stitches in a project becomes too small to fit comfortably on a regular circular needle or when working in the round. They are also useful when working on projects that require shaping, such as increasing or decreasing stitches.
When switching to double pointed needles, it’s important to have a good understanding of basic knitting techniques, such as knitting and purling. Additionally, it’s helpful to have a firm grasp of how to read knitting patterns and understand knitting terminology.
To switch to double pointed needles, start by dividing your stitches evenly onto three or four needles, depending on the pattern instructions. One needle is used to hold the stitches while the other needles are used to work the stitches.
It’s important to be mindful of the order of the stitches on your needles. Make sure they are not twisted and are aligned properly. This will ensure that your knitting is even and that there are no gaps or holes in your work.
When working with double pointed needles, it’s common to use a stitch marker to indicate the beginning of a round. This can help you keep track of where you are in the pattern and prevent mistakes.
As with any new knitting technique, switching to double pointed needles may take some practice and patience. However, with time and experience, you’ll become more comfortable with this method and be able to tackle even more complex knitting projects.
Finishing Touches: Binding Off
After completing the final row of your knit watch cap, it’s time to finish off your project with a clean and secure bind off. The bind off is an essential step that ensures the edges of your cap won’t unravel, giving your hat a polished and professional look.
To bind off your knit watch cap, follow these simple steps:
- Knit the first two stitches of the final row as usual.
- Insert your left needle into the first stitch on your right needle.
- Pull the first stitch over the second stitch and off the right needle, binding it off.
- Knit the next stitch on your left needle.
- Repeat steps 2-4 until you have bound off all stitches, leaving only one stitch remaining.
- Cut your yarn, leaving a long tail for sewing the remaining stitch.
Once you have finished binding off all stitches, thread the yarn tail through the final stitch and pull tight to secure. This will create a neat and tidy edge for your knit watch cap.
If you prefer a stretchy bind off, you can use a different method called the “elastic bind off”. This technique involves knitting two stitches together through the back loop and then passing the resulting stitch back onto the left needle. Repeat this process until all stitches have been bound off.
By following these binding off techniques, you can add the perfect finishing touch to your knit watch cap. Now your hat is ready to be worn and enjoyed, keeping you warm and stylish during the colder months.
Adding a Pom Pom (Optional)
Adding a pom pom to your knit watch cap is a fun and stylish way to finish off your project. Whether you prefer a small pom pom for a subtle touch or a large and fluffy one for a more playful look, the choice is yours!
To add a pom pom, you’ll need some yarn in a coordinating color, a pom pom maker or a piece of cardboard, and a pair of scissors. Here’s a simple step-by-step guide to help you:
- Start by choosing the size of your pom pom. If you’re using a pom pom maker, follow the instructions provided to create your desired size. If you’re using cardboard, cut out two identical circles and cut a smaller circle in the center of each one.
- Take your chosen yarn and wrap it around the pom pom maker or the cardboard circles. The more times you wrap it, the fuller your pom pom will be.
- Once you’re happy with the amount of yarn, carefully slide it off the pom pom maker or insert your scissors through the yarn between the cardboard circles.
- Secure the center of the yarn tightly with a separate piece of yarn or a zip tie. Make sure it’s tied securely to prevent the pom pom from falling apart.
- Next, using your scissors, cut through the loops of yarn on both sides of the pom pom. Trim any uneven strands to make it look neat and even.
- Give your pom pom a gentle shake and fluff it up with your fingers to create a nice round shape.
- Finally, attach the pom pom to the top of your knit watch cap by sewing it on with a few stitches. Make sure it’s centered and secure.
Adding a pom pom to your knit watch cap is a great way to personalize your creation and add a playful touch to your winter wardrobe. Enjoy experimenting with different colors and sizes to create pom poms that reflect your style and personality.
Finishing and Styling Your Knit Watch Cap
After completing your knit watch cap, there are a few final steps to take to ensure a polished and professional finish. Follow these steps to complete your project and style it to your liking:
1. Blocking
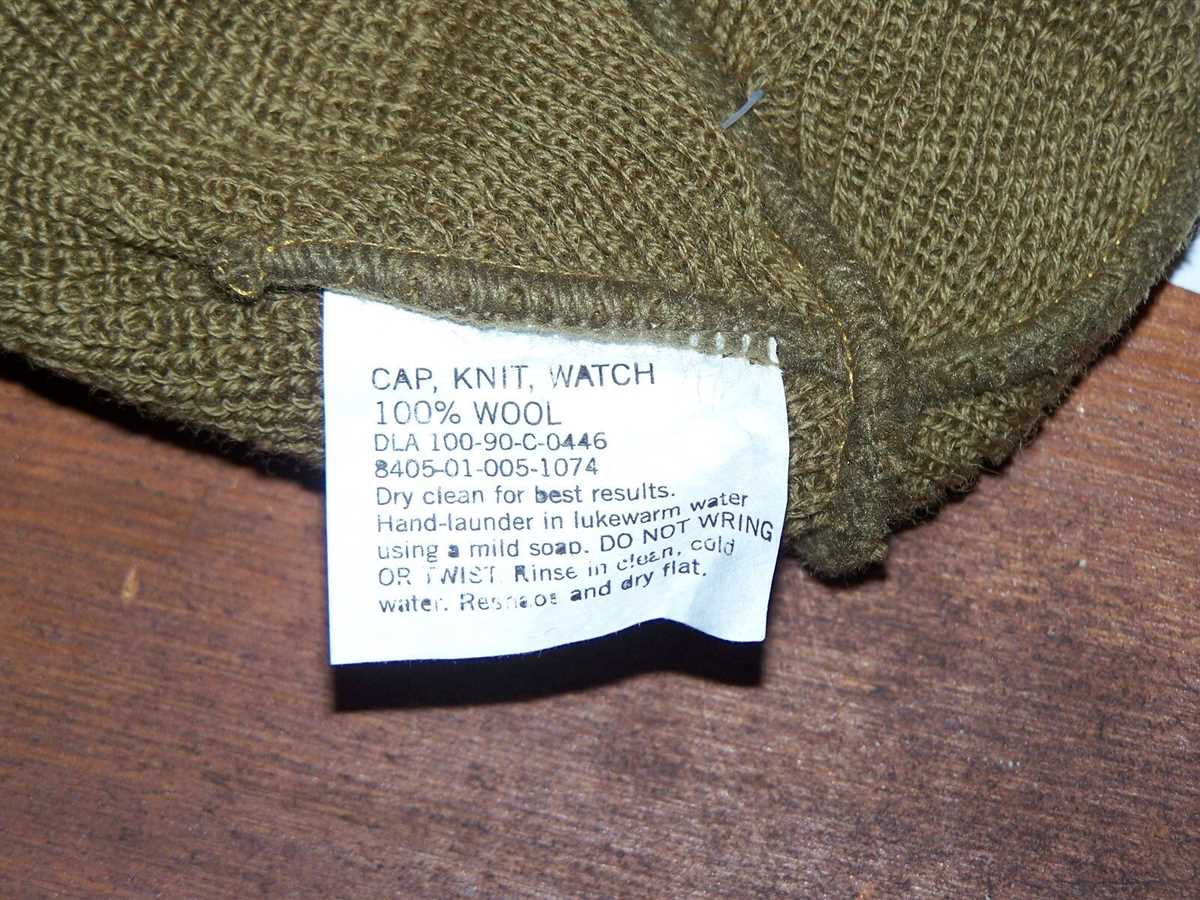
Blocking your finished knit watch cap is an important step to shape and enhance the stitch definition of your hat. To block your hat, start by gently soaking it in cold water with a mild detergent for about 15 minutes. Gently squeeze out the excess water, being careful not to wring or twist the hat. Lay the hat flat on a clean towel and gently shape it to the desired size and shape. Allow it to air dry completely before moving on to the next step.
2. Adding a Pom-Pom (Optional)
To add a playful and stylish touch to your knit watch cap, you can attach a pom-pom. There are various methods to make a pom-pom, including using a pom-pom maker, a piece of cardboard, or even your own hand. Once you have made the desired pom-pom, secure it to the top of your hat using a yarn needle and the yarn tails from the pom-pom. Make sure to attach it securely so that it stays in place during wear.
3. Choosing a Styling Option
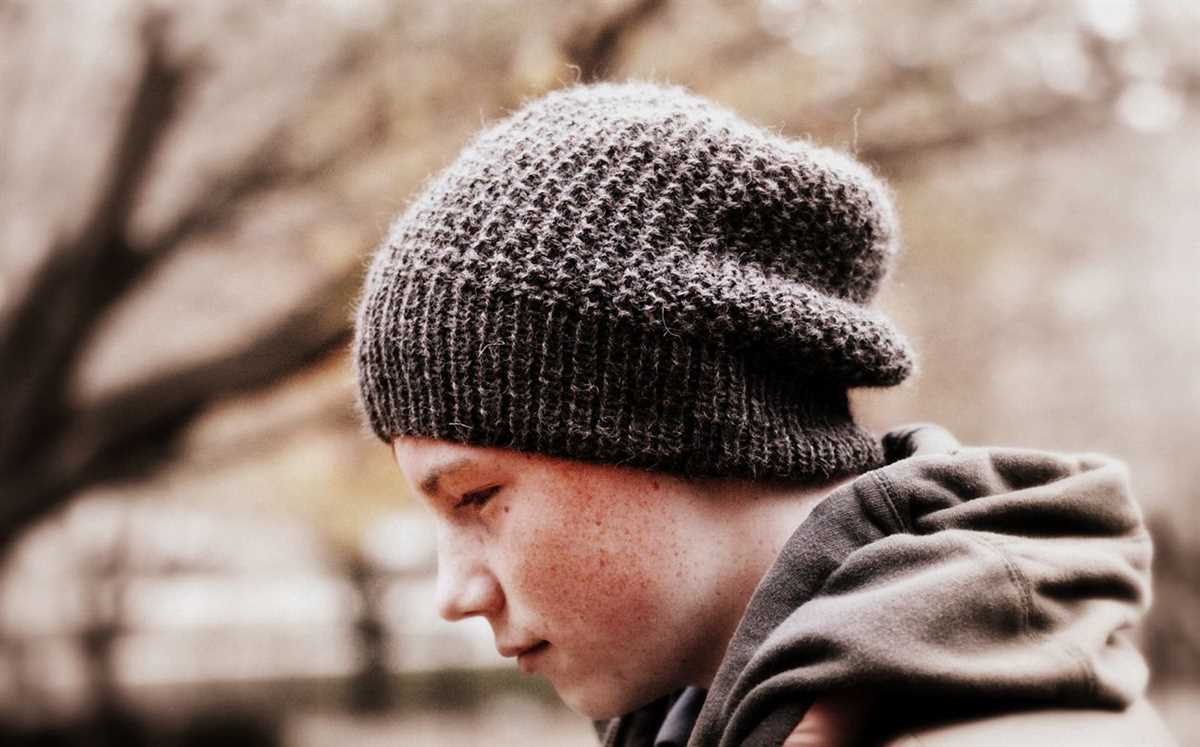
Once your knit watch cap is dry and the pom-pom is attached (if desired), you can start experimenting with different ways to wear and style your hat. Some popular options include:
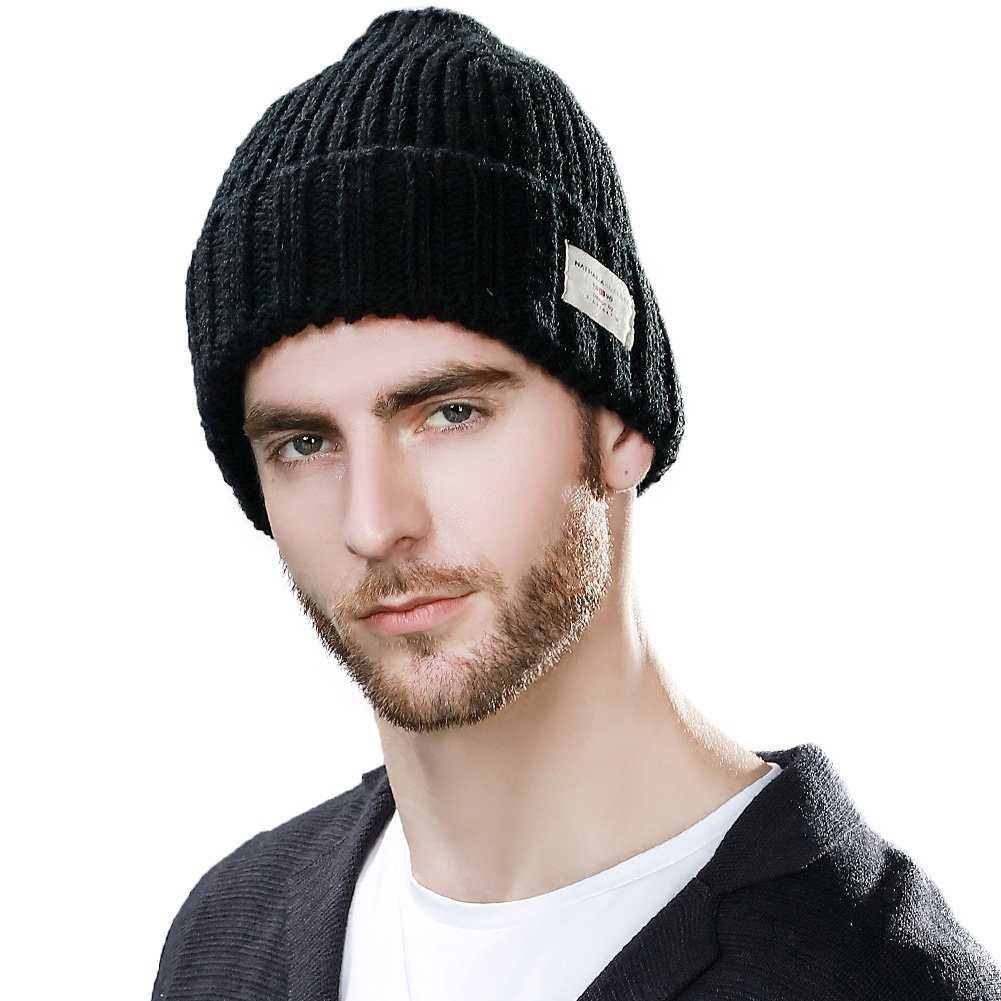
- Folded Brim: Fold the bottom edge of the hat up to create a double-layered brim. This style provides extra warmth and a clean, finished look.
- Slouchy Fit: Tug the hat slightly at the back after putting it on to create a slouchy, relaxed fit. This style adds a casual and trendy touch.
- Cuffed Brim: Fold the bottom edge of the hat up once to create a single-layered cuff. This style is versatile and can be adjusted to your desired length.
4. Care Instructions
To keep your knit watch cap looking its best, it’s important to follow proper care instructions. Hand washing is generally recommended to prevent any damage to the delicate knit fabric. Use a mild detergent and lukewarm water, gently squeeze out the excess water, and reshape as needed during the drying process. Avoid wringing or twisting the hat and never machine wash or tumble dry it.
With these finishing and styling tips, your knit watch cap is ready to be worn and enjoyed for seasons to come. Whether you prefer a sleek and classic look or a more playful and colorful style, there are endless possibilities to make your cap uniquely yours.