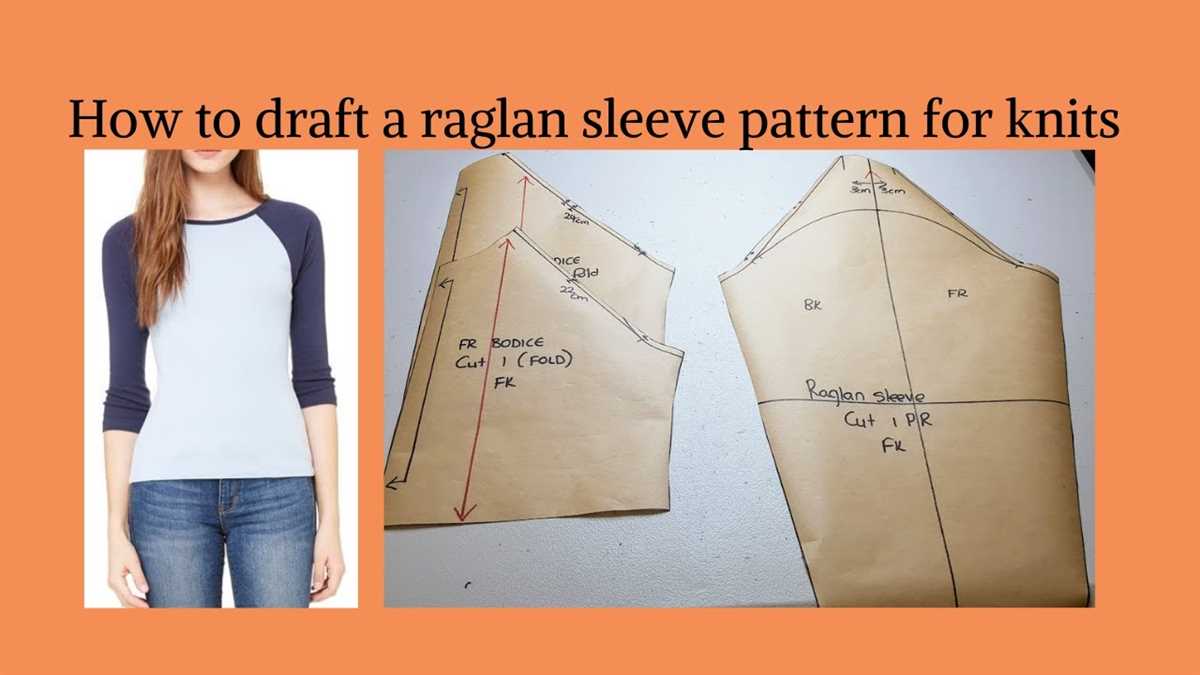
Creating a Beautiful Raglan Sleeve with Knitting Needles

Knitting is a beloved pastime for many, and if you’re an avid knitter, you’re likely familiar with the raglan sleeve. The raglan sleeve is a popular choice for sweaters and other garments as it offers a flattering fit and allows for easy movement. In this article, we’ll explore the knitted raglan sleeve pattern and provide you with a step-by-step guide to creating this versatile sleeve design.
One of the key features of the raglan sleeve is its construction. Unlike traditional set-in sleeves, the raglan sleeve is seamlessly integrated into the body of the sweater. This means that there are no seams to sew up later, making the knitting process quicker and easier. The raglan sleeve gets its name from Lord Raglan, a British soldier known for his distinctive sleeve design in military uniforms. This design has since become popular in casual wear and is now widely used in knitting patterns.
When knitting a raglan sleeve, you’ll start by creating the body of the sweater from the bottom up. The raglan shaping is then achieved by increasing stitches at specific points to form diagonal lines that extend from the underarms to the neck. These diagonal lines create a slanting seam that gives the raglan sleeve its distinctive look. The number of increase rows and stitches will depend on the size of the garment and the desired fit. It’s important to follow the pattern instructions carefully to ensure the proper shaping of the raglan sleeve.
What is a Knitted Raglan Sleeve?
A knitted raglan sleeve is a specific type of sleeve construction commonly used in knitting patterns. Raglan sleeves are named after Lord Raglan, a British officer who lost his arm during the Crimean War and had his tailor create coats with sleeves that extended from the collar, allowing for better movement and comfort. The raglan sleeve construction creates a diagonal seam that runs from the underarm to the neckline, creating a seamless transition between the sleeve and the body of the garment.
The key characteristic of a knitted raglan sleeve is its seamless construction. Unlike other sleeve types that require seaming or setting in, the raglan sleeve is knit in one piece with the body of the garment, making it easier and faster to knit. This construction method also allows for easy customization, as the sleeve length can be easily adjusted by knitting more or fewer rows.
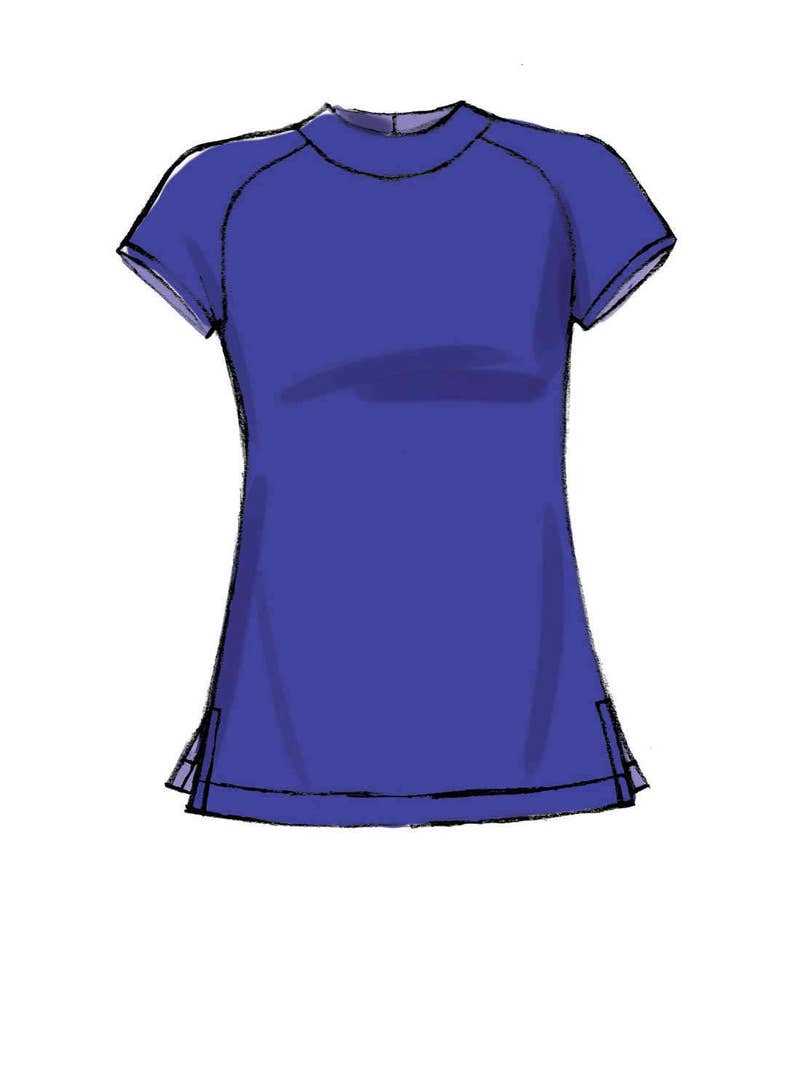
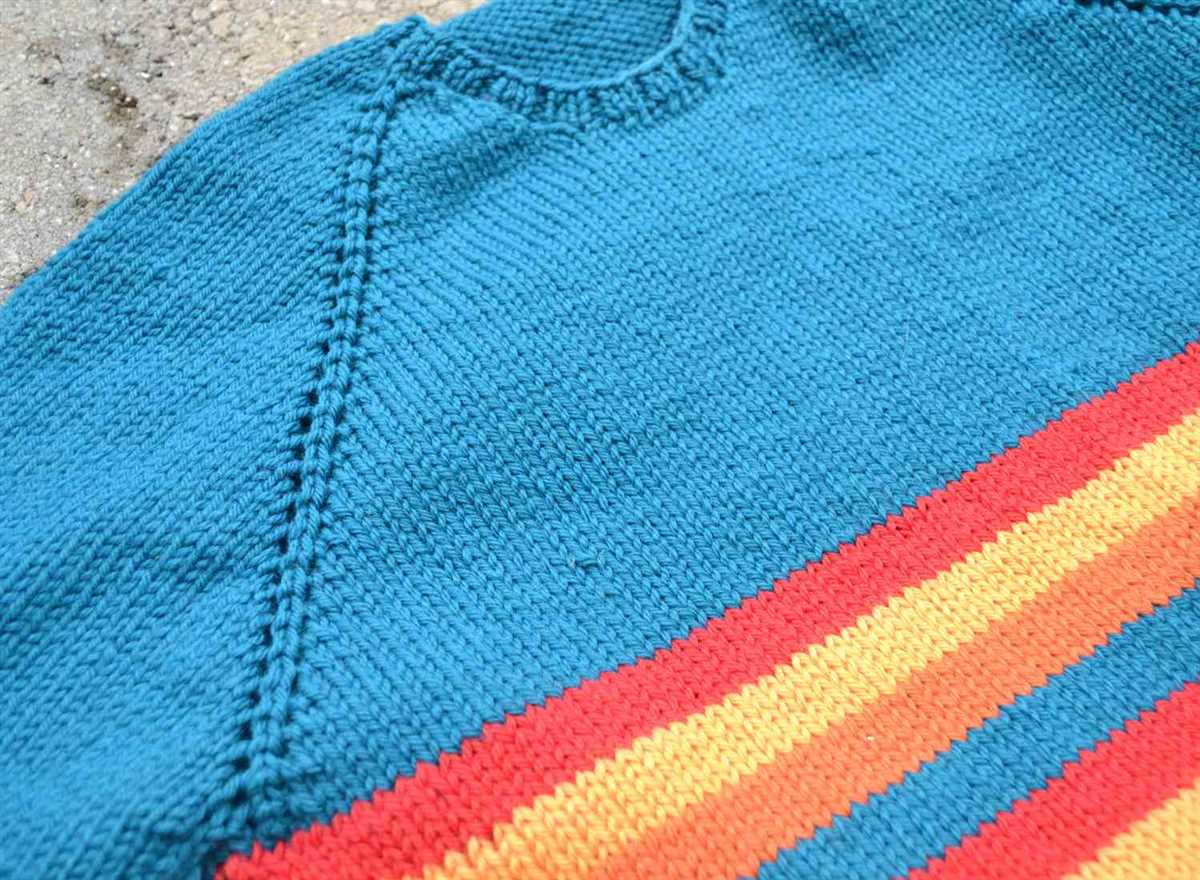
The raglan sleeve is typically wider at the top and narrower at the wrist, creating a flattering silhouette that follows the natural shape of the arm. This construction also provides a greater range of motion, making it ideal for active or sporty garments such as sweaters, cardigans, and jackets. The diagonal seam of the raglan sleeve adds visual interest to the design and can be showcased with contrasting yarn colors or stitch patterns.
Knitting a raglan sleeve requires basic knitting skills, such as casting on, knit and purl stitches, and decreasing. The construction may vary depending on the pattern and the desired fit. Raglan sleeves can be knit from the top down or from the bottom up, and they can be shaped with simple decreases or more complex techniques like short rows or double decreases. Regardless of the specific technique used, the resulting raglan sleeve provides both comfort and style to knitted garments.
Understanding the Basics
When it comes to knitting raglan sleeves, it is important to have a good understanding of the basics. Raglan sleeves are a popular choice for knitted garments as they create a seamless construction that is both comfortable and flattering. In order to successfully knit raglan sleeves, you’ll need to be familiar with a few key techniques and concepts.
1. Raglan Construction
One of the defining features of raglan sleeves is the diagonal seam that runs from the underarm to the neck. This seam is created by decreasing stitches on either side of the raglan lines, resulting in a triangular shape that fits smoothly into the garment. Understanding how these decreases work and how they affect the overall shape of the sleeve is crucial for creating a well-fitting garment.
2. Raglan Math
Knitting raglan sleeves also requires some basic math skills. You’ll need to calculate the number of stitches that need to be decreased at each raglan line in order to achieve the desired fit. This will depend on the gauge of your knitting, the size of the garment, and the desired shape of the sleeves. Taking accurate measurements and keeping track of your stitch counts is essential for achieving a professional-looking finished product.
3. Pattern Selection
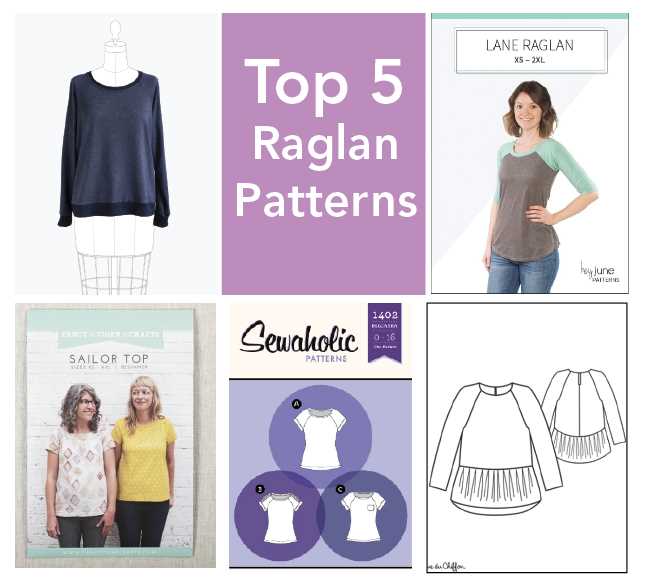
Choosing the right pattern is important when knitting raglan sleeves. Look for patterns that specifically mention raglan sleeves and provide detailed instructions for the construction and shaping of the sleeves. Pay attention to the recommended yarn weight and needle size to ensure that your finished garment will have the desired drape and fit.
In conclusion, knitting raglan sleeves requires a solid understanding of the basic techniques and concepts involved. By familiarizing yourself with raglan construction, mastering the math behind shaping the sleeves, and selecting the right pattern, you’ll be well on your way to creating beautiful knitted garments with raglan sleeves.
Benefits of Knitting a Raglan Sleeve
If you are an avid knitter, you may already be familiar with the raglan sleeve pattern. This particular sleeve design offers several benefits that make it a popular choice among knitters of all skill levels. Whether you are a beginner or an experienced knitter, the raglan sleeve pattern can be a great addition to your knitting repertoire.
One of the main benefits of knitting a raglan sleeve is its seamless construction. Unlike other sleeve patterns that require stitching or seaming, the raglan sleeve is knit in one continuous piece. This means that there are no seams to sew or finish, resulting in a cleaner and more polished final product. Additionally, the seamless construction of the raglan sleeve ensures a comfortable and flexible fit, as there are no bulky seams to hinder movement.
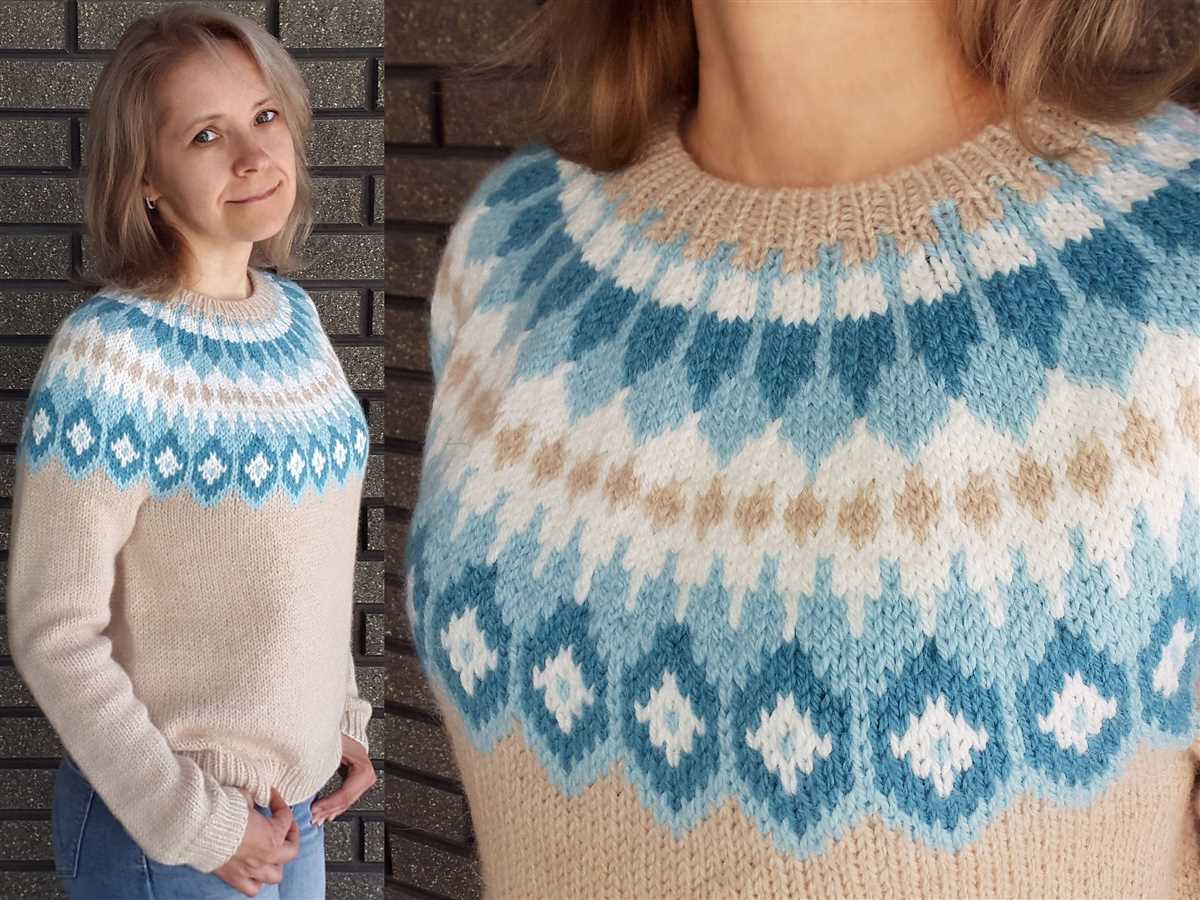
Another benefit of the raglan sleeve pattern is its versatility. This sleeve design can be easily incorporated into a wide range of knitting projects, including sweaters, cardigans, and even accessories like hats and scarves. The simple yet elegant shaping of the raglan sleeve adds visual interest to any garment, making it a great choice for both casual and formal wear.
The raglan sleeve pattern also offers knitters the opportunity to showcase their creativity and personal style. By selecting different yarns, stitch patterns, or color combinations, you can create a unique and one-of-a-kind garment that reflects your individual taste. Whether you prefer a classic, understated look or a bold and vibrant design, the raglan sleeve pattern can easily be customized to suit your preferences.
In conclusion, knitting a raglan sleeve offers several benefits, including seamless construction, versatility, and the opportunity for creativity. Whether you are a beginner or an experienced knitter, incorporating the raglan sleeve pattern into your projects can result in beautiful and comfortable garments that showcase your skills and personal style.
How to Knit a Raglan Sleeve
Knitting a raglan sleeve is a popular technique used in sweater and cardigan patterns. Raglan sleeves are known for their seamless construction and comfortable fit, making them a great choice for both beginners and experienced knitters. Here are the steps to knit a raglan sleeve:
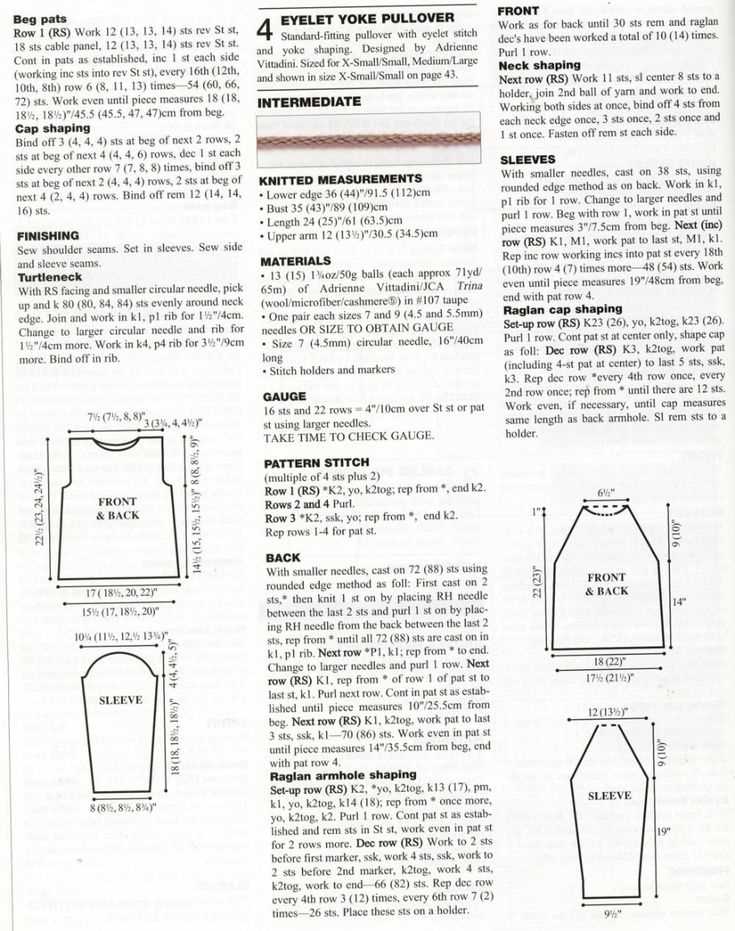
1. Determine your measurements
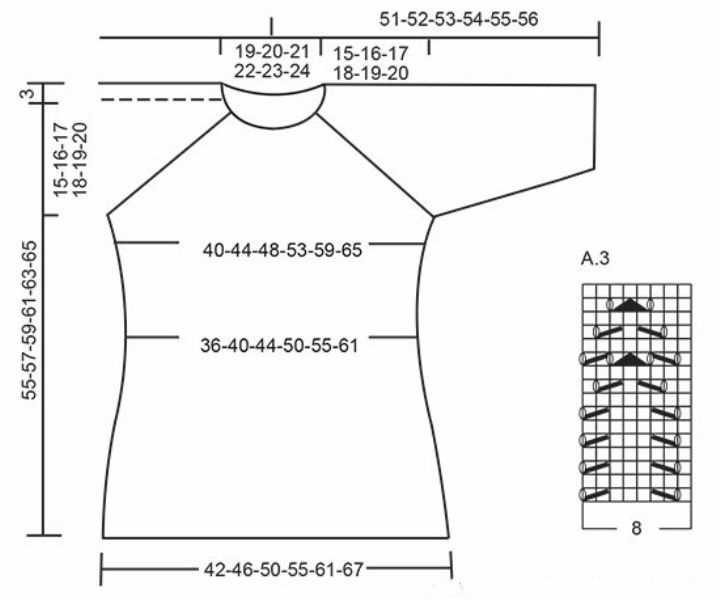
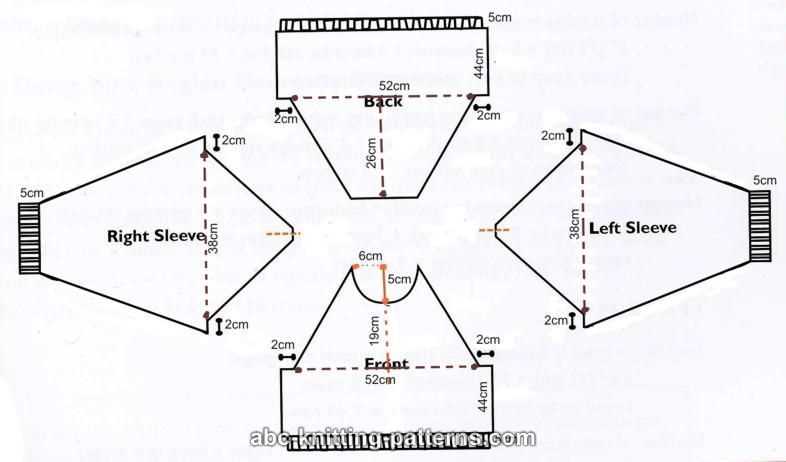
Before you begin knitting, it’s important to determine your measurements to ensure a proper fit. Measure your bust, waist, and arm circumference, as well as the length from your shoulder to your wrist. These measurements will determine the number of stitches and rows you need for your raglan sleeve.
2. Start with a raglan increase
Begin by casting on the required number of stitches for your size. To create the raglan increase, you will add stitches at four points: two on each side of the front and back, and two on each side of the sleeves. This will create a diagonal line from the neckline to the underarm. Follow the pattern instructions to evenly distribute the increases.
3. Knit the body and sleeves separately
Once the raglan increase is complete, you will continue knitting the body and sleeves separately. For the body, follow the pattern instructions to knit in the desired stitch pattern until you reach the hem. For the sleeves, work in the desired stitch pattern until you reach the desired length.
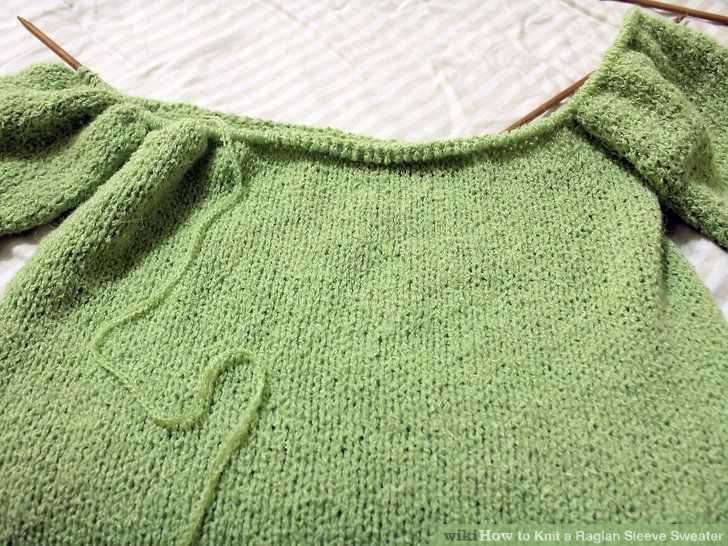
4. Join the body and sleeves
Once the body and sleeves are the desired length, you will join them together. Using a circular needle or double-pointed needles, place the body and sleeves onto the same needle. The raglan line should match up, and you can knit across each section to create the seamless join.
5. Continue knitting in the round
After joining the body and sleeves, you will continue knitting in the round to complete the body of the sweater or cardigan. Follow the pattern instructions for the desired stitch pattern and length. You may need to make additional increases or decreases to shape the garment as needed.
By following these steps, you can successfully knit a raglan sleeve and create a beautiful and comfortable garment. Whether you’re a beginner or an experienced knitter, the raglan sleeve technique is a great way to add style and functionality to your knitted projects.
Gathering the Necessary Materials

Before you start knitting your raglan sleeve, you will need to gather all the necessary materials. Here is a list of the items you will need:
- Yarn: Choose a yarn that is suitable for the pattern you are using. Look for a soft and lightweight yarn that is appropriate for the climate and season you will be wearing the knitted piece in.
- Knitting Needles: Make sure you have the correct size knitting needles for your chosen yarn. Check the pattern for the recommended needle size and use circular or double-pointed needles as required.
- Stitch Markers: These are essential for marking key points in your pattern, such as the beginning of rounds or specific stitch counts. Use different colored stitch markers to help you keep track of different sections or increases.
- Tapestry Needle: You will need a tapestry needle or yarn needle for weaving in the loose ends of your work and joining pieces together. Choose a needle with a large enough eye to accommodate your yarn.
- Scissors: A good pair of scissors is essential for cutting the yarn when needed.
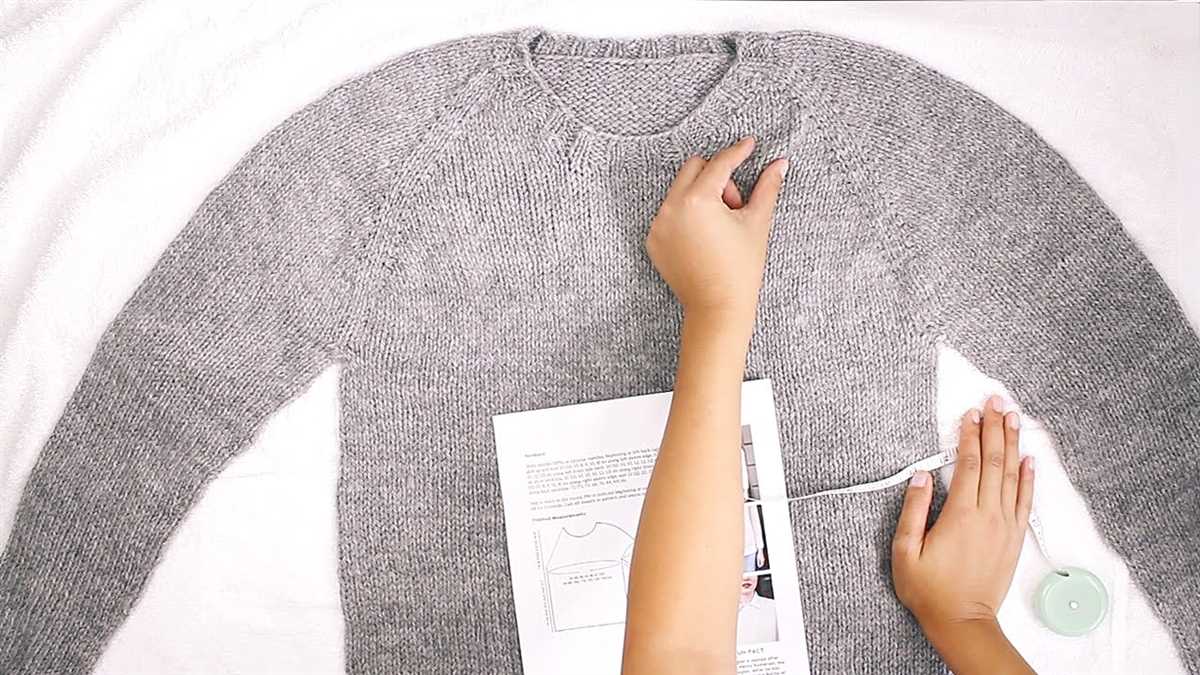
- Measuring Tape: A measuring tape or ruler will help you check your gauge and measure your progress as you knit.
- Pattern: Make sure you have a copy of the raglan sleeve pattern you will be working on. Read through the instructions thoroughly before you begin.
- Notions: Depending on the pattern, you may need additional notions such as buttons, zippers, or ribbon for finishing touches.
Once you have gathered all of these materials, you will be ready to start your knitting project. Ensure that you have everything on hand before you begin, as it can be frustrating to have to stop and search for missing items midway through your project. Happy knitting!
Casting on Stitches
Casting on stitches is the first step in starting a raglan sleeve knitted project. It is a technique used to create the foundation row of stitches that will be worked throughout the pattern. There are several methods to cast on stitches, including the long-tail cast on, the knit cast on, and the cable cast on. Each method creates a slightly different edge, so it’s important to choose the one that best suits the desired outcome of the project.
The long-tail cast on is one of the most commonly used methods for casting on stitches. To perform this technique, a long tail of yarn is left before the first stitch is cast on. The yarn is then wrapped around the needle and pulled through the loop, creating a new stitch. This method creates a sturdy, yet elastic edge that is ideal for projects such as sweaters and cardigans.
Here is a step-by-step guide to the long-tail cast on method:
- Make a slipknot by making a loop with the yarn, with the tail end over the working yarn.
- Insert the needle through the slipknot, making sure the working yarn is behind the needle.
- Using the tail end of the yarn, wrap it around the needle from front to back.
- Pull the tail end of the yarn through the slipknot, creating a new stitch on the needle.
- Repeat steps 2-4 until the desired number of stitches is cast on.
Once the stitches are cast on, they can be used to start knitting the raglan sleeve pattern. It is important to have the correct number of stitches cast on, as specified in the pattern, to ensure the proper fit and shape of the sleeve. By following the appropriate casting on technique and carefully counting the stitches, you can create a strong foundation for your raglan sleeve project.
Working the Raglan Shaping
When knitting a raglan sleeve, the shaping is an important part of creating the characteristic diagonal lines that extend from the neckline to the underarm. This shaping technique is commonly used in top-down sweaters and makes for a comfortable and flattering fit.
There are different ways to work the raglan shaping, but one common method involves decreasing stitches at regular intervals to create the diagonal lines. This can be done by working a decrease on both sides of a specific stitch (such as a marker) to create the slanted line.
To begin the raglan shaping, the pattern will typically instruct you to place markers at the specific points where the decreases will be made. These markers will help guide your decreases and ensure that they are evenly spaced.
Once the markers are in place, you will then start working the decreases on either side of the marker stitches. This is usually done by knitting or purling two stitches together. The frequency of the decreases will depend on the specific pattern instructions, but they are typically worked every other row or every few rows.
The raglan shaping continues until the desired number of stitches remain for the underarm. At this point, the decreases are usually stopped and you will continue knitting or purling straight until the desired length is reached.
Overall, working the raglan shaping requires attention to detail and careful execution of the decreases. However, with a bit of practice, you will be able to achieve the beautiful diagonal lines that make a raglan sleeve so distinctive.
Knitting the Sleeves
Once you have completed the raglan shaping on your knitted raglan sleeve pattern, it’s time to start knitting the sleeves. The sleeves are typically knitted in the round, using double-pointed needles or a circular needle with the magic loop method. This allows you to avoid seams and create a seamless garment.
1. Divide Stitches
First, you’ll need to divide the stitches from your raglan shaping onto the needle(s) you’ll be using for the sleeves. This is usually done by placing the underarm stitches on hold on a separate piece of waste yarn. The remaining stitches on the front and back sections of the raglan are then distributed evenly onto the needles.
2. Knitting in the Round
Once your stitches are divided, you can begin knitting the sleeves in the round. Start by joining your yarn at the underarm, being careful not to twist the stitches. You can use a marker to indicate the start of the round if needed.
3. Knitting the Sleeve Length
Follow the instructions in your pattern to knit the desired length for the sleeves. This may involve knitting in stockinette stitch or a specific stitch pattern, depending on the design. Make sure to periodically try on the garment to check the sleeve length and make any necessary adjustments.
4. Sleeve Shaping
If your pattern includes shaping for the sleeves, such as decreases or increases, be sure to follow the instructions carefully. These shaping techniques help create the desired fit and silhouette for the sleeves.
5. Finishing
Once you’ve reached the desired length and completed any shaping, you can finish off the sleeves. This usually involves binding off the stitches in a neat and even manner. Be sure to weave in any loose ends for a polished look.
By following these steps, you’ll be able to successfully knit the sleeves of your raglan sweater or top. The sleeves are an important component of the garment, so take your time and enjoy the process of creating a beautifully knitted piece.
Adding the Neckline
The neckline is an important part of the knitted raglan sleeve pattern as it frames the face and adds a finishing touch to the garment. There are several different neckline options to choose from, depending on the desired style and fit.
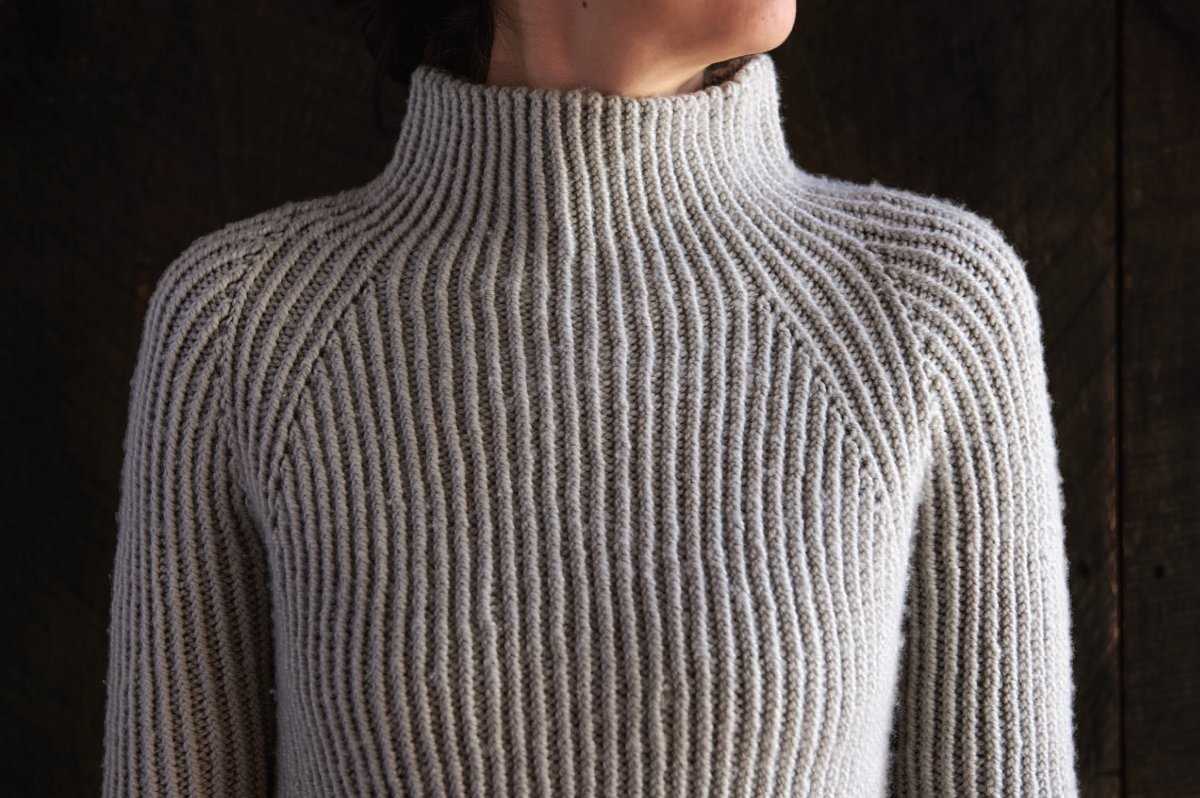
One common neckline option is the crew neckline, which is a round, high neckline that sits close to the neck. To create a crew neckline, you will typically bind off a certain number of stitches at the center front and back of the neckline, then continue knitting the remaining stitches in the round.
Another popular neckline option is the V-neckline, which forms a V shape at the front of the garment. To create a V-neckline, you will typically decrease the number of stitches at the center front of the neckline, creating a diagonal line that forms the shape of the V.
For a more feminine or delicate look, you may choose to add a scoop neckline. This neckline is wider and deeper than the crew neckline, and it curves gently down towards the center front of the garment. To create a scoop neckline, you will typically bind off more stitches at the center front and back of the neckline, creating a wider opening.
Once you have chosen your desired neckline option, you can then add any desired finishing touches, such as a ribbed or rolled edge, to complete the look of the neckline. It is important to carefully follow the instructions provided in the pattern to ensure that the neckline is added correctly and fits properly with the rest of the garment.
Overall, adding the neckline is an important step in completing the knitted raglan sleeve pattern, as it not only adds style and personality to the garment, but also ensures a comfortable and flattering fit for the wearer.
Finishing Touches
Once you have finished knitting your raglan sleeve, it’s time to add the finishing touches to make your garment complete. These final steps will help give your knitted piece a polished and professional look.
Blocking
One of the most important finishing touches for any knitted item is blocking. Blocking helps to even out your stitches, open up lace patterns, and give your garment its final shape. To block your raglan sleeve, simply soak it in lukewarm water with a bit of gentle detergent, then press out the excess water and lay it flat to dry. You can use blocking pins to help hold the shape of the sleeve while it dries.
Seaming
To complete your raglan sleeve, you’ll need to seam it to the body of the garment. Starting at the underarm, use a yarn needle to sew the sleeve to the body using a mattress stitch or your preferred seaming technique. Make sure to match up the raglan decreases with the corresponding stitch markers on the body. Take your time with this step to ensure that the seam is neat and strong.
Finishing the Cuffs
The cuffs of your raglan sleeve can be finished in a variety of ways, depending on the look you want to achieve. You can opt for a simple ribbed cuff, a folded hem, or even a decorative picot edge. Whatever method you choose, make sure to pick up the stitches evenly around the cuff and work the desired finish with the same needle size used for the rest of the sleeve.
Adding Buttons or Fastenings
If your raglan sleeve pattern includes a cardigan-style opening, you may want to add buttons or other fastenings. Choose buttons that complement the yarn and style of your garment. Sew them securely onto the band of the opening, making sure they are evenly spaced and aligned. If using buttons, reinforce the area behind the buttons with a small piece of fabric or interfacing to prevent stretching. If you prefer a different type of closure, such as a zipper or snaps, follow the manufacturer’s instructions for attaching.
Final Touches
Once all the major finishing touches are complete, take a final look at your raglan sleeve and make any adjustments needed. Check for loose ends or stitches, and weave in any remaining ends using a yarn needle. Double check that all seams are secure and tidy. Now your knitted raglan sleeve is ready to be shown off or combined with the rest of the garment, completing a beautiful and cozy piece of clothing.
Tips and Tricks for Knitting Raglan Sleeves
When knitting raglan sleeves, there are several tips and tricks that can help you achieve a professional-looking and well-fitting result. The raglan sleeve construction is popular for its seamless design and comfortable fit, but it can also pose some challenges. Here are some suggestions to make the process easier and more enjoyable.
1. Use stitch markers
Stitch markers are a knitter’s best friend when working on raglan sleeves. They can help you keep track of the different sections and decreases, making it easier to stay on track. Place a stitch marker at the beginning and end of each raglan section, as well as between the body and the sleeve stitches. This will help you visualize the decreases and ensure that they are evenly distributed.
2. Pay attention to gauge
Gauge is crucial when knitting raglan sleeves, as it determines the overall fit of the garment. Make sure to swatch and block your gauge before starting the project and adjust your needle size if necessary. Remember that raglan decreases can affect the fabric tension, so it’s important to keep an eye on your gauge throughout the knitting process.
3. Mind the increases and decreases
Raglan sleeves involve both increases and decreases to shape the garment. Take extra care when working these stitches to ensure that they are done correctly and consistently. Use a method that produces neat and even decreases, such as k2tog or ssk. When increasing, choose a method that matches your preferred knitting style, whether it’s yarn overs or M1 increases.
4. Try on as you go
Trying on your garment as you knit can be incredibly helpful, especially when it comes to raglan sleeves. It allows you to check the fit and make adjustments if needed. Slip the stitches onto a spare circular needle or waste yarn and try on the sleeve regularly to ensure that it falls at the right place on your shoulder and has the desired length.
5. Finishing touches
Once the sleeve is complete, make sure to block it to achieve a smooth and polished look. Blocking will even out any uneven stitches or tensions and give the fabric a more professional appearance. Follow the care instructions for your chosen yarn and use blocking techniques that are suitable for the fiber content.
By following these tips and tricks, you will be able to successfully knit raglan sleeves with confidence and ease. Enjoy the process, and before you know it, you’ll have a beautiful garment ready to wear!
Choosing the Right Yarn and Needles
When it comes to knitting raglan sleeves, choosing the right yarn and needles is crucial to achieving the desired result. The yarn and needle selection will not only affect the overall look and feel of the finished garment but also its fit and durability.
Yarn: The choice of yarn for a knitted raglan sleeve pattern can greatly impact the project. It is important to consider not only the weight of the yarn but also its fiber content. Different fibers have different properties, such as warmth, breathability, and drape. For a cozy and warm sweater, wool or wool-blend yarns are often preferred. For a lighter and more breathable option, cotton or bamboo yarns can be used. It is also essential to consider the elasticity of the yarn, as this will affect the stretch and recovery of the knitted fabric.
Needles: The size and type of needles will also contribute to the success of the project. The size of the needles will determine the gauge of the knitted fabric, which in turn affects the size and fit of the garment. It is important to check the gauge specified in the pattern and use needles that will help achieve the correct gauge. Knitting with too large or too small needles can result in a finished garment that is either too large or too small. The type of needles, whether they are straight, circular, or double-pointed, will depend on the individual’s preferred knitting method and the specific design of the raglan sleeve pattern.
In conclusion, choosing the right yarn and needles for a knitted raglan sleeve pattern is essential to ensure a successful outcome. By considering the weight, fiber content, and elasticity of the yarn, as well as selecting the appropriate needle size and type, knitters can create a garment that not only looks and feels great but also fits well and has long-lasting durability.
Adjusting the Fit
When knitting a raglan sleeve sweater, it’s important to make sure the garment fits well. Here are some tips for adjusting the fit:
- Measurements: Before starting the project, take accurate measurements of the recipient’s body. This includes the chest circumference, arm length, and neck size. Use these measurements to determine the appropriate size to knit.
- Modify stitch count: If the sweater seems too loose or too tight, you can modify the stitch count. To make the sweater larger, add a few stitches to the body and sleeves. To make it smaller, subtract a few stitches. Just make sure to keep the increases or decreases evenly spaced for a balanced fit.
- Adjust length: If the sweater’s body or sleeves are too long or too short, you can easily adjust the length. Simply add or subtract rows before starting the raglan shaping. Remember to keep track of your modifications to ensure symmetry.
- Try it on: To check the fit as you go, try the sweater on the recipient periodically. This will give you a better idea of how it’s shaping up and allow you to make adjustments as necessary. It’s better to make small modifications along the way rather than realizing the fit is off once the sweater is already finished.
Remember, every individual has a unique body shape and size, so it’s important to tailor the fit of the sweater accordingly. Pay attention to the measurements and make adjustments as needed to ensure a comfortable and flattering fit.