Cozy Up with a Free Knitted Shrug Pattern

Looking for a cozy and stylish accessory to add to your wardrobe? Look no further than a knitted shrug! This versatile garment is perfect for layering and can be worn in a variety of ways. Whether you want to dress up a casual outfit or add a touch of warmth to your evening attire, a knitted shrug is the perfect choice.
With this free pattern, you can create your own knitted shrug in no time. The pattern is suitable for beginners and includes step-by-step instructions, making it easy to follow along. You can choose your preferred yarn and color to create a shrug that matches your style and personality.
The knitted shrug is a great project for both experienced knitters looking for a quick and satisfying project and beginners looking to expand their skills. It’s a fun and rewarding project that you can wear with pride. So gather your knitting needles and get ready to create a stylish and cozy shrug!
Overview of a knitted shrug
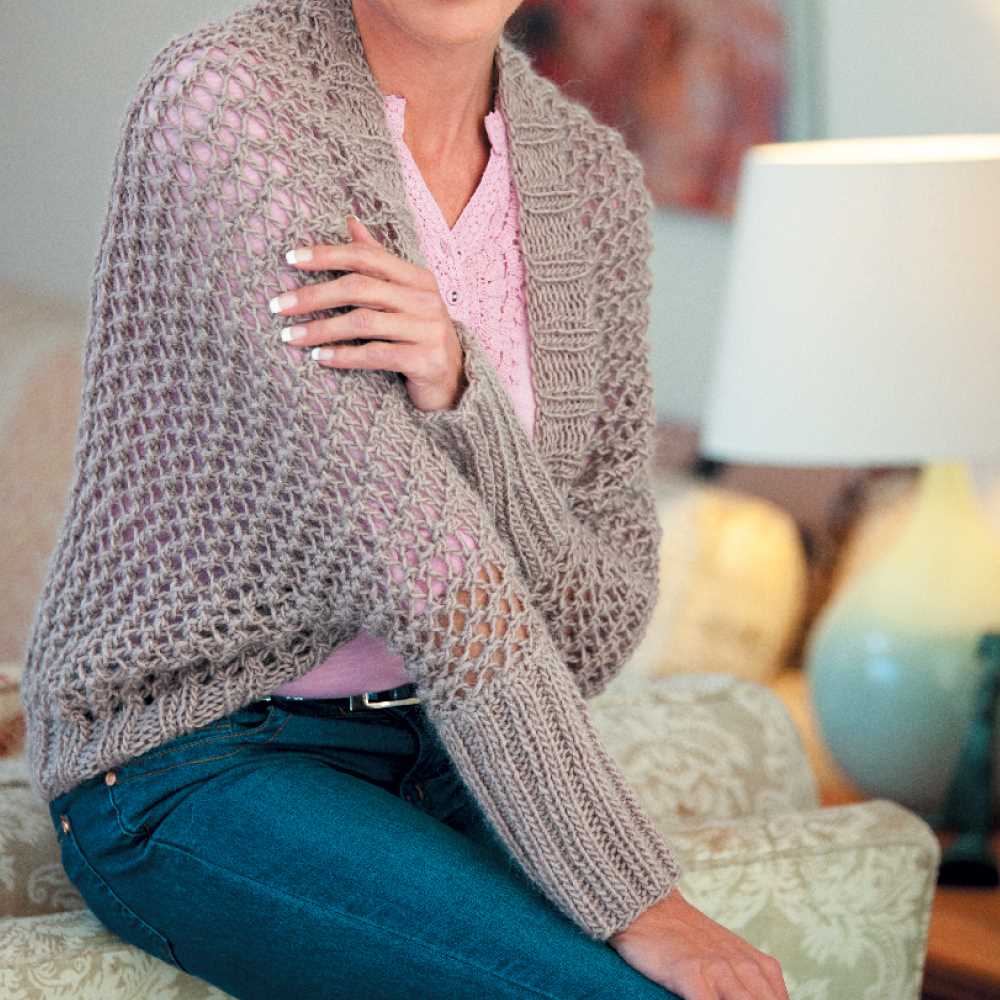
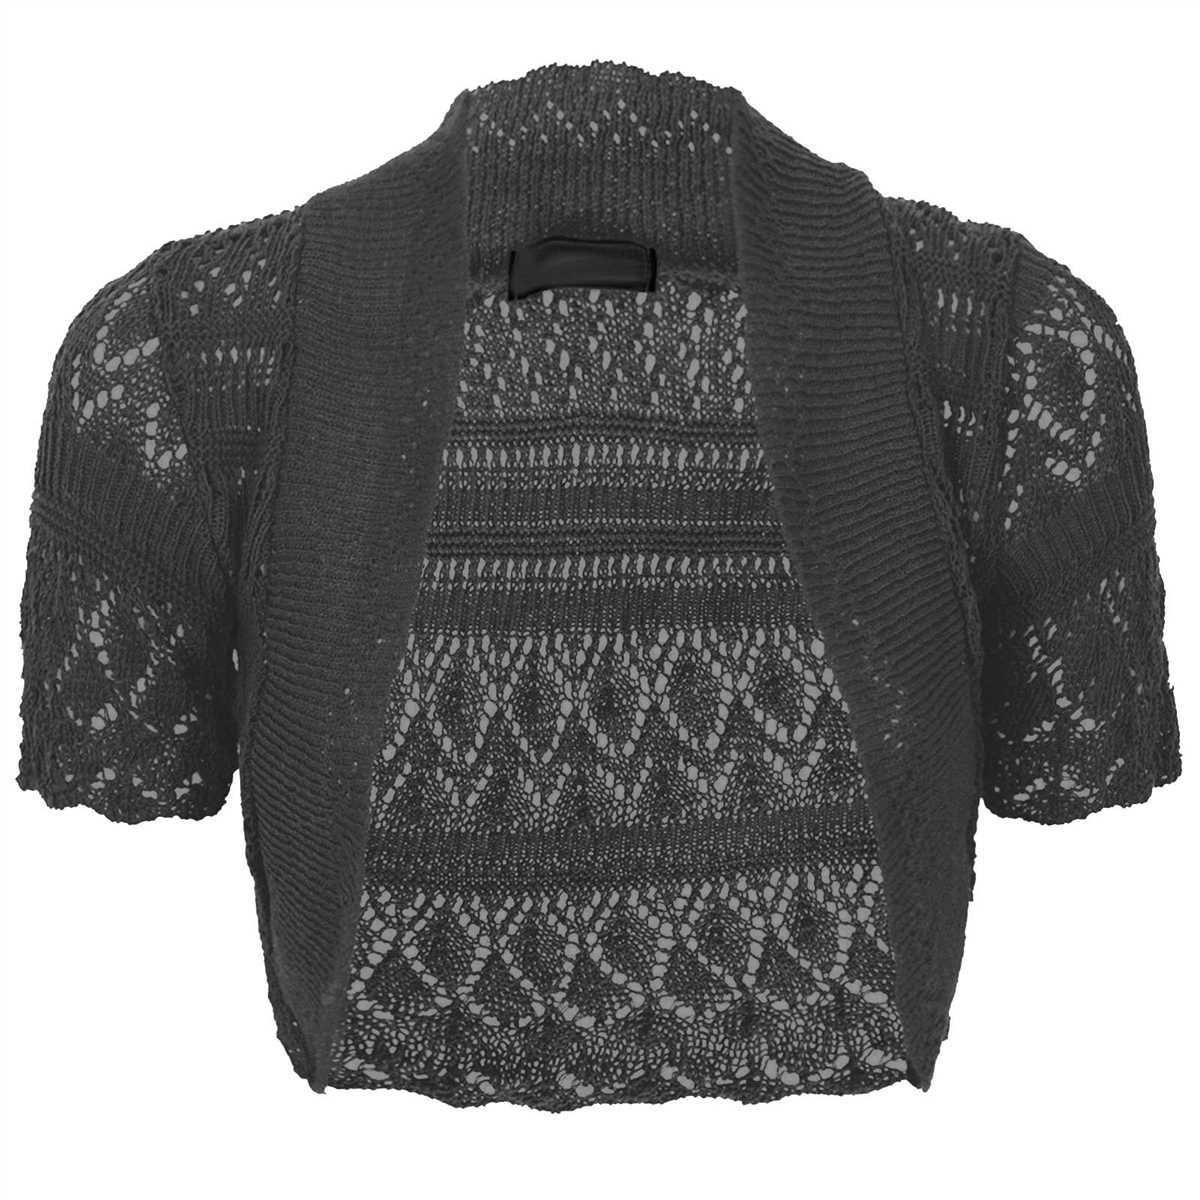
A knitted shrug is a stylish and versatile garment that can be worn in various ways to complement any outfit. It is typically a small, cropped sweater that covers the shoulders and upper arms, leaving the back and front open. The shrug is often designed with short or three-quarter length sleeves, providing just enough coverage to add warmth without being too bulky.
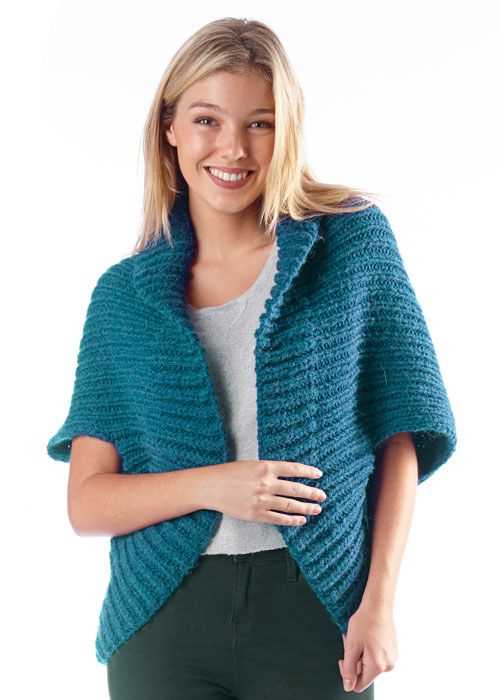
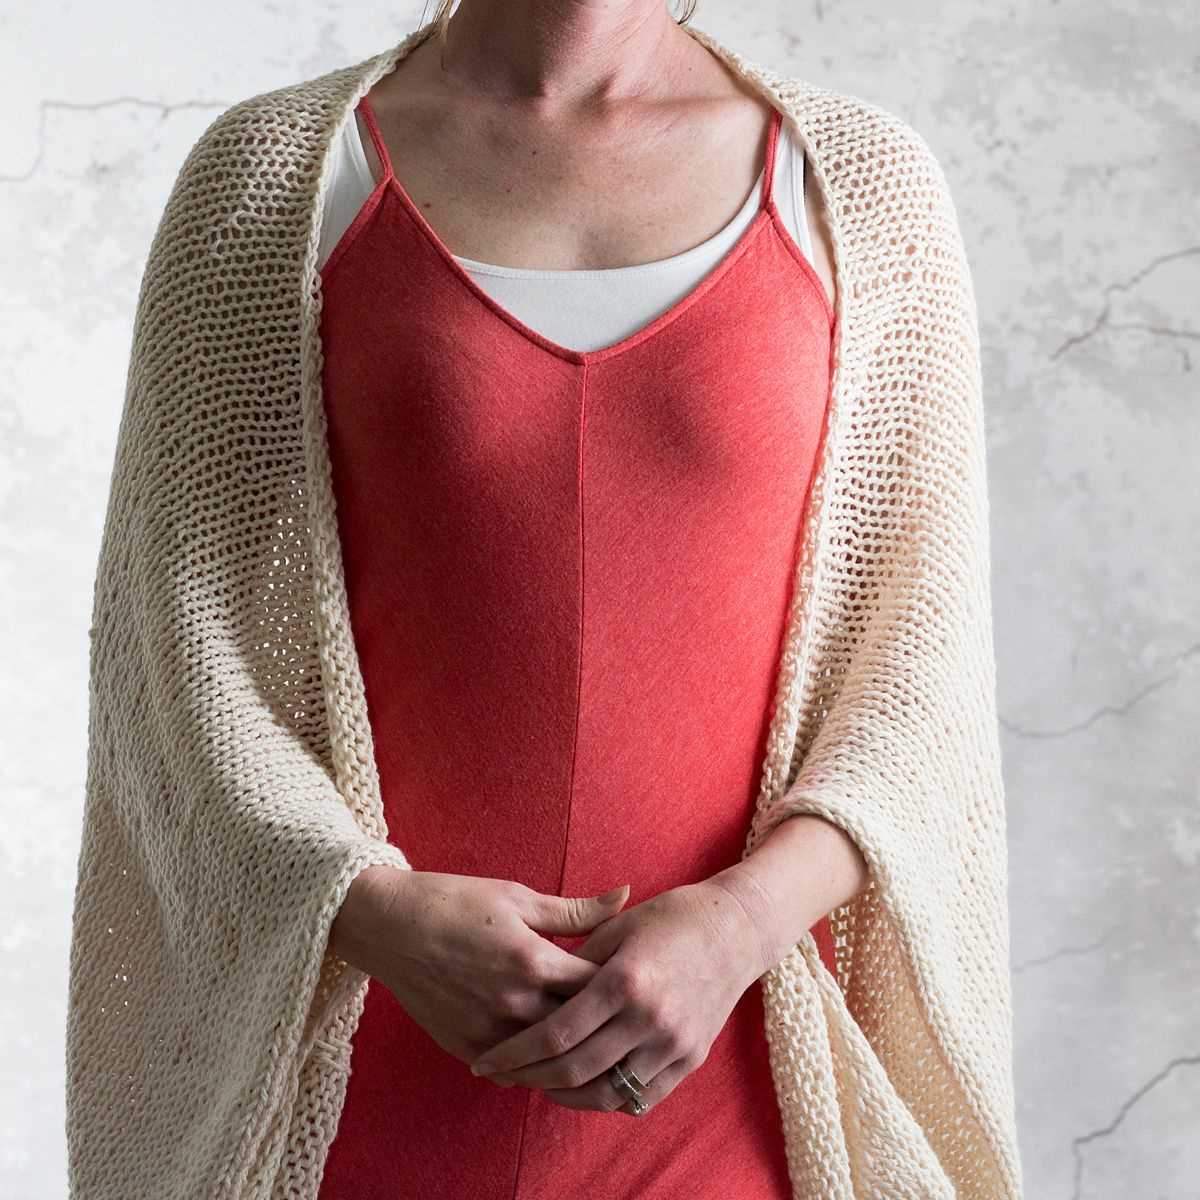
One of the main advantages of a knitted shrug is its ease of wear. It can be effortlessly thrown over a dress or worn with a tank top and jeans for a casual yet chic look. The open front design allows for easy layering and showcases the undergarments or tops worn underneath. Additionally, the shrug can be folded and easily carried in a bag, making it a convenient accessory for transitional weather.
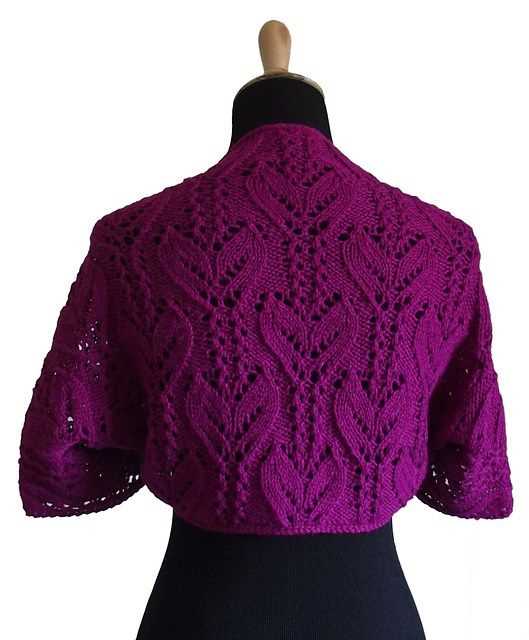
When it comes to knitting a shrug, there are countless patterns available to suit different skill levels and preferences. Whether you prefer a lacey design for a feminine touch or a more structured and textured pattern for a modern look, there is a pattern out there for everyone. Knitting a shrug can be a rewarding project for knitters of all levels, offering an opportunity to practice different stitch patterns and techniques.
To choose the best pattern for your needs, consider your skill level, the desired style, and the yarn you wish to use. Selecting the right yarn is important as it can affect the drape, warmth, and overall look of the finished shrug. Take the time to swatch and gauge your knitting to ensure the correct fit and to make any necessary adjustments to the pattern.
Overall, a knitted shrug is a versatile and fashionable addition to any wardrobe. Whether you wear it as a casual layering piece or a statement accessory, it adds warmth and style to any outfit.
Choosing the Right Yarn for Your Shrug

When it comes to knitting a shrug, choosing the right yarn is essential to ensure that the finished product is comfortable, stylish, and long-lasting. There are several factors to consider when selecting yarn for your project, including fiber content, weight, and texture.
Fiber Content: The fiber content of the yarn you choose will greatly impact the overall look and feel of your shrug. Natural fibers such as wool, cotton, or alpaca offer a luxurious and soft texture, perfect for cozy and warm shrugs. These fibers are also breathable, making them ideal for year-round wear. If you prefer a more lightweight and drapey shrug, you might opt for synthetic fibers such as acrylic or nylon. These yarns are often more affordable and easier to care for, but they may not have the same natural feel as their counterparts.
Weight: The weight of the yarn plays a significant role in determining the finished size and warmth of your shrug. Bulky or chunky weight yarns will create a thick and cozy shrug that is perfect for colder climates. Alternatively, if you’re making a shrug for warmer weather, you might want to choose a lighter weight yarn such as fingering or sport weight. These yarns will create a more lightweight and breathable shrug that is perfect for layering.
Texture: The texture of the yarn can add interest and depth to your shrug. Smooth and shiny yarns will give your shrug a more polished and sleek look, while textured or variegated yarns can create a more unique and eye-catching design. Consider the overall style and aesthetic you want to achieve with your shrug and choose a yarn with a corresponding texture to enhance the final result.
By taking into account the fiber content, weight, and texture of the yarn, you can select the perfect option for your knitted shrug. Whether you’re going for warmth or breathability, luxury or affordability, there are countless options available to suit your needs and preferences. So, take your time to explore different yarns and find the one that will make your shrug project a success.
Understanding the basic stitches
When it comes to knitting, understanding the basic stitches is crucial for any project. Whether you are a beginner or an experienced knitter, familiarizing yourself with these stitches will give you the foundation to create beautiful and intricate designs.
Here are some of the most commonly used stitches in knitting:
- Knit stitch: The knit stitch is the most basic and essential stitch in knitting. It creates a smooth and flat fabric with a “v” shape texture.
- Purl stitch: The purl stitch is the reverse of the knit stitch and creates a bumpy texture on the fabric. It is often used in combination with the knit stitch to create various knitting patterns.
- Stockinette stitch: The stockinette stitch is created by alternating rows of knit and purl stitches. This stitch creates a smooth and uniform fabric.
- Garter stitch: The garter stitch is created by knitting every row. It creates a ridged texture and is commonly used for borders and edgings.
- Rib stitch: The rib stitch is created by alternating knit and purl stitches in the same row. It is often used for cuffs, collars, and hems.
Learning these basic stitches will help you build your knitting skills and open up a world of possibilities for creating your own unique designs. Experiment with combining different stitches and patterns to create beautiful and personalized knitted shrugs and other projects.
Getting started: casting on and knitting the first row
Before you begin knitting your shrug, you’ll need to cast on and knit the first row. This is the foundation of your project and sets the tone for the rest of the pattern. Here are the steps to get started:
Casting on:

1. Hold the end of your yarn in your right hand and make a slipknot by looping the yarn around your finger and pulling the end through the loop.
2. Insert your knitting needle into the slipknot and tighten it slightly.
3. Hold the knitting needle with the slipknot in your right hand. Use your left hand to hold the long end of the yarn that is attached to the skein.
4. With your right hand, bring the needle over and under the long end of the yarn, creating a loop around the needle. This is your first cast-on stitch.
5. Continue making cast-on stitches by repeating step 4 until you have the required number of stitches on your needle, as specified in the pattern.
Knitting the first row:

After you have cast on the required number of stitches, you are ready to start knitting the first row. Here’s how to do it:
- Hold the knitting needle with the stitches in your right hand and the empty needle in your left hand.
- Insert the right needle into the first stitch on the left needle, going from left to right.
- Wrap the yarn around the right needle, going from back to front.
- Using the right needle, pull the wrapped yarn through the stitch, bringing it to the right needle and slipping the stitch off the left needle.
- Repeat steps 2-4 until all the stitches have been transferred from the left needle to the right needle.
Once you have completed knitting the first row, you can continue following the pattern instructions to create your knitted shrug.
Working the body of the shrug
Once you have completed the ribbing, it’s time to start working on the body of the shrug. Switch to the main pattern stitch, which is usually a combination of knit and purl stitches. Follow the written instructions or the chart provided in the pattern to create the desired stitch pattern.
For example, the pattern may instruct you to knit a certain number of rows in the main stitch pattern, then switch to a different stitch pattern for a specific number of rows. Pay attention to any instructions regarding increases or decreases that may be needed to shape the body of the shrug.
Working with the stitch pattern:
- Continue working in the main stitch pattern as specified in the pattern until the body of the shrug reaches the desired length. This typically involves repeating specific rows or rounds of the stitch pattern.
- Remember to check your gauge as you work to ensure that the shrug is turning out the correct size. Adjust your needle size if necessary to obtain the correct gauge.
- Take frequent measurements to ensure that the shrug is progressing as expected. Measure the length and width as specified in the pattern to ensure proper fit.
Tip: It can be helpful to place stitch markers at regular intervals to help you keep track of where you are in the pattern. This is especially useful if the stitch pattern involves repeats or complex stitch combinations.
Once you have completed the required number of rows or rounds in the main stitch pattern, you may need to finish the body of the shrug with a few rows or rounds of ribbing or a different stitch pattern. The pattern will provide instructions for how to finish the body.
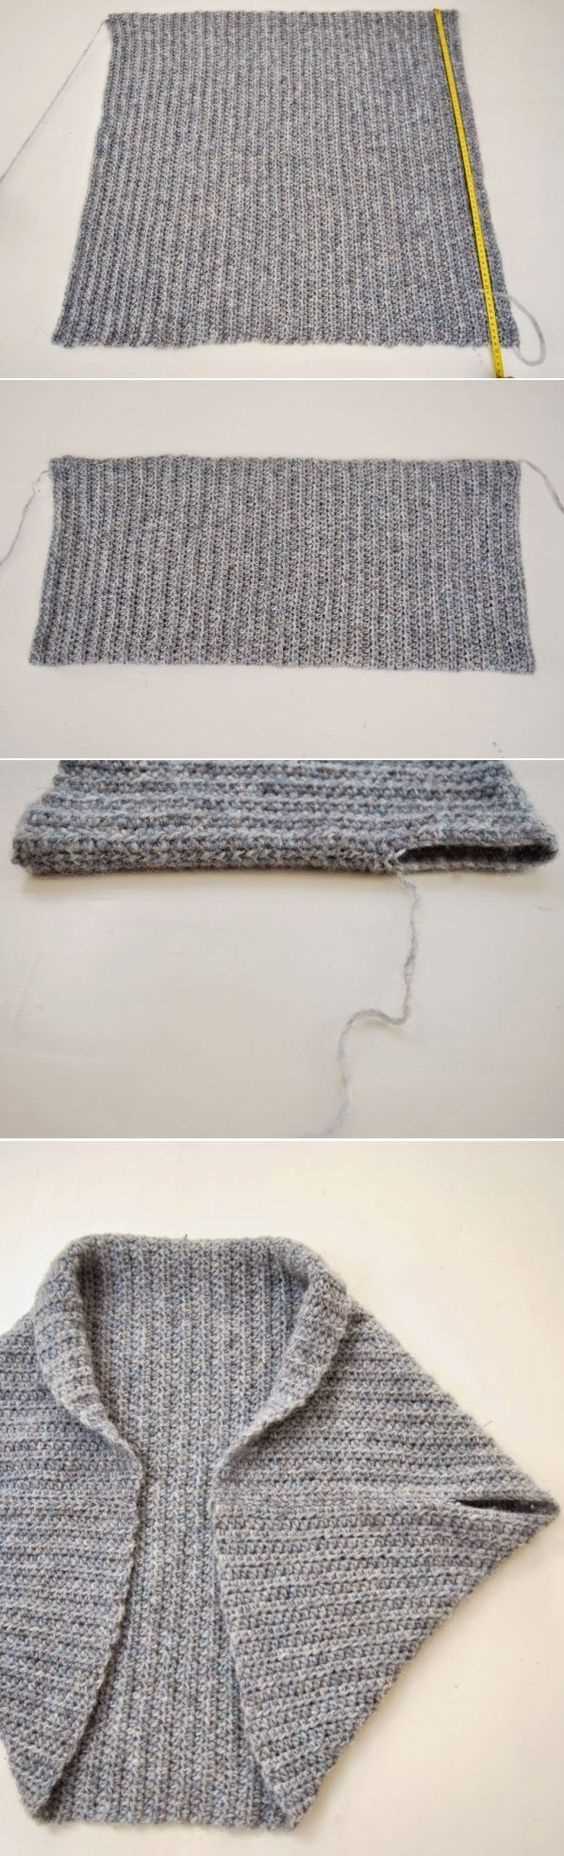
Creating the sleeve openings
Once you have completed the back and front pieces of the shrug, it’s time to create the sleeve openings. The sleeve openings will allow you to comfortably wear the shrug and give you the flexibility to move your arms.
To create the sleeve openings, you will need to divide the stitches on the needle according to the pattern instructions. The pattern will usually specify how many stitches to place on a stitch holder or to cast off for each sleeve opening. Make sure to follow the pattern carefully to ensure that the sleeve openings are created correctly.
Once you have divided the stitches, you can continue working on the remaining stitches to complete the rest of the shrug. It’s important to pay attention to the pattern instructions for any shaping or finishing details that need to be done before the shrug is complete.
Step-by-step instructions for creating the sleeve openings:
- 1. Follow the pattern instructions to determine how many stitches to place on a stitch holder or to cast off for each sleeve opening.
- 2. Carefully divide the stitches according to the pattern instructions.
- 3. Place the stitches for each sleeve opening on a stitch holder or cast them off, as instructed.
- 4. Continue working on the remaining stitches to complete the rest of the shrug.
- 5. Follow any additional pattern instructions for shaping or finishing details.
By following these steps, you will be able to create the sleeve openings for your knitted shrug. Remember to take your time and double-check the pattern instructions to ensure that you are creating the openings correctly. Once the sleeve openings are complete, you can continue working on the shrug and look forward to wearing your finished project.
Adding the finishing touches: ribbing and binding off
After completing the main body of the knitted shrug, it’s time to add the finishing touches with ribbing and binding off. Ribbing not only adds a decorative touch to the edges of the shrug, but also helps to create a stretchy and snug fit. Binding off, on the other hand, is the final step to secure the stitches and prevent them from unravelling.
To create the ribbing, start by switching to a smaller sized needle. This will help to create a tighter fabric that will provide structure to the edges of the shrug. Knit the first row of the ribbing pattern, which is typically a combination of knit and purl stitches. Repeat this pattern for several rows, depending on the desired length of the ribbing. The ribbing should be slightly shorter than the main body of the shrug to create a nice finish.
Next, it is time to bind off the stitches. Start by knitting the first two stitches of the row. Then, using the left needle, lift the first stitch over the second stitch and over the tip of the right needle. Continue this process of knitting a stitch and lifting the previous stitch over it until only one stitch remains on the right needle. Cut the yarn, leaving a tail of a few inches, and pull it through the final stitch to secure it.
Once the ribbing is complete and the stitches are bound off, it’s time to weave in any loose ends of yarn. This can be done using a tapestry needle or a crochet hook. Thread the loose end of yarn onto the needle or hook, and weave it under the nearby stitches, going back and forth to secure it in place. Trim any excess yarn to create a neat and tidy finish.
With the ribbing and binding off complete, the knitted shrug is now finished and ready to be worn. The ribbing adds a stylish touch to the edges of the shrug, while the binding off secures the stitches and prevents any unravelling. The final step of weaving in loose ends ensures a clean and professional finish.
Blocking your knitted shrug

Blocking is an essential step in finishing your knitted shrug. It helps to even out the stitches, open up lace patterns, and give your garment its final shape and size. Here are some steps to follow when blocking your knitted shrug:
1. Prepare your shrug for blocking

Start by gently washing your shrug with a mild detergent and lukewarm water. Avoid using harsh chemicals or agitating the fiber too much. Rinse it thoroughly and gently squeeze out the excess water without wringing or twisting the fabric.
Next, lay your shrug flat on a clean towel or blocking mat. Gently pat and reshape the fabric to its desired size and shape, making sure all the edges are straight and the stitches are sitting evenly.
2. Pin your shrug in place
Once your shrug is laid flat, use rustproof blocking pins to secure the edges and corners. Place the pins at regular intervals along the edges to help keep the shape and prevent any curling or distortion. Pay extra attention to the edges and any lace or decorative patterns that need to be opened up.
3. Let your shrug dry
Allow your shrug to dry completely in a well-ventilated area. This may take a few days, depending on the thickness of the yarn and the humidity in the air. Avoid direct sunlight or heat sources, as they can damage the fibers. Once dry, remove the blocking pins and gently reshape any areas that need adjusting.
Blocking is an important step that can greatly enhance the appearance and fit of your knitted shrug. It allows you to control the final shape and size, ensuring that your shrug looks and feels just right. So don’t skip this step and enjoy the process of transforming your knitted piece into a beautifully finished garment!
Final thoughts and variations
One option is to experiment with different yarn weights and textures. You can use a bulky yarn for a chunkier shrug that will keep you warm in the winter, or opt for a lighter-weight yarn for a more delicate and breathable piece. Don’t be afraid to mix and match yarns to create unique color combinations and patterns.
Another way to personalize your shrug is to add embellishments such as buttons, beads, or embroidery. This can be a fun and creative way to add some extra flair and make your shrug truly one-of-a-kind. You can even experiment with different stitch patterns or lacework for added interest.
If you’re feeling adventurous, you could also try modifying the shape or length of the shrug. For example, you could make it longer to create more of a cardigan-style garment, or shorten it for a cropped shrug that pairs perfectly with high-waisted skirts or dresses. The possibilities are endless – let your imagination run wild!
Whether you stick to the original pattern or make some modifications, the most important thing is to have fun with your knitting and create something that you love. Knitting is a wonderful way to express your creativity and make something truly unique. So grab your needles and start knitting your own fabulous shrug!
Free downloadable pattern for a knitted shrug

If you’re looking for a cozy and stylish addition to your wardrobe, a knitted shrug is a perfect choice. It’s a versatile garment that can be worn in various ways, both casual and formal. Whether you’re a beginner or an experienced knitter, you can find a variety of free patterns available for download online.
When choosing a pattern, consider the level of difficulty, size, and style that you prefer. Some patterns are more suitable for beginners, while others may require more advanced skills. It’s important to read the pattern carefully and make sure you understand all the instructions before starting your project.
Here are some websites where you can find free downloadable patterns for knitted shrugs:
- Ravelry: This popular knitting community offers a wide range of free patterns. You can search for shrugs specifically or browse through different categories to find the right pattern for you.
- AllFreeKnitting: This website features a collection of free knitting patterns, including shrugs. You can find patterns for different skill levels and styles.
- Knitting Pattern Central: Here, you’ll find a directory of free knitting patterns from various sources. Simply search for “shrug” in the directory to find the available patterns.
Remember to check the gauge and adjust your needle size if necessary to ensure the correct fit. Don’t be afraid to experiment with different yarns and colors to create a shrug that reflects your personal style. Happy knitting!