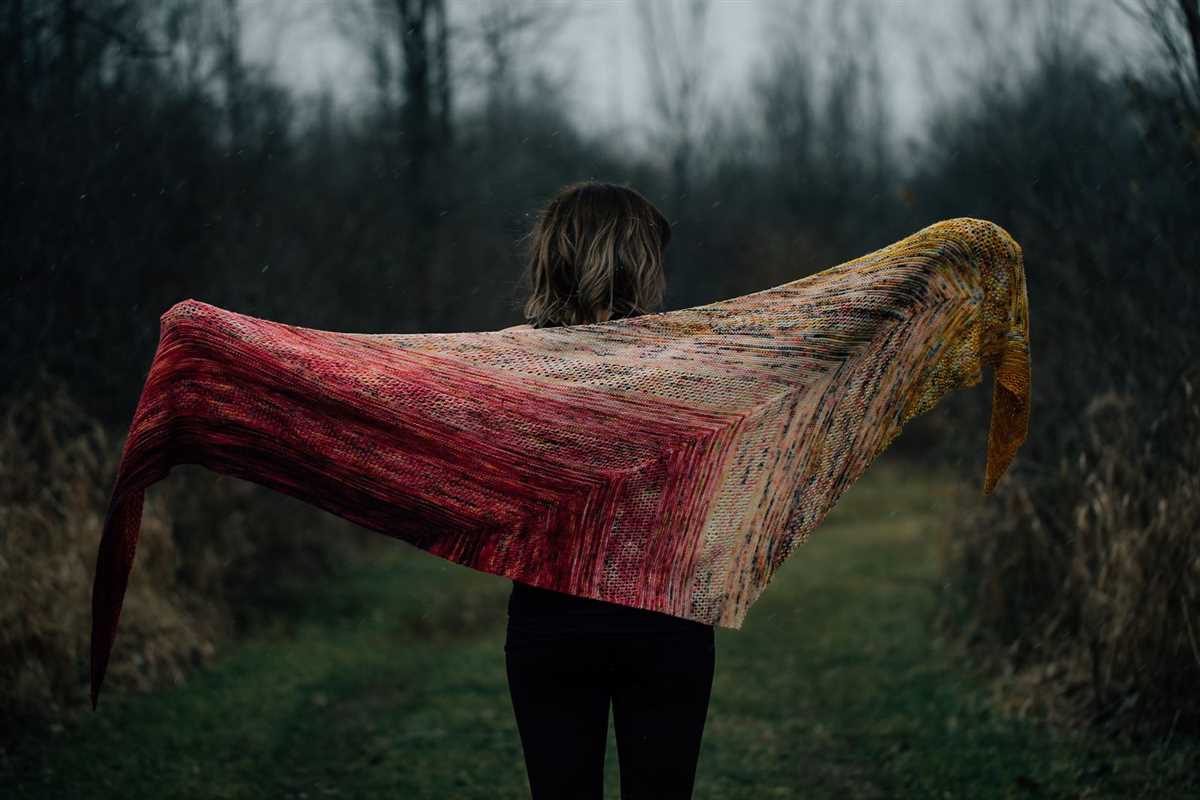
Creating a Beautiful Ombre Effect in Your Knitting: Introducing the Knitting Fade Pattern

Knitting fade patterns have become increasingly popular among knitting enthusiasts, thanks to their stunning color blending and stylish designs. This unique technique allows knitters to create beautiful gradients and transitions between colors, resulting in a visually striking finished piece.
With a knitting fade pattern, you can take a basic knitting project and transform it into a work of art. By carefully selecting a range of colors that blend seamlessly together, you can create a fade effect that adds depth and dimension to your knitting. Whether you’re knitting a sweater, a scarf, or a hat, a fade pattern can instantly elevate your project and make it truly unique.
One of the reasons why knitting fade patterns have gained so much popularity is the endless possibilities they offer. From soft pastels to vivid rainbow hues, you can experiment with different color combinations and create a fade pattern that suits your personal style. Moreover, the fade effect can be applied in various ways – from a gentle transition between colors to a more dramatic change. This versatility allows knitters of all skill levels to explore their creativity and produce stunning results.
What is a knitting fade pattern?
A knitting fade pattern is a technique used in knitting to create a gradual color transition in a project. It involves using multiple colors of yarn that gradually blend together to create a fading effect. This technique is often used in projects such as shawls, scarves, and sweaters to add visual interest and dimension to the finished piece.
The fade pattern is created by strategically changing colors at specific intervals or using gradient or variegated yarns that naturally transition from one color to another. This can be achieved by using different stitches or techniques, such as color blocking, striping, or blending colors together in the same row or round.
To create a knitting fade pattern, you will need:
- Multiple colors of yarn
- Knitting needles or a knitting machine
- A pattern or design idea
- Basic knitting skills
Once you have gathered your materials, you can begin by selecting your colors and deciding on the order in which you want them to blend. You can choose a gradient effect where the colors transition from light to dark or vice versa, or you can create a more random fade pattern by choosing colors that complement or contrast with each other.
When knitting a fade pattern, it’s important to pay attention to gauge and tension to ensure that your transitions are smooth and even. You may need to adjust your needle size or tension as you work to achieve the desired fade effect.
In conclusion, a knitting fade pattern is a technique used to create a gradual color transition in knitting projects. By using multiple colors of yarn and strategically changing colors, you can create a visually stunning fade effect in your knitting projects.
How to choose the right yarn for your fade pattern
When it comes to knitting a fade pattern, choosing the right yarn is crucial for achieving the desired effect. The fade pattern is all about gradually transitioning from one color to another, creating a beautiful gradient effect. To ensure a successful fade, there are a few factors to consider when selecting the yarn.
Weight and Fiber Content
First, consider the weight and fiber content of the yarn. Different weights and fibers will yield different effects in the fade pattern. For a smooth transition between colors, it’s best to choose yarns with similar weights and fiber contents. This will ensure that the colors blend seamlessly together.
Color Selection
Next, think about the colors you want to use in your fade pattern. Consider whether you want a subtle or bold gradient. If you prefer a subtle fade, choose colors that are closely related on the color wheel. For a bolder gradient, select colors that are further apart on the color wheel. It’s also helpful to choose colors with different tones and saturations to add depth to your fade.
Yarn Requirements
- Check the yardage of each color you plan to use. Make sure you have enough yarn for each color, as running out in the middle of your project can be frustrating.
- Take note of the recommended gauge for the pattern you’re following. Make sure the yarn you choose matches the gauge to ensure proper sizing.
- Consider the drape and feel of the yarn. Knitting with a yarn that has good drape and a soft texture can enhance the overall look and feel of your finished project.
Test your colors
Lastly, it’s always a good idea to test your chosen colors before starting your project. Knit small swatches or hold the yarns together to see how the colors blend and if they create the desired fade effect. This will help you make any necessary adjustments before committing to the entire project.
By considering the weight and fiber content, color selection, yarn requirements, and testing your colors, you can choose the right yarn for your fade pattern and create a stunning gradient effect in your knitting project.
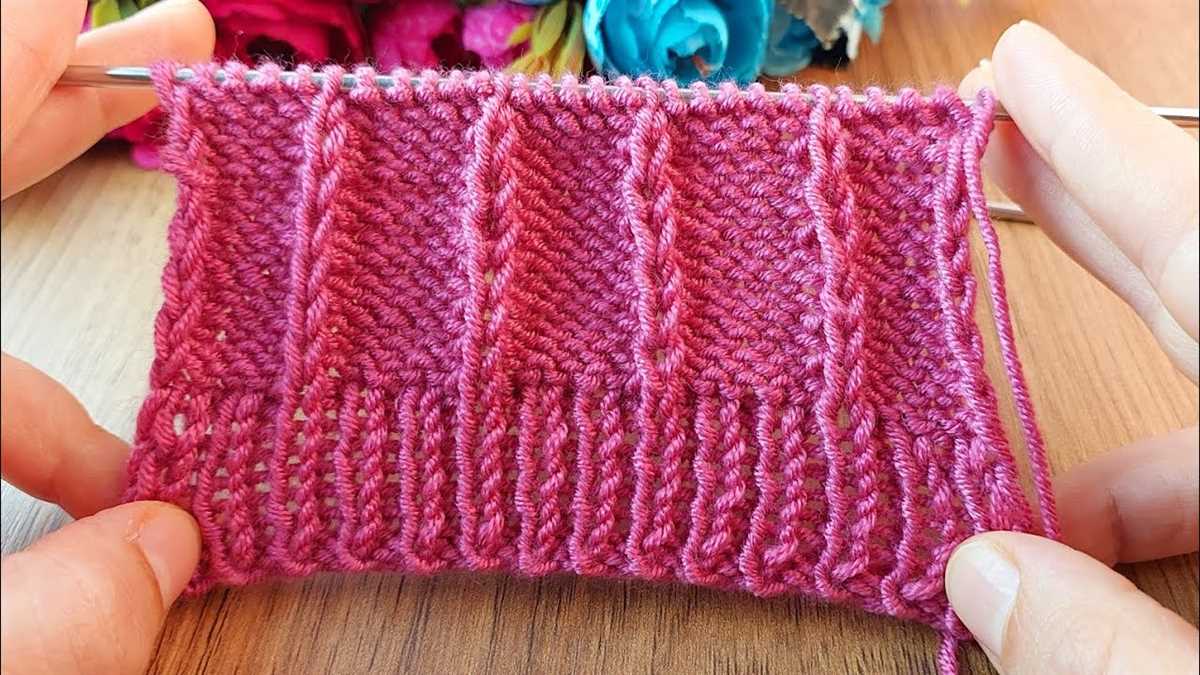
Step-by-Step Guide to Knitting a Fade Pattern
Knitting a fade pattern can be a fun and creative way to add color and dimension to your knitting projects. Whether you’re a beginner or an experienced knitter, this step-by-step guide will walk you through the process of creating a fade pattern that is sure to impress.
1. Choose your yarn: The first step in creating a fade pattern is to choose your yarn. Look for yarn in a range of colors that transition smoothly from one shade to another. You can either choose yarn from the same brand and collection or mix and match different yarns to create a unique fade pattern.
2. Determine your fade order: Once you have your yarn, it’s time to determine the order in which you will fade from one color to another. You can create a simple gradient by fading from light to dark or experiment with more complex fade patterns by blending multiple colors together. Make a note of your fade order so that you can easily refer to it as you knit.
3. Choose your knitting project: The next step is to decide what project you want to knit using your fade pattern. Whether it’s a sweater, a shawl, or a pair of socks, make sure the pattern you choose is compatible with the fade effect you want to achieve. Some patterns may require modifications or adjustments to accommodate the fade pattern.
4. Swatch and gauge: Before you start knitting your project, it’s important to swatch and determine your gauge. This will help ensure that your fade pattern is consistent and that your project turns out the way you envisioned. Knit a small swatch using the chosen yarn and needle size, and measure your gauge to ensure accuracy.
5. Start knitting: Once you have your yarn, fade order, pattern, and gauge determined, it’s time to start knitting! Follow the pattern instructions while incorporating the fade pattern according to your chosen order. Remember to switch colors as indicated in your fade order and keep track of your progress to ensure a smooth transition from one color to the next.
6. Block and finish: After you’ve completed your knitting project, it’s important to block and finish it to give it a polished look. Blocking helps even out the stitches and open up the lace or texture of the knitting, while finishing techniques such as weaving in loose ends and sewing on buttons add the final touches to your project.
By following these step-by-step instructions, you can successfully create a fade pattern in your knitting projects. So grab your needles, choose your yarn, and get ready to experiment with color and create stunning fade patterns!
Tips for achieving smooth color transitions
When creating a knitting fade pattern, achieving smooth color transitions is essential to create a cohesive and visually appealing project. Here are some tips to help you achieve those flawless fades:
- Select yarns with similar fiber content: To ensure that the colors blend seamlessly, it’s important to choose yarns that are made from the same material or have a similar fiber content. This helps the colors to blend smoothly together without any noticeable jumps or transitions.
- Choose colors from the same color family: Sticking to colors that are part of the same color family, such as various shades of blues or pinks, can make it easier to achieve smooth transitions. This way, the colors will naturally blend together, creating a harmonious gradient.
- Plan your color placement: Before starting your project, take some time to plan out the placement of each color. You can create a color chart or use a color planning tool to visualize how the colors will transition. This way, you can make any necessary adjustments before starting to knit.
- Use a gradual color change technique: There are several techniques you can employ to create gradual color transitions, such as the slip stitch or the join-as-you-go method. These techniques help to blend colors smoothly by gradually introducing the new color while fading out the old one.
- Pay attention to tension: Maintaining consistent tension throughout your knitting is vital for achieving smooth color transitions. Be mindful of your knitting technique and make sure that you’re not pulling the yarn too tightly or loosely when switching between colors.
By following these tips, you can create stunning knitting fade patterns with flawless color transitions. Experiment with different color combinations and techniques to achieve the desired effect and take your knitting projects to the next level.
Popular knitting fade patterns to inspire your next project
If you’re a knitting enthusiast looking for a new project to dive into, consider trying out one of the popular knitting fade patterns that are currently trending. The fade technique involves blending different colors of yarn together in a gradient effect, creating a beautiful transition from one color to another. It adds depth and dimension to your knitting, making it a visually appealing and fun project to work on.
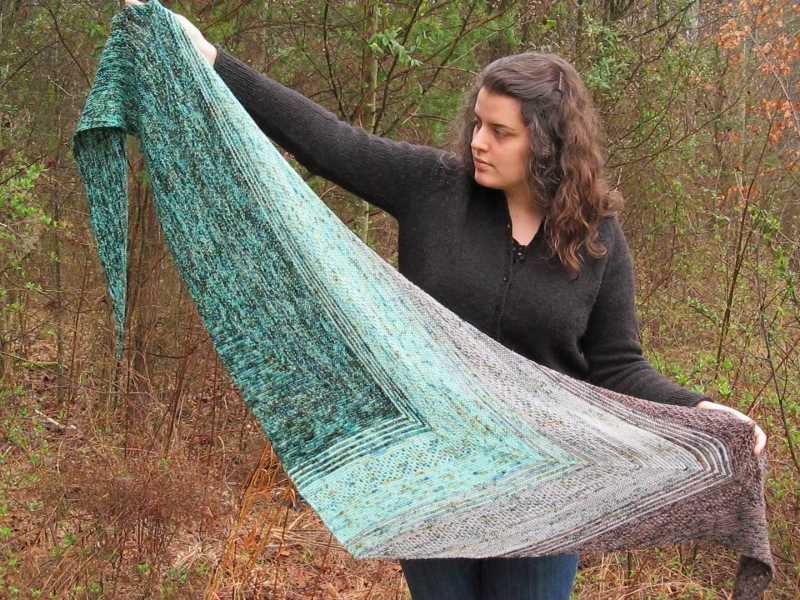
One popular knitting fade pattern is the “Find Your Fade” shawl, created by Andrea Mowry. This pattern allows you to incorporate multiple colors and stitch patterns, resulting in a stunning finished piece. The shawl starts with a simple garter stitch and gradually transitions into lace and eyelet stitches, showcasing the fade in a captivating way.
If you’re looking for a fade pattern that showcases bold and vibrant colors, the “So Faded” sweater pattern by Andrea Mowry might be just what you’re looking for. This pattern is perfect for those who love to experiment with color combinations, as it allows you to blend different shades of the same color or mix contrasting colors together. The result is a unique and eye-catching sweater that is sure to make a statement.
For those who prefer a more subtle fade, the “Harlow” hat pattern by Andrea Mowry is a great option. This pattern incorporates a fade effect using two or three colors, creating a soft and delicate transition between the shades. The textured stitch pattern adds further interest to the design, making it a great project for intermediate knitters looking to challenge themselves.
No matter which knitting fade pattern you choose, the key is to have fun and get creative with your color choices. Whether you opt for a bold and vibrant fade or a more subtle and soft transition, your finished project is bound to be a unique and beautiful creation.
How to customize your fade pattern for a unique look
When it comes to knitting a fade pattern, there are endless possibilities to create a unique and personalized look. Whether you’re a beginner or an experienced knitter, customizing your fade pattern allows you to showcase your creativity and make your knitting projects truly one-of-a-kind.
To start customizing your fade pattern, it’s important to first choose the colors you want to incorporate. Consider selecting yarns with different shades and tones that complement each other. You can go for a monochromatic fade, where you use various shades of the same color, or opt for contrasting colors for a bolder effect. Experiment with different combinations to find the perfect palette for your fade pattern.
1. Determine the sequence: Once you have your colors selected, think about how you want them to transition in your project. You can create a gradual fade by arranging the colors in a smooth transition from light to dark or vice versa. Alternatively, you can create a more dynamic fade pattern by incorporating multiple color changes throughout your project.
2. Consider stitch patterns: Another way to customize your fade pattern is by incorporating different stitch patterns. You can choose to knit certain sections in stockinette stitch for a smooth and uniform look, while adding sections of lace or cables for texture and interest. Mixing different stitch patterns adds depth and dimension to your fade pattern.
3. Play with color placement: To further customize your fade pattern, experiment with different color placements. You can create different effects by alternating colors in stripes, or by introducing color blocks. Alternatively, you can create an ombre effect by blending the colors gradually in a diagonal or vertical gradient.
Remember, the key to creating a unique fade pattern is to let your imagination run wild and experiment with different combinations. Don’t be afraid to try new things and step outside your comfort zone. With a little creativity, you can take your knitting projects to the next level and create stunning fade patterns that are truly one-of-a-kind.
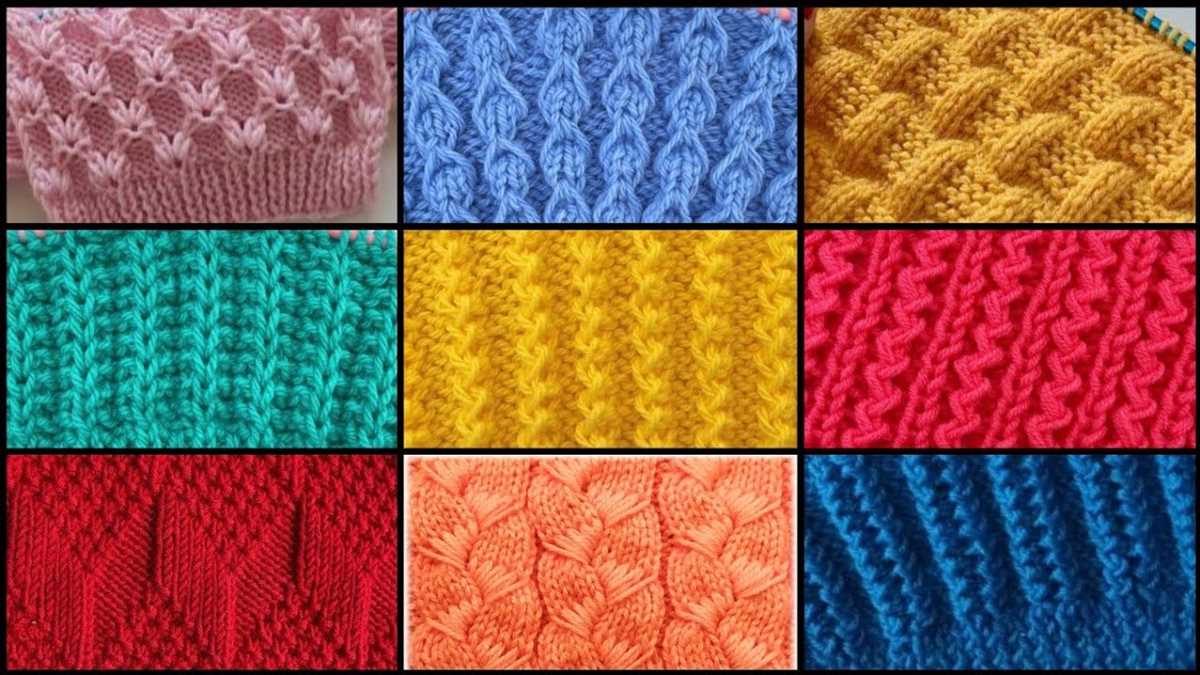
Exploring Different Stitch Patterns for a Fade Design
When it comes to knitting, there are endless possibilities for creating unique and eye-catching designs. One popular technique is the fade design, where different colors blend seamlessly into each other. While the choice of colors plays a crucial role in achieving a beautiful fade, the stitch patterns used can also significantly enhance the overall design.
1. Garter Stitch: The garter stitch is a classic choice for a fade design. Its simplicity and texture make it a great option for showcasing the color transitions. The ridges created by the garter stitch can add depth and visual interest to the fabric, making the fade design stand out even more.
2. Lace Stitch: Lace stitch patterns can add an elegant and delicate touch to a fade design. Knitting lace in a fade pattern can create a stunning effect, with the colors peeking through the intricate holes and motifs. Whether it’s a simple lace pattern or a more complex one, using lace stitches in a fade design can create a unique and visually appealing result.
3. Cable Stitch: If you’re looking to create a more textured and three-dimensional effect in your fade design, using cable stitches can be a great choice. Cable stitches create twists and braids in the fabric, adding depth and complexity to the overall design. Whether it’s a simple cable or an intricate cable pattern, incorporating cables into a fade design can take it to the next level.
4. Seed Stitch: For a fade design with a subtler texture, the seed stitch can be the perfect choice. The alternating knit and purl stitches create a bumpy and textured fabric that adds depth without overpowering the color transitions. The seed stitch is versatile and can work well with both bold and subtle color schemes, making it a versatile stitch pattern for a fade design.
5. Chevron Stitch: The chevron stitch, with its zigzag pattern, can create a bold and striking fade design. The sharp angles and color shifts can create an eye-catching effect that draws attention to the color transitions. Whether it’s a simple chevron or a more complex chevron lace pattern, incorporating this stitch in a fade design can result in a statement-making piece.
These are just a few examples of stitch patterns that can be used in a fade design. With so many options available, each knitter can experiment with different stitches to create their own unique and personalized fade designs.
Fade Pattern: Creating Stunning Gradient Effects in Knitting
Knitting with fade patterns is a popular technique among crafters who seek to achieve beautiful gradient effects in their projects. This technique involves a gradual transition from one color to another, creating a visually stunning effect that adds depth and dimension to your knitted items. Whether you’re knitting a scarf, a sweater, or even a pair of socks, incorporating a fade pattern can elevate your project to the next level.
Choosing the Right Yarn: When creating a fade pattern, it’s essential to choose yarns that have a similar fiber content and weight to ensure a smooth transition between colors. Opting for yarns that have been specifically dyed to create a fade effect can also simplify the process by eliminating the need to select and coordinate individual colors. Many yarn companies offer sets of mini skeins or gradient kits specifically designed for fade patterns.
Selecting the Colors: The key to a successful fade pattern lies in selecting colors that harmoniously blend together. You can choose colors that gradually transition from light to dark within the same color family or experiment with contrasting colors for a more bold and vibrant effect. Color wheels and online color palette generators can be helpful tools to assist in choosing complementary hues for your fade pattern.
Planning the Fade: Before starting your project, it’s crucial to plan the order in which your colors will fade. This can be done by creating a swatch or using a planning sheet to visualize the gradient effect. Some knitters prefer a gradual fade, while others may opt for a more abrupt transition. Experimentation and swatching can help you determine the effect you prefer and allow you to make any necessary adjustments before diving into your project.
Implementing the Fade: Once you’ve chosen your yarn and planned your fade, it’s time to start knitting. There are various techniques you can use to achieve a fade effect, such as striping, color blocking, or even blending colors through the use of stitch patterns like intarsia or stranded knitting. Following a fade-specific pattern or using your creativity to incorporate fade elements into your own design will result in a unique and eye-catching finished product.
By incorporating a fade pattern into your knitting projects, you can create stunning gradient effects that are sure to impress. Whether you’re a beginner or an experienced knitter, experimenting with fade patterns can add a new dimension to your crafting repertoire and result in beautiful, one-of-a-kind pieces.
How to fix mistakes in your fade pattern

Mistakes happen, and when they do in your knitting fade pattern, it can be frustrating. But fear not, because there are ways to fix these mistakes and salvage your project. Here are some tips to help you get back on track:
1. Lifelines:
Use lifelines: To prevent major setbacks, it’s always a good idea to insert lifelines every few rows or after completing a section of your fade pattern. Lifelines are threads that you weave through your stitches, capturing them in a specific row. In case you make a mistake, you can easily rip back to the lifeline row and fix it without losing all your progress.
2. Tinking:
Try tinking: When you notice a mistake right after making it, you can use the technique called “tinking” (which is knitting spelled backward) to undo your stitches one by one. With the help of a crochet hook or your knitting needle, carefully unravel the stitches in reverse order until you reach the mistake. Then, re-knit the correct stitches back onto your needle.
3. Dropped stitches:
Fix dropped stitches: If you accidentally drop a stitch in your fade pattern, don’t panic. Take a deep breath and use a crochet hook or knitting needle to catch the dropped stitch from the row below. Carefully work the stitch back up to your current row, making sure to twist it correctly. Repeat this process for any other dropped stitches.
4. Duplicate stitch:
Use duplicate stitch: For minor mistakes, such as a single color stitch in the wrong place, you can use duplicate stitch to cover it up. With a tapestry needle and matching yarn, embroider over the incorrect stitch to create a new one in the correct color and position.
5. Cutting and grafting:
Cut and graft: In extreme cases where the mistake cannot be easily fixed, you can consider cutting out the affected area and grafting in new stitches. This technique requires careful planning and execution, so it’s recommended for advanced knitters or those who feel comfortable with this method.
Remember, practice makes perfect, and even experienced knitters can make mistakes. Don’t be discouraged if you encounter errors in your knitting fade pattern. With these tips and a little patience, you can fix those mistakes and continue enjoying your project.
Conclusion
Creating a fade pattern in knitting can be a fun and rewarding experience. By carefully selecting and blending colors, you can achieve a beautiful gradient effect in your project. Whether you’re a beginner or an experienced knitter, the fade pattern technique offers endless possibilities for creating unique and eye-catching designs.
Remember to choose high-quality yarn that is suitable for your project and take the time to swatch and plan your color transitions. Blocking your finished fade pattern is essential to ensure that your project retains its shape and looks its best. Follow the recommended care instructions for your yarn to keep your fade pattern looking great for years to come.
How to Care for and Block Your Finished Fade Pattern
When your fade pattern is complete, it’s important to care for and block your finished project to ensure it looks its best. Here are some steps to follow:
- Gently hand wash your project in lukewarm water using a mild detergent or wool wash. Avoid agitating or wringing the fabric to prevent stretching or damaging the yarn.
- Rinse your project thoroughly to remove any soap residue.
- Carefully squeeze out excess water using a towel or by gently pressing the fabric against the sink or tub.
- Lay your project flat on a clean, dry towel or blocking mat, shaping it to the desired size and dimensions.
- Pin the edges of your project with rust-proof T-pins or blocking wires to help it maintain its shape during drying.
- Allow your project to dry completely before removing the pins or blocking wires.
- Once dry, your fade pattern should be beautifully blocked and ready to wear or display.
With proper care and blocking, your fade pattern will not only look stunning, but it will also last longer and maintain its shape and color transitions. Enjoy the process of creating and caring for your fade pattern, and let your creativity shine!