Create a beautiful lace snood with this knitting pattern

Are you looking for a new knitting project to keep you busy and warm this winter? Look no further than a lace snood knitting pattern. Snoods are a versatile and stylish accessory that can add a touch of elegance to any outfit. Whether you’re a beginner or an experienced knitter, you’ll find that this lace snood pattern is both challenging and rewarding to work on.
A snood is a type of scarf or neck accessory that is typically worn around the neck and can be pulled up over the head. It provides warmth and protection from the cold weather, while also adding a fashionable touch to your ensemble. The lace snood pattern adds an extra layer of elegance to the traditional snood, with delicate lace motifs that create an eye-catching design.
If you’re new to lace knitting, don’t worry! This snood pattern includes detailed instructions and stitch diagrams, making it easy for even beginners to follow along. The pattern uses basic knitting stitches like knit and purl, as well as some simple lace techniques like yarn overs and knit 2 together. With a little practice, you’ll be able to create a beautiful lace snood that you can wear with pride.
So why not add a little sophistication to your winter wardrobe with a lace snood? Knitting this stylish accessory will not only keep you warm and cozy, but it will also give you the satisfaction of creating something beautiful with your own two hands. Whether you decide to keep the snood for yourself or give it as a gift to a loved one, it’s sure to be a cherished item for years to come.
Lace Snood Knitting Pattern

If you’re looking to add a touch of elegance to your winter wardrobe, a lace snood may be just the accessory you need. A snood is essentially a wide loop of fabric that can be worn around the neck or pulled up over the head as a hood. Knitting your own lace snood allows you to choose the colors and materials that best suit your personal style.
Materials:
- Approximately 200 yards of lace weight yarn
- US size 6 (4mm) circular knitting needles, 24″ in length
- Tapestry needle for weaving in ends
Instructions:
- Cast on 120 stitches using the long-tail cast-on method.
- Join the round, being careful not to twist the stitches.
- Knit every round for 10 inches, or desired length.
- Begin lace pattern: Knit 2, *yo, k2tog, k4,* repeat from * to * until end of round.
- Continue knitting the lace pattern for 3 inches, or desired depth of lace section.
- Switch back to knitting every round for 10 inches, or desired length.
- Bind off all stitches loosely.
- Weave in ends and block the snood to open up the lace pattern.
With its delicate lace pattern, this snood is sure to add a touch of sophistication to any outfit. Whether you wear it as a fashionable accessory or as a practical way to keep warm, a lace snood is a versatile and stylish addition to your winter wardrobe.
Note: The lace pattern used in this snood knitting pattern is a simple repeat of yarn overs (yo) and knit two together (k2tog) stitches. As you become more comfortable with lace knitting, you can experiment with more complex lace patterns to create unique and intricate snoods.
Choosing the Right Yarns and Needles

When it comes to knitting a lace snood, choosing the right yarns and needles is crucial to achieving the desired result. The yarn you choose should be lightweight and have good stitch definition. A yarn with a smooth texture and enough drape will help showcase the intricate lace pattern and allow the snood to hang beautifully when worn.
Yarn weight: Lace weight or fingering weight yarns are ideal for knitting lace snoods. These yarns are thin and delicate, allowing you to achieve intricate lace patterns with great detail. The finer the yarn, the more delicate and airy the snood will be.
Fiber content: The fiber content of the yarn will also affect the final result. Natural fibers such as silk or wool blends are popular choices for lace knitting as they offer a combination of softness, drape, and stitch definition. Synthetic fibers like acrylic or nylon can be used as well, but they may not provide the same level of drape and luxury as natural fibers.
Needles: The choice of needles will depend on your personal knitting style and the yarn you are using. Generally, lace knitting requires smaller needles to create a tight, even fabric. Circular needles are often preferred for snood projects as they can accommodate a large number of stitches and make it easier to work the lace pattern in the round.
Gauge: Before starting your lace snood, it’s important to check your gauge. Knitting a swatch in the lace pattern and blocking it will give you an idea of how the yarn and needles work together and help you adjust your needle size if needed. Achieving the correct gauge will ensure that your snood comes out the right size and has the desired drape.
Color choice: The color of the yarn is also an important factor to consider. Lighter colors tend to highlight the lace pattern and give the snood an ethereal look. However, darker shades can also create a dramatic effect and add elegance to the finished piece. Ultimately, the color choice should complement your personal style and the occasions you plan to wear the snood for.
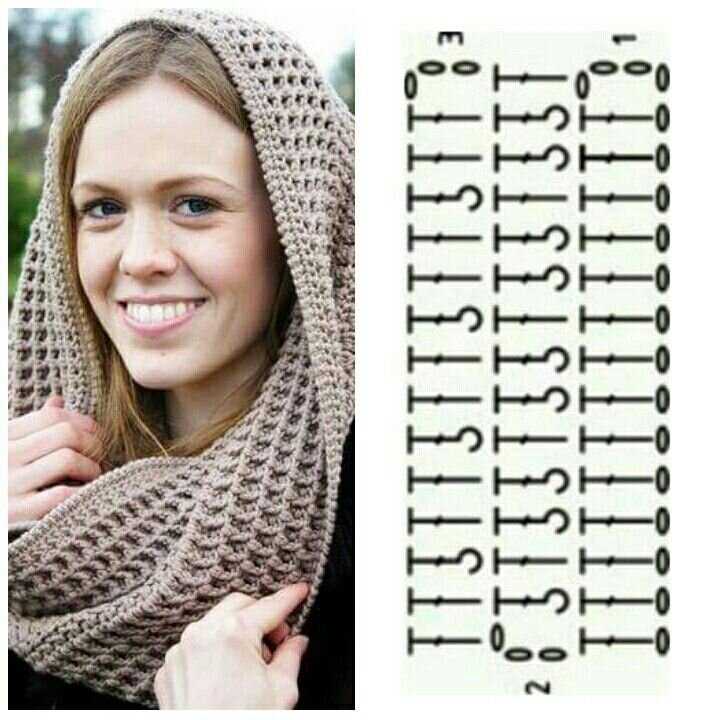
Understanding Lace Knitting Charts
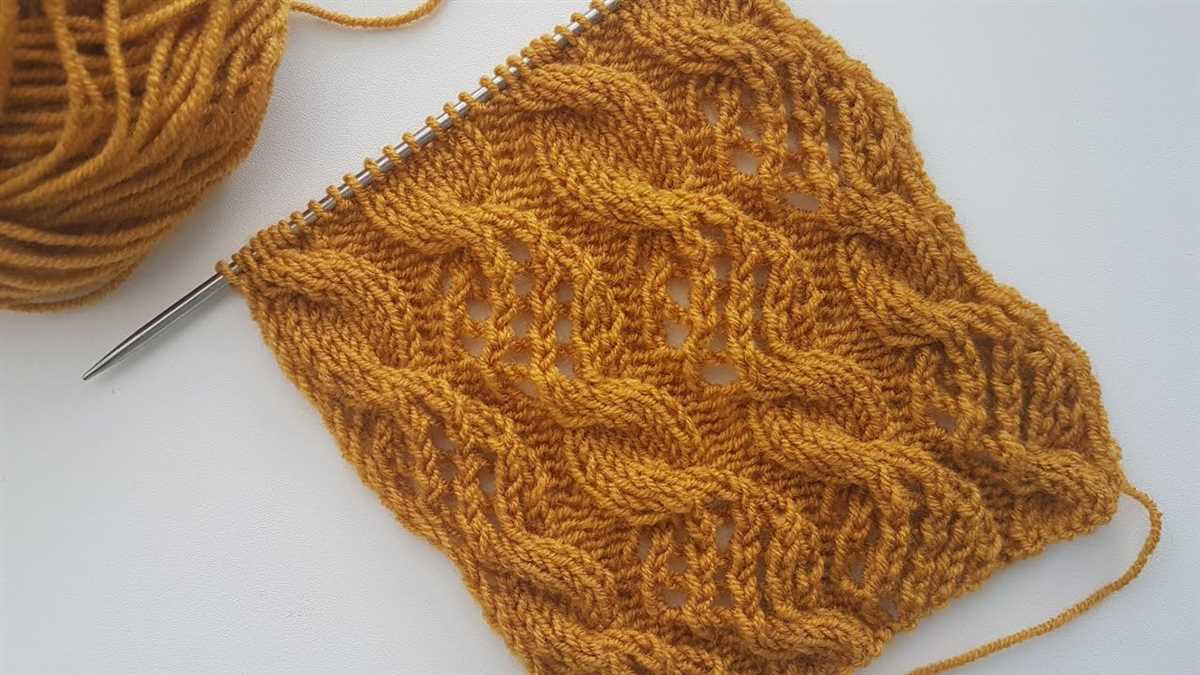
Lace knitting charts are an essential tool for knitters who want to create intricate lace patterns. These charts visually represent the different stitches and their placement in a lace pattern, allowing knitters to easily follow along and create beautiful designs.
When reading a lace knitting chart, it is important to understand the symbols and directions used. Each symbol represents a different stitch or action, such as a yarn over, knit, or purl. These symbols are often accompanied by a key or legend that explains what each symbol means, allowing knitters to easily decipher the chart.
Highlighted stitches: In some lace knitting charts, certain stitches may be highlighted or colored to indicate specific actions or repeats. This can help knitters keep track of where they are in a pattern and ensure they are following the correct instructions.
Multiple rows: Lace knitting charts typically represent multiple rows of knitting in a condensed form. Each row of the chart is read from right to left for right-side (RS) rows and from left to right for wrong-side (WS) rows. This allows for a compact representation of the entire lace pattern.
Repeats: Lace knitting charts often include repeat sections, which are indicated by brackets or other symbols. These repeats allow knitters to easily replicate a section of the pattern multiple times. By following the chart and repeating the specified section, knitters can create a continuous lace pattern.
To use a lace knitting chart effectively, it is important to take the time to carefully study and understand the chart before beginning your project. By familiarizing yourself with the symbols, repeats, and directions, you can confidently knit beautiful lace patterns with ease.
Cast On and Knit the First Rows
Before you can begin knitting your lace snood, you’ll need to cast on your stitches. Start by using your preferred casting on method to add the required number of stitches to your knitting needle. Make sure to leave a long enough tail for weaving in later.
Once you have your stitches cast on, you’re ready to start knitting the first rows of your lace snood. Follow the instructions in the lace snood knitting pattern to begin. This may involve knitting the first few rows in a specific stitch pattern or using a particular set of stitches.
If the pattern specifies, you may need to use markers to indicate certain sections or repeats in the lace pattern. This can help you keep track of your progress and ensure that you’re following the pattern correctly.
As you knit the first few rows of your lace snood, pay close attention to the tension and gauge of your knitting. It’s important to knit at a consistent tension throughout the project to ensure that the final snood fits properly and looks as intended.
Take your time and enjoy the process of knitting the first rows of your lace snood. It’s an opportunity to familiarize yourself with the pattern and get into a rhythm with your knitting. Once you’ve completed the first few rows, you’ll be well on your way to creating a beautiful lace snood that you can wear with pride.
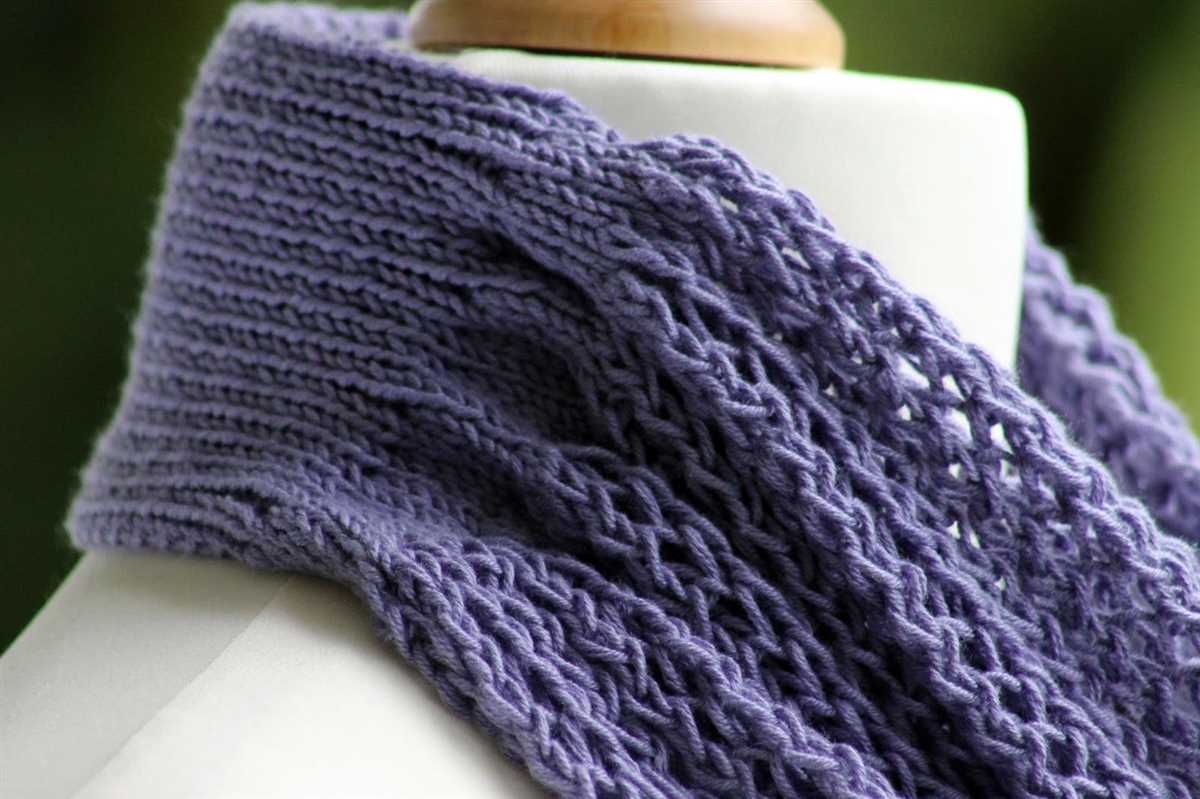
Creating the Lace Pattern

The lace pattern used in this snood knitting pattern adds a delicate and intricate touch to the final garment. To create the lace pattern, you will be using a combination of various knitting stitches and techniques to achieve the desired look.
First, you will start by casting on the required number of stitches for your snood. This will depend on the size and length you want the snood to be. Once you have cast on the stitches, you will begin working the lace pattern.
To create the lace pattern, you will be using a combination of knit and purl stitches, yarn overs, and decreases. These stitches will create the openwork and decorative motifs that make up the lace pattern. The pattern will usually include a set of instructions that specify the exact stitches to be worked and their placement within each row.
It’s important to pay close attention to the lace pattern instructions and carefully follow each step. This will ensure that the lace pattern is created correctly and the final result looks as intended. It may be helpful to use stitch markers to keep track of any pattern repeats or specific stitch placements.
Some lace patterns may be more complex than others, requiring multiple rows and intricate stitch combinations. Others may be simpler, with a repeated pattern that is easy to memorize. Regardless of the complexity, working with lace patterns can be both challenging and rewarding. It allows you to create beautiful and delicate designs that can elevate any knitting project.
As you work through the lace pattern, make sure to periodically check your stitch count to ensure you haven’t made any mistakes. Fixing mistakes in lace knitting can be more challenging than in other knitting techniques, so catching them early on is important.
Once you have completed the lace pattern, you can continue knitting the remaining rows according to the snood pattern instructions. This may involve switching to a different stitch pattern or continuing with the lace pattern, depending on the design.
When you have finished knitting the snood, you can block it to enhance the lace pattern’s appearance. Blocking involves wetting the knitted piece and reshaping it to its desired dimensions. This not only helps the stitches relax and settle into place but also gives the snood a professional and polished look.
Creating a lace pattern requires patience and attention to detail, but the end result is well worth the effort. The delicate and feminine look of lace adds elegance and sophistication to any knitting project, making it a popular choice for snoods, shawls, and other accessories.
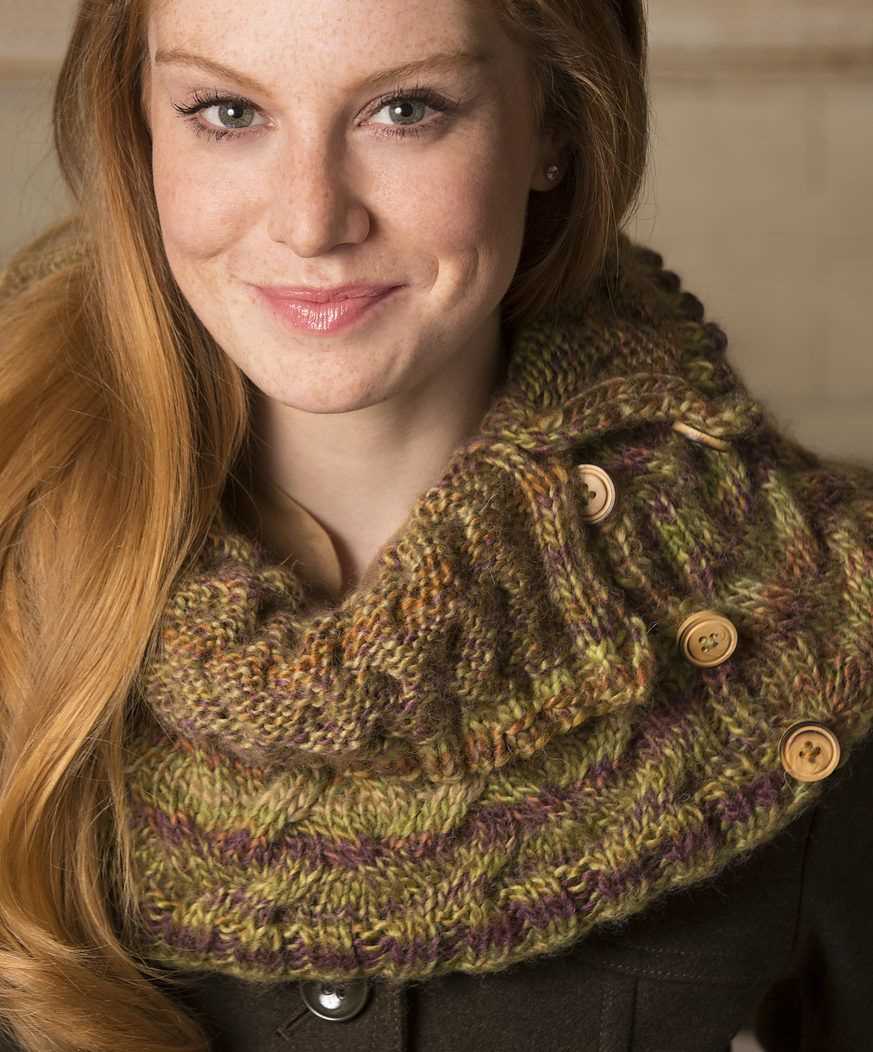
Adding Decorative Stitches

When knitting a lace snood, adding decorative stitches can enhance the overall design and make the final piece even more beautiful. Here are some ideas for incorporating decorative stitches into your snood pattern:
1. Lace Panels
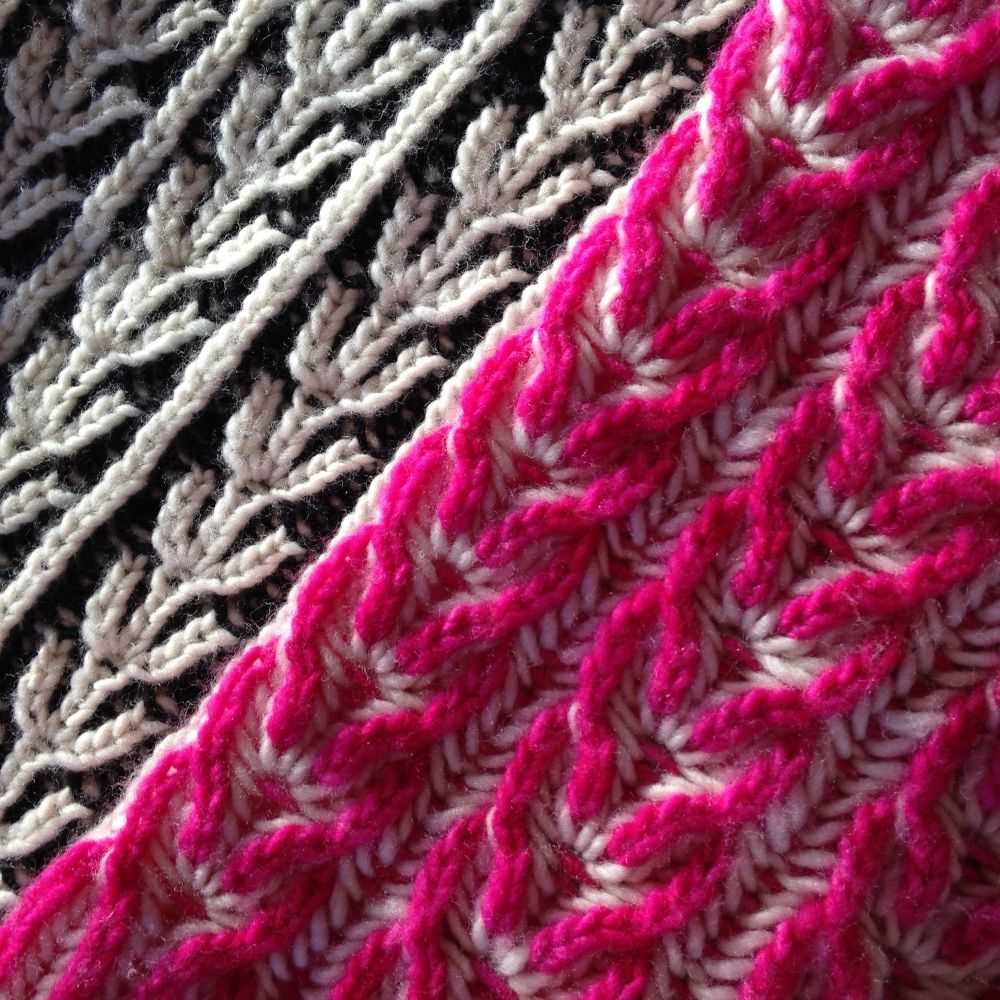
One popular way to add decorative stitches is by incorporating lace panels into your knitting pattern. Lace panels typically feature intricate designs with different types of yarn overs, decreases, and eyelets. These panels can be placed at regular intervals or used sparingly to create a more delicate look.
2. Bobbles and Nupps

Adding bobbles or nupps can create texture and interest in your lace snood. Bobbles are small raised bumps that are created by increasing stitches and then knitting them together. Nupps, on the other hand, are small clusters of stitches that are worked into one stitch and then knitted together on the next row. Both bobbles and nupps can add a unique touch to your snood design.
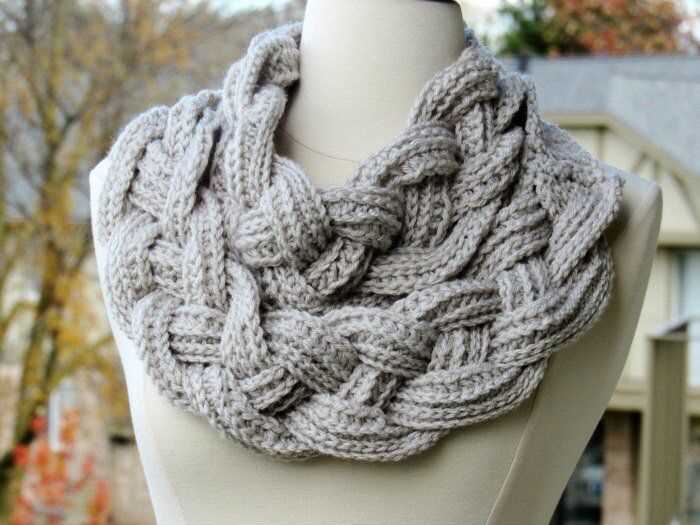
3. Cables
Cables are another great way to add decorative stitches to your lace snood. Cable stitches are created by crossing certain stitches over others, creating a braided or twisted design. You can incorporate simple cables or more intricate cable patterns depending on the level of detail you want to achieve.
4. Seed Stitch or Garter Stitch Borders
Adding a seed stitch or garter stitch border to your lace snood can provide a contrast to the lace pattern and frame the design. Seed stitch involves alternating knit and purl stitches in a specific pattern, while garter stitch is created by knitting every row. Both of these stitches can add a cozy and textured look to your snood.
By incorporating these decorative stitches into your lace snood knitting pattern, you can create a unique and eye-catching accessory that showcases your knitting skills and adds an extra touch of beauty to your wardrobe.
Shaping the Snood
The snood is a versatile and fashionable accessory that can be knit in many different patterns, including lace. When knitting a lace snood, it is important to shape it properly to ensure a comfortable and flattering fit.
To begin shaping the snood, you will need to cast on the desired number of stitches. This will depend on the stitch pattern you choose and the size of the snood you want to create. It is recommended to cast on a multiple of the stitch pattern repeat, plus a few extra stitches for the selvage edge.
Increase and decrease rows:
- After casting on, you will need to work increase rows to create the desired width of the snood. This can be done by knitting a certain number of stitches, then working the increase stitch, such as a yarn over, and then knitting the remaining stitches. Repeat this pattern until you reach the desired width.
- Once you have reached the desired width, you can start shaping the snood by working decrease rows. This can be done by knitting a certain number of stitches, then working the decrease stitch, such as knitting two stitches together, and then knitting the remaining stitches. Repeat this pattern until you have decreased to the desired number of stitches.
Finishing the snood:
After shaping the snood, you will need to bind off the stitches. This can be done using a traditional bind off method, such as the basic bind off, or a decorative bind off, such as the picot bind off. Choose a bind off method that complements the overall design of the snood.
Once the stitches are bound off, you can weave in any loose ends and block the snood to ensure the lace pattern is fully visible and the snood maintains its shape. Blocking involves wetting the snood, carefully stretching it to the desired dimensions, and allowing it to dry flat.
Finishing Touches: Blocking and Weaving in Ends
After completing your lace snood knitting pattern, the final steps to give your project a polished look are blocking and weaving in the ends. Blocking is the process of shaping and stretching the knitted fabric to ensure that it lies flat and evenly. It also helps open up any lace patterns, allowing the stitches to show their full potential. Weaving in ends refers to securing the loose yarn tails from the cast-on and bind-off edges, as well as any additional yarn changes, so they are hidden and do not unravel over time.
To begin, you will need to gather the necessary blocking tools. This typically includes blocking mats or towels, rustproof T-pins (or blocking wires), and a spray bottle filled with water. Lay your knitted snood flat on the blocking mats or towels, making sure the garment is shaped as desired. Use the T-pins or blocking wires to secure the edges and keep the fabric taut. If there are any lace sections, gently stretch and pin them to open up the pattern.
Once your snood is pinned in place, lightly mist it with water using the spray bottle. Avoid soaking the fabric, as excessive moisture can damage certain yarns. Allow the snood to dry completely before removing the pins or wires. This may take several hours or overnight, depending on the yarn and ambient conditions. Blocking will help smooth out any uneven stitches or tension issues and give your snood a professional finish.
Next, you will need to weave in the loose ends to ensure they do not unravel or detract from the finished snood. Use a yarn needle and thread the yarn tail through the stitches on the wrong side of the fabric, following the direction of the knitting. Take care to weave in the ends discreetly, avoiding any bulk or visible knots. Once woven in, trim any excess yarn tail close to the fabric, being careful not to cut into the knitted fabric itself.
With proper blocking and weaving in of ends, your lace snood will be complete and ready to wear. These finishing touches not only improve the appearance of your project but also contribute to the longevity of the garment, ensuring it retains its shape and beauty for years to come. Take the time to give your snood the attention it deserves, and you will be rewarded with a stunning accessory to adorn your outfits.
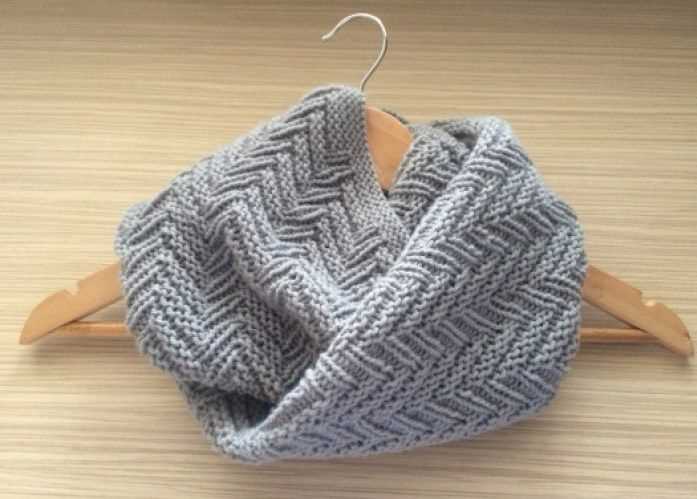
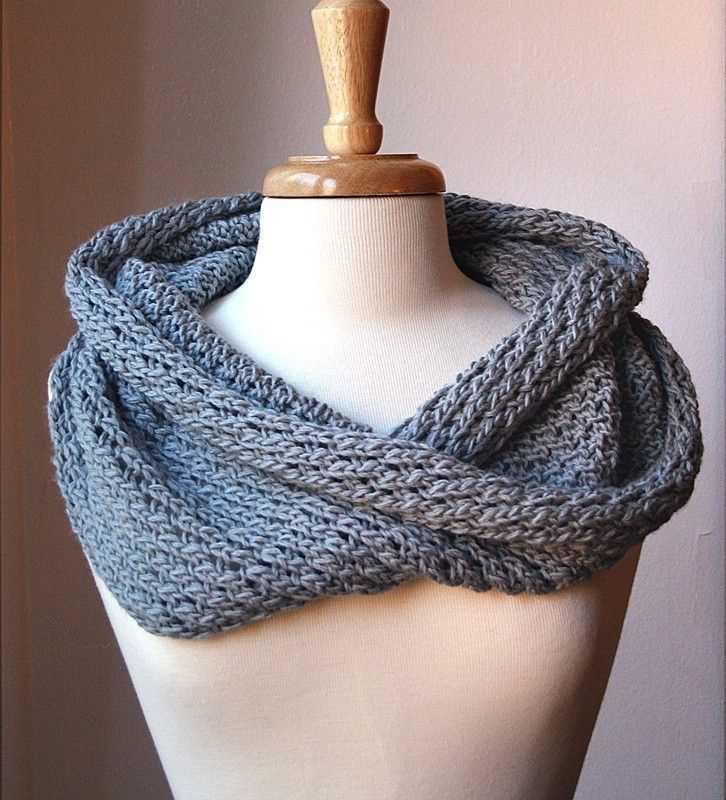
Styling and Wearing Your Lace Snood
Once you have finished knitting your lace snood, it’s time to style and wear it! Here are some tips and ideas to help you make the most of your beautiful accessory.
First, decide how you want to wear your snood. You can wear it around your neck as a stylish alternative to a traditional scarf. Simply drape it over your shoulders and let it hang loosely for a casual look, or wrap it snugly around your neck for extra warmth on chilly days.
Another option is to wear your lace snood over your head, like a hood. This is a great way to keep your ears and head cozy in colder weather. Simply pull the snood over your head, allowing it to rest around your neck and shoulders. You can also play around with different ways to wear it, such as pulling it up over your nose for added protection from the elements.
When it comes to styling your lace snood, the possibilities are endless. You can wear it with a simple t-shirt and jeans for a casual, everyday look, or dress it up with a blouse and skirt for a more polished ensemble. The delicate lace pattern adds a touch of elegance to any outfit.
In terms of color, you can choose a snood that complements your outfit or go for a bold contrast. A neutral-colored snood, such as white or beige, can be paired with almost anything, while a vibrant color like red or purple can add a pop of personality to a more understated outfit.
Whether you’re heading to work, meeting friends for lunch, or going on a date, a lace snood is a versatile accessory that can elevate any look. So, go ahead and experiment with different ways to wear and style your lace snood to suit your personal style and the occasion.