Easy Loom Knit Hat Pattern

Are you looking for a fun and fashionable knitting project? Look no further than a loom knit hat pattern! Loom knitting is a technique that uses a circular loom instead of knitting needles, making it easier and more accessible for beginners to create beautiful, handmade items.
Whether you’re a seasoned knitter or new to the craft, a loom knit hat is a great project to try. With endless possibilities for colors, patterns, and styles, you can create a hat that is unique to your own personal style. Plus, loom knitting is a great way to relax and destress while still being productive.
In this article, we’ll provide you with a simple and easy-to-follow loom knit hat pattern. Even if you’ve never tried loom knitting before, don’t worry – we’ll walk you through the process step-by-step. By the end, you’ll have a cozy and stylish hat that you’ll be proud to wear or gift to a loved one!
Loom Knit Hat Pattern

If you love knitting and want to create a cozy hat for yourself or someone special, then a loom knit hat pattern is just what you need. Loom knitting is a technique that uses a round or rectangular loom to create stitches, making it easy for beginners or those who struggle with traditional knitting needles. With a loom knit hat pattern, you can create a stylish and warm hat in no time.
To get started with a loom knit hat pattern, you’ll need a loom, loom hook, and yarn of your choice. Choose a loom size that matches the desired size of your hat, and select a soft yarn that will be comfortable to wear. Once you have your supplies ready, follow the steps below to create your loom knit hat:
Step 1: Cast On

Start by wrapping the yarn around the pegs of the loom, creating a loop on each peg. This is called casting on and will form the base of your hat.
Step 2: Knit Stitches
Using the loom hook, pull the bottom loop over the top loop on each peg. This will create a knit stitch. Continue knitting stitches all the way around the loom until you have completed one round.
Step 3: Continue Knitting

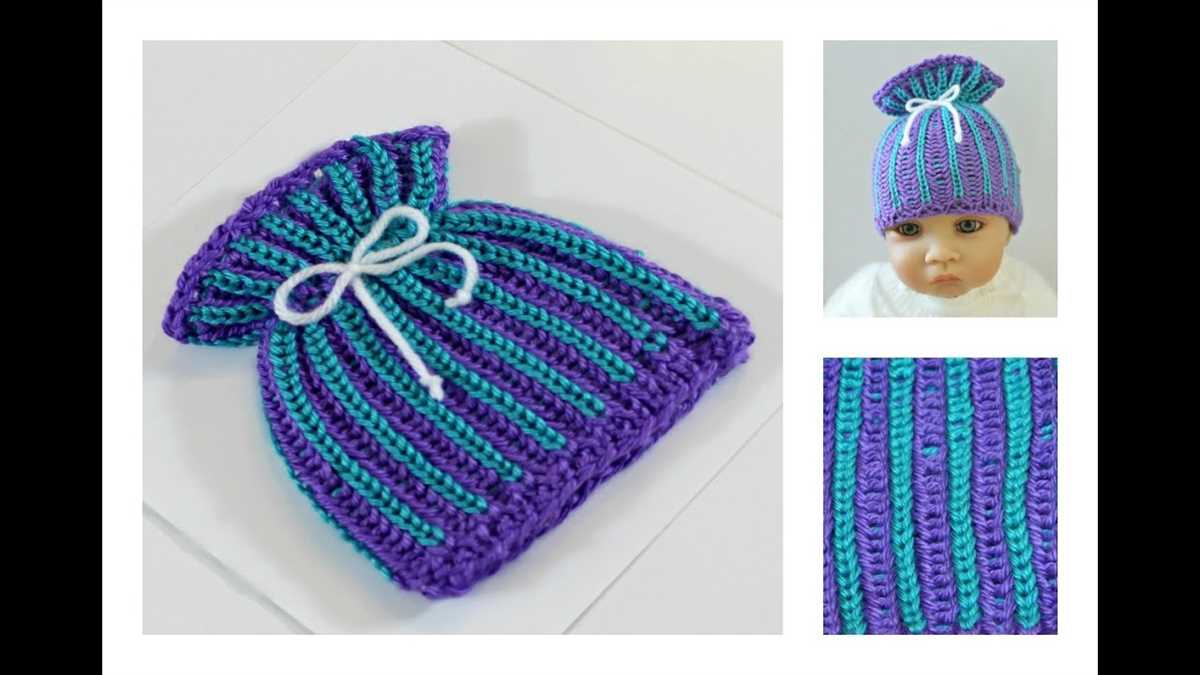
Repeat step 2 until your hat reaches the desired length. You can make a beanie-style hat by knitting for a shorter length or a slouchy-style hat by knitting for a longer length.
Step 4: Bind Off
To finish your hat, you’ll need to bind off. Cut the yarn, leaving a long tail. Thread the tail through the loom hook and pull it through the loops on each peg, removing the stitches from the loom. Once all the stitches are off the loom, pull the tail tight to secure the hat.
With these simple steps, you can create a beautiful loom knit hat using your favorite colors and patterns. Whether you’re a beginner or an experienced knitter, a loom knit hat pattern is a great project to try. So grab your loom and yarn, and start knitting a cozy hat today!
What is Loom Knitting?
Loom knitting is a technique of creating knitted items using a loom instead of traditional knitting needles. It is a popular method among beginners and those who have difficulty with traditional knitting techniques.
Looms are circular or rectangular frames with pegs or posts placed around the edges. Yarn is wrapped around the pegs and manipulated to create stitches. The loom creates a tight, even tension, making it easier to create professional-looking pieces.
Loom knitting is a versatile craft that can be used to create a variety of items, such as hats, scarves, blankets, and even socks. The technique is ideal for creating simple, repetitive patterns, making it accessible to knitters of all skill levels.
One of the advantages of loom knitting is its simplicity. The technique can be quickly learned and mastered, allowing beginners to create beautiful pieces without the frustration of dropped stitches or uneven tension. Additionally, loom knitting can be a great option for individuals with arthritis or other hand conditions, as it requires less hand dexterity than traditional knitting.
Overall, loom knitting is a fun and accessible way to create knitted items. Whether you’re a beginner or an experienced knitter looking to try something new, loom knitting offers a unique and enjoyable crafting experience.
Benefits of Loom Knitting
Loom knitting is a popular craft that offers a wide range of benefits for both beginners and experienced knitters. Whether you’re looking to create warm hats, cozy scarves, or stylish sweaters, loom knitting provides a versatile and accessible way to express your creativity.
Ease of Use: One of the biggest advantages of loom knitting is its simplicity. Unlike traditional knitting needles, looms have pegs that hold the yarn in place, making it easier to create stitches and maintain tension. This makes loom knitting an ideal choice for individuals who struggle with traditional knitting techniques or have limited dexterity.
Speed and Efficiency: Loom knitting can be a faster process than traditional knitting, as the continuous circular motion allows for quicker stitches. The larger gauge of loom knitting also means that projects can be completed in less time compared to traditional knitting. This makes it a great option for those looking to create gifts or projects with tight deadlines.
Variety of Projects: Loom knitting offers a wide range of project possibilities, from hats and scarves to blankets and even stuffed animals. With different sizes and shapes of looms available, you can easily customize your projects to suit your style and skill level. Plus, the repetitive nature of loom knitting can be both relaxing and therapeutic, making it a great way to unwind and destress.
Portability: Loom knitting is a portable craft that can be done anywhere, whether you’re on the go or sitting in the comfort of your own home. Looms are lightweight and compact, allowing you to take your projects with you wherever you please. This makes loom knitting a great option for travel or for those who like to knit on the go.
In conclusion, loom knitting offers a variety of benefits that make it an attractive craft for both beginners and experienced knitters. From its ease of use to the speed and efficiency it offers, loom knitting provides a fun and accessible way to create beautiful and practical items. So why not give loom knitting a try and discover the joy of this versatile craft?
Choosing the Right Loom

When it comes to knitting hats on a loom, choosing the right loom is essential to achieving the desired fit and style. There are several factors to consider when selecting a loom for your hat project.
Size of the Loom:
One important factor to consider is the size of the loom. This will determine the circumference of the hat you can knit. If you want to make a smaller hat, choose a smaller loom with fewer pegs. For larger hats, opt for a larger loom with more pegs. It is also worth considering the thickness of the yarn you plan to use, as this can affect the size of the hat as well.
Type of the Loom:
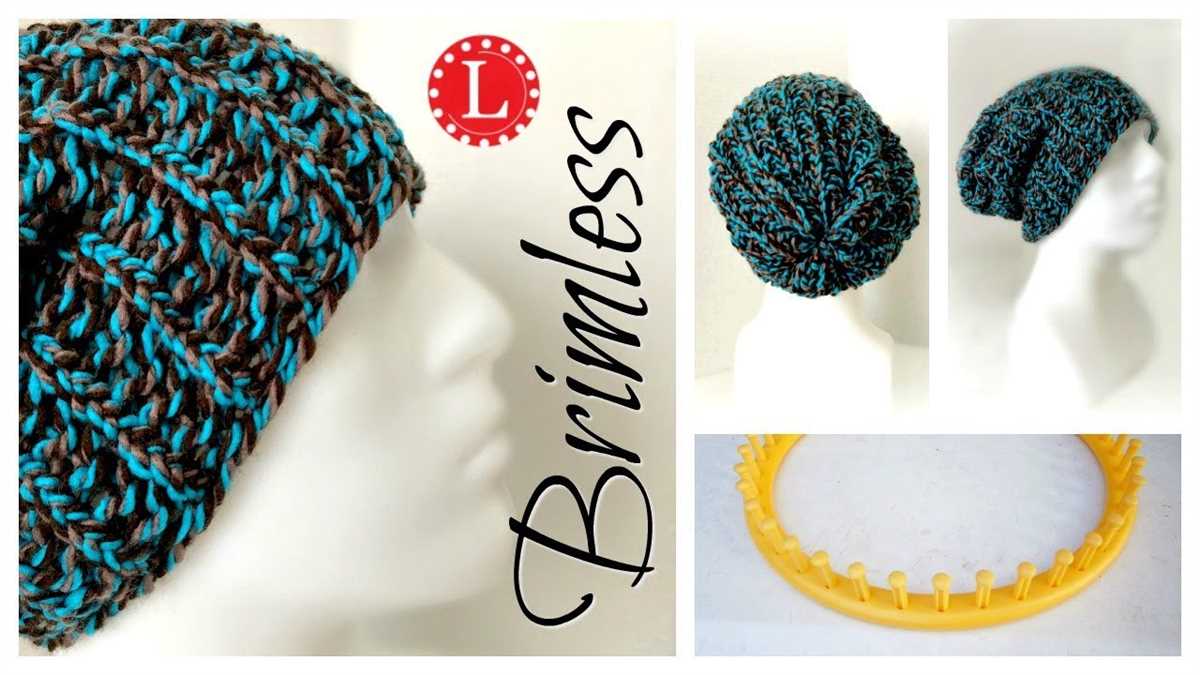
Another factor to consider is the type of loom. There are different types of looms available, such as round looms and long looms. Round looms are popular for hat knitting as they create a seamless tube, while long looms can be used for both flat and circular knitting. Consider your knitting style and preferences when choosing the type of loom.
Gauge of the Loom:
The gauge of the loom refers to the distance between the pegs. This can affect the tightness or looseness of the stitches in your hat. A loom with a larger gauge will produce a looser stitch, while a loom with a smaller gauge will produce a tighter stitch. Consider the desired texture of your hat when selecting the gauge of the loom.
Material of the Loom:
Lastly, consider the material of the loom. Looms can be made from plastic, wood, or metal. Plastic looms are lightweight and affordable, while wood and metal looms are more durable and sturdy. Choose a material that suits your needs and preferences.
By considering these factors and choosing the right loom, you can ensure that your hat knitting project turns out just the way you envisioned it.
Getting Started with Loom Knitting
If you’re new to loom knitting, it’s helpful to have an understanding of the basic techniques and tools involved. Loom knitting is a great alternative to traditional knitting with needles, as it allows you to create the same beautiful items with less complexity. Whether you’re looking to make hats, scarves, or other accessories, loom knitting is an enjoyable and accessible craft to learn.
To get started with loom knitting, you’ll need a few essential tools. The first is a loom. Looms come in various shapes and sizes, depending on the type of project you want to make. For example, if you’re looking to knit a hat, a round loom is ideal. If you’re interested in knitting a scarf, a long, rectangular loom is more suitable. Additionally, you’ll need a loom hook or a knitting needle, which is used to pull the yarn through the loops on the loom.
Basic Loom Knitting Techniques
Once you have your loom and hook, it’s time to learn some basic loom knitting techniques. The first technique you’ll need to know is the cast on. This is how you start your knitting project on the loom. There are different methods of casting on, but the e-wrap method is commonly used. This involves wrapping the yarn around each peg of the loom in a figure-eight pattern.
After you’ve cast on, you can begin the actual knitting process. The basic stitch in loom knitting is called the knit stitch. To knit a stitch, you use the hook or needle to lift the bottom loop over the top loop on each peg. This creates a series of interlocking loops, similar to traditional knitting. Once you’ve completed a row, you can continue knitting additional rows to create the desired length of your project.
With these simple techniques and tools, you’ll be well on your way to creating your first loom-knitted project. As you gain more experience, you can explore different stitches and patterns to add variety to your work. Loom knitting is a versatile and enjoyable craft that allows you to create beautiful, handmade items with ease.
Basic Stitches in Loom Knitting
In loom knitting, there are several basic stitches that are commonly used to create various patterns and designs. These stitches are easy to learn and can be used to make a wide range of projects, including hats, scarves, and blankets.
1. Knit Stitch: The knit stitch is the most basic stitch in loom knitting. It creates a smooth, stockinette-like fabric and is often used as the foundation stitch for many projects. To make a knit stitch, simply wrap the yarn around the peg in a clockwise direction and then use the hook to pull the bottom loop over the top loop, leaving only one loop on the peg.
2. Purl Stitch: The purl stitch is the reverse of the knit stitch and creates a bumpy texture on the fabric. To make a purl stitch, wrap the yarn around the peg in a counterclockwise direction and then use the hook to pull the bottom loop over the top loop, again leaving only one loop on the peg.
3. Rib Stitch: The rib stitch is a combination of knit and purl stitches and creates a stretchy fabric with alternating columns of knit and purl stitches. It is commonly used for ribbed cuffs, collars, and edges. To make a rib stitch, alternate between knit and purl stitches on each peg.
4. Garter Stitch: The garter stitch is created by knitting or purling every stitch in every row. It creates a textured fabric with rows of bumps on both sides. Garter stitch is commonly used for scarves, blankets, and dishcloths.
5. Seed Stitch: The seed stitch is similar to the garter stitch but creates a more textured fabric by alternating knit and purl stitches in each row. It creates a fabric with small, raised dots. Seed stitch is often used for smaller projects like hats and mittens.
6. Cable Stitch: The cable stitch is a more advanced stitch that creates twisted, interlocking patterns in the fabric. It is created by crossing stitches over each other using a cable needle or by manipulating the stitches on the loom. Cable stitches can add interest and detail to projects like hats and sweaters.
These are just a few of the basic stitches in loom knitting. Once you master these stitches, you can start experimenting with different patterns and designs to create unique and customized projects.
Understanding the Loom Knit Hat Pattern
When embarking on a loom knitting project, it’s important to first understand the loom knit hat pattern. This pattern serves as a guide and roadmap for creating a beautifully knitted hat using a loom. By familiarizing yourself with the pattern, you can ensure that your final product turns out just as you envisioned.
The pattern typically consists of the following elements:
- Cast On Instructions: This is the first step in the pattern and provides instructions for securing the yarn on the loom to begin the knitting process. It’s important to follow these instructions carefully to ensure a proper foundation for your hat.
- Stitch Instructions: The stitch instructions outline the specific knitting techniques used to create various patterns and textures on the hat. This can include stitches such as knit, purl, and cables. Understanding these instructions is crucial for achieving the desired design.
- Row Instructions: This section of the pattern guides you through the number of rows to knit and any necessary stitch changes or increases/decreases. Row instructions help ensure that your hat gradually takes shape and fits properly.
- Decrease Instructions: Towards the end of the pattern, you will encounter instructions for decreasing the number of stitches to form the top of the hat. These instructions are crucial for shaping the hat and creating a neat finish.
- Bind Off Instructions: The bind off instructions mark the final step in the pattern and guide you through the process of securing the remaining stitches to prevent them from unraveling. This step ensures that your hat stays intact and ready to wear.
By thoroughly reading and understanding each element of the loom knit hat pattern, you can confidently embark on your knitting journey. Don’t be afraid to consult knitting resources or seek guidance from experienced knitters if you come across any unfamiliar terms or techniques. With practice, you’ll soon be able to decipher any pattern and create beautiful hats with ease.
Materials Needed for Loom Knit Hat
Before beginning a loom knit hat project, it is important to gather all the necessary materials. Here is a list of the essential items you will need:
- Loom: Choose a loom that is the appropriate size for the hat you want to make. There are different loom sizes available, so be sure to select one that matches your desired finished hat measurements.
- Yarn: Select a soft and warm yarn that is suitable for hats. Any yarn with a medium weight (also known as worsted weight) will work well for most hat patterns. Choose a color that you like and that complements your wardrobe.
- Loom Hook: This specialized hook is used to manipulate the stitches on the loom. It should have a comfortable grip and fit easily into the pegs of the loom.
- Tapestry Needle: This needle is used to weave in loose ends and finish off the hat. Choose one with a large eye and a blunt tip for easier threading and weaving.
- Measuring Tape: A measuring tape is essential for ensuring the hat is the correct size. Measure the circumference of the head or use a standard hat size guide to determine the appropriate measurements.
Once you have gathered these materials, you will be ready to start your loom knit hat project. Having all the necessary tools and supplies on hand will make the process smoother and more enjoyable. So gather your materials and get ready to create a cozy and stylish hat!
Step-by-Step Instructions for Loom Knit Hat
If you’re new to loom knitting or just looking for a quick and easy project, loom knitting a hat is a great place to start. With a few simple steps, you’ll have a cozy hat to keep you warm in no time. Follow these step-by-step instructions to create your own loom knit hat.
Materials you will need:
- Loom knitting loom
- Yarn in your choice of color
- Loom knitting hook
- Yarn needle
- Scissors
Step 1: Set up your loom
Begin by setting up your loom according to the instructions that came with it. This typically involves attaching the pegs to the loom base and placing them in a circular or rectangular pattern.
Step 2: Cast on
Take your yarn and create a slipknot. Place the slipknot on the anchor peg on your loom. Wrap the yarn around each peg in a clockwise direction, moving in a circle. Once you have wrapped the yarn around each peg, wrap it around each peg for a second time. This will create a double-wrap cast on.
Step 3: Knit the first row
Using your loom knitting hook, lift the bottom loop on the first peg over the top loop and completely off the peg. Repeat this process for each peg around the loom. Once you have completed a full round, begin again and repeat this process for a total of three rounds.
Step 4: Continue knitting
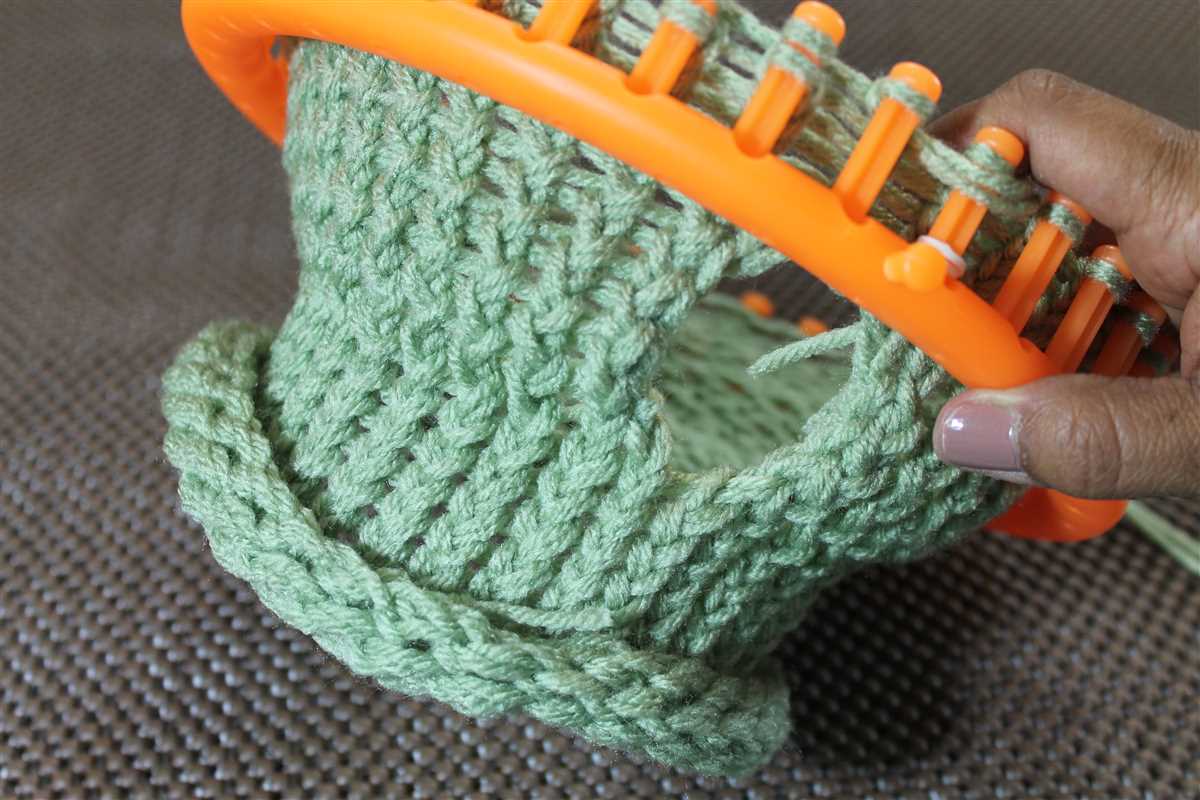
After completing the first three rounds, continue knitting each round using the e-wrap stitch. To do this, wrap the yarn around each peg in a clockwise direction, crossing the yarn over itself to create an “e” shape. Lift the bottom loop over the top loop and completely off the peg, and repeat this process for each peg around the loom. Continue knitting until your hat reaches the desired length.
Step 5: Bind off
Once your hat has reached the desired length, it’s time to bind off. Starting with the first peg, knit one stitch onto the adjacent peg, then lift the bottom loop over the top loop and completely off the peg. Continue this process for each peg around the loom. After the last peg, cut the yarn, leaving a long tail. Thread the yarn through a yarn needle and weave it through the loops on the loom, removing the hat from the loom as you go.
Step 6: Finishing touches
Once you have removed the hat from the loom, use your yarn needle to weave the tail of the yarn through the top of the hat and secure it. Trim any excess yarn. You can also add embellishments, such as a pom-pom or a decorative button, to personalize your hat.
With these step-by-step instructions, you can easily create your own loom knit hat. Experiment with different yarn colors and stitch patterns to make each hat unique. Happy loom knitting!
Tips and Tricks for Loom Knit Hat
When it comes to loom knitting hats, there are a few tips and tricks that can help make the process smoother and the end result more professional-looking. Here are some key points to keep in mind:
1. Choose the right loom
The size of the loom will determine the size of the hat you knit. It’s important to choose the right loom size to achieve the desired fit. A larger loom will create a larger hat, while a smaller loom will result in a smaller hat. Consider the recipient’s head size and the type of yarn you’re using to make your decision.
2. Use a stitch marker
When working on a loom, it’s easy to lose track of where you are in the pattern. To avoid this, use a stitch marker to mark the beginning of each round. This will help you keep track of your progress and ensure that your stitches are even.
3. Choose the right yarn
The type of yarn you use can greatly affect the look and feel of your hat. For a warmer hat, choose a chunky or bulky yarn. For a more lightweight hat, opt for a thinner yarn. Be mindful of the fiber content as well, as some fibers are more suitable for hats than others. Consider the recipient’s preferences and any allergies they may have before selecting your yarn.
4. Pay attention to tension
Tension is key when loom knitting a hat. If your stitches are too loose, the hat may come out too big and not provide enough warmth. On the other hand, if your stitches are too tight, the hat may be too small and uncomfortable to wear. Practice maintaining an even tension as you work to achieve a balanced and well-fitting hat.
5. Experiment with different stitch patterns
While the basic knit stitch is common in loom knitting hats, there are various other stitch patterns you can experiment with to add texture and interest to your hat. Try out different stitch combinations, such as ribbing or seed stitch, to create unique designs. This will give your hat a personalized touch and make it stand out from the rest.
By keeping these tips and tricks in mind, you’ll be well-equipped to create beautiful loom knit hats. Remember to practice and have fun with your knitting projects, and don’t be afraid to try new techniques and designs!
Customizing Your Loom Knit Hat
If you’re looking to add a unique touch to your loom knit hat, there are several ways to customize it to reflect your personal style. Whether you prefer a simple and chic design or something more intricate, here are some ideas to get you started.
1. Choose your favorite yarn:
One of the easiest ways to customize your loom knit hat is by selecting the perfect yarn. You can opt for a solid color for a classic look or experiment with variegated yarns for a more playful and vibrant effect. Consider the texture and weight of the yarn as well, as it can greatly influence the final appearance of your hat.
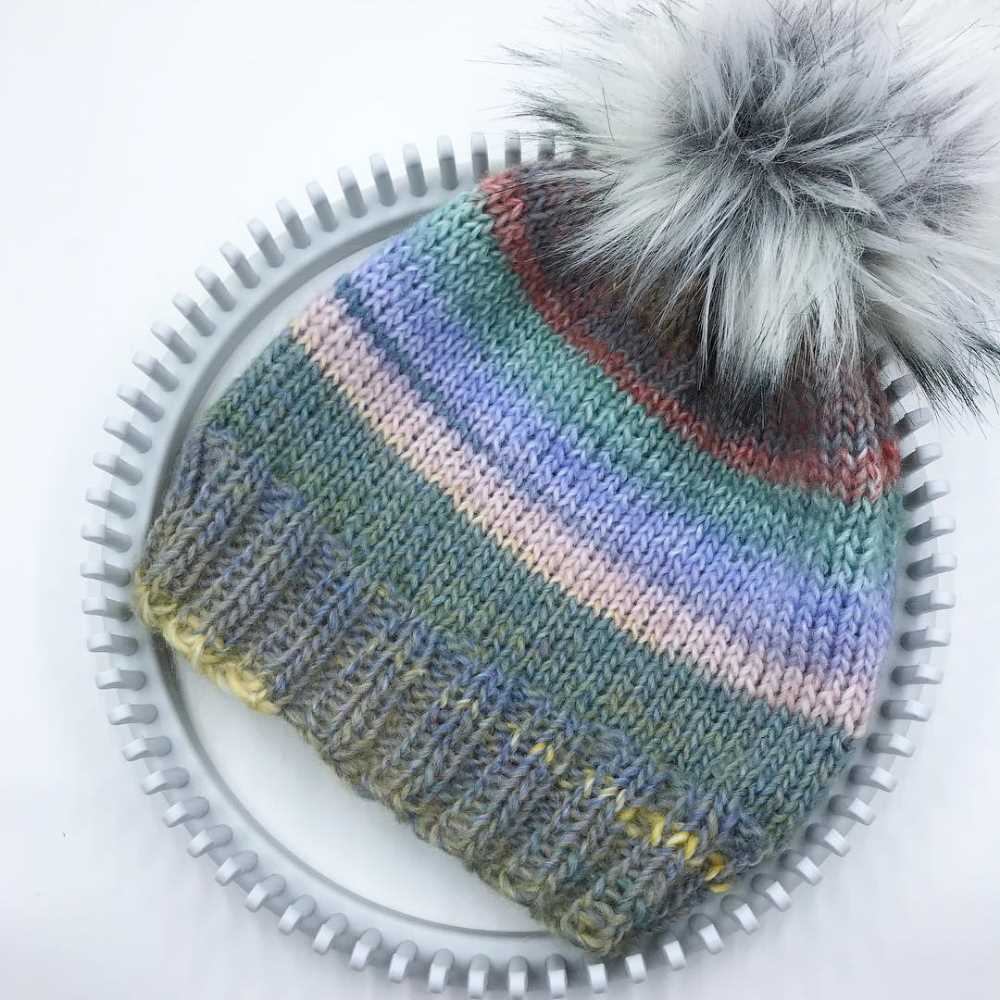
2. Add embellishments:
Embellishments are an excellent way to make your loom knit hat truly one-of-a-kind. You can sew on buttons, beads, or sequins to add a touch of sparkle and dimension. Additionally, you can attach a pom-pom or tassel to the top of your hat for a fun and whimsical detail.
3. Experiment with different stitch patterns:
The stitch pattern you choose can greatly impact the overall look of your loom knit hat. Consider trying out different stitch patterns, such as ribbing or cables, to add texture and visual interest. You can also combine different stitch patterns to create a unique and intricate design.
- 4. Customize the size:
- When loom knitting a hat, you have the freedom to customize the size to fit your needs perfectly. Whether you prefer a slouchy hat or a more fitted style, you can easily adjust the number of rows and stitches to achieve the desired fit.
- 5. Personalize with a monogram or initials:
- If you’re looking to add a personal touch to your loom knit hat, consider adding a monogram or your initials. This can be done through embroidery or by using a patch or applique with your initials. It’s a subtle and stylish way to make your hat truly yours.
Remember, the beauty of loom knitting is that you have the freedom to experiment and create something unique. Don’t be afraid to let your creativity shine and customize your loom knit hat to reflect your personal style.
Enjoying Your Finished Loom Knit Hat
Now that you have completed your loom knit hat, it’s time to enjoy the fruits of your labor! Whether you made the hat for yourself or as a gift, there are many ways to appreciate and use your finished creation.
First and foremost, wear your hat with pride! Show off your new accessory to your friends and family, and enjoy the cozy warmth it provides during colder months. Your loom knit hat is not only a practical item, but also a stylish addition to any outfit.
If you made the hat as a gift, you can now present it to the lucky recipient. Seeing their joy and appreciation will be incredibly rewarding, and they will surely appreciate the time and effort you put into creating a personalized, handmade gift just for them.
Additionally, you can experiment with different ways to wear your loom knit hat. Try folding up the brim for a slouchy look, or add a pom-pom or other embellishments to customize the hat even further. Get creative and make it uniquely yours!
Finally, don’t forget to take care of your loom knit hat to ensure its longevity. Follow the care instructions provided with your chosen yarn, and consider storing it in a cool, dry place when not in use. With proper care, your hat will last for many seasons to come.
So go ahead and enjoy the satisfaction of completing your loom knit hat project. Wear it proudly, gift it to someone special, and cherish the memories you made while creating this cozy accessory.