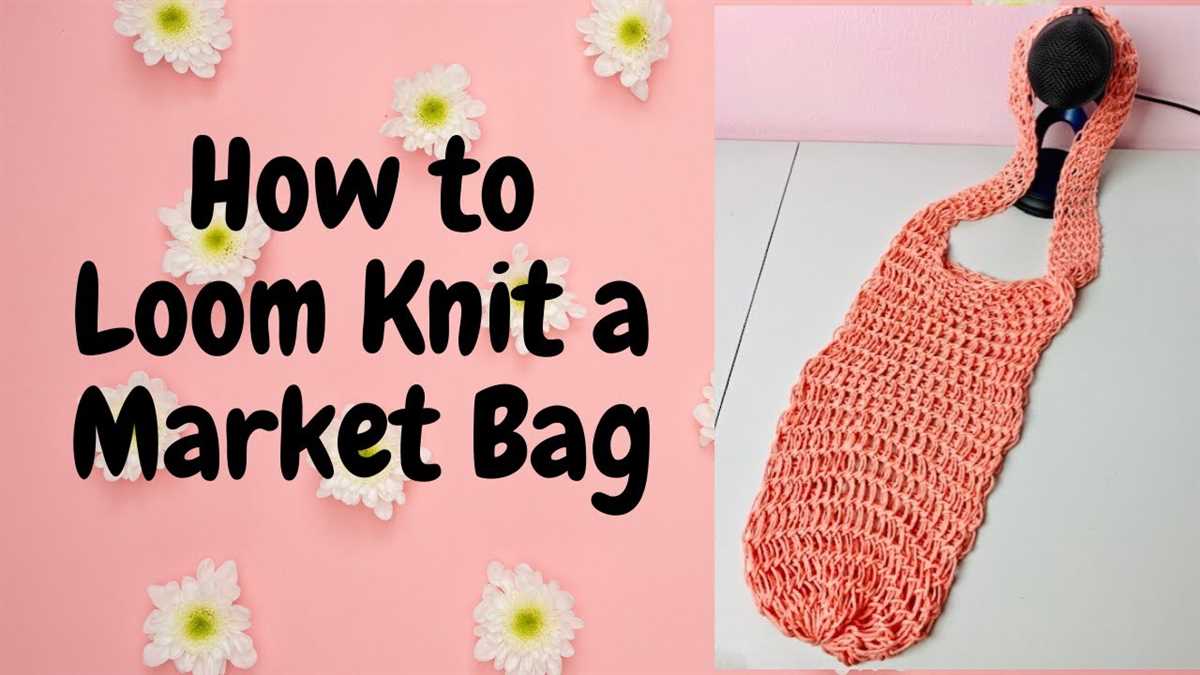
Simple and Stylish Loom Knit Market Bag Pattern

In recent years, there has been a growing interest in sustainable and eco-friendly alternatives to traditional products. One area that has seen a surge in popularity is the use of reusable market bags instead of disposable plastic bags. These market bags are not only better for the environment, but they also add a touch of style to your grocery shopping trips.
If you enjoy knitting and want to contribute to the zero-waste movement, why not try your hand at loom knitting a market bag? Loom knitting is an easy and enjoyable technique that uses a circular loom to create beautiful and functional items. With a loom knit market bag, you can carry your groceries in style while also reducing your carbon footprint.
Creating a loom knit market bag is a fun and rewarding project that allows you to customize your bag to suit your specific needs. Whether you prefer a small bag for quick trips to the store or a large bag for your weekly grocery haul, you can easily adjust the pattern to fit your desired size.
In this article, we will provide you with a step-by-step guide to creating your own loom knit market bag. We will cover everything from choosing the right loom and yarn to casting on, stitching, and finishing techniques. So grab your loom, some yarn, and let’s get started on this sustainable knitting adventure!
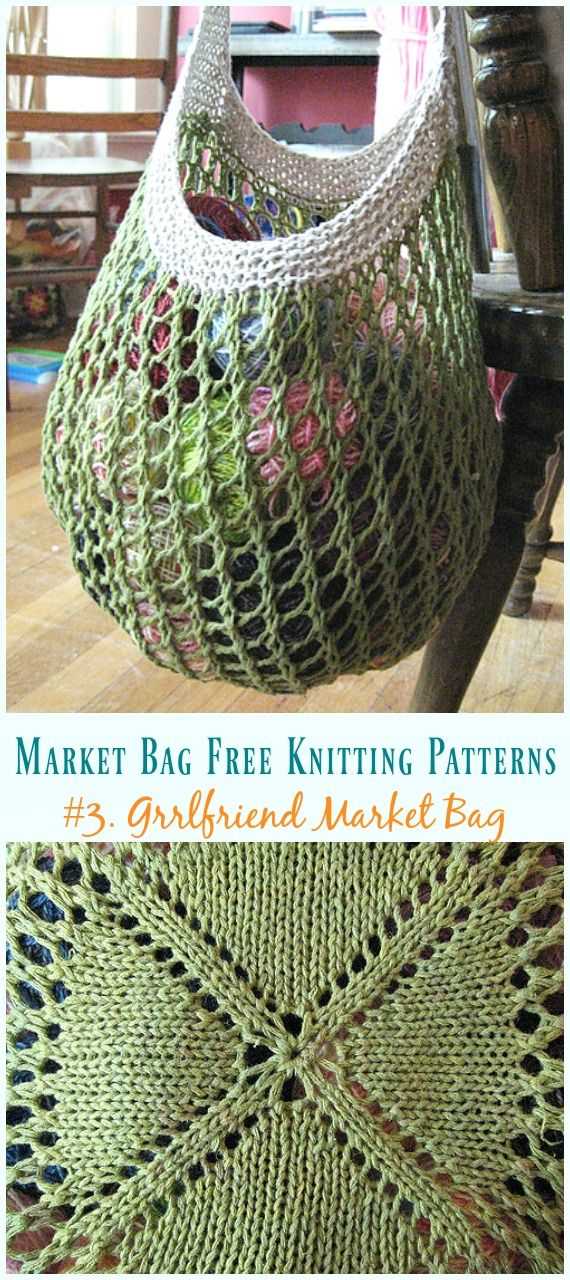
Loom Knit Market Bag Pattern
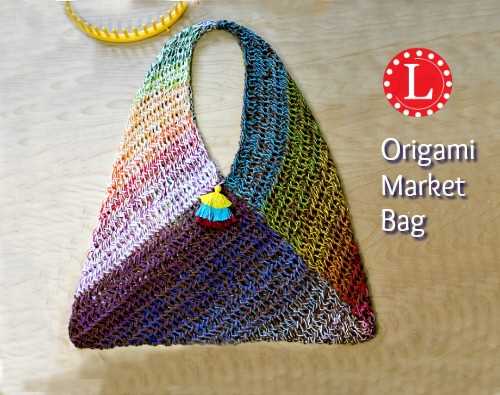
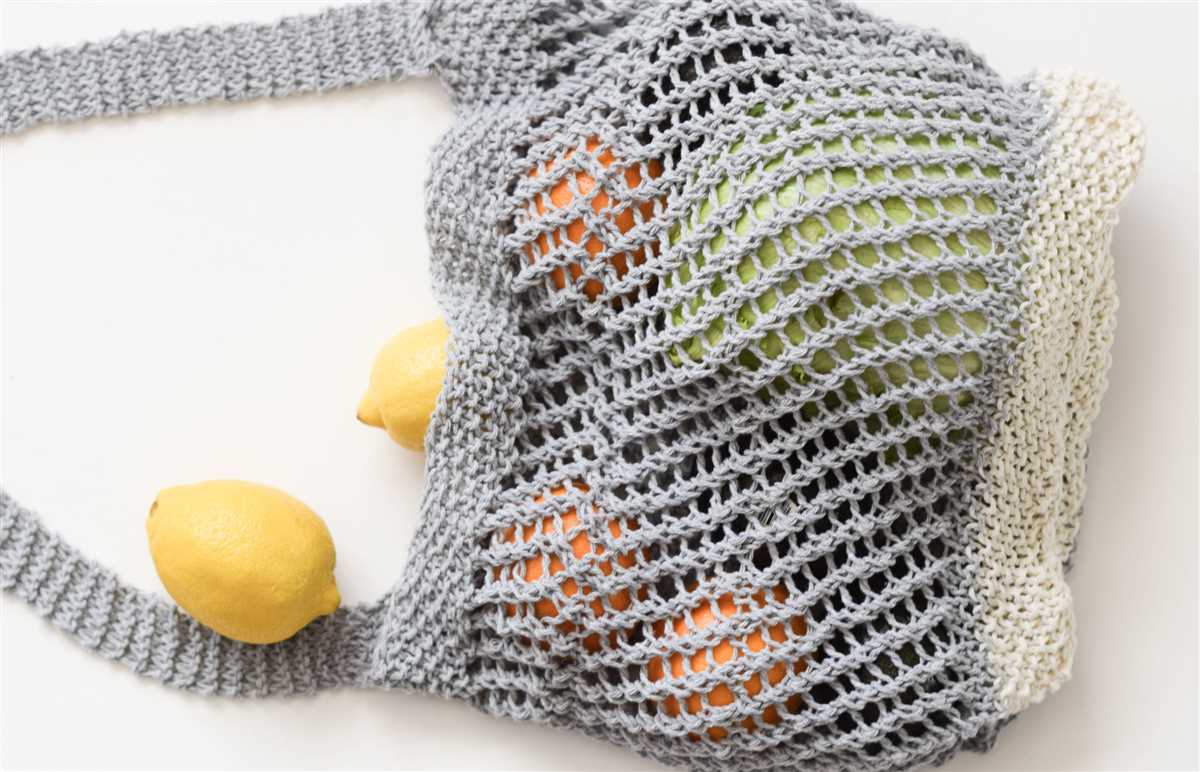
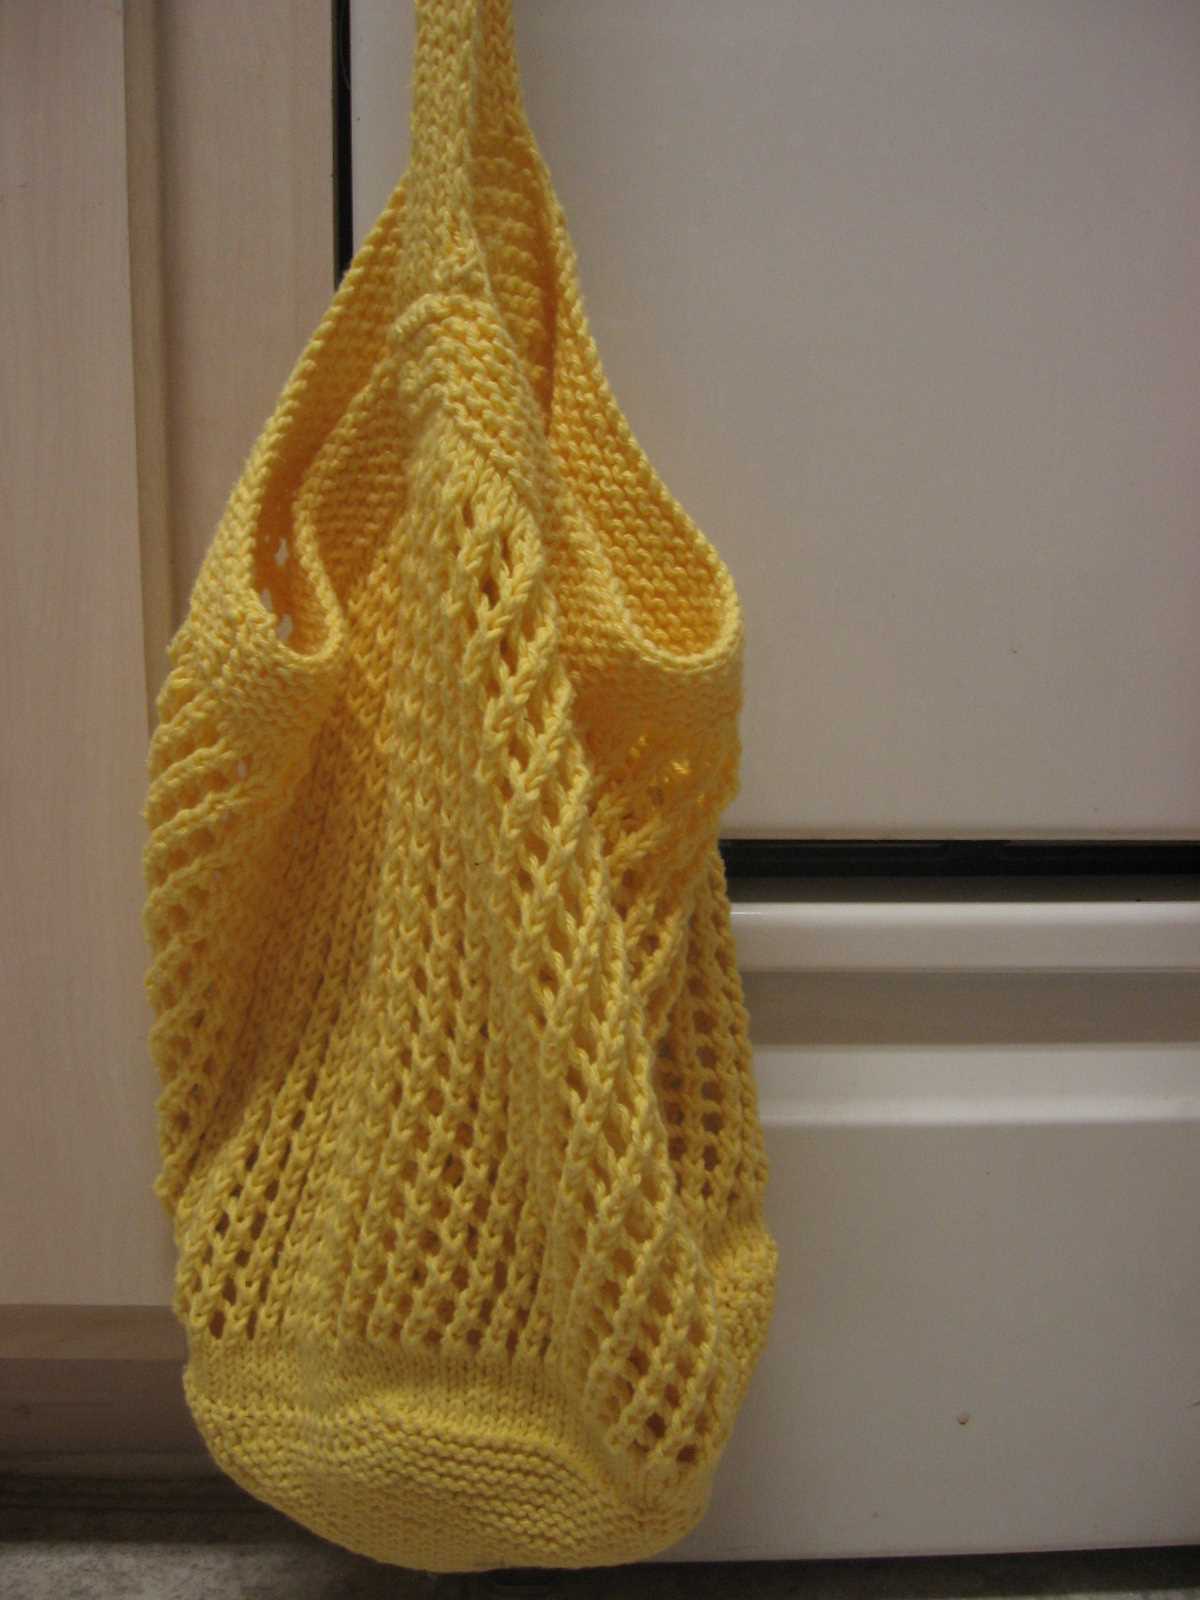
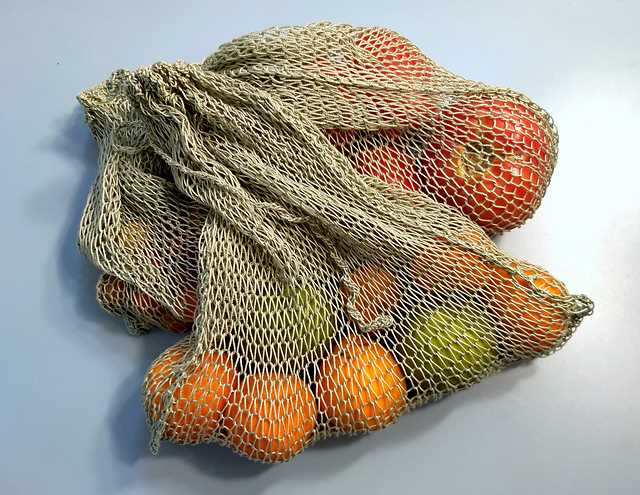
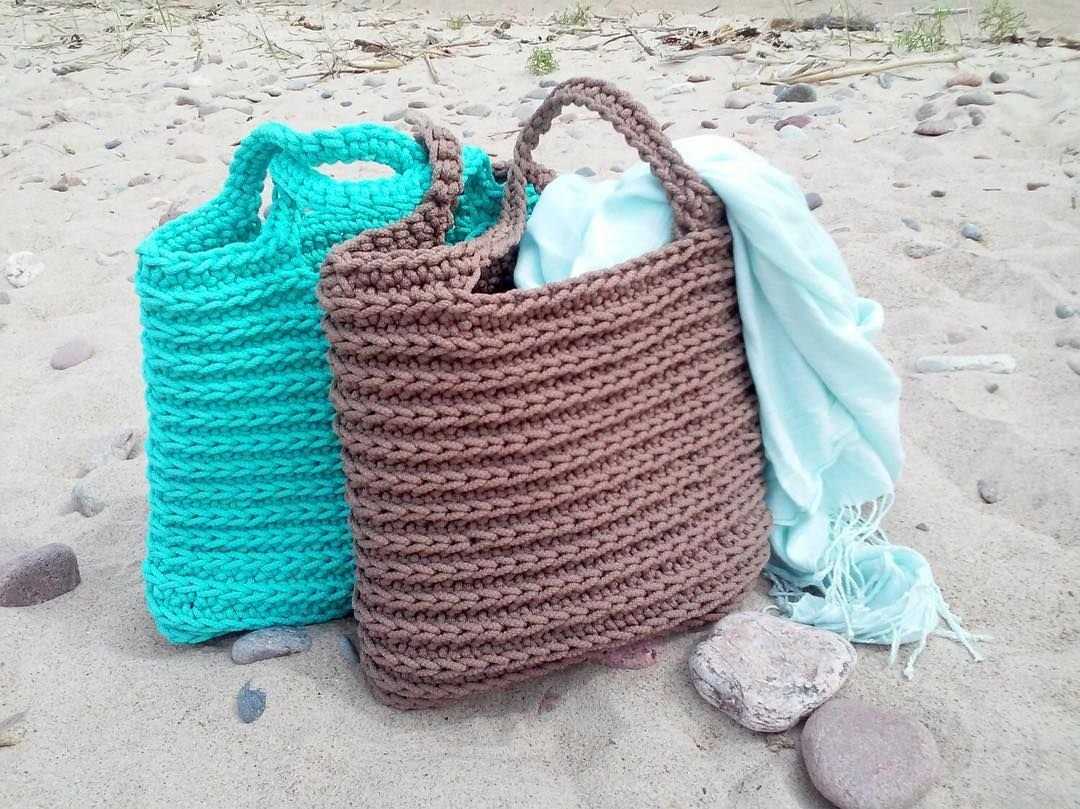
A loom knit market bag is a versatile and stylish accessory that you can use for all your shopping needs. With a loom knit market bag pattern, you can create your own unique bag that is both functional and fashionable. Whether you’re going to the grocery store or heading to the farmers market, this bag will be your go-to companion.
The loom knit market bag pattern usually involves using a circular loom and a few basic stitches such as the e-wrap and purl. The pattern will provide step-by-step instructions on how to create the bag, from casting on to binding off. It will also include information on how to create the handles and any additional embellishments you may want to add.
- Materials: To create a loom knit market bag, you will need a circular loom, a loom hook, yarn of your choice, and a tapestry needle for weaving in the ends.
- Instructions: Start by casting on the desired number of stitches on the loom. Then, follow the pattern’s instructions for knitting the body of the bag using the e-wrap and purl stitches. Once the body is complete, the pattern will guide you through creating the handles and finishing the bag with a bind off.
- Tips: When choosing yarn for your loom knit market bag, opt for a sturdy and durable option such as cotton or acrylic. These materials will ensure that your bag can withstand carrying heavier items and can be easily cleaned. Additionally, consider adding a lining to your bag for added stability and to prevent items from falling through the stitches.
With a loom knit market bag pattern, you can create a practical and stylish accessory that is sure to turn heads. Whether you’re a beginner or an experienced loom knitter, this project is a great way to expand your skills and create something useful. So grab your loom and get started on your own loom knit market bag today!
About Loom Knitting
Loom knitting is a type of knitting done on a circular loom or knitting loom. It is a technique that allows you to create knit stitches without using traditional knitting needles. Instead, you use a loom, which is a round or rectangular device with pegs or pins that hold the yarn in place.
One of the benefits of loom knitting is that it is easier to learn compared to traditional knitting with needles. It does not require as much dexterity or coordination, making it a great option for beginners or those with limited mobility in their hands. Loom knitting can also be faster than traditional knitting, as the loom allows you to work on multiple stitches at the same time.
There are various types of looms available, including round looms, long looms, and knitting boards. Each type of loom produces a different stitch pattern and can be used to create different types of projects. Round looms are commonly used for hats, while long looms are ideal for scarves and blankets. Knitting boards are versatile and can be used for a variety of projects, including bags, socks, and shawls.
To start loom knitting, you will need a loom, yarn, a loom hook or knitting tool, and scissors. There are many resources available online that provide tutorials, patterns, and instructions for various loom knitting projects. Whether you’re a beginner or an experienced knitter, loom knitting offers a fun and creative way to create beautiful knitted items.
Benefits of Loom Knitting:
- Easier to learn and requires less coordination than traditional knitting
- Faster than traditional knitting
- Can be done by beginners or those with limited hand mobility
- Various types of looms available for different project types
- Wide range of tutorials and patterns available online
Benefits of Using a Loom
When it comes to knitting and crocheting, many people prefer to use traditional needles or hooks. However, using a loom can offer several unique benefits that make it a great alternative.
1. Easier for beginners: Loom knitting is often considered easier for beginners to learn compared to traditional knitting or crocheting. The loom’s pegs hold the stitches in place, making it easier to count and keep track of your work. This makes it a great option for those who are new to the craft or struggle with dexterity.
2. Faster results: Loom knitting can be faster than traditional knitting or crocheting techniques. Because the loom’s pegs hold multiple stitches at once, you can work on several stitches simultaneously, which can help you complete projects more quickly.
3. Versatile designs: Looms come in various sizes and configurations, allowing you to create a wide range of designs and projects. From simple scarves and hats to intricate blankets and sweaters, the possibilities are endless. Plus, with the right yarn and technique, you can achieve different textures and patterns.
4. Portable and compact: Unlike traditional knitting or crocheting tools, looms are generally more portable and compact. They take up less space and can be easily carried in a bag or purse. This makes loom knitting a convenient option for on-the-go projects or knitting in small spaces.
5. Less strain on hands and wrists: Loom knitting can be less straining on the hands and wrists compared to traditional knitting or crocheting. The loom’s pegs do most of the work, reducing the repetitive movements and potential strain on your hands and wrists. This can be beneficial for those with arthritis or other hand-related conditions.
Overall, using a loom for knitting and crocheting has many benefits, from its ease of use for beginners to its portability and versatility. Whether you’re a seasoned crafter or just starting out, loom knitting can provide an enjoyable and efficient way to create beautiful projects.
Choosing the Right Loom
When it comes to loom knitting a market bag, choosing the right loom is crucial to ensuring successful results. The loom you select will determine the size, shape, and texture of the finished bag. Here are a few important factors to consider when choosing a loom:
- Size: The size of the loom will determine the size of the bag you can create. Larger looms will allow you to make bigger bags, while smaller looms are better suited for smaller projects. Consider the purpose of your market bag and choose a loom size accordingly.
- Gauge: The gauge of the loom refers to the number of pegs per inch. The gauge will affect the tightness or looseness of your stitches, as well as the drape and durability of the bag. A loom with a smaller gauge will produce tighter stitches, while a loom with a larger gauge will result in looser stitches.
- Shape: Looms come in various shapes, including round, rectangular, and oval. The shape of the loom will determine the shape of your bag. Round looms are ideal for creating cylindrical or round-bottomed bags, while rectangular or oval looms can be used for creating bags with flat bottoms.
- Material: Looms can be made from different materials, such as plastic, wood, or metal. Each material has its own advantages and disadvantages. Plastic looms are lightweight and affordable, but may not be as durable as wooden or metal looms. Wooden looms are durable and have a smooth finish, but they can be more expensive. Metal looms are sturdy and long-lasting, but they can be heavy to work with.
- Extras: Some looms come with additional features, such as adjustable pegs or peg extenders, which allow you to customize the size and shape of your bag. These extras can add versatility to your loom and help you create unique designs.
By considering these factors and selecting the right loom for your market bag project, you can ensure that you achieve the desired size, shape, and texture for your finished bag. Experimenting with different loom sizes, gauges, and shapes can also help you discover new possibilities and create personalized designs.
Materials Needed for the Market Bag
In order to create a beautiful and functional market bag, you will need a few key materials. These materials will ensure that your bag is sturdy, durable, and able to hold all of your groceries or other items with ease.
Yarn: The most important material for a loom knit market bag is the yarn. You will want to choose a yarn that is strong and durable, as well as easy to work with on your loom. Cotton yarn is a popular choice for market bags because it is both sturdy and lightweight. Make sure to choose a yarn color that you love and that matches your personal style.
Needles:
Your loom is essentially your needle when it comes to loom knitting. However, you will also need a loom tool or hook to help you manipulate the yarn on the loom. This tool typically has a hook at one end and a point at the other, and it is used to grab the yarn and pull it through the loops on the loom. Make sure to choose a loom tool that is comfortable for you to hold and use.
Measuring Tape:
A measuring tape is an essential tool for any knitting project, including loom knitting a market bag. It will help you ensure that your bag is the correct size and that you are knitting to the correct gauge. This is especially important if you are following a specific market bag pattern, as the measurements will need to be precise in order for the bag to turn out correctly.
Scissors:
Having a pair of sharp scissors on hand is always useful when it comes to knitting. You will need scissors to cut the yarn when you are finished with your bag, as well as to trim any excess yarn throughout the project. A good pair of scissors will ensure clean and precise cuts, which will make your finished bag look even more professional.
- Yarn
- Needles
- Measuring tape
- Scissors
By gathering these essential materials, you will be well-prepared to begin your loom knitting journey and create a beautiful market bag that you can use for years to come. Happy knitting!
Step-by-Step Instructions
In order to create your own loom knit market bag, follow these step-by-step instructions:
Gather Supplies:
- Knitting loom
- Round knitting loom with pegs
- 6mm crochet hook
- Thick cotton yarn
- Yarn needle
- Scissors
Create the Base:

- Begin by casting on your stitches using the round knitting loom and the cotton yarn. Make sure to leave a long tail.
- Knit in a continuous circle until you have reached the desired size for the base of your market bag. This will create a flat, circular shape.
- Bind off your stitches by using the crochet hook to pull the loops over the pegs. This will create a secure edge for your base.
Knit the Sides:

- Transfer your stitches from the round knitting loom to the straight knitting loom.
- Continue knitting in a rectangular shape, using the long cotton yarn tail from the base to connect the sides to the base. This will create the sides of your market bag.
- Knit until your market bag reaches the desired height. Remember to leave enough yarn for the handles.
- Bind off your stitches using the crochet hook once again to create a secure edge for the top of your market bag.
Create and Attach Handles:
- Measure and cut two pieces of cotton yarn for the handles of your market bag.
- Attach one end of each handle to the inside of the market bag, near the top edge. Use the yarn needle to sew them securely in place.
- Repeat the process for the other end of each handle on the opposite side of the market bag.
You have now successfully created your own loom knit market bag! It is ready to be used for your grocery shopping or any other purposes you have in mind.
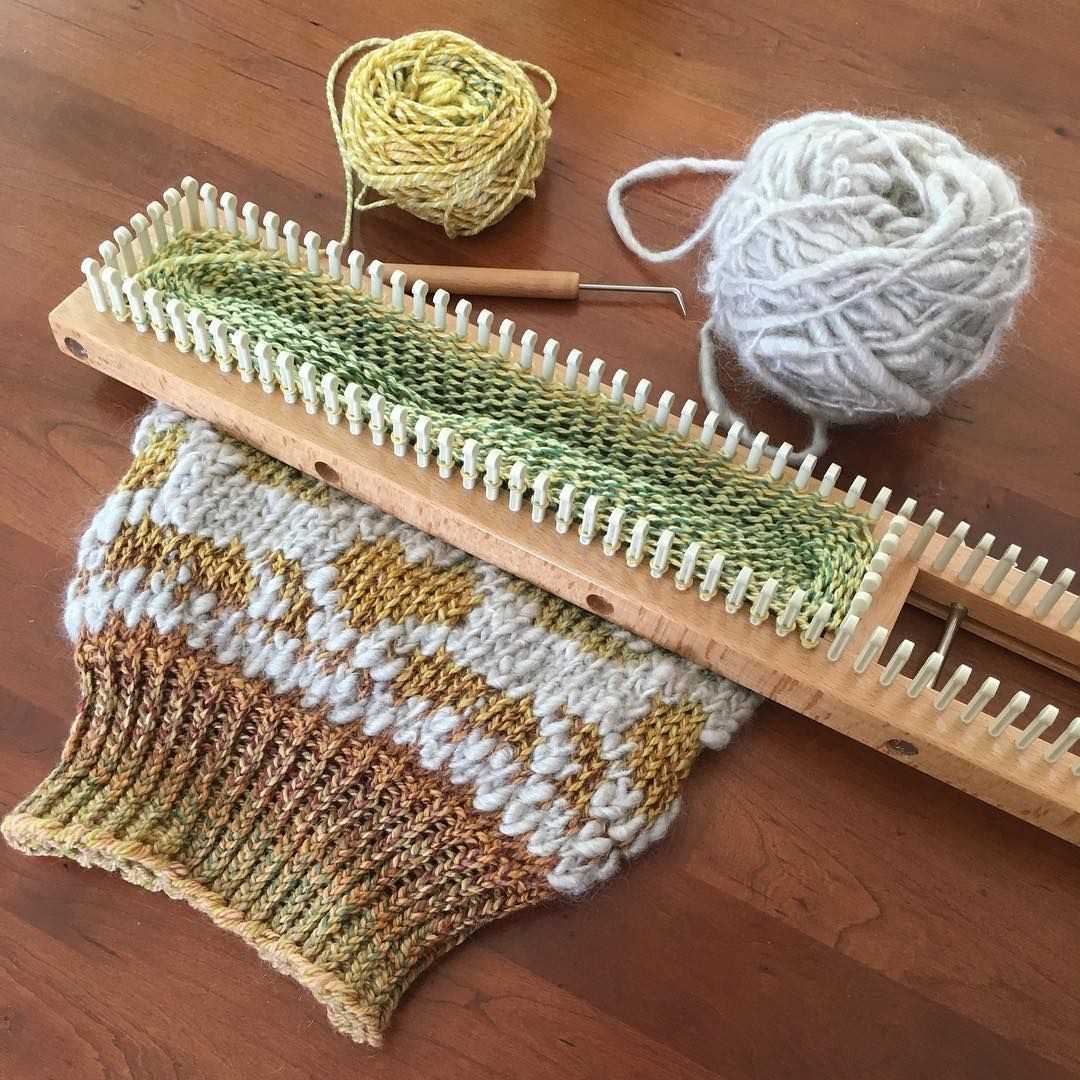
Casting On
The first step in making a loom knit market bag is casting on. This is the process of creating the first row of stitches on the loom. There are several methods you can use to cast on, but for this pattern, we will be using the double e-wrap cast on.
To begin, make a slip knot and place it on the first peg of the loom. Take the working yarn and wrap it around the next peg in a counter-clockwise direction, bringing the yarn back to the starting peg. This creates an “e” shape. Repeat this process for each peg around the loom, wrapping the yarn in an “e” shape around each peg.
After completing one round of the e-wrap cast on, go back to the first peg and repeat the process, this time creating a second “e” shape with the yarn. Continue this pattern of wrapping the yarn in an “e” shape around each peg until you have reached the desired number of stitches for your project.
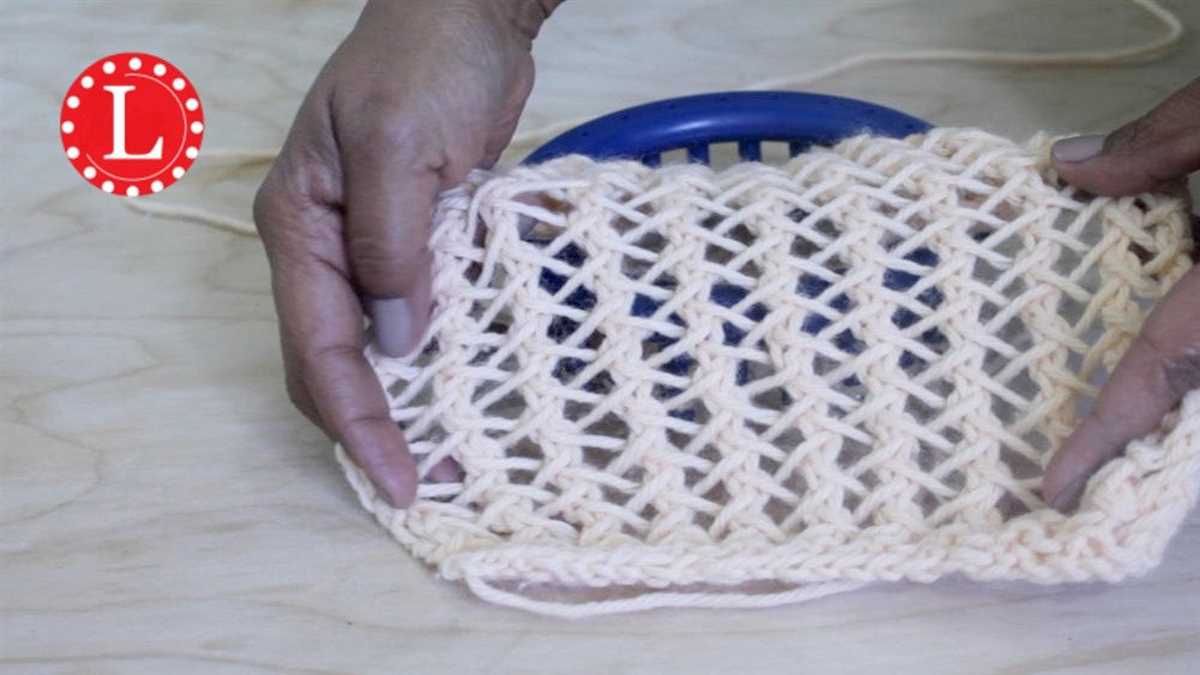
Knitting the Body of the Bag
Now that you have finished the base of the market bag, it’s time to start knitting the body. This is where the bag will start to take shape and you can customize it to your desired length and width.
Using your loom and the chosen yarn, begin by casting on the desired number of stitches. You can make the bag as wide or as narrow as you like, depending on your preference. Remember to keep the stitches loose so that the bag will have enough stretch to hold your items.
Once you have cast on, start knitting in the desired stitch pattern. You can use a simple knit stitch for a basic design or try different stitch patterns for a more intricate look. Knit each row until the body of the bag reaches your desired length.
As you knit, periodically check the width of the bag to ensure it is the size you want. If you need to make adjustments, you can add or remove stitches at the beginning or end of each row. Keep in mind that adding or removing stitches may affect the overall shape and stretchiness of the bag.
Continue knitting until the body of the bag is the desired length and width. Once you are satisfied with the size, you can bind off the stitches to finish the body of the bag. Congratulations, you have completed the knitting portion of your loom knit market bag!
Creating Handles
One of the essential features of a market bag is its handles. They are what allow you to comfortably carry your bag around while shopping. When creating a loom knit market bag, you have different options for making the handles. The choice depends on your preference and the functionality you desire.
1. Knitting handles: One option is to knit the handles directly into the body of the bag. This method creates integrated handles that are sturdy and secure. To do this, you would simply continue knitting the body of the bag until you reach the desired length for the handles. Then, you would bind off the stitches for the handles and continue knitting the remainder of the bag. This technique gives the bag a seamless look and provides a strong and durable handle.
2. Adding separate handles: Another option is to create separate handles that can be attached to the bag later. This method allows for more flexibility in terms of handle length and style. To do this, you would knit or crochet the handles separately using a similar yarn or a contrasting color, depending on your preference. Once the handles are complete, you can then attach them to the sides or top of the bag using a whipstitch or another sewing method. This technique allows for customization and easy replacement of handles if needed.
- Knitting handles: This method involves knitting the handles directly into the body of the bag, creating integrated and seamless handles.
- Adding separate handles: This method involves creating separate handles that can be attached to the bag later, allowing for more flexibility and customization.
Ultimately, the choice between knitting handles or adding separate handles to your loom knit market bag depends on your personal preference and the functionality you desire. Consider the look you want to achieve, the durability you require, and the level of customization you desire. Whichever method you choose, creating handles that are secure, comfortable, and functional is an important step in completing your market bag.
Finishing Touches
Once you have finished knitting your market bag, it’s time to add the finishing touches to give it a polished look. Here are a few steps you can follow to complete your project:
1. Bind off the stitches:
Start by binding off the stitches to secure the edges of your bag. This can be done by knitting two stitches, then passing the first stitch over the second stitch. Repeat this process until you have bound off all the stitches on your loom.
2. Attach handles:
Next, attach the handles to your bag. You can use strong yarn or rope for this step. Measure the desired length for your handles and thread the yarn through the loops on the sides of your bag. Knot the yarn securely to hold the handles in place.
3. Weave in loose ends:
Take the time to weave in any loose ends of yarn to ensure a neat and tidy appearance. Use a yarn needle to thread the loose ends through the stitches on the inside of your bag. Trim any excess yarn for a clean finish.
4. Add decorative elements:
If you want to add a personal touch to your market bag, consider adding decorative elements such as buttons, beads, or embroidery. Sew these elements onto your bag using a needle and thread to create a unique and customized design.
By following these steps, you can give your loom knit market bag the finishing touches it needs to make it both functional and stylish. With a little creativity, you can create a bag that is not only environmentally friendly but also unique to your personal style.
Tips and Tricks
When making your own loom knit market bag, here are some tips and tricks to keep in mind:
- Choose the right yarn: Select a sturdy and durable yarn that is suitable for bags. Cotton blends or nylon yarns work well for this purpose.
- Use a loom with the right gauge: Make sure to use a loom with a gauge that matches the thickness of your yarn. This will ensure that your stitches are even and your bag turns out correctly sized.
- Start with a small project: If you’re new to loom knitting, it’s a good idea to start with a smaller project, such as a pouch or a coaster, before tackling a larger bag. This will help you familiarize yourself with the loom and the stitches.
- Don’t pull your stitches too tight: It’s important to maintain a consistent tension while knitting, but be careful not to pull your stitches too tight. This can make it difficult to work with the yarn and result in a stiff and rigid bag.
- Add reinforcement to the handles: To make your bag more durable, consider adding reinforcement to the handles. You can use fabric or leather strips, or even crochet around the handle area to provide extra strength.
- Block your finished bag: Once you’ve completed your loom knit market bag, block it to give it a more polished and professional look. Blocking helps to even out the stitches and shape the bag.
By following these tips and tricks, you’ll be able to create a beautiful and functional loom knit market bag that you can use for your shopping needs. Happy knitting!