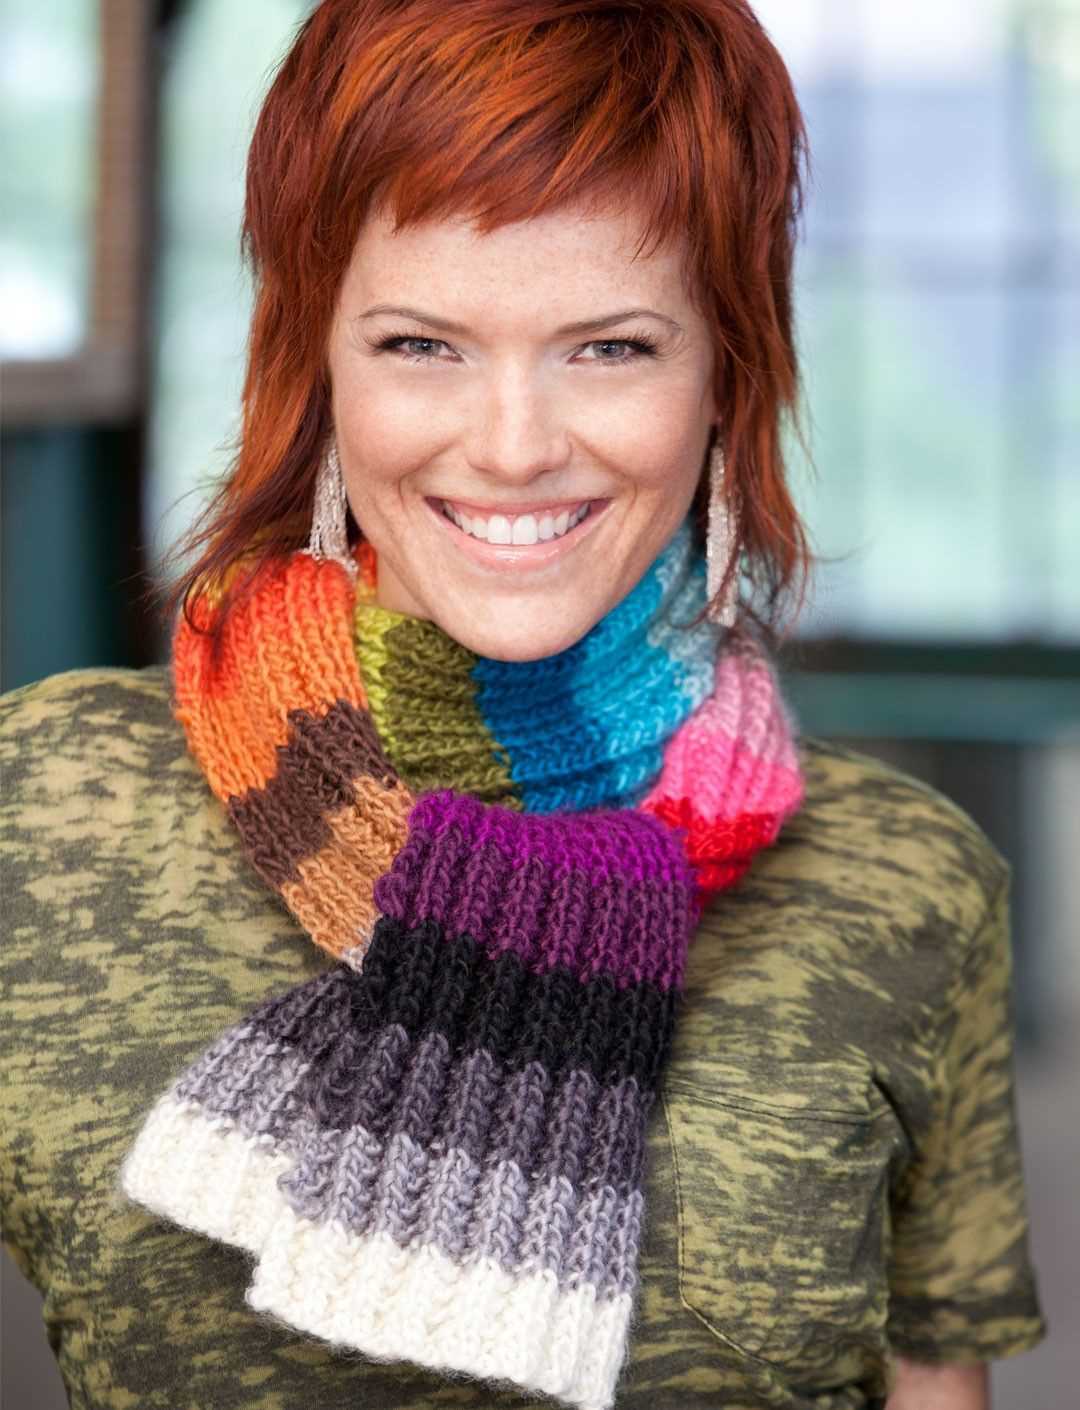
Knit a Colorful Scarf for Free – Rainbow Pattern

If you love bright and colorful accessories, then this free rainbow scarf knitting pattern is perfect for you! The rainbow design is not only cheerful, but it also adds a pop of color to any outfit. Whether you’re a beginner knitter or an experienced one looking for a quick and fun project, this pattern is suitable for all skill levels.
The pattern uses a combination of basic stitches to create a beautiful color gradient resembling a rainbow. This includes knit and purl stitches, as well as simple color changes. The scarf is worked in rows, so you can easily adjust the length according to your preference.
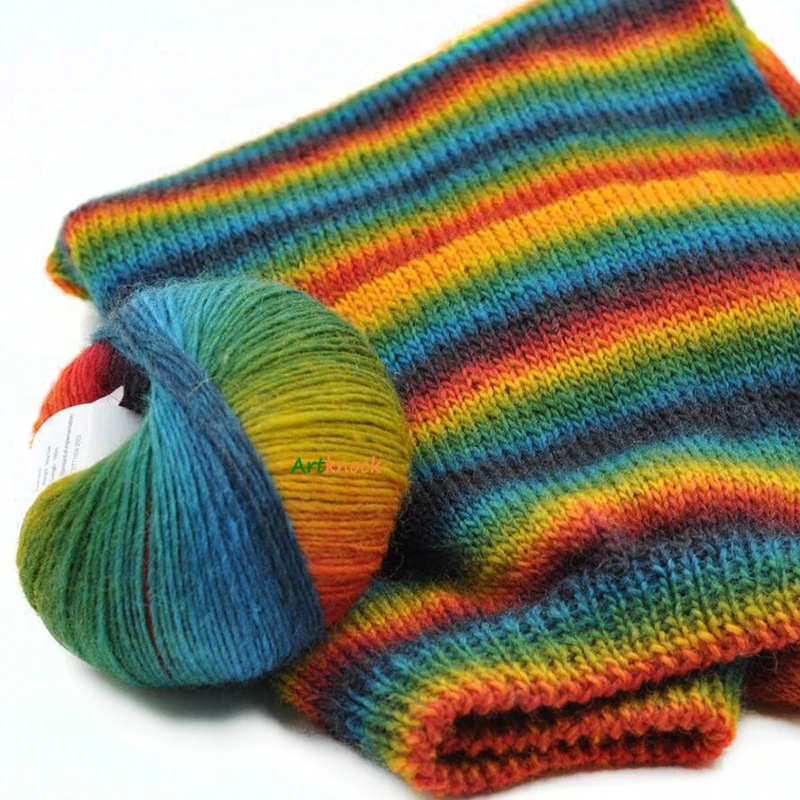
To make the rainbow scarf, you will need a set of knitting needles and skeins of yarn in various colors. The pattern suggests using worsted weight yarn for a cozy and warm scarf. Feel free to choose any color combination you like to personalize the scarf and make it truly unique.
To get started on this vibrant project, simply follow the step-by-step instructions provided in the pattern. With a little time and effort, you’ll have a stylish and eye-catching scarf that will surely turn heads. So grab your needles and start knitting your own rainbow scarf today!
Materials needed
In order to knit the rainbow scarf, you will need a few materials. Here is a list of everything you will need to gather before getting started:
- Yarn: You will need different colors of yarn to create the rainbow pattern. It is recommended to choose soft and cozy yarn that will keep you warm during the colder months.
- Knitting needles: Make sure to have the appropriate size of knitting needles for your chosen yarn. This will help you achieve the desired tension and texture.
- Tapestry needle: This needle will be used to weave in the loose ends of yarn once you have finished knitting the scarf.
- Scissors: You will need a pair of sharp scissors to cut the yarn at various stages of the knitting process.
- Measuring tape: This tool will help you keep track of the length of your scarf as you progress.
Once you have gathered all of the necessary materials, you can begin knitting your rainbow scarf. Make sure to have a comfortable and well-lit space to work on your project. Happy knitting!
Choosing the right yarn

When it comes to knitting a rainbow scarf, choosing the right yarn is crucial. The yarn you choose will determine the overall look and feel of your scarf, so it’s important to consider a few factors before making your selection.
Fiber content: One of the first things to consider is the fiber content of the yarn. Different fibers have different qualities and will result in different textures and drapes. For a rainbow scarf, you might want to consider using a soft and smooth yarn that will showcase the colors beautifully.
Weight: The weight of the yarn will also affect the final outcome of your scarf. A lightweight yarn will create a delicate and airy scarf, perfect for more mild climates. On the other hand, a heavier yarn will result in a warmer and more substantial scarf, suitable for colder weather. Consider the climate and the intended use of your scarf when choosing the weight of the yarn.
When selecting yarn for a rainbow scarf, it’s also important to consider the color palette you want to achieve. You can either use a yarn that includes multiple colors in one skein, or you can select different skeins of yarn in the colors of the rainbow. Whatever option you choose, make sure the colors are vibrant and complementary to create a visually stunning scarf.
Finally, don’t forget to take into account your budget when choosing yarn. There are many affordable options available, so you don’t have to break the bank to create a beautiful rainbow scarf. Just make sure to check the yardage and calculate how much yarn you’ll need to complete your project.
Getting started
Are you ready to start knitting your own rainbow scarf? This free knitting pattern will guide you through the process step by step. Before you begin, make sure you have all the necessary materials and tools:
- Yarn: You will need 7 different colors of yarn to create the rainbow effect. Choose colors that you love and that work well together. Each color should be approximately 100 yards.
- Knitting needles: Use size 8 (5mm) knitting needles for this project. Make sure they are the right length for the scarf width you want to achieve.
- Scissors: You will need a pair of sharp scissors to cut the yarn at various points during the knitting process.
- Tapestry needle: This needle will be used to weave in loose ends and finish off the scarf.
Once you have gathered all the materials, you are ready to cast on and start knitting. Follow the pattern instructions carefully, counting stitches and changing colors as directed. The pattern is designed for beginner to intermediate knitters, so even if you are new to knitting, don’t be afraid to give it a try!
Casting on
Before you can start knitting your rainbow scarf, you need to cast on your stitches. Casting on is the process of creating the first row of stitches on your knitting needle. It’s the foundation of your project and sets the stage for the rest of your work.
There are different methods you can use to cast on, and the one you choose will depend on the type of scarf you want to create and your personal preference. One popular method is the long-tail cast on, which creates a neat and elastic edge. To do the long-tail cast on, you’ll need to estimate the amount of yarn you’ll need for your stitches and leave a long tail, which will be used to create the stitches. Then, you’ll create a slipknot and place it on your needle, followed by creating more stitches using the tail of the yarn.
Another popular casting on method is the knitted cast on, which creates a firmer edge. To do the knitted cast on, you’ll start with a slipknot on your needle and then knit into this slipknot to create the first stitch. You’ll repeat this process to create more stitches, knitting into each newly created stitch until you have the desired number of stitches.
Knitting the body of the scarf
Once you have finished casting on and completing the border of your rainbow scarf, it’s time to start knitting the body of the scarf. The body of the scarf will consist of rows of knit and purl stitches, creating a textured pattern that complements the colorful border.
To begin, you will continue with the same color yarn that you used for the border. Start knitting in the pattern specified in the rainbow scarf knitting pattern. The pattern may include a combination of knit and purl stitches, or it may be a simple garter stitch pattern. Regardless of the pattern, make sure to follow the instructions carefully to achieve the desired design.
As you work along the rows, make sure to keep an eye on your tension and ensure that your stitches are consistent in size. This will help create an even and professional-looking finished result. You may also want to periodically measure the width of your scarf to ensure that you are on track with the desired dimensions.
As you progress through the body of the scarf, you will continue switching between colors according to the rainbow pattern. Each color change adds a vibrant and eye-catching element to the scarf. Make sure to secure the yarn ends neatly and weave them in as you go to avoid any loose ends or knots that may detract from the overall appearance of the scarf.
To keep track of your progress and make any adjustments, it can be helpful to use stitch markers or a row counter. This will help ensure that you don’t accidentally skip or repeat rows, which could affect the final pattern. Take your time and enjoy the process of knitting the body of the scarf, watching as the rainbow colors come to life with each stitch.
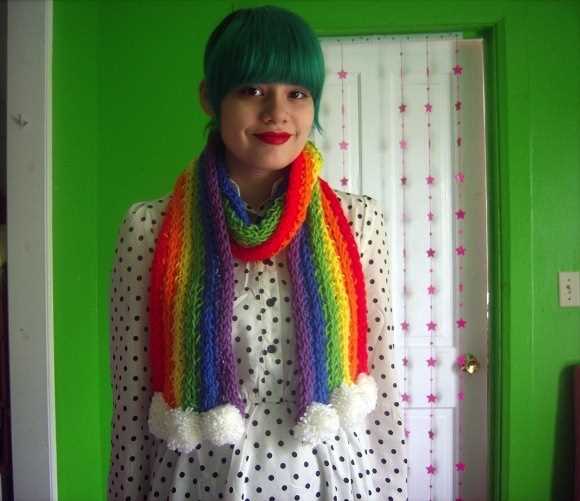
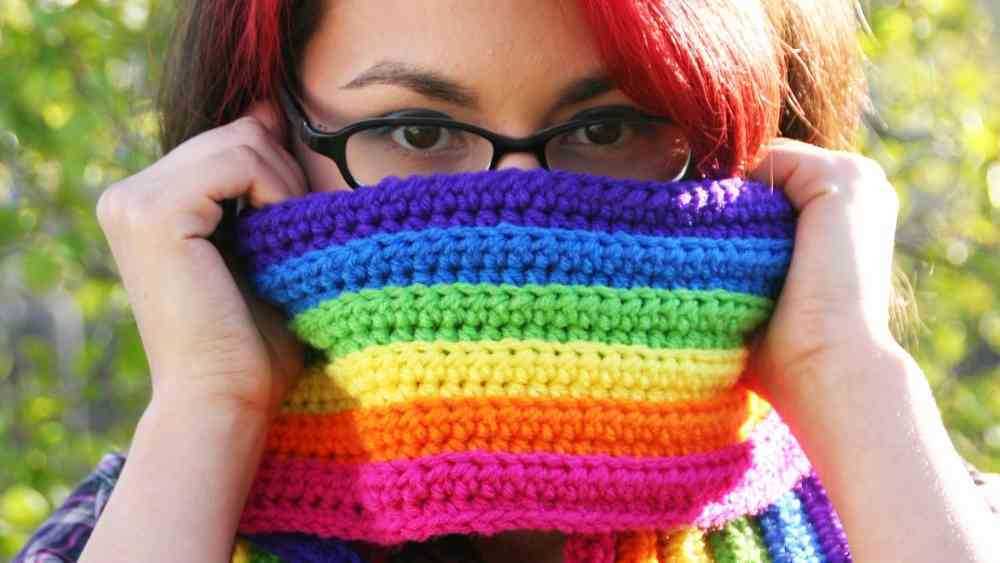
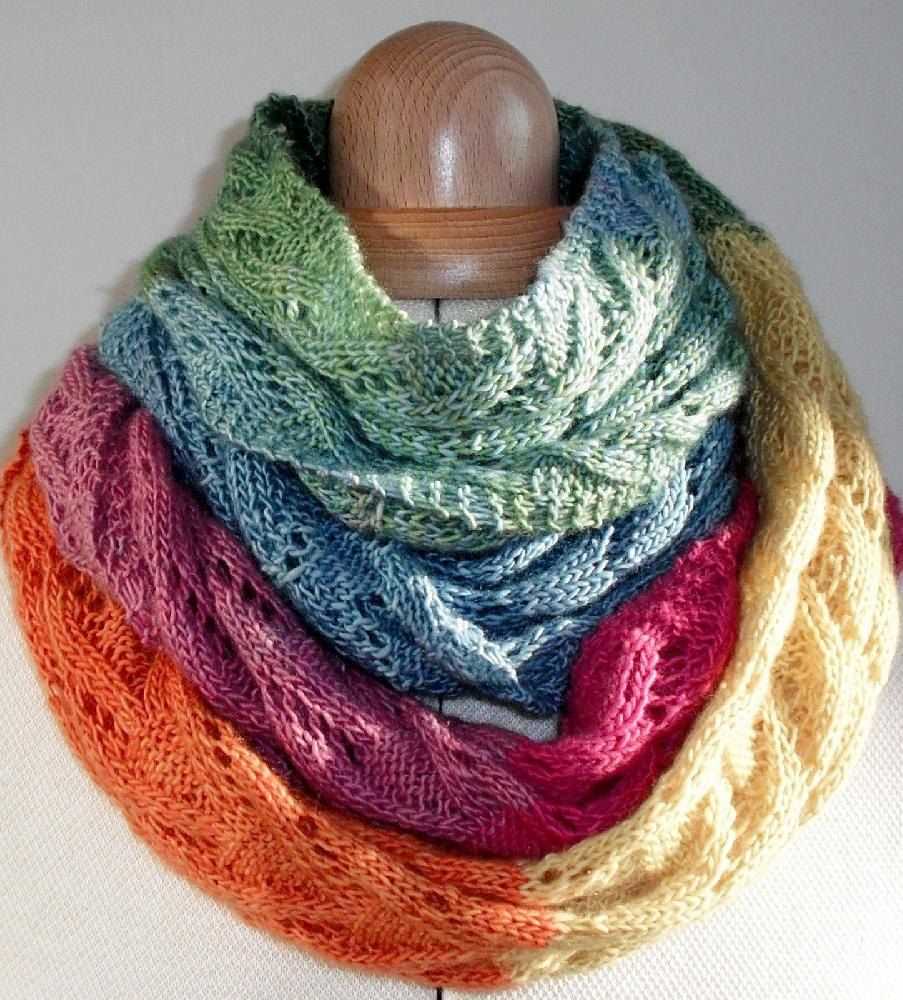
Adding the rainbow colors
Adding the rainbow colors to your scarf can be a fun and creative way to make it vibrant and eye-catching. There are several ways to incorporate the colors of the rainbow into your knitting pattern, whether you prefer to knit with multiple yarn colors or use a gradient yarn that transitions through all the colors.
1. Knitting with multiple colors: If you want to add the rainbow colors using different yarns, you can create stripes or color blocks in each of the rainbow shades. Start with red, then knit a few rows or rounds with orange, followed by yellow, green, blue, indigo, and violet. Repeat this pattern until you reach the desired length of your scarf. This method allows you to have more control over the placement and width of each color.
2. Gradient yarn: Another option is to use a gradient yarn that automatically transitions through the rainbow colors. This type of yarn creates a beautiful ombre effect and makes it easy to add the entire spectrum of colors to your scarf. Simply knit with the gradient yarn according to your pattern, and watch as the colors shift from one shade to the next.
Regardless of which method you choose, it’s important to consider the color order of the rainbow: red, orange, yellow, green, blue, indigo, and violet. This order ensures that the colors flow seamlessly and create a harmonious rainbow effect on your scarf.
If you want to add more visual interest to your rainbow scarf, you can also incorporate different stitch patterns or textures. For example, you could use a rib stitch for one color and a seed stitch for another. This adds depth and dimension to your scarf, making it even more unique.
Remember to have fun and experiment with different color combinations and stitch patterns. Adding the rainbow colors to your scarf will not only make it beautiful but also bring a sense of joy and positivity to your knitting project.
Changing colors
One of the most exciting aspects of knitting a rainbow scarf is the ability to change colors. This allows you to create an eye-catching and vibrant accessory that will surely stand out. By selecting a range of different colored yarns, you can create a stunning gradient effect that will be sure to impress.
When it comes to changing colors in your knitting project, there are several techniques you can use. One common method is the “intarsia” technique, which involves using separate balls of yarn for each color section. This allows you to easily switch between colors and create clean color transitions.
Intarsia technique: To change colors using the intarsia technique, start by knitting to the point where you want to switch colors. Drop the current yarn and pick up the new color, leaving a long tail of the previous color to weave in later. Continue knitting with the new color, making sure to twist the two yarns together at the color change to avoid any gaps.
Striping technique: Another option is the striping technique, which involves knitting with multiple colors in a striped pattern. This technique is great for creating a vibrant and playful look. To change colors using the striping technique, simply drop the current color and pick up the new color at the beginning of a row. When you reach the end of the row, drop the current color and pick up the next color.
Regardless of the technique you choose, it’s important to keep an eye on your tension when changing colors. Make sure to keep your tension consistent throughout the project to ensure an even and professional-looking finish. With a little practice and experimentation, you’ll soon become a pro at changing colors and creating beautiful rainbow scarves!
Finishing the scarf
After completing the knitting pattern for the rainbow scarf, it is important to properly finish off the edges and give the scarf a polished look. There are several techniques that can be used to finish a knitted scarf, including blocking, weaving in ends, and adding fringe.
Blocking: One of the first steps in finishing the scarf is to block it. Blocking helps to even out the stitches and gives the finished piece a more professional appearance. To block the scarf, lay it flat on a clean surface and gently stretch it to the desired shape and size. Use blocking pins or weights to hold it in place, and then leave it to dry completely. This will help to set the stitches and make the scarf more wearable.
Weaving in ends: Once the scarf is blocked, it is important to weave in any loose ends. Take a darning needle and thread it with the tail of the yarn. Starting at one end of the scarf, weave the needle in and out of the stitches along the edge, ensuring that the yarn is secure and hidden. Repeat this process for any remaining loose ends, trimming any excess yarn once they are woven in.
Adding fringe: Finally, for an extra touch of style, consider adding fringe to the ends of the scarf. To do this, cut lengths of yarn double the desired length of the fringe. Fold each length in half, creating a loop at one end. Using a crochet hook or knitting needle, pull the loop through a stitch at the end of the scarf. Then, thread the yarn ends through the loop and pull tight to secure the fringe. Repeat this process for each fringe strand, spacing them evenly along the edge of the scarf.
By following these steps to finish the rainbow scarf, you will have a beautiful and professional-looking knitted accessory to wear or gift to someone special. The time and effort put into completing the finishing touches will be well worth it when you see the final result.
Blocking and Shaping
Once you have finished knitting your rainbow scarf, it is important to block and shape it to enhance the overall look and drape of the finished piece. Blocking helps to even out stitches, relax the fibers, and give the scarf a more professional appearance.
To block your scarf, follow these simple steps:
- Fill a clean sink or basin with lukewarm water and add a small amount of wool wash or gentle soap.
- Submerge the scarf in the water, gently pressing it down to ensure it is completely saturated.
- Let the scarf soak for about 10-15 minutes, allowing the fibers to absorb the water.
- Remove the scarf from the water and gently squeeze out the excess water, being careful not to wring or twist the fabric.
- Lay a clean towel on a flat surface and place the scarf on top. Roll up the towel with the scarf inside to squeeze out any remaining water.
- Unroll the towel and carefully transfer the scarf to a dry towel or blocking mat.
- Using t-pins or blocking wires, gently stretch the scarf to its desired shape and dimensions. Pay attention to the edges and corners to ensure they lie flat and straight.
- Leave the scarf to dry completely, usually overnight or for 24-48 hours.
Once the scarf is dry, remove the pins or wires and gently fluff the fibers with your fingers. You can also steam the scarf lightly to further relax the stitches and improve the overall finish. Now your rainbow scarf is ready to be worn or gifted!
Blocking and shaping is an essential step in the knitting process, especially for projects like scarves that require a polished and professional finish. Although it may seem like an extra step, the results are well worth the effort. By following these simple steps, you can ensure that your rainbow scarf looks its best and is a beautiful addition to your wardrobe or a thoughtful gift for someone special.