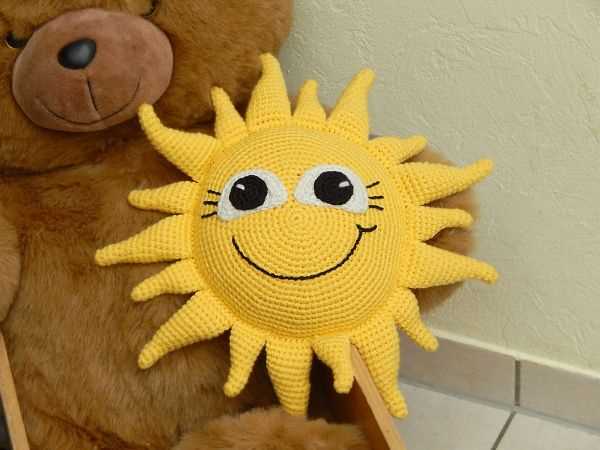
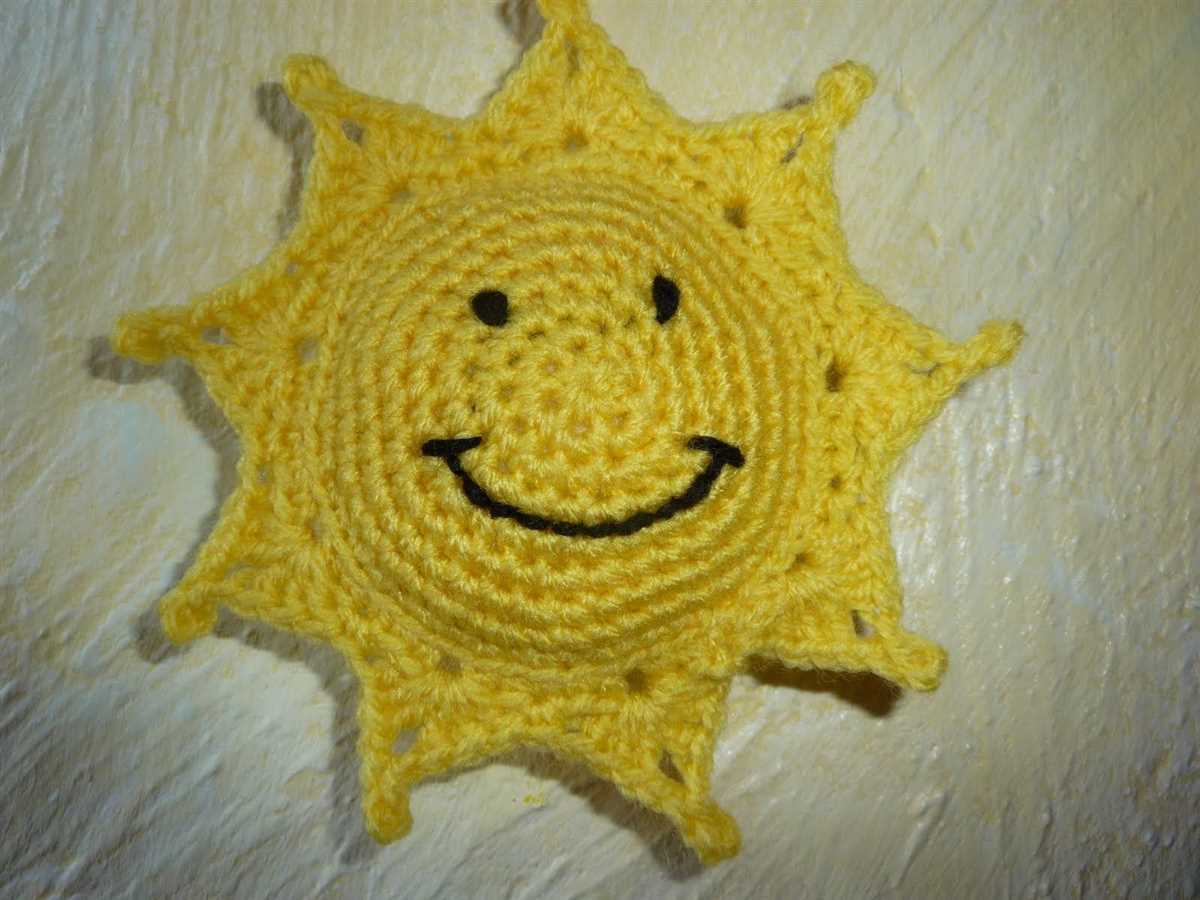
Sunny Stitches: A Delightful Sun Knitting Pattern

Knitting patterns are a popular way to create unique and beautiful garments, accessories, and home decor items. When it comes to finding the perfect pattern, there are countless options to choose from. One pattern that has gained popularity in recent years is the sun knitting pattern. This pattern features a vibrant and detailed sun design, making it a perfect choice for adding a touch of warmth and sunshine to any project.
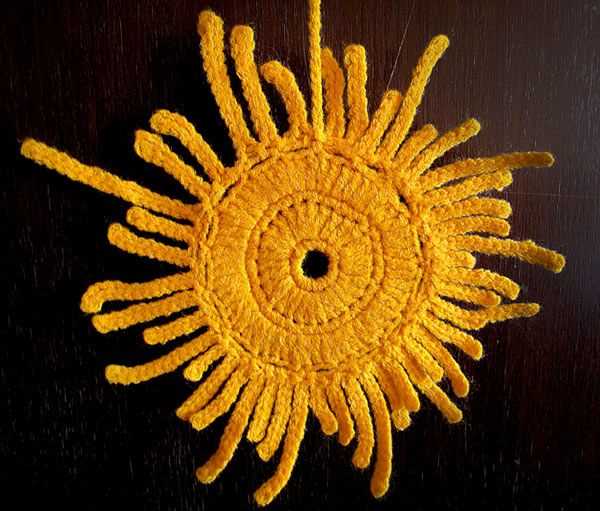
The sun knitting pattern can be used to create a variety of items, including blankets, scarves, hats, and more. The design typically features a large sun in the center, surrounded by rays of varying lengths and widths. This pattern is perfect for knitters of all skill levels, as it can be easily customized to fit any project. Whether you’re a beginner looking for a simple and fun project, or an experienced knitter looking to challenge yourself with intricate details, the sun knitting pattern is a great choice.
One of the best things about the sun knitting pattern is its versatility. The vibrant sun design can be created using a variety of colors, allowing you to customize the pattern to fit your personal style and preferences. Whether you prefer bright and bold shades, or soft and subtle hues, the sun knitting pattern can be adapted to create a look that is uniquely yours.
Sun Knitting Pattern: Create a Bright and Beautiful Accessory
Looking for a knitting project that will brighten up your wardrobe and add a touch of sunshine to your day? Look no further than the sun knitting pattern! This pattern allows you to create a beautiful accessory that captures the warmth and vibrancy of the sun.
The sun knitting pattern is versatile, allowing you to make a variety of items such as scarves, shawls, or even blankets. With its combination of intricate lacework and bold color choices, the finished product is sure to make a statement.
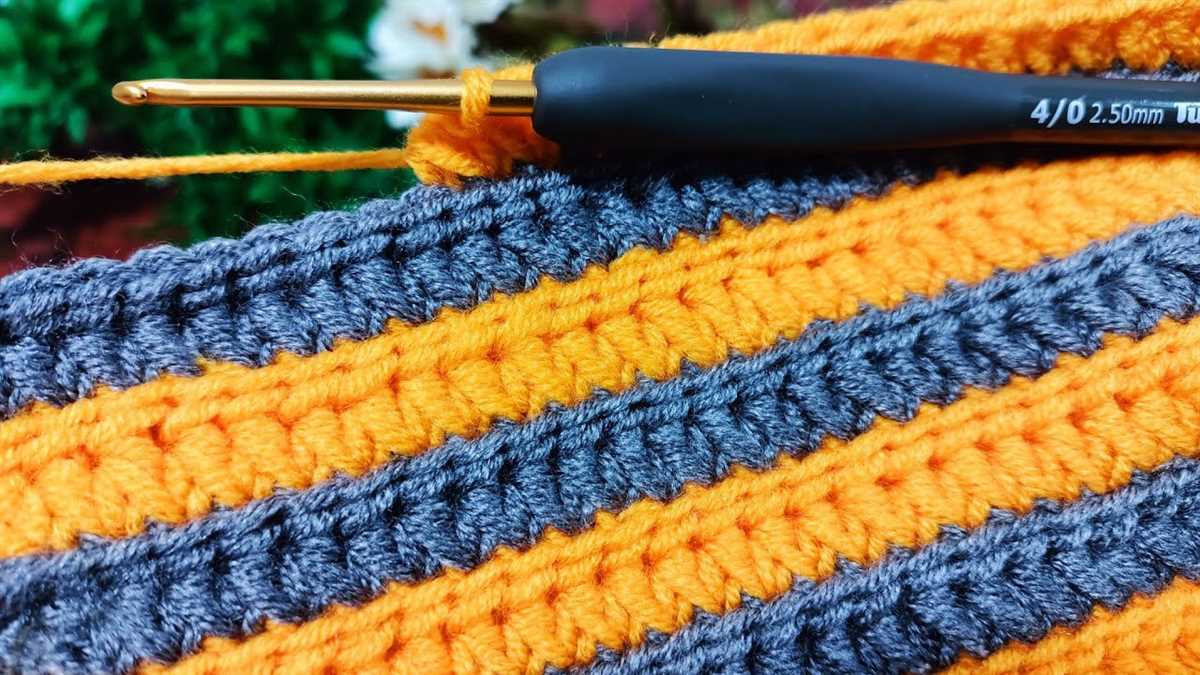
Materials you will need:
- Yarn in shades of yellow, orange, and gold
- Knitting needles in the appropriate size for your chosen yarn
- Tapestry needle for weaving in ends
- Stitch markers to help keep track of your progress
Instructions:
- Start by casting on the desired number of stitches, depending on the width of your accessory. Make sure to choose a multiple of the lace pattern repeat.
- Begin the lace pattern, following the chart or written instructions provided. This may involve yarn overs, decreases, and other common lace knitting techniques.
- Continue knitting rows, repeating the lace pattern until your accessory reaches the desired length. Feel free to experiment with different yarn colors to create a unique gradient effect.
- Once you have reached the desired length, bind off your stitches and weave in any loose ends.
- Your sun-inspired accessory is now ready to be worn or gifted to someone special. Its bright and beautiful design will add a pop of color to any outfit, making it the perfect addition to your wardrobe.
The sun knitting pattern is a great way to showcase your knitting skills while creating a stunning accessory that will brighten up even the grayest of days. So grab your knitting needles and yarn, and get ready to bring a little sunshine into your life!
Choose the Perfect Yarn for Your Sun Knitting Project
When embarking on a sun knitting project, one of the most important decisions you’ll make is choosing the right yarn. The yarn you select will determine the overall look and feel of your finished piece, as well as its durability and ease of care. With so many options available, it can be overwhelming to make a choice. However, by considering a few key factors, you can find the perfect yarn for your sun knitting project.
1. Fiber Content: The first thing to consider when choosing yarn for your sun knitting project is the fiber content. Natural fibers such as cotton and linen are ideal for warm weather projects as they are breathable and wick away moisture. These fibers are also lightweight and comfortable to wear, making them perfect for sun-kissed days. Synthetic fibers like acrylic and nylon can also be suitable options, as they often offer a similar look and feel to natural fibers while being more affordable and easy to care for.
2. Weight:
- When selecting yarn for sun knitting, the weight of the yarn is an important factor to consider. Lighter weight yarns like fingering or sport weight are ideal for warm weather projects as they are lightweight and won’t weigh you down. They are also perfect for creating delicate lace patterns that allow the sun to shine through.
- However, if you’re looking to create a more substantial sun knitting project like a beach cover-up or a sun hat, you may want to opt for a heavier weight yarn such as worsted or bulky. These yarns will provide more coverage and durability, making them suitable for projects that require a bit more structure.
3. Color: The color of the yarn can also play a role in your sun knitting project. Lighter colors like pastels or neutrals are popular choices for summer projects as they reflect the sun’s rays and help keep you cool. They can also showcase intricate stitch patterns or lacework more effectively. On the other hand, if you’re looking to make a statement with your sun knitting project, bold and vibrant colors can add a fun and playful element to your finished piece.
By considering these factors and taking the time to choose the perfect yarn for your sun knitting project, you’ll be well on your way to creating a beautiful and functional piece that you can enjoy in the summer sun.
Essential Knitting Tools You’ll Need

Knitting is an enjoyable craft that can produce beautiful and cozy creations. To get started with knitting, there are a few essential tools you’ll need to have on hand. These tools will help you create your projects with ease and precision.
Knitting Needles

The most important tool in knitting is, of course, the knitting needles. You’ll need a pair of knitting needles to work with, and they come in various sizes and materials. Choose the needle size based on the thickness of your yarn, and consider using circular needles for larger projects or for working in the round.
Yarn

Yarn is another essential tool in knitting. There are countless types of yarn available, each with its own texture, weight, and color. Choose a yarn that suits your project’s needs and your personal preferences. Whether you prefer natural fibers or synthetic blends, there’s a yarn out there for every knitting project.
Knitting Gauge
A knitting gauge is a handy tool that helps you measure your stitches and rows per inch. It ensures that your knitting project will have the correct dimensions and fit correctly. A knitting gauge is especially important when following patterns to achieve the desired results.
Scissors

Scissors are an essential tool in knitting for cutting yarn and for trimming any loose ends. Opt for a pair of sharp and small scissors that are easy to handle. Having a dedicated pair of scissors for knitting will prevent them from being used for other purposes and becoming dull.
Tapestry Needles

Tapestry needles are used for weaving in yarn ends and sewing pieces together. These needles have a large eye and a blunt tip, making them easy to thread and safe to use. Having a few tapestry needles of different sizes will come in handy for various projects.
These are just a few essential knitting tools that every knitter should have in their collection. As you continue on your knitting journey, you may discover additional tools that you enjoy using. Remember to choose tools that are comfortable for you to work with and that suit the type of projects you enjoy making.
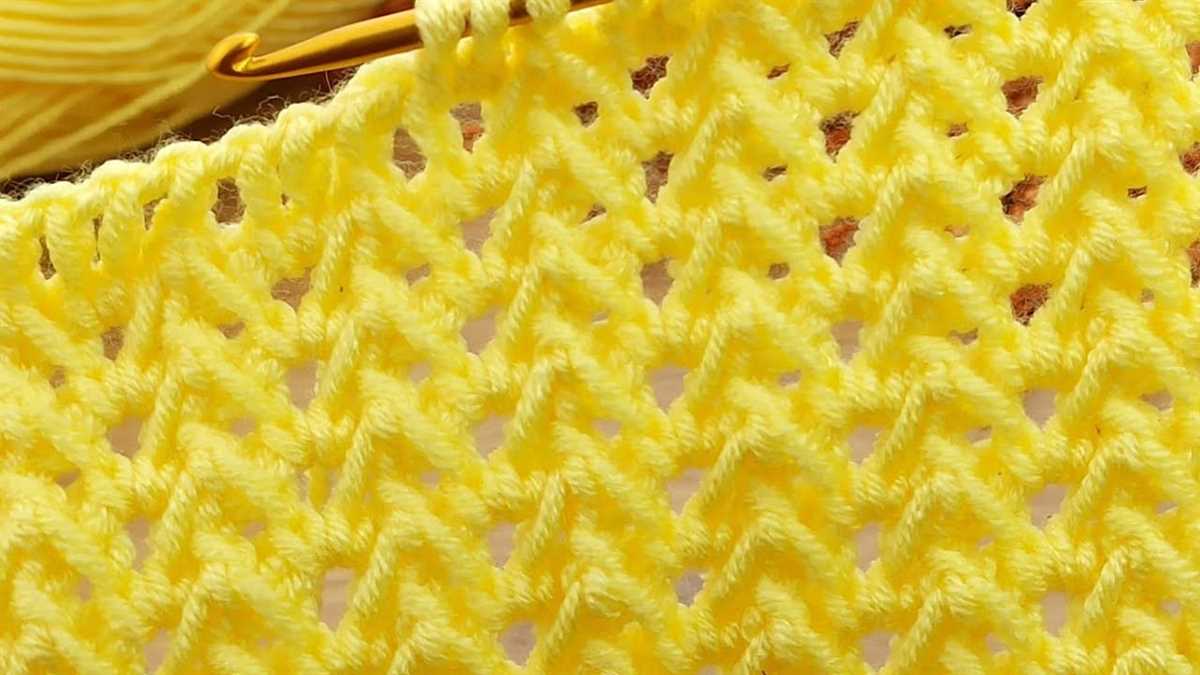
Get Started with Basic Knitting Stitches
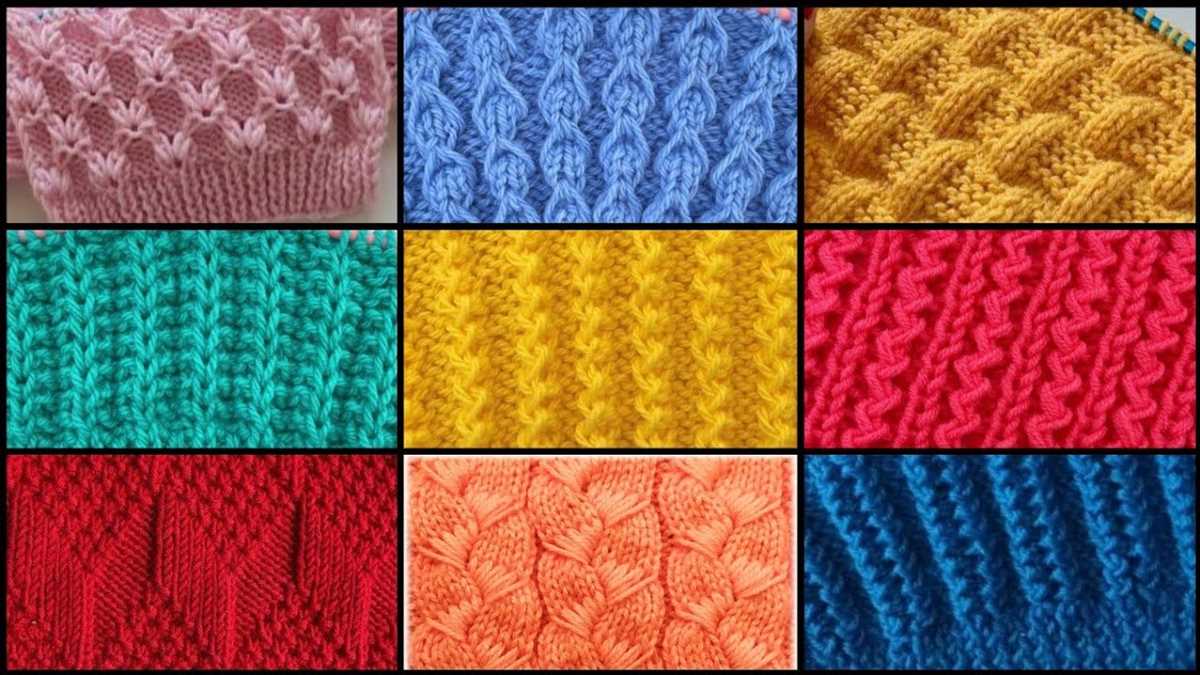
If you’re new to knitting, learning the basic stitches is essential. These foundational stitches form the basis for all knitting patterns and projects. With a little practice, you’ll be able to create beautiful and intricate designs.
Casting on: Before you start knitting, you need to cast on your stitches. This is the process of creating loops on your knitting needle. There are different methods for casting on, such as the long-tail cast on and the thumb cast on. Choose the method that is most comfortable for you. It’s important to cast on the correct number of stitches for your project.
Knit stitch: The knit stitch is the most basic stitch in knitting. It creates a smooth and flat fabric. To knit, insert your right needle into the stitch on your left needle from left to right. Wrap the yarn around the right needle and pull it through the stitch, slipping the old stitch off the left needle. Practice knitting a few rows until you feel comfortable with the motion.
Purl stitch: The purl stitch is the reverse of the knit stitch. It creates a bumpy texture on your fabric. To purl, insert your right needle into the stitch on your left needle from right to left. Wrap the yarn around the right needle and pull it through the stitch, slipping the old stitch off the left needle. Practice purling a few rows to get the hang of it.
Stockinette stitch: Once you’ve mastered the knit and purl stitches, you can create the stockinette stitch. This stitch pattern is created by knitting one row and purling the next row. Repeat these two rows to create a smooth and flat fabric on one side and a bumpy texture on the other side. Stockinette stitch is commonly used in sweaters, scarves, and other garments.
- Garter stitch: Another simple stitch pattern is the garter stitch. This is created by knitting every row, creating a bumpy texture on both sides of the fabric. Garter stitch is often used for blankets, dishcloths, and scarves.
- Ribbing: Ribbing is a stitch pattern commonly used for cuffs, collars, and hems. It is created by alternating knit and purl stitches in the same row. This creates a stretchy and elastic fabric.
- Seed stitch: The seed stitch is a textured stitch pattern that creates a bumpy and pebbled effect. It is created by alternating knit and (or) purl stitches within the same row, repeating the pattern on each subsequent row.
With these basic stitches, you can begin exploring a variety of knitting patterns and projects. Start with simple designs, such as scarves or dishcloths, and gradually move on to more complex projects. With practice and patience, you’ll soon be creating beautiful knitted items.
Follow the Sun Knitting Pattern Instructions
Knitting patterns can sometimes be daunting, especially for beginners. However, with the “Sun Knitting Pattern”, you can create a beautiful and intricate design while following simple and clear instructions.
The first step to follow the “Sun Knitting Pattern” is to gather all the necessary materials. You will need different colors of yarn, knitting needles, a tape measure, and a pair of scissors. Once you have all your materials ready, you can begin the knitting process.
Step 1: To start the “Sun Knitting Pattern”, cast on the desired number of stitches onto your knitting needles. Make sure to leave a long tail of yarn for later use.
Step 2: The first row of the pattern is the foundation row. Knit each stitch across the row, following the instructions for your desired pattern. This row sets the foundation for the rest of the knitting.
Step 3: Once you have completed the foundation row, you can move on to the subsequent rows. Each row will have its own set of instructions, including knit stitches, purl stitches, and yarn overs. Make sure to carefully read and follow the instructions for each row.
Step 4: As you continue knitting, you will start to see the sun pattern emerge. The combination of different stitches and colors will create a stunning design that resembles the sun. Keep following the pattern instructions row by row until the desired length is reached.
Step 5: Once you have completed the knitting portion of the pattern, it’s time to finish off your project. Follow the instructions for binding off your stitches, snip the yarn, and weave in any loose ends.
Whether you’re an experienced knitter or just starting out, the “Sun Knitting Pattern” is a great project to try. With its clear instructions and beautiful design, you’ll be able to create a stunning piece that showcases your knitting skills. So gather your materials, follow the pattern instructions, and enjoy the process of knitting your very own sun-inspired masterpiece.
Customize Your Sun Knitting Pattern with Colorful Yarns
If you’re looking to add a personal touch to your sun knitting pattern, why not try using colorful yarns? By incorporating different shades and hues, you can create a vibrant and unique sun design that reflects your style and creativity.
One way to customize your sun knitting pattern with colorful yarns is to experiment with different color combinations. For example, you could use a gradient yarn to create an ombre effect, starting with a deep yellow at the center of the sun and gradually transitioning to a lighter shade towards the edges. This can add depth and dimension to your sun design, making it visually interesting and eye-catching.
Another option is to use variegated yarns that feature multiple colors in one skein. This can create a beautiful and unpredictable pattern, with the colors blending and changing as you knit. You could choose a variegated yarn with warm tones, such as oranges and reds, to evoke a sunset-inspired sun design. Alternatively, you could opt for cooler tones like blues and greens for a more whimsical and playful sun.
If you prefer a more minimalistic and sleek sun design, you could use a solid-colored yarn with a hint of shimmer or metallic finish. This can give your sun a touch of glamour and elegance, while still keeping the overall design simple and modern. Gold or silver yarns can be particularly stunning for this type of sun knitting pattern, adding a touch of sophistication and luxury.
Ultimately, the choice of colorful yarns for your sun knitting pattern is completely up to you. Don’t be afraid to experiment and try different combinations until you find the perfect look. Remember, knitting is not only a practical craft but also a form of self-expression, so let your creativity shine and have fun with your sun design!
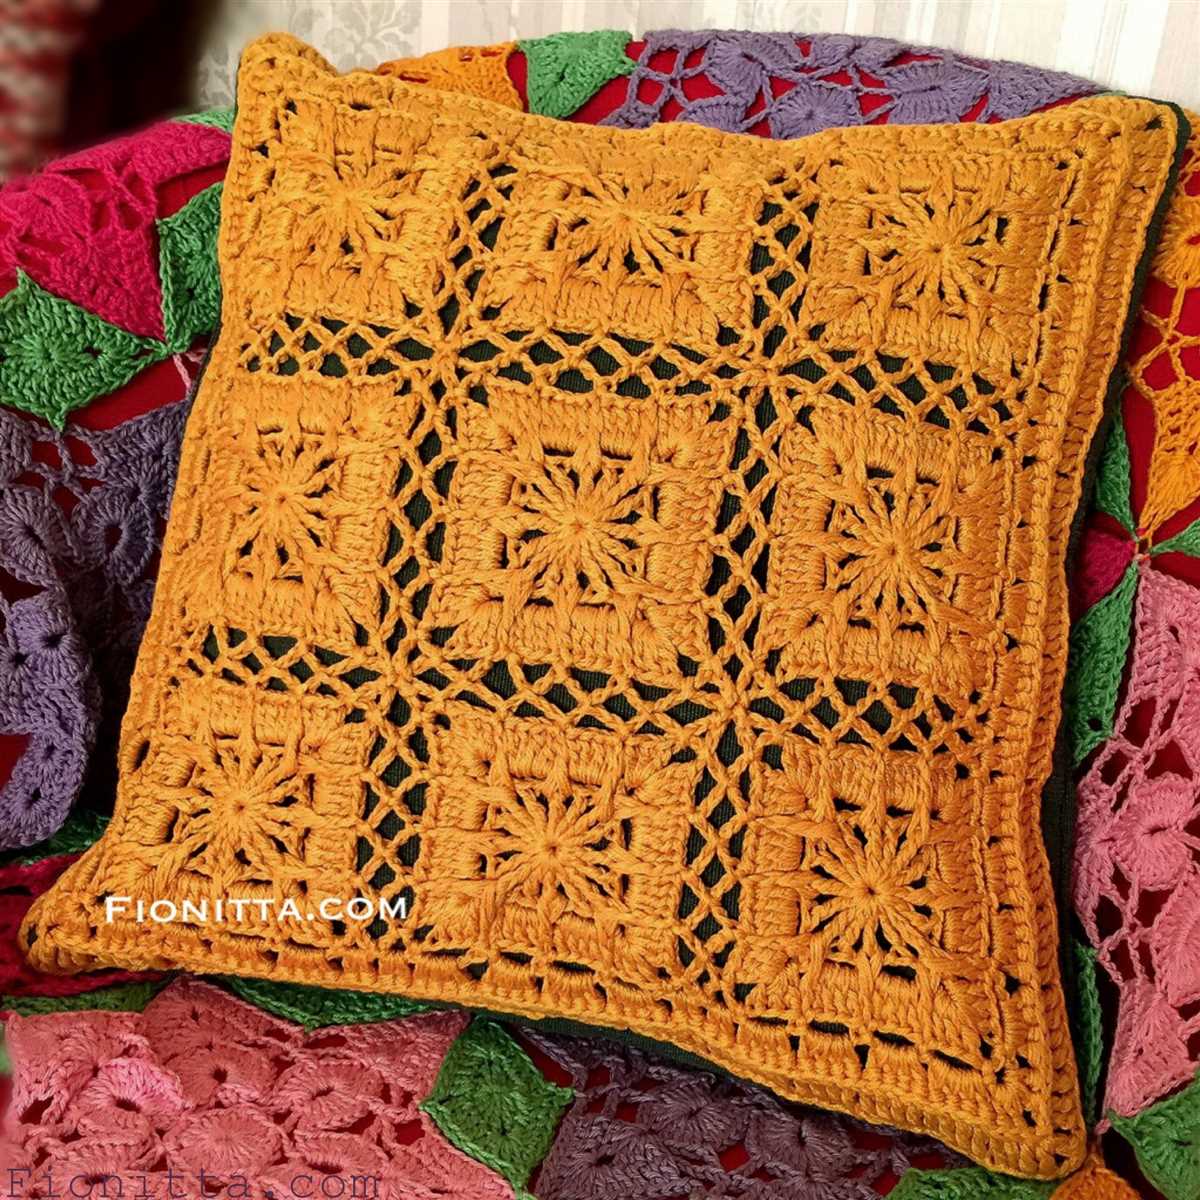
Add Embellishments to Make Your Sun Knitting Project Shine
When working on a sun knitting project, adding embellishments can take your creation to the next level. Whether you’re making a sun-shaped applique, a sun-inspired hat, or a sunny throw pillow, adding a few extra details will make your project shine.
Sequins and Beads: One way to add some sparkle and shine to your sun knitting project is by incorporating sequins and beads. You can sew them onto the surface of your project in a random pattern or arrange them to create a specific design. Choose sequins and beads in colors that complement your yarn to create a cohesive look.
Embroidery Stitches: Embroidery stitches can add texture and visual interest to your sun knitting project. You can use simple stitches like backstitch or running stitch to outline the sun’s rays or create a sunburst effect. For a more intricate look, try using chain stitch or French knots to add dimension and detail to your sun.
Button Accents: Buttons can serve as both decorative elements and functional accents in your sun knitting project. You can sew buttons in the center of the sun to mimic the appearance of the sun’s core or use them as eyes for a sun-shaped plush toy. Choose buttons in different sizes, shapes, and colors to create a unique and eye-catching design.
Pom-Poms: Add a playful touch to your sun knitting project by attaching pom-poms to the tips of the sun’s rays. You can make pom-poms using yarn in complementary colors or opt for multi-colored pom-poms for a more whimsical look. Attach them securely using a needle and thread or a hot glue gun, depending on the type of project you’re working on.
Contrasting Yarn: Incorporating contrasting yarn can help highlight the sun’s shape and make it stand out. You can use a different color yarn to outline the sun’s rays or create a border around the sun motif. This technique adds visual interest and draws attention to the focal point of your sun knitting project.
Remember, the key to successfully embellishing your sun knitting project is to choose embellishments that complement your design and yarn choices. Experiment with different options and have fun adding those extra details that will make your project shine!
Expert Tips for a Flawless Sun Knitting Project
When it comes to creating a sun knitting project, there are a few expert tips to keep in mind to ensure a flawless result. Whether you’re a beginner or more experienced in the world of knitting, these tips will help you make the most out of your project.
1. Choose the Right Yarn

One of the most important factors to consider when starting a sun knitting project is choosing the right yarn. Opt for a lightweight and breathable yarn that is suitable for warm weather. Cotton or linen yarns are great options as they won’t make your finished project feel heavy or uncomfortable.
2. Use a Circular Needle
Using a circular needle instead of straight needles can make the process of knitting a sun project much easier. Circular needles allow for more flexibility and allow you to knit in the round, which is perfect for creating sun patterns. Additionally, they distribute the weight of the project more evenly, reducing strain on your hands and wrists.
3. Pay Attention to Gauge
Gauge is crucial when it comes to any knitting project, including sun knitting. Take the time to check your gauge before starting, and adjust your needle size if needed to ensure you are matching the recommended gauge. This will ensure that your finished project turns out the right size and shape.
4. Use Stitch Markers
When knitting sun patterns with multiple repeats, it’s easy to lose track of where you are in the pattern. To prevent mistakes, use stitch markers to mark the beginning of each repeat. This will help you stay organized and make it easier to catch any errors early on.
5. Block Your Finished Project
After completing your sun knitting project, make sure to block it to give it a polished look. Blocking involves wetting the project and then reshaping it to the desired dimensions. This will help even out the stitches and give your project a more professional finish.
By following these expert tips, you can ensure a flawless sun knitting project that you’ll be proud to show off. Remember to have fun and enjoy the process as you create your own unique sun-inspired creations!
Common Mistakes to Avoid When Knitting the Sun Pattern

Knitting the sun pattern can be an enjoyable and rewarding project, but like any knitting pattern, it’s important to be mindful of common mistakes that can occur. By being aware of these potential pitfalls, you can ensure that your sun pattern turns out beautifully.
1. Not following the pattern instructions
One of the most common mistakes knitters make when working on the sun pattern is not following the pattern instructions carefully. It’s important to read through the pattern thoroughly before starting and make sure you understand each step. Even if you’re an experienced knitter, it’s easy to overlook a crucial detail or misinterpret a direction, so take your time and double-check your work as you go.
2. Incorrect gauge
Gauge is crucial in knitting, and even more so when working on intricate patterns like the sun design. If your gauge is too tight or too loose, the final result may not look as intended. It’s important to swatch and measure your gauge before starting the project, and make any necessary adjustments to your knitting needles or tension to match the required gauge.
3. Lack of tension consistency

Consistency in tension is key to creating an even and professional-looking sun pattern. If your tension varies throughout the project, it can result in uneven stitches and distort the overall design. Pay attention to your tension as you knit and try to maintain a consistent pressure on the yarn.
4. Not using the right yarn
Choosing the right yarn is essential for a successful sun pattern. The wrong type or weight of yarn can affect the drape, texture, and overall appearance of the finished project. It’s important to use a yarn that is suitable for the pattern and will give you the desired result. Make sure to check the recommended yarn and needle size in the pattern instructions and choose a similar option.
5. Skipping stitch markers
When working on the sun pattern, there may be instances where stitch markers are used to mark specific stitches or sections. Skipping or misplacing these stitch markers can lead to confusion and mistakes in the pattern. Be sure to place the markers correctly and keep them in the right position as you progress through the project.
By being mindful of these common mistakes and taking the necessary precautions, you can ensure a successful knitting experience with the sun pattern. Happy knitting!
How to Finish and Block Your Sun Knitting Project
Finishing and blocking your sun knitting project is an important final step that helps to give your project a polished and professional look. Here are some tips to guide you through the process:
Finishing:
1. Weave in the ends: After you have completed all the knitting, make sure to weave in any loose ends using a yarn needle. This ensures that your project looks neat and tidy.
2. Secure any seams: If your sun knitting project has seams, make sure to secure them properly. You can use a yarn needle and matching yarn to sew the seams together, ensuring that they are strong and durable.
3. Add any desired embellishments: If you want to personalize your sun knitting project, this is the time to do it. You can add buttons, beads, or any other decorative elements that you like.
Blocking:

1. Wet blocking: Fill a sink or basin with lukewarm water and add a small amount of mild detergent. Place your sun knitting project in the water and gently press it down to immerse it completely. Let it soak for about 15 minutes.
2. Remove excess water: After soaking, carefully lift your project out of the water and gently squeeze out the excess water. Do not twist or wring your project, as this can distort the shape.
3. Shape and dry: Lay your project flat on a clean towel or blocking mat, and gently shape it to the desired measurements. Use rustproof pins to secure the edges and any desired shaping. Let it air dry completely.
By following these steps, you can ensure that your sun knitting project is finished and blocked properly, resulting in a beautiful and professional-looking piece.
Ways to Style and Wear Your Finished Sun Knit Accessory
Once you have finished knitting your sun pattern accessory, you may be wondering how to style and wear it. Whether you have created a sun-inspired hat, scarf, or shawl, there are several ways you can showcase your finished piece and show off your knitting skills.
1. Casual and Cozy
The sun knit accessory can be a perfect addition to a casual and cozy outfit. Pair it with your favorite jeans, a simple sweater, and some ankle boots for a relaxed and stylish look. The sun pattern will add a touch of whimsy to your outfit and serve as a conversation starter.
2. Boho Chic
If you’re aiming for a boho chic vibe, incorporate your sun knit accessory into a flowy maxi dress or a floral skirt. Layer it over a lightweight blouse and add some layered necklaces and sandals to complete the look. The sun pattern will complement the bohemian aesthetic and add an extra touch of texture.
3. Dressy and Elegant
Don’t be afraid to dress up your sun knit accessory for a more formal occasion. Choose a sleek black dress or a tailored suit and use your sun accessory as a statement piece. Wrap it around your shoulders for a shawl effect or tie it around your neck as a scarf. The sun pattern will add a unique and eye-catching element to your elegant ensemble.
4. Beachy and Relaxed
If you’re heading to the beach or a tropical destination, incorporate your sun knit accessory into your beachwear. Use it as a sarong, beach cover-up, or headscarf to shield yourself from the sun while adding a stylish twist. The sun pattern will reinforce the beachy vibes and make you stand out in the crowd.
In conclusion, your finished sun knit accessory offers endless possibilities for styling and wearing. Whether you’re going for a casual, boho, dressy, or beachy look, incorporating your sun pattern into your outfit will add a unique touch and showcase your creativity. Experiment with different ways of wearing it and have fun showing off your knitting skills!
Share Your Sun Knitting Project with the Knitting Community
If you have recently completed a sun knitting project or are in the process of creating one, we encourage you to share your work with the knitting community. The sun knitting pattern has gained popularity due to its vibrant colors and intricate design. By sharing your project, you not only showcase your skills but also inspire others to try their hand at this unique pattern.
One way to share your sun knitting project is by posting pictures on social media platforms using relevant hashtags such as #sunknittingproject or #sunpattern. This allows fellow knitters to easily discover and admire your work. You can also write a caption describing your creative process, the materials you used, and any challenges or insights you gained along the way. This not only provides context but also offers helpful information to aspiring knitters who may be interested in attempting the pattern themselves.
Additionally, if you are part of a knitting community or group, consider organizing a sun knitting showcase where members can display their finished projects. This can be a fun and interactive way to connect with fellow knitters, exchange ideas, and even learn new knitting techniques. By sharing your sun knitting project in person, you can receive direct feedback, appreciation, and valuable tips from experienced knitters.
For those who prefer a more digital approach, there are various online knitting forums and platforms where you can share your project. Websites like Ravelry and LoveKnitting allow users to create project pages, upload pictures, and provide details about their creations. This not only helps document your work but also enables others to find inspiration and guidance from your project.
Remember, sharing your sun knitting project with the knitting community is not only a way to showcase your skills but also a means of fostering creativity, inspiring others, and receiving support and feedback from like-minded individuals. So, don’t hesitate to share your work and contribute to the vibrant and welcoming world of knitting!
Explore More Knitting Patterns Inspired by Nature
Knitting is not only a relaxing and creative hobby, but it also allows us to connect with the natural world around us. If you’ve enjoyed knitting the sun pattern, why not explore more knitting patterns inspired by nature? Here are a few ideas to get you started:
1. Leaf Lace Shawl
Embrace the beauty of leaves with a delicate lace shawl pattern. Choose a yarn in earthy tones to capture the essence of nature and create a stunning accessory that can be worn year-round.
2. Flower Garden Blanket
Create a cozy and colorful flower garden blanket that will brighten up any room. Choose a variety of floral-inspired stitch patterns and use a combination of different yarn colors to mimic the vibrant hues of a blossoming garden.
3. Ocean Waves Scarf
Immerse yourself in the calming rhythm of the ocean with an ocean waves scarf pattern. Combine different shades of blue and green yarn to create a wave-like effect, and enjoy the soothing and meditative process of knitting.
4. Tree Bark Socks
Take inspiration from the textures of tree bark with a pair of cozy tree bark socks. Experiment with different stitch patterns to create a unique and natural-looking texture, and choose a yarn with natural fibers for extra comfort.
With these knitting patterns, you can bring a touch of nature into your knitting projects and create beautiful pieces that reflect your love for the outdoors. So grab your knitting needles and let nature be your guide!
Q&A:
What is a sun knitting pattern?
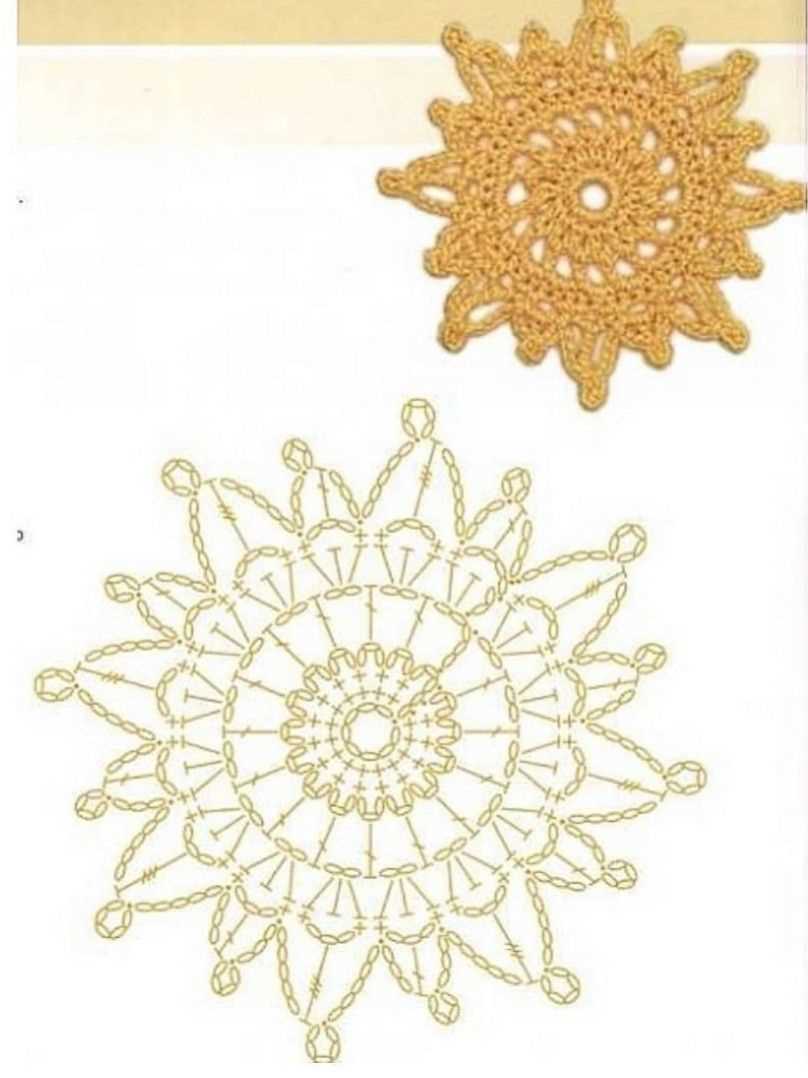
A sun knitting pattern is a design or pattern for knitting that features a sun motif. It often includes instructions for creating a sun shape using various stitch patterns and techniques.
Where can I find a sun knitting pattern?
You can find sun knitting patterns in various places, such as knitting magazines, knitting websites, and online marketplaces for knitting patterns. You can also try searching for free sun knitting patterns on knitting blogs or on social media platforms dedicated to knitting.
Are there different types of sun knitting patterns?
Yes, there are different types of sun knitting patterns. Some patterns may feature a realistic sun design, while others may incorporate the sun motif in a more abstract or stylized way. Additionally, you can find sun knitting patterns for different items, such as hats, sweaters, blankets, and more.
Do I need any special knitting skills to create a sun knitting pattern?
The level of knitting skills required to create a sun knitting pattern can vary depending on the complexity of the pattern. Some sun knitting patterns may be suitable for beginners, while others may require more advanced knitting techniques. It’s always a good idea to read through the pattern instructions and check if any specific knitting skills are required before starting.
Can I modify a sun knitting pattern to suit my preferences?
Yes, you can modify a sun knitting pattern to suit your preferences. Knitting patterns can be a great starting point for customization and personalization. You can change the colors, adjust the size, or add your own unique touches to make the sun knitting pattern your own. Just make sure to keep track of any modifications you make to the pattern to ensure consistent results.
What is a sun knitting pattern?
A sun knitting pattern is a design template or instructions for creating a knitting project that is inspired by the sun. It can involve using different yarn colors, stitch patterns, or motifs to represent the sun in a knitted item.