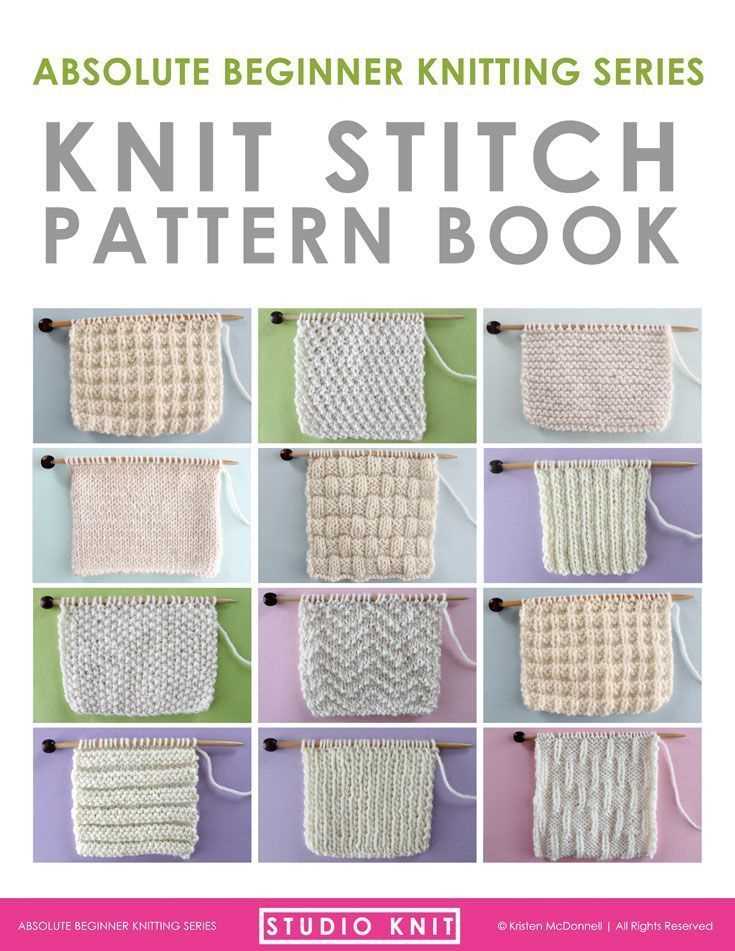
Easy Knitting Patterns for Beginners

Whether you’re a complete beginner or just looking for some new knitting patterns to try out, this article is for you. Knitting is a versatile craft that allows you to create beautiful and functional items with just a few basic skills. In this article, we will provide step-by-step instructions for beginner knitting patterns, so you can start your knitting journey with confidence.
Before we dive into the patterns, let’s cover the basics. Knitting requires two basic stitches: knit and purl. These stitches form the foundation of almost all knitting patterns. If you’re new to knitting, don’t worry – these stitches are easy to learn and you can quickly become comfortable with them.
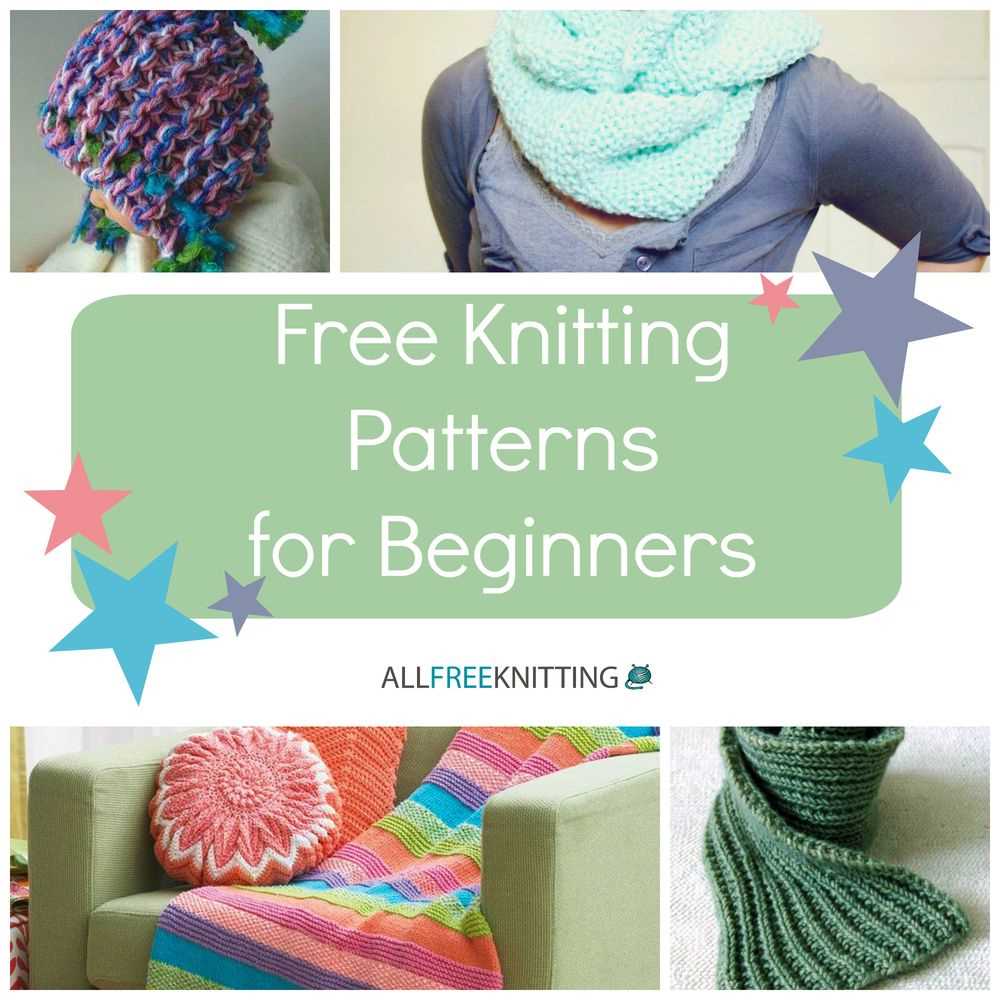
Once you’ve mastered the knit and purl stitches, you’re ready to start your first project. We’ve selected a range of beginner-friendly patterns that are perfect for practicing your new skills. From scarves and hats to dishcloths and baby blankets, these patterns will help you build your confidence and create something beautiful.
Beginner Knitting Patterns Instructions

If you are a beginner in knitting, it is important to start with simple and easy patterns. This will help you learn the basic stitches and techniques before moving on to more complex projects. In this article, we will provide some instructions for beginner knitting patterns that you can try.
Garter Stitch Scarf
One of the easiest knitting patterns for beginners is a garter stitch scarf. To make this scarf, all you need to know is how to knit. Simply cast on the desired number of stitches, and then knit every row until you reach the desired length. This pattern is great for practicing your knitting tension and creating a warm and cozy scarf.
Stockinette Stitch Hat
The stockinette stitch is another basic stitch that every beginner knitter should learn. To make a simple hat using this stitch, start by casting on the required number of stitches. Then, alternate between knitting one row and purling the next row until the hat measures the desired length. Finally, bind off the stitches and sew up the sides to create a cozy hat for the winter.
Remember, practice makes perfect. Start with these easy knitting patterns and gradually move on to more challenging projects as you become more comfortable with the basic stitches. Happy knitting!
What are Knitting Patterns
Knitting patterns are detailed instructions that guide knitters in creating specific designs, stitches, and shapes using yarn and needles. These patterns serve as a blueprint or roadmap for knitters to follow, ensuring that they achieve the desired finished product.
Knitting patterns typically include information about the materials required, such as the type and weight of yarn, as well as the size of the needles needed. They also provide step-by-step instructions for each stitch and technique involved in the design, including any shaping or finishing details.
Knitting patterns can range in complexity from beginner-level projects to advanced designs requiring more advanced skills. They can be found in various formats, including books, magazines, websites, and digital downloads. Some knitting patterns are free, while others may require a purchase.
When following a knitting pattern, it is important to carefully read and understand the instructions before beginning the project. Paying attention to gauge, or the number of stitches and rows per inch, is crucial to ensure that the finished item will have the correct size and fit.
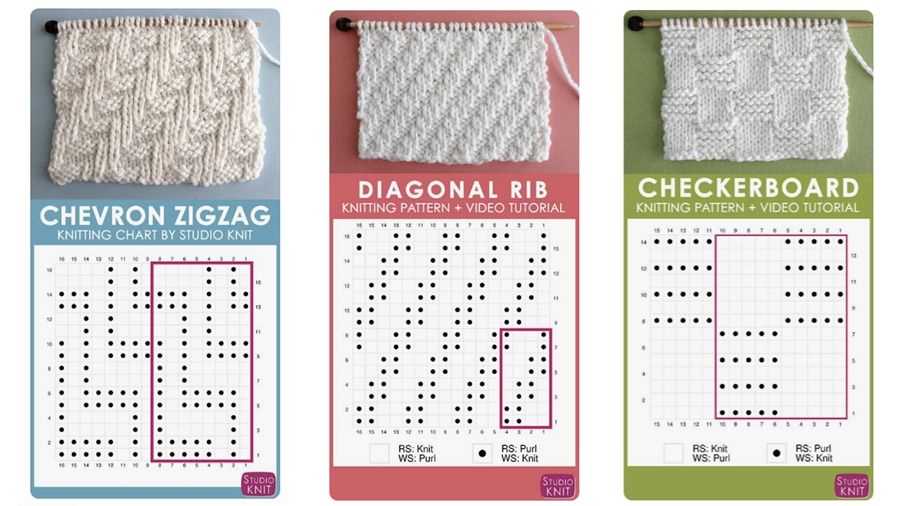
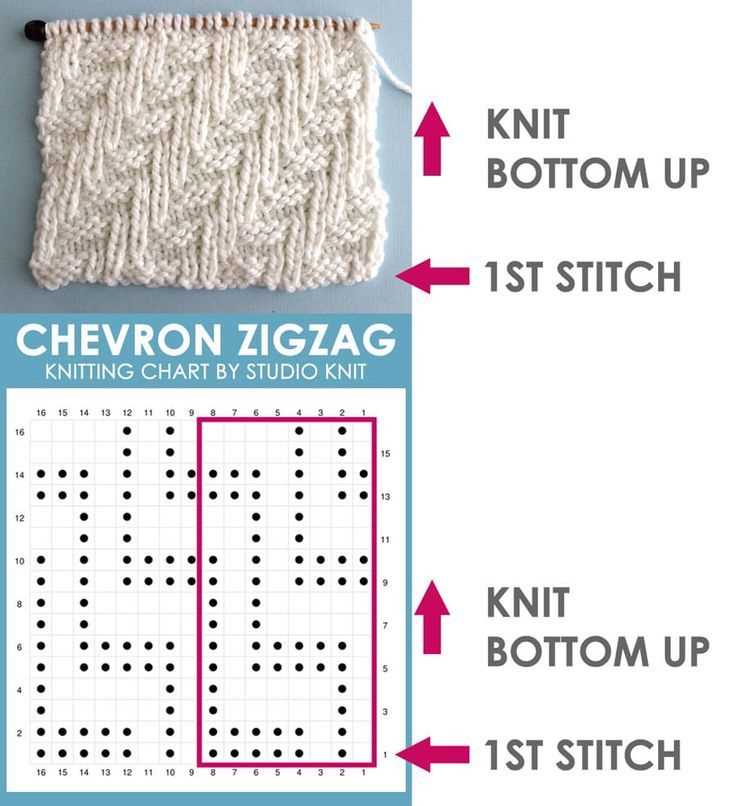
- Knitting patterns often include charts or diagrams to visually represent stitch patterns, color changes, or shaping.
- They may also include abbreviations, which are commonly used shortcuts or codes for various knitting techniques. These abbreviations help to condense and simplify the instructions.
- Some knitting patterns may provide alternative sizing options, allowing knitters to customize the fit of the finished item.
Essential Knitting Tools
When it comes to knitting, having the right tools can make all the difference in creating a successful project. Whether you’re a beginner or an experienced knitter, there are a few essential tools that you’ll want to have in your knitting bag. These tools will not only help make your knitting experience more enjoyable, but they’ll also ensure that your projects turn out beautifully.
1. Knitting Needles
Of course, one of the most important tools in knitting is a pair (or several pairs) of knitting needles. There are many different types of knitting needles to choose from, including straight, circular, and double-pointed needles. The type of needles you choose will depend on the type of project you’re working on and your personal preferences.
2. Stitch Markers
Stitch markers are small, removable rings that are used to mark specific stitches or points in your knitting. They can be particularly useful when knitting patterns that involve shaping or complex stitch patterns. Stitch markers come in a variety of sizes and colors, making it easy to find ones that suit your needs.
3. Tapestry Needles
Tapestry needles, also known as yarn needles, are used for weaving in ends and finishing your knitting projects. They have a large eye and a blunt tip, making them perfect for threading yarn through stitches. Having a tapestry needle in your knitting bag is essential for completing your projects with a professional finish.
4. Measuring Tape

A measuring tape is an essential tool for checking your gauge, measuring the length of your knitting, and ensuring that your finished project will fit correctly. You’ll want to have a flexible measuring tape that can easily wrap around your knitting and provide accurate measurements.
5. Scissors
Having a pair of sharp, small scissors in your knitting bag is necessary for cutting yarn and trimming ends. Choose a pair of scissors that are comfortable to hold and easy to use, as you’ll be using them frequently during your knitting projects.
6. Row Counter
A row counter is a handy tool that allows you to keep track of the number of rows you’ve knitted. This is especially useful when working on patterns that have a specific number of rows or when you want to make sure that both sides of your knitting look even. Row counters can be mechanical, digital, or even made out of beads.
7. Yarn Bowl or Bag

While not necessary, a yarn bowl or bag can be a helpful tool for keeping your yarn organized and tangle-free. Yarn bowls are usually made of ceramic or wood and have a curved shape that holds your yarn while you knit. Yarn bags, on the other hand, are portable and have compartments for storing both your yarn and knitting tools.
By having these essential knitting tools on hand, you’ll be well-prepared to tackle any knitting project that comes your way. Whether you’re knitting a scarf, hat, or sweater, these tools will help ensure that your stitches are even, your measurements are accurate, and your finished project is top-notch.
Understanding Knitting Abbreviations
When starting out in knitting, it can be overwhelming to see all the abbreviations that are used in knitting patterns. However, understanding these abbreviations is key to being able to follow patterns accurately and efficiently. In this article, we will go over some common knitting abbreviations and what they mean.
1. K – knit: This is one of the most basic knitting stitches. To knit, you insert the right-hand needle into the stitch on the left-hand needle from left to right, wrap the yarn around the right-hand needle counterclockwise, and pull the new loop through the old stitch.
2. P – purl: Purling is another basic knitting stitch. To purl, you insert the right-hand needle into the stitch on the left-hand needle from right to left, wrap the yarn around the right-hand needle counterclockwise, and pull the new loop through the old stitch.
3. CO – cast on: This abbreviation refers to the process of creating the first row of stitches on the knitting needle. There are various methods of casting on, such as the long tail cast on and the cable cast on.
4. BO – bind off: Binding off is the process of finishing the last row of stitches and creating a neat edge. It involves knitting two stitches, passing the first stitch over the second stitch, and repeating until there is only one stitch left on the needle.
5. RS – right side: This abbreviation indicates the side of the knitting work that will be visible when the project is complete. It is important to keep track of the right side and wrong side when following a pattern.
- 6. WS – wrong side: This abbreviation refers to the side of the knitting work that will not be visible when the project is complete.
- 7. st – stitch: This abbreviation is used to denote an individual loop on the knitting needle.
- 8. k2tog – knit two together: This abbreviation instructs you to knit two stitches together as one, reducing the number of stitches on the needle.
- 9. yo – yarn over: This abbreviation indicates that you should bring the yarn forward between the needles to create an extra loop.
By familiarizing yourself with these common knitting abbreviations, you will be able to follow knitting patterns with more confidence and ease. Happy knitting!
How to Cast On Stitches

Learning how to cast on stitches is the first step in every knitting project. It is the process of creating a foundation row of stitches on your knitting needle. There are different methods to cast on stitches, but one of the most common methods is the long tail cast on.
Long Tail Cast On Method
To cast on stitches using the long tail cast on method, you will need to estimate the length of the yarn tail that you need. As a general rule of thumb, each stitch requires about one inch of yarn. So if you need to cast on 20 stitches, you will need approximately 20 inches of yarn.
1. Begin by making a slipknot near the end of your yarn, leaving a long tail of about 3-4 times the width of your knitting project.
2. Insert your knitting needle through the slipknot and snug it up close to the needle, making sure not to tighten it too much.
3. Hold the needle with the slipknot in your right hand, and the other end of the yarn (the working yarn) in your left hand.
4. With your thumb and index finger of your left hand, spread them open to create a space between the two strands of yarn.
5. Bring the needle forward, insert it into the space created by your thumb and index finger from front to back, and then bring it under the working yarn.
6. Bring the needle over the working yarn and back through the space created by your thumb and index finger, sliding the new loop of yarn onto the needle. This is your first cast on stitch.
7. Repeat steps 4-6 until you have cast on the desired number of stitches, making sure to keep the tension of the yarn consistent.
8. Once you have cast on all the stitches, you are ready to start knitting your project!
Now that you know how to cast on stitches using the long tail cast on method, you can begin your knitting project with confidence. Remember to practice and keep experimenting with different cast on methods to find the one that works best for you.
Basic Knit Stitch Tutorial

The basic knit stitch is the foundation of knitting and is a great place to start for beginners. This simple stitch creates a smooth and flat fabric, perfect for a variety of projects. In this tutorial, we will break down the steps to master the basic knit stitch.
To begin, you will need a pair of knitting needles and some yarn. Start by making a slipknot and placing it on your needle. Hold one needle in your right hand (if you’re right-handed) and the other in your left hand. Insert the right-hand needle into the slipknot from front to back, making sure the yarn is in the back of the needles.
Step 1: Making the first stitch
With the right-hand needle inserted into the slipknot, take the yarn from the back of the needles and wrap it around the right-hand needle counterclockwise. This is called a yarn over. Use your right-hand needle to pull the yarn through the slipknot, creating a new loop on the right-hand needle. Let the old loop slip off the left-hand needle.
Step 2: Completing the stitch
Now that you have one stitch on your right-hand needle, repeat the process. Insert the right-hand needle into the loop on the left-hand needle from front to back. Wrap the yarn counterclockwise around the right-hand needle and pull the yarn through the loop, creating a new stitch. Let the old loop slip off the left-hand needle. Continue this process until you have the desired number of stitches on your right-hand needle.
Congratulations! You have now mastered the basic knit stitch. Practice this stitch until you feel comfortable with the motions. Once you have a solid understanding of the knit stitch, you can explore more complex knitting patterns and techniques.
Purl Stitch Instructions
The purl stitch is one of the basic stitches in knitting and is often used alongside the knit stitch to create various patterns and textures. It is a versatile stitch that can be used for both decorative and functional purposes.
To work the purl stitch, follow these instructions:
- Hold your knitting needle with the stitches in your left hand.
- Insert the right needle into the first stitch from right to left, bringing it in front of the left needle.
- Take the yarn and wrap it counterclockwise around the tip of the right needle.
- With your right needle, pull the loop of yarn through the stitch, sliding it off the left needle.
- Move the newly formed stitch to the right needle, completing the purl stitch.
- Repeat these steps for each stitch in the row.
When working in rows, the purl stitch will create a series of bumps on the right side of the fabric. On the wrong side, these bumps will appear as V-shaped stitches. The purl stitch can be used to create stockinette stitch, seed stitch, ribbing, and many other patterns.
Practice the purl stitch and experiment with different stitch combinations to create beautiful and unique knitting projects. With time and practice, you’ll become more comfortable with this essential knitting skill.
Knitting Increases and Decreases
When knitting, it’s important to know how to increase and decrease stitches to shape your projects and create different patterns. Increases and decreases can be done in various ways, depending on the desired outcome and the stitch pattern you’re working with.
The most basic increase in knitting is called a yarn over (YO). To create a yarn over, simply wrap the yarn around the right-hand needle from back to front before knitting the next stitch. This creates an extra stitch and a small hole in your fabric, which can be used for decorative purposes or to create lacy patterns.
On the other hand, when it comes to decreasing stitches, the most common method is the knit two together (K2tog) decrease. To do a K2tog, insert the right-hand needle into the next two stitches as if to knit, and then knit them together as one stitch. This decreases the stitch count by one and creates a slant to the right on the fabric.
Another commonly used decrease is the slip, slip, knit (SSK) decrease. To do an SSK, slip the next two stitches knitwise onto the right-hand needle one at a time, then insert the left-hand needle into the front loops of the slipped stitches and knit them together. This also decreases the stitch count by one, but creates a slant to the left on the fabric.
In addition to these basic increases and decreases, there are many other techniques you can learn to shape your knitting projects, such as make one (M1) increases, knit front and back (KFB) increases, and various types of double decreases. These techniques can be used to create shaping in garments, add design elements, or solve stitch count issues in your patterns.
As you gain more experience in knitting, you’ll become familiar with different increase and decrease methods and be able to use them to achieve the desired results in your projects. Practice these techniques on simple beginner patterns first, and then gradually experiment with more complex stitch patterns and designs.
Finishing Techniques for Knitting
When you have finished knitting your project, it is important to properly finish and tidy up the loose ends. By using the right finishing techniques, you can give your knitting a polished and professional look.
Weaving in ends: One of the most important finishing techniques is weaving in ends. This involves using a yarn needle to thread the loose yarn ends back into the knitted fabric. Start by threading the yarn end through the needle and then insert the needle into the fabric, following the direction of the stitches. Weave the yarn in and out several times, making sure to secure it well. Finally, trim any excess yarn.
Blocking: Blocking is another crucial step in finishing knitting projects. It helps to shape and set the stitches, giving your knitted item a more even and professional appearance. To block your project, you will need to soak it in lukewarm water and then gently squeeze out the excess moisture. Lay the item flat on a towel and shape it into the desired dimensions, using rust-proof pins if necessary. Leave it to dry completely before removing the pins.
- Seaming: If your knitting project involves multiple pieces that need to be joined together, you will need to use seaming techniques. There are different methods for seaming, such as whip stitch, mattress stitch, and backstitch. The choice of seaming method depends on the desired finish and the type of project.
- Adding buttonholes: If your knitting project requires buttons, you can add buttonholes during the finishing stage. There are various methods for creating buttonholes, such as yarn overs, using a horizontal slit, or making eyelets. The choice of buttonhole method depends on the design and yarn used.
- Blocking lace: If you have knitted lace patterns, blocking is especially important to open up and enhance the lacework. Tensioning the lace by blocking will help to showcase the intricate details and ensure that the pattern is clearly visible.
By using these finishing techniques, you can achieve professional-looking results for your knitting projects. Remember to take your time and pay attention to detail, as the finishing touches can make all the difference in the final appearance of your knitwear.
Easy Scarf Pattern for Beginners
If you’re new to knitting and looking for a simple project to start with, an easy scarf pattern is a great choice. Scarves are versatile and practical, and they make for a fantastic first knitting project. With just a few basic stitches and some soft yarn, you can create a cozy accessory that will keep you warm during the colder months.
To get started, you’ll need some supplies: knitting needles, yarn, and a pair of scissors. Choose a soft, medium-weight yarn in a color that you love. You can experiment with different textures and fibers, but it’s best to stick with a smooth yarn for your first scarf. For needles, a pair of size 8 or 9 would be suitable. Once you have your materials ready, you’re all set to begin!
Step 1: Cast on about 30-40 stitches, depending on how wide you want your scarf to be. This will be the foundation of your project. Make sure to leave a long tail of yarn at the beginning for later use.
Step 2: Start knitting in the basic garter stitch: knit every row until your scarf reaches the desired length. The garter stitch is created by knitting every stitch in every row, resulting in a bumpy texture. This stitch is easy to learn and produces a fabric that lays flat.
Step 3: Continue knitting in the garter stitch until your scarf is the desired length. You can measure it against yourself or refer to a standard scarf length (typically around 60-70 inches). Feel free to experiment with different knitting techniques or add some decorative touches, such as fringe or tassels, to personalize your scarf.
Once you’re happy with the length of your scarf, it’s time to finish it off. Step 4: Bind off the stitches by knitting two stitches, then passing the first stitch over the second and off the needle. Repeat this process until you’ve bound off all the stitches. Cut the yarn, leaving a long tail, and pull it through the last stitch to secure.
And there you have it – an easy scarf pattern for beginners! With a bit of practice, you’ll be able to create beautiful scarves to wear or give as gifts. Remember to take your time, enjoy the process, and don’t be afraid to make mistakes. Knitting is a relaxing and rewarding hobby that allows you to create something tangible and beautiful with your own two hands.
Simple Hat Pattern with Circular Needles
Making your own hat is a fun and rewarding project for beginners in knitting. With a simple pattern and circular needles, you can create a cozy and stylish hat that will keep you warm during the cold months.
Here is a step-by-step guide on how to knit a simple hat using circular needles:
- Gather the materials: You will need a pair of circular knitting needles in the appropriate size for your desired hat, yarn in your preferred color, and a set of double-pointed needles.
- Cast on stitches: Start by casting on the desired number of stitches onto your circular needles. The number of stitches will depend on the size of your head and the gauge of your yarn. Make sure to join the round, being careful not to twist the stitches.
- Knit in the round: Using the circular needles, knit every stitch in the round until the hat reaches your desired length. This basic stitch pattern will create a smooth and simple fabric.
- Decrease stitches: When the hat is long enough, you can start decreasing the stitches to shape the crown. This is usually done by knitting two stitches together at regular intervals. Follow the pattern instructions or use a simple decrease method like k2tog (knit two stitches together).
- Switch to double-pointed needles: Once there are too few stitches to comfortably work with the circular needles, switch to the set of double-pointed needles. Distribute the stitches evenly onto three or four needles, and continue decreasing until you have only a few stitches left.
- Finishing: Cut the yarn, leaving a long tail. Thread the tail through a yarn needle and pass it through the remaining stitches, removing them from the needles. Pull tight to close the top of the hat and secure the yarn.
With this simple pattern, you can create a hat that is perfect for yourself or as a gift for a loved one. Have fun experimenting with different yarns and colors to make each hat unique!
Baby Blanket Pattern for Beginners
If you’re new to knitting and looking for a simple and rewarding project, a baby blanket is a great choice. Baby blankets are smaller in size compared to regular blankets, which makes them perfect for beginners who want to practice their skills without getting overwhelmed by a large project.
To get started with your baby blanket, you’ll need some basic knitting supplies, including a pair of knitting needles and some soft and washable yarn. Choose yarn that is specifically labeled as baby-friendly, as it will be gentle on the baby’s skin and easy to care for. You can choose any colors you like to match the nursery or the baby’s gender, or go for a neutral palette that can be used for either a boy or a girl.
Instructions:
- Cast on: Start by casting on the desired amount of stitches on your knitting needles. Consult the pattern or size guide to determine the number of stitches needed for your blanket.
- Knit rows: Once you have cast on, you can start knitting the rows of your blanket. Use the basic knit stitch to create a smooth and even texture.
- Continue knitting: Keep knitting the rows until your blanket reaches the desired length. You can knit in a single color or incorporate different colors or patterns for added visual interest.
- Bind off: When you’re ready to finish your blanket, bind off the stitches to secure your work. Cut the yarn, leaving a tail to weave in later.
- Weave in ends: Take a yarn needle and weave in the loose ends of yarn to give your blanket a clean and finished look.
- Block if desired: Blocking is an optional step, but it can help even out the stitches and give your blanket a polished appearance. Follow the instructions on your yarn label for blocking.
Remember, practice makes perfect! Don’t worry if your first baby blanket doesn’t turn out exactly as you envisioned. The more you knit, the better you’ll become, and soon you’ll be creating beautiful blankets for your loved ones.
Tips for Successful Beginner Knitting
Knitting is a wonderful hobby that allows you to create beautiful and unique handmade items. If you are a beginner knitter, it’s important to start with simple patterns and follow some basic tips to ensure your knitting journey is successful. Here are some tips to help you get started:
1. Choose the Right Yarn and Needles

Choosing the right yarn and needles is crucial for a successful knitting project. As a beginner, it’s best to start with medium-weight yarn and medium-sized needles. These are easier to handle and allow you to see your stitches more clearly. Avoid using textured or novelty yarns that can make it difficult to see where you’re inserting your needle.
2. Practice Basic Stitches

Take the time to practice and master the basic knitting stitches, such as the knit stitch and the purl stitch. These stitches form the foundation of most knitting patterns, so it’s important to become comfortable with them. Start by practicing on a simple swatch before moving on to a beginner project.
3. Take Breaks and Rest Your Hands
Knitting can be a repetitive activity that puts strain on your hands and wrists, so it’s important to take breaks and rest. Stretch your hands and fingers regularly to prevent stiffness and pain. If you start to feel any discomfort, stop knitting and give your hands a break. It’s better to take breaks and knit in shorter sessions than to push through pain and risk injury.
4. Use Stitch Markers

Stitch markers are useful tools that can help you keep track of your stitches and patterns. These small plastic or metal rings can be placed on your needles to mark specific stitches, pattern repeats, or shaping instructions. They can be a lifesaver when following complex patterns, preventing you from losing your place and making mistakes.
5. Keep a Good Tension
Consistent tension is important in knitting to ensure an even and professional-looking fabric. Make sure you don’t pull your yarn too tight or leave it too loose. Practice finding a comfortable tension that allows your stitches to be the same size and not too tight or too loose. Remember, tension may vary between knitters, so it’s essential to find what works best for you.
6. Join a Knitting Group or Community

Joining a knitting group or online community can provide you with support, inspiration, and advice. Being part of a knitting community can help you stay motivated and learn new techniques. It’s also a great way to share your progress, ask questions, and connect with fellow knitters who share the same passion.
By following these tips, you’ll be well on your way to successful beginner knitting. Remember to be patient with yourself, practice regularly, and have fun with your knitting projects. Happy knitting!