Easy DIY Pattern for a Knitted Soap Holder

If you’re looking for a creative and practical way to store your soap, why not try knitting a soap holder? This simple and fun project is a great way to use up leftover yarn and create a unique and functional item for your bathroom. Whether you’re a seasoned knitter or just starting out, this pattern is perfect for all skill levels.
The beauty of knitting a soap holder is that you can customize it to fit any size or shape of soap. You can also experiment with different stitch patterns and yarn types to create a variety of textures and designs. This allows you to unleash your creativity and make a truly one-of-a-kind soap holder.
In this article, we will provide a step-by-step guide to knitting a soap holder, including the materials you’ll need and the basic stitches required. We’ll also include tips and tricks to help you along the way and troubleshoot any common problems. So grab your needles and yarn, and let’s get started on this fun and practical project!
Knitted Soap Holder Pattern
Looking for a fun and practical knitting project? Why not try knitting a soap holder? This knitted soap holder pattern is a great way to use up leftover yarn and create a useful item for your bathroom or kitchen. Plus, it makes a great gift!
To get started, you’ll need some basic knitting supplies, including yarn and knitting needles. You can use any type of yarn that you have on hand, but a soft and absorbent cotton or bamboo yarn works best for a soap holder. As for needles, choose a size that will give you a fairly tight gauge.
Materials:
- Yarn (cotton or bamboo suggested)
- Knitting needles
- Scissors
- Tapestry needle
Once you have your supplies ready, cast on the desired number of stitches. A good starting point is around 20 stitches, but you can adjust the number to make the soap holder larger or smaller. Knit in the round until the piece is long enough to comfortably fit your soap.
Next, you’ll want to create a handle for your soap holder. This can be done by knitting a few rows in a contrasting color or by creating a loop with a crochet hook. Attach the handle to the top of the soap holder, making sure it’s securely fastened.
Finally, bind off your stitches and weave in any loose ends. Your knitted soap holder is now ready to use or give as a gift! This pattern can be easily customized by adding stripes, embellishments, or even a lace pattern. Get creative and have fun with it!
Materials Needed
In order to create your own knitted soap holder, you will need the following materials:
- Yarn: Choose a soft and durable yarn in the color of your choice. You will only need a small amount, so consider using leftover yarn from previous projects.
- Knitting Needles: Select a pair of knitting needles that are appropriate for the weight of your yarn. A set of size 6 or 7 needles should work well for most yarns.
- Tapestry Needle: This needle will be used to weave in any loose ends and to seam the knitted pieces together.
- Soap: Find a bar of soap that you would like to use with your knitted soap holder. Choose a soap that is not too large or too small, as you will need to fit it comfortably inside the holder.
- Scissors: Make sure you have a pair of scissors handy to cut the yarn and any excess thread.
- Stitch Markers (optional): If you find it helpful, you can use stitch markers to mark the beginning of each round or any special stitch patterns.
Once you have gathered all of your materials, you will be ready to start knitting your own soap holder. Make sure to read the pattern instructions carefully and have fun with your project!
Step-by-Step Instructions
Here are step-by-step instructions on how to knit a soap holder:
Materials
- Size 8 knitting needles
- Worsted weight cotton yarn
- Tapestry needle
Pattern
- Cast on 30 stitches.
- Knit one row.
- Purl one row.
- Repeat steps 2 and 3 until the piece measures 4 inches.
- Knit one row.
- Purl one row.
- Bind off all stitches.
- Using a tapestry needle, fold the knitted piece in half and sew the side seams together.
- Turn the holder inside out.
Finishing
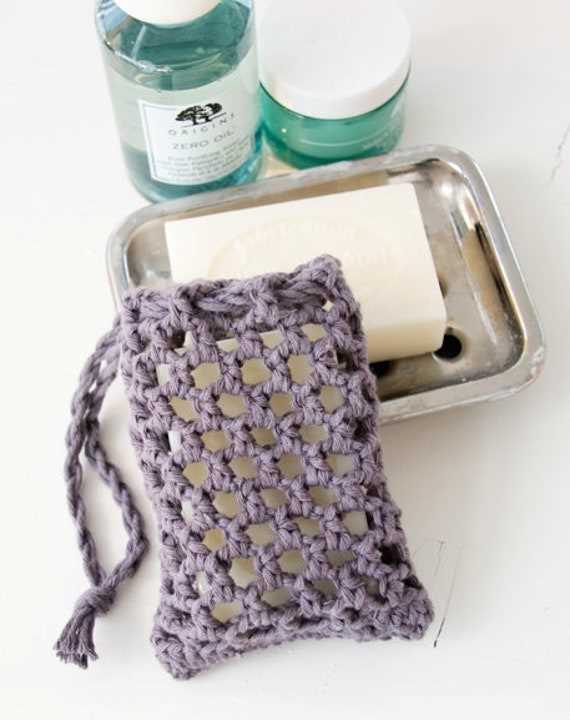
Once you have completed the knitting and seaming, your soap holder is almost ready to use. The final step is to slide a bar of soap into the holder and tighten the drawstring closure at the top to secure the soap in place.
Now you have a knitted soap holder that will keep your soap dry and make it easier to grip. Enjoy your handmade soap holder!
Tips for Knitting
Knitting is a relaxing and rewarding craft that allows you to create beautiful and unique items. Whether you are a beginner or an experienced knitter, here are some tips to help you improve your skills and enjoy your knitting projects.
1. Choose the right yarn and needles

When starting a new knitting project, it’s important to select the right yarn and needles. The yarn should be appropriate for the pattern you are working on, taking into consideration factors such as weight, fiber content, and color. The needles should be the correct size for your yarn to ensure an even tension and gauge.
2. Practice proper tension and gauge
Tension and gauge are crucial elements of knitting that determine the finished size and appearance of your project. To achieve the desired tension and gauge, practice knitting a swatch using the chosen yarn and needles, and measure it against the pattern requirements. Adjust your tension and needle size as needed to match the gauge, ensuring your final project turns out as intended.
3. Learn and master different stitches
Expand your knitting skills by learning and mastering different stitches. There are numerous stitch patterns and techniques available, such as ribbing, cables, lace, and colorwork. Experiment with different stitches to add texture and visual interest to your projects, and challenge yourself to try new techniques to keep your knitting journey exciting.
4. Take breaks and rest your hands
Knitting can be an enjoyable and addictive activity, but it’s important to take breaks and rest your hands to prevent fatigue and strain. Stretch your hands and fingers regularly, and consider using ergonomic knitting needles or accessories to ensure comfort and minimize discomfort during long knitting sessions. Remember, knitting should be a relaxing and enjoyable experience.
5. Join a knitting community
Knitting is a craft that brings people together, so consider joining a knitting community or group. Whether it’s an in-person knitting circle or an online forum, being part of a knitting community provides opportunities to share patterns, tips, and inspiration with fellow knitters. Additionally, you can learn from experienced knitters and gain valuable insights and support for your projects.
Choosing the Right Yarn
When it comes to knitting a soap holder, choosing the right yarn is crucial to ensure that it serves its purpose effectively. The yarn should be both durable and gentle on the skin, as it will be in constant contact with the soap.
1. Consider the texture: Opt for a yarn with a soft and smooth texture that will feel comfortable against the skin. Avoid yarns that are too coarse or rough, as they can cause irritation.
2. Look for absorbency: Choose a yarn that has good absorbency properties, as it will help to lather the soap and create a rich foam. Natural fibers like cotton and bamboo are excellent choices for their absorbent qualities.
3. Check the durability: The yarn should be durable enough to withstand frequent use and washing. Look for yarns that are known for their strength and resilience, such as acrylic blends or mercerized cotton.
4. Consider the weight: The weight of the yarn will affect the overall feel and performance of the soap holder. Opt for a medium-weight yarn that is not too thick or too thin, as this will provide a balanced and comfortable grip.
5. Experiment with colors: While the color of the yarn may not impact the functionality of the soap holder, it can add a fun and decorative element. Consider choosing a yarn in a color that complements the décor of your bathroom or adds a pop of color to your knitting project.
By considering these factors and selecting the right yarn, you can create a knitted soap holder that is not only functional but also aesthetically pleasing.
Creating Different Patterns
Knitting is a versatile craft that allows you to create a wide range of patterns and designs. With your creativity and a few basic techniques, you can make unique and beautiful knitted items. Whether you are a beginner or an experienced knitter, experimenting with different patterns can be a fun and rewarding experience.
One way to create different patterns is to experiment with different stitch patterns. There are numerous stitch patterns available, ranging from simple to complex. You can choose from basic stitches like garter stitch or stockinette stitch, or try more intricate patterns like cables or lace. Different stitch patterns can be combined to create interesting textures and designs.
Another way to create different patterns is to play with color. You can use different colored yarns to create stripes, ombre effects, or color blocks. If you want to take it a step further, you can also try Fair Isle or intarsia knitting, which involve using multiple colors in a single row or motif. Adding color to your knitted items can bring them to life and make them stand out.
Furthermore, you can create different patterns by modifying existing patterns. Once you have a solid understanding of knitting techniques, you can start making changes to patterns to suit your preferences. You can alter the stitch count, change the size, or add or remove certain design elements. This allows you to put your own personal touch on the pattern and make it unique.
In conclusion, there are numerous ways to create different patterns in knitting. By experimenting with different stitch patterns, playing with color, and modifying existing patterns, you can unleash your creativity and make one-of-a-kind knitted items. So grab your knitting needles, choose your favorite yarn, and start creating your own unique patterns today!
Adding Embellishments
Once you have finished knitting your soap holder, you can add embellishments to make it even more unique and colorful.
One option is to sew on buttons or beads. This can create a visually interesting design and add texture to your soap holder. You can choose beads in different colors and sizes to create a pattern or a random design. You can also use buttons in different shapes and styles to complement the overall look of your soap holder.
Another option is to embroider on your soap holder. You can use colorful embroidery floss to stitch on patterns, flowers, or any other design you like. Embroidery can add a personal touch and make your soap holder stand out.
If you prefer a simpler approach, you can add a crochet border to your soap holder. This can be done by using a crochet hook to create loops around the edges of your soap holder. You can choose a contrasting color yarn to make the border pop or use the same color for a subtle, cohesive look.
Regardless of the embellishment option you choose, make sure to securely attach the embellishments to the soap holder. This will ensure that they stay in place even with regular use and washing. Now that you have added your own personal touch, your knitted soap holder is ready to use or gift to someone special!
Benefits of Using a Knitted Soap Holder
A knitted soap holder is a practical and stylish accessory that offers several benefits for both you and your soap. Whether you’re using it in the shower or at the sink, here are some reasons why you should consider using a knitted soap holder:
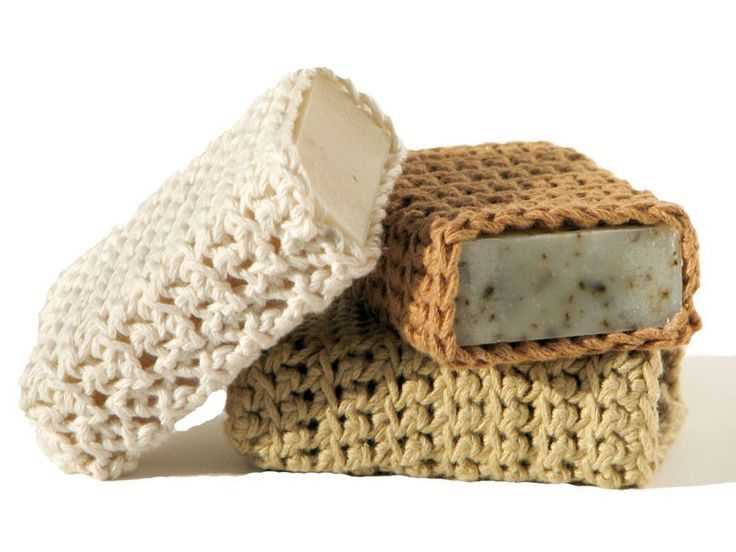
Maintains Soap Bar’s Shape
One of the main benefits of using a knitted soap holder is that it helps to maintain the shape of your soap bar. The knitted fabric provides a gentle cushioning effect, preventing the soap from becoming mushy or melting too quickly. This means that your soap will last longer, saving you money in the long run.
Exfoliates and Cleanses
A knitted soap holder is typically made with textured stitches or embellishments, which can help exfoliate your skin as you use it. The gentle abrasion removes dead skin cells, leaving your skin feeling smooth and refreshed. Additionally, the raised surface of the knitted fabric creates lather more easily, allowing for a deeper cleanse.
No More Slippery Soap
Have you ever dropped a slippery soap bar during your shower or while washing your hands? With a knitted soap holder, you can say goodbye to those slippery moments. The textured surface of the knitted fabric provides a better grip, making it easier to hold onto your soap securely. This reduces the risk of accidents and prevents any wastage.
Eco-Friendly Option
Using a knitted soap holder is an eco-friendly alternative to traditional plastic soap holders or disposable soap dishes. By opting for a reusable and washable knitted holder, you’re reducing your environmental footprint by eliminating the need for single-use plastic or other materials. It’s a small but impactful change that can contribute to a greener planet.
In conclusion, a knitted soap holder offers numerous benefits, including maintaining the shape of your soap, exfoliating and cleansing your skin, preventing slippery accidents, and being an eco-friendly option. Consider adding a knitted soap holder to your bathroom or kitchen routine for a more enjoyable and sustainable experience.
Customizing Your Soap Holder
One of the great things about knitting your own soap holders is the ability to customize them to fit your personal style and preferences. Whether you prefer bright colors or neutral tones, there are endless options for making your soap holder unique.
Color: Choose yarn in a color that complements your bathroom or matches your soap. Vibrant colors like aqua, hot pink, or lime green can add a fun pop to your bathroom decor. If you prefer a more classic look, consider using neutral tones like beige, gray, or white. You can also experiment with variegated yarns for a more unique and textured look.
Pattern: Get creative with different stitch patterns to add texture and visual interest to your soap holder. Try a simple garter stitch for a classic look, or experiment with ribbing, cables, or lace patterns for a more intricate design. You can also combine different stitch patterns to create a unique and personalized soap holder.
Size: Adjusting the size of your soap holder is another way to customize it. If you prefer a smaller soap holder, you can simply cast on fewer stitches or decrease the number of rows you knit. For a larger soap holder, you can cast on more stitches or knit additional rows. Consider the size of your soap and how snug or loose you want the holder to fit.
Embellishments: Add extra flair to your soap holder with embellishments like buttons, beads, or bows. Sew a small button onto the front of your soap holder for a cute and functional closure. String beads onto the yarn as you knit for added texture and visual interest. You can also attach a knitted or fabric bow to the top of your soap holder for a feminine touch.
Customizing your soap holder is a fun and creative way to make it uniquely yours. Whether you choose bold colors, intricate stitch patterns, or added embellishments, your custom soap holder will be a perfect match for your personal style.
Knotting Techniques
If you’re interested in learning how to create intricate and beautiful knotted designs, understanding different knotting techniques is essential. Knotting techniques can be used in various crafts, such as macrame, jewelry making, and even knitting. In this article, we will explore some commonly used knotting techniques and their applications in different crafts.
1. Square Knot
The square knot is one of the most basic and versatile knotting techniques. It is created by crossing two strands of rope or thread over and under each other alternately. This technique is commonly used in macrame to create braided patterns and in jewelry making to secure beads in place.
2. Half Hitch
The half hitch is a simple knotting technique that involves looping one end of a rope or thread over the other end and pulling it through. It can be used to create decorative patterns in macrame and to secure cords in jewelry making.
3. Lark’s Head Knot
The lark’s head knot is used to attach a cord or thread to a ring, dowel, or other objects. It is created by folding the cord or thread in half, placing the folded end over the object, and pulling the loose ends through the loop created. This technique is commonly used in macrame to attach cords to a base.
4. Double Half Hitch
The double half hitch is a more complex knotting technique that involves creating two consecutive half hitch knots. This technique is commonly used in macrame to create more intricate patterns and in jewelry making to secure cords tightly.
By mastering these knotting techniques, you can unlock a world of creativity and create stunning knotted designs in various crafts. Experiment with different materials and knotting patterns to create unique and personalized creations.
Washing and Caring for Your Knitted Soap Holder
Knitted soap holders are not only functional but also add a touch of charm to your bathroom or kitchen. To ensure that your knitted soap holder remains in good condition and continues to serve its purpose, it is important to follow proper washing and care instructions.
Washing:
When it comes to washing your knitted soap holder, it is best to hand wash it in lukewarm water. Avoid using hot water as it can cause the fibers to shrink. Gently squeeze the soap holder to remove any excess water, but do not wring or twist it as this can distort its shape. Use a mild detergent suitable for delicate fabrics and scrub any stains or dirt gently with your fingertips. Rinse thoroughly to remove any soap residue.
Drying:
After washing, it is important to properly dry your knitted soap holder to prevent mildew or odors. Gently reshape the soap holder to its original shape, patting it with a towel to remove excess water. Avoid wringing or twisting. To expedite the drying process, you can place the soap holder on a towel and roll it up, applying gentle pressure to absorb additional moisture. Lastly, lay the soap holder flat on a clean, dry towel or drying rack and allow it to air dry completely before using it again.
It is worth noting that some knitted soap holders may be machine washable, but it is always best to check the care instructions specific to your soap holder’s material before attempting to machine wash it.
General Care Tips:
- Avoid exposing your knitted soap holder to direct sunlight for extended periods of time as it can cause the colors to fade.
- Keep your soap holder away from sharp objects that can snag or tear the delicate fibers.
- If your soap holder becomes stretched out, you can reshape it by wetting it slightly and gently pulling it back into shape.
- To prolong the lifespan of your knitted soap holder, consider rotating it with other soap holders to distribute the wear evenly.
By following these washing and care instructions, you can ensure that your knitted soap holder remains clean, fresh, and in good condition for many uses to come.
Using Your Knitted Soap Holder
Now that you’ve finished knitting your soap holder, it’s time to put it to use! Here are some tips for using your knitted soap holder:
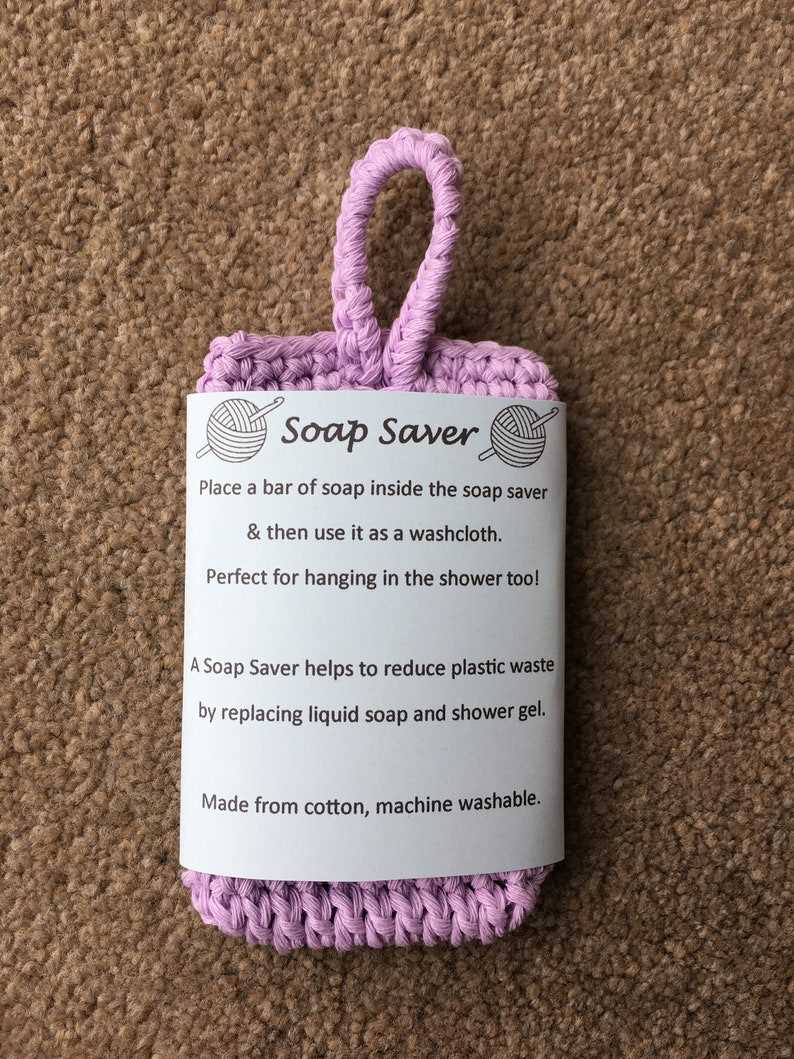
1. Insert your soap
Place a bar of soap into the knitted pouch. Make sure the soap is centered and secure inside the holder.
2. Wet and lather
Wet the soap and holder together under running water. Once wet, start lathering the soap in your hands, allowing the knitted texture to create a gentle exfoliating experience.
3. Hang to dry
After using the soap, hang the holder in a well-ventilated area to dry. This will help prevent any mildew or unwanted odors from developing.
4. Maintenance and care
Regularly clean the soap holder to keep it fresh and hygienic. You can hand wash the holder with gentle soap and water, or toss it in the washing machine on a delicate cycle.
To add a decorative touch to your bathroom, you can also display your knitted soap holders on a soap dish or hang them with a ribbon or hook.
Conclusion
A knitted soap holder not only adds a touch of handmade charm to your bathroom, but it also provides a practical way to extend the life of your soap. With a knitted texture that gently exfoliates and a design that allows for easy drying, your soap holder will enhance your bathing experience. So grab your knitting needles and start creating a collection of knitted soap holders to enjoy!