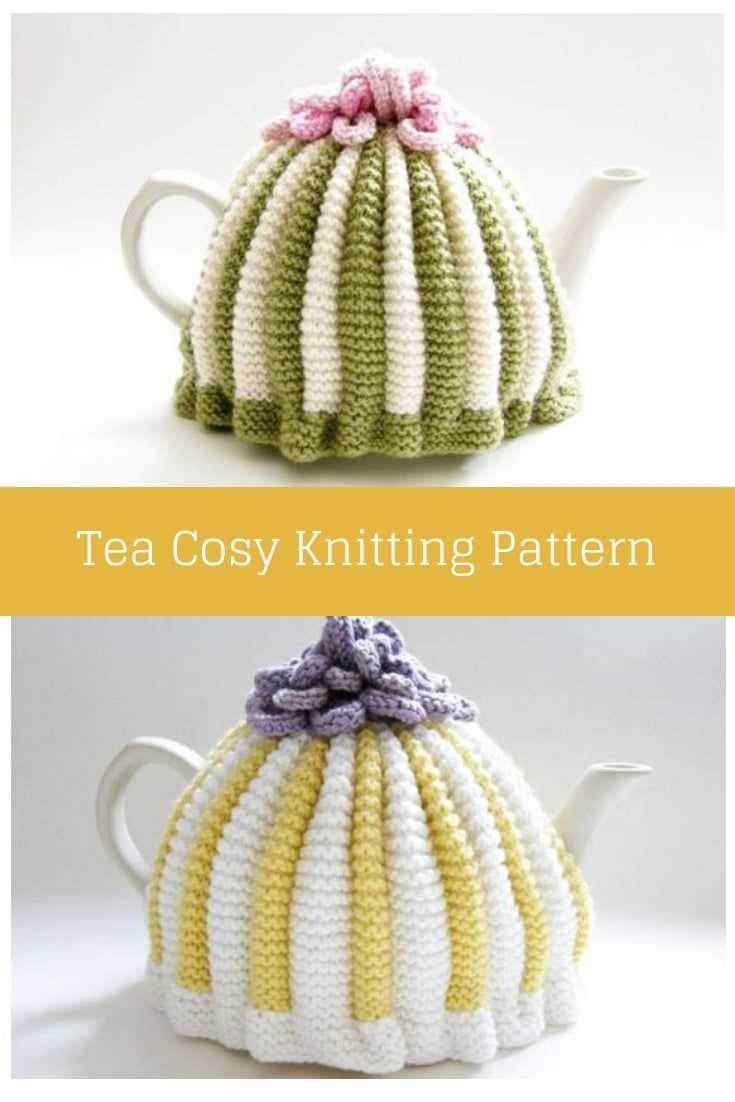
Cozy up with this English tea knitting pattern

If you are a fan of tea and knitting, then this article is for you! In this guide, we will show you how to create your very own English tea cosy using a knitting pattern. A tea cosy is a knitted cover that is placed over a teapot to keep the tea warm. It not only serves a practical purpose, but it also adds a touch of charm and character to your tea set.
Knitting a tea cosy is a great project for both experienced and beginner knitters. It allows you to practice various knitting techniques and experiment with different yarns and colors. Plus, you will end up with a functional and stylish accessory for your teapot.
In this article, we will provide you with an easy-to-follow knitting pattern for an English tea cosy. We will also explain the basic knitting techniques used in the pattern, so even if you are a beginner, you will be able to create a beautiful tea cosy. So grab your knitting needles, your favorite tea blend, and let’s get started!
How to Knit an English Tea Cosy: A Complete Guide
In this complete guide, we will walk you through step-by-step instructions on how to knit your very own English tea cosy. A tea cosy is a knitted cover that is placed over a teapot to keep the tea warm for longer periods of time. It not only serves a functional purpose but also adds a touch of charm and personality to your tea time.
Materials you will need:
- Knitting needles
- Yarn in your desired color
- Scissors
- Measuring tape
Step 1: Choosing the right pattern
There are numerous knitting patterns available for tea cosies, ranging from simple designs to intricate patterns. Choose a pattern that matches your skill level and personal style. Some popular patterns include the classic ribbed design, the delicate lace pattern, or the whimsical animal-shaped cosy.
Step 2: Gathering your materials
Make sure you have all the necessary materials before you start knitting. Knitting needles in the appropriate size for your chosen pattern, yarn in your desired color, scissors, and a measuring tape are all essential for a successful tea cosy project.
Step 3: Casting on
Using your knitting needles, cast on the required number of stitches as specified in your pattern. This will form the foundation of your tea cosy. Make sure to keep your tension even to achieve a neat and uniform look.
Step 4: Knitting the body
Follow the instructions in your chosen pattern to knit the body of the tea cosy. This may involve different stitch patterns and shaping techniques. Take your time to read the pattern carefully and follow it step by step. Don’t hesitate to seek clarification if you come across any confusing instructions.
Step 5: Shaping the top
Once you have completed the body of the tea cosy, you may need to shape the top to accommodate the teapot’s spout and handle. This may involve decreasing the number of stitches or creating openings for the spout and handle. Follow the pattern instructions closely to achieve the desired shape.
Step 6: Finishing touches
After shaping the top, you will need to bind off your stitches to secure the knitting. Cut the yarn, leaving a long tail for sewing. Use a tapestry needle to weave in any loose ends and sew any necessary seams. Your tea cosy is now complete!
With these step-by-step instructions, you can now confidently knit your own English tea cosy. Experiment with different patterns and colors to create unique and personalized designs that will impress your guests as they enjoy a warm cup of tea.
Choosing the Right Yarn for Your Tea Cosy
When it comes to knitting a tea cosy, choosing the right yarn is essential. The yarn you select will not only determine the overall look of your tea cosy but also its functionality and durability. There are several factors to consider when choosing the perfect yarn for your project.
1. Insulation: One of the main purposes of a tea cosy is to keep your tea warm. Therefore, it’s important to choose a yarn that provides good insulation. Look for yarns made from natural fibers, such as wool or alpaca, as they tend to have excellent insulating properties.
2. Durability: A tea cosy is a functional item that will be used and washed frequently. Select a yarn that is strong and durable to ensure your tea cosy withstands regular use. Yarns that have a tight twist or a blend of natural and synthetic fibers are often more durable.
3. Style: The yarn you choose will also impact the overall style and appearance of your tea cosy. Consider the texture, color, and pattern of the yarn to complement your tea set or kitchen decor. Variegated or self-striping yarns can add visual interest, while solid-colored yarns offer a more classic and timeless look.
4. Gauge: Pay attention to the recommended gauge for your chosen knitting pattern. Using the right yarn weight and achieving the correct gauge is crucial for ensuring your tea cosy fits properly. Make sure to check the label of the yarn for its weight and recommended needle size.
5. Care Instructions: Lastly, consider the care instructions for the yarn. Some yarns may require special care, such as handwashing or dry cleaning, while others can be machine washed. Choose a yarn that aligns with your preferred method of care to make maintenance easier.
By considering these factors and selecting the right yarn for your tea cosy, you’ll be able to create a functional and beautiful accessory for your teapot. Take your time to browse through different yarn options and don’t hesitate to ask for advice from experienced knitters or yarn store employees.
Selecting the Perfect Needles for Knitting
When it comes to knitting, selecting the right needles is crucial for a successful project. The type and size of the needles can greatly affect the outcome of your knitting, from the look and feel of the final product to the ease of working with the yarn. There are a few key factors to consider when choosing your needles.
Type of Needles
There are various types of knitting needles available on the market, each with its own advantages and disadvantages. The most common types include straight needles, circular needles, and double-pointed needles. Straight needles are the traditional choice and are ideal for flat knitting projects. Circular needles are versatile and can be used for both flat and circular knitting. Double-pointed needles are primarily used for knitting in the round, such as for socks or hats.
Needle Material
The material of the needles can also make a significant difference in your knitting experience. Different materials have different characteristics, such as their weight, texture, and flexibility. Common needle materials include metal, wood, and plastic. Metal needles are durable and have a smooth surface, allowing stitches to glide effortlessly. Wood needles are lightweight and warm to the touch, providing a comfortable knitting experience. Plastic needles are affordable and lightweight, making them a great choice for beginners.
Needle Size
The size of the needles is another important consideration. Needle sizes are usually measured in millimeters (mm) or in US sizes. The size of the needles will depend on the yarn weight and the desired tension or gauge of your project. Thicker yarns generally require larger needles, while thinner yarns require smaller needles. It’s important to follow the recommended needle size specified in the pattern you are working with to achieve the desired results.
Overall, selecting the perfect needles for knitting involves considering the type of needles, the material, and the size. By selecting the right needles for your project, you can ensure a smooth and enjoyable knitting experience, and create beautiful and professional-looking finished pieces.
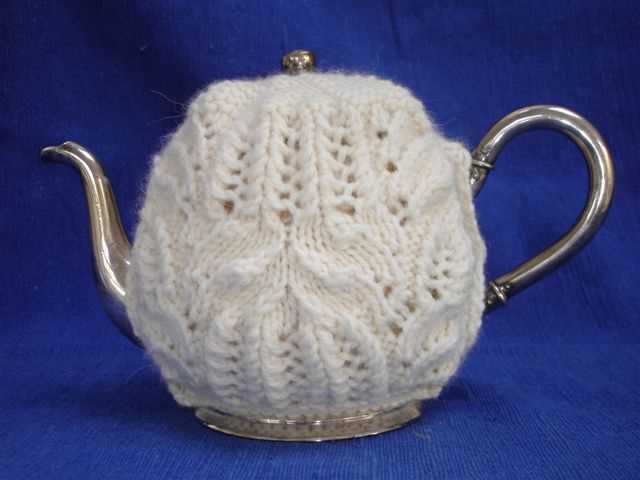
Understanding the Basic Knitting Stitches

Knitting is a traditional craft that involves creating fabric by interlocking loops of yarn with knitting needles. It is a versatile and enjoyable activity that allows you to create beautiful garments and accessories. To get started on your knitting journey, it’s essential to understand the basic knitting stitches.
Knit Stitch (K)
The knit stitch is the most fundamental stitch in knitting. It creates a smooth and even fabric texture. To knit, insert the right-hand needle into the front of the first stitch on the left-hand needle, bringing the yarn up and over the right-hand needle. Pull the new loop through the stitch, slipping the old stitch off the left-hand needle. Repeat this process across the row.
Purl Stitch (P)
The purl stitch is the mirror image of the knit stitch and creates a bumpy texture on the fabric’s right side. To purl, insert the right-hand needle into the front of the first stitch on the left-hand needle, but this time bring the yarn in front of the right-hand needle. Pull the new loop through the stitch, slipping the old stitch off the left-hand needle. Repeat this process across the row.
Stockinette Stitch
The stockinette stitch is created by alternating rows of knit and purl stitches. It produces a smooth and flat fabric on one side, called the right side, and a bumpy texture on the other side, called the wrong side. To achieve the stockinette stitch, knit one row, then purl the next row, and continue repeating these two rows.
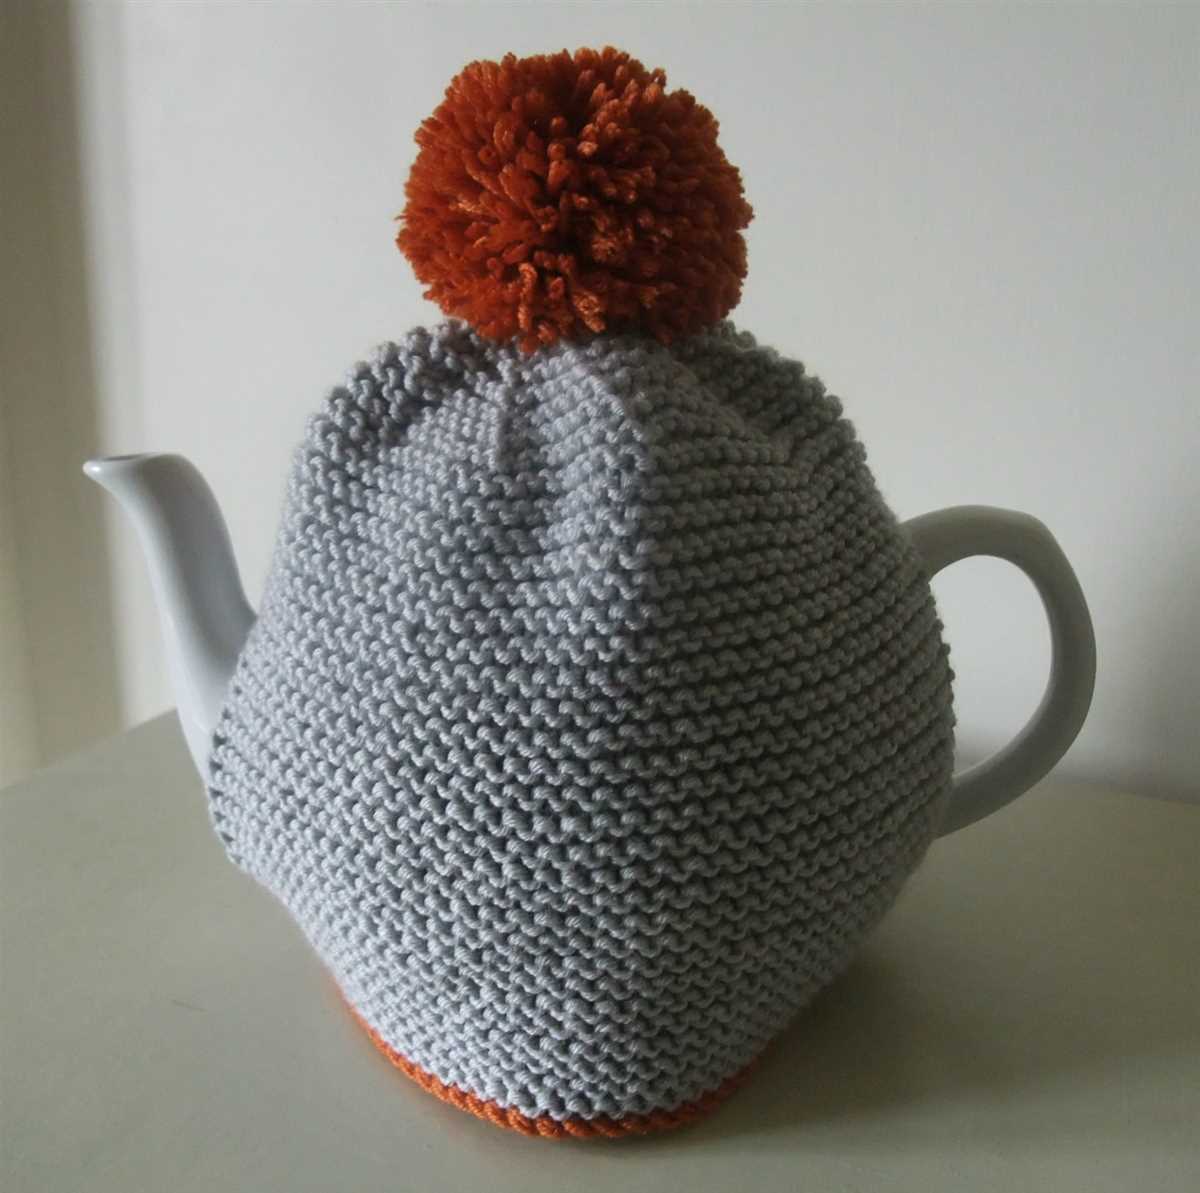
Garter Stitch
The garter stitch is another basic stitch pattern that is created by knitting every row. It creates a fabric with ridges on both sides and is reversible, meaning both sides of the fabric look the same. The garter stitch is often used for scarves and blankets. To knit the garter stitch, simply knit every stitch on every row.
Casting on to Start Your Tea Cosy
When knitting a tea cosy, the first step is to cast on stitches to create the base of the cosy. This is an essential step that determines the size and shape of the cosy, so it is important to cast on the correct number of stitches.
To start, you will need a pair of knitting needles and your chosen yarn. It is best to use a yarn that is suitable for the cozy and will provide the desired texture and insulation. Once you have your materials ready, you can begin casting on.
Step 1: Hold one knitting needle in your right hand and the other needle in your left hand. Make sure the needle with the slipknot is in your left hand.
Step 2: Insert the right-hand needle into the slipknot from left to right, with the point of the needle facing the left. The slipknot should be on the left-hand needle.
Step 3: Using your right hand, bring the yarn over the right-hand needle from back to front, creating a loop around the needle.
Step 4: Bring the right-hand needle back through the slipknot, from right to left, and pull the loop of yarn through the slipknot.
Step 5: Tighten the loop of yarn around the needle to secure the stitch. Make sure it is not too tight or too loose, as this can affect the tension of your knitting.
Step 6: Repeat steps 2 to 5 to cast on the desired number of stitches for your tea cosy pattern. Count the stitches as you go to ensure you have the correct number.
Once you have cast on all the stitches, you are ready to start knitting the first row of your tea cosy pattern. Happy knitting!
Knitting the Body of the Tea Cosy
In order to start knitting the body of the tea cosy, you will need to cast on the required number of stitches, as specified in the knitting pattern. This is usually done using the long-tail cast on method, but you can use any cast on method you prefer.
Once you have cast on the stitches, you can begin working in the specified stitch pattern. This may involve knitting, purling, or combining different stitches to create the desired pattern. The pattern will indicate the number of rows or rounds to work in the stitch pattern, so make sure to keep track of your progress.
As you work on the body of the tea cosy, it’s important to maintain an even tension throughout your knitting to ensure that the finished product is the correct size. If your tension is too tight, the tea cosy may be too small, and if it’s too loose, it may be too big. Take your time and adjust your tension as necessary.
Depending on the knitting pattern, you may need to make increases or decreases to shape the body of the tea cosy. These are usually done by adding or subtracting stitches at certain points in the pattern. Make sure to follow the pattern instructions carefully to achieve the correct shape.
As you approach the end of the body, the pattern may instruct you to finish with a certain number of rows or rounds in a specific stitch pattern. Once you have completed these, you can bind off your stitches to secure the edges of the tea cosy. This is typically done using the basic bind off method, but again, you can use any bind off method you prefer.
Creating Beautiful Patterns with Fair Isle Technique
The Fair Isle knitting technique is a traditional style of stranded colorwork that originated in the Fair Isle of Scotland. It involves knitting with two or more colors in each row, creating beautiful intricate patterns. This technique is often used to create warm and cozy accessories, such as hats, mittens, and sweaters.
To create stunning Fair Isle patterns, you will need to choose a color palette that complements each other. You can use bright and contrasting colors to make your patterns pop or opt for a more subtle and harmonious color combination. It’s important to choose colors that work well together and create a balanced look.
Getting Started
Once you have chosen your color palette, you will need to decide on a pattern to knit. Fair Isle patterns often feature geometric shapes, motifs, and repeating patterns. You can find a wide variety of patterns available online or in knitting books. Some popular Fair Isle patterns include traditional Nordic designs, floral motifs, and abstract geometric patterns.
When knitting with the Fair Isle technique, it’s important to keep your tension even. Uneven tension can result in uneven stitches and a distorted pattern. Take care to knit each stitch with the same tension, ensuring that your fabric lays flat and the patterns are clearly defined.
- Use a colorwork chart: Fair Isle patterns are typically charted, with each square representing a stitch and each color represented by a symbol. Follow the chart carefully to create the desired pattern, switching colors as indicated.
- Carry your yarn: When knitting with multiple colors, you will need to carry your yarn across the back of your work. This helps create a clean and neat finish, and prevents long floats of yarn from getting tangled.
- Block your finished project: To enhance the beauty of your Fair Isle knitting, block your finished project. This involves gently washing and stretching your knitted piece to even out the stitches and create a smoother fabric.
With practice and attention to detail, you can create beautiful patterns using the Fair Isle knitting technique. Whether you’re knitting a cozy tea cosy or a stylish sweater, the intricate colorwork will add a touch of elegance to your knitting projects.
Shaping the Top of Your Tea Cosy with Decreases
When knitting a tea cosy, one of the key elements is shaping the top to create a snug fit around the teapot lid. This is achieved through a series of decreases. Decreases involve knitting or purling two stitches together to reduce the total number of stitches on the needle.
To begin shaping the top of your tea cosy, you will need to identify the center stitches. These are the stitches that will go over the teapot lid. You can easily find the center by folding your tea cosy in half and marking the stitches on either side of the fold.
Selecting the Decrease Method
There are several decrease methods you can choose from to shape the top of your tea cosy. The most common methods are knit two together (k2tog) and purl two together (p2tog). You can also use slip, slip, knit (ssk) and slip, slip, purl (ssp) for more decorative decreases.
- Knit two together (k2tog) is a simple decrease that creates a right-leaning decrease.
- Purl two together (p2tog) is the purl equivalent of k2tog and also creates a right-leaning decrease.
- Slip, slip, knit (ssk) is a left-leaning decrease that twists the stitches as it reduces the total number of stitches.
- Slip, slip, purl (ssp) is the purl equivalent of ssk and also creates a left-leaning decrease.
Choose the decrease method that best suits your desired appearance and knitting style. It’s important to keep in mind that the decreases should be evenly spaced around the center stitches to create a symmetrical tea cosy.
Decreasing Row by Row
To begin decreasing, you will work the decrease row every few rows as specified in your knitting pattern or according to your own design. The decrease row typically involves working a series of decreases on either side of the center stitches.
For example, you may work a decrease row as follows: k2tog, knit to the last 2 stitches before the center stitches, k2tog, slip-marker, knit to the end. This decrease row is then repeated every few rows until the desired number of stitches is reached.
Remember to keep track of your decrease rows and ensure they maintain the desired symmetry and fit around the teapot lid. Once you have completed the required number of decrease rows, you can proceed with the rest of your tea cosy pattern, such as shaping the sides and creating the handle opening.
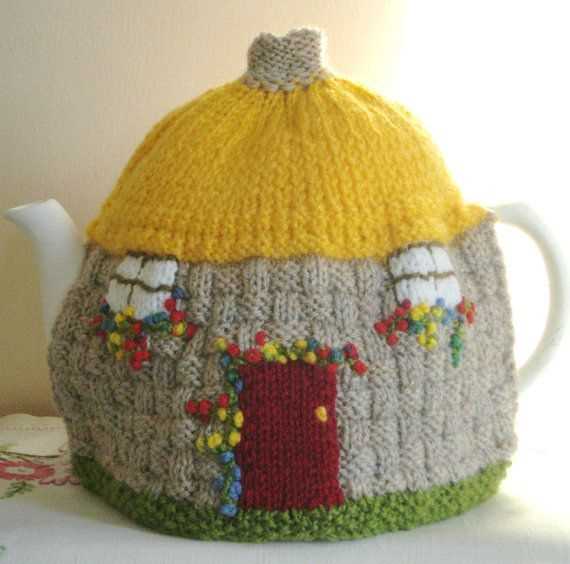
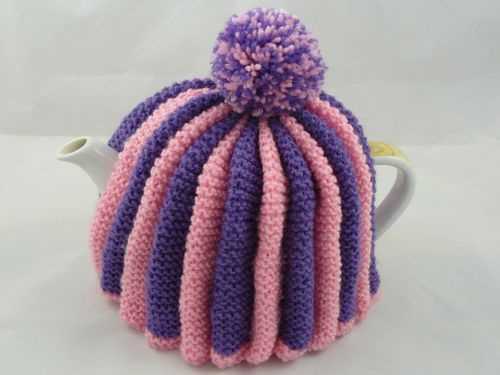
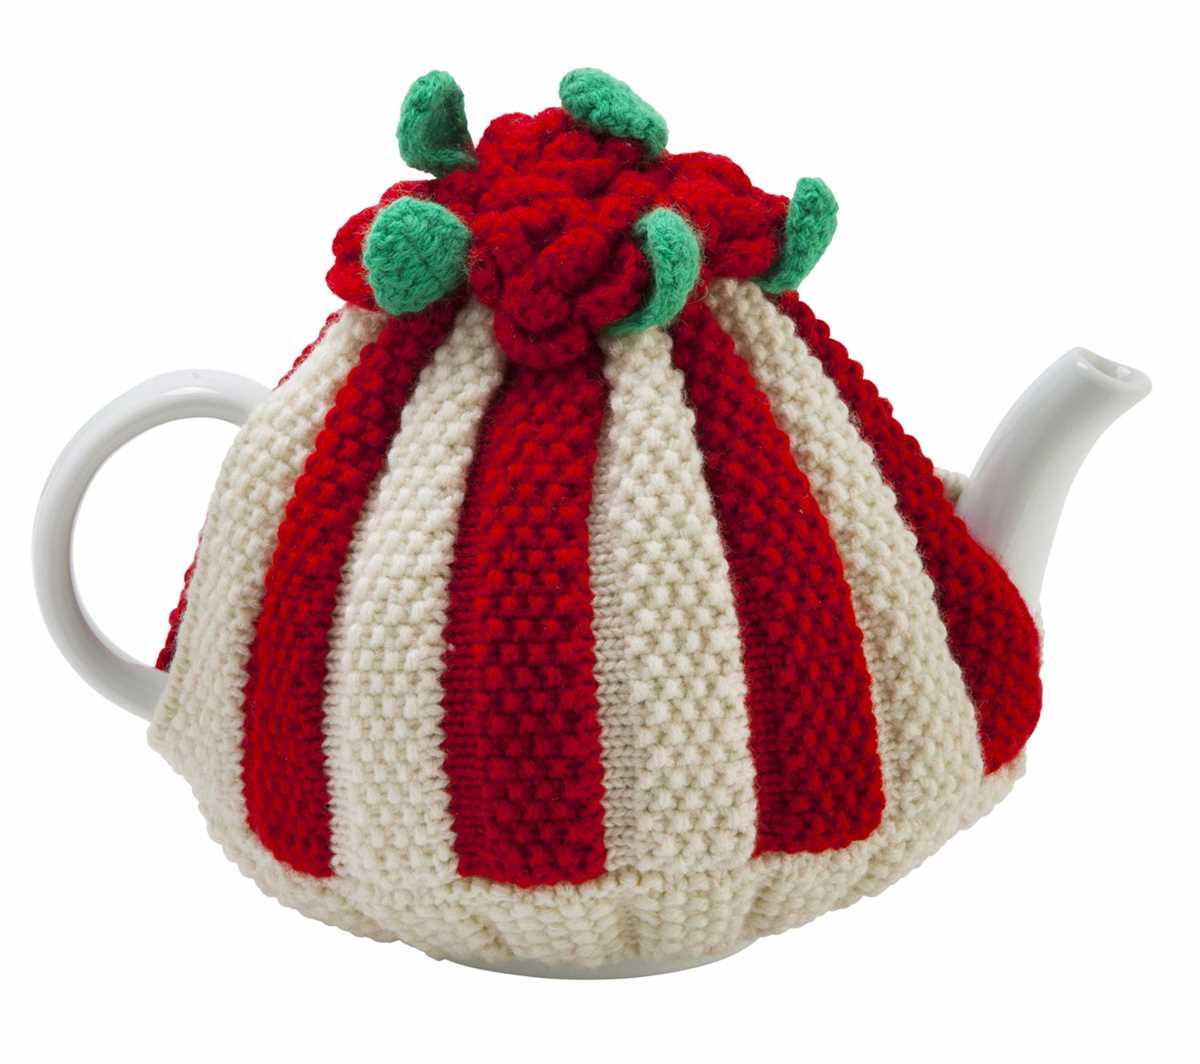
Adding Embellishments: Buttons, Ribbons, and More
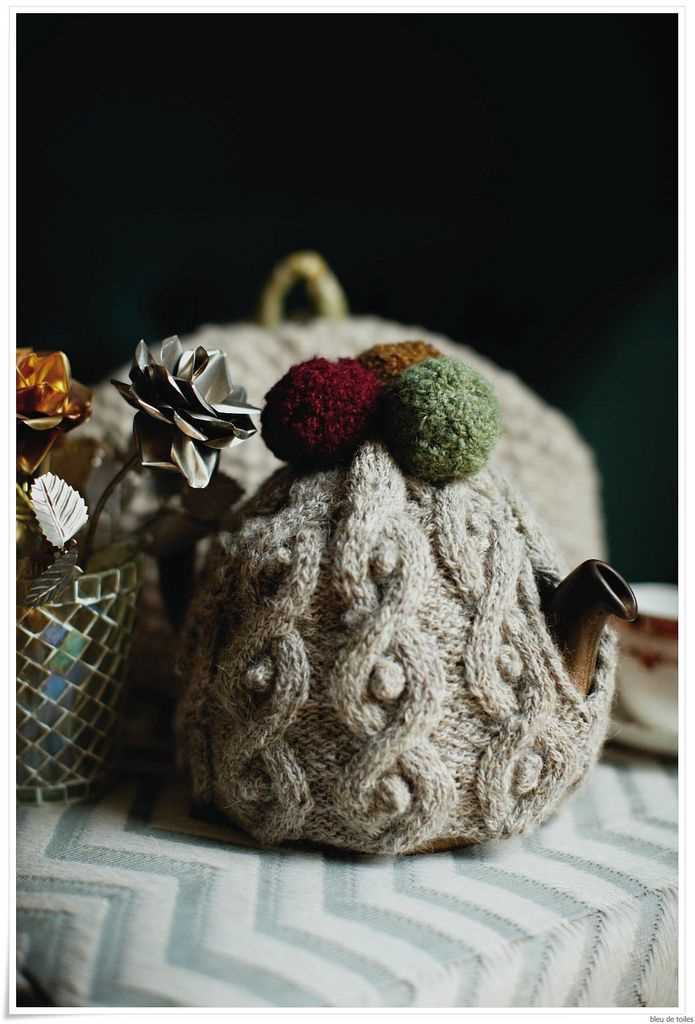
In addition to providing insulation and charm to your teapot, a knitted tea cosy can also be a great canvas for adding unique embellishments. Buttons, ribbons, and other decorative elements can be used to personalize your tea cosy and make it truly one of a kind.
If you want to add buttons to your tea cosy, simply sew them onto the knitted fabric using thread and a needle. You can choose buttons in different colors, shapes, and sizes to match your personal style or the theme of your tea party. Buttons can be attached as simply as sewing them onto the fabric, or you can get creative by arranging them in patterns or clusters.
Using Ribbons
Ribbons are another popular embellishment for tea cosies. You can add a ribbon as a tie closure, securing the cosy around the teapot. Alternatively, you can use ribbons to create bows, loops, or other decorative elements. Simply sew the ribbon onto the knitted fabric and tie it in a knot or a bow to add a touch of elegance and femininity to your tea cosy.
Other Embellishment Ideas

If you want to go beyond buttons and ribbons, there are endless possibilities for adding unique embellishments to your tea cosy. You can use embroidery thread to add intricate designs or monograms to the fabric. Beads, sequins, and pearls can be sewn on to create a glamorous and eye-catching effect. You can even use fabric paint or fabric markers to draw or stencil designs directly onto the fabric.
When it comes to adding embellishments to your tea cosy, the sky is the limit. Let your creativity run wild and experiment with different materials, colors, and techniques to create a tea cosy that is as beautiful as it is functional.
Blocking and Finishing Your Tea Cosy
Once you have finished knitting your tea cosy, the next step is to block and finish it. Blocking is an important process that helps shape your knitted piece and give it a professional finish. Here are some steps to follow:
1. Soak your tea cosy
Fill a basin or sink with lukewarm water and add a mild soap or wool wash. Gently place your tea cosy in the water and let it soak for about 15-20 minutes. This will help relax the fibers and remove any dirt or oils.
2. Shape your tea cosy
Remove the tea cosy from the water and gently squeeze out the excess water. Lay a clean towel on a flat surface and place the tea cosy on top. Gently shape it into the desired form, making sure all the stitches are in place.
3. Pin your tea cosy
Using rust-proof blocking pins, gently pin the edges of the tea cosy to the towel, ensuring it maintains its shape. You can also pin any decorative details or trimmings in place. Be careful not to stretch the fabric too much, as this may distort the pattern.
4. Allow your tea cosy to dry
Leave your pinned tea cosy to dry naturally, away from direct sunlight or heat sources. This may take a few days, depending on the thickness of the yarn and the humidity of the environment. Once it is completely dry, gently remove the pins.
5. Finishing touches
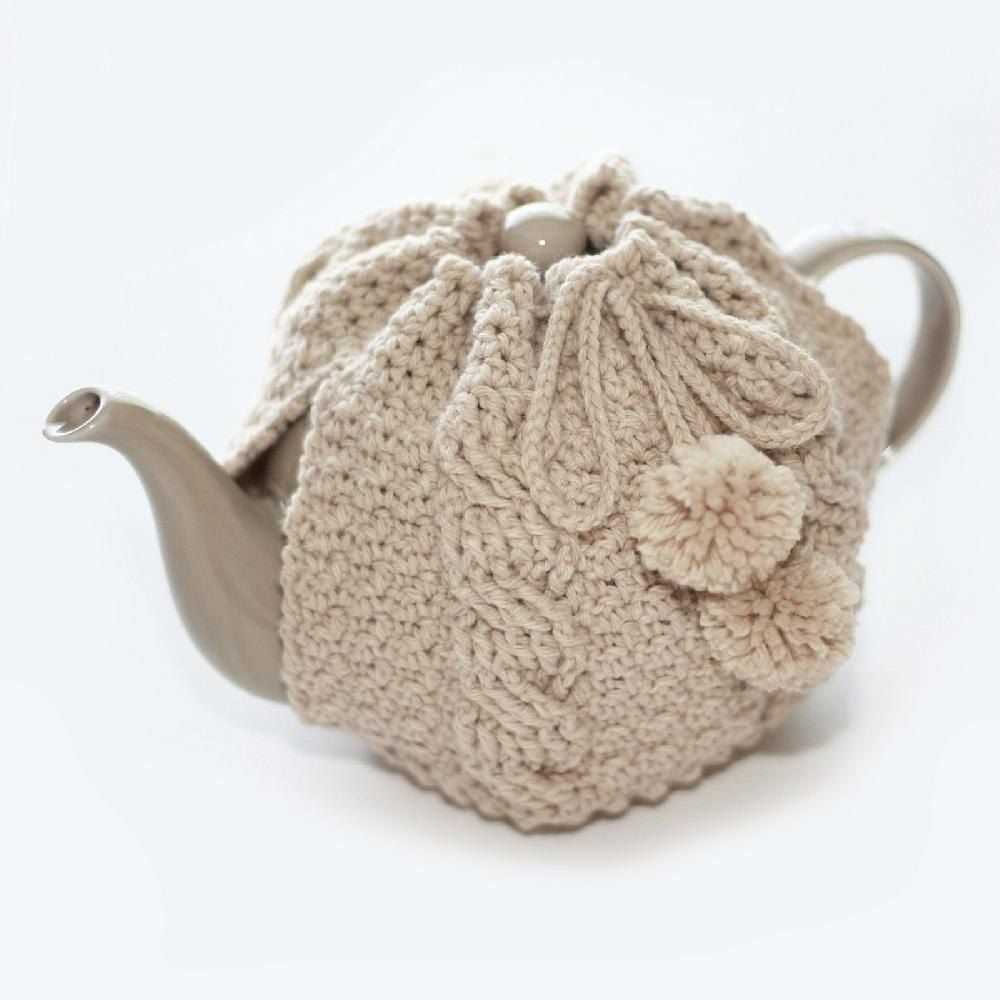
If desired, you can add any additional decorations or finishing touches to your tea cosy, such as buttons, pom-poms, or ribbons. Sew them securely in place using a needle and thread or a small crochet hook.
Once your tea cosy is blocked and finished, it is ready to use or gift to someone special. Enjoy your cozy cup of tea!
Customizing Your Tea Cosy with Embroidery
If you’re looking to add a personal touch to your tea cosy, embroidery is a great way to do it. Not only does it allow you to create unique designs, but it also adds texture and depth to your knitted creation. Here are a few tips to help you get started with customizing your tea cosy with embroidery.
Choose Your Design
Before you start embroidering, think about the design you want to create. You could go for a simple pattern, such as flowers or geometrical shapes, or you could get more creative and personalize the design. Consider the color scheme of your tea cosy and choose embroidery thread that complements it.
Prepare Your Tea Cosy
Before you begin embroidering, make sure your tea cosy is clean and free from any loose threads. It’s also a good idea to iron it to create a smooth surface for your embroidery. You can use a stabilizer to prevent the fabric from puckering or stretching while you embroider.
Get the Right Tools
To embroider your tea cosy, you’ll need some basic embroidery tools. These include embroidery needles, embroidery thread, embroidery scissors, and an embroidery hoop. The embroidery hoop will help keep the fabric taut while you work, ensuring even stitching. You can also use a thimble to protect your finger while pushing the needle through the fabric.
Embroidery Techniques
There are various embroidery techniques you can use to decorate your tea cosy. Some common techniques include satin stitch, backstitch, chain stitch, and French knots. Experiment with different stitches and combinations to create different textures and effects. You can find tutorials and guides online to help you learn these techniques if you’re new to embroidery.
Finishing Touches
Once you’ve finished embroidering your design, make sure to secure the threads on the back of the fabric to prevent them from coming loose. You can do this by tying knots or weaving the threads through the stitches. If you want to add an extra touch, you could embellish your tea cosy with buttons, beads, or sequins.
With these tips in mind, you’re ready to start customizing your tea cosy with embroidery. Let your creativity shine and transform your knitted creation into a unique and personalized piece.
Tips and Tricks for a Perfect Tea Cosy
If you’re looking to knit your own English tea cosy, there are a few tips and tricks that can help you achieve the perfect result. Whether you’re a beginner or an experienced knitter, these tips will ensure that your tea cosy not only looks great but also keeps your tea warm for longer.
Choose the right yarn: When selecting yarn for your tea cosy, it’s important to choose a thick, insulating yarn that will keep your tea warm. Look for yarns labeled as “worsted weight” or “aran weight” as these are ideal for knitting tea cosies.
Get the gauge right: Before starting your tea cosy, make sure to check the gauge of your knitting. This will ensure that your tea cosy fits your teapot perfectly. Use the recommended needle size and yarn weight to achieve the correct gauge.
Use the right stitch pattern: The stitch pattern you choose can make a big difference in the appearance and functionality of your tea cosy. Consider using a ribbed or textured stitch pattern for extra insulation and a decorative touch.
Don’t forget the top opening: When knitting your tea cosy, don’t forget to leave an opening for the teapot handle. This will allow you to remove the tea cosy easily without having to remove the entire teapot lid.
Add decorations: To make your tea cosy truly unique, consider adding decorations such as buttons, pom poms, or lace trims. These small details can add a touch of charm and personalization to your tea cosy.
Test for fit: Before finishing your tea cosy, make sure to test it on your teapot to ensure it fits snugly. Adjust the size if necessary to ensure a perfect fit that will keep your tea warm.
With these tips and tricks in mind, you’re well on your way to creating the perfect English tea cosy. Enjoy your cozy tea time with a beautifully crafted and functional tea cosy!
Tea Cosy Patterns for Different Skill Levels
If you are interested in knitting a tea cosy but unsure of your knitting skills, there are patterns available for every skill level. Whether you are a beginner or an experienced knitter, you can find a pattern that suits your level of expertise.
For beginners, there are simple tea cosy patterns that are perfect for practicing basic knitting techniques. These patterns typically involve basic stitches like knit and purl, and are a great way to build confidence and improve your knitting skills. The patterns often come with detailed instructions and step-by-step photos to help you along the way.
Beginner Tea Cosy Patterns
- Classic Garter Stitch Tea Cosy: This pattern uses only garter stitch, which is perfect for beginners. It creates a cozy and timeless design.
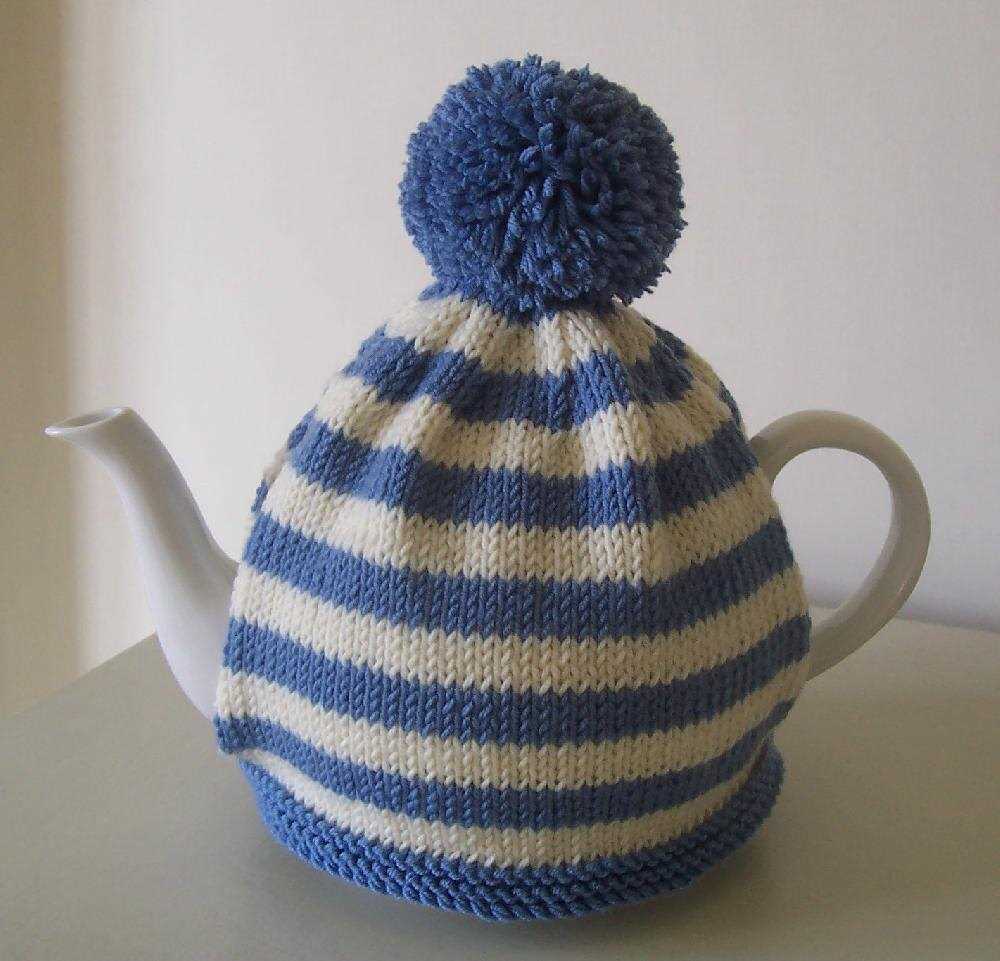
- Striped Stockinette Tea Cosy: This pattern incorporates both knit and purl stitches to create simple stripes. It’s a great project for learning how to switch between stitches.
If you are an intermediate knitter looking to expand your skills, there are more complex tea cosy patterns available. These patterns often involve more advanced stitches, techniques, and intricate designs. They are a great way to challenge yourself and take your knitting to the next level.
Intermediate Tea Cosy Patterns
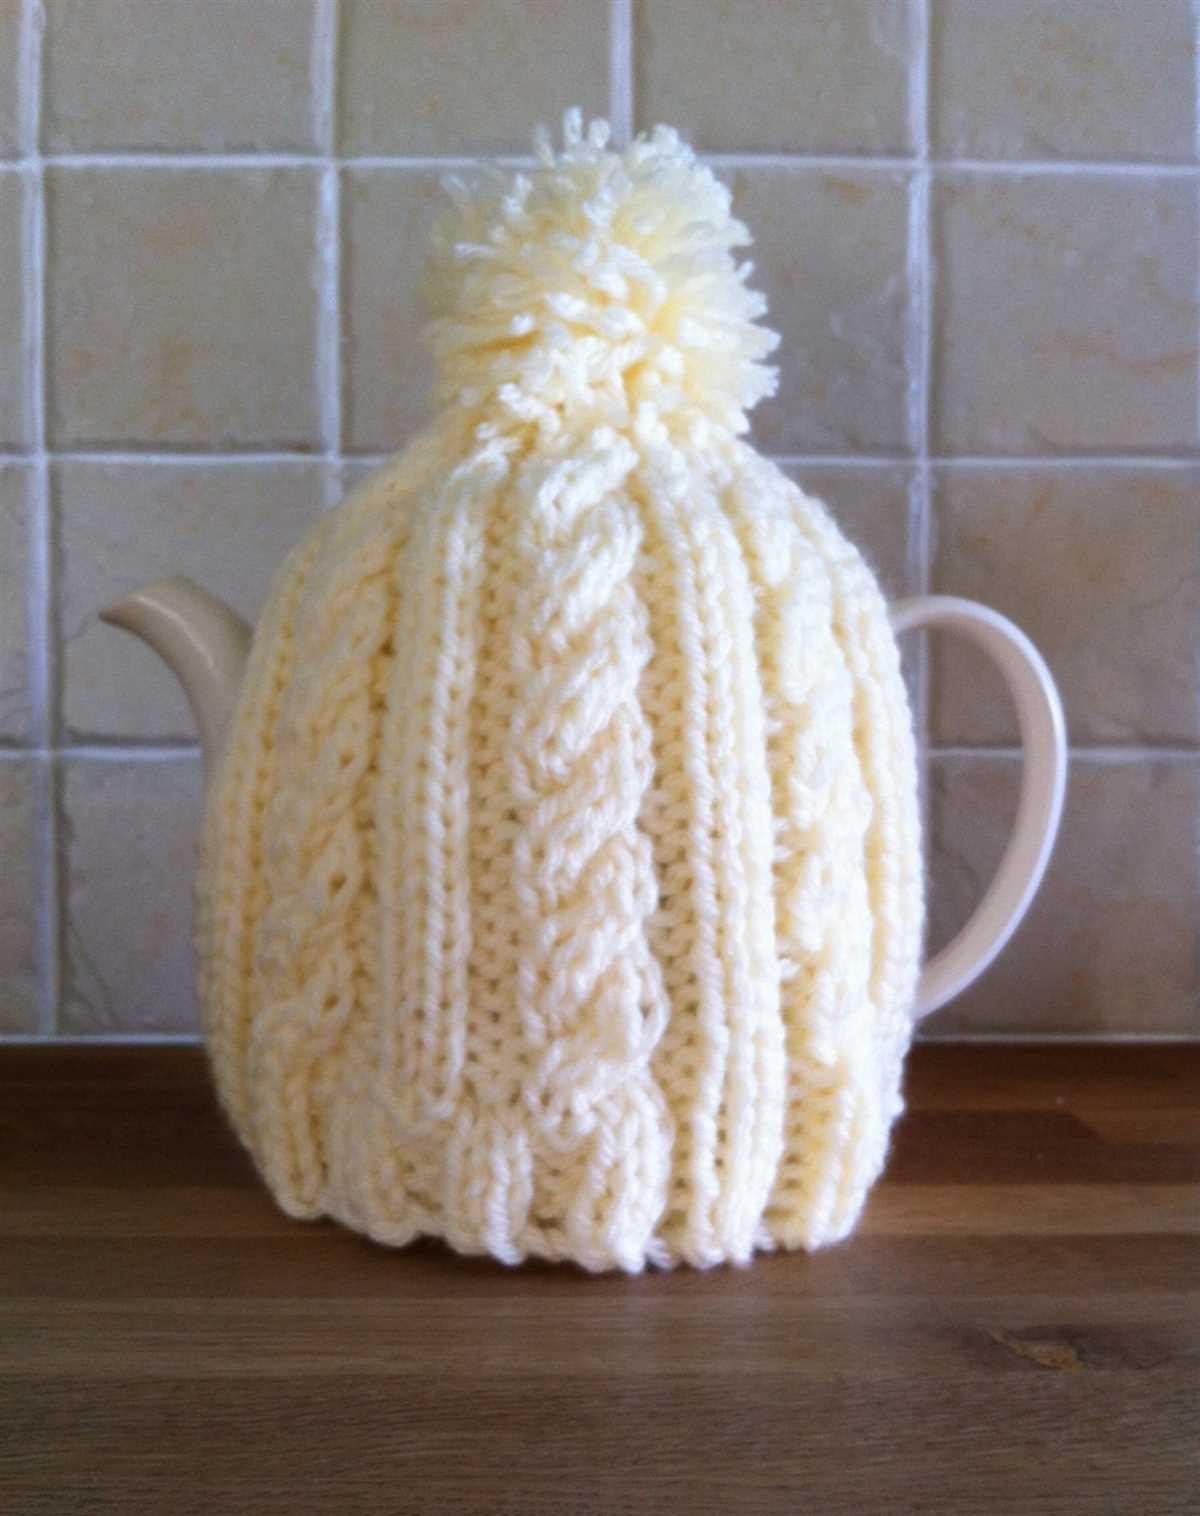
- Cable Knit Tea Cosy: This pattern introduces cable knitting, which creates beautiful braided designs. It’s a great pattern for knitters looking to learn or practice cable techniques.
- Lace Tea Cosy: This pattern incorporates lace knitting, creating an elegant and delicate design. It’s a great project for knitters looking to improve their lace knitting skills.
For advanced knitters, there are tea cosy patterns that offer even more complex and intricate designs. These patterns often involve advanced techniques, unique stitches, and detailed motifs.
Advanced Tea Cosy Patterns
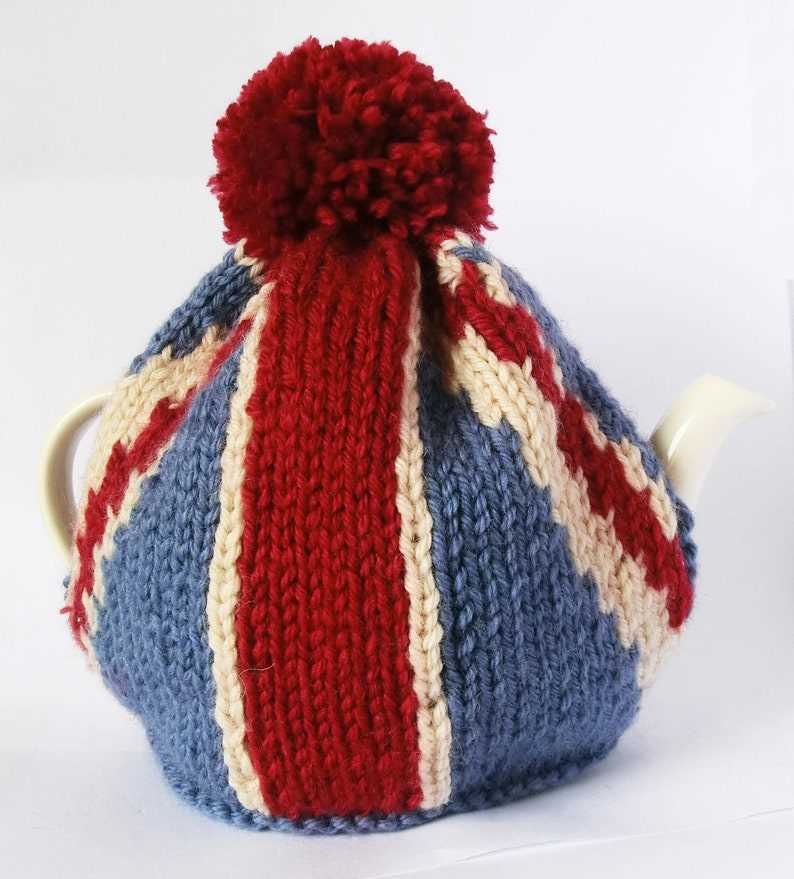
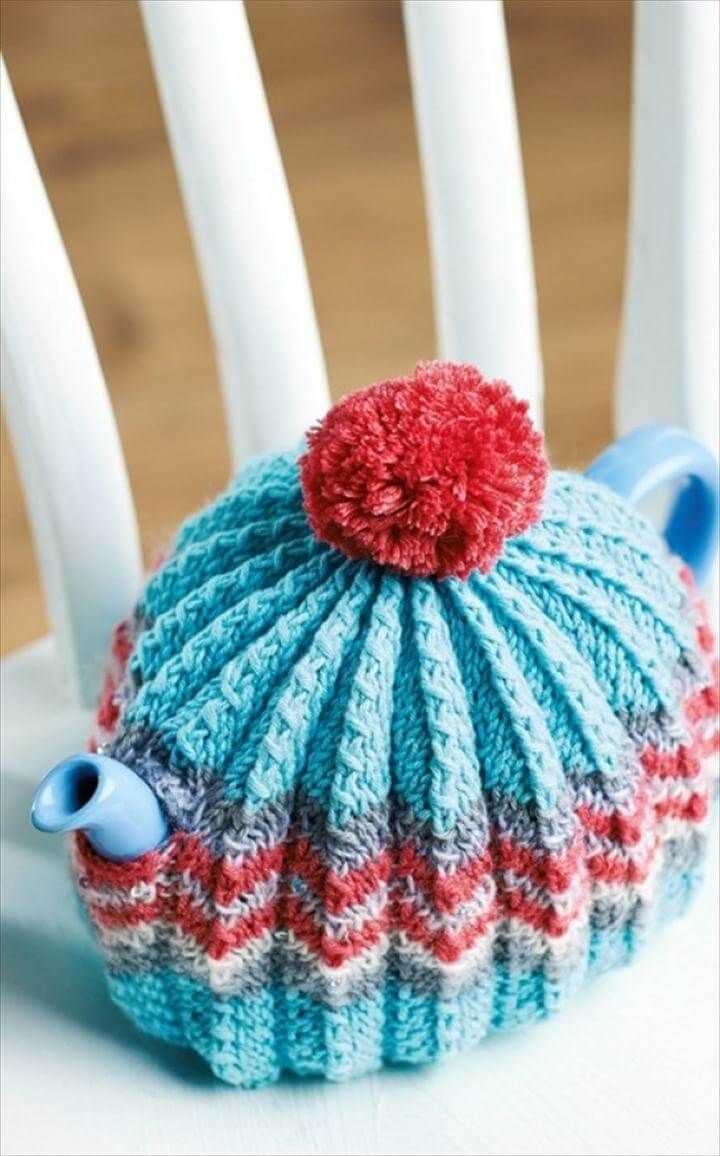
- Fair Isle Tea Cosy: This pattern incorporates Fair Isle knitting, which involves knitting with multiple colors in one row. It creates stunning patterns and designs.
- Intarsia Tea Cosy: This pattern uses the intarsia technique, which allows you to create large blocks of color and detailed patterns. It’s a great project for knitters experienced in colorwork.
No matter your skill level, there is a tea cosy pattern out there for you. So grab your knitting needles, choose a pattern, and get ready to add some warmth and style to your tea time!